engine SKODA OCTAVIA 2005 1.G / (1U) Owner's Guide
[x] Cancel search | Manufacturer: SKODA, Model Year: 2005, Model line: OCTAVIA, Model: SKODA OCTAVIA 2005 1.G / (1U)Pages: 315, PDF Size: 11.8 MB
Page 42 of 315
Instruments and Indicator/Warning Lights41
Using the systemSafetyDriving TipsGeneral MaintenanceBreakdown assistanceTechnical Data
If the warning light
flashes (handbrake is not applied),
stop and check
the brake fluid level ⇒.
The following text will be displayed in the information display*:
STOP Brake fluid Owner's manual
If there is a fault in the ABS which also influences the function of the
normal brake system (e.g. distribution of brake pressure), the ABS
warning light
comes on together with the brake system warning light . Be aware that not only the ABS but also another part of th brake
system is defective ⇒.
3 peeps sound as an additional warning signal.
One should get used to high pedal forces, long braking distances and long
free play of the brake pedal when driving to the next specialist garage.
For further information on the brake system ⇒page 216, “Brakes”.
Handbrake applied
The warning light
also comes on if the handbrake is applied. An audible
warning is also given if you drive the vehicle for at least 3 seconds at a
speed of more than 6 km/h.
The following text will be displayed in the information display*:
Handbrake on!
WARNING
•Pay attention to the following instructions ⇒page 248, “Working
in the engine compartment” before checking the brake fluid level
and opening the bonnet.
•If the brake system warning light does not go out a few
seconds after switching on the ignition or comes on when driving,
stop immediately and check the brake fluid in the reservoir
⇒ page 256, “Brake fluid”. If the fluid level has dropped below the MIN marking, do not drive any further - risk of accident! Contact a
Škoda dealer to obtain professional assistance.
Seat belt warning light*
The warning light comes on after the ignition is switched on as a
reminder to fasten the seat belt. The warning light only goes out if the
driver has fastened his seat belt.
If you do not fasten the seat belt, a long warning signal sounds for 6
seconds.
If you do not fasten the seat belt, a warning signal sounds continuously at
a speed of more than 10 km/h.
The following text will be displayed in the information display*:
Please fasten seatbelt!
For further information on the seat belts ⇒page 183, “Seat belts”.
WARNING (continued)
s24s.book Page 41 Thursday, November 24, 2005 12:27 PM
Page 43 of 315
Unlocking and locking
42
Unlocking and locking
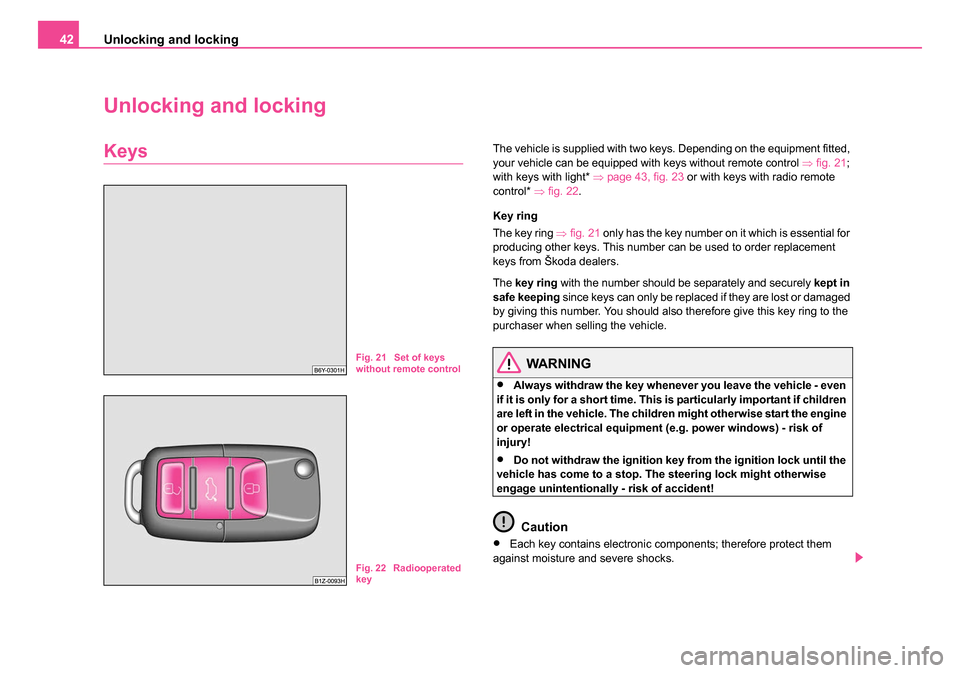
KeysThe vehicle is supplied with two keys. Depending on the equipment fitted,
your vehicle can be equipped with keys without remote control ⇒fig. 21 ;
with keys with light* ⇒page 43, fig. 23 or with keys with radio remote
control* ⇒fig. 22 .
Key ring
The key ring ⇒fig. 21 only has the key number on it which is essential for
producing other keys. This number can be used to order replacement
keys from Škoda dealers.
The key ring with the number should be separately and securely kept in
safe keeping since keys can only be replaced if they are lost or damaged
by giving this number. You should also therefore give this key ring to the
purchaser when selling the vehicle.
WARNING
•Always withdraw the key whenever you leave the vehicle - even
if it is only for a short time. This is particularly important if children
are left in the vehicle. The children might otherwise start the engine
or operate electrical equipment (e.g. power windows) - risk of
injury!
•Do not withdraw the ignition key fr om the ignition lock until the
vehicle has come to a stop. The steering lock might otherwise
engage unintentionally - risk of accident!
Caution
•Each key contains electronic components; therefore protect them
against moisture and severe shocks.
Fig. 21 Set of keys
without remote control
Fig. 22 Radiooperated
key
s24s.book Page 42 Thursday, November 24, 2005 12:27 PM
Page 46 of 315
Unlocking and locking45
Using the systemSafetyDriving TipsGeneral MaintenanceBreakdown assistanceTechnical Data
•If it is still not be possible to unlock or lock the vehicle with the remote
control even after replacing the battery this means that the system has to
be synchronised ⇒page 53.
Electronic immobiliser
The electronic immobiliser prevents the vehicle being
operated by an unauthorised person.
An electronic chip is integrated in the head of the key. The immobiliser is
deactivated with the aid of this chip when the key is inserted in the ignition
lock. The electronic immobiliser is automatically activated when you with-
draw the ignition key from the lock.
Note
It is only possible to start the engine of your car with a Genuine Škoda key
with the matching code ⇒page 32.
Child safety locks
The child safety lock prevents the rear door from being
opened from the inside.
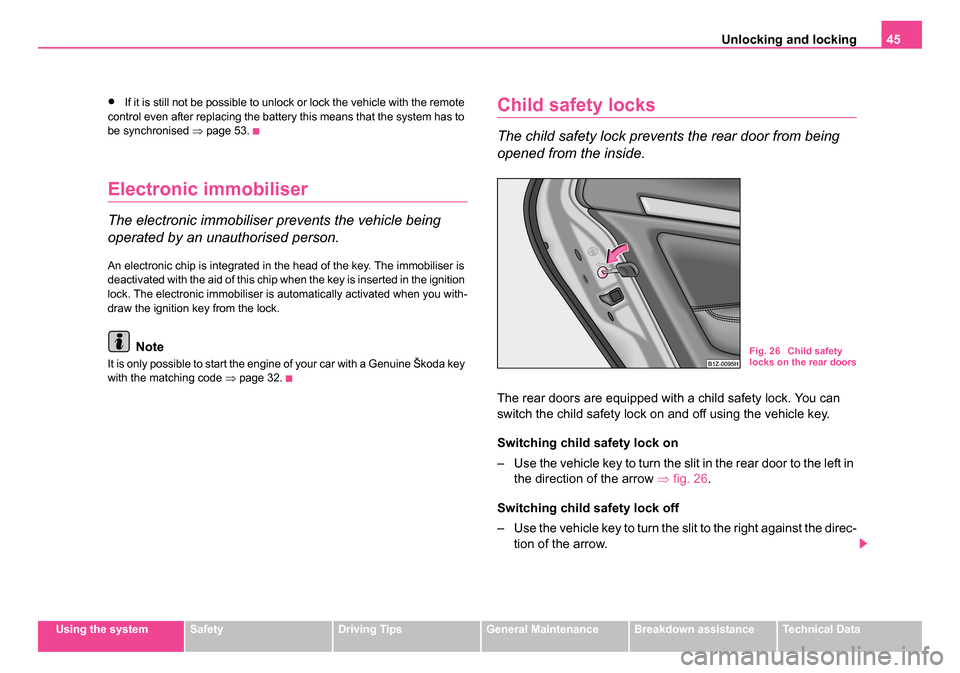
The rear doors are equipped with a child safety lock. You can
switch the child safety lock on and off using the vehicle key.
Switching child safety lock on
– Use the vehicle key to turn the slit in the rear door to the left in
the direction of the arrow ⇒fig. 26.
Switching child safety lock off
– Use the vehicle key to turn the slit to the right against the direc- tion of the arrow.
Fig. 26 Child safety
locks on the rear doors
s24s.book Page 45 Thursday, November 24, 2005 12:27 PM
Page 53 of 315
Unlocking and locking
52
Remote control*
Description
You can use the remote control:
•to unlock and lock the car,
•unlocking boot lid,
•Opening and closing window.
The transmitter with the battery is housed in the handle of the master key.
The receiver is located in the interior of the car. The operating range of the
remote control is 10 metres but this range can be reduced if the batteries
are waek.
The master key has a fold-open key bit which can be used for unlocking
and locking the car manually and also for starting the engine.
If a lost key is replaced or if the receiver unit has been repaired or a new
unit installed, it is then necessary for a Škoda Dealer to initialise the
system. Only after this is it possible to again use the remote control.
Note
•The remote control is automatically deactivated when the ignition is
switched on.
•The operation of the remote control may temporarily be affected by
interference from transmitters close to the car and which operate in the
same frequency range (e.g. mobile phone, TV transmitter).
•The battery must be replaced, ideally by the Škoda dealer, if the
central locking or anti-theft alarm system does react to the remote control
at less than 3 metres away.
Unlocking and locking car
Unlocking th e vehicle
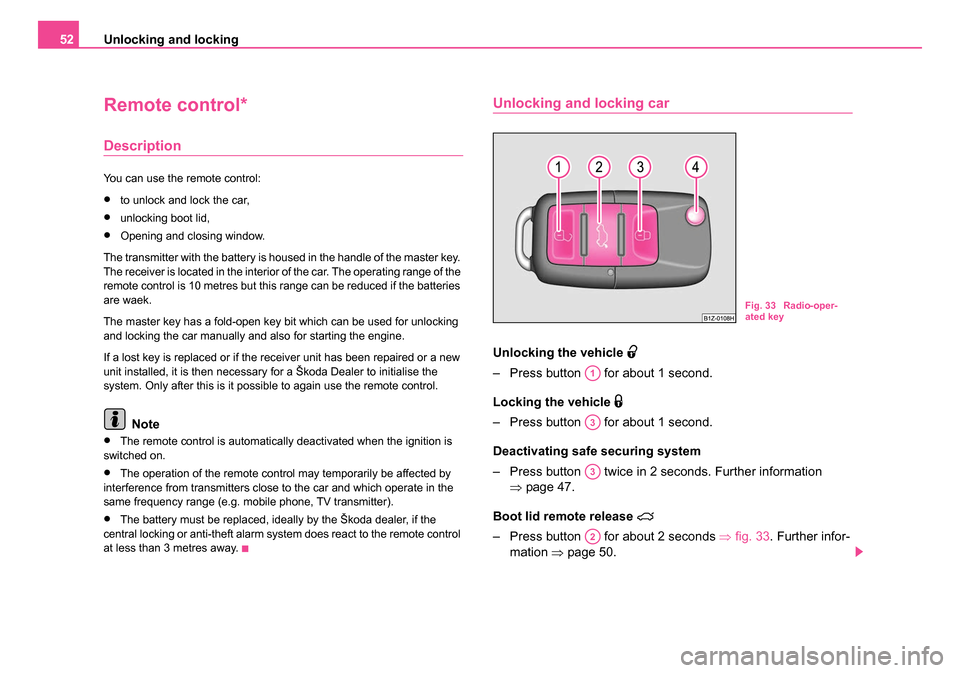
– Press button for about 1 second.
Locking the vehicle
– Press button for about 1 second.
Deactivating safe securing system
– Press button twice in 2 seconds. Further information
⇒page 47.
Boot lid remote release
– Press button for about 2 seconds ⇒fig. 33 . Further infor-
mation ⇒page 50.
Fig. 33 Radio-oper-
ated key
A1
A3
A3
A2
s24s.book Page 52 Thursday, November 24, 2005 12:27 PM
Page 73 of 315
Lights and Visibility
72
Entry lighting*
The lighting is positioned on the bottom edge of the exterior mirror.
The light beam is directed towards the entry area of the front door.
The light comes on after the doors have been locked or on opening the
boot lid. The light goes out after switching on the ignition or up to 30
seconds after closing all the doors, the bonnet and the boot lid.
If a door, the bonnet or the boot lid remains open, the light goes out within
2 minutes if the ignition is switched off.
WARNING
If the entry light comes on, do not touch its cover - risk of burns!
Visibility
Rear window heater
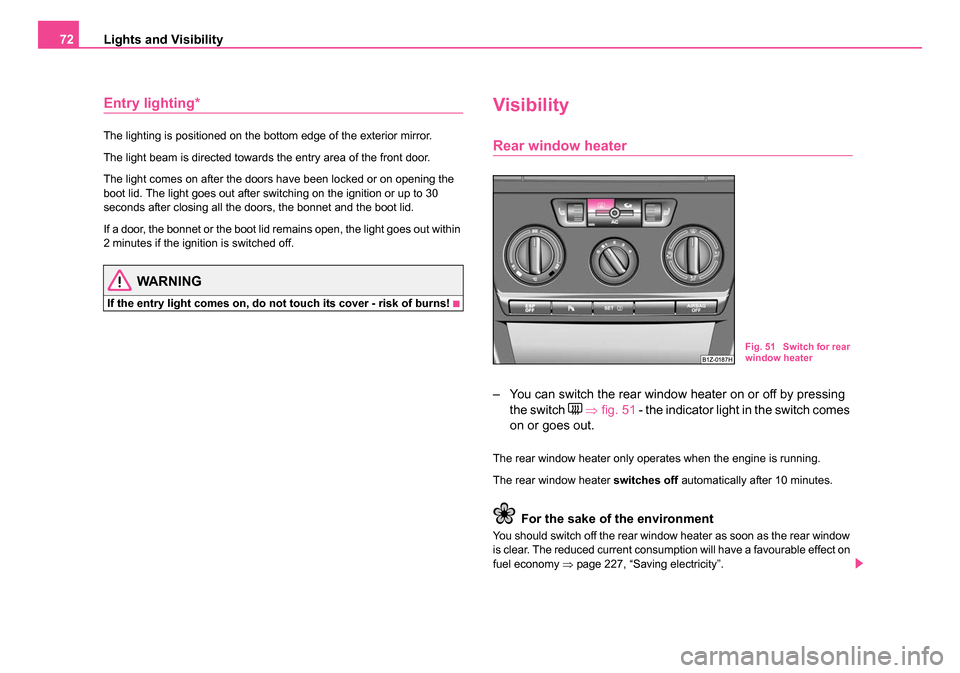
– You can switch the rear window heater on or off by pressing
the switch
⇒ fig. 51 - the indicator light in the switch comes
on or goes out.
The rear window heater only operates when the engine is running.
The rear window heater switches off automatically after 10 minutes.
For the sake of the environment
You should switch off the rear window heater as soon as the rear window
is clear. The reduced current consumption will have a favourable effect on
fuel economy ⇒page 227, “Saving electricity”.
Fig. 51 Switch for rear
window heater
s24s.book Page 72 Thursday, November 24, 2005 12:27 PM
Page 74 of 315
Lights and Visibility73
Using the systemSafetyDriving TipsGeneral MaintenanceBreakdown assistanceTechnical Data
Note
•The position and the shape of the switch can differ depending on
equipment installed in the vehicle.
•If the on-board voltage drops, the rear window heater is switched off
automatically, in order to provide sufficient electrical energy for the engine
control.
Sun visors
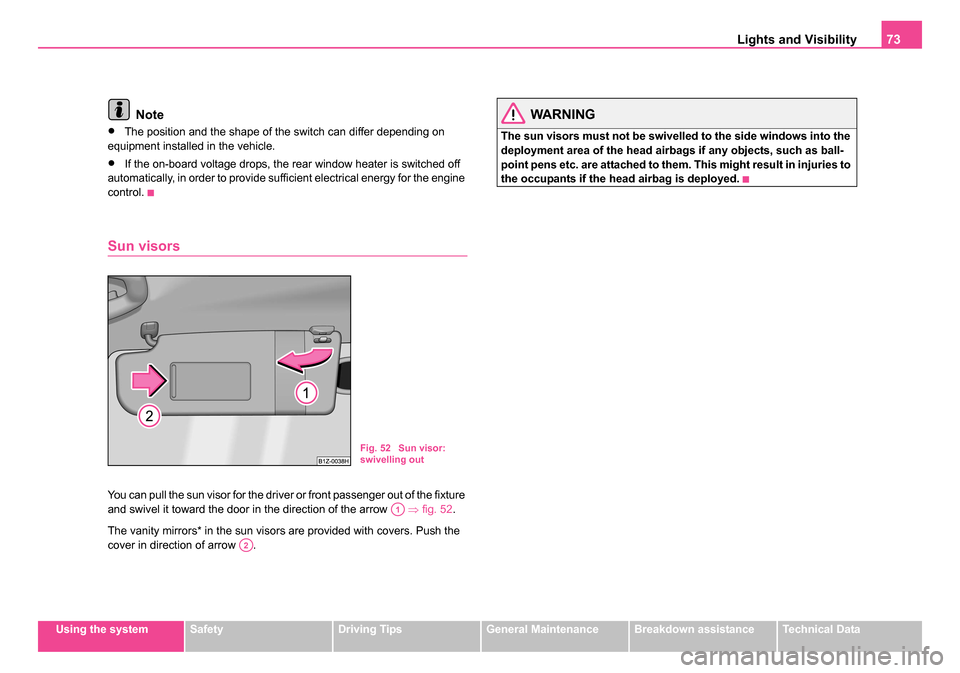
You can pull the sun visor for the driver or front passenger out of the fixture
and swivel it toward the door in the direction of the arrow ⇒fig. 52 .
The vanity mirrors* in the sun visors are provided with covers. Push the
cover in direction of arrow .
WARNING
The sun visors must not be swivelled to the side windows into the
deployment area of the head airbags if any objects, such as ball-
point pens etc. are attached to them. This might result in injuries to
the occupants if the head airbag is deployed.
Fig. 52 Sun visor:
swivelling out
A1
A2
s24s.book Page 73 Thursday, November 24, 2005 12:27 PM
Page 81 of 315
Lights and Visibility
80
•Do not affix any stickers in front of the light sensor, so that you do not
impair the automatic dimming function or put it out of operation.
•If you switch off the automatic dimming interior rear-view mirror, also
the exterior mirror dimming is switched off.
Exterior mirrors
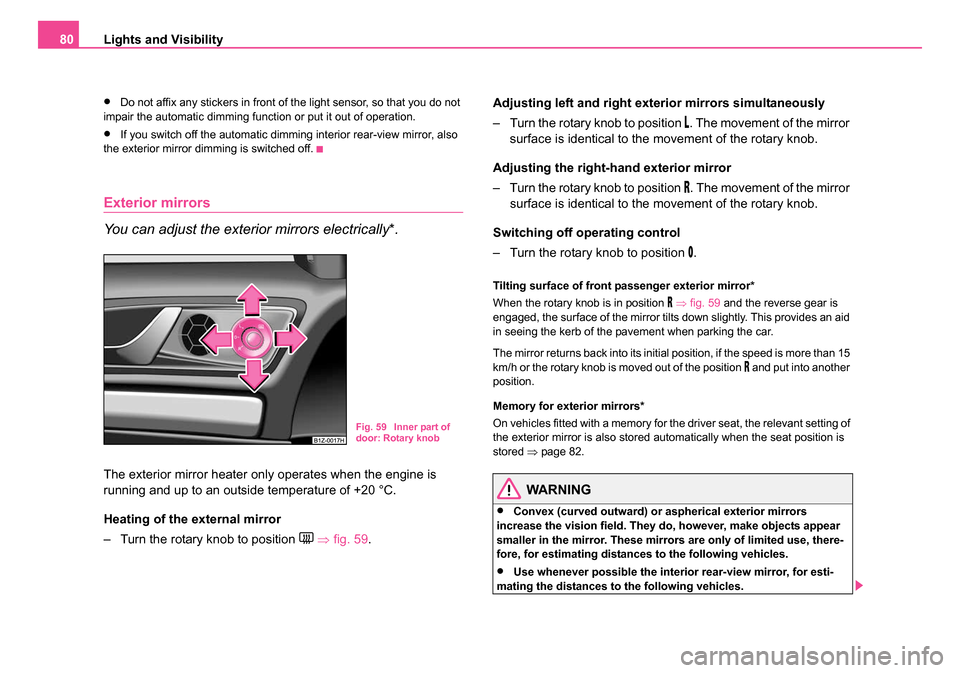
You can adjust the exterior mirrors electrically*.
The exterior mirror heater only operates when the engine is
running and up to an outside temperature of +20 °C.
Heating of the external mirror
– Turn the rotary knob to position
⇒ fig. 59 . Adjusting left and right ext
erior mirrors simultaneously
– Turn the rotary knob to position
. The movement of the mirror
surface is identical to the movement of the rotary knob.
Adjusting the right-hand exterior mirror
– Turn the rotary knob to position
. The movement of the mirror
surface is identical to the movement of the rotary knob.
Switching off operating control
– Turn the rotary knob to position
.
Tilting surface of front passenger exterior mirror*
When the rotary knob is in position
⇒ fig. 59 and the reverse gear is
engaged, the surface of the mirror tilts down slightly. This provides an aid
in seeing the kerb of the pavement when parking the car.
The mirror returns back into its initial position, if the speed is more than 15
km/h or the rotary knob is moved out of the position
and put into another
position.
Memory for exterior mirrors*
On vehicles fitted with a memory for the driver seat, the relevant setting of
the exterior mirror is also stored automatically when the seat position is
stored ⇒page 82.
WARNING
•Convex (curved outward) or aspherical exterior mirrors
increase the vision field. They do, however, make objects appear
smaller in the mirror. These mirrors are only of limited use, there-
fore, for estimating distances to the following vehicles.
•Use whenever possible the interior rear-view mirror, for esti-
mating the distances to the following vehicles.
Fig. 59 Inner part of
door: Rotary knob
s24s.book Page 80 Thursday, November 24, 2005 12:27 PM
Page 90 of 315
Seats and Stowage89
Using the systemSafetyDriving TipsGeneral MaintenanceBreakdown assistanceTechnical Data
Note
•The seat heating should only be switched on when the engine is
running. This has a significant effect of saving on the battery capacity.
•If the on-board voltage drops, the seat heating is switched off automat-
ically, in order to provide sufficient electrical energy for the engine
control.
Rear seats
Folding the rear seats forwards
To enlarge the luggage compartment, the rear seats can be
folded forwards, if necessary remove the rear seats. Both rear
seats can be folded forward individually on vehicles with divided
rear seats*.
Folding the rear seats forwards
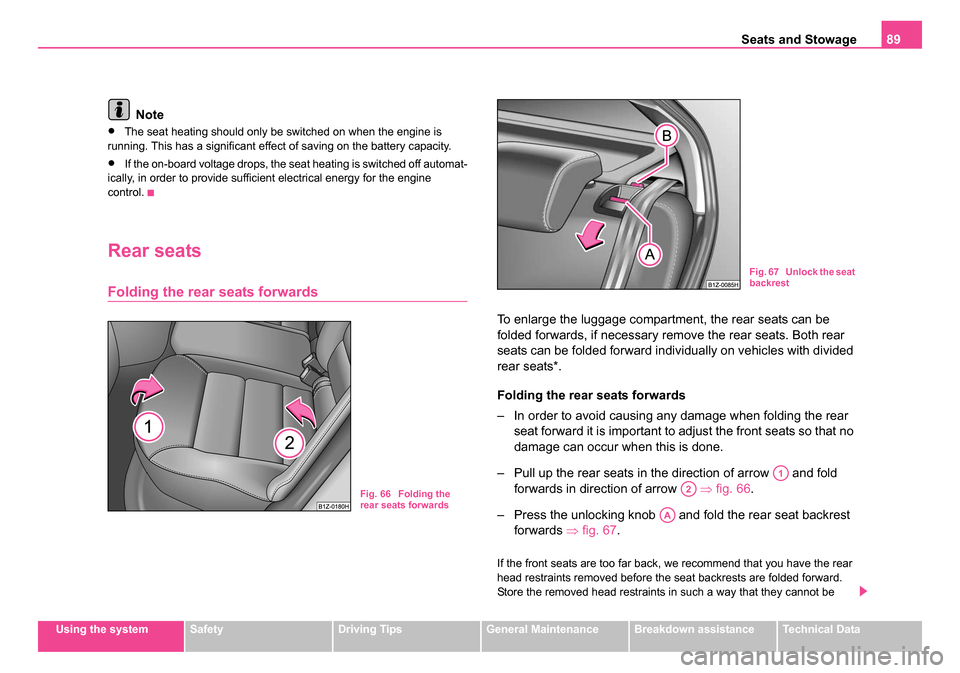
– In order to avoid causing any damage when folding the rear seat forward it is important to adjust the front seats so that no
damage can occur when this is done.
– Pull up the rear seats in the direction of arrow and fold forwards in direction of arrow ⇒ fig. 66.
– Press the unlocking knob and fold the rear seat backrest forwards ⇒fig. 67.
If the front seats are too far back, we recommend that you have the rear
head restraints removed before the seat backrests are folded forward.
Store the removed head restraints in such a way that they cannot be
Fig. 66 Folding the
rear seats forwards
Fig. 67 Unlock the seat
backrest
A1
A2
AA
s24s.book Page 89 Thursday, November 24, 2005 12:27 PM
Page 108 of 315
Seats and Stowage107
Using the systemSafetyDriving TipsGeneral MaintenanceBreakdown assistanceTechnical Data
Using the cigarette lighter
– Press in the button of the cigarette lighter ⇒page 106, fig. 96 .
– Wait until the button jumps forward.
– Remove the cigarette lighter immediately and use it.
– Insert the cigarette lighter again into the socket.
Using the power socket
– Take out the cigarette lighter.
– Insert the plug of the electrical appliance into the socket of the cigarette lighter.
The 12 volt power socket can also be used to supply power to electrical
accessories with a power uptake up to 180 watts.
WARNING
•Take care when using the cigarette lighter! Not paying proper
attention or incorrect use the cigarette lighter in an uncontrolled
manner may result in burns.
•The cigarette lighter and the power socket also operates when
the ignition is switched off or the ignition key withdrawn. You
should therefore never leave children unattended in the vehicle.
Caution
Always use matching plugs to avoid damaging the power sockets.
Note
•Connecting electrical components when the engine is not
running will drain the battery of the vehicle - risk of battery draining!
•Further information ⇒page 270, “Accessories, changes and replace-
ment of parts”.
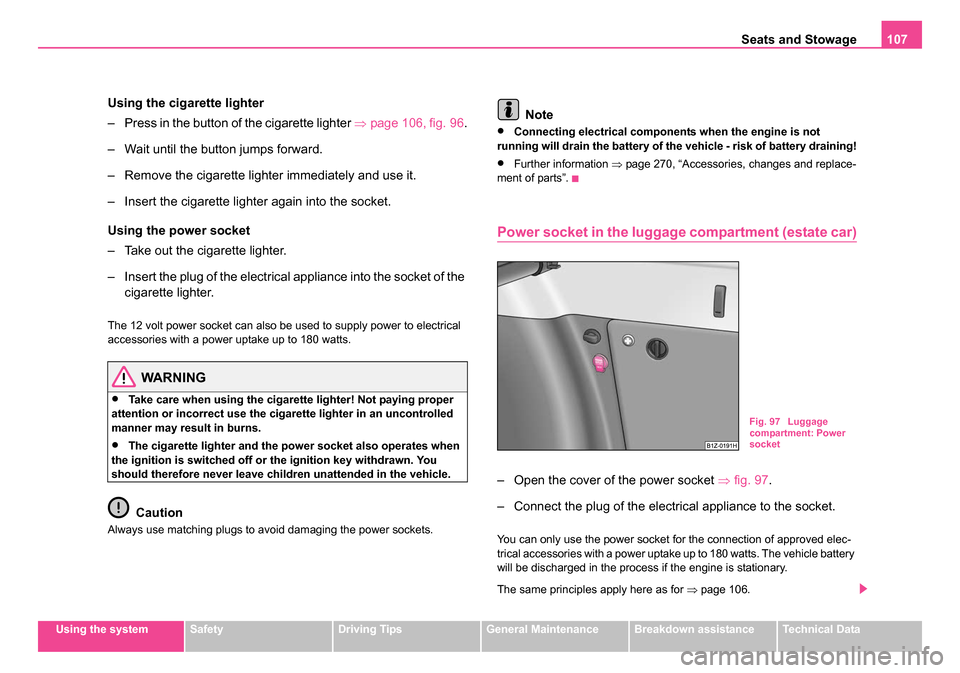
Power socket in the luggag e compartment (estate car)
– Open the cover of the power socket ⇒fig. 97.
– Connect the plug of the electrical appliance to the socket.
You can only use the power socket for the connection of approved elec-
trical accessories with a power uptake up to 180 watts. The vehicle battery
will be discharged in the process if the engine is stationary.
The same principles apply here as for ⇒page 106.
Fig. 97 Luggage
compartment: Power
socket
s24s.book Page 107 Thursday, November 24, 2005 12:27 PM
Page 121 of 315
Heating and air conditioning system
120
The heating effect is dependent upon the coolant temperature, thus full
heat output only occurs when the engine has reached its operating
temperature.
The blower should aways be on to prevent the windows from misting up.
WARNING
You should not leave recirculated air mode on over a longer period
of time. “Stale air” may result in fatigue in the driver and passen-
gers, reduce attention levels and also cause the windows to mist
up. The risk of having an accident increases. Switch recirculated
air mode off as soon as the windows begin misting up.
Note
•The whole heat output will be needed to unfrost the windscreen and
side windows. No warm air will be fed to the footwell. This can lead to
restriction of the heating comfort.
•The used air streams out through the air removal openings in the
luggage compartment.
Set heating
Recommended settings of heating controls for:
Defrosting the windscreen and side windows
•Turn control dial ⇒ page 119, fig. 116 to the right up to the stop
•Blower switch in position 3
•Turn the air distribution control into the position
•Open air outlet vents 3 ⇒ page 122, fig. 117 and point towards the side
window.
•Close the air outlet vents 4
Keeping windscreen and side windows demisted
We recommend that you use the following setting in cases where the
windows are misted up more than usual (e.g. when it is raining):
•Control dial where necessary to the heating range
•Blower switch in position 2 or 3
•Control dial to or as required or to any desired position
between these symbols
•Open air outlet vents 3 and point towards the side window
•Close the air outlet vents 4
Warming up the inside of the ve hicle as rapidly as possible
•Turn control dial to the right up to the stop
•Blower switch in position 3
•Turn the air distribution control into the position
•Open the air outlet vents 3 and 4
•We recommend briefly pressing button air recirculation mode. The
windows can steam up in this position however.
Heating the vehicle to a comfortable temperature
We recommend the following setting once the windows are no longer
misted up and the desired teperature has been reached:
•Control dial at the desired heat output
•Blower switch in position 2 or 3
•Turn the air distribution control into the position
•Open the air outlet vents 3
•Close the air outlet vents 4
•Set the air distribution regulator as required between positions
and , if the windscreen gets misted up again.
AA
AB
AC
AA
AB
AC
AA
AB
AC
A1
AA
AB
AC
AC
s24s.book Page 120 Thursday, November 24, 2005 12:27 PM