window SKODA OCTAVIA 2008 2.G / (1Z) Columbus Navigation System Manual
[x] Cancel search | Manufacturer: SKODA, Model Year: 2008, Model line: OCTAVIA, Model: SKODA OCTAVIA 2008 2.G / (1Z)Pages: 75, PDF Size: 3.54 MB
Page 53 of 75
Selector key NAV (Navigation)51
– If you press the function key next to the starting point of the tour “
”, you will only have the possibility to determine, via the , the first stopover destin ation after the starting
point. The starting point has already been determined automatically
via the GPS position definition of the unit and can therefore not be
processed.
– If you press the function key next to one of the other destinations, you will be offered further modification options.
Options for determining a tour destination
– opens the menu Destination data for a detailed display of the selected
destination. Press the function key to be shown the destination on
the map. Pressing the function key will switch you back to the detailed display.
– Renewed pressing on will only start the route guidance to this tour
destination, possible stopover destinations will be ignored. Press to change
back to the display of the tour plan without starting the route guidance.
– erases after further confirming the displayed tour destination.
– Press to select an entry behind which the selected tour destina-
tion should be moved.
– for input of a further tour destination.
Waypoint mode (Offroad Navigation)Overview of the functionsOpening the waypoint mode
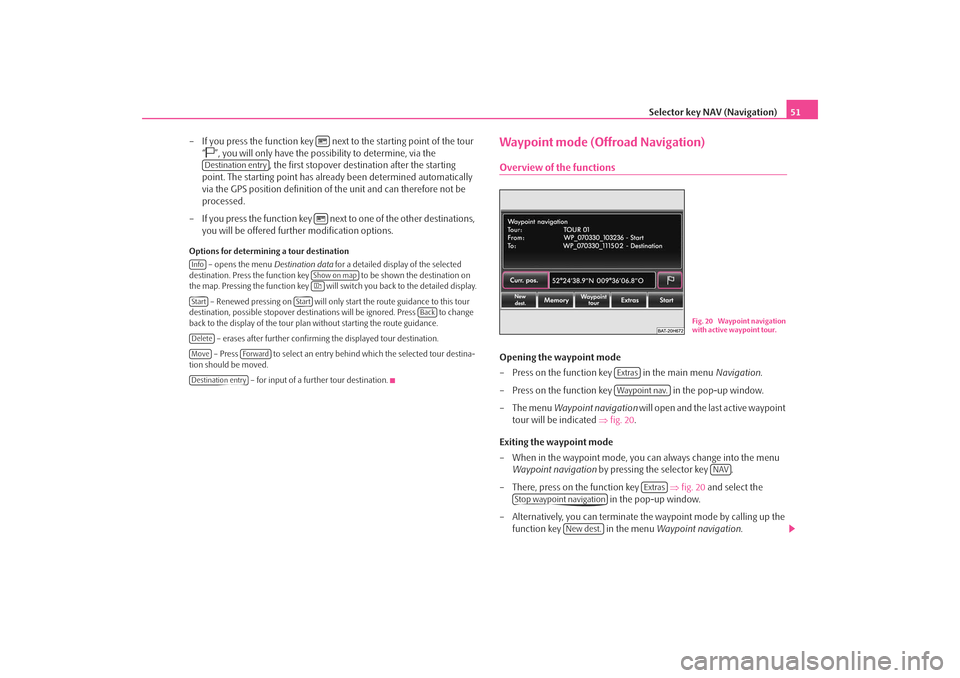
– Press on the function key in the main menu Navigation.
– Press on the function key in the pop-up window.
– The menu Waypoint navigation will open and the last active waypoint
tour will be indicated ⇒fig. 20 .
Exiting the waypoint mode
– When in the waypoint mode, you can always change into the menu Waypoint navigation by pressing the selector key .
– There, press on the function key ⇒ fig. 20 and select the
in the pop-up window.
– Alternatively, you can terminate the waypoint mode by calling up the
function key in the menu Waypoint navigation.
Destination entry
Info
Show on map
Start
Start
Back
DeleteMove
Forward
Destination entry
Fig. 20 Waypoint navigation
with active waypoint tour.
ExtrasWaypoint nav.
NAV
Extras
Stop waypoint navigation
New dest.
s2u4.6.book Page 51 Wednesday, August 13, 2008 7:57 AM
Page 54 of 75
Selector key NAV (Navigation)
52
– Once you have reached the destin ation of a waypoint tour, the
waypoint mode will close automati cally and the “normal” main menu
Navigation will open again.When in the menu Waypoint navigation , the last active waypoint tour and its
current geo-position will be displayed. If no waypoint tour has been recorded or all
of them have been deleted, a correspond ing message will be inserted. In this case
the function keys for starting, loading or processing a waypoint tour are not active.
If a waypoint tour is disp layed, the waypoint tour ⇒page 53, “Driving a stored
waypoint tour” will be started by pressing the function key .
The following menus and sub-menus are operated analog to the already described
menus of the navigation system and will no longer be described here in detail:•
Pressing on a displayed entry or the function key will always open the
detailed display.
•
Pressing the function key opens a pop- up window for analog processing of
the accompanying input.
The function key
Pressing the function key will open a safety interrogation:
– switches back into the waypoint mode. – terminates the waypoint mode and opens the menu New
destination for selection of an “Onroad destinat ion” from the available navigation
data.
The function key
Pressing the function key will open a pop-up window:
– opens a list of the stored wayp oint tours. Press the corresponding
waypoint tour for selection.
– opens the waypoint tour memory. Stored waypoint
tours can be displayed, renamed or deleted.
The function key
Pressing the function key will open a pop-up window to display a
new waypoint tour or to process the displayed one. – starts after naming the waypoint tour, selecting an accept-
ance mode and displaying a new waypoint tour. A displayed waypoint tour is auto-
matically stored and can be ca lled up later from the via .
– opens a list with the waypoint s of the tour currently displayed
in the menu Waypoint navigation . The waypoints in the li st can be displayed,
deleted, moved or renamed in the map. Further waypoints can be added via the
selection from the map or the input of the GPS position. If a different waypoint tour
has to be processed instead of the one disp layed, it must first of all be called up
from the with .
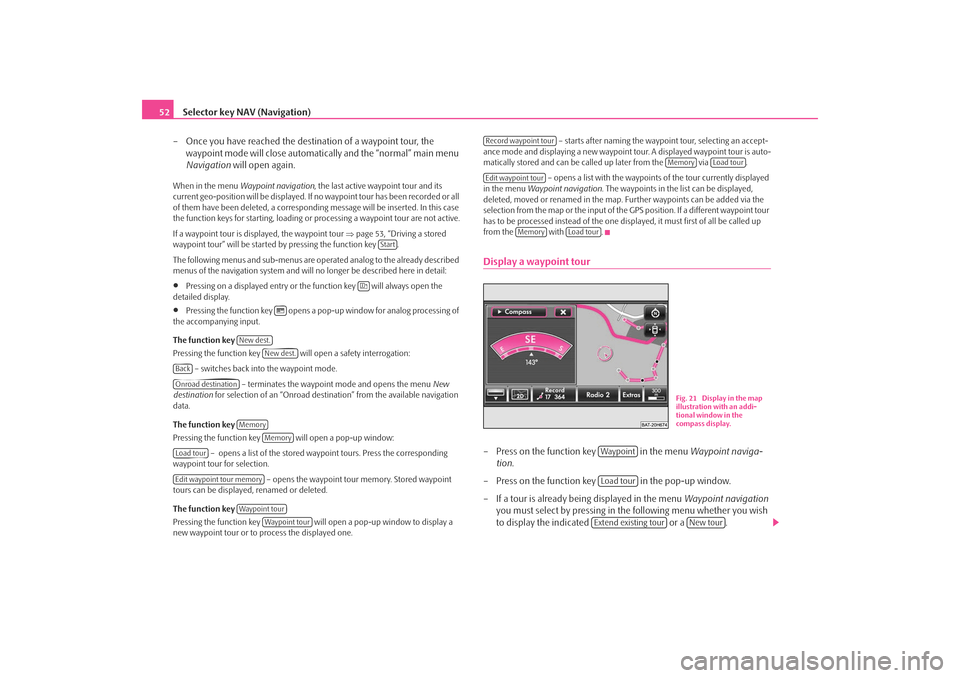
Display a waypoint tour– Press on the function key in the menu Waypoint naviga-
tion .
– Press on the function key in the pop-up window.
– If a tour is already being displayed in the menu Waypoint navigation
you must select by pressing in the following menu whether you wish
to display the indicated or a .
Start
New dest.
New dest.
BackOnroad destination
Memory
Memory
Load tourEdit waypoint tour memory
Waypoint tour
Waypoint tour
Record waypoint tour
Memory
Load tour
Edit waypoint tour
Memory
Load tour
Fig. 21 Display in the map
illustration with an addi-
tional window in the
compass display.
WaypointLoad tourExtend existing tour
New tour
s2u4.6.book Page 52 Wednesday, August 13, 2008 7:57 AM
Page 55 of 75
Selector key NAV (Navigation)53
– Give a short and clear name to the waypoint tour. Confirm the displayed name by pressing .
– Select an acceptance mode by pressing the respective key.
– Press the function key to a llow the system to automatically
set the waypoints (recommended) during the display.
– Press the function key if you wish to set all waypoints yourself during the display.
– After starting the display, the number of used and still available waypoints as well as the set display mode will be indicated in the
menu Waypoint navigation .
– Press the selector key to change into the map display. Repeated pressing of the selector key will open and close the additional
window ⇒page 52, fig. 21 .
– Press on the selector key to switch back into the main menu Waypoint navigation .
– Press the function key to set the
waypoints manually. When in the ma p display you can find this func-
tion key in the pop-up window for the function key
⇒ page 52, fig. 21 ⇒ page 53, “Function key in the map display”.
Function key in the map display
The waypoints used up to no w for the tour and those still available are indicated in
the function key .
Pressing the function key ⇒page 52, fig. 21 – will open a pop-up window
for controlling the display.
– ends the recording: the last set waypoint becomes the endpoint of the
waypoint tour.
– switches on and off the functions indicating that the
waypoints are set automatically via the sensors in the vehicle when changing the
direction. A tick in the checkbox
indicates that the function is switched on. – sets a manual waypoint at the current driving
position.
Driving a stored waypoint tourBefore you start driving a waypoint tour , you must be in the vicinity of the
desired starting point of this waypoint tour.
Select a waypoint tour
– Press the function key in the menu Waypoint navigation.
– Press on the function key in the pop-up window.
– Choose a waypoint tour in the list by pressing on the respective tour.
Driving a waypoint tour
– Press the function key in the menu Waypoint navigation. The
menu Starting from which waypoint will open. Starting and finishing
points of the waypoint tour are displayed at the top.
– Press the function key in the menu to drive the
selected tour in the opposite direction.
Stopping the route guidance
– Press the third function key at the bottom of the map display for infor- mation about the distance to the closest waypoint and in the pop-up window.
– Alternatively, press the selector key and then press the function key .When driving
Follow the information regarding turns as far as possible. Once you have come as
close as 50 meters to a waypoint, the drive recommendation will appear for the
next waypoint.
OK
AutomaticManualMAP
MAPNAVStore current position as waypoint
Record
RecordRecord
Record
Stop Automatic recording
Add current position as waypoint
Memory
Load tour
StartReverse waypoint tour
Stop route guidance
NAV
Stop
s2u4.6.book Page 53 Wednesday, August 13, 2008 7:57 AM
Page 56 of 75
Selector key NAV (Navigation)
54If a waypoint has not been reached, you mu st ignore it, otherwise the system will
continue to try and guide you to this wayp oint. The distance to the next waypoint
and the number of it according to the sequen ce in the waypoint tour is indicated in
the third function key at the bottom of the map display.
Press this function key and choose in the pop-up window to ignore
the waypoint to which the system wishes to guide you.
Alternatively, press the selector key and press the function key .
Press the function key or in the corresponding
menu to approach the last waypoint again.
While you are approaching a waypoint tour, press on the third function key at the
bottom of the map display and on in the pop-up
window in order to supplement the tour with further waypoints. For example, you
can designate route marks an d name them later or store new detours on route.
Alternatively, call up this function by pressing the selector key and the func-
tion key .
Next Waypoint
NAV
Next Waypoint
Prev. Waypnt.
Previous waypoint
Add current position as waypoint
NAV
Waypoint tour
s2u4.6.book Page 54 Wednesday, August 13, 2008 7:57 AM
Page 57 of 75
Selector key NAV (Navigation)55
Route guidanceStarting and stopping route guidanceSelect a travel destination or enter a tour and start route guidance as
described in the respective chapter. The unit will switch over to the map
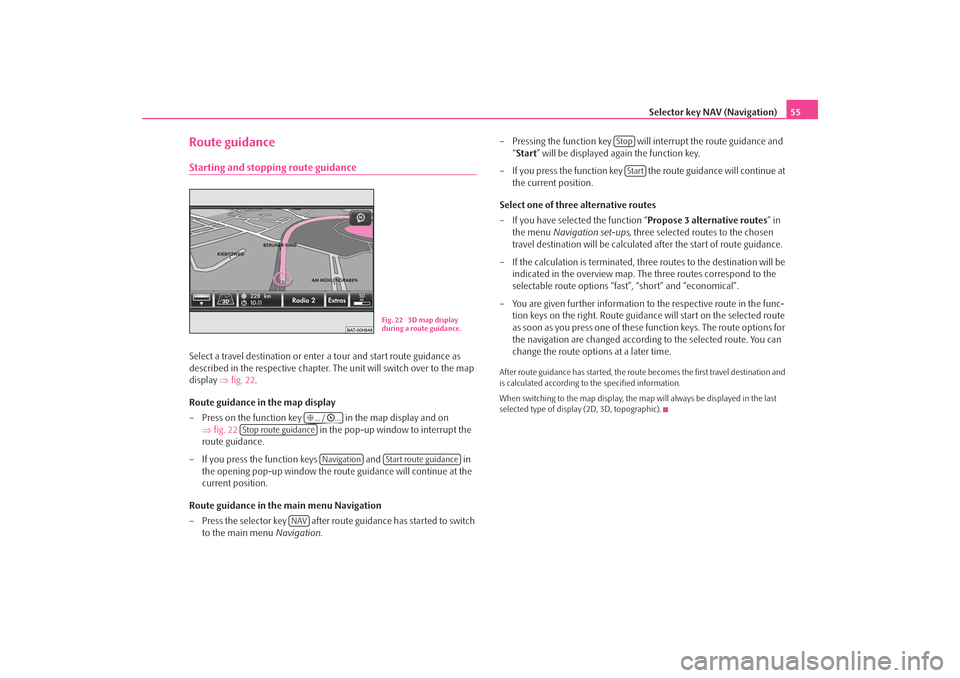
display ⇒fig. 22 .
Route guidance in the map display
– Press on the function key in the map display and on ⇒fig. 22 in the pop-up window to interrupt the
route guidance.
– If you press the function keys and in
the opening pop-up window the rout e guidance will continue at the
current position.
Route guidance in the main menu Navigation
– Press the selector key after rout e guidance has started to switch
to the main menu Navigation. – Pressing the function key will interrupt the route guidance and
“Start ” will be displayed again the function key.
– If you press the function key the route guidance will continue at the current position.
Select one of three alternative routes
– If you have selected the function “ Propose 3 alternative routes” in
the menu Navigation set-ups , three selected routes to the chosen
travel destination will be calculated after the start of route guidance.
– If the calculation is terminated, three routes to the destination will be indicated in the overview map. The three routes correspond to the
selectable route options “fast”, “short” and “economical”.
– You are given further information to the respective route in the func- tion keys on the right. Route guidance will start on the selected route
as soon as you press one of these function keys. The route options for
the navigation are changed according to the selected route. You can
change the route options at a later time.
After route guidance has started, the route becomes the first travel destination and
is calculated according to the specified information.
When switching to the map display, the ma p will always be displayed in the last
selected type of display (2D, 3D, topographic).
Fig. 22 3D map display
during a route guidance.
... / ...
Stop route guidance
Navigation
Start route guidance
NAV
StopStart
s2u4.6.book Page 55 Wednesday, August 13, 2008 7:57 AM
Page 58 of 75
Selector key NAV (Navigation)
56Receiving driving recommendations– Press the key at the unit , if you wish to repeat the last audible
driving recommendation.
– Press the selector key in the map display to insert the additional
window.
– Press the function key at the top left in the additional window.
– In the pop-up window press on to display the direction
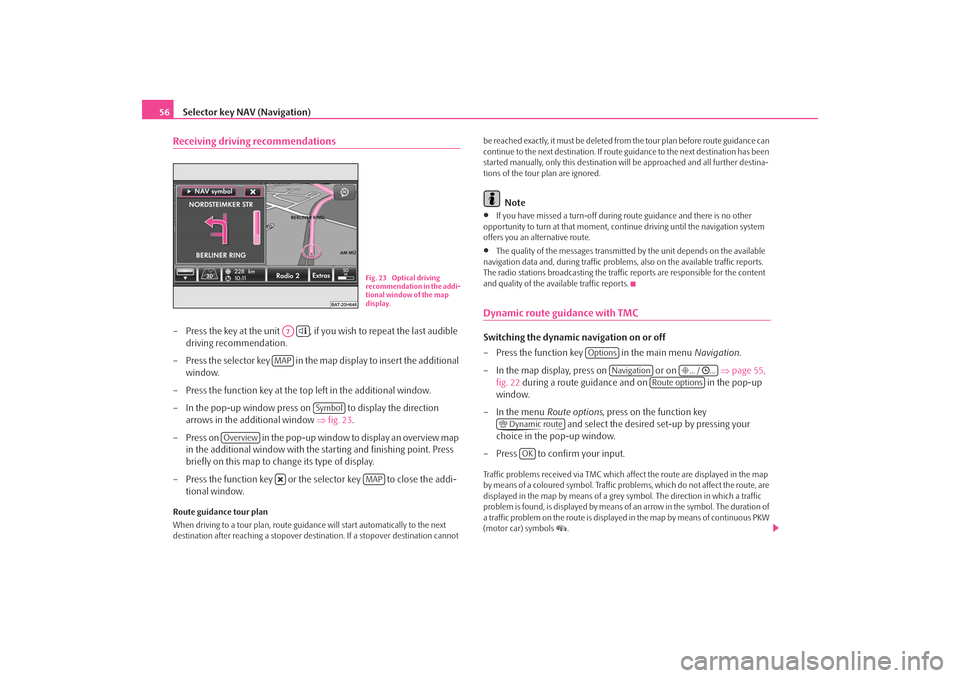
arrows in the additional window ⇒fig. 23 .
– Press on in the pop-up window to display an overview map in the additional window with the starting and finishing point. Press
briefly on this map to change its type of display.
– Press the function key or the selector key to close the addi- tional window.Route guidance tour plan
When driving to a tour plan, route guidan ce will start automatically to the next
destination after reaching a stopover dest ination. If a stopover destination cannot be reached exactly, it must be deleted from
the tour plan before route guidance can
continue to the next destinat ion. If route guidance to the next destination has been
started manually, only this destination wi ll be approached and all further destina-
tions of the tour plan are ignored.
Note
•
If you have missed a turn-off during route guidance and there is no other
opportunity to turn at that moment, cont inue driving until the navigation system
offers you an alternative route.
•
The quality of the messages transmitte d by the unit depends on the available
navigation data and, during traffic problems, also on the available traffic reports.
The radio stations broadcasting the traffic reports are responsible for the content
and quality of the available traffic reports.
Dynamic route guidance with TMCSwitching the dynamic navigation on or off
– Press the function key in the main menu Navigation.
– In the map display, press on or on ⇒page 55,
fig. 22 during a route guidance and on in the pop-up
window.
– In the menu Route options, press on the function key
and select the desired set-up by pressing your
choice in the pop-up window.
– Press to confirm your input.Traffic problems received via TMC which af fect the route are displayed in the map
by means of a coloured symbol. Traffic prob lems, which do not affect the route, are
displayed in the map by means of a grey symbol. The direction in which a traffic
problem is found, is displayed by means of an arrow in the symbol. The duration of
a traffic problem on the route is displayed in the map by means of continuous PKW
(motor car) symbols
.
Fig. 23 Optical driving
recommendation in the addi-
tional window of the map
display.
A7
MAP
Symbol
Overview
MAP
Options
Navigation
... / ...
Route options
Dynamic route
OK
s2u4.6.book Page 56 Wednesday, August 13, 2008 7:57 AM
Page 59 of 75
Selector key NAV (Navigation)57
Dynamic route
Off
When the dynamic navigation is switched off you will not be advised of traffic prob-
lems affecting your route during route guidance and you are not directed away
from or through the traffic problems. TMC traffic reports are updated ⇒page 57,
“Requirements for a dynamic route guid ance” automatically in the unit and
displayed by pressing the selector key .
If one of the announced traffic problems is on your route, you can also switch on
the dynamic route guidance during the cu rrent route guidance or block the route
manually ⇒page 58, “Manually blocking a stretch of the route”.
Dynamic route
Manual
If the dynamic navigation is set to manual and you are in route guidance mode you
can select to avoid the announced traffic problems on your route ⇒page 57,
“Requirements for a dynamic route guidance”.
If the navigation system is alerted of a tr affic problem on the calculated route, the
driver will be notified of this by means of an audible message and information in a
pop-up window.
The expected delay incurred in avoiding this traffic problem and the length of the
alternative route will be displayed. The expected time lost when driving through
this traffic problem will also be displayed.
•
Press to remain on the calculated route and to pass through the
traffic problem.
•
Press for an alternative route to be calculated taking into account
the announced traffic problem.
Dynamic route
Automatic
If the dynamic navigati on system is set to Automatic and you are in tour guidance
mode, you will automa tically be guided ⇒page 57, “Requirements for a dynamic
route guidance” around the announced traffic problem on your route.
After input of relevant traffic information for your route you will be advised of the
change in the current route guidance by means of an acoustic message. You will
automatically be guided around announced traffic jams or blocked roads, if this
saves time. Such announcements will take place if a
traffic problem affects the original route
calculation, the traffic problem has been solved and the navigation system can see
only one possibility of driving the actually most advantagous route.
Requirements for a dynamic route guidance
TMC (Traffic Message Channel) is a digital radio data service for continuous trans-
mission of traffic information.
The unit has a continuous background of TMC traffic reports providing a TMC
station at the current location can be received.
The quality of the transmitted traffic reports depends on the broadcast editing
carried out by the radio station. The rece ption of the TMC traffic reports cannot be
switched on or off.
The station you are listening to does not have to be a TMC station.
TMC traffic reports can only be evaluated and displayed by the unit if the navigation
data for the currently driven area is stored in the unit memory or can be called up
via an inserted navigation DVD.
The current TMC traffic reports can be di splayed by pressing the selector key
.
Note
•
There may not be any advantantage in avoiding the traffic jam if, as a result of
the TMC traffic reports, the dive rsion is also heavily congested.
•
You can manually block the information for the route in front of you if a traffic
problem ahead has not yet been included in the TMC traffic reports ⇒page 58.
TRAFFIC
Keep routeDetour route
TRAFFIC
s2u4.6.book Page 57 Wednesday, August 13, 2008 7:57 AM
Page 60 of 75
Selector key NAV (Navigation)
58Inserting a route or manoeuvre listThe route or manoeuvre list can only be displayed during a route guid-
ance.
Additional window in the map display
– Press the selector key in the ma p display to open the additional
window.
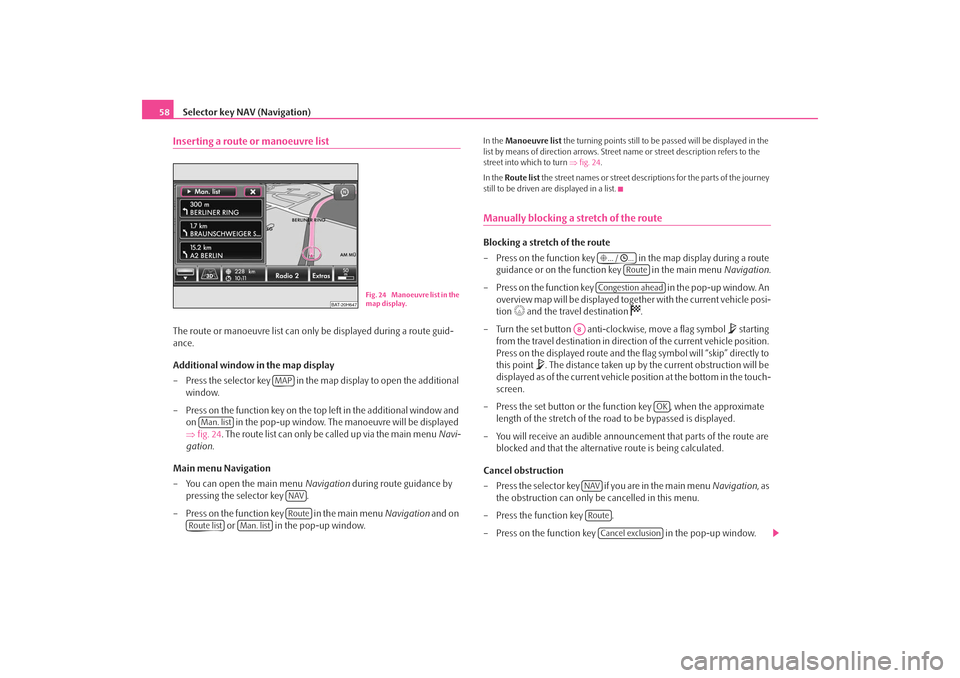
– Press on the function key on the top left in the additional window and on in the pop-up window. The manoeuvre will be displayed
⇒fig. 24 . The route list can only be called up via the main menu Navi-
gation .
Main menu Navigation
– You can open the main menu Navigation during route guidance by
pressing the selector key .
– Press on the function key in the main menu Navigation and on
or in the pop-up window.
In the Manoeuvre list the turning points still to be passed will be displayed in the
list by means of direction arrows. Street name or street description refers to the
street into which to turn ⇒fig. 24 .
In the Route list the street names or street descriptions for the parts of the journey
still to be driven are displayed in a list.Manually blocking a stretch of the routeBlocking a stretch of the route
– Press on the function key in the map display during a route guidance or on the function key in the main menu Navigation.
– Press on the function key in the pop-up window. An
overview map will be displayed together with the current vehicle posi-
tion
and the travel destination
.
– Turn the set button anti-clockwise, move a flag symbol
starting
from the travel destination in direct ion of the current vehicle position.
Press on the displayed route and the flag symbol will “skip” directly to
this point
. The distance taken up by the current obstruction will be
displayed as of the current vehicle po sition at the bottom in the touch-
screen.
– Press the set button or the function key , when the approximate length of the stretch of the ro ad to be bypassed is displayed.
– You will receive an audible announcement that parts of the route are blocked and that the alternative route is being calculated.
Cancel obstruction
– P re s s t h e s e l e c t o r key if y o u a re i n t h e m a in m en u Navigation, as
the obstruction can only be cancelled in this menu.
– Press the function key .
– Press on the function key in the pop-up window.
BAT-20H647
Fig. 24 Manoeuvre list in the
map display.
MAP
Man. list
NAVRoute
Route list
Man. list
... / ...
Route
Congestion ahead
A8
OK
NAVRoute
Cancel exclusion
s2u4.6.book Page 58 Wednesday, August 13, 2008 7:57 AM
Page 62 of 75
Range selector key MAP
60Range selector key MAPMap displayBy pressing the selector key you can move from any menu into the map
display.
Pressing the selector key will open or close an additional window in the map
display, where further informatio n can be displayed and selected ⇒page 63,
“Additional window in the map display”.
During route guidance the map display will differ in some points from the “normal”
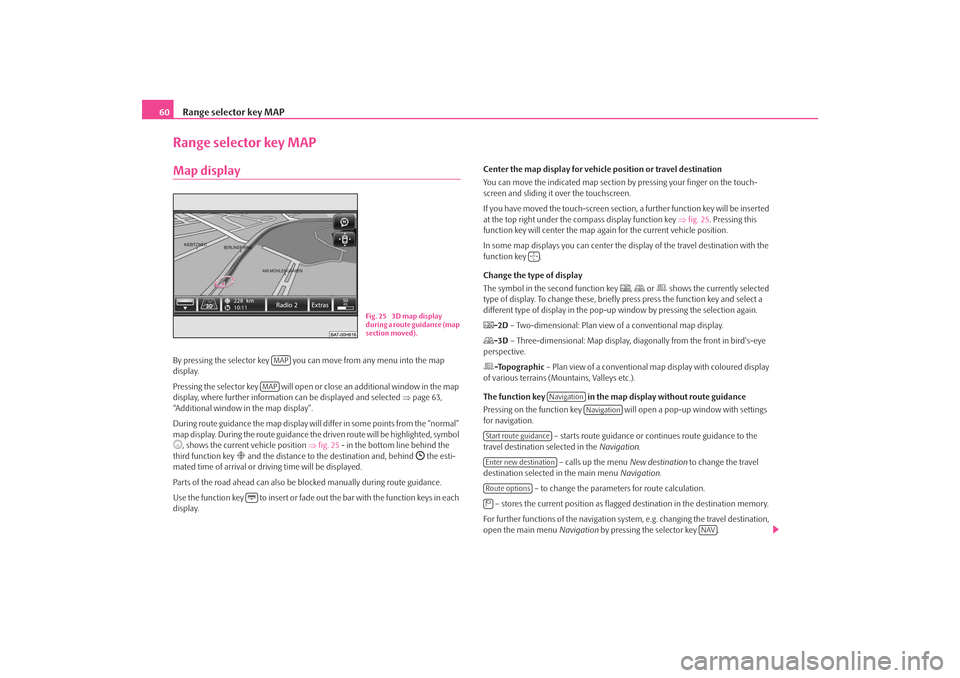
map display. During the route guidance the driven route will be highlighted, symbol , shows the current vehicle position ⇒fig. 25 - in the bottom line behind the
third function key
and the distance to the destination and, behind
the esti-
mated time of arrival or dr iving time will be displayed.
Parts of the road ahead can also be blocked manually during route guidance.
Use the function key to insert or fade out the bar with the function keys in each
display. Center the map display for vehicle
position or travel destination
You can move the indicated map section by pressing your finger on the touch-
screen and sliding it over the touchscreen.
If you have moved the touch-screen section, a further function key will be inserted
at the top right under the co mpass display function key ⇒fig. 25 . Pressing this
function key will center the map ag ain for the current vehicle position.
In some map displays you can center the di splay of the travel destination with the
function key .
Change the type of display
The symbol in the second function key
, or shows the currently selected
type of display. To change these, briefl y press press the function key and select a
different type of display in the pop-up window by pressing the selection again.
-2D – Two-dimensional: Plan view of a conventional map display.-3D – Three-dimensional: Map display, diagonally from the front in bird's-eye
perspective.-Topographic – Plan view of a conventional map display with coloured display
of various terrains (M ountains, Valleys etc.).
The function key in the map display without route guidance
Pressing on the function key will open a pop-up window with settings
for navigation.
– starts route guidance or continues route guidance to the
travel destination selected in the Navigation.
– calls up the menu New destination to change the travel
destination selected in the main menu Navigation.
– to change the parameters for route calculation.
– stores the current position as flagged destination in the destination memory.
For further functions of the navigation system, e.g. changing the travel destination,
open the main menu Navigation by pressing the selector key .
Fig. 25 3D map display
during a route guidance (map
section moved).
MAPMAP
Navigation
Navigation
Start route guidanceEnter new destinationRoute options
NAV
s2u4.6.book Page 60 Wednesday, August 13, 2008 7:57 AM
Page 63 of 75
Range selector key MAP61
The function key in the map display during a route guidance
Pressing the function key ⇒page 60, fig. 25 will open a pop-up window
with set-ups for route guidance.
– stops route guidance at the current position. The route guid-
ance can be continued at any time by pressing the function key and .
– calls up the menu New destination in order to enter a stop-
over destination to be approached during current route guidance.
– for manual entry of a route block.
– to change the parameters for route calculation.
– stores the current position as flagged destination in the destination memory.
For further functions of the navigation, open the main menu Navigation by
pressing the selector key .
Control media source
The function key displays the currently selected media source (here the
radio station “Radio 2”). To control the selected media source, briefly press the
function key and select a station (radio mo de) or title (media mode) by pressing the
selection in the pop-up window.
Radio mode: The six station keys of the main menu RADIO are faded in.
Media mode: The title name and the function keys for controlling the current
media source are faded in.
Function keys
Pressing the function key will open a pop-up window for further set-ups and
displays.
– shows the currently selected travel destination in the map
display in the main menu Navigation. Use the function key on the right under the
compass display to center the ma p again on the vehicle position.
– will change between day and night design. – will open the additional window. The additional window can be
opened or closed in the map displa y by pressing the selector key . – during route guidance, when driving and turning on roads with
more than one lane, a small additional window with lane recommendations will be
inserted in the map. A tick in the checkbox
indicates that the function is switched
on.
Scale modification and display
Pressing the function key with the display of the currently selected map dimension
at the bottom right will insert further functi on keys for changing the map detail and
the map scale. If not used, these function keys fade out again after five seconds.
– briefly switches the map display to the overview display (large scale). After a
few seconds it will switch back automatica lly to the last selected zoom display
(smaller scale).
or – to zoom in or out of the map, i.e.changing the map scale. Alternatively,
move the sliding regulator
within the scale.
– switches to the overview map with start and finish point during route guid-
ance.
– for switching on the autozoom during a route guidance. If “Autozoom” is
active, the map scale will change automa tically depending on the driven route
(Motorway trip: small map scale - City center: large map scale). The switched-on
Autozoom is displayed in the scale display by
. Press again to switch off or
manually change the scale with the set button .
Display favourite symbol
A favourite category can be dete rmined for stored destinations.
Favourite destinations are displayed in the map, depending on set-up, with their
assigned favourite symbol.
... / ...
... / ...
Stop route guidance
Navigation
Start route guidanceAdd intermed. dest.Congestion aheadRoute options
NAV
Radio 2Extras
Extras
Destination viewDay/NightSplit screen
MAP
Symbol
Description
Infrastructure
Private
Restaurant
Lane guidance+
-
-
A8
s2u4.6.book Page 61 Wednesday, August 13, 2008 7:57 AM