technical data SKODA OCTAVIA 2008 2.G / (1Z) Owner's Guide
[x] Cancel search | Manufacturer: SKODA, Model Year: 2008, Model line: OCTAVIA, Model: SKODA OCTAVIA 2008 2.G / (1Z)Pages: 304, PDF Size: 17.69 MB
Page 62 of 304
Lights and Visibility61
Using the systemSafetyDriving TipsGeneral MaintenanceBreakdown assistanceTechnical Data
If the vehicle speed is below 65 km/h for at least 2 minutes, the lights are switched
off.
Rain lights
If you switch on the windscreen wipe in
the operation rain sensor* for longer than
10 seconds or in the operation permanent wipe (position 2 or 3) ⇒page 69
switching on for longer than 15 seconds, th e side lights and low beam are switched
on automatically. The light switches off if the windscreen wipe is in operation rain
sensor* for more than 4 minutes or is no t switched on in the operation permanent
wipe.
WARNING
The automatic light control only operates as a support. The driver is not
released from his responsibility to inspect the light and if necessary to switch
on the light depending on the light conditions. The light sensor cannot
detect for example rain or snow. For these conditions we recommend to
switch on the low beam
!
Note
•Do not affix any stickers in front of the light sensor, so that you do not impair its
function or put it out of operation.
•The same principles as fo r using the automatic light control also apply to the
light which is switched on manually ⇒page 59.
Cornering lights*
The cornering lights are used to illuminate the curves by means of the cone of light
swiveling together with the front headlight with Xenon lights*.
WARNING
If the cornering lights are defectiv e, the headlights are automatically
lowered to the emergency position, whic h prevents a possible dazzling of oncoming traffic. Thus the illuminated length of the road is shortened. Drive
carefully and have the car inspected
immediately by a specialist garage.
Coming Home Function
The function makes it possible to switch on the lights in the darkness for
a short time after leaving the vehicle.
Switching on Coming Home Function
– The light switch is in the position automatic driving lamp control
and the low beam illuminates.
– Switch off the ignition.
– After opening the driver's door , the function Coming Home is
switched on.
– Close all the doors and the boot lid and lock the vehicle. After a short time, switch all lights off.
Depending on equipment fitted the function Coming Home switches on the
following lights:
•Parking lights,
•Low beam,
•Entry lighting in the exterior mirrors,
•Licence plate light.
Coming Home Function
The lights go out 10 seconds after cl osing all the doors and the boot lid.
If a door or the boot lid remains open, th e lights go out 60 seconds after switching
off the ignition.
The function Coming Home is controlled wi th the light sensor in the mount of the
interior rear mirror. If the light intensity is higher than the set value of the light
WARNING (continued)
20A5Facelift.book Page 61 Saturday, September 6, 2008 2:13 PM
Page 64 of 304
Lights and Visibility63
Using the systemSafetyDriving TipsGeneral MaintenanceBreakdown assistanceTechnical Data
The rear fog light warning light
⇒ page 32 lights up in the instrument cluster
when the fog light is switched off.
Fog lights with the function “Corner”*
The fog lights with the function “Corner” improve the illumination of
areas close to the vehicle when turning, parking etc.
The fog lights with the function “Corner” are regulated according to the steering
angle or after switching on the turn signal light8) in the following circumstances:
•the vehicle is stationary an d the engine is running or it moves with a speed of
maximum 40 km/h;
•the daylight driving lights are not switched on;
•the low beam is switched on or th e light switch is in the position and the
intensity of the ambient light causes the low beam to be switched on;
•the fog lights are not switched on;
•no reverse gear is engaged.
Note
If you engage the reverse gear during the active function “Corner”, both fog lights
illuminate.
Rear fog light
Switching on the rear fog light
– First of all turn the light switch into position
or ⇒ page 62,
fig. 58 .
– Pull the switch into position .
The rear fog light warning light ⇒ page 32 lights up in the instrument cluster
when the fog light is switched off.
Only the rear fog light of the trailer ligh ts up automatically when you are towing a
trailer using a factory-fitted towing device which is fitted with the rear fog light.
The rear fog light is located in the rear light array on the driver's side.
Caution
The rear fog light should only be switched on if visibility is particularly poor
(conform with any varying legal provisions) to avoid dazzling vehicles behind your
vehicle.
Instrument lighting*
You can adjust the brightness of the instrument lighting.
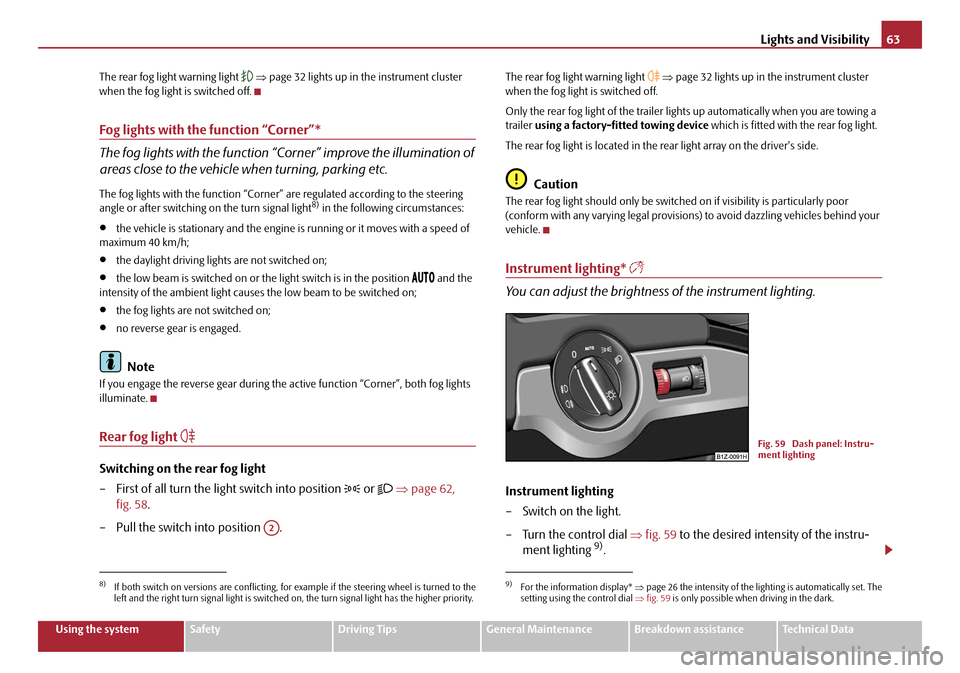
Instrument lighting
– Switch on the light.
– Turn the control dial ⇒fig. 59 to the desired intensity of the instru-
ment lighting
9).
8)If both switch on versions are conflicting, for example if the steering wheel is turned to the
left and the right turn signal light is switched on, the turn signal light has the higher priority.
A2
9)For the information display* ⇒page 26 the intensity of the lighting is automatically set. The
setting using the control dial ⇒ fig. 59 is only possible when driving in the dark.
Fig. 59 Dash panel: Instru-
ment lighting
20A5Facelift.book Page 63 Saturday, September 6, 2008 2:13 PM
Page 66 of 304
Lights and Visibility65
Using the systemSafetyDriving TipsGeneral MaintenanceBreakdown assistanceTechnical Data
Note
Switch on the hazard warning light system if, for example:
•you encounter traffic congestion,
•your vehicle breaks down or an emergency situation occurs.
The turn signal and main beam lever
The parking lights and headlight flas her are also switched on and off
using the turn signal and main beam lever.
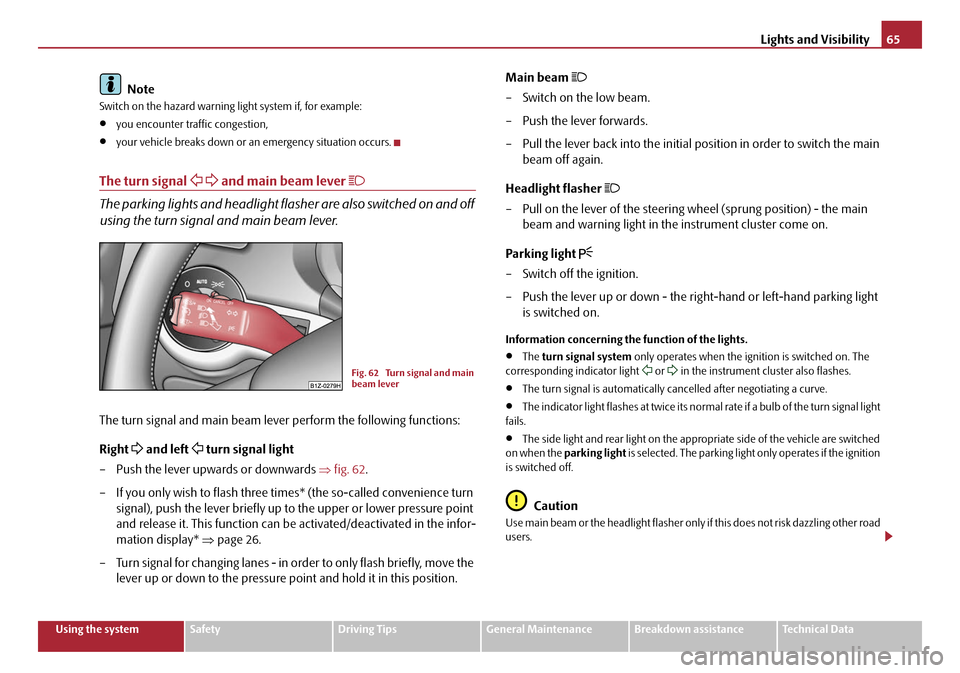
The turn signal and main beam lever perform the following functions:
Right
and left turn signal light
– Push the lever upwards or downwards ⇒fig. 62 .
– If you only wish to flash three times* (the so-called convenience turn signal), push the lever briefly up to the upper or lower pressure point
and release it. This function can be activated/deactivated in the infor-
mation display* ⇒page 26.
– Turn signal for changing lanes - in or der to only flash briefly, move the
lever up or down to the pressure po int and hold it in this position. Main beam
– Switch on the low beam.
– Push the lever forwards.
– Pull the lever back into the initial position in order to switch the main
beam off again.
Headlight flasher
– Pull on the lever of the steering wheel (sprung position) - the main beam and warning light in the instrument cluster come on.
Parking light
– Switch off the ignition.
– Push the lever up or down - the right-hand or left-hand parking light is switched on.
Information concerning the function of the lights.
•The turn signal system only operates when the ignition is switched on. The
corresponding indicator light or in the instrument cluster also flashes.
•The turn signal is automatically cancelled after negotiating a curve.
•The indicator light flashes at twice its normal rate if a bulb of the turn signal light
fails.
•The side light and rear light on the appropriate side of the vehicle are switched
on when the parking light is selected. The parking light only operates if the ignition
is switched off.
Caution
Use main beam or the headlight flasher only if this does not risk dazzling other road
users.
Fig. 62 Turn signal and main
beam lever
20A5Facelift.book Page 65 Saturday, September 6, 2008 2:13 PM
Page 68 of 304
Lights and Visibility67
Using the systemSafetyDriving TipsGeneral MaintenanceBreakdown assistanceTechnical Data
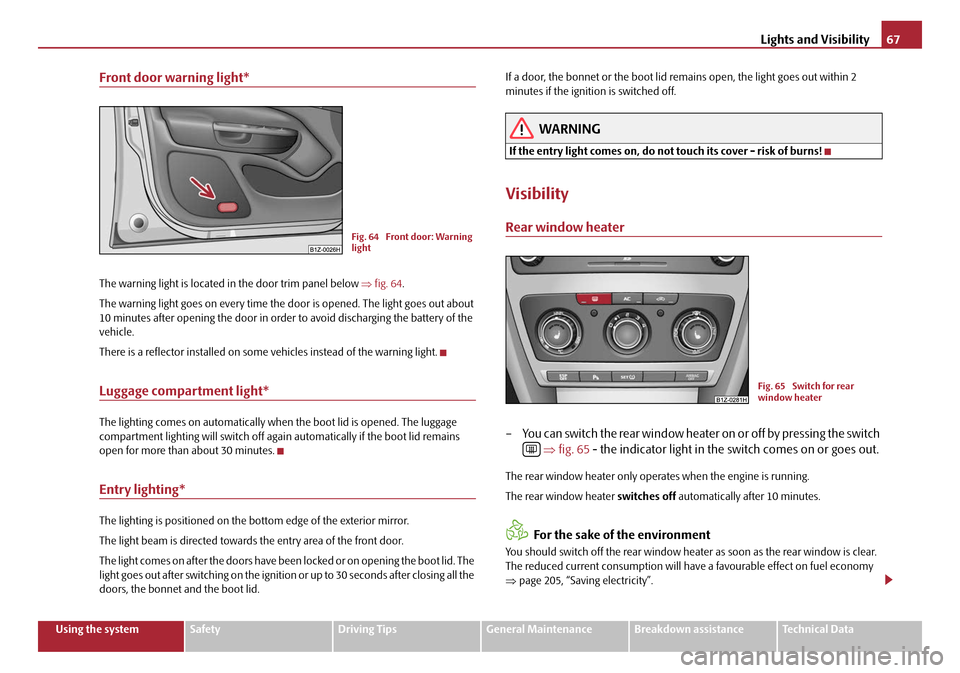
Front door warning light*
The warning light is located in the door trim panel below ⇒fig. 64 .
The warning light goes on every time the door is opened. The light goes out about
10 minutes after opening the door in order to avoid discharging the battery of the
vehicle.
There is a reflector installed on some vehicles instead of the warning light.
Luggage compartment light*
The lighting comes on automatically when the boot lid is opened. The luggage
compartment lighting will switch off agai n automatically if the boot lid remains
open for more than about 30 minutes.
Entry lighting*
The lighting is positioned on the bottom edge of the exterior mirror.
The light beam is directed towards the entry area of the front door.
The light comes on after the doors have been locked or on opening the boot lid. The
light goes out after switching on the ignition or up to 30 seconds after closing all the
doors, the bonnet and the boot lid. If a door, the bonnet or the boot lid remains open, the light goes out within 2
minutes if the ignition is switched off.
WARNING
If the entry light comes on, do not touch its cover - risk of burns!
Visibility
Rear window heater
– You can switch the rear window heater
on or off by pressing the switch
⇒ fig. 65 - the indicator light in the switch comes on or goes out.
The rear window heater only oper ates when the engine is running.
The rear window heater switches off automatically after 10 minutes.
For the sake of the environment
You should switch off the rear window heater as soon as the rear window is clear.
The reduced current consumption will have a favourable effect on fuel economy
⇒ page 205, “Saving electricity”.
Fig. 64 Front door: Warning
light
Fig. 65 Switch for rear
window heater
20A5Facelift.book Page 67 Saturday, September 6, 2008 2:13 PM
Page 70 of 304

Lights and Visibility69
Using the systemSafetyDriving TipsGeneral MaintenanceBreakdown assistanceTechnical Data
The sun screen is located in a ho using on the luggage compartment
cover. If required, you can remove the housing with the sun screen from
the luggage compartment cover.
Unrolling
– Pull the sun screen at the loop and hang it in the brackets ⇒page 68, fig. 68 .
Rolling up
– Take the sun screen out of the brackets and hold it at the loop so that it can roll up slowly and without damage into the housing on
the luggage compartment cover.
Removing
– Unhook the fastening elements from the luggage compartment cover .
– Roll up the sun screen again into the housing on the luggage compart- ment cover.
– Press the locking button in the direction of arrow and take out the sun screen in the direction or arrow ⇒fig. 69 .
Windshield wiper and wash system
Windshield wiper
You can operate the windscreen wipers and automatic wipe/wash
using the windscreen wiper lever.
The windscreen wiper lever ⇒fig. 70 has the following positions:
Finger-operated wiping
– If you wish to wipe the windscreen only briefly, push the lever into the
sprung position . If you hold the le ver in the lower position for more
than 1 second, the wiper wipes faster.
Intermittent wiping
– Position the lever up into position .
– Set with the switch the desired break between the individual wiper strokes
Slow wipe
– Position the lever up into position .
Fig. 69 Remove the sun
screen
AAAB
ABAA
AC
A1
A2
Fig. 70 Windscreen wiper
lever
A4
A1
AA
A2
20A5Facelift.book Page 69 Saturday, September 6, 2008 2:13 PM
Page 72 of 304
Lights and Visibility71
Using the systemSafetyDriving TipsGeneral MaintenanceBreakdown assistanceTechnical Data
WARNING
•Properly maintained windscreen wiper blades are essential for clear visi-
bility and safe driving ⇒page 71.
•Do not use the windscreen washer sy stem at low temperatures, without
heating the windscreen beforehand. Otherwise the window cleaner could
freeze on the windscreen and re strict the view to the front.
•The rain sensor only operates as a support. The driver is not released
from the responsibility to set the function of the windscreen wipers manu-
ally depending on the visibility conditions.
Caution
In frosty weather, please first of all check whether the windscreen wiper blades are
not frozen to the windscreen before swit ching them on. Switching on windscreen
wipers when the blades are frozen to the windscreen may result in damage both to
the blades and the motor of the windscreen wipers!
Note
•If the slower or the faster wiper setting is switched on ⇒page 69, fig. 70
and the vehicle speed decreases to below 4 km/h, the lower wiper step is switched
on automatically. At a speed increase of more than 8 km/h the previous wiper
setting is esta blished again.
•If there is an obstacle on the windscre en, the wiper will try to push away the
obstacle. If the obstacle continues to block the wiper, th e wiper stops after 5 cycles,
in order to avoid a damage to the wiper. Remove the obstacle and and switch on
the wiper again.
Headlight cleaning system*
The headlights are being cleaned after the windscreen has been sprayed for the first
time and fifth time, the low beam or ma in beam are switched on and the wind-
screen wiper lever was he ld in the position ⇒page 69, fig. 70 for about 1
second. The headlight washer nozzles are moved forward out of the bumper by the water
pressure for cleaning the headlights.
You should remove stubborn dirt (such
as insect residues) from the headlight
lenses at regular intervals, for example when refuelling. Please refer to the following
guidelines ⇒page 214, “The headlight lenses”.
You should remove any snow from the fixtures of the washer nozzles and clear ice
in winter with a de-icing spray in order to ensure proper operation of the cleaning
system.
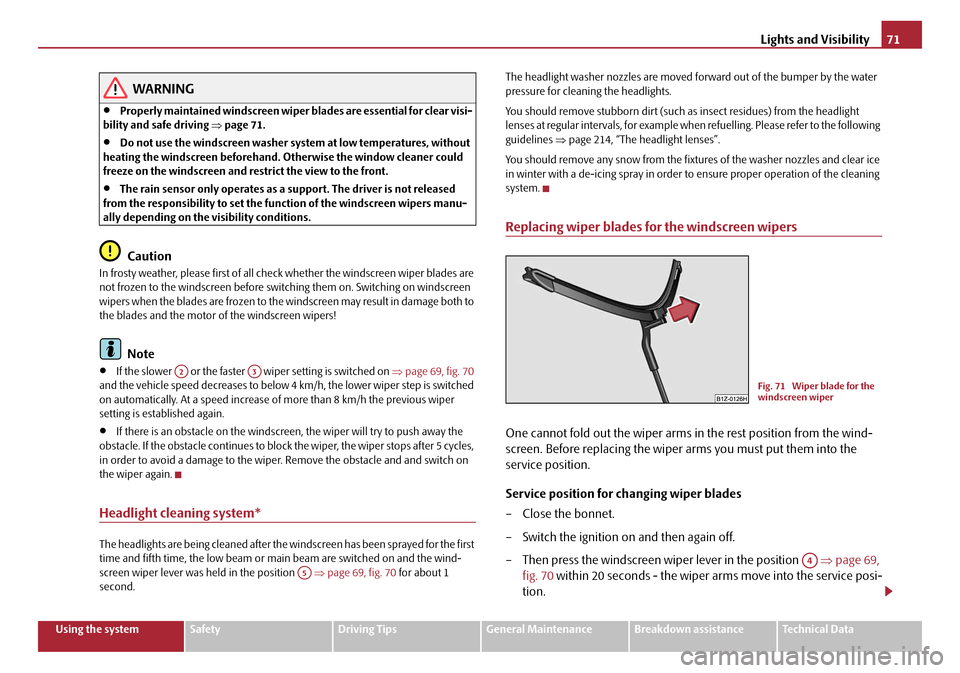
Replacing wiper blades for the windscreen wipers
One cannot fold out the wiper arms in the rest position from the wind-
screen. Before replacing the wiper arms you must put them into the
service position.
Service position for changing wiper blades
– Close the bonnet.
– Switch the ignition on and then again off.
– Then press the windscreen wiper lever in the position ⇒page 69,
fig. 70 within 20 seconds - the wiper arms move into the service posi-
tion.
A2A3
A5
Fig. 71 Wiper blade for the
windscreen wiper
A4
20A5Facelift.book Page 71 Saturday, September 6, 2008 2:13 PM
Page 74 of 304
Lights and Visibility73
Using the systemSafetyDriving TipsGeneral MaintenanceBreakdown assistanceTechnical Data
Rear-view mirror
Manual dimming interior rear-view mirror
Basic setting
– Pull the lever on the bottom edge of the mirror forward.
Dimming mirror
– Pull the lever on the bottom edge of the mirror back.
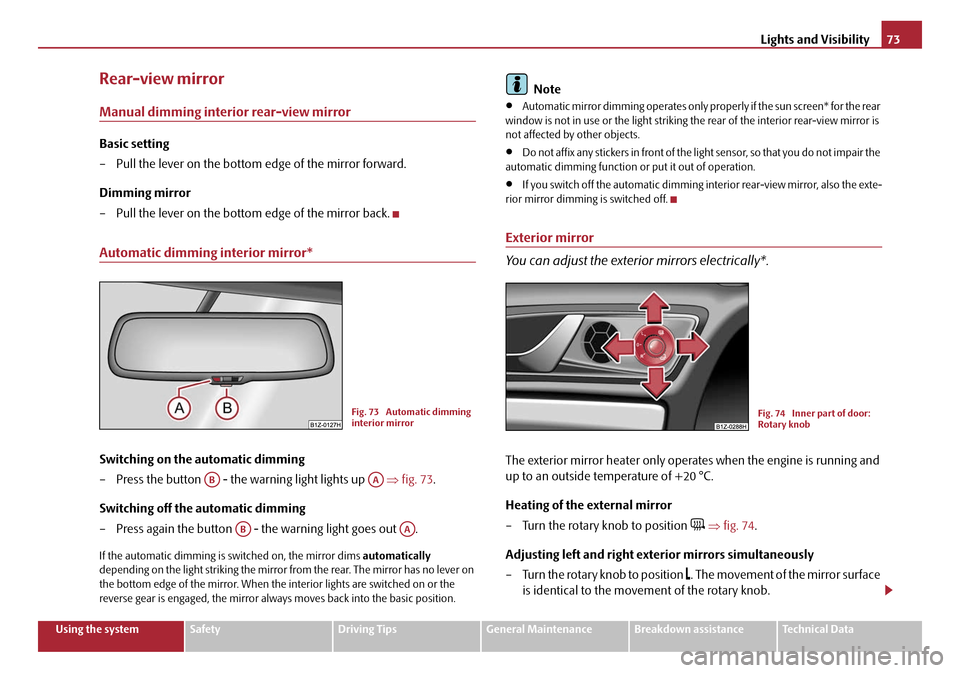
Automatic dimming interior mirror*
Switching on the automatic dimming
– Press the button - the warning light lights up ⇒fig. 73 .
Switching off the automatic dimming
– Press again the button - the warning light goes out .
If the automatic dimming is switched on, the mirror dims automatically
depending on the light striking the mirror from the rear. The mirror has no lever on
the bottom edge of the mirror. When the interior lights are switched on or the
reverse gear is engaged, the mirror alwa ys moves back into the basic position.
Note
•Automatic mirror dimming operates only pr operly if the sun screen* for the rear
window is not in use or the light striking th e rear of the interior rear-view mirror is
not affected by other objects.
•Do not affix any stickers in front of the li ght sensor, so that you do not impair the
automatic dimming function or put it out of operation.
•If you switch off the automatic dimming interior rear-view mirror, also the exte-
rior mirror dimming is switched off.
Exterior mirror
You can adjust the exterior mirrors electrically*.
The exterior mirror heater only oper ates when the engine is running and
up to an outside temperature of +20 °C.
Heating of the external mirror
– Turn the rotary knob to position
⇒ fig. 74 .
Adjusting left and right exterior mirrors simultaneously
– Turn the rotary knob to position
. The movement of the mirror surface
is identical to the movement of the rotary knob.
Fig. 73 Automatic dimming
interior mirror
ABAA
ABAA
Fig. 74 Inner part of door:
Rotary knob
20A5Facelift.book Page 73 Saturday, September 6, 2008 2:13 PM
Page 76 of 304

Lights and Visibility75
Using the systemSafetyDriving TipsGeneral MaintenanceBreakdown assistanceTechnical Data
•If you switch off the automatic dimming interior rear-view mirror, also the exte-
rior mirror dimming is switched off.
20A5Facelift.book Page 75 Saturday, September 6, 2008 2:13 PM
Page 78 of 304
Seats and Stowage77
Using the systemSafetyDriving TipsGeneral MaintenanceBreakdown assistanceTechnical Data
– Lower the seat if required by pushing or pumping lever down-
wards.
Adjust the angle of the seat backrest
– Relieve any pressure on the backrest (do not lean on it) and turn the handwheel ⇒page 76, fig. 75 to adjust the desired angle of the
backrest.
Adjusting lumbar support*
– Turn the handwheel until you have set the most comfortable
curvature of the seat upholstery in the area of your spine.
The driver's seat should be adjusted in such a way that the pedals can be pressed
to the floor with slightly bent legs.
The backrest on the driver's seat should be adjusted in such a way that the upper
point of the steering wheel can be easi ly reached with slightly bent arms.
WARNING
•Only adjust the driver seat when the ve hicle is stationary - risk of injury!
•Take care when adjusting the seat! Adjusting the seat without care can
lead to bruises or injuries.
•The backrests must not be angled too far back when driving otherwise
this will affect proper operation of the seat belts and of the airbag system -
risk of injury!
Adjusting front seats electrically*
Adjusting seats
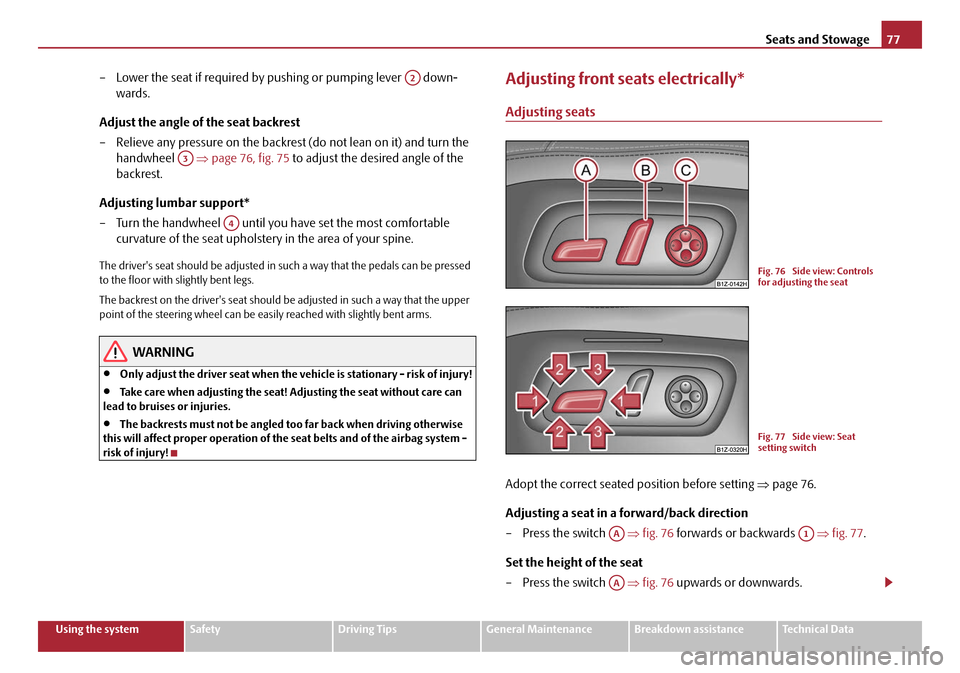
Adopt the correct seated position before setting ⇒page 76.
Adjusting a seat in a forward/back direction
– Press the switch ⇒fig. 76 forwards or backwards ⇒fig. 77 .
Set the height of the seat
– Press the switch ⇒fig. 76 upwards or downwards.
A2
A3
A4
Fig. 76 Side view: Controls
for adjusting the seat
Fig. 77 Side view: Seat
setting switch
AAA1
AA
20A5Facelift.book Page 77 Saturday, September 6, 2008 2:13 PM
Page 80 of 304
Seats and Stowage79
Using the systemSafetyDriving TipsGeneral MaintenanceBreakdown assistanceTechnical Data
– Engage reverse gear.
– Move the right exterior mirror into the desired position ⇒page 73.
– Take the vehicle out of gear. The set position of the exterior mirror is stored.
Memory buttons
Memory for the seat offers the possibility to store the individual driver seat and
external mirror position. An individual posi tion can be allocated to each of the three
memory buttons ⇒page 78, fig. 78 , that is three in tota l. After pressing the
corresponding memory button , the seat and the exterior mirror are automati-
cally moved into the positions which have been allocated to this button ⇒page 79.
Emergency Off
You can interrupt the setting operation at any time, if you operate any button of the
driver seat.
Note
•When storing settings with the memory buttons, we recommend that you begin
with the front button and assign a memo ry button to each additional driver.
•Each new setting stored with the same button erases the previous setting.
•Each time you store the seat and exterior mirror settings for driving forward you
also have to re-store the individual setting of the exterior mirror on the passenger
side for reversing.
Assigning remote control to the memory buttons
After storing the settings of the seat and exterior mirrors, you have 10
seconds in order to assign the remote control to the appropriate memory
button.
– Withdraw the ignition key.
– Press the button for unlocking the vehicle ⇒page 50. The setting is
stored with the memory button which you have selected.
If you wish to be able to retrieve the settings which are stored in the memory by also
using the remote control, you have to assign the remote control to a memory
button in each case.
If you wish, you can obtain an additional key with radio remote control from a
Škoda dealer and then assign the radio re mote control to another memory button.
Note
•If the remote control had previously been assigned to another memory button,
this setting is then erased by the new assignment.
•If you assign the remote control to a memory button which has already been
assigned to a remote control, the old assi gnment is also replaced by a new assign-
ment in this case.
•The assignment of the remote control to a memory button is retained, however,
after reassigning the seats and exterior mirrors.
Retrieving settings of the seat and mirrors
You can retrieve the stored settings either with the memory buttons
or with the remote control*.
Retrieving settings with memory buttons
– In order to retrieve the stored setting, you have two possibilities:
– One-touch automatic memory: Briefly press the desired memory
button ⇒page 78, fig. 78 . The seat and exterior mirror are moved
automatically into the stored position s (this applies only if the ignition
is switched on and the speed is less than 5 km/h).
– Memory keying : Press and hold the desired memory button
pressed long enough until the seat and the exterior mirror are moved
into the stored positions.
ABAB
AB
AB
20A5Facelift.book Page 79 Saturday, September 6, 2008 2:13 PM