key SKODA OCTAVIA 2008 2.G / (1Z) Owner's Manual
[x] Cancel search | Manufacturer: SKODA, Model Year: 2008, Model line: OCTAVIA, Model: SKODA OCTAVIA 2008 2.G / (1Z)Pages: 304, PDF Size: 17.69 MB
Page 4 of 304
Contents3
Using the systemSafetyDriving TipsGeneral MaintenanceBreakdown assistanceTechnical Data
Contents
Layout of this Owner's Manual
(explanations)
. . . . . . . . . . . . . . . . . . . . . . . . . .
Using the system. . . . . . . . . . . . . . . . . . . . . .
Cockpit. . . . . . . . . . . . . . . . . . . . . . . . . . . . . . . . . . . . . . . .
Overview . . . . . . . . . . . . . . . . . . . . . . . . . . . . . . . . . . . .
The brief instruction . . . . . . . . . . . . . . . . . . . . . . . . . .
Basic functions and important information . . . . .
Instruments and Indicator/Warning Lights. . .
General view of the instrument cluster . . . . . . . . .
Engine revolutions counter . . . . . . . . . . . . . . . . . . . .
Speedometer . . . . . . . . . . . . . . . . . . . . . . . . . . . . . . . .
Coolant temperature gauge . . . . . . . . . . . . . . . . . . .
Fuel gauge . . . . . . . . . . . . . . . . . . . . . . . . . . . . . . . . . . .
Counter for distance driven . . . . . . . . . . . . . . . . . . .
Service Interval Display . . . . . . . . . . . . . . . . . . . . . . .
Digital clock . . . . . . . . . . . . . . . . . . . . . . . . . . . . . . . . . .
Multi-functional indicato r (onboard computer)*
Information display* . . . . . . . . . . . . . . . . . . . . . . . . . .
Audio . . . . . . . . . . . . . . . . . . . . . . . . . . . . . . . . . . . . . . . .
Navigation system* . . . . . . . . . . . . . . . . . . . . . . . . . . .
Auto Check Control* . . . . . . . . . . . . . . . . . . . . . . . . . .
Warning lights . . . . . . . . . . . . . . . . . . . . . . . . . . . . . . . .
Unlocking and locking . . . . . . . . . . . . . . . . . . . . . . . .
Key . . . . . . . . . . . . . . . . . . . . . . . . . . . . . . . . . . . . . . . . . .
Key with light* . . . . . . . . . . . . . . . . . . . . . . . . . . . . . . . .
Changing the battery of the radio remote control
Electronic immobiliser . . . . . . . . . . . . . . . . . . . . . . . .
Child safety lock . . . . . . . . . . . . . . . . . . . . . . . . . . . . . .
Central locking system . . . . . . . . . . . . . . . . . . . . . . . .
Remote control* . . . . . . . . . . . . . . . . . . . . . . . . . . . . . . Synchonisation of the remote control . . . . . . . . . .
Anti-theft alarm system* . . . . . . . . . . . . . . . . . . . . . .
Power windows* . . . . . . . . . . . . . . . . . . . . . . . . . . . . .
Electric sliding/tilting roof* . . . . . . . . . . . . . . . . . . . .
Lights and Visibility . . . . . . . . . . . . . . . . . . . . . . . . . . .
Lights . . . . . . . . . . . . . . . . . . . . . . . . . . . . . . . . . . . . . . . .
Interior lighting . . . . . . . . . . . . . . . . . . . . . . . . . . . . . . .
Visibility . . . . . . . . . . . . . . . . . . . . . . . . . . . . . . . . . . . . .
Windshield wiper and wash system . . . . . . . . . . . .
Rear-view mirror . . . . . . . . . . . . . . . . . . . . . . . . . . . . .
Seats and Stowage. . . . . . . . . . . . . . . . . . . . . . . . . . . .
Front seats . . . . . . . . . . . . . . . . . . . . . . . . . . . . . . . . . . .
Adjusting front seats electrically* . . . . . . . . . . . . . .
Head restraints . . . . . . . . . . . . . . . . . . . . . . . . . . . . . . .
Middle rear head restraint* . . . . . . . . . . . . . . . . . . . .
Rear seats . . . . . . . . . . . . . . . . . . . . . . . . . . . . . . . . . . . .
Pedals . . . . . . . . . . . . . . . . . . . . . . . . . . . . . . . . . . . . . . .
luggage compartment . . . . . . . . . . . . . . . . . . . . . . . .
Net partition (Estate)* . . . . . . . . . . . . . . . . . . . . . . . .
The roof rack* . . . . . . . . . . . . . . . . . . . . . . . . . . . . . . . .
Cup holder . . . . . . . . . . . . . . . . . . . . . . . . . . . . . . . . . . .
Note holder . . . . . . . . . . . . . . . . . . . . . . . . . . . . . . . . . .
Ashtray* . . . . . . . . . . . . . . . . . . . . . . . . . . . . . . . . . . . . .
Cigarette lighter*, power sockets . . . . . . . . . . . . . . .
Storage compartments . . . . . . . . . . . . . . . . . . . . . . . .
Overview . . . . . . . . . . . . . . . . . . . . . . . . . . . . . . . . . . . .
Storage compartment on the front passenger side
Cooling of storage compartment on front
passenger side* . . . . . . . . . . . . . . . . . . . . . . . . . . . . . .
Storage compartment on the driver's side . . . . . .
Storage compartment on the dash panel* . . . . . .
Stowage compartment in front centre console* .
Storage net on the front centre console* . . . . . . . Stowage compartment for spectacles* . . . . . . . . .
Storage compartment in the front doors . . . . . . .
Stowage compartment below front passenger
seat* . . . . . . . . . . . . . . . . . . . . . . . . . . . . . . . . . . . . . . . .
Front seat armrest with storage compartment* .
Rear seat armrest with storage compartment* . .
Stowage compartment in rear centre console* .
Seat backrest with opening for skis* . . . . . . . . . . . .
Through-loading bag* . . . . . . . . . . . . . . . . . . . . . . . .
Side compartment* . . . . . . . . . . . . . . . . . . . . . . . . . .
Stowage compartment behind the rear seats
(estate car) . . . . . . . . . . . . . . . . . . . . . . . . . . . . . . . . . . .
Clothes hooks* . . . . . . . . . . . . . . . . . . . . . . . . . . . . . .
Heating and air conditioning system. . . . . . . . .
Air outlet vents . . . . . . . . . . . . . . . . . . . . . . . . . . . . . . .
Heating . . . . . . . . . . . . . . . . . . . . . . . . . . . . . . . . . . . . . .
Climatic* (semi-automatic air conditioning
system) . . . . . . . . . . . . . . . . . . . . . . . . . . . . . . . . . . . . . .
Climatronic* (automatic air conditioning) . . . . . .
Auxiliary heating (auxiliary heating and
ventilation)* . . . . . . . . . . . . . . . . . . . . . . . . . . . . . . . . .
Starting-off and Driving . . . . . . . . . . . . . . . . . . . . . .
Setting steering wheel position . . . . . . . . . . . . . . . .
Ignition lock . . . . . . . . . . . . . . . . . . . . . . . . . . . . . . . . .
Starting the engine . . . . . . . . . . . . . . . . . . . . . . . . . . .
Switching off the engine . . . . . . . . . . . . . . . . . . . . . .
Shifting (manual gearbox) . . . . . . . . . . . . . . . . . . . . .
Handbrake . . . . . . . . . . . . . . . . . . . . . . . . . . . . . . . . . . .
Rear parking aid* . . . . . . . . . . . . . . . . . . . . . . . . . . . . .
Front and rear parking aid* . . . . . . . . . . . . . . . . . . . .
Cruise control system (CCS)* . . . . . . . . . . . . . . . . . .
Automatic gearbox . . . . . . . . . . . . . . . . . . . . . . . . . . .
Automatic gearbox* . . . . . . . . . . . . . . . . . . . . . . . . . .
6
7
9
9
11
11
17
17
18
18
18
18
19
20
21
21
26
28
28
28
32
42
42
42
43
44
44
45
49 51
51
53
56
59
59
66
67
69
73
76
76
77
80
81
81
85
85
91
93
94
95
95
97
98
98
99
99
100
100
101
101 101
102
102
102
103
104
104
105
106
106
107
108
108
109
111
115
119
124
124
125
126
127
127
128
129
130
131
134
134
20A5Facelift.book Page 3 Saturday, September 6, 2008 2:13 PM
Page 12 of 304
The brief instruction11
Using the systemSafetyDriving TipsGeneral MaintenanceBreakdown assistanceTechnical Data
The brief instruction
Basic functions and important information
Introduction
The chapter of the brief instruction is only used as a quick reference
of the most important operating elem ents of the vehicle. It is neces-
sary to observe all the informat ion which is contained in the
following chapters of the Owner's Manual.
Unlocking and locking the vehicle
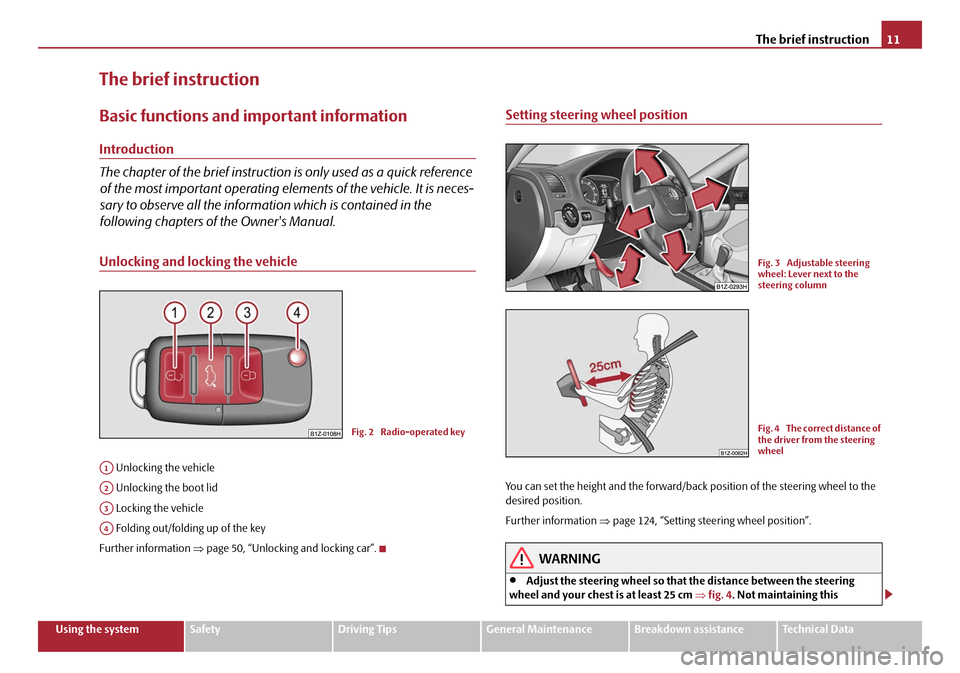
Unlocking the vehicle
Unlocking the boot lid
Locking the vehicle
Folding out/folding up of the key
Further information ⇒ page 50, “Unlocking and locking car”.
Setting steering wheel position
You can set the height and the forward/back position of the steering wheel to the
desired position.
Further information ⇒page 124, “Setting steering wheel position”.
WARNING
•Adjust the steering wheel so that the distance between the steering
wheel and your chest is at least 25 cm ⇒fig. 4 . Not maintaining this
Fig. 2 Radio-operated key
A1
A2
A3
A4
Fig. 3 Adjustable steering
wheel: Lever next to the
steering column
Fig. 4 The correct distance of
the driver from the steering
wheel
20A5Facelift.book Page 11 Saturday, September 6, 2008 2:13 PM
Page 16 of 304
The brief instruction15
Using the systemSafetyDriving TipsGeneral MaintenanceBreakdown assistanceTechnical Data
Safety switch
Further information ⇒ page 53, “Power windows*”.
Refuelling
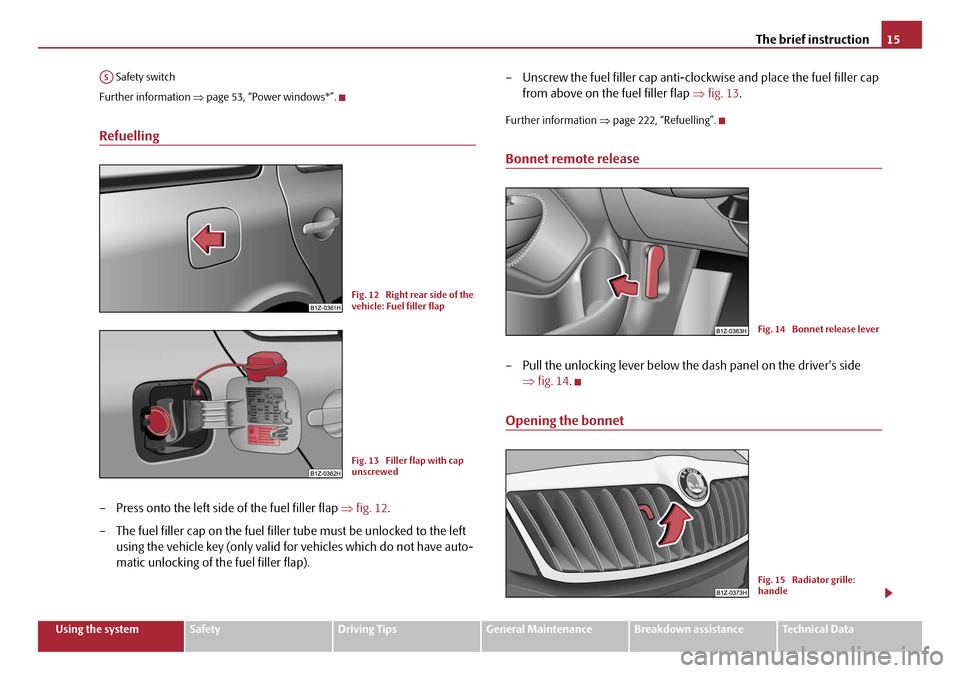
– Press onto the left side of the fuel filler flap ⇒fig. 12 .
– The fuel filler cap on the fuel fille r tube must be unlocked to the left
using the vehicle key (only valid for vehicles which do not have auto-
matic unlocking of the fuel filler flap). – Unscrew the fuel filler cap anti-clo
ckwise and place the fuel filler cap
from above on the fuel filler flap ⇒fig. 13 .
Further information ⇒page 222, “Refuelling”.
Bonnet remote release
– Pull the unlocking lever below the dash panel on the driver's side
⇒ fig. 14 .
Opening the bonnet
AS
Fig. 12 Right rear side of the
vehicle: Fuel filler flap
Fig. 13 Filler flap with cap
unscrewed
Fig. 14 Bonnet release lever
Fig. 15 Radiator grille:
handle
20A5Facelift.book Page 15 Saturday, September 6, 2008 2:13 PM
Page 21 of 304
Instruments and Indicator/Warning Lights
20
Service Interval Display
Depending on the equipment installed in the vehicle, the text can differ on the
display.
Service Interval Display
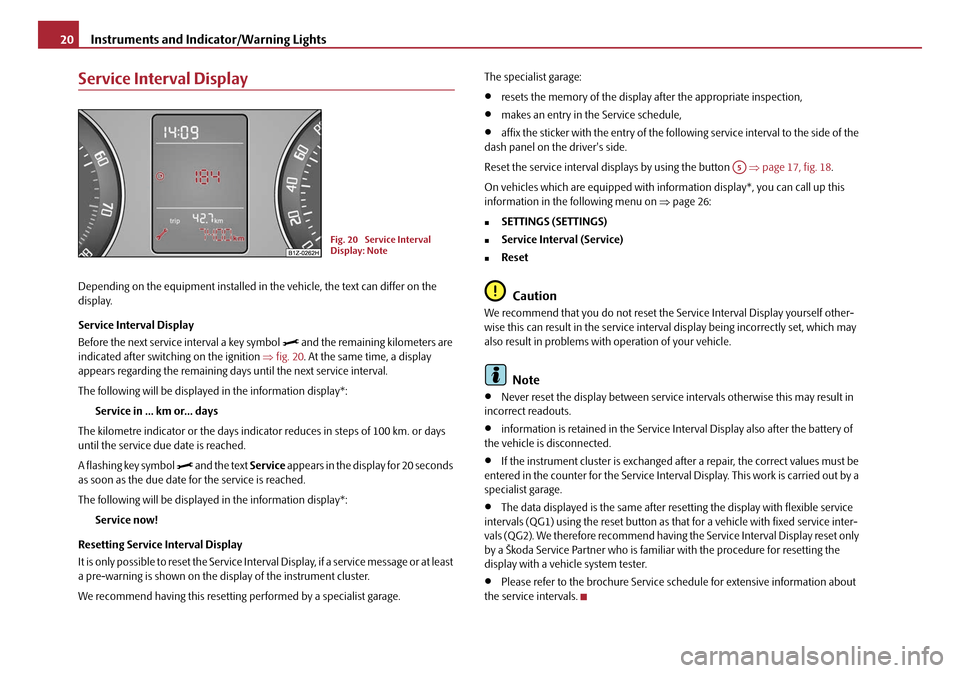
Before the next service interval a key symbol
and the remaining kilometers are
indicated after switching on the ignition ⇒fig. 20 . At the same time, a display
appears regarding the remaining days until the next service interval.
The following will be displayed in the information display*:
Service in ... km or... days
The kilometre indicator or the days indica tor reduces in steps of 100 km. or days
until the service due date is reached.
A flashing key symbol
and the text Service appears in the display for 20 seconds
as soon as the due date for the service is reached.
The following will be displayed in the information display*:
Service now!
Resetting Service Interval Display
It is only possible to reset the Service Interval Display, if a service message or at least
a pre-warning is shown on the display of the instrument cluster.
We recommend having this resetting performed by a specialist garage. The specialist garage:
•resets the memory of the display after the appropriate inspection,
•makes an entry in the Service schedule,
•affix the sticker with the entry of the following service interval to the side of the
dash panel on the driver's side.
Reset the service interval displays by using the button ⇒page 17, fig. 18 .
On vehicles which are equipped with in formation display*, you can call up this
information in the following menu on ⇒page 26:
„SETTINGS (SETTINGS)
„Service Interval (Service)
„Reset
Caution
We recommend that you do not reset the Service Interval Display yourself other-
wise this can result in the service interval display being incorrectly set, which may
also result in problems with operation of your vehicle.
Note
•Never reset the display between service intervals otherwise this may result in
incorrect readouts.
•information is retained in the Service Interval Display also after the battery of
the vehicle is disconnected.
•If the instrument cluster is exchanged afte r a repair, the correct values must be
entered in the counter for the Service Interva l Display. This work is carried out by a
specialist garage.
•The data displayed is the same after resetting the display with flexible service
intervals (QG1) using the reset button as th at for a vehicle with fixed service inter-
vals (QG2). We therefore recommend having the Service Interval Display reset only
by a Škoda Service Partner who is familiar with the procedure for resetting the
display with a vehicle system tester.
•Please refer to the brochure Service schedule for extensive information about
the service intervals.
Fig. 20 Service Interval
Display: Note
A5
20A5Facelift.book Page 20 Saturday, September 6, 2008 2:13 PM
Page 43 of 304
Unlocking and locking
42
Unlocking and locking
Key
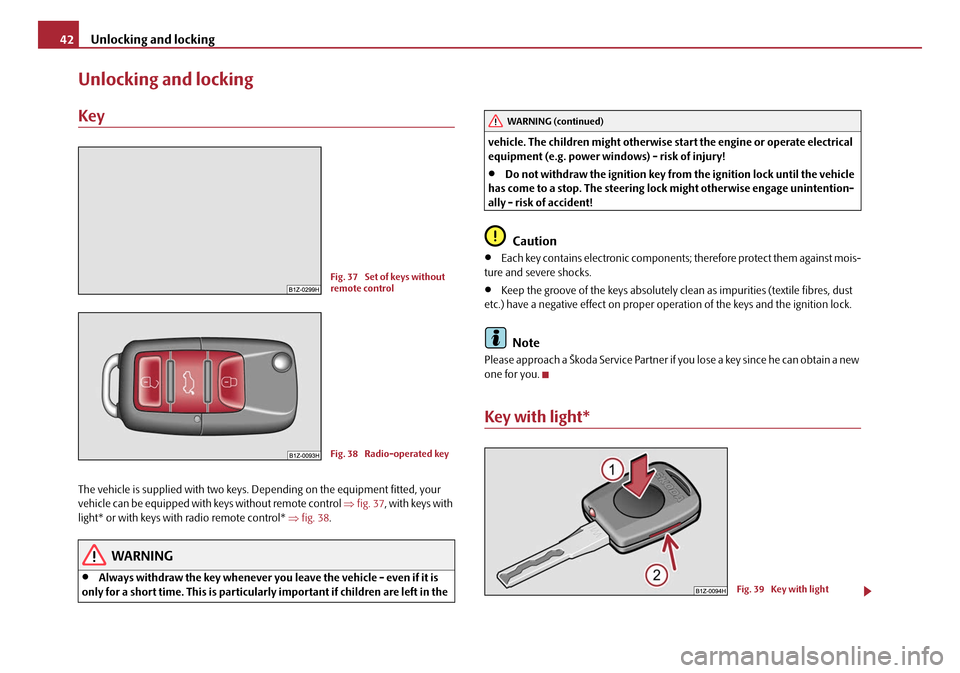
The vehicle is supplied with two keys. Depending on the equipment fitted, your
vehicle can be equipped with keys without remote control ⇒fig. 37 , with keys with
light* or with keys with radio remote control* ⇒fig. 38 .
WARNING
•Always withdraw the key whenever you leave the vehicle - even if it is
only for a short time. This is particularly important if children are left in the vehicle. The children might otherwise st
art the engine or operate electrical
equipment (e.g. power windows) - risk of injury!
•Do not withdraw the ignition key from the ignition lock until the vehicle
has come to a stop. The steering lock might otherwise engage unintention-
ally - risk of accident!
Caution
•Each key contains electronic components; therefore protect them against mois-
ture and severe shocks.
•Keep the groove of the keys absolutely cl ean as impurities (textile fibres, dust
etc.) have a negative effect on proper op eration of the keys and the ignition lock.
Note
Please approach a Škoda Service Partner if you lose a key since he can obtain a new
one for you.
Key with light*
Fig. 37 Set of keys without
remote control
Fig. 38 Radio-operated key
WARNING (continued)
Fig. 39 Key with light
20A5Facelift.book Page 42 Saturday, September 6, 2008 2:13 PM
Page 44 of 304
Unlocking and locking43
Using the systemSafetyDriving TipsGeneral MaintenanceBreakdown assistanceTechnical Data
Switching on the light
– Press the button in the middle in the direction of arrow .
Replacing battery or bulb
– Insert a coin into the slot of th e key housing (arrow ) and press off
the upper part through a rotary movement of the coin.
– Replace the battery or bulb.
– Place the upper and lower part above each other and press the parts together.
You can obtain replacement batteries and re placement bulbs at a specialist garage.
For the sake of the environment
Dispose of an old battery in accordance with environm ental regulations.
Note
The replacement battery must have the same specification as the original battery.
Changing the battery of the radio remote control
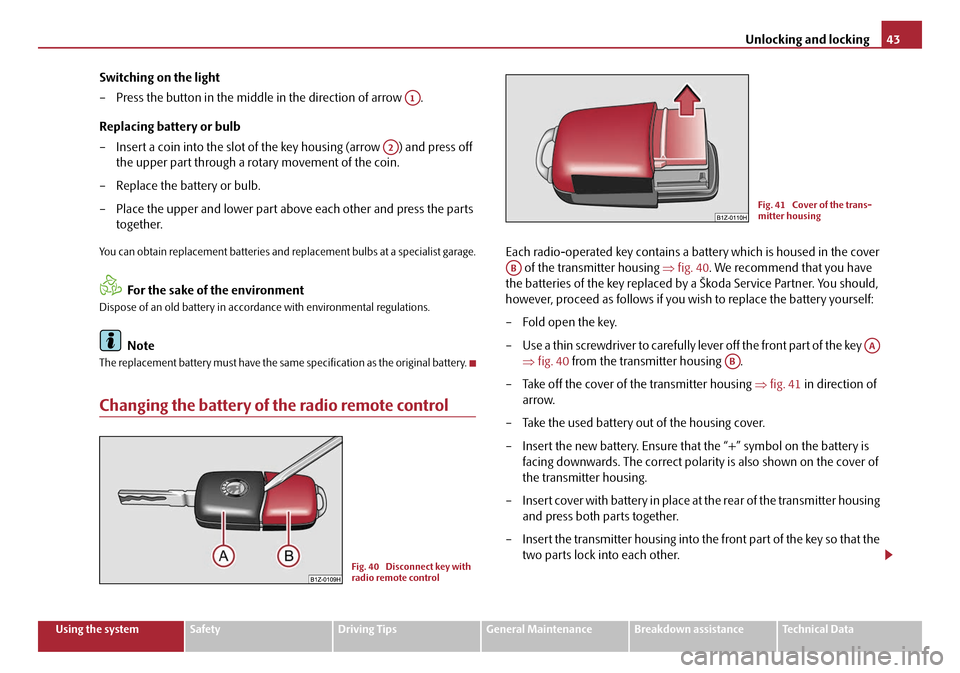
Each radio-operated key contains a battery which is housed in the cover
of the transmitter housing ⇒fig. 40 . We recommend that you have
the batteries of the key replaced by a Škoda Service Partner. You should,
however, proceed as follows if you wi sh to replace the battery yourself:
– Fold open the key.
– Use a thin screwdriver to carefully lever off the front part of the key ⇒fig. 40 from the transmitter housing .
– Take off the cover of the transmitter housing ⇒fig. 41 in direction of
arrow.
– Take the used battery out of the housing cover.
– Insert the new battery. Ensure that the “+” symbol on the battery is facing downwards. The correct polarity is also shown on the cover of
the transmitter housing.
– Insert cover with battery in place at the rear of the transmitter housing
and press both parts together.
– Insert the transmitter housing into the front part of the key so that the two parts lock into each other.
A1
A2
Fig. 40 Disconnect key with
radio remote control
Fig. 41 Cover of the trans-
mitter housing
AB
AA
AB
20A5Facelift.book Page 43 Saturday, September 6, 2008 2:13 PM
Page 45 of 304
Unlocking and locking
44
For the sake of the environment
Dispose of an old battery in accord ance with environmental regulations.
Note
•The replacement battery must have the same specification as the original
battery.
•If it is still not be possible to unlock or lock the vehicle with the remote control
even after replacing the battery this means that the system has to be synchronised
⇒ page 51.
Electronic immobiliser
The electronic immobiliser prevents the vehicle being operated by an
unauthorised person.
An electronic chip is integrated in the he ad of the key. The immobiliser is deacti-
vated with the aid of this chip when the key is inserted in the ignition lock. The elec-
tronic immobiliser is automatically activated when you withdraw the ignition key
from the lock.
Note
It is only possible to start the engine of your car with a Genuine Škoda key with the
matching code.
Child safety lock
The child safety lock prevents the rear door from being opened from
the inside.
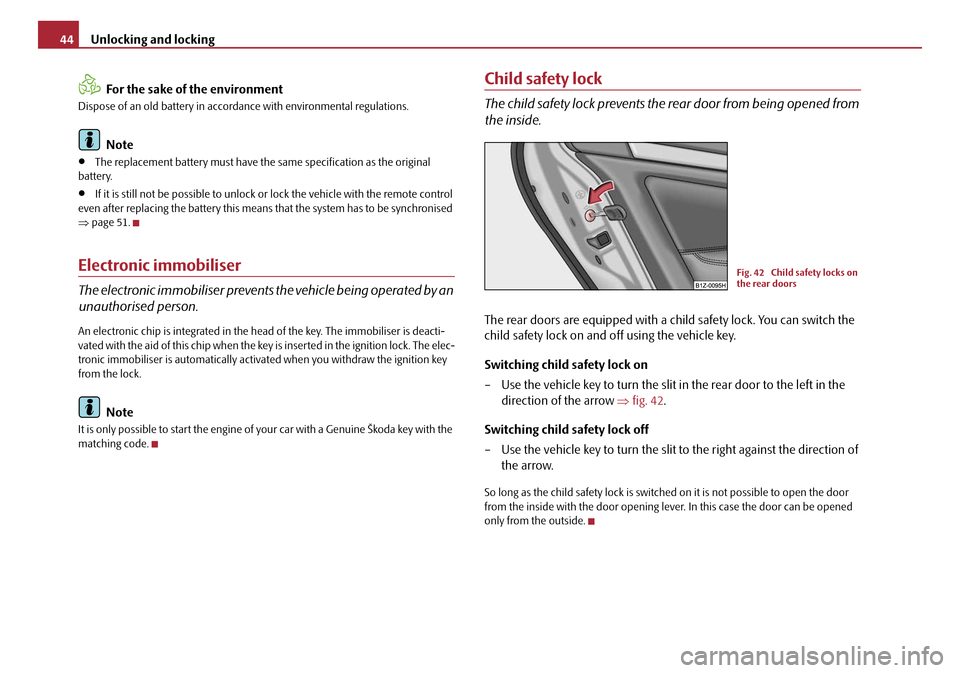
The rear doors are equipped with a child safety lock. You can switch the
child safety lock on and off using the vehicle key.
Switching child safety lock on
– Use the vehicle key to turn the slit in the rear door to the left in the direction of the arrow ⇒fig. 42 .
Switching child safety lock off
– Use the vehicle key to turn the slit to the right against the direction of
the arrow.
So long as the child safety lo ck is switched on it is not possible to open the door
from the inside with the door opening lever. In this case the door can be opened
only from the outside.
Fig. 42 Child safety locks on
the rear doors
20A5Facelift.book Page 44 Saturday, September 6, 2008 2:13 PM
Page 46 of 304
Unlocking and locking45
Using the systemSafetyDriving TipsGeneral MaintenanceBreakdown assistanceTechnical Data
Central locking system
Description
Unlocking or locking causes all the doors and the fuel filler flap* to be unlocked or
locked at the same time by the central lockin g system (as long as it is not set differ-
ently in the menu Setup (settings) - Convenience information display*). The boot
lid is unlocked when opening. It can be op ened by pressing the hand grip above the
licence plate ⇒page 48.
Operation of the central locking system is possible:
•from the outside using the vehicle key ⇒page 46,
•using the button for the central locking system ⇒page 47,
•by using the remote control ⇒page 50.
Indicator light in the driver's door on vehicles without anti-theft alarm system
After the car is locked, the indicator light flashes after 2 seconds.
After the car is locked with the deactivate d safe securing system, the indicator light
flashes only after 30 seconds.
Indicator light in the driver's door on vehicles with anti-theft alarm system
After locking the vehicle the indicator light flashes for 2 seconds fast, then more
slowly.
If the vehicle is locked and the safe securing system ⇒page 46 is not operating, the
indicator light in the driver door flashes for about 2 seconds fast, goes out and starts
to flash slowly after about 30 seconds.
If the indicator light first of all flashes fast for about 2 seconds, afterwards lights up
for about 30 seconds and then flashes slowly, there is a fault in the system of the
central locking or the interior monitor* ⇒page 52. Contact a specialist garage to
obtain assistance.
Convenience operation of windows
One can open and close the electrically powered windows when unlocking and
locking the vehicle ⇒page 55. Opening a single door*
This function allows one to just unlock
the driver's door. The other doors and the
fuel filler flap* remain locked and are only unlocked after repetitive unlocking.
If you wish, you can have your Škoda Dealer activate the function of the single door
opening mode.
Automatic locking*
All the doors and the boot lid are locked automatically once the car reaches a speed
of about 15 km/h.
If the ignition key is withdrawn, the car is then automatically unlocked again. In
addition, it is possible for the driver to unlock the car by pressing the central locking
button
or by pulling the door opening lever.
If you wish, your Škoda Deal er can activate the function of the automatic locking
mode.
WARNING
Locking the doors prevents involuntary opening in an exceptional situation
(an accident). Locked doors prevent unwanted entry into the vehicle from
outside, for example at road crossings. Locked doors do, however, make it
more difficult for rescuers to get into the vehicle in an emergency - danger to
life!
Note
•In the event of an accident in which the airbags are deployed, the locked doors
are automatically unlocked in order to enable rescuers to gain access to the vehicle.
•Only the front doors can be unlocked and locked using the key if the central
locking system fails. You can lock or unlock manually the other doors and the boot
lid.
−Emergency locking of the door ⇒page 48.
− Emergency unlocking of the boot lid ⇒page 49.
20A5Facelift.book Page 45 Saturday, September 6, 2008 2:13 PM
Page 47 of 304
Unlocking and locking
46
Safe securing
The central locking system is equipped with a safe securing system. Locking the
vehicle from the outside causes the door lock s to be automatically blocked. It is not
possible to open the doors with the door handle either from the inside or from the
outside. This acts as an effective deterrent for attempts to break into your vehicle.
You can deactivate the safe securing sy stem by locking twice within 2seconds.
If the safe securing system is not operating, the warning light in the driver door
flashes for about 2 seconds fast, goes out and starts to flash slowly again after about
30 seconds.
The safe securing system is again activate d the next time the vehicle is unlocked and
locked again.
The doors can be opened from the inside if the vehicle is locked and the safe
securing system is deactivated:
•The door is unlocked by actuating the door-opening lever.
•The door opens upon actuating the door-opening lever again.
WARNING
If the vehicle is locked from the outside and the safe securing system is acti-
vated, there must not be any person and animals in the vehicle as it is then
not possible to open either a door or a window from the inside. The locked
doors make it more difficult for rescuers to get into the vehicle in an emer-
gency - hazard!
Note
The anti-theft alarm system* is also activated with the deactivated safe securing
system when locking the vehicle. The inte rior monitor* is however not activated.
Unlocking the vehicle using the key
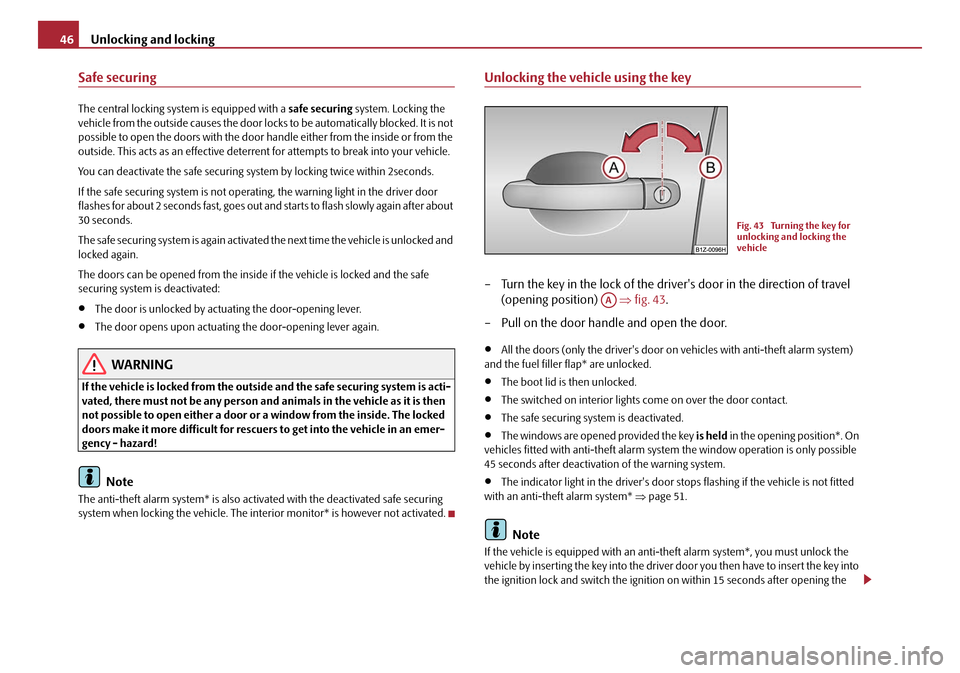
– Turn the key in the lock of the driver's door in the direction of travel
(opening position) ⇒fig. 43 .
– Pull on the door handle and open the door.
•All the doors (only the driver's door on vehicles with anti-theft alarm system)
and the fuel filler flap* are unlocked.
•The boot lid is then unlocked.
•The switched on interior lights come on over the door contact.
•The safe securing system is deactivated.
•The windows are opened provided the key is held in the opening position*. On
vehicles fitted with anti-theft alarm syst em the window operation is only possible
45 seconds after deactivation of the warning system.
•The indicator light in the driver's door stops flashing if the vehicle is not fitted
with an anti-theft alarm system* ⇒page 51.
Note
If the vehicle is equipped with an anti-theft alarm system*, you must unlock the
vehicle by inserting the key into the driver door you then have to insert the key into
the ignition lock and switch the ignition on within 15 seconds after opening the
Fig. 43 Turning the key for
unlocking and locking the
vehicle
AA
20A5Facelift.book Page 46 Saturday, September 6, 2008 2:13 PM
Page 48 of 304
Unlocking and locking47
Using the systemSafetyDriving TipsGeneral MaintenanceBreakdown assistanceTechnical Data
door. The
alarm will be triggered if you do not switch on the ignition within 15
seconds.
Closing the vehicle with the key
– Turn the key in the lock of the driver's door in the opposite direction of travel (closing position) ⇒page 46, fig. 43 .
•The doors, the boot lid and the fuel filler flap* are locked.
•The switched on interior lights wi ll switch off over the door contact.
•The windows and the electric sliding/tilting roof* are closed provided the key is
held in the locking position.
•The safe securing system is activated immediately.
•The indicator light in the driver door begins flashing.
Note
The opened driver door cannot be locked. It must be locked separately after closing
it.
Buttons for the central locking system
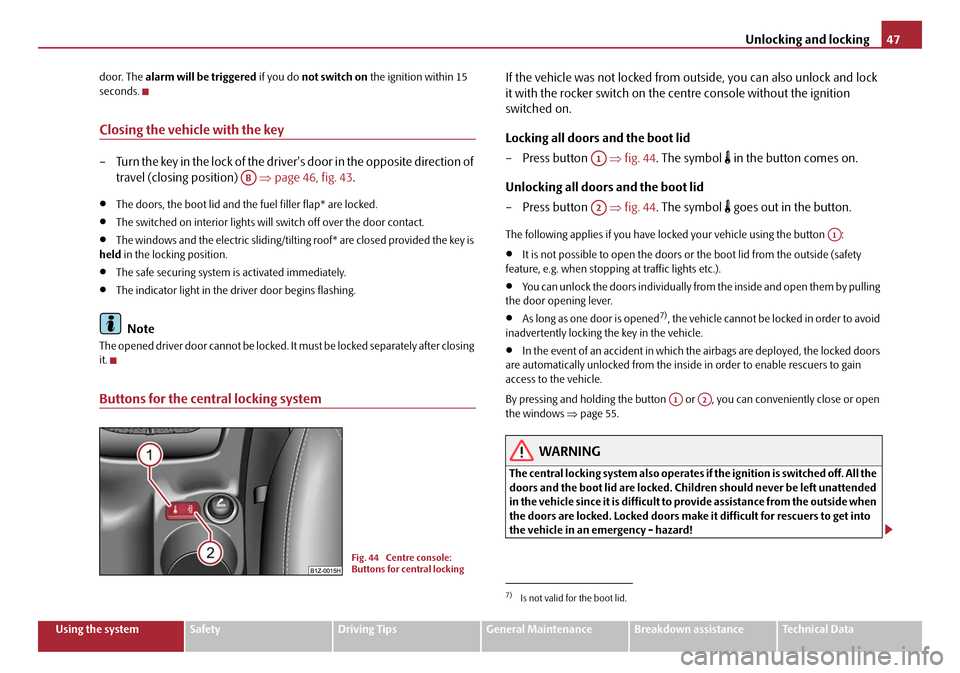
If the vehicle was not locked from ou tside, you can also unlock and lock
it with the rocker switch on the centre console without the ignition
switched on.
Locking all doors and the boot lid
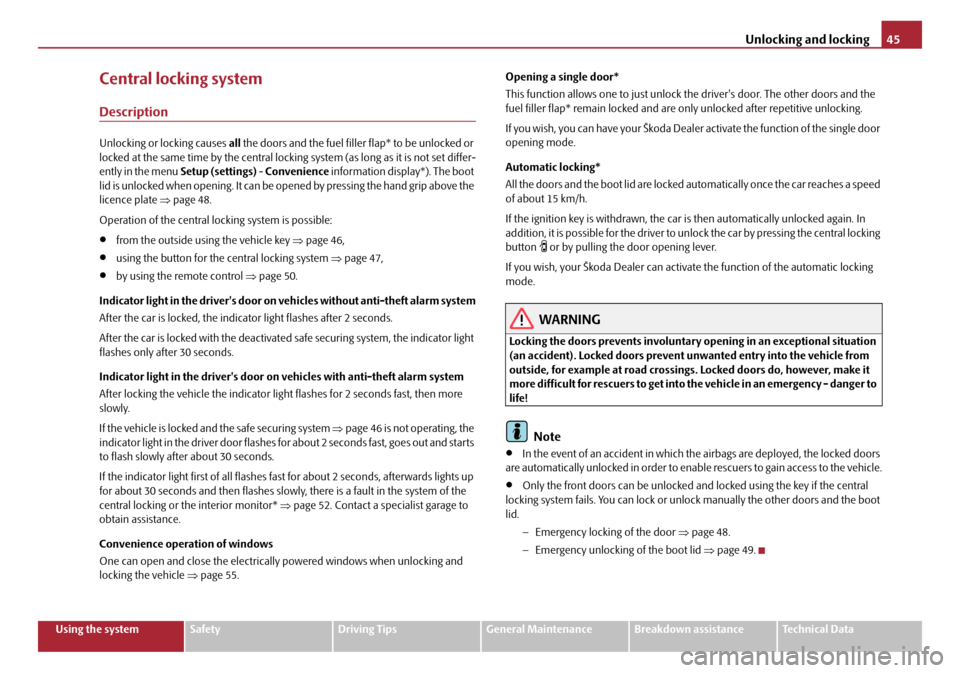
–Press button ⇒fig. 44 . The symbol
in the button comes on.
Unlocking all doors and the boot lid
–Press button ⇒fig. 44 . The symbol
goes out in the button.
The following applies if you have lo cked your vehicle using the button :
•It is not possible to open the doors or the boot lid from the outside (safety
feature, e.g. when stopping at traffic lights etc.).
•You can unlock the doors individually from the inside and open them by pulling
the door opening lever.
•As long as one door is opened7), the vehicle cannot be locked in order to avoid
inadvertently locking the key in the vehicle.
•In the event of an accident in which the airbags are deployed, the locked doors
are automatically unlocked from the inside in order to enable rescuers to gain
access to the vehicle.
By pressing and holding the button or , you can conveniently close or open
the windows ⇒page 55.
WARNING
The central locking system also operates if the ignition is switched off. All the
doors and the boot lid are locked. Children should never be left unattended
in the vehicle since it is difficult to provide assistance from the outside when
the doors are locked. Locked doors make it difficult for rescuers to get into
the vehicle in an emergency - hazard!
AB
Fig. 44 Centre console:
Buttons for central locking
7)Is not valid for the boot lid.
A1
A2
A1
A1A2
20A5Facelift.book Page 47 Saturday, September 6, 2008 2:13 PM