service indicator SKODA OCTAVIA 2008 2.G / (1Z) Owner's Manual
[x] Cancel search | Manufacturer: SKODA, Model Year: 2008, Model line: OCTAVIA, Model: SKODA OCTAVIA 2008 2.G / (1Z)Pages: 304, PDF Size: 17.69 MB
Page 4 of 304
Contents3
Using the systemSafetyDriving TipsGeneral MaintenanceBreakdown assistanceTechnical Data
Contents
Layout of this Owner's Manual
(explanations)
. . . . . . . . . . . . . . . . . . . . . . . . . .
Using the system. . . . . . . . . . . . . . . . . . . . . .
Cockpit. . . . . . . . . . . . . . . . . . . . . . . . . . . . . . . . . . . . . . . .
Overview . . . . . . . . . . . . . . . . . . . . . . . . . . . . . . . . . . . .
The brief instruction . . . . . . . . . . . . . . . . . . . . . . . . . .
Basic functions and important information . . . . .
Instruments and Indicator/Warning Lights. . .
General view of the instrument cluster . . . . . . . . .
Engine revolutions counter . . . . . . . . . . . . . . . . . . . .
Speedometer . . . . . . . . . . . . . . . . . . . . . . . . . . . . . . . .
Coolant temperature gauge . . . . . . . . . . . . . . . . . . .
Fuel gauge . . . . . . . . . . . . . . . . . . . . . . . . . . . . . . . . . . .
Counter for distance driven . . . . . . . . . . . . . . . . . . .
Service Interval Display . . . . . . . . . . . . . . . . . . . . . . .
Digital clock . . . . . . . . . . . . . . . . . . . . . . . . . . . . . . . . . .
Multi-functional indicato r (onboard computer)*
Information display* . . . . . . . . . . . . . . . . . . . . . . . . . .
Audio . . . . . . . . . . . . . . . . . . . . . . . . . . . . . . . . . . . . . . . .
Navigation system* . . . . . . . . . . . . . . . . . . . . . . . . . . .
Auto Check Control* . . . . . . . . . . . . . . . . . . . . . . . . . .
Warning lights . . . . . . . . . . . . . . . . . . . . . . . . . . . . . . . .
Unlocking and locking . . . . . . . . . . . . . . . . . . . . . . . .
Key . . . . . . . . . . . . . . . . . . . . . . . . . . . . . . . . . . . . . . . . . .
Key with light* . . . . . . . . . . . . . . . . . . . . . . . . . . . . . . . .
Changing the battery of the radio remote control
Electronic immobiliser . . . . . . . . . . . . . . . . . . . . . . . .
Child safety lock . . . . . . . . . . . . . . . . . . . . . . . . . . . . . .
Central locking system . . . . . . . . . . . . . . . . . . . . . . . .
Remote control* . . . . . . . . . . . . . . . . . . . . . . . . . . . . . . Synchonisation of the remote control . . . . . . . . . .
Anti-theft alarm system* . . . . . . . . . . . . . . . . . . . . . .
Power windows* . . . . . . . . . . . . . . . . . . . . . . . . . . . . .
Electric sliding/tilting roof* . . . . . . . . . . . . . . . . . . . .
Lights and Visibility . . . . . . . . . . . . . . . . . . . . . . . . . . .
Lights . . . . . . . . . . . . . . . . . . . . . . . . . . . . . . . . . . . . . . . .
Interior lighting . . . . . . . . . . . . . . . . . . . . . . . . . . . . . . .
Visibility . . . . . . . . . . . . . . . . . . . . . . . . . . . . . . . . . . . . .
Windshield wiper and wash system . . . . . . . . . . . .
Rear-view mirror . . . . . . . . . . . . . . . . . . . . . . . . . . . . .
Seats and Stowage. . . . . . . . . . . . . . . . . . . . . . . . . . . .
Front seats . . . . . . . . . . . . . . . . . . . . . . . . . . . . . . . . . . .
Adjusting front seats electrically* . . . . . . . . . . . . . .
Head restraints . . . . . . . . . . . . . . . . . . . . . . . . . . . . . . .
Middle rear head restraint* . . . . . . . . . . . . . . . . . . . .
Rear seats . . . . . . . . . . . . . . . . . . . . . . . . . . . . . . . . . . . .
Pedals . . . . . . . . . . . . . . . . . . . . . . . . . . . . . . . . . . . . . . .
luggage compartment . . . . . . . . . . . . . . . . . . . . . . . .
Net partition (Estate)* . . . . . . . . . . . . . . . . . . . . . . . .
The roof rack* . . . . . . . . . . . . . . . . . . . . . . . . . . . . . . . .
Cup holder . . . . . . . . . . . . . . . . . . . . . . . . . . . . . . . . . . .
Note holder . . . . . . . . . . . . . . . . . . . . . . . . . . . . . . . . . .
Ashtray* . . . . . . . . . . . . . . . . . . . . . . . . . . . . . . . . . . . . .
Cigarette lighter*, power sockets . . . . . . . . . . . . . . .
Storage compartments . . . . . . . . . . . . . . . . . . . . . . . .
Overview . . . . . . . . . . . . . . . . . . . . . . . . . . . . . . . . . . . .
Storage compartment on the front passenger side
Cooling of storage compartment on front
passenger side* . . . . . . . . . . . . . . . . . . . . . . . . . . . . . .
Storage compartment on the driver's side . . . . . .
Storage compartment on the dash panel* . . . . . .
Stowage compartment in front centre console* .
Storage net on the front centre console* . . . . . . . Stowage compartment for spectacles* . . . . . . . . .
Storage compartment in the front doors . . . . . . .
Stowage compartment below front passenger
seat* . . . . . . . . . . . . . . . . . . . . . . . . . . . . . . . . . . . . . . . .
Front seat armrest with storage compartment* .
Rear seat armrest with storage compartment* . .
Stowage compartment in rear centre console* .
Seat backrest with opening for skis* . . . . . . . . . . . .
Through-loading bag* . . . . . . . . . . . . . . . . . . . . . . . .
Side compartment* . . . . . . . . . . . . . . . . . . . . . . . . . .
Stowage compartment behind the rear seats
(estate car) . . . . . . . . . . . . . . . . . . . . . . . . . . . . . . . . . . .
Clothes hooks* . . . . . . . . . . . . . . . . . . . . . . . . . . . . . .
Heating and air conditioning system. . . . . . . . .
Air outlet vents . . . . . . . . . . . . . . . . . . . . . . . . . . . . . . .
Heating . . . . . . . . . . . . . . . . . . . . . . . . . . . . . . . . . . . . . .
Climatic* (semi-automatic air conditioning
system) . . . . . . . . . . . . . . . . . . . . . . . . . . . . . . . . . . . . . .
Climatronic* (automatic air conditioning) . . . . . .
Auxiliary heating (auxiliary heating and
ventilation)* . . . . . . . . . . . . . . . . . . . . . . . . . . . . . . . . .
Starting-off and Driving . . . . . . . . . . . . . . . . . . . . . .
Setting steering wheel position . . . . . . . . . . . . . . . .
Ignition lock . . . . . . . . . . . . . . . . . . . . . . . . . . . . . . . . .
Starting the engine . . . . . . . . . . . . . . . . . . . . . . . . . . .
Switching off the engine . . . . . . . . . . . . . . . . . . . . . .
Shifting (manual gearbox) . . . . . . . . . . . . . . . . . . . . .
Handbrake . . . . . . . . . . . . . . . . . . . . . . . . . . . . . . . . . . .
Rear parking aid* . . . . . . . . . . . . . . . . . . . . . . . . . . . . .
Front and rear parking aid* . . . . . . . . . . . . . . . . . . . .
Cruise control system (CCS)* . . . . . . . . . . . . . . . . . .
Automatic gearbox . . . . . . . . . . . . . . . . . . . . . . . . . . .
Automatic gearbox* . . . . . . . . . . . . . . . . . . . . . . . . . .
6
7
9
9
11
11
17
17
18
18
18
18
19
20
21
21
26
28
28
28
32
42
42
42
43
44
44
45
49 51
51
53
56
59
59
66
67
69
73
76
76
77
80
81
81
85
85
91
93
94
95
95
97
98
98
99
99
100
100
101
101 101
102
102
102
103
104
104
105
106
106
107
108
108
109
111
115
119
124
124
125
126
127
127
128
129
130
131
134
134
20A5Facelift.book Page 3 Saturday, September 6, 2008 2:13 PM
Page 18 of 304
Instruments and Indicator/Warning Lights17
Using the systemSafetyDriving TipsGeneral MaintenanceBreakdown assistanceTechnical Data
Instruments and Indicator/Warning Lights
General view of the instrument cluster
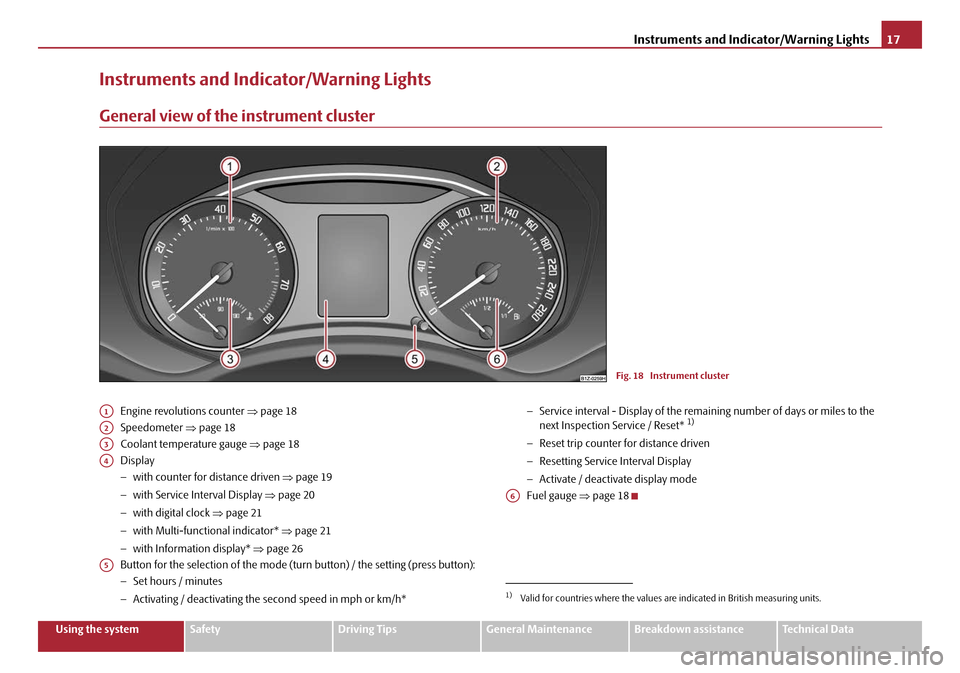
Engine revolutions counter ⇒page 18
Speedometer ⇒page 18
Coolant temperature gauge ⇒page 18
Display
− with counter for distance driven ⇒page 19
− with Service Interval Display ⇒page 20
− with digital clock ⇒page 21
− with Multi-functional indicator* ⇒page 21
− with Information display* ⇒page 26
Button for the selection of the mode (t urn button) / the setting (press button):
− Set hours / minutes
− Activating / deactivating the second speed in mph or km/h* −
Service interval - Display of the rema ining number of days or miles to the
next Inspection Se rvice / Reset* 1)
−Reset trip counter for distance driven
− Resetting Service Interval Display
− Activate / deactivate display mode
Fuel gauge ⇒page 18
Fig. 18 Instrument cluster
A1
A2
A3
A4
A5
1)Valid for countries where the values are indicated in British measuring units.
A6
20A5Facelift.book Page 17 Saturday, September 6, 2008 2:13 PM
Page 21 of 304
Instruments and Indicator/Warning Lights
20
Service Interval Display
Depending on the equipment installed in the vehicle, the text can differ on the
display.
Service Interval Display
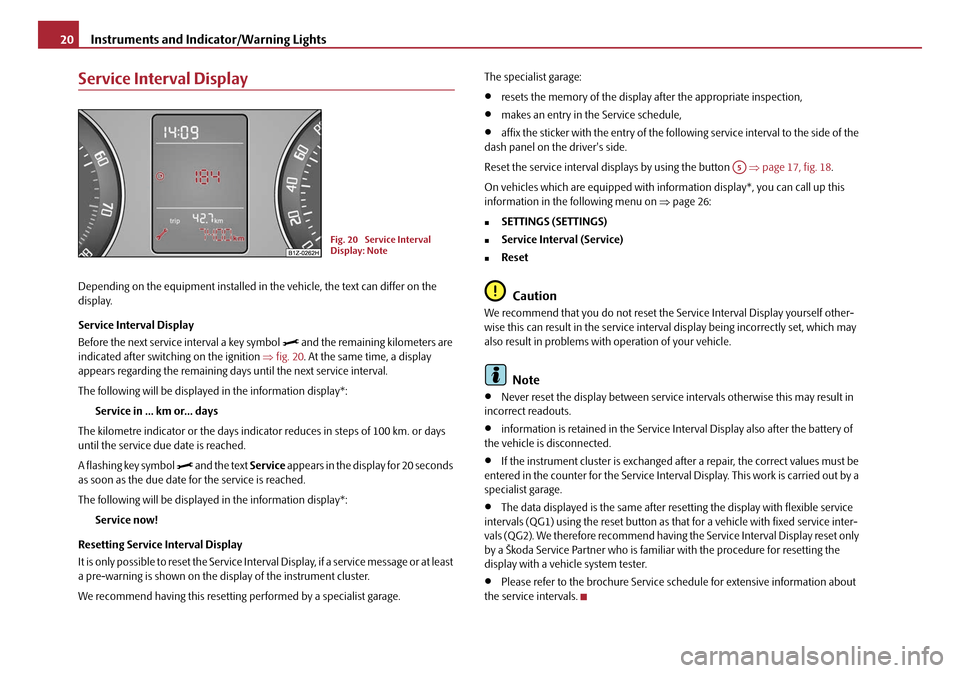
Before the next service interval a key symbol
and the remaining kilometers are
indicated after switching on the ignition ⇒fig. 20 . At the same time, a display
appears regarding the remaining days until the next service interval.
The following will be displayed in the information display*:
Service in ... km or... days
The kilometre indicator or the days indica tor reduces in steps of 100 km. or days
until the service due date is reached.
A flashing key symbol
and the text Service appears in the display for 20 seconds
as soon as the due date for the service is reached.
The following will be displayed in the information display*:
Service now!
Resetting Service Interval Display
It is only possible to reset the Service Interval Display, if a service message or at least
a pre-warning is shown on the display of the instrument cluster.
We recommend having this resetting performed by a specialist garage. The specialist garage:
•resets the memory of the display after the appropriate inspection,
•makes an entry in the Service schedule,
•affix the sticker with the entry of the following service interval to the side of the
dash panel on the driver's side.
Reset the service interval displays by using the button ⇒page 17, fig. 18 .
On vehicles which are equipped with in formation display*, you can call up this
information in the following menu on ⇒page 26:
�„SETTINGS (SETTINGS)
�„Service Interval (Service)
�„Reset
Caution
We recommend that you do not reset the Service Interval Display yourself other-
wise this can result in the service interval display being incorrectly set, which may
also result in problems with operation of your vehicle.
Note
•Never reset the display between service intervals otherwise this may result in
incorrect readouts.
•information is retained in the Service Interval Display also after the battery of
the vehicle is disconnected.
•If the instrument cluster is exchanged afte r a repair, the correct values must be
entered in the counter for the Service Interva l Display. This work is carried out by a
specialist garage.
•The data displayed is the same after resetting the display with flexible service
intervals (QG1) using the reset button as th at for a vehicle with fixed service inter-
vals (QG2). We therefore recommend having the Service Interval Display reset only
by a Škoda Service Partner who is familiar with the procedure for resetting the
display with a vehicle system tester.
•Please refer to the brochure Service schedule for extensive information about
the service intervals.
Fig. 20 Service Interval
Display: Note
A5
20A5Facelift.book Page 20 Saturday, September 6, 2008 2:13 PM
Page 27 of 304
Instruments and Indicator/Warning Lights
26
Information display*
Introduction
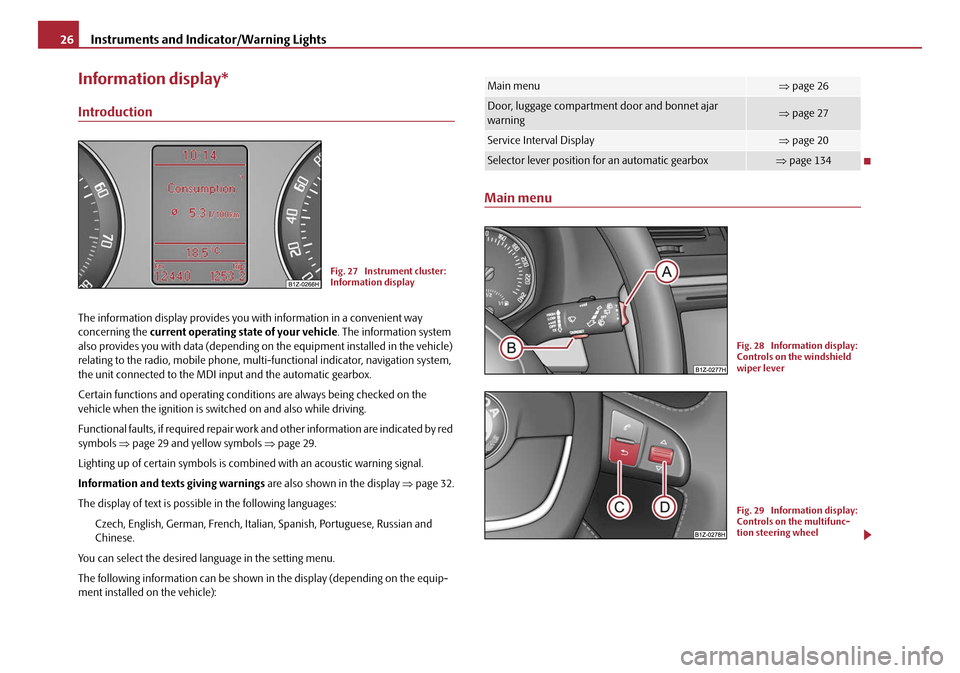
The information display provides you with information in a convenient way
concerning the current operating state of your vehicle . The information system
also provides you with data (depending on the equipment installed in the vehicle)
relating to the radio, mobile phone, mult i-functional indicator, navigation system,
the unit connected to the MDI input and the automatic gearbox.
Certain functions and operating conditio ns are always being checked on the
vehicle when the ignition is switched on and also while driving.
Functional faults, if required repair work and other information are indicated by red
symbols ⇒page 29 and yellow symbols ⇒page 29.
Lighting up of certain symbols is comb ined with an acoustic warning signal.
Information and text s giving warnings are also shown in the display ⇒page 32.
The display of text is possible in the following languages: Czech, English, German, French, Italia n, Spanish, Portuguese, Russian and
Chinese.
You can select the desired language in the setting menu.
The following information can be shown in the display (depending on the equip-
ment installed on the vehicle):
Main menu
Fig. 27 Instrument cluster:
Information display
Main menu⇒ page 26
Door, luggage compartment door and bonnet ajar
warning⇒page 27
Service Interval Display⇒page 20
Selector lever position for an automatic gearbox⇒page 134
Fig. 28 Information display:
Controls on the windshield
wiper lever
Fig. 29 Information display:
Controls on the multifunc-
tion steering wheel
20A5Facelift.book Page 26 Saturday, September 6, 2008 2:13 PM
Page 29 of 304
Instruments and Indicator/Warning Lights
28
The door, luggage compartment door and bonnet ajar warning lights up when at
least one of the three items door, luggage compartment or bonnet are not closed
when the ignition is turned on. The symbol indicates which door is still open or
whether the luggage compartment door or bonnet is not closed ⇒ page 27, fig. 30 .
The symbol goes out as soon as the doors, luggage compartment door and bonnet
are completely closed.
A warning signal sounds if the car is driven at a speed of more than 6km/hour and
if the engine or the luggage compartment door is open.
Audio
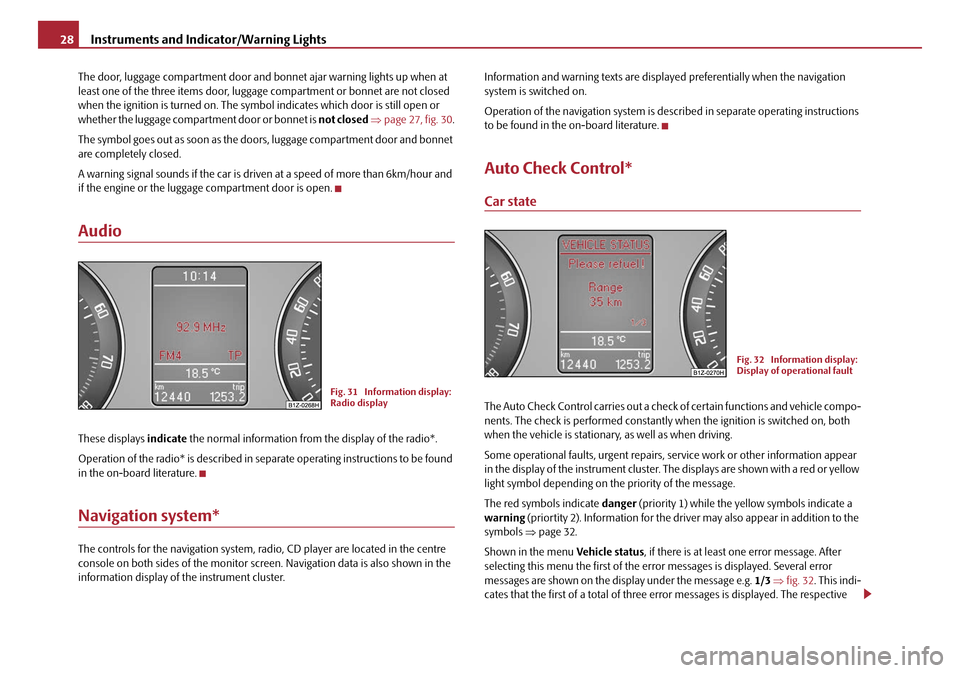
These displays indicate the normal information from the display of the radio*.
Operation of the radio* is described in separate operating instructions to be found
in the on-board literature.
Navigation system*
The controls for the navigation system, radi o, CD player are located in the centre
console on both sides of th e monitor screen. Navigation data is also shown in the
information display of the instrument cluster. Information and warning texts are displayed preferentially when the navigation
system is switched on.
Operation of the navigation system is described in separate operating instructions
to be found in the on-board literature.
Auto Check Control*
Car state
The Auto Check Control carries out a chec
k of certain functions and vehicle compo-
nents. The check is performe d constantly when the ignition is switched on, both
when the vehicle is stationary, as well as when driving.
Some operational faults, urgent repairs, service work or other information appear
in the display of the instrument cluster. The displays are shown with a red or yellow
light symbol depending on the priority of the message.
The red symbols indicate danger (priority 1) while the yellow symbols indicate a
warning (priortity 2). Information for the driver may also appear in addition to the
symbols ⇒page 32.
Shown in the menu Vehicle status, if there is at least one error message. After
selecting this menu the first of the error messages is displayed. Several error
messages are shown on the display under the message e.g. 1/3 ⇒ fig. 32 . This indi-
cates that the first of a total of three error messages is displayed. The respective
Fig. 31 Information display:
Radio display
Fig. 32 Information display:
Display of operational fault
20A5Facelift.book Page 28 Saturday, September 6, 2008 2:13 PM
Page 31 of 304
Instruments and Indicator/Warning Lights
30
Set-up
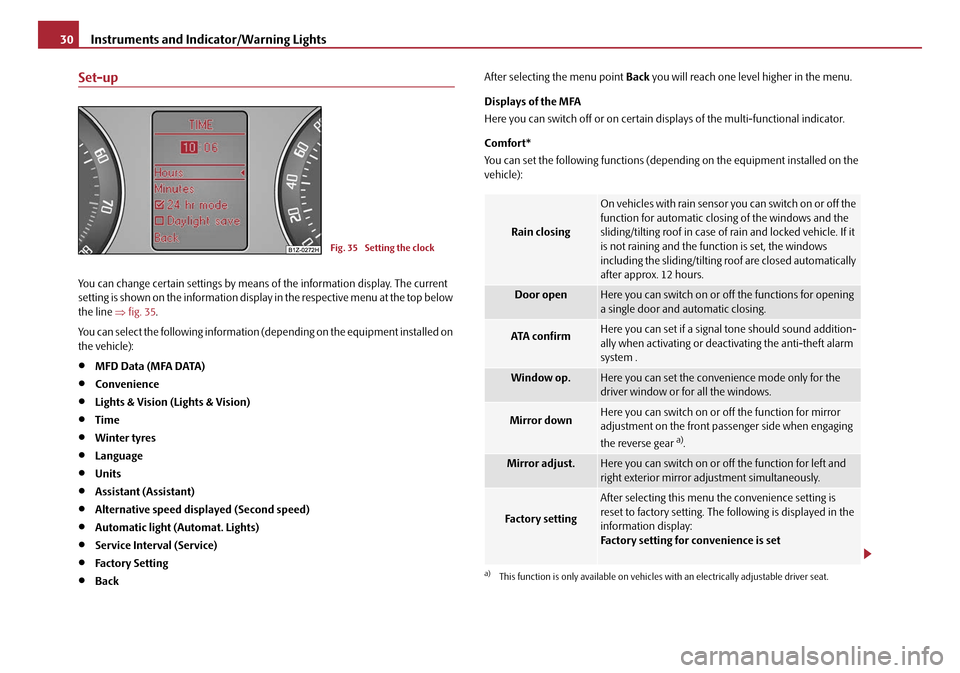
You can change certain settings by means of the information display. The current
setting is shown on the information displa y in the respective menu at the top below
the line ⇒fig. 35 .
You can select the following information (d epending on the equipment installed on
the vehicle):
•MFD Data (MFA DATA)
•Convenience
•Lights & Vision (Lights & Vision)
•Time
•Winter tyres
•Language
•Units
•Assistant (Assistant)
•Alternative speed displayed (Second speed)
•Automatic light (Automat. Lights)
•Service Interval (Service)
•Factory Setting
•Back After selecting the menu point
Back you will reach one level higher in the menu.
Displays of the MFA
Here you can switch off or on certain di splays of the multi-functional indicator.
Comfort*
You can set the following functions (depen ding on the equipment installed on the
vehicle):
Fig. 35 Setting the clock
Rain closing
On vehicles with rain sensor you can switch on or off the
function for automatic closing of the windows and the
sliding/tilting roof in case of rain and locked vehicle. If it
is not raining and the function is set, the windows
including the sliding/tilting roof are closed automatically
after approx. 12 hours.
Door openHere you can switch on or of f the functions for opening
a single door and automatic closing.
ATA confirmHere you can set if a signal tone should sound addition-
ally when activating or deactivating the anti-theft alarm
system .
Window op.Here you can set the convenience mode only for the
driver window or for all the windows.
Mirror downHere you can switch on or off the function for mirror
adjustment on the front passe nger side when engaging
the reverse gear
a).
a)This function is only available on vehicles with an electrically adjustable driver seat.
Mirror adjust.Here you can switch on or off the function for left and
right exterior mirror adjustment simultaneously.
Fa c t o r y s e t t i n g
After selecting this menu the convenience setting is
reset to factory setting. The following is displayed in the
information display:
Factory setting for convenience is set
20A5Facelift.book Page 30 Saturday, September 6, 2008 2:13 PM
Page 32 of 304
Instruments and Indicator/Warning Lights31
Using the systemSafetyDriving TipsGeneral MaintenanceBreakdown assistanceTechnical Data
Lights and Visibility
Here you can set how long the light should
stay on for the function Coming/Leaving
Home and the intensity of the footwell li ghting. Furthermore you can here switch
on or off the function daylight drivin g lights and convenience turn signal.
After selecting the menu point Fac to r y s e tt ing the factory setting is established
again.
Time
Here you can set the time, the time format (12 or 24 hour indicator) and the time
change summer/winter time.
Winter tyres
Here you can set at which speed a warning signal should sound. This function is
used for e.g winter tyres with the permissible maximum speed less than the
maximum speed of the vehicle.
When exceeding the speed, the following is displayed on the information display*:
Snow tyres max. speed ... km/h (Winter tyres maximum ... km/h)
Language
Here you can set in which language the warning and information texts should be
displayed.
Measures
Here you can set the units for temperat ure, consumption and distance driven.
Assistant
Here you can adjust the tones of the acoustic signals of the parking aid*.
Second speed
Here you can switch on the display of the second speed in mph or in km/h
3).
Service
Here you can have the kilomete rs still to be driven and the days until the following
service interval shown and the Service Interval Display reset. Factory Setting
After selecting the menu point
Factory Setting the factory setting of the informa-
tion display is established again.
3)Valid for countries where the values are indicated in British measuring units.
20A5Facelift.book Page 31 Saturday, September 6, 2008 2:13 PM
Page 39 of 304
Instruments and Indicator/Warning Lights
38
Electronic stability programme (ESP)*
The warning light comes on for a few seconds when the ignition is switched on.
Components of the ESP system also include the Traction Control System (TCS),
Electronic Differential Lock (EDL), and the Antilock Brake System ABS (ABS).
The warning light comes on when driving when a control cycle is activated.
The warning light will come on and remains on if the ESP is switched off or if there
is a fault in the system.
The fact that the ESP system operates together with the ABS means that the ESP
warning light will also come on if the ABS system is not operating properly.
If the warning light
comes on immediately after starting the engine, the ESP
system can be switched off for technical reasons. In this case, the ESP system can
be switched on again by switching the ignition on and off. If the warning light goes
out, the ESP system is fully functional again.
Further information on the ESP ⇒page 193, “Electronic stability programme
(ESP)*”.
Electronic Differential Lock (EDL)*
The EDL is a part of the ESP. A fault in the EDL is indicated by the ESP warning light
in the instrument cluster. Have the ve hicle inspected without delay by a Škoda
Service Partner. Further information on the EDL ⇒page 194, “Electronic Differen-
tial Lock (EDS)*”.
Note
If the battery has been disconnected and reconnected, the warning light comes
on after switching on the ignition. The warn ing light must go out after driving a short
distance.
Selector lever lock*
If the green warning light lights up, operate the brake pedal. This is necessary, in
order to be able to move the selector lever out of the position P or N. Further information about the selector lever lock
⇒page 134.
Tyre inflation pressure*
The warning light lights up, if there is a substantial drop in inflation pressure in
one of the tyres. Reduce the speed and check or correct as soon as possible the
inflation pressure in the tyres ⇒page 237.
If the warning light flashes, there is a system fault. Visit the nearest specialist garage
and have the fault rectified.
Further information about tyre pressure-control system ⇒page 199.
WARNING
•When the warning light lights up, immediately reduce the speed and
avoid sudden steering and brake manoeuvres. Please stop the vehicle
without delay at the nearest possible stop and inspect the tyres and their
inflation pressures.
•Under certain circumstances (e.g. sporty style of driving, wintry or
unpaved roads) the warning light can be delayed or does not light up at
all.
Note
If the battery has been disc onnected, the warning light comes on after switching
on the ignition. The warning light must go out after driving a short distance.
Antilock brake system (ABS)
The warning light shows the functionality of the ABS.
The warning light comes on for a few seconds after the ignition has been switched
on or when starting the engine. The warnin g light goes out after an automatic check
sequence has been completed.
20A5Facelift.book Page 38 Saturday, September 6, 2008 2:13 PM
Page 175 of 304
Airbag system
174
Airbag system
Description of the airbag system
General information on the airbag system
The front airbag system is complementary to the three-point seat belts and offers
additional protection for the head and chest area of the driver and passenger in the
event of a frontal collision.
In the case of a violent side crash, the si de* and head* airbags reduce the risk of
injuries to the occupants on the part of the body facing the side of the accident
⇒ .
The airbag system is only functional after the ignition has been switched on.
The operational readiness of the airbag system is monitored electronically. The
airbag warning light comes on for a few seconds each time the ignition is switched
on.
The airbag system (according to vehicl e equipment) essentially consists of:
•an electronic control unit,
•front airbag for the driver and the front seat passenger*,
•Side airbags*,
•head airbags*,
•an airbag warning light in the instrument cluster,
•a front passenger airbag switch* ⇒page 182,
•an indicator light for a switched off fron t seat passenger airbag* in the middle
of the dash panel ⇒page 182.
A fault in the airbag system exists if:
•the airbag indicator light does not light up when the ignition is switched on,
•the warning light does not go out after about 4 seconds after the ignition is
switched on,
•the airbag indicator light goes out and comes on again after the ignition is
switched on,
•the airbag indicator light comes on or flickers when driving,
•an airbag indicator light showing a swit ched-off front passenger airbag* in the
middle of the dash panel flashes.
WARNING
•To enable the occupants of a car to be protected with the greatest
possible effect when the airbag is deployed, the front seats must be
⇒ page 164, “Correct seated position” co rrectly adjusted to match the body
size of the occupant.
•If you do not fasten the seat belts when driving, lean too far forward or
adopt an incorrect seated position, you are exposing yourself to increased
risk of injury in the event of an accident.
•Have the airbag system checked imme diately by a specialist garage if a
fault exists. Otherwise, there is a risk of the airbag not being activated in the
event of an accident.
•No modifications of any kind may be made to parts of the airbag system.
•It is prohibited to manipulate individual parts of the airbag system as this
might result in the airbag being deployed.
•The protective function of the airbag system is sufficient for only one
accident. The airbag system must then be replaced if the airbag has been
deployed.
•The airbag system needs no maintenance during its working life.
•If you sell your car, please hand over the complete vehicle documenta-
tion to the new owener. Please note that the documents relating to the
possibility of deactivating the front passenger airbag are also part of the
vehicle documents!
•If the vehicle or individual parts of the airbag system are scrapped, it is
essential to observe the relevant safety precautions. Škoda Service Partners
are familiar with these regulations.
•When disposing of vehicle or parts of the airbag system, it is important
to comply with the national legal requirements.
20A5Facelift.book Page 174 Saturday, September 6, 2008 2:13 PM
Page 183 of 304
Airbag system
182
Deactivation of airbags is envisaged only for particular instances, such as if:
•you must in exceptional cases use a child seat on the front passenger seat
where the child has its back to the directio n of travel of the vehicle (in some coun-
tries this must be in the direction of trav el due to other legal regulations applying)
⇒ page 184, “Important safety information regarding the use of child safety seats”
•you are not able to maintain the distance of at least 25 cm between middle of
steering wheel and chest, despite the driver seat being correctly adjusted,
•special attachments are required in the area of the steering wheel because of a
physical disability,
•you have installed other seats (e.g. orthopaedic seats without side airbags).
Monitoring the airbag system
The functionality of the airbag system is also monitored electronically, when one
airbag has been switched off
If the airbag was switched off using diagnostic equipment:
•The warning light for the airbag system lights up for 4 seconds after switching
on the ignition and then flashes for 12 seconds afterwards in 2 second intervals.
Front passenger airbags sw itched off using the switch for front passenger
airbags* in stowage compartmen t on the front passenger side:
•The airbag warning light comes on in the instrument cluster for about 4 seconds
each time the igniti on is switched on.
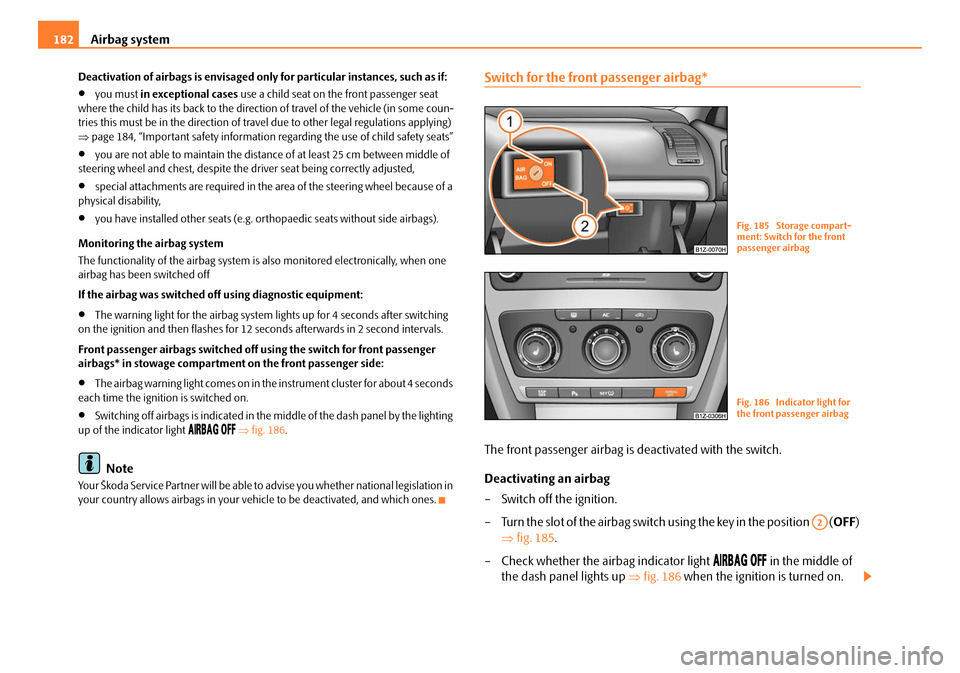
•Switching off airbags is indicated in the middle of the dash panel by the lighting
up of the indicator light ⇒ fig. 186 .
Note
Your Škoda Service Partner will be able to advise you whether national legislation in
your country allows airbags in your vehicle to be deactivated, and which ones.
Switch for the front passenger airbag*
The front passenger airbag is deactivated with the switch.
Deactivating an airbag
– Switch off the ignition.
– Turn the slot of the airbag switch using the key in the position ( OFF)
⇒ fig. 185 .
– Check whether the airbag indicator light
in the middle of
the dash panel lights up ⇒fig. 186 when the ignition is turned on.
Fig. 185 Storage compart-
ment: Switch for the front
passenger airbag
Fig. 186 Indicator light for
the front passenger airbag
A2
20A5Facelift.book Page 182 Saturday, September 6, 2008 2:13 PM