turn signal SKODA OCTAVIA 2010 2.G / (1Z) User Guide
[x] Cancel search | Manufacturer: SKODA, Model Year: 2010, Model line: OCTAVIA, Model: SKODA OCTAVIA 2010 2.G / (1Z)Pages: 275, PDF Size: 16.43 MB
Page 56 of 275
Lights and Visibility55
Using the system
Safety
Driving Tips
General Maintenance
Breakdown assistance
Technical Data
Fog lights with turning light “CORNER”* function
The fog lights with the function “COR NER” are designed for a better illu-
mination of the surrounding area near the vehicle when corning,
parking etc.The fog lights with the function “CORNER” ar e adjusted according to the steering angle
or after switching on the turn signal light
9) in the following circumstances:
the vehicle is stationary and the engine is running or it moves with a speed of
maximum 40 km/h,
the daylight driving lights are not switched on,
the low beam is switched on or th e light switch is in the position
and the
intensity of the ambient light causes the low beam to be switched on,
the fog lights are not switched on,
no reverse gear is engaged.Note
If you engage the reverse gear during the active function “CORNER”, both fog lights
illuminate.Rear fog light
Switching on the rear fog light– First of all turn the light switch into position
or page 54, fig. 39 .
– Pull the switch into position .
The warning light
lights up in the instrument cluster when the rear fog light is
switched on page 27.
Only the rear fog light of the trailer lights up automatically when you are towing a trailer
using a factory-fitted towing device which is fitted with the rear fog light.
The rear fog light is located in the rear light array on the driver's side.
Caution
The rear fog light should only be switched on if visibility is particularly poor (conform
with any varying legal provisions) to avoi d dazzling vehicles behind your vehicle.Instrument lighting*
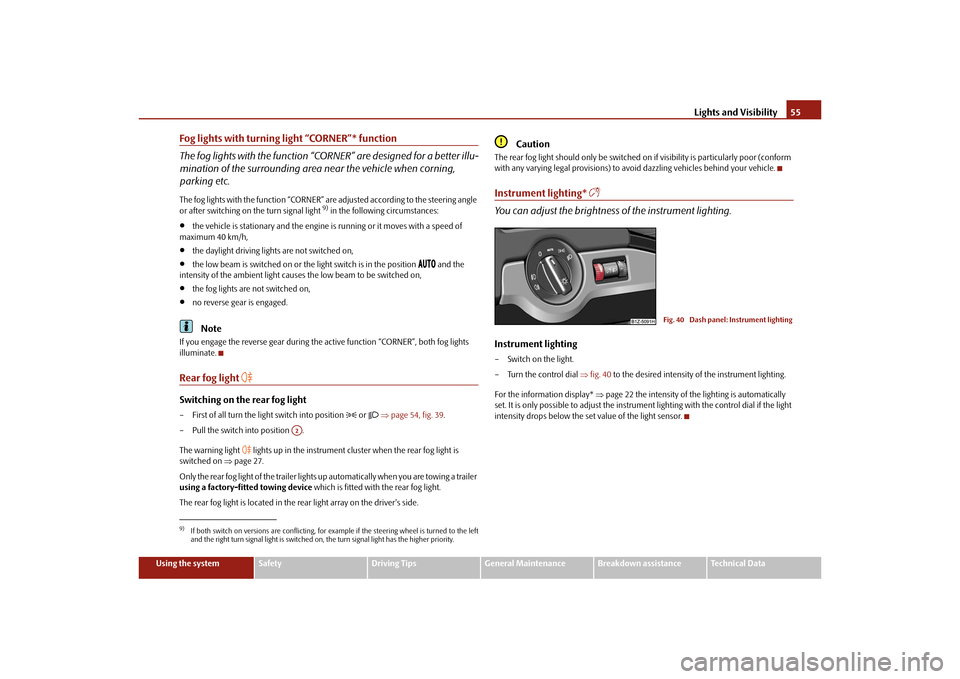
You can adjust the brightness of the instrument lighting.Instrument lighting– Switch on the light.
– Turn the control dial fig. 40 to the desired intensity of the instrument lighting.
For the information display* page 22 the intensity of the lighting is automatically
set. It is only possible to adjust the instrume nt lighting with the control dial if the light
intensity drops below the set value of the light sensor.
9)If both switch on versions are conflicting, for ex ample if the steering wheel is turned to the left
and the right turn signal light is switched on, the turn signal light has the higher priority.
A2
Fig. 40 Dash panel: Instrument lighting
s43s.1.book Page 55 Thursday, May 13, 2010 1:21 PM
Page 57 of 275
Lights and Visibility
56
Headlamp range adjustment
Once the low beam is switched on you can then adapt the range of the
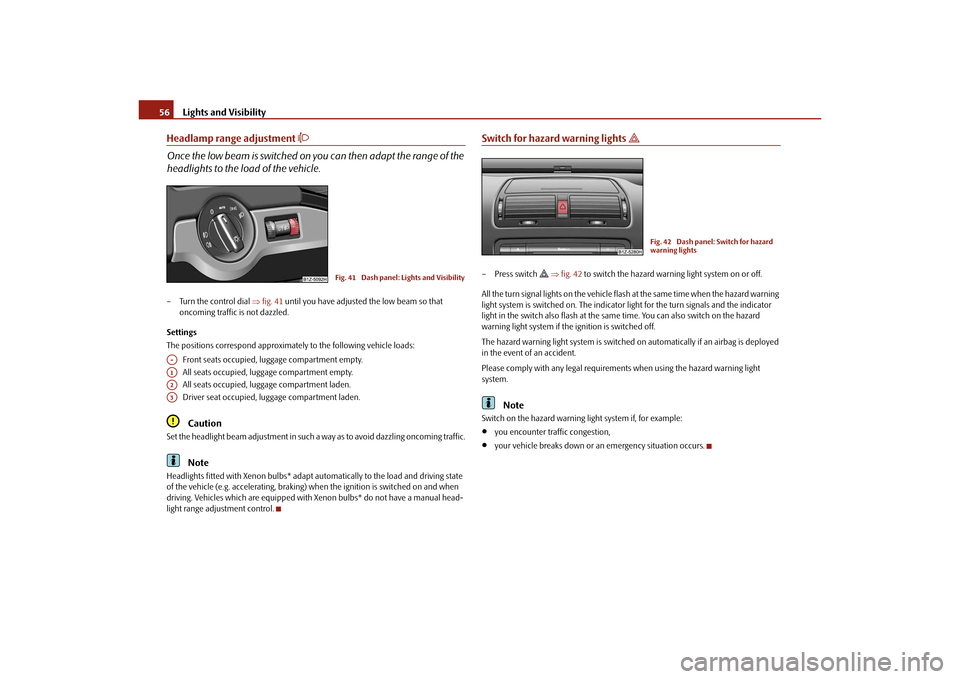
headlights to the lo ad of the vehicle.– Turn the control dial fig. 41 until you have adjusted the low beam so that
oncoming traffic is not dazzled.
Settings
The positions correspond approximately to the following vehicle loads:
Front seats occupied, luggage compartment empty.
All seats occupied, luggage compartment empty.
All seats occupied, luggage compartment laden.
Driver seat occupied, lu ggage compartment laden.
Caution
Set the headlight beam adjustment in such a way as to avoid dazzling oncoming traffic.
Note
Headlights fitted with Xenon bulbs* adapt automatically to the load and driving state
of the vehicle (e.g. accelerating, braking) wh en the ignition is switched on and when
driving. Vehicles which are equipped with Xenon bulbs* do not have a manual head-
light range adjustment control.
Switch for hazard warning lights
– Press switch
fig. 42 to switch the hazard warning light system on or off.
All the turn signal lights on the vehicle flas h at the same time when the hazard warning
light system is switched on. The indicator light for the turn signals and the indicator
light in the switch also flash at the same time. You can also switch on the hazard
warning light system if the ignition is switched off.
The hazard warning light system is switched on automatically if an airbag is deployed
in the event of an accident.
Please comply with any legal requirements when using the hazard warning light
system.
Note
Switch on the hazard warning light system if, for example:
you encounter traffic congestion,
your vehicle breaks down or an emergency situation occurs.
Fig. 41 Dash panel: Lights and Visibility
A-A1A2A3
Fig. 42 Dash panel: Switch for hazard
warning lights
s43s.1.book Page 56 Thursday, May 13, 2010 1:21 PM
Page 58 of 275
Lights and Visibility57
Using the system
Safety
Driving Tips
General Maintenance
Breakdown assistance
Technical Data
The turn signal
and main beam lever
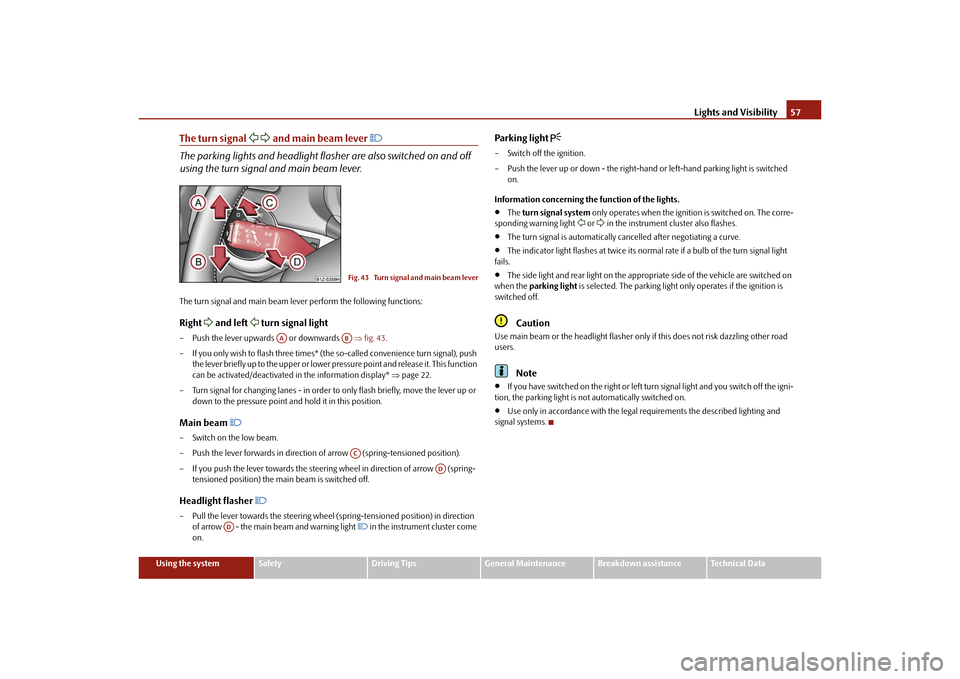
The parking lights and headlight flas her are also switched on and off
using the turn signal and main beam lever.The turn signal and main beam le ver perform the following functions:Right
and left
turn signal light
– Push the lever upwards or downwards fig. 43 .
– If you only wish to flash three times* (the so-called convenience turn signal), push
the lever briefly up to the upper or lower pr essure point and release it. This function
can be activated/deactivated in the information display* page 22.
– Turn signal for changing lanes - in order to only flash briefly, move the lever up or
down to the pressure point and hold it in this position.Main beam
– Switch on the low beam.
– Push the lever forwards in direction of arrow (spring-tensioned position).
– If you push the lever towards the steering wheel in direction of arrow (spring-
tensioned position) the main beam is switched off.Headlight flasher
– Pull the lever towards the steering wheel (spring-tensioned position) in direction
of arrow - the main beam and warning light
in the instrument cluster come
on.
Parking light
– Switch off the ignition.
– Push the lever up or down - the right-hand or left-hand parking light is switched
on.
Information concerning the function of the lights.
The turn signal system only operates when the ignition is switched on. The corre-
sponding warning light
or in the instrument cluster also flashes.
The turn signal is automatically cancelled after negotiating a curve.
The indicator light flashes at twice its normal rate if a bulb of the turn signal light
fails.
The side light and rear light on the appropriate side of the vehicle are switched on
when the parking light is selected. The parking light only operates if the ignition is
switched off.Caution
Use main beam or the headlight flasher only if this does not risk dazzling other road
users.
Note
If you have switched on the right or left turn signal light and you switch off the igni-
tion, the parking light is not automatically switched on.
Use only in accordance with the legal requirements the described lighting and
signal systems.
Fig. 43 Turn signal and main beam lever
AA
ABAC
AD
AD
s43s.1.book Page 57 Thursday, May 13, 2010 1:21 PM
Page 70 of 275
Seats and Stowage69
Using the system
Safety
Driving Tips
General Maintenance
Breakdown assistance
Technical Data
The seat backrests must not be angled too far back when driving otherwise
this will affect proper operation of the se at belts and of the airbag system - risk
of injury!Note
If the movement of the seat is inadverten tly interrupted during an adjustment, once
again press the switch in the appropriate di rection and continue with the adjustment
of the seat to the end.Storing settingStoring seat and exterior mirror settings for driving forward– Switch on the ignition.
– Adjust the seat page 68.
– Adjust both exterior mirrors page 65.
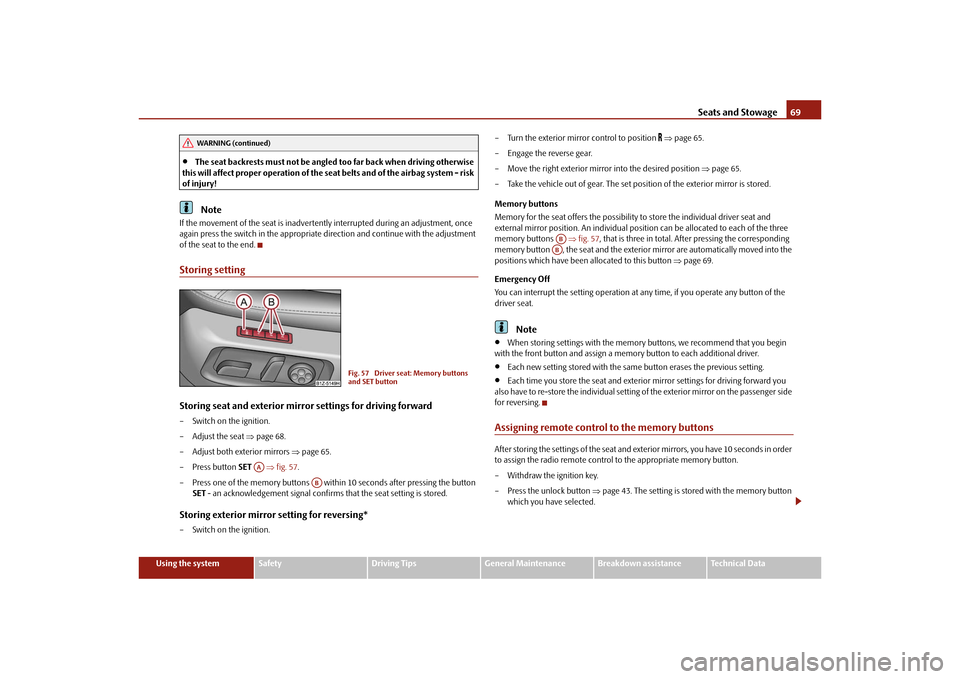
– Press button SET fig. 57 .
– Press one of the memory buttons with in 10 seconds after pressing the button
SET - an acknowledgement signal confirms that the seat setting is stored.Storing exterior mirror setting for reversing*– Switch on the ignition. – Turn the exterior mirror control to position
page 65.
– Engage the reverse gear.
– Move the right exterior mirror into the desired position page 65.
– Take the vehicle out of gear. The set posi tion of the exterior mirror is stored.
Memory buttons
Memory for the seat offers the possibility to store the individual driver seat and
external mirror position. An individual posi tion can be allocated to each of the three
memory buttons fig. 57 , that is three in total. Af ter pressing the corresponding
memory button , the seat and the exterior mirror are automatically moved into the
positions which have been allocated to this button page 69.
Emergency Off
You can interrupt the setting operation at any time, if you operate any button of the
driver seat.
Note
When storing settings with the memory buttons, we recommend that you begin
with the front button and assign a memory button to each additional driver.
Each new setting stored with the same button erases the previous setting.
Each time you store the seat and exterior mirror settings for driving forward you
also have to re-store the individual setting of the exterior mirror on the passenger side
for reversing.
Assigning remote control to the memory buttonsAfter storing the settings of the seat and exterior mirrors, you have 10 seconds in order
to assign the radio remote control to the appropriate memory button.
– Withdraw the ignition key.
– Press the unlock button page 43. The setting is stored with the memory button
which you have selected.
WARNING (continued)
Fig. 57 Driver seat: Memory buttons
and SET button
AA
AB
ABAB
s43s.1.book Page 69 Thursday, May 13, 2010 1:21 PM
Page 113 of 275
Starting-off and Driving
112
Activating
The parking aid is activated automatically when reverse gear is engaged and the igni-
tion is turned on. This is confirme d by a brief acknowledgement signal.
Deactivating
The parking aid is deactivated by removing the reverse gear.
WARNING
The parking aid is not a substitute for the driver paying proper attention and
it is always the driver's responsibility to take care when parking the vehicle or
carrying out similar manoeuvres.
You should therefore satisfy yourself, befo re reversing, that there is no small
obstacle, such as a rock, thin post, trailer drawbar etc., behind your vehicle.
Such an obstacle might not be within the range detected by the sensors.
Under certain circumstances, surfaces of certain objects and types of
clothing cannot reflect the signal of the parking aid. Thus, these objects or
people who wear such clothing are not recognised by the sensors of the parking
aid.Note
The parking aid does not operate if you are towing a trailer (applies to models
which feature a factory-fitted towing device*).
If a warning signal sounds for about 3 seconds after switching the ignition on and
engaging reverse gear, and there is no obstac le close to your vehicle, this indicates a
system fault. Have the fault rectified by a specialist workshop.
The sensors must be kept clean and free of ice to enable the parking aid to operate
properly.
Front and rear parking aid*The parking aid provides a warning of obstacles in front and behind the
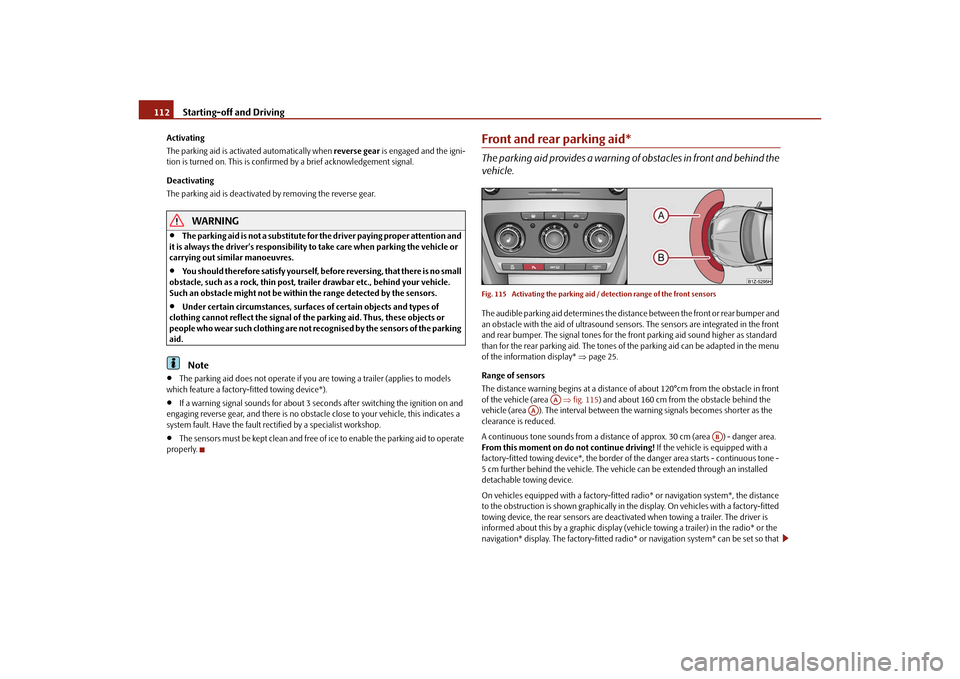
vehicle.Fig. 115 Activating the parking aid / detection range of the front sensorsThe audible parking aid determines the distan ce between the front or rear bumper and
an obstacle with the aid of ultrasound sensors. The sensors are integrated in the front
and rear bumper. The signal tones for the fr ont parking aid sound higher as standard
than for the rear parking aid. The tones of the parking aid can be adapted in the menu
of the information display* page 25.
Range of sensors
The distance warning begins at a distance of about 120°cm from the obstacle in front
of the vehicle (area fig. 115 ) and about 160 cm from the obstacle behind the
vehicle (area ). The interval between th e warning signals becomes shorter as the
clearance is reduced.
A continuous tone sounds from a distance of approx. 30 cm (area ) - danger area.
From this moment on do not continue driving! If the vehicle is equipped with a
factory-fitted towing device*, the border of the danger area starts - continuous tone -
5 cm further behind the vehicle. The vehi cle can be extended through an installed
detachable towing device.
On vehicles equipped with a factory-fitted radio* or navigation system*, the distance
to the obstruction is shown graphically in the display. On vehicles with a factory-fitted
towing device, the rear sensors are deactivated when towing a trailer. The driver is
informed about this by a graphic display (vehic le towing a trailer) in the radio* or the
navigation* display. The factory-fitted radio* or navigation system* can be set so that
AA
AA
AB
s43s.1.book Page 112 Thursday, May 13, 2010 1:21 PM
Page 138 of 275
Communication137
Using the system
Safety
Driving Tips
General Maintenance
Breakdown assistance
Technical Data
Signal settings
Ring tone
Volume
Phone settings
Select operator
Automatic
Manual
Network mode
Off time
SIM mode - applies to telephones with the rSAP profile in which two SIM cards
can be inserted - there is the possibility to select which SIM card may be connected
with the hands-free system and the possibility to select the name for the SIM card.
SIM mode 1
SIM mode 2
GPRS - You can ask a network provider about the settings of the access point for an
internet connection
Switch off ph. - switching off the telephone unit (telephone remains connected)
Back
Return in the main menu of the information display.
Voice controlIntroductionThe period, in which the telephone system is ready to receive voice commands and
carry out the voice commands, is called DI ALOGUE. The system gives audible feedback
and guides you if necessary through the relevant functions.
The volume can be changed at any time with the control button of the radio* or the
navigation system* or with the buttons on the multifunction steering wheel*. Switch on voice control (dialogue)
You can start the dialogue at any time
by briefly pressing the PTT button
on the
multifunction st eering wheel* page 134.
If the system does not recognise your command, it repeats the first part of the aid and
thus a new entry is possible. After the 2nd error the system repeats the second part of
the aid. After the 3rd error the answer “ Procedure cancelled” is given and the dialogue
is ended.
Switching off voice control (dialogue)
You can end the dialogue at an y time by briefly pressing the button on the multifunc-
tion steering wheel* page 134. If the system expects a voice command, you can end
the dialogue with the command CANCEL.
Only the message just repeated can be ended by pressing the PTT button during the
message and thus it is possible to pronounce the expected command sooner.
The dialogue of the incoming call is immediately interrupted and you can accept the
call by pressing the button
on the multifunction steering wheel*.
Optimum understanding of the voice commands depends on the following
factors:
Speak with a normal tone of voice withou t intonation and excessive voice pauses.
Avoid insufficient articulation.
Close the doors, windows and sliding roof, in order to reduce or stop disturbing
exterior noise.
It is recommended to speak louder at higher speeds, so that the tone of your voice
is louder than the increased surrounding noise.
During the dialogue avoid additional noise in the vehicle, e.g. simultaneously
talking occupants.
Do not speak, if the system makes an announcement.
The microphone for voice control is inserted in the moulded headliner and
directed to the driver and front passenger. Therefore the driver and the front passenger
can operate the equipment.
s43s.1.book Page 137 Thursday, May 13, 2010 1:21 PM
Page 142 of 275
Passive Safety141
Using the system
Safety
Driving Tips
General Maintenance
Breakdown assistance
Technical Data
SafetyPassive SafetyBasic informationDriving the safe way
Passive safety measures reduce the risk of injury in accident situations.In this section you will find important info rmation, tips and notes on the subject of
passive safety in your vehicle. We have combined everything here which you should
be familiar with, for example, regarding seat belts, airbags, child seats and safety of
children. It is therefore important, in partic ular, to comply with the notes and warnings
in this section for your own interest and in the interest of those travelling with you.
WARNING
This chapter contains important information on how to use the vehicle for
the driver and his occupants. You will find further information on safety, which
concerns you and those travelling with you, in the following chapters of this
Owner's Manual.
The complete on-board literature should always be in the vehicle. This
applies in particular, if you rent out or sell the vehicle.
Safety equipment
The safety equipment is part of the occupant protection and it can
reduce the risk of injuries in accident situations.“Do not put at risk” your safety and the safety of those travelling with you . In the event
of an accident, the safety equipment can redu ce the risk of injuries. The following list
contains part of the safety equipment in your vehicle:
Three-point seat belts for all the seats,
belt force limiter for front and outer rear seats*,
belt tensioner for front seats,
seat belt height adjuster for front seats,
front airbag for the driver and the front seat passenger*,
side airbags*,
head airbags*,
anchoring points for child seat using the “ISOFIX” system,
anchoring points for child seat using the “Top Tether” system,
head restraint adjustable for height,
adjustable steering column.
The specified safety equipment works togeth er, in order to optimally protect you and
those travelling with you in accident situat ions. The safety equipment does not protect
you or the people travelling with you, if you or your occupants adopt an incorrect
seated position or the equipment is not correctly adjusted or used.
For this reason you will be provided with information on why this equipment is very
important, how it protects you and the occupants, what should be observed when
using the equipment and how you and the peop le travelling with you can make full use
of the existing safety equipment. This Owner's Manual contains important warning
notes, which you and those travelling with you should pay attention to in order to
reduce a risk of injury.
Safety concerns everybody!
Before setting off
The driver is always fully responsibl e for his occupants and for the oper-
ating safety of the vehicle.For your own safety and the safety of the pe ople travelling with you, please pay atten-
tion to the following points before setting off:
Ensure that the lighting and the turn signal system are functioning properly.
Inspect the tyre inflation pressure.
s43s.1.book Page 141 Thursday, May 13, 2010 1:21 PM
Page 223 of 275
Breakdown assistance
222
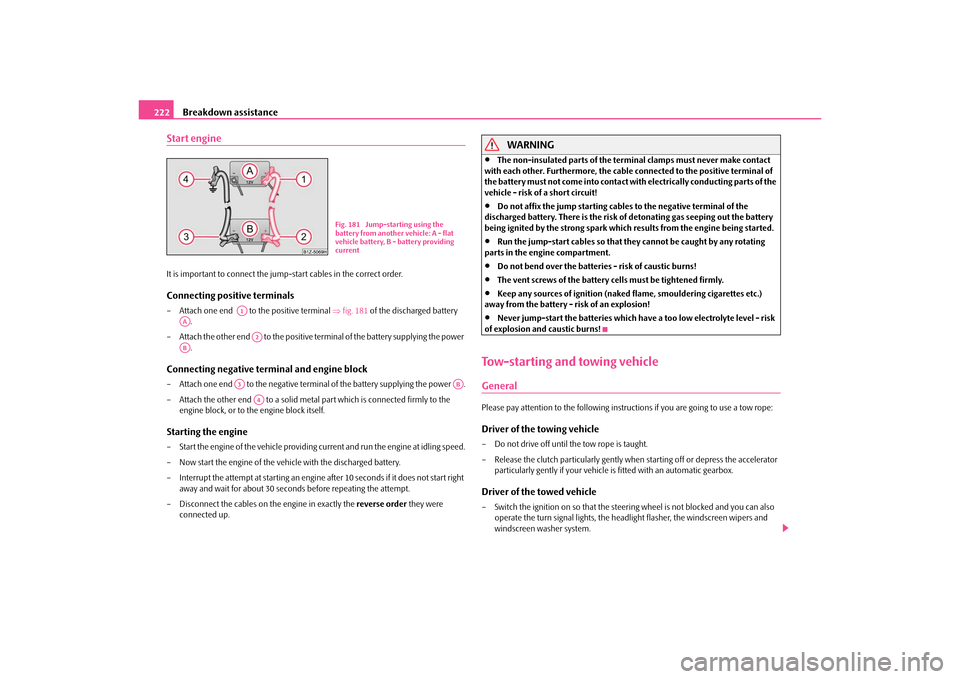
Start engineIt is important to connect the jump -start cables in the correct order.Connecting positive terminals– Attach one end to the positive terminal fig. 181 of the discharged battery
.
– Attach the other end to the positive term inal of the battery supplying the power
.Connecting negative terminal and engine block– Attach one end to the negative termin al of the battery supplying the power .
– Attach the other end to a solid metal part which is connected firmly to the
engine block, or to the engine block itself.Starting the engine– Start the engine of the vehicle providing current and run the engine at idling speed.
– Now start the engine of the vehicle with the discharged battery.
– Interrupt the attempt at starting an engine after 10 seconds if it does not start right
away and wait for about 30 seconds before repeating the attempt.
– Disconnect the cables on the engine in exactly the reverse order they were
connected up.
WARNING
The non-insulated parts of the terminal clamps must never make contact
with each other. Furthermore, the cable connected to the positive terminal of
the battery must not come into contact with electrically conducting parts of the
vehicle - risk of a short circuit!
Do not affix the jump starting cables to the negative terminal of the
discharged battery. There is the risk of detonating gas seeping out the battery
being ignited by the strong spark which results from the engine being started.
Run the jump-start cables so that they cannot be caught by any rotating
parts in the engine compartment.
Do not bend over the batteries - risk of caustic burns!
The vent screws of the battery cells must be tightened firmly.
Keep any sources of ignition (naked flame, smouldering cigarettes etc.)
away from the battery - risk of an explosion!
Never jump-start the batteries which ha ve a too low electrolyte level - risk
of explosion and caustic burns!
Tow-starting and towing vehicleGeneralPlease pay attention to the following instru ctions if you are going to use a tow rope:Driver of the towing vehicle– Do not drive off until the tow rope is taught.
– Release the clutch particularly gently wh en starting off or depress the accelerator
particularly gently if yo ur vehicle is fitted with an automatic gearbox.Driver of the towed vehicle– Switch the ignition on so that the steeri ng wheel is not blocked and you can also
operate the turn signal lights, the headlight flasher, the windscreen wipers and
windscreen washer system.
Fig. 181 Jump-starting using the
battery from another vehicle: A - flat
vehicle battery, B - battery providing
current
A1
AA
A2
AB
A3
AB
A4
s43s.1.book Page 222 Thursday, May 13, 2010 1:21 PM
Page 228 of 275
Fuses and light bulbs227
Using the system
Safety
Driving Tips
General Maintenance
Breakdown assistance
Technical Data
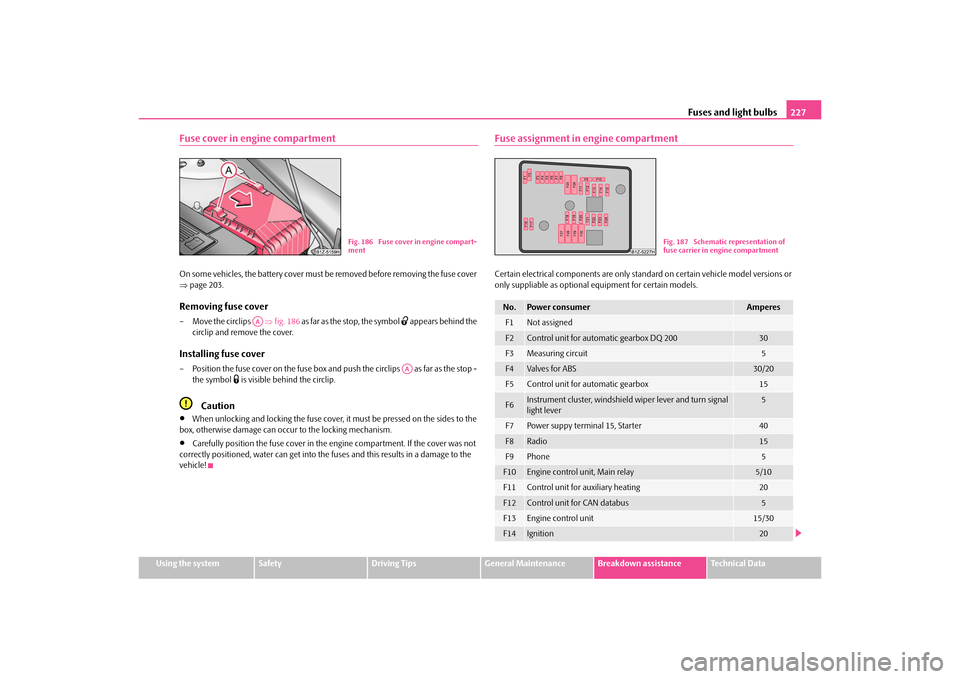
Fuse cover in engine compartmentOn some vehicles, the battery cover must be removed before removing the fuse cover
page 203.Removing fuse cover– Move the circlips fig. 186 as far as the stop, the symbol
appears behind the
circlip and remove the cover.
Installing fuse cover– Position the fuse cover on the fuse box and push the circlips as far as the stop -
the symbol
is visible behind the circlip.
Caution
When unlocking and locking the fuse cover, it must be pressed on the sides to the
box, otherwise damage can occur to the locking mechanism.
Carefully position the fuse cover in the engine compartment. If the cover was not
correctly positioned, water can get into the fuses and this results in a damage to the
vehicle!
Fuse assignment in engine compartmentCertain electrical components are only stan dard on certain vehicle model versions or
only suppliable as optional equipment for certain models.
Fig. 186 Fuse cover in engine compart-
ment
AA
AA
No.
Power consumer
Amperes
F1
Not assigned
F2
Control unit for automatic gearbox DQ 200
30
F3
Measuring circuit
5
F4
Valves for ABS
30/20
F5
Control unit for automatic gearbox
15
F6
Instrument cluster, windshield wiper lever and turn signal
light lever
5
F7
Power suppy terminal 15, Starter
40
F8
Radio
15
F9
Phone
5
F10
Engine control unit, Main relay
5/10
F11
Control unit for auxiliary heating
20
F12
Control unit for CAN databus
5
F13
Engine control unit
15/30
F14
Ignition
20
Fig. 187 Schematic representation of
fuse carrier in engine compartment
s43s.1.book Page 227 Thursday, May 13, 2010 1:21 PM
Page 231 of 275
Fuses and light bulbs
230
We therefore recommend that you have an y bulbs changed by an authorised Škoda
Service Partner or, in exceptional cases, by calling on other professional assistance.
Please note that the engine compartment is a hazardous area page 197, “Working
in the engine compartment”.
We recommend that you always have a small box of replacement bulbs in your vehicle.
You can obtain replacement bulbs from Škoda original accessories or from a specialist
garage
21).
A stowage place for the bulbs is located in the box in the spare wheel.
Fitted with a xenon headlight
Change of bulbs on vehicles with Xenon lights (low beam lights, parking lights and
main beam lights) should be und ertaken by a specialist garage.
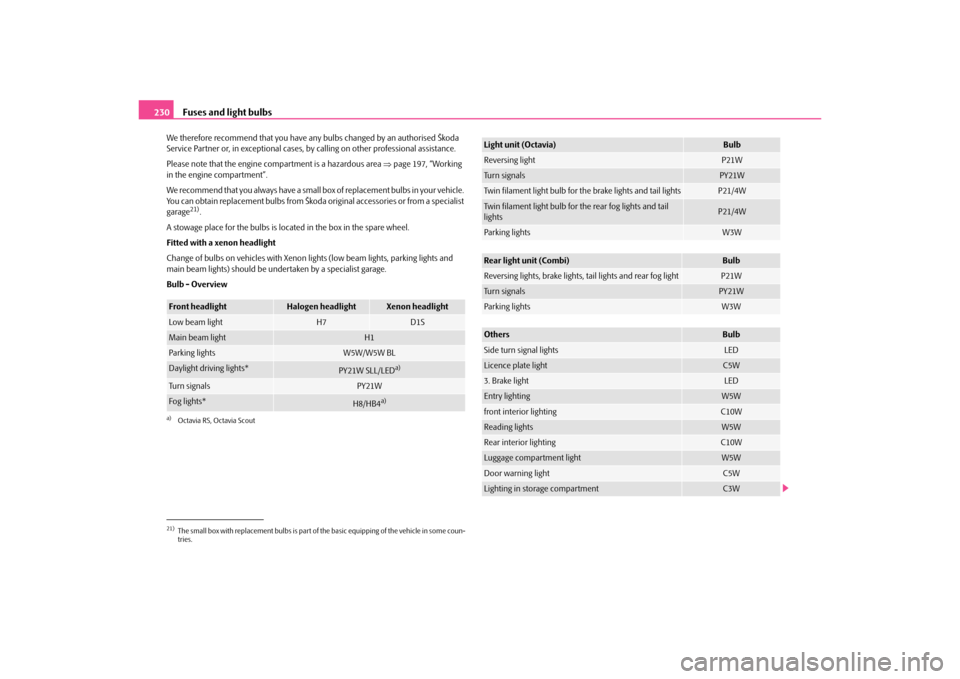
Bulb - Overview
21)The small box with replacement bulbs is part of the basic equipping of the vehicle in some coun-
tries.Front headlight
Halogen headlight
Xenon headlight
Low beam light
H7
D1S
Main beam light
H1
Parking lights
W5W/W5W BL
Daylight driving lights*
PY21W SLL/LED
a)
a)Octavia RS, Octavia ScoutTu r n s i g n a l s
PY21W
Fog lights*
H8/HB4
a)
Light unit (Octavia)
Bulb
Reversing light
P21W
Turn signals
PY21W
Twin filament light bulb for th e brake lights and tail lights
P21/4W
Twin filament light bulb for the rear fog lights and tail
lights
P21/4W
Parking lights
W3W
Rear light unit (Combi)
Bulb
Reversing lights, brake lights, tail lights and rear fog light
P21W
Turn signals
PY21W
Parking lights
W3W
Others
Bulb
Side turn signal lights
LED
Licence plate light
C5W
3. Brake light
LED
Entry lighting
W5W
front interior lighting
C10W
Reading lights
W5W
Rear interior lighting
C10W
Luggage compartment light
W5W
Door warning light
C5W
Lighting in storage compartment
C3W
s43s.1.book Page 230 Thursday, May 13, 2010 1:21 PM