sensor SKODA OCTAVIA 2010 2.G / (1Z) Owner's Manual
[x] Cancel search | Manufacturer: SKODA, Model Year: 2010, Model line: OCTAVIA, Model: SKODA OCTAVIA 2010 2.G / (1Z)Pages: 275, PDF Size: 16.43 MB
Page 13 of 275
The brief instruction
12
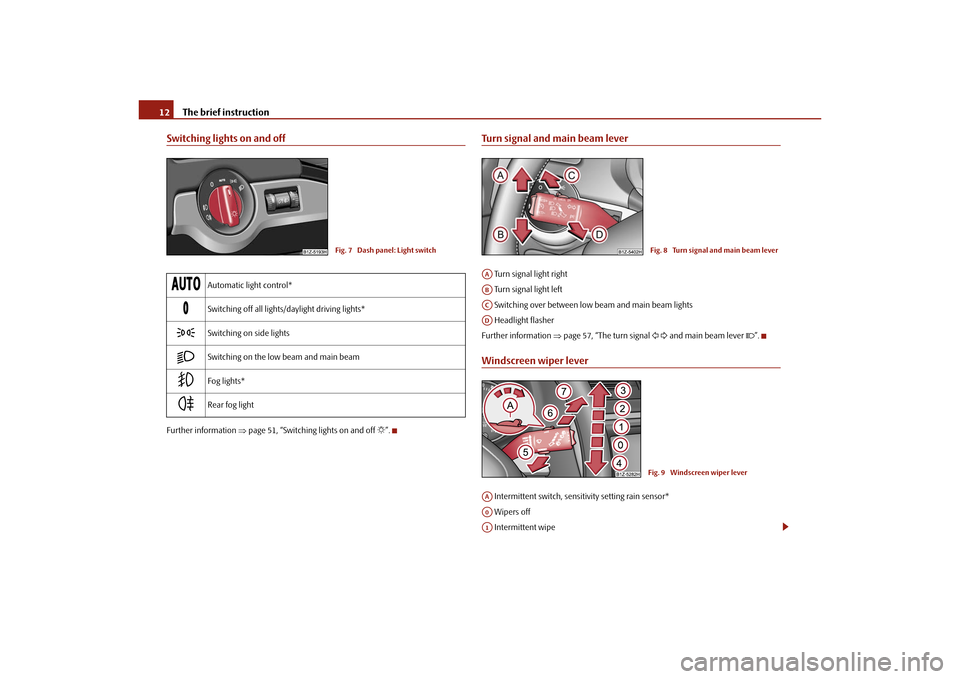
Switching lights on and offFurther information page 51, “Switching lights on and off ”.
Turn signal and main beam lever Turn signal light right
Turn signal light left
Switching over between low beam and main beam lights
Headlight flasher
Further information page 57, “The turn signal and main beam lever ”.Windscreen wiper lever Intermittent switch, sensitivity setting rain sensor*
Wipers off
Intermittent wipe
Automatic light control*
Switching off all lights/daylight driving lights*
Switching on side lights
Switching on the low beam and main beam
Fog lights*
Rear fog light
Fig. 7 Dash panel: Light switch
Fig. 8 Turn signal and main beam lever
AAABACAD
Fig. 9 Windscreen wiper lever
AAA0A1
s43s.1.book Page 12 Thursday, May 13, 2010 1:21 PM
Page 26 of 275
Instruments and warning lights25
Using the system
Safety
Driving Tips
General Maintenance
Breakdown assistance
Technical Data
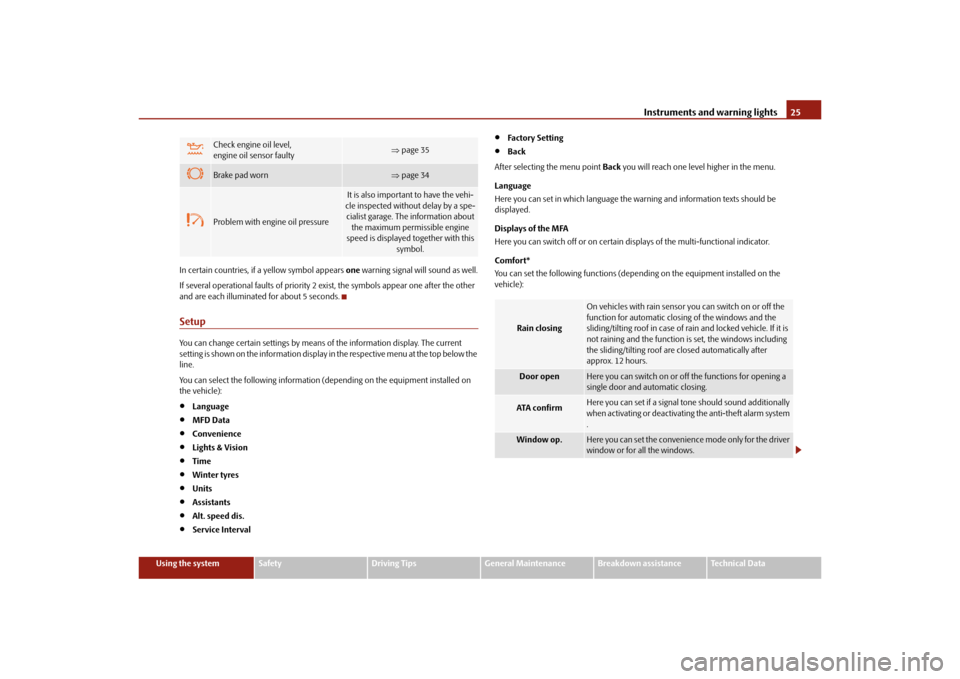
In certain countries, if a yellow symbol appears
one warning signal will sound as well.
If several operational faults of priority 2 exist, the symbols appear one after the other
and are each illuminated for about 5 seconds.
SetupYou can change certain setti ngs by means of the information display. The current
setting is shown on the information display in the respective menu at the top below the
line.
You can select the following information (d epending on the equipment installed on
the vehicle):
Language
MFD Data
Convenience
Lights & Vision
Time
Winter tyres
Units
Assistants
Alt. speed dis.
Service Interval
Factory Setting
Back
After selecting the menu point Back you will reach one level higher in the menu.
Language
Here you can set in which language the warning and information texts should be
displayed.
Displays of the MFA
Here you can switch off or on certain displays of the multi-functional indicator.
Comfort*
You can set the following f unctions (depending on the equipment installed on the
vehicle):
Check engine oil level,
engine oil sensor faulty
page 35
Brake pad worn
page 34
Problem with engine oil pressure
It is also important to have the vehi-
cle inspected without delay by a spe- cialist garage. The information about the maximum permissible engine
speed is displayed together with this symbol.
Rain closing
On vehicles with rain sensor you can switch on or off the
function for automatic closing of the windows and the
sliding/tilting roof in case of ra in and locked vehicle. If it is
not raining and the function is set, the windows including
the sliding/tilting roof are closed automatically after
approx. 12 hours.
Door open
Here you can switch on or off the functions for opening a
single door and automatic closing.
ATA c onfirm
Here you can set if a signal tone should sound additionally
when activating or deactivating the anti-theft alarm system
.
Window op.
Here you can set the convenience mode only for the driver
window or for all the windows.
s43s.1.book Page 25 Thursday, May 13, 2010 1:21 PM
Page 36 of 275
Instruments and warning lights35
Using the system
Safety
Driving Tips
General Maintenance
Breakdown assistance
Technical Data
For further information on the brake system
page 170, “Brakes”.
Handbrake applied
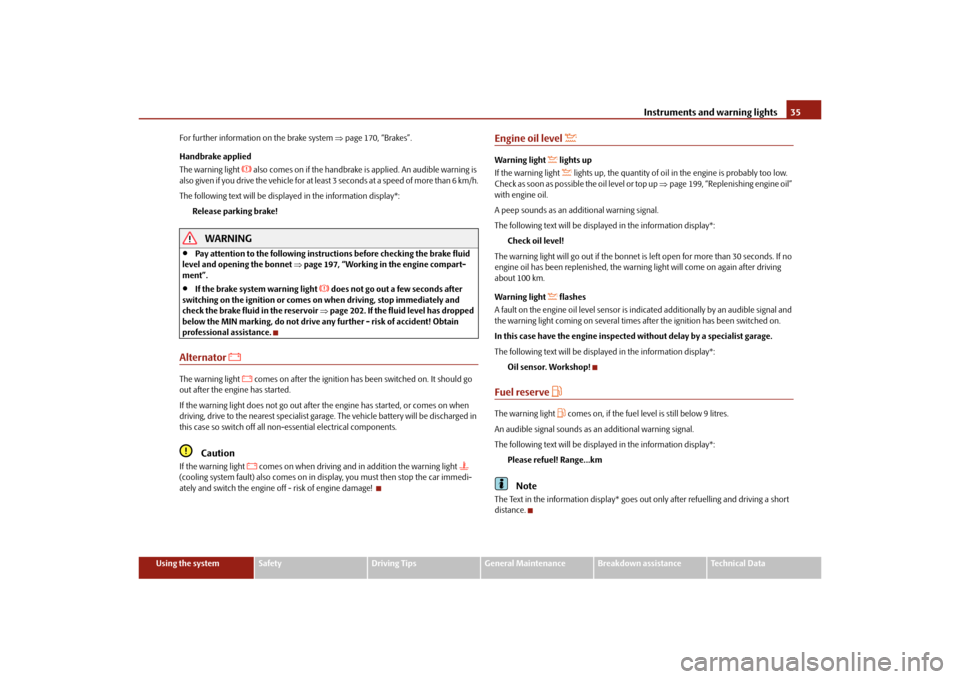
The warning light
also comes on if the handbrake is applied. An audible warning is
also given if you drive the vehicle for at least 3 seconds at a speed of more than 6 km/h.
The following text will be displayed in the information display*:
Release parking brake!
WARNING
Pay attention to the following instruct ions before checking the brake fluid
level and opening the bonnet page 197, “Working in the engine compart-
ment”.
If the brake system warning light
does not go out a few seconds after
switching on the ignition or comes on when driving, stop immediately and
check the brake fluid in the reservoir page 202. If the fluid level has dropped
below the MIN marking, do not drive any further - risk of accident! Obtain
professional assistance.
Alternator
The warning light
comes on after the ignition has been switched on. It should go
out after the engine has started.
If the warning light does not go out after the engine has started, or comes on when
driving, drive to the nearest specialist garage. The vehicle battery will be discharged in
this case so switch off all non- essential electrical components.
Caution
If the warning light
comes on when driving and in addition the warning light
(cooling system fault) also comes on in di splay, you must then stop the car immedi-
ately and switch the engine off - risk of engine damage!
Engine oil level
Warning light
lights up
If the warning light lights up, the quantity of oil in the engine is probably too low.
Check as soon as possible the oil level or top up page 199, “Replenishing engine oil”
with engine oil.
A peep sounds as an additional warning signal.
The following text will be displayed in the information display*:
Check oil level!
The warning light will go out if the bonnet is left open for more than 30 seconds. If no
engine oil has been replenished, the warning light will come on again after driving
about 100 km.
Warning light
flashes
A fault on the engine oil level sensor is indicated additionally by an audible signal and
the warning light coming on several times after the ignition has been switched on.
In this case have the engine inspecte d without delay by a specialist garage.
The following text will be displayed in the information display*: Oil sensor. Workshop!
Fuel reserve
The warning light
comes on, if the fuel level is still below 9 litres.
An audible signal sounds as an additional warning signal.
The following text will be displayed in the information display*: Please refuel! Range...km
Note
The Text in the information display* goes ou t only after refuelling and driving a short
distance.
s43s.1.book Page 35 Thursday, May 13, 2010 1:21 PM
Page 53 of 275
Lights and Visibility
52
“DAY LIGHT”* Switching on daylight driving lights– Switch on the ignition without turning th e light switch out of the position 0 or
.
Deactivating the function daylight driving lights– Pull the turn signal light lever towards the steering wheel up to 3 seconds after
switching on the ignition and at the same time, slide it to the bottom and hold it in
this position for at least 3 seconds.Activating the function daylight driving lights– Pull the turn signal light lever towards the steering wheel up to 3 seconds after switching on the ignition and at the same time, slide it to the top and hold it in this
position for at least 3 seconds.
On vehicles fitted with an information displa y*, you can also activate or deactivate in
the menu the function da ylight driving lights:
SETUP
Lights & Vision
On vehicles with separate ligh ts* for daylight driving lights in the fog lights or in the
front bumper, the parking lights and the lice nce plate light do not come on when acti-
vating the function daylight drivin g lights (neither front nor rear).
If the vehicle is not equipped with separate lights* for daylight driving lights, the
combination of the low beam, the parking ligh ts (front and rear) including the licence
plate light is used as daylight driving lights.
In some countries, the na tional legal provisions require that the rear parking lights also
come on together with the separate lights* for daylight driving lights when activating
the function daylight driving lights.
When the daylight driving lights are switch ed on, the illumination of the instrument
cluster is switched off, however, it is switched on in the position
when it is dark
and the low beam shines with full br ightness (100% of the performance).
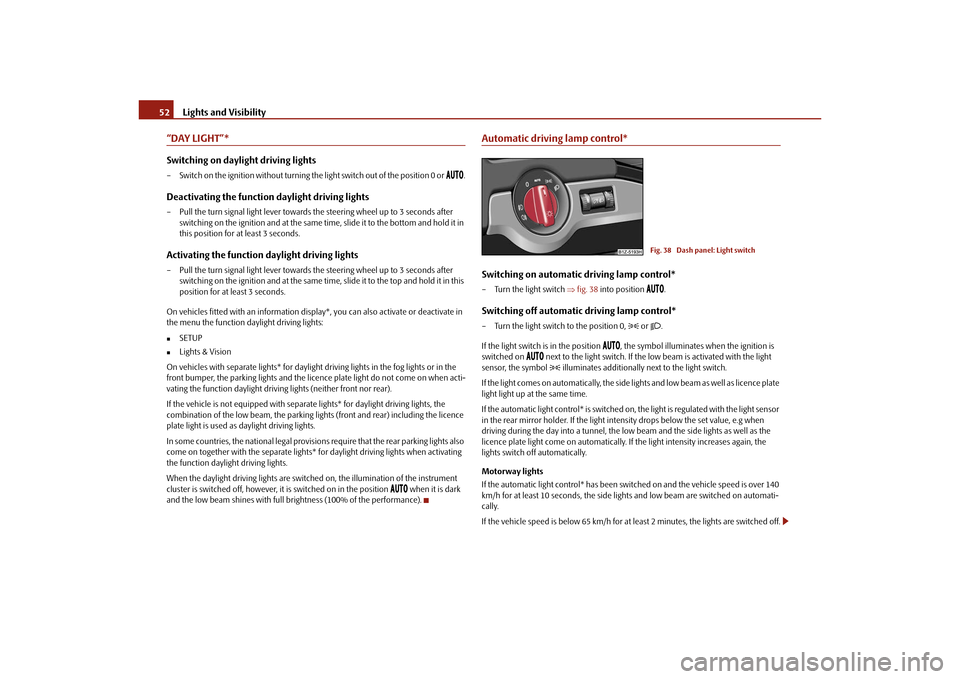
Automatic driving lamp control*Switching on automatic driving lamp control*– Turn the light switch fig. 38 into position
.
Switching off automatic driving lamp control*– Turn the light switch to the position 0,
or .
If the light switch is in the position
, the symbol illuminates when the ignition is
switched on
next to the light switch. If the low beam is activated with the light
sensor, the symbol illuminates additionally next to the light switch.
If the light comes on automatically, the side lights and low beam as well as licence plate
light light up at the same time.
If the automatic light control* is switched on , the light is regulated with the light sensor
in the rear mirror holder. If the light intensity drops below the set value, e.g when
driving during the day into a tunnel, the lo w beam and the side lights as well as the
licence plate light come on automatically. If the light intensity increases again, the
lights switch off automatically.
Motorway lights
If the automatic light control* has been swit ched on and the vehicle speed is over 140
km/h for at least 10 seconds, the side ligh ts and low beam are switched on automati-
cally.
If the vehicle speed is below 65 km/h for at least 2 minutes, the lights are switched off.
Fig. 38 Dash panel: Light switch
s43s.1.book Page 52 Thursday, May 13, 2010 1:21 PM
Page 54 of 275
Lights and Visibility53
Using the system
Safety
Driving Tips
General Maintenance
Breakdown assistance
Technical Data
Rain lights
If you switch on the windscreen wipe in th
e operation rain sensor* for longer than 10
seconds or in the operation permanent wipe (position 2 or 3) page 61 switching on
for longer than 15 seconds, the side lights and low beam are switched on automati-
cally. The light switches off if the windscreen wipe is in operation rain sensor* for more
than 4 minutes or is not switched on in the operation permanent wipe.
WARNING
The automatic light control only operat es as a support. The driver is not
released from his responsibility to inspect the light and if necessary to switch on
the light depending on the light conditions. The light sensor cannot detect for
example rain or snow. For these conditions we recommend to switch on the low
beam
!
Note
Do not affix any stickers in front of the light sensor, so that you do not impair its
function or put it out of operation.
The same principles as for using the automa tic light control also apply to the light
which is switched on manually page 51.
Cornering lights*The cornering lights are used to illuminate the curves by means of the cone of light
swiveling together with the front headlight with Xenon lights*. This function is active
when the speed of the car increases to more than 10km/h.
The swiveling function of the headlights ca n be switched off / on via the menu point
Assistants in the main menu of the information display* page 23.
WARNING
If the cornering ligh ts are defective, the headlights are automatically lowered to
the emergency position, which prevents a possible dazzling of oncoming traffic.
Thus the illuminated length of the road is shortened. Drive carefully and have
the car inspected immediatel y by a specialist garage.
Coming Home FunctionThe function makes it possible to switch on the lights in the darkness for a short time
after leaving the vehicle.Switching on Coming Home Function– The light switch is in the position automatic driving lamp control
and the low
beam illuminates.
– Switch off the ignition.
– After opening the driver's door, the function Coming Home is switched on.
– Close all the doors and the boot lid and lo ck the vehicle. After a short time, switch
all lights off.
Depending on equipment fitted the function Coming Home switches on the following
lights:
Parking lights,
Low beam,
Entry lighting in the exterior mirrors,
Licence plate light.
Coming Home Function
The lights go out 10 seconds after cl osing all the doors and the boot lid.
If a door or the boot lid re mains open, the lights go out 60 seconds after switching off
the ignition.
The function Coming Home is controlled with the light sensor in the mount of the inte-
rior rear mirror. If the light intensity is higher than the set value of the light sensor, the
Coming Home Function is not switched on after switching off the ignition.Note
If the Coming Home Function is switched on constantly, the battery will be heavily
discharged particularly in short-haul traffic.
The switching on of the described lights should only be undertaken in accordance
with the legal requirements.
s43s.1.book Page 53 Thursday, May 13, 2010 1:21 PM
Page 55 of 275
Lights and Visibility
54
You can change the illumination period for the Coming Home Function by means
of the information display*.
Leaving Home FunctionThis function makes it possible to switch on the lights when approaching the vehicle.Switching on Leaving Home Function– The light switch is in the position automatic driving lamp control
.
– Unlock the vehicle with the radio remote control - the lights come on.
Depending on equipment fitted the function Leaving Home switches on the following
lights:
Parking lights,
Low beam,
Entry lighting in the exterior mirrors,
Licence plate light.
Leaving Home Function
The function Leaving Home is controlled with the light sensor in the mount of the inte-
rior rear mirror. If the light intensity is higher than the set value of the light sensor, the
Leaving Home Function is not switched on after unlocking the vehicle with the radio
remote control.
After unlocking the vehicle with the radio remote control, the lights come on for 10
seconds. The Leaving Home Function is also switched off after the ignition is switched
on and after locking the vehicle.
If no door is opened within 30 seconds, the lights go out and the vehicle is locked auto-
matically.Note
If the Leaving Home Function is switched on constantly, the battery will be heavily
discharged particularly in short-haul traffic.
The switching on of the described lights should only be undertaken in accordance
with the legal requirements.
You can change the illumination period for the Leaving Home Function by means
of the information display*.
Tourist light*This mode makes it possible to drive in countries with opposing traffic system, driving
on the left/right, without dazzling the oncoming vehicles. When the mode “tourist
light” is active, the side to side swivel of the headlights is deactivated.
The mode “tourist light” is activated / deactivated via the information display* in the
menu:
SETUP
Lights & Vision
Tra v e l m o d e
Off
Switched on
Fog lights*
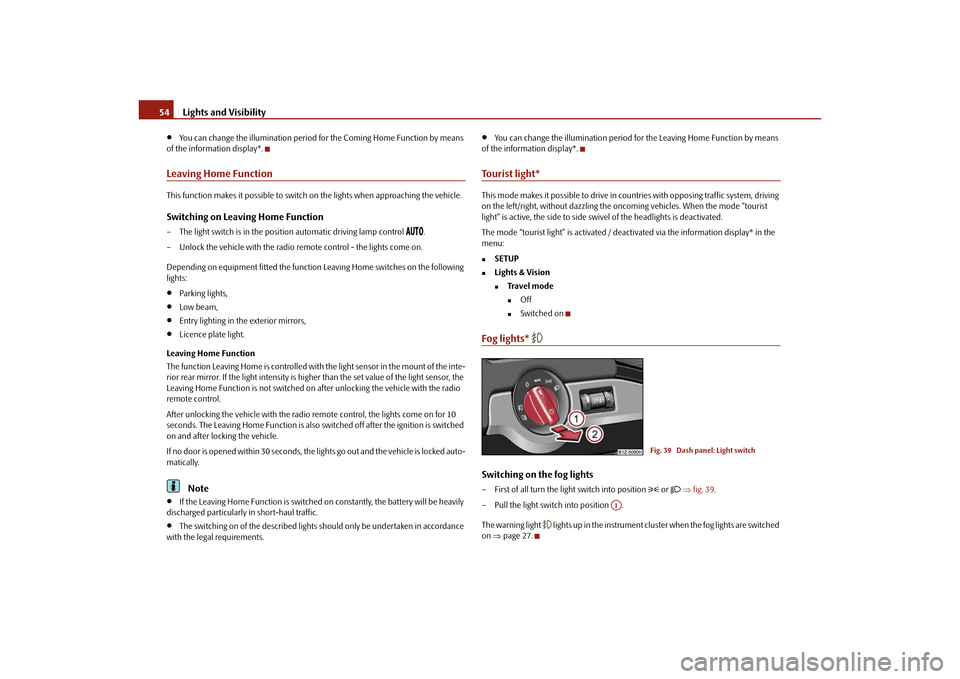
Switching on the fog lights– First of all turn the light switch into position
or fig. 39 .
– Pull the light switch into position .
The warning light
lights up in the instrument cluste r when the fog lights are switched
on page 27.
Fig. 39 Dash panel: Light switch
A1
s43s.1.book Page 54 Thursday, May 13, 2010 1:21 PM
Page 56 of 275
Lights and Visibility55
Using the system
Safety
Driving Tips
General Maintenance
Breakdown assistance
Technical Data
Fog lights with turning light “CORNER”* function
The fog lights with the function “COR NER” are designed for a better illu-
mination of the surrounding area near the vehicle when corning,
parking etc.The fog lights with the function “CORNER” ar e adjusted according to the steering angle
or after switching on the turn signal light
9) in the following circumstances:
the vehicle is stationary and the engine is running or it moves with a speed of
maximum 40 km/h,
the daylight driving lights are not switched on,
the low beam is switched on or th e light switch is in the position
and the
intensity of the ambient light causes the low beam to be switched on,
the fog lights are not switched on,
no reverse gear is engaged.Note
If you engage the reverse gear during the active function “CORNER”, both fog lights
illuminate.Rear fog light
Switching on the rear fog light– First of all turn the light switch into position
or page 54, fig. 39 .
– Pull the switch into position .
The warning light
lights up in the instrument cluster when the rear fog light is
switched on page 27.
Only the rear fog light of the trailer lights up automatically when you are towing a trailer
using a factory-fitted towing device which is fitted with the rear fog light.
The rear fog light is located in the rear light array on the driver's side.
Caution
The rear fog light should only be switched on if visibility is particularly poor (conform
with any varying legal provisions) to avoi d dazzling vehicles behind your vehicle.Instrument lighting*
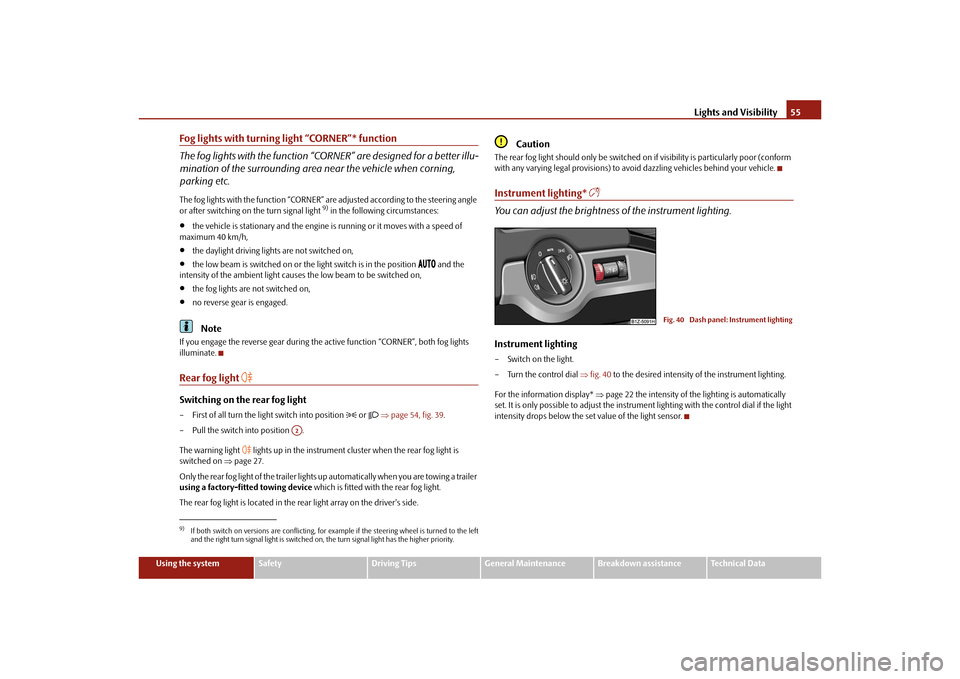
You can adjust the brightness of the instrument lighting.Instrument lighting– Switch on the light.
– Turn the control dial fig. 40 to the desired intensity of the instrument lighting.
For the information display* page 22 the intensity of the lighting is automatically
set. It is only possible to adjust the instrume nt lighting with the control dial if the light
intensity drops below the set value of the light sensor.
9)If both switch on versions are conflicting, for ex ample if the steering wheel is turned to the left
and the right turn signal light is switched on, the turn signal light has the higher priority.
A2
Fig. 40 Dash panel: Instrument lighting
s43s.1.book Page 55 Thursday, May 13, 2010 1:21 PM
Page 62 of 275
Lights and Visibility61
Using the system
Safety
Driving Tips
General Maintenance
Breakdown assistance
Technical Data
Windshield wiper and wash systemWindshield wiper
You can operate the windscreen wipers and automatic wipe/wash
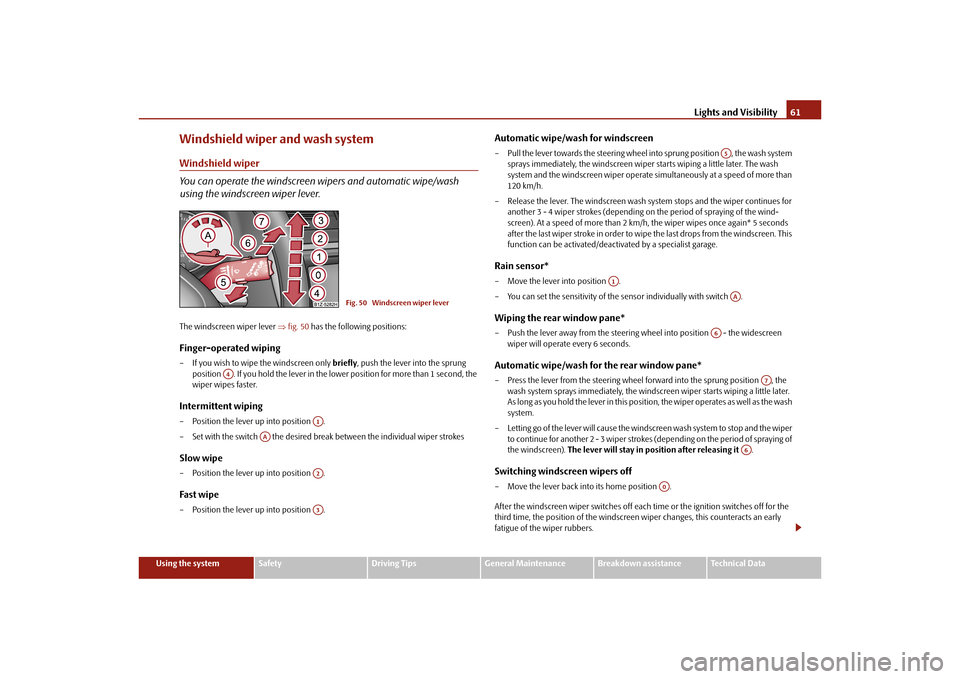
using the windscreen wiper lever.The windscreen wiper lever fig. 50 has the following positions:Finger-operated wiping– If you wish to wipe the windscreen only briefly, push the lever into the sprung
position . If you hold the lever in the lo wer position for more than 1 second, the
wiper wipes faster.Intermittent wiping– Position the lever up into position .
– Set with the switch the desired brea k between the individual wiper strokesSlow wipe– Position the lever up into position .Fast wipe– Position the lever up into position .
Automatic wipe/wash for windscreen– Pull the lever towards the steering wheel into sprung position , the wash system
sprays immediately, the windscreen wiper starts wiping a little later. The wash
system and the windscreen wiper operate simultaneously at a speed of more than
120 km/h.
– Release the lever. The windscreen wash system stops and the wiper continues for another 3 - 4 wiper strokes (depending on the period of spraying of the wind-
screen). At a speed of more than 2 km/h, the wiper wipes once again* 5 seconds
after the last wiper stroke in order to wipe the last drops from the windscreen. This
function can be activated/deacti vated by a specialist garage.Rain sensor*– Move the lever into position .
– You can set the sensitivity of the sensor individually with switch .Wiping the rear window pane*– Push the lever away from the steering wheel into position - the widescreen
wiper will operate every 6 seconds.Automatic wipe/wash for the rear window pane*– Press the lever from the steering wheel forward into the sprung position , the wash system sprays immediately, the windscreen wiper starts wiping a little later.
A s l o n g a s y o u h o l d t h e l e v e r i n t h i s p o s i t i o n, th e w i p e r o p e ra t e s a s w e l l a s t h e w a s h
system.
– Letting go of the lever will cause the windscreen wash system to stop and the wiper to continue for another 2 - 3 wiper strokes (depending on the period of spraying of
the windscreen). The lever will stay in position after releasing it .Switching windscreen wipers off– Move the lever back into its home position .
After the windscreen wiper switches off each time or the ignition switches off for the
third time, the position of the windscreen wiper changes, this counteracts an early
fatigue of the wiper rubbers.
Fig. 50 Windscreen wiper lever
A4
A1
AA
A2A3
A5
A1
AA
A6
A7
A6
A0
s43s.1.book Page 61 Thursday, May 13, 2010 1:21 PM
Page 63 of 275
Lights and Visibility
62
The windscreen wipers and the wash system only operate if the ignition is switched on
and the bonnet is closed
10).
If the intermittent wipe is switched on, the intervals are also controlled depending on
speed.
The rain sensor* automatically regulates the break between the individual wiper
strokes depending on the intensity of the rain.
The rear window will be wiped again if the front window wipers are on when reverse
gear is selected.
The windscreen washer nozzles are heated* when the ignition is switched on.
Top up with wash liquid page 207.
Winter position
If the windscreen wipers are in rest positi on, they cannot be folded out from the wind-
screen. For this reason we recommend adjusting the windscreen wipers in winter so
that they can be folded out from the windscreen easily. You can set this rest position as
follows:
Switch on the windscreen wipers.
Switch off the ignition. The windscreen wipers remain in the position in which they
were when switching off the ignition.
You can also use the service position page 63 as a winter position.
WARNING
Properly maintained wind screen wiper blades are essential for clear visi-
bility and safe driving page 63.
Do not use the windscreen washer sy stem at low temperatures, without
heating the windscreen beforehand. Otherwise the window cleaner could
freeze on the windscreen and re strict the view to the front.
The rain sensor only operates as a support. The driver is not released from
the responsibility to set the function of the windscreen wipers manually
depending on the visibility conditions.
Caution
In frosty weather, please firs t of all check whether the windscreen wiper blades are not
frozen to the windscreen before switching them on. Switching on windscreen wipers
when the blades are frozen to the windscreen may result in damage both to the blades
and the motor of the windscreen wipers!
Note
If the slower or the faster wiper setting is switched on page 61, fig. 50 and
the vehicle speed decreases to below 4 km/h, the lower wiper step is switched on
automatically. At a speed increase of more than 8 km/h the previous wiper setting is
established again.
If there is an obstacle on the windscre en, the wiper will try to push away the
obstacle. If the obstacle continues to block the wiper, the wiper stops after 5 cycles, in
order to avoid a damage to the wiper. Re move the obstacle and and switch on the
wiper again.
Automatic rear window wiper* (Combi)If the windshield wiper lever is in the position page 61, fig. 50 or , the rear
window wiper carries out a wi ping process every 30 seconds or 10 seconds at a speed
above 5 km/h.
When the rain sensor* is active (the lever is in the position ) the function is only
active if the front window wipers continue to operate (no break between each wiping
process).
Activation/deactivation
The function of the automatic rear window wiper is activated/deactivated in the infor-
mation display* in the menu:
Setup
Lights & Vision
Rear wiper
10)On vehicles which do not have a contact switch for the bonnet, the windshield wiper and wash
system operates also when the bonnet is opened.
A2
A3
A2
A3
A1
s43s.1.book Page 62 Thursday, May 13, 2010 1:21 PM
Page 66 of 275
Lights and Visibility65
Using the system
Safety
Driving Tips
General Maintenance
Breakdown assistance
Technical Data
Note
Automatic mirror dimming operates only properly if the sun screen* for the rear
window in the housing on the luggage compartment cover is not in use or the light
striking the interior rear-view mirr or is not affected by other objects.
Do not affix any stickers in front of the light sensor, so that you do not impair the
automatic dimming function or put it out of operation.
If you switch off the automatic dimming inte rior rear-view mirror, also the exterior
mirror dimming is switched off.
Exterior mirror
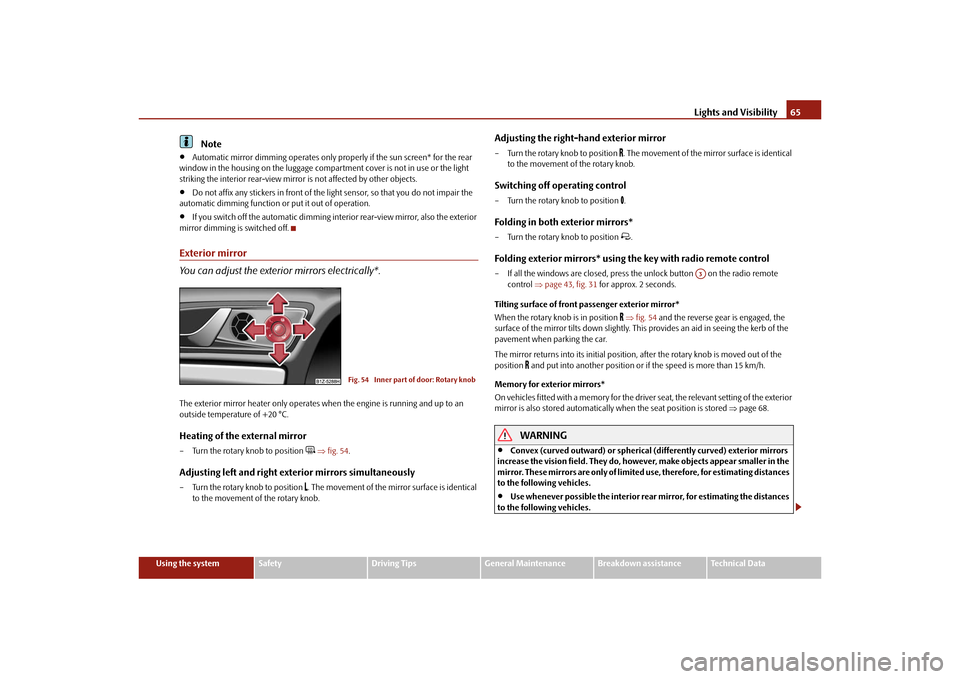
You can adjust the exterior mirrors electrically*.The exterior mirror he ater only operates when the en gine is running and up to an
outside temperature of +20 °C. Heating of the external mirror – Turn the rotary knob to position
fig. 54 .
Adjusting left and right exterior mirrors simultaneously– Turn the rotary knob to position
. The movement of the mirror surface is identical
to the movement of the rotary knob.
Adjusting the right-hand exterior mirror– Turn the rotary knob to position
. The movement of the mirror surface is identical
to the movement of the rotary knob.
Switching off operating control– Turn the rotary knob to position
.
Folding in both exterior mirrors*– Turn the rotary knob to position
.
Folding exterior mirrors* using the key with radio remote control– If all the windows are closed, press the unlock button on the radio remote
control page 43, fig. 31 for approx. 2 seconds.
Tilting surface of front pa ssenger exterior mirror*
When the rotary knob is in position
fig. 54 and the reverse gear is engaged, the
surface of the mirror tilts down slightly. This provides an aid in seeing the kerb of the
pavement when parking the car.
The mirror returns into its initial position, after the rotary knob is moved out of the
position
and put into another position or if the speed is more than 15 km/h.
Memory for exterior mirrors*
On vehicles fitted with a memory for the driver seat, the relevant setting of the exterior
mirror is also stored automatically when the se at position is stored page 68.WARNING
Convex (curved outward) or spherical (differently curved) exterior mirrors
increase the vision field. They do, however, make objects appear smaller in the
mirror. These mirrors are only of limited use, therefore, for estimating distances
to the following vehicles.
Use whenever possible the interior rear mirror, for estimating the distances
to the following vehicles.
Fig. 54 Inner part of door: Rotary knob
A3
s43s.1.book Page 65 Thursday, May 13, 2010 1:21 PM