open bonnet SKODA OCTAVIA 2010 2.G / (1Z) Owner's Manual
[x] Cancel search | Manufacturer: SKODA, Model Year: 2010, Model line: OCTAVIA, Model: SKODA OCTAVIA 2010 2.G / (1Z)Pages: 275, PDF Size: 16.43 MB
Page 14 of 275
The brief instruction13
Using the system
Safety
Driving Tips
General Maintenance
Breakdown assistance
Technical Data
Slow wipe
Fast wipe
one time wipe
Automatic wipe/wash
Rear window wiper* Intermittent wipe - every 6 seconds
Automatic wipe/wash
Further information page 61, “Windshield wiper”.
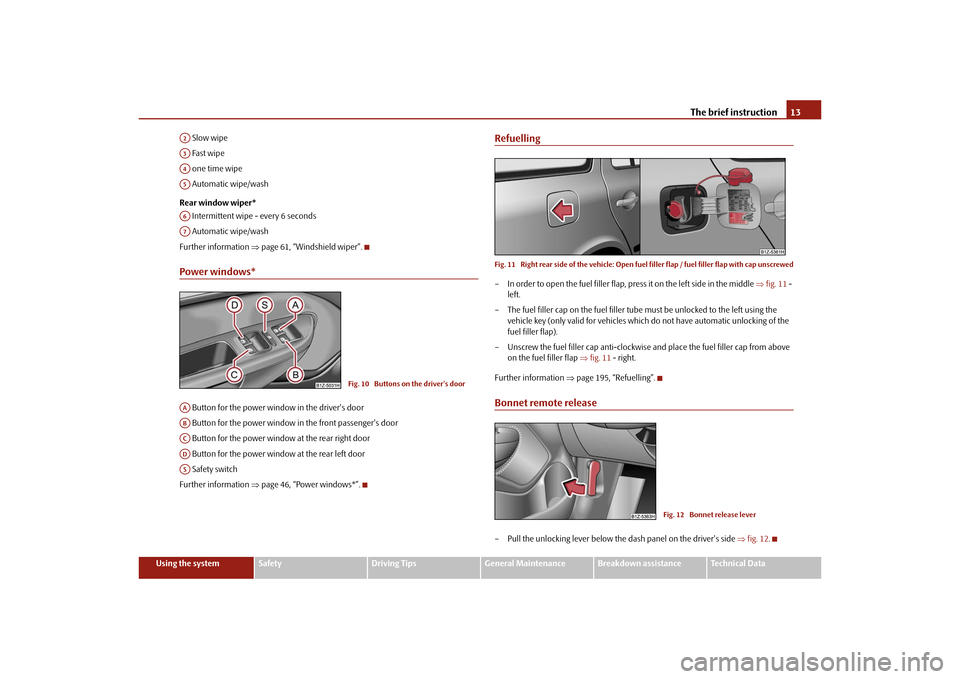
Power windows* Button for the power window in the driver's door
Button for the power window in the front passenger's door
Button for the power window at the rear right door
Button for the power window at the rear left door
Safety switch
Further information page 46, “Power windows*”.
RefuellingFig. 11 Right rear side of the ve hicle: Open fuel filler flap / fuel filler flap with cap unscrewed– In order to open the fuel filler flap, press it on the left side in the middle fig. 11 -
left.
– The fuel filler cap on the fuel filler tube must be unlocked to the left using the
vehicle key (only valid for vehicles which do not have automatic unlocking of the
fuel filler flap).
– Unscrew the fuel filler ca p anti-clockwise and place the fuel filler cap from above
on the fuel filler flap fig. 11 - right.
Further information page 195, “Refuelling”.Bonnet remote release– Pull the unlocking lever below the dash panel on the driver's side fig. 12 .
A2A3A4A5A6A7
Fig. 10 Buttons on the driver's door
AAABACADAS
Fig. 12 Bonnet release lever
s43s.1.book Page 13 Thursday, May 13, 2010 1:21 PM
Page 15 of 275
The brief instruction
14
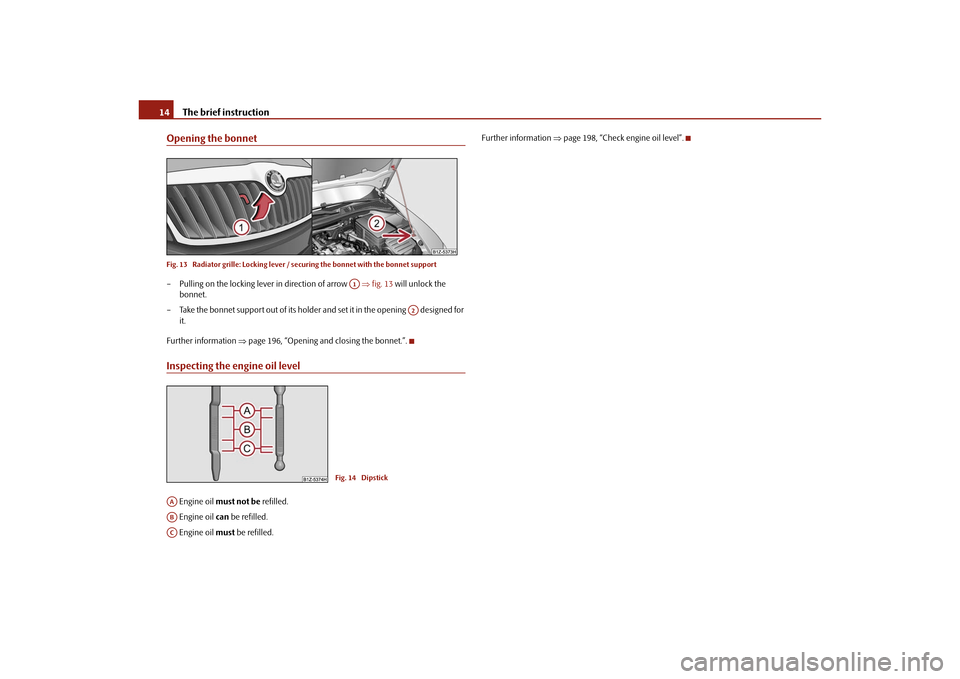
Opening the bonnetFig. 13 Radiator grille: Locking lever / se curing the bonnet with the bonnet support– Pulling on the locking lever in direction of arrow fig. 13 will unlock the
bonnet.
– Take the bonnet support out of its holder and set it in the opening designed for it.
Further information page 196, “Opening and closing the bonnet.”.Inspecting the engine oil level Engine oil must not be refilled.
Engine oil can be refilled.
Engine oil must be refilled. Further information
page 198, “Check engine oil level”.
A1
A2
Fig. 14 Dipstick
AAABACs43s.1.book Page 14 Thursday, May 13, 2010 1:21 PM
Page 25 of 275
Instruments and warning lights
24
Door, luggage compartment door and bonnet ajar warningThe door, luggage compartment and bonnet ajar warning lights up if at least one door,
the luggage compartment or bonnet are not closed. The symbol indicates which door
is still open or whether the luggage compartment door or bonnet is not closed.
The symbol goes out as soon as the doors, luggage compartment door and bonnet are
completely closed.
A warning signal sounds if the car is driven at a speed of more than 6km/hour and if
the engine or the luggage compartment door is open.Auto Check Control*Car stateThe Auto Check Control carries out a chec k of certain functions and vehicle compo-
nents. The check is performed constantly when the ignition is switched on, both when
the vehicle is stationary, as well as when driving.
Some operational faults, urgent repairs, service work or other information appear in
the display of the instrument cluster. The di splays are shown with a red or yellow light
symbol depending on the priority of the message.
The red symbols indicate danger (priority 1) while the yellow symbols indicate a
warning (priortity 2). Information for the driver may also appear in addition to the
symbols page 27.
Shown in the menu Vehicle status, if there is at least one error message. After selecting
this menu the first of the error messages is displayed. Several error messages are
shown on the display under the message e.g. 1/3. This indicates that the first of a total
of three error messages is displayed. Investigate the displayed faults as soon as
possible.
As long as the operational faults are not rectified, the symbols are always indicated
again. After the first display, the symbol s are indicated without information for the
driver.
If a fault occurs, a warning signal will also sound in addition to the symbol and text in
the display:
Priority 1 - three warning signals
Priority 2 - one warning signal
Red symbols
A red symbol signals danger.– Stop the vehicle.
– Switch the engine off.
– Investigate the function indicated.
– Obtain professional assistance.
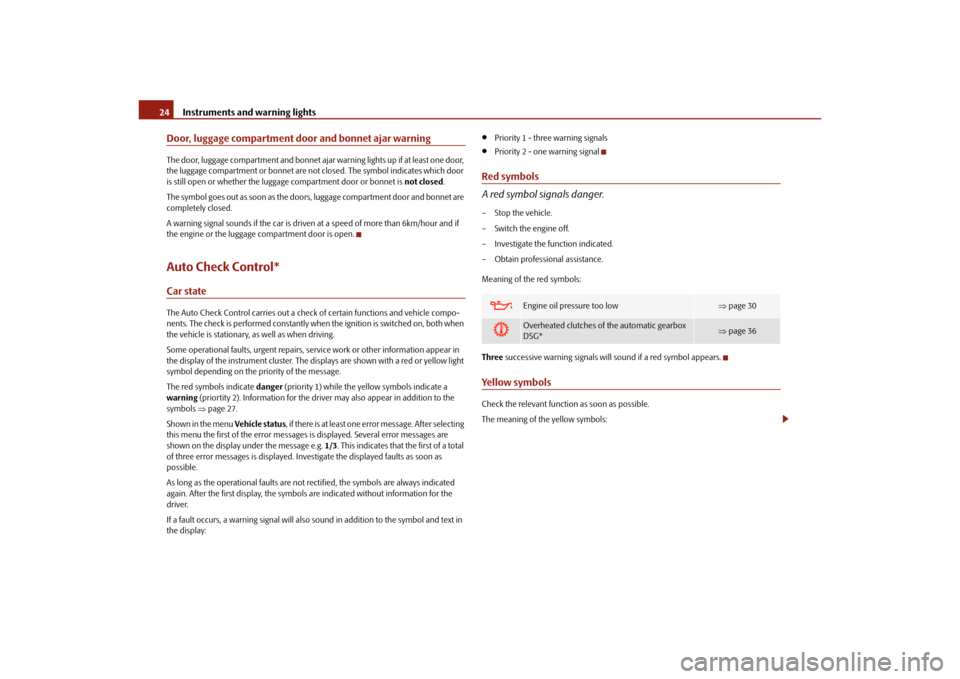
Meaning of the red symbols:
Three successive warning signals will sound if a red symbol appears.Yellow symbolsCheck the relevant function as soon as possible.
The meaning of the yellow symbols:
Engine oil pressure too low
page 30
Overheated clutches of the automatic gearbox
DSG*
page 36
s43s.1.book Page 24 Thursday, May 13, 2010 1:21 PM
Page 29 of 275
Instruments and warning lights
28
WARNING
If you do not pay attention to the warning lights coming on and the corre-
sponding descriptions and warning notes, this may result in severe body inju-
ries or major vehicle damage.
The engine compartment of your car is a hazardous area. There is a risk of
injuries, scalding, accidents and fire wh en working in the engine compartment,
e.g. inspecting and replenishing oil and other fluids. It is also essential to
observe all warnings page 197, “Working in the engine compartment”.Note
The arrangement of the indicator lights depends on the model version. The
symbols shown in the following functional description are to be found as indicator
lights in the instrument cluster.
Operational faults are shown in the instrument cluster as red symbols (priority 1 -
danger) or yellow symbol s (priority 2 - warning).
Turn signal system
Either the left
or right
indicator light flashes depending on the position of the turn
signal lever.
The indicator light flashes at twice its normal rate if a turn signal light fails.
Switching off the hazard warning light system is switched on will cause all of the turn
signal lights as well as both indicator lights to flash.
Further information about the turn signal system page 57.
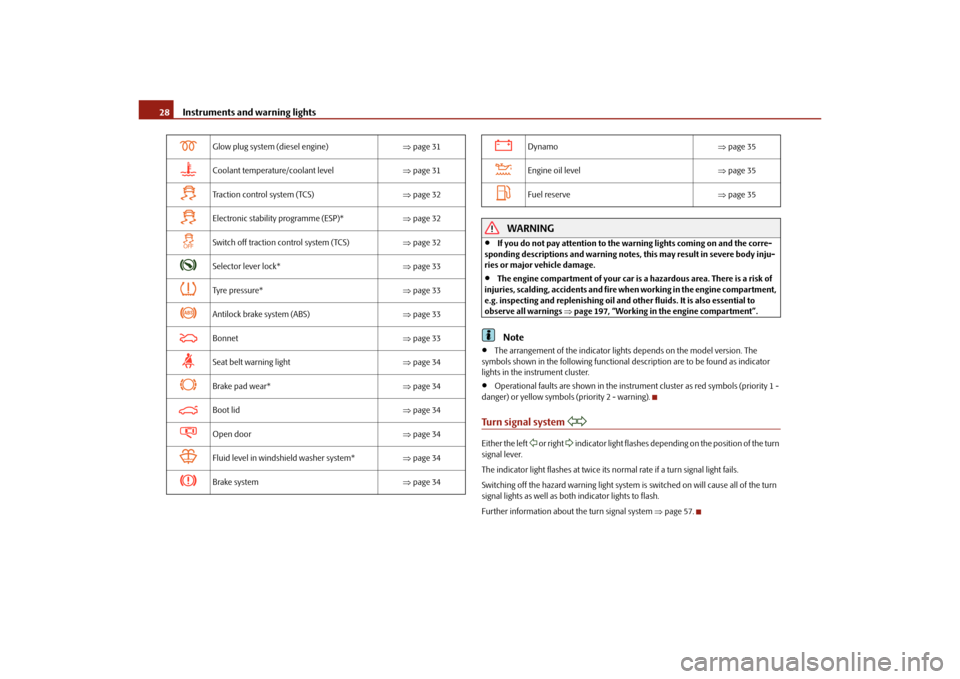
Glow plug system (diesel engine) page 31
Coolant temperature/coolant level page 31
Traction control system (TCS) page 32
Electronic stability programme (ESP)* page 32
Switch off traction control system (TCS) page 32
Selector lever lock* page 33
Tyre pres su re* page 33
Antilock brake system (ABS) page 33
Bonnet page 33
Seat belt warning light page 34
Brake pad wear* page 34
Boot lid page 34
Open door page 34
Fluid level in windshield washer system* page 34
Brake system page 34
Dynamo page 35
Engine oil level page 35
Fuel reserve page 35
s43s.1.book Page 28 Thursday, May 13, 2010 1:21 PM
Page 34 of 275
Instruments and warning lights33
Using the system
Safety
Driving Tips
General Maintenance
Breakdown assistance
Technical Data
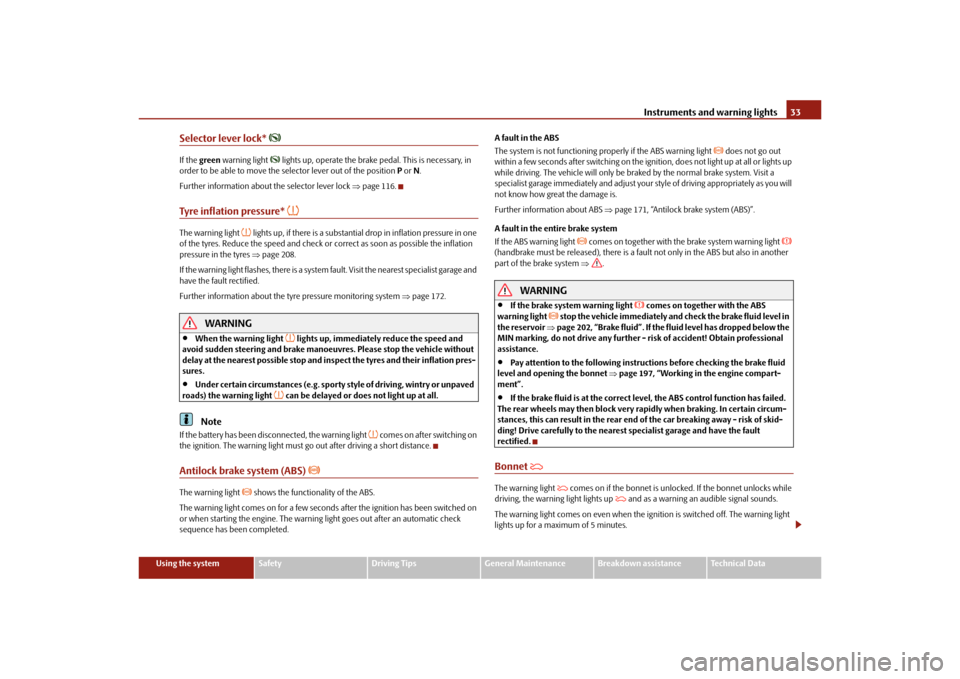
Selector lever lock*
If the green warning light
lights up, operate the brake pedal. This is necessary, in
order to be able to move the selector lever out of the position P or N.
Further information about the selector lever lock page 116.
Tyre inflation pressure*
The warning light
lights up, if there is a substantia l drop in inflation pressure in one
of the tyres. Reduce the speed and check or correct as soon as possible the inflation
pressure in the tyres page 208.
If the warning light flashes, there is a system fault. Visit the nearest specialist garage and
have the fault rectified.
Further information about the tyre pressure monitoring system page 172.
WARNING
When the warning light
lights up, immediately reduce the speed and
avoid sudden steering and brake manoeuvr es. Please stop the vehicle without
delay at the nearest possible stop and in spect the tyres and their inflation pres-
sures.
Under certain circumstances (e.g. sporty style of driving, wintry or unpaved
roads) the warning light
can be delayed or does not light up at all.
Note
If the battery has been disconnected, the warning light
comes on after switching on
the ignition. The warning light must go out after driving a short distance.
Antilock brake system (ABS)
The warning light
shows the functionality of the ABS.
The warning light comes on for a few seconds after the ignition has been switched on
or when starting the engine. The warning light goes out after an automatic check
sequence has been completed. A fault in the ABS
The system is not functioning properly if the ABS warning light
does not go out
within a few seconds after switching on the igni tion, does not light up at all or lights up
while driving. The vehicle will only be br aked by the normal brake system. Visit a
specialist garage immediately and adjust your style of driving appropriately as you will
not know how great the damage is.
Further information about ABS page 171, “Antilock brake system (ABS)”.
A fault in the entire brake system
If the ABS warning light
comes on together with the brake system warning light
(handbrake must be released), there is a fault not only in the ABS but also in another
part of the brake system .
WARNING
If the brake system warning light
comes on together with the ABS
warning light
stop the vehicle immediately an d check the brake fluid level in
the reservoir page 202, “Brake fluid”. If the fluid level has dropped below the
MIN marking, do not drive any further - risk of accident! Obtain professional
assistance.
Pay attention to the following instructions before checking the brake fluid
level and opening the bonnet page 197, “Working in the engine compart-
ment”.
If the brake fluid is at the correct leve l, the ABS control function has failed.
The rear wheels may then block very rapi dly when braking. In certain circum-
stances, this can result in the rear end of the car breaking away - risk of skid-
ding! Drive carefully to the nearest specialist garage and have the fault
rectified.
Bonnet
The warning light
comes on if the bonnet is unlocked. If the bonnet unlocks while
driving, the warning light lights up
and as a warning an audible signal sounds.
The warning light comes on even when the ig nition is switched off. The warning light
lights up for a maximum of 5 minutes.
s43s.1.book Page 33 Thursday, May 13, 2010 1:21 PM
Page 36 of 275
Instruments and warning lights35
Using the system
Safety
Driving Tips
General Maintenance
Breakdown assistance
Technical Data
For further information on the brake system
page 170, “Brakes”.
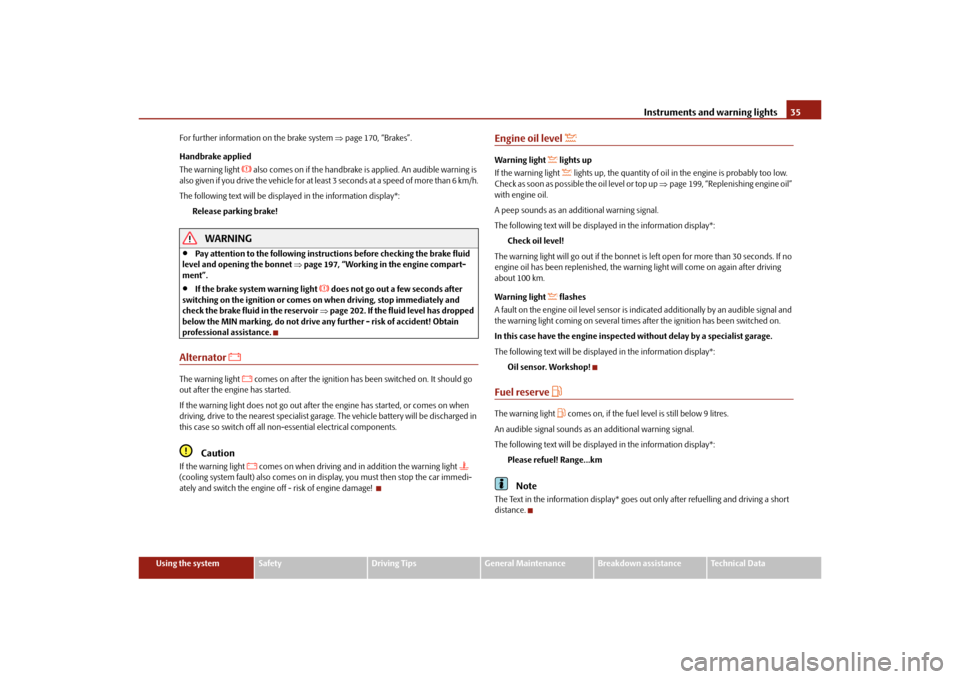
Handbrake applied
The warning light
also comes on if the handbrake is applied. An audible warning is
also given if you drive the vehicle for at least 3 seconds at a speed of more than 6 km/h.
The following text will be displayed in the information display*:
Release parking brake!
WARNING
Pay attention to the following instruct ions before checking the brake fluid
level and opening the bonnet page 197, “Working in the engine compart-
ment”.
If the brake system warning light
does not go out a few seconds after
switching on the ignition or comes on when driving, stop immediately and
check the brake fluid in the reservoir page 202. If the fluid level has dropped
below the MIN marking, do not drive any further - risk of accident! Obtain
professional assistance.
Alternator
The warning light
comes on after the ignition has been switched on. It should go
out after the engine has started.
If the warning light does not go out after the engine has started, or comes on when
driving, drive to the nearest specialist garage. The vehicle battery will be discharged in
this case so switch off all non- essential electrical components.
Caution
If the warning light
comes on when driving and in addition the warning light
(cooling system fault) also comes on in di splay, you must then stop the car immedi-
ately and switch the engine off - risk of engine damage!
Engine oil level
Warning light
lights up
If the warning light lights up, the quantity of oil in the engine is probably too low.
Check as soon as possible the oil level or top up page 199, “Replenishing engine oil”
with engine oil.
A peep sounds as an additional warning signal.
The following text will be displayed in the information display*:
Check oil level!
The warning light will go out if the bonnet is left open for more than 30 seconds. If no
engine oil has been replenished, the warning light will come on again after driving
about 100 km.
Warning light
flashes
A fault on the engine oil level sensor is indicated additionally by an audible signal and
the warning light coming on several times after the ignition has been switched on.
In this case have the engine inspecte d without delay by a specialist garage.
The following text will be displayed in the information display*: Oil sensor. Workshop!
Fuel reserve
The warning light
comes on, if the fuel level is still below 9 litres.
An audible signal sounds as an additional warning signal.
The following text will be displayed in the information display*: Please refuel! Range...km
Note
The Text in the information display* goes ou t only after refuelling and driving a short
distance.
s43s.1.book Page 35 Thursday, May 13, 2010 1:21 PM
Page 46 of 275
Unlocking and locking45
Using the system
Safety
Driving Tips
General Maintenance
Breakdown assistance
Technical Data
Once you unlock the vehicle by inserting the ke
y into the driver door you then have to
insert the key into the ignition lock and switch the ignition on within 15 seconds after
opening the door in order to deactiva te the anti-theft alarm system. The alarm will be
triggered if you do not switch on the ignition within 15 seconds.
When is the alarm triggered?
The following security areas of the locked vehicle are monitored:
Bonnet,
Boot lid,
Doors,
Ignition lock,
Angle of the vehicle* page 45,
Vehicle interior* page 45,
A drop in voltage of the on-board power supply.
An alarm is immediately triggered if either of the two battery terminals is disconnected
while the anti-theft alarm system is activated.
How is the alarm switched off?
You switch the alarm off if you unlock the vehi cle with the radio remote control or if you
switch the ignition on.Note
The working life of the alarm siren is 6 years. More detailed information is available
by a specialist garage.
Before leaving the car, check that all the doors, windows and the electric
sliding/tilting roof* are properly closed in order to ensure that the anti-theft alarm
system is fully operational.
Coding of the radio remote control and th e receiver unit precludes the use of the
radio remote control from other vehicles.
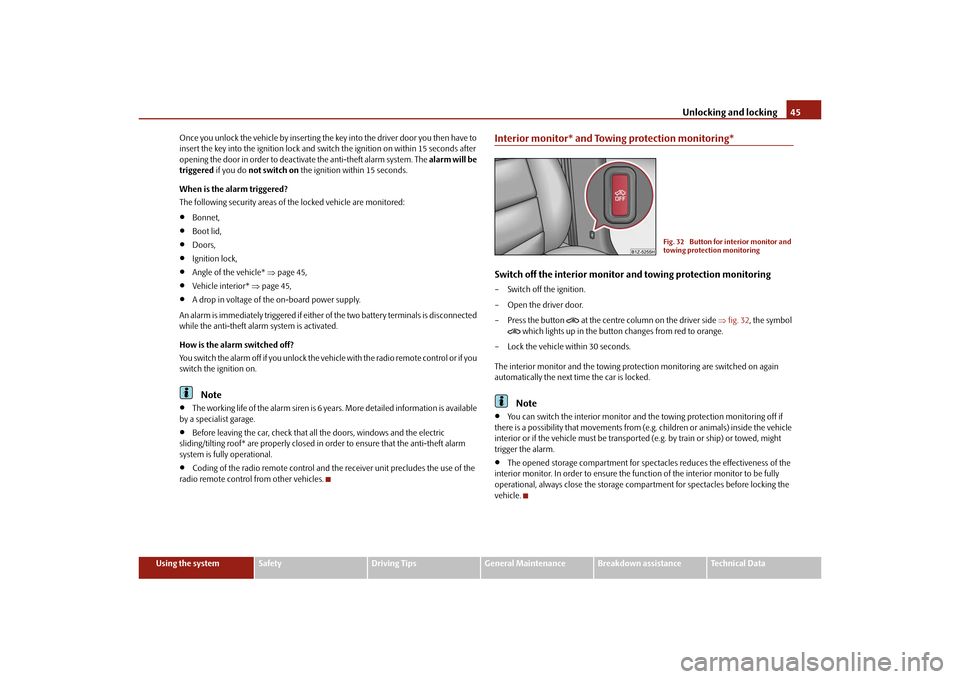
Interior monitor* and Towing protection monitoring*Switch off the interior monitor and towing protection monitoring– Switch off the ignition.
– Open the driver door.
–Press the button
at the centre column on the driver side fig. 32 , the symbol
which lights up in the button changes from red to orange.
– Lock the vehicle within 30 seconds.
The interior monitor and the towing protec tion monitoring are switched on again
automatically the next ti me the car is locked.Note
You can switch the interior monitor and th e towing protection monitoring off if
there is a possibility that movements from (e.g. children or animals) inside the vehicle
interior or if the vehicle must be transported (e.g. by train or ship) or towed, might
trigger the alarm.
The opened storage compartment for spectacles reduces the effectiveness of the
interior monitor. In order to ensure the func tion of the interior monitor to be fully
operational, always close the storage comp artment for spectacles before locking the
vehicle.
Fig. 32 Button for interior monitor and
towing protection monitoring
s43s.1.book Page 45 Thursday, May 13, 2010 1:21 PM
Page 63 of 275
Lights and Visibility
62
The windscreen wipers and the wash system only operate if the ignition is switched on
and the bonnet is closed
10).
If the intermittent wipe is switched on, the intervals are also controlled depending on
speed.
The rain sensor* automatically regulates the break between the individual wiper
strokes depending on the intensity of the rain.
The rear window will be wiped again if the front window wipers are on when reverse
gear is selected.
The windscreen washer nozzles are heated* when the ignition is switched on.
Top up with wash liquid page 207.
Winter position
If the windscreen wipers are in rest positi on, they cannot be folded out from the wind-
screen. For this reason we recommend adjusting the windscreen wipers in winter so
that they can be folded out from the windscreen easily. You can set this rest position as
follows:
Switch on the windscreen wipers.
Switch off the ignition. The windscreen wipers remain in the position in which they
were when switching off the ignition.
You can also use the service position page 63 as a winter position.
WARNING
Properly maintained wind screen wiper blades are essential for clear visi-
bility and safe driving page 63.
Do not use the windscreen washer sy stem at low temperatures, without
heating the windscreen beforehand. Otherwise the window cleaner could
freeze on the windscreen and re strict the view to the front.
The rain sensor only operates as a support. The driver is not released from
the responsibility to set the function of the windscreen wipers manually
depending on the visibility conditions.
Caution
In frosty weather, please firs t of all check whether the windscreen wiper blades are not
frozen to the windscreen before switching them on. Switching on windscreen wipers
when the blades are frozen to the windscreen may result in damage both to the blades
and the motor of the windscreen wipers!
Note
If the slower or the faster wiper setting is switched on page 61, fig. 50 and
the vehicle speed decreases to below 4 km/h, the lower wiper step is switched on
automatically. At a speed increase of more than 8 km/h the previous wiper setting is
established again.
If there is an obstacle on the windscre en, the wiper will try to push away the
obstacle. If the obstacle continues to block the wiper, the wiper stops after 5 cycles, in
order to avoid a damage to the wiper. Re move the obstacle and and switch on the
wiper again.
Automatic rear window wiper* (Combi)If the windshield wiper lever is in the position page 61, fig. 50 or , the rear
window wiper carries out a wi ping process every 30 seconds or 10 seconds at a speed
above 5 km/h.
When the rain sensor* is active (the lever is in the position ) the function is only
active if the front window wipers continue to operate (no break between each wiping
process).
Activation/deactivation
The function of the automatic rear window wiper is activated/deactivated in the infor-
mation display* in the menu:
Setup
Lights & Vision
Rear wiper
10)On vehicles which do not have a contact switch for the bonnet, the windshield wiper and wash
system operates also when the bonnet is opened.
A2
A3
A2
A3
A1
s43s.1.book Page 62 Thursday, May 13, 2010 1:21 PM
Page 120 of 275
Automatic gearbox119
Using the system
Safety
Driving Tips
General Maintenance
Breakdown assistance
Technical Data
stationary. The vehicle would otherwise
immediately start off - also when the
handbrake is firmly applied - risk of an accident!
You must move the selector lever into position P and firmly apply the hand-
brake first before you or any other person opens the bonnet and starts working
on the engine when it is running - risk of accident! It is also essential to observe
all warnings page 197, “Working in the engine compartment”.
Selector lever lockAutomatic selector lever lock
With the ignition on, the selector lever is locked when it is in the positions P and N . You
must first of all depress the brake pedal in or der to move the selector lever out of this
position. The warning light
page 33 lights up in the instrument cluster as a
reminder for the driver when the selector lever is in the positions P and N.
A time delay element ensures that the selector lever is not blocked when rapidly
switching over the position N (e.g. from R to D). This does, for example, allow one to
seesaw out a stuck vehicle. The selector lever lo ck will click into place if the lever is in
the N position for more than 2 seconds without the brake pedal being pressed.
The selector lever lock is only active if the vehicle is stationary or moving at speed of
less than 5 km/hour. The lock is swit ched off automatically into position N when the
car is travelling at a higher speed.
Shiftlock button
The Shiftlock button in the hand le of selector lever prevents certain selector lever posi-
tions being engaged inadvertently. The selector lever lock is cancelled when you press
the Shiftlock button.
Keylock - Ignition key withdrawal lock
You can only withdraw the ignition key after switching off the ignition if the selector
lever is in position P. If the ignition key is withdrawn, the selector lever is blocked in
position P.
Kickdown function
The kickdown function provides you with maximum acceleration
power.Fully depressing the a ccelerator pedal allows the kickdown function to be activated in
the desired driving program. This function has precedence over the driving
programme and serves for maximum accelerati on of the vehicle when exploiting the
maximum power potential of the engine wi thout taking into account the current
selector lever position ( D, S or Tiptronic). The gearbox shifts down to one or several
gears in line with the driving state and the vehicle accelerates. The gearbox does not
shift up into the highest gear until the en gine has reached its maximum revolutions for
this gear range.
WARNING
Please note that using the kickdown function can result in the driven wheels
spinning on a smooth or slippery road surface - risk of skidding!Dynamic shift programmeThe automatic gearbox of your vehicle is controlled electronically. Shifting up and
down through the gears is performed automatically on the basis of pre-defined driving
programmes.
Adopting a moderate style of driving will cause the gearbox to select the most
economical driving programme. Shifting up into a higher gear as soon as possible and
shifting down as late as po ssible will have a favourable effect on your fuel consump-
tion.
Adopting a sporty style of driving with rapid movements of the accelerator pedal
combined with sharp acceleration and freque nt changes in speed, exploiting the top
speed of the car or depressing the accele rator pedal (kickdown function), will cause
the gearbox to switch over to this style of driving and shift down earlier with frequent
changes in gears in comparison to the moderate style of driving.
Selecting the most appropriate driving programme for the particular style of driving is
a continuous process. Irrespective of this it is, however, possible to switch or shift down
into a dynamic shift programme by depressi ng the accelerator rapidly. The gearbox
shifts down into a lower gear matching the speed of the car and this allows you to
WARNING (continued)
s43s.1.book Page 119 Thursday, May 13, 2010 1:21 PM
Page 189 of 275
Taking care of your vehicle and cleaning the vehicle
188
Do not use window leathers which you have us ed to polish the vehicle body to dry off
the windows. Residues of preservatives in the window leather can dirty the window
and reduce visibility.
Do not affix any stickers over the inside of the rear window to avoid damage to the
heating elements of the rear window heater .
We recommend using a preserva tive from Škoda genuine accessories offered by your
Škoda dealer.
Caution
Never remove snow or ice from the glass parts with warm or hot water - risk of forma-
tion of cracks in the glass!The headlight lensesPlease do not use any aggressi ve cleaning or chemical solvent products for cleaning
the front headlights - risk of damage to the plastic lenses. Please use soap and clean
warm water.
Caution
Never wipe the headlights dry and do not use any sharp objects for cleaning the plastic
lenses, this may result in damage to the protective paintwork and consequently in
formation of cracks on the headlight lenses, e.g through effect of chemical products.Door and window sealsThe rubber seals on the doors, boot lid, bonnet and windows remain supple and last
longer if you treat them from time to time with a rubber care product (e.g. with a spray
with silicone-free oil). You also avoid premature wear of the seals and prevent leakages
in this way. It is also easier to open the doors. Rubber seals which are well cared for also
do not stick together in cold winter weather.Locking cylinderWe recommend that you use the spray from Škoda original accessories with regreasing
and anticorrosive effect for de-icing locking cylinders.
Note
When washing your vehicle, ensure that as little water as possible gets into the locking
cylinders.WheelsSteel wheels
You should also thoroughly wash the wheels and wheel trims when giving your vehicle
its regular wash. This prevents any brake dust, dirt and road salt from sticking to the
wheel hubs. You can remove stubborn brake abrasion adhering to the wheels with an
industrial cleaner. Touch up any damage to the paintwork on the wheels before rust is
able to form.
Light alloy wheels
Regular care of light alloy wh eels is necessary in order to retain their decorative
appearance over long periods. It is particul arly important to remove regularly any road
salt and brake abrasion from light alloy wheels, otherwise the light metal will suffer.
Wash thoroughly and then treat the wheels with a protective product for light alloy
wheels which does not cont ain any acidic components. We recommend to apply a
hard wax layer onto the wheel hubs every three months. You must not use any prod-
ucts which cause abrasion when treating the wheel hubs. Any damage to the paint
layer on the wheel hubs must be touched up immediately.
We recommend using a preservative from Šk oda genuine accessories offered by your
Škoda dealer.
WARNING
One should remember when cleaning th e wheels that moisture, ice and road
salt may adversely affect braking ef ficiency - risk of an accident!
Note
Severe layers of dirt on the wheels can also result in wheel imbalance. This may show
itself in the form of a wheel vibration which is transmitted to the steering wheel which,
in certain circumstances, can cause premature wear of the steering. This means it is
necessary to remove the dirt.
s43s.1.book Page 188 Thursday, May 13, 2010 1:21 PM