key SKODA OCTAVIA 2012 3.G / (5E) Owner's Manual
[x] Cancel search | Manufacturer: SKODA, Model Year: 2012, Model line: OCTAVIA, Model: SKODA OCTAVIA 2012 3.G / (5E)Pages: 222, PDF Size: 13.52 MB
Page 5 of 222
Table of Contents
Abbreviations
Using the system
Cockpit
7
Overview
6
Instruments and warning lights
9
Instrument cluster
9
Warning lights
12
Information system
21
Introductory information
21
Outside temperature
21
Recommended gear
21
Door, boot lid and bonnet warning
21
Eco tips
21
Driving data (Multifunction display)
22
Information display
25
Traffic sign recognition
25
Fatigue detection (break recommendation)
27
Unlocking and locking
28
Vehicle key
28
Child safety lock
29
Open door and close
29
Central locking system
29
Locking/unlocking with the key
31
Vehicle locking/unlocking from the inside
32
Remote control
32
KESSY system
33
Anti-theft alarm system
35
Emergency unlocking/locking
36
Luggage compartment lid
37
Electrical power windows
38
Power panoramic sliding/sliding tilting roof
41Lights and visibility43Lights43
Interior light
51
Visibility
52
Windscreen wipers and washers
53
Rear mirror
56
Seats and Stowage
59
Front seats
59
Seat heaters
62
Head restraints
63
Rear seats
63
Boot
64
Roof rack system
68
Cup holder
69
Ashtray
70
Cigarette lighter
70
Sockets
71
Storage compartments
72
Clothes hooks
79
Parking ticket holder
80
Heating and air conditioning system
81
Heating and air conditioning system
81
Air outlets
82
Heating
83
Air conditioning system (manual air conditioning system)
84
Climatronic (automatic air conditioningsystem)
86
Auxiliary heating (auxiliary heating andventilation)
88
Starting-off and Driving
92
Starting and stopping the engine
92
KESSY system
95
Brakes
97
Shifting
99
Pedals
99Driving and the Environment100Running in100
Catalytic converter
100
Economical and environmentally friendly
driving
101
Environmental compatibility
103
Driving abroad
104
Driving through water on the street
104
Towing a trailer
106
Towing device
106
Loading a trailer
109
Driving with a trailer
110
Assist systems
112
Brake assist systems
112
Parking aid
114
Park Assist
116
Cruise control system (CCS)
119
START/STOP
121
Select driving mode
124
ProActive passenger protection
125
Lane Assist
126
Automatic gearbox
129
Automatic transmission
129
Communication
134
Introductory information
134
Declaration of conformity
134
Warning statement
134
Phonebox
135
Multimedia
135
Safety
Passive Safety
138
General information
138
Correct seated position
1393Table of Contents
Page 9 of 222
Using the system
Cockpit
OverviewElectrical power windows
38
Door opening lever on the driver's side
29
Electric exterior mirror adjustment
58
Air outlet vent on the driver's side
82
Operating lever:
› Turn signal light, headlight and parking light, headlight flasher
45
›Speed regulating system
119
Steering wheel:
› With horn
› With driver’s front airbag
147
›With pushbuttons for radio, navigation system and mobile
phone
134
Instrument cluster: Instruments and warning lights
9
Operating lever:
› Multifunction display
22
›Windscreen wiper and wash system
53
Air outlet vents, middle
82
Depending on equipment fitted:
› Infotainment Radio
» operating instructions for Infotainment
Radio
› Infotainment Navigation
» operating instructions for the Info-
tainment Navigation
Warning light for the deactivated front seat passenger airbag
151
Switch for hazard warning lights
49
Interior rear-view mirror
57
Storage compartment on the front passenger side
73
Front passenger airbag
147
CD/DVD/Blu-ray drive and memory card slot (in the passenger-side
storage compartment) » operating instructions for Infotainment
Radio and/or Infotainment Navigation
12345678910111213141516Air outlet vent on the front passenger side82Key switch for switching off the front passenger airbag (in front
passenger storage compartment)151
Door opening lever on the front passenger side
29
Electric power-operated window front passenger side
40
Light switch
44
Fuse box (behind the storage compartment in the dash panel)
200
Bonnet release lever
171
Lever for adjusting the steering wheel
93
Ignition lock
94
Pedals
99
Storage compartment
74
Handbrake lever
98
Depending on equipment fitted:
› Gearshift lever (manual gearbox)
99
›Selector lever (automatic gearbox)
130
Depending on equipment fitted:
› Operating controls for the heating
83
›Operating controls for the air conditioning system
84
›
Operating controls for Climatronic
86
Depending on equipment fitted:
› 12-Volt power socket
71
›Cigarette lighter
70
Bar with keys depending on the equipment fitted:
›
Central locking system
32
›
START STOP
121
›
Traction control TCS
113
›
Electronic Stability Control ESC
112
›
Selection of driving mode
124
›
Park Assist
116
›
Parking aid
114
›
Tyre inflation pressure calibration
185
Depending on equipment fitted:
› USB/AUX input
134
›MEDIA IN input
134
17181920212223242526272829303132337Cockpit
Page 21 of 222
NoteThe text in the information display goes out after refuelling and driving a short
distance.
Safety systems
If the warning light lights up, there is a fault in the airbag or pedestrian protec-
tion system.
Airbag system
The following message is shown in the information cluster display:
Error: airbag
or AIRBAG ERROR
The functionality of the airbag system is monitored electronically even if one of
the airbags is switched off.
The following applies if one of the airbags or the belt tensioner was switched
off with the diagnostic equipment:
The warning light
lights up for approx. 4 seconds after switching on the igni-
tion and then flashes again for approx. 12 seconds.
The following message is shown in the information cluster display: Airbag/belt tensioner deactivated.
or AIRBAG/BELT TENSIONER OFF
The following applies if the front passenger airbag has been switched off using the key switch in the storage compartment:
› The indicator light
comes on for around 4 seconds after the ignition has been
switched on;
› The warning light
in the display
in the middle of the dash
panel lights up after switching on the ignition » page 151.
Passenger protection system The following message is shown in the information cluster display:
Error: pedestrian protection
or
PASSENGER PROTECTION SYSTEM ERROR
Further information » page 153.WARNINGIf there is a fault in the safety system, have it checked immediately by a
ŠKODA specialist garage. Otherwise, there is a risk of the systems not being
activated in the event of an accident.
Tyre pressure
The warning light
lights up, if there is a substantial drop in inflation pressure in
one of the tyres. Check and adjust the pressure in all tyres » page 181.
An audible signal sounds as a warning signal.
If the warning light
lights up, there is a fault in the system.
Seek help from a ŠKODA specialist garage. Further information » page 185, Tyre control display .
Note
If the vehicle's battery has been disconnected and reconnected, the warning light
comes on after switching on the ignition. If the warning light does not go out
after moving a short distance, this means there is an error in the system. Seek
help from a ŠKODA specialist garage.
Windscreen washer fluid level
If the windscreen washer fluid level is too low, the warning light
comes on. Top
up with washer fluid.
Top up with liquid » page 176.
The following message is shown in the information cluster display: Top up washer fluid!
or
WASHER FLUID PLEASE TOP UP
19Instruments and warning lights
Page 30 of 222
Unlocking and locking
Vehicle key
Introductory information
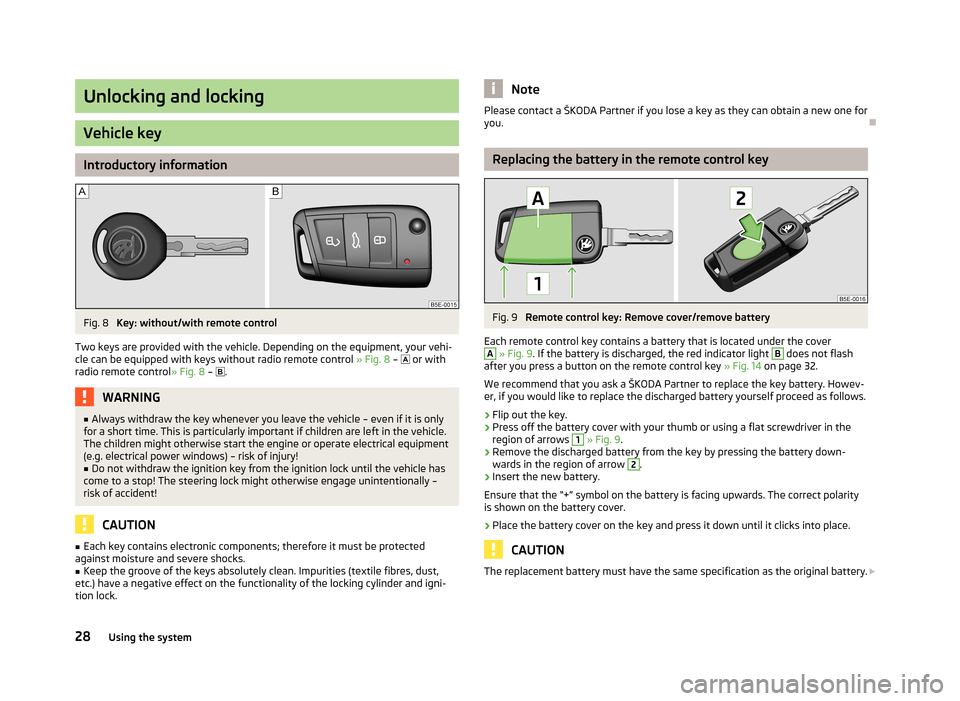
Fig. 8
Key: without/with remote control
Two keys are provided with the vehicle. Depending on the equipment, your vehi- cle can be equipped with keys without radio remote control » Fig. 8 –
or with
radio remote control » Fig. 8 –
.
WARNING■
Always withdraw the key whenever you leave the vehicle – even if it is only
for a short time. This is particularly important if children are left in the vehicle.
The children might otherwise start the engine or operate electrical equipment
(e.g. electrical power windows) – risk of injury!■
Do not withdraw the ignition key from the ignition lock until the vehicle has
come to a stop! The steering lock might otherwise engage unintentionally – risk of accident!
CAUTION
■ Each key contains electronic components; therefore it must be protected
against moisture and severe shocks.■
Keep the groove of the keys absolutely clean. Impurities (textile fibres, dust,
etc.) have a negative effect on the functionality of the locking cylinder and igni-
tion lock.
NotePlease contact a ŠKODA Partner if you lose a key as they can obtain a new one for you.
Replacing the battery in the remote control key
Fig. 9
Remote control key: Remove cover/remove battery
Each remote control key contains a battery that is located under the cover
A
» Fig. 9 . If the battery is discharged, the red indicator light
B
does not flash
after you press a button on the remote control key » Fig. 14 on page 32.
We recommend that you ask a ŠKODA Partner to replace the key battery. Howev- er, if you would like to replace the discharged battery yourself proceed as follows.
›
Flip out the key.
›
Press off the battery cover with your thumb or using a flat screwdriver in theregion of arrows
1
» Fig. 9 .
›
Remove the discharged battery from the key by pressing the battery down-
wards in the region of arrow
2
.
›
Insert the new battery.
Ensure that the “+” symbol on the battery is facing upwards. The correct polarity
is shown on the battery cover.
›
Place the battery cover on the key and press it down until it clicks into place.
CAUTION
The replacement battery must have the same specification as the original battery. 28Using the system
Page 31 of 222
For the sake of the environmentDispose of the used battery in accordance with national legal provisions.
Note
The key has to be synchronised if the vehicle cannot be unlocked or locked with
the remote control key after replacing the battery » page 33.
Child safety lock
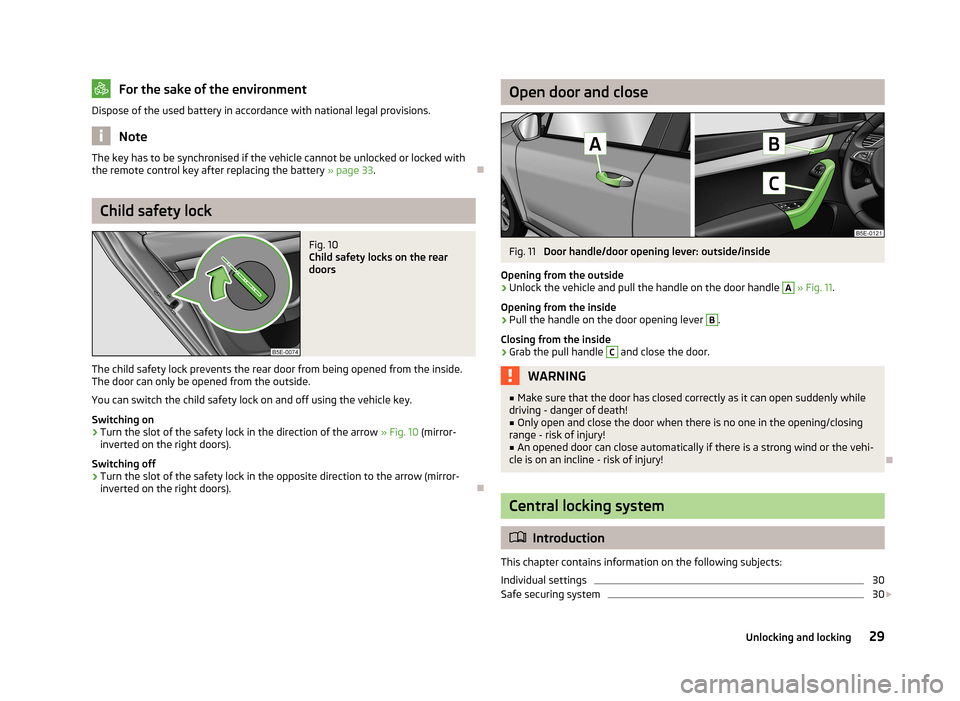
Fig. 10
Child safety locks on the rear
doors
The child safety lock prevents the rear door from being opened from the inside.
The door can only be opened from the outside.
You can switch the child safety lock on and off using the vehicle key.
Switching on
›
Turn the slot of the safety lock in the direction of the arrow » Fig. 10 (mirror-
inverted on the right doors).
Switching off
›
Turn the slot of the safety lock in the opposite direction to the arrow (mirror- inverted on the right doors).
Open door and closeFig. 11
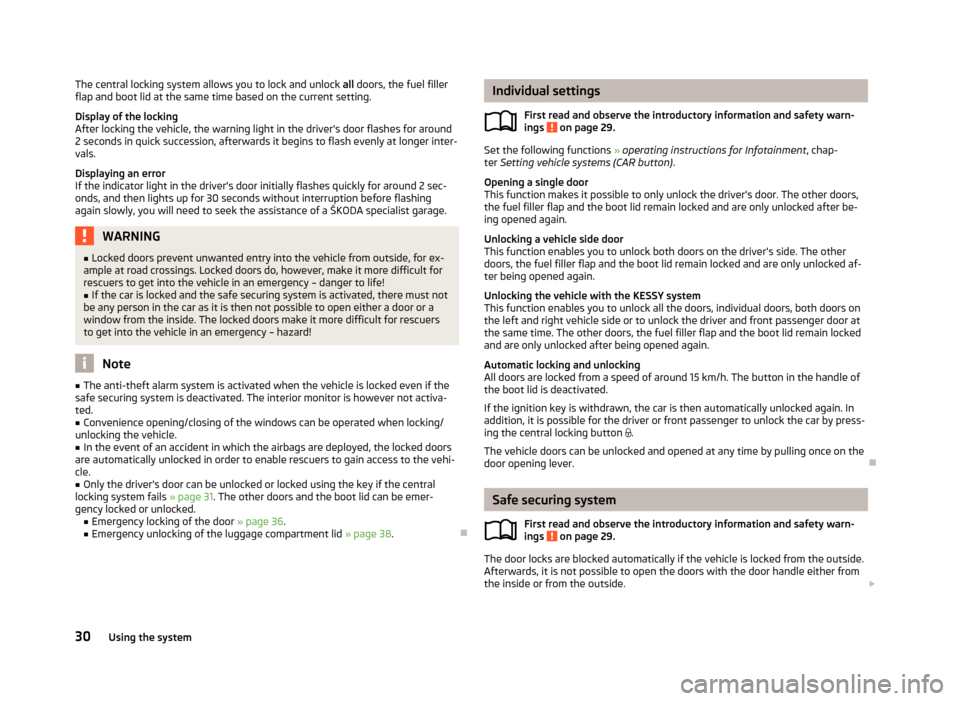
Door handle/door opening lever: outside/inside
Opening from the outside
›
Unlock the vehicle and pull the handle on the door handle
A
» Fig. 11 .
Opening from the inside
›
Pull the handle on the door opening lever
B
.
Closing from the inside
›
Grab the pull handle
C
and close the door.
WARNING■ Make sure that the door has closed correctly as it can open suddenly while
driving - danger of death!■
Only open and close the door when there is no one in the opening/closing
range - risk of injury!
■
An opened door can close automatically if there is a strong wind or the vehi-
cle is on an incline - risk of injury!
Central locking system
Introduction
This chapter contains information on the following subjects:
Individual settings
30
Safe securing system
30
29Unlocking and locking
Page 32 of 222
The central locking system allows you to lock and unlock all doors, the fuel filler
flap and boot lid at the same time based on the current setting.
Display of the locking
After locking the vehicle, the warning light in the driver's door flashes for around
2 seconds in quick succession, afterwards it begins to flash evenly at longer inter-
vals.
Displaying an error
If the indicator light in the driver's door initially flashes quickly for around 2 sec-
onds, and then lights up for 30 seconds without interruption before flashing
again slowly, you will need to seek the assistance of a ŠKODA specialist garage.WARNING■ Locked doors prevent unwanted entry into the vehicle from outside, for ex-
ample at road crossings. Locked doors do, however, make it more difficult for rescuers to get into the vehicle in an emergency – danger to life!■
If the car is locked and the safe securing system is activated, there must not
be any person in the car as it is then not possible to open either a door or a window from the inside. The locked doors make it more difficult for rescuers
to get into the vehicle in an emergency – hazard!
Note
■ The anti-theft alarm system is activated when the vehicle is locked even if the
safe securing system is deactivated. The interior monitor is however not activa- ted.■
Convenience opening/closing of the windows can be operated when locking/
unlocking the vehicle.
■
In the event of an accident in which the airbags are deployed, the locked doors
are automatically unlocked in order to enable rescuers to gain access to the vehi-
cle.
■
Only the driver's door can be unlocked or locked using the key if the central
locking system fails » page 31. The other doors and the boot lid can be emer-
gency locked or unlocked. ■Emergency locking of the door » page 36.
■ Emergency unlocking of the luggage compartment lid » page 38.
Individual settings
First read and observe the introductory information and safety warn-
ings
on page 29.
Set the following functions » operating instructions for Infotainment , chap-
ter Setting vehicle systems (CAR button) .
Opening a single door
This function makes it possible to only unlock the driver's door. The other doors,
the fuel filler flap and the boot lid remain locked and are only unlocked after be- ing opened again.
Unlocking a vehicle side door
This function enables you to unlock both doors on the driver's side. The other doors, the fuel filler flap and the boot lid remain locked and are only unlocked af-
ter being opened again.
Unlocking the vehicle with the KESSY system
This function enables you to unlock all the doors, individual doors, both doors on the left and right vehicle side or to unlock the driver and front passenger door at
the same time. The other doors, the fuel filler flap and the boot lid remain locked
and are only unlocked after being opened again.
Automatic locking and unlocking
All doors are locked from a speed of around 15 km/h. The button in the handle of
the boot lid is deactivated.
If the ignition key is withdrawn, the car is then automatically unlocked again. In addition, it is possible for the driver or front passenger to unlock the car by press-
ing the central locking button
.
The vehicle doors can be unlocked and opened at any time by pulling once on the
door opening lever.
Safe securing system
First read and observe the introductory information and safety warn-
ings
on page 29.
The door locks are blocked automatically if the vehicle is locked from the outside.
Afterwards, it is not possible to open the doors with the door handle either from
the inside or from the outside.
30Using the system
Page 33 of 222
If the vehicle is locked and the safe securing system is switched off, the door can
be opened separately from the inside by a single pull on opening lever.
A message is shown after switching off the ignition.
Information message
In the instrument cluster display: CHECK SAFELOCK.
Vehicles with the information display: Check SAFELOCK! Owner's manual! Check
SAFELOCK! Owner's manual!)
Switching on
The safelock switches on automatically the next time the vehicle is locked and
unlocked.
Switching off
The safelock can be switched off by locking twice within 2 seconds.
Switch-on display
The warning light flashes for around 2 seconds in quick succession, afterwards it
begins to flash evenly at longer intervals.
Switch-off display
The indicator light in the driver door flashes for about 2 seconds fast, goes out
and starts to flash at longer intervals after about 30 seconds.
Locking/unlocking with the key
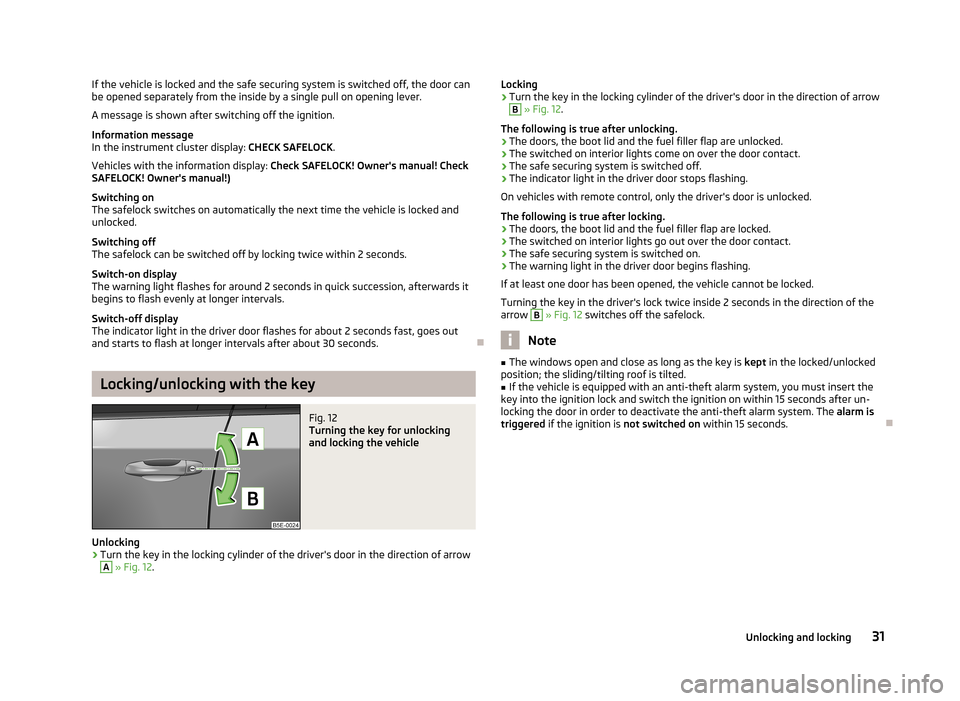
Fig. 12
Turning the key for unlocking
and locking the vehicle
Unlocking
›
Turn the key in the locking cylinder of the driver's door in the direction of arrow
A
» Fig. 12 .
Locking›Turn the key in the locking cylinder of the driver's door in the direction of arrowB
» Fig. 12 .
The following is true after unlocking.
› The doors, the boot lid and the fuel filler flap are unlocked.
› The switched on interior lights come on over the door contact.
› The safe securing system is switched off.
› The indicator light in the driver door stops flashing.
On vehicles with remote control, only the driver's door is unlocked.
The following is true after locking. › The doors, the boot lid and the fuel filler flap are locked.
› The switched on interior lights go out over the door contact.
› The safe securing system is switched on.
› The warning light in the driver door begins flashing.
If at least one door has been opened, the vehicle cannot be locked.
Turning the key in the driver's lock twice inside 2 seconds in the direction of the arrow
B
» Fig. 12 switches off the safelock.
Note
■
The windows open and close as long as the key is kept in the locked/unlocked
position; the sliding/tilting roof is tilted.■
If the vehicle is equipped with an anti-theft alarm system, you must insert the
key into the ignition lock and switch the ignition on within 15 seconds after un-
locking the door in order to deactivate the anti-theft alarm system. The alarm is
triggered if the ignition is not switched on within 15 seconds.
31Unlocking and locking
Page 34 of 222
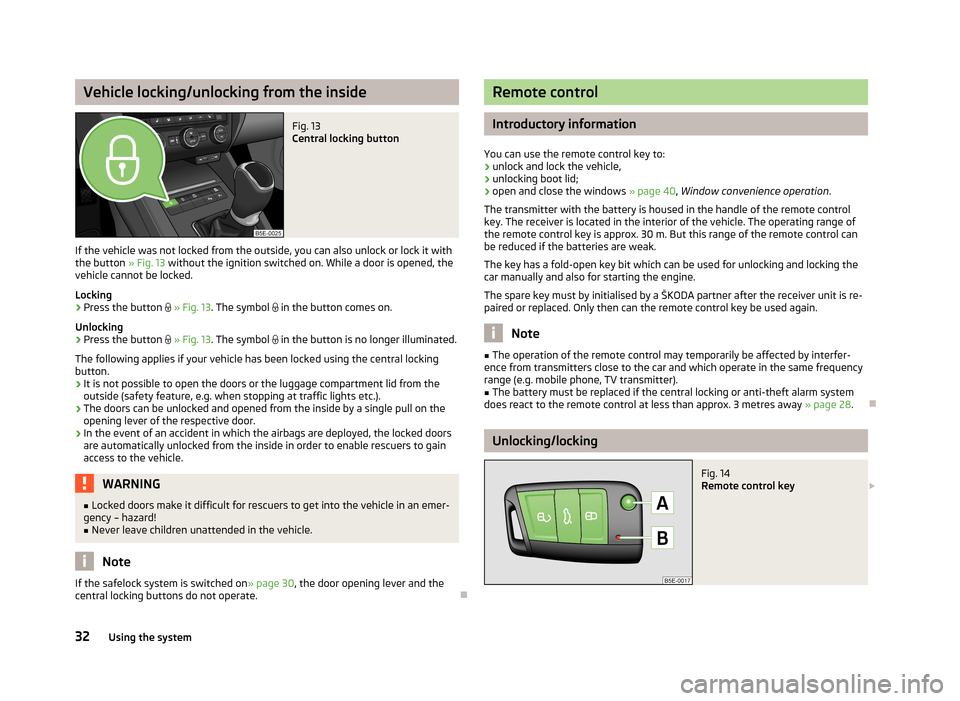
Vehicle locking/unlocking from the insideFig. 13
Central locking button
If the vehicle was not locked from the outside, you can also unlock or lock it with
the button » Fig. 13 without the ignition switched on. While a door is opened, the
vehicle cannot be locked.
Locking
›
Press the button
» Fig. 13 . The symbol
in the button comes on.
Unlocking
›
Press the button
» Fig. 13 . The symbol
in the button is no longer illuminated.
The following applies if your vehicle has been locked using the central locking button.
› It is not possible to open the doors or the luggage compartment lid from the
outside (safety feature, e.g. when stopping at traffic lights etc.).
› The doors can be unlocked and opened from the inside by a single pull on the
opening lever of the respective door.
› In the event of an accident in which the airbags are deployed, the locked doors
are automatically unlocked from the inside in order to enable rescuers to gain access to the vehicle.
WARNING■ Locked doors make it difficult for rescuers to get into the vehicle in an emer-
gency – hazard!■
Never leave children unattended in the vehicle.
Note
If the safelock system is switched on » page 30
, the door opening lever and the
central locking buttons do not operate.
Remote control
Introductory information
You can use the remote control key to:
› unlock and lock the vehicle,
› unlocking boot lid;
› open and close the windows
» page 40, Window convenience operation .
The transmitter with the battery is housed in the handle of the remote control
key. The receiver is located in the interior of the vehicle. The operating range of
the remote control key is approx. 30 m. But this range of the remote control can
be reduced if the batteries are weak.
The key has a fold-open key bit which can be used for unlocking and locking the
car manually and also for starting the engine.
The spare key must by initialised by a ŠKODA partner after the receiver unit is re-
paired or replaced. Only then can the remote control key be used again.
Note
■ The operation of the remote control may temporarily be affected by interfer-
ence from transmitters close to the car and which operate in the same frequency
range (e.g. mobile phone, TV transmitter).■
The battery must be replaced if the central locking or anti-theft alarm system
does react to the remote control at less than approx. 3 metres away » page 28.
Unlocking/locking
Fig. 14
Remote control key
32Using the system
Page 35 of 222
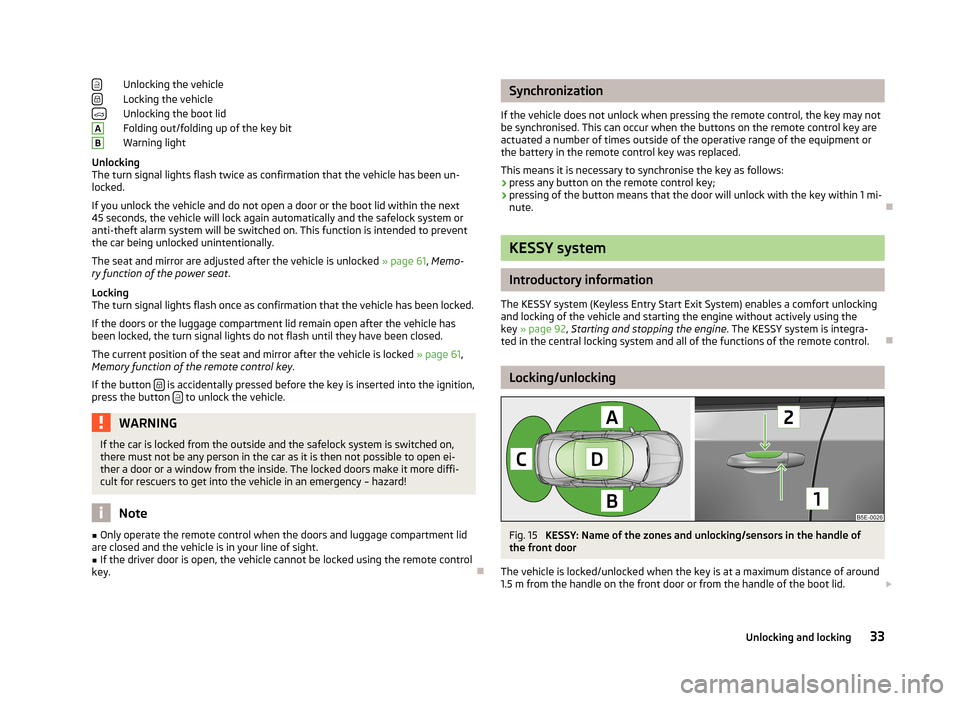
Unlocking the vehicle
Locking the vehicle
Unlocking the boot lid
Folding out/folding up of the key bit
Warning light
Unlocking
The turn signal lights flash twice as confirmation that the vehicle has been un-
locked.
If you unlock the vehicle and do not open a door or the boot lid within the next
45 seconds, the vehicle will lock again automatically and the safelock system or
anti-theft alarm system will be switched on. This function is intended to prevent
the car being unlocked unintentionally.
The seat and mirror are adjusted after the vehicle is unlocked » page 61, Memo-
ry function of the power seat .
Locking
The turn signal lights flash once as confirmation that the vehicle has been locked.
If the doors or the luggage compartment lid remain open after the vehicle has
been locked, the turn signal lights do not flash until they have been closed.
The current position of the seat and mirror after the vehicle is locked » page 61,
Memory function of the remote control key .
If the button
is accidentally pressed before the key is inserted into the ignition,
press the button to unlock the vehicle.
WARNINGIf the car is locked from the outside and the safelock system is switched on,
there must not be any person in the car as it is then not possible to open ei-
ther a door or a window from the inside. The locked doors make it more diffi-
cult for rescuers to get into the vehicle in an emergency – hazard!
Note
■ Only operate the remote control when the doors and luggage compartment lid
are closed and the vehicle is in your line of sight.■
If the driver door is open, the vehicle cannot be locked using the remote control
key.
ABSynchronization
If the vehicle does not unlock when pressing the remote control, the key may not be synchronised. This can occur when the buttons on the remote control key areactuated a number of times outside of the operative range of the equipment or
the battery in the remote control key was replaced.
This means it is necessary to synchronise the key as follows:
› press any button on the remote control key;
› pressing of the button means that the door will unlock with the key within 1 mi-
nute.
KESSY system
Introductory information
The KESSY system (Keyless Entry Start Exit System) enables a comfort unlocking
and locking of the vehicle and starting the engine without actively using the
key » page 92 , Starting and stopping the engine . The KESSY system is integra-
ted in the central locking system and all of the functions of the remote control.
Locking/unlocking
Fig. 15
KESSY: Name of the zones and unlocking/sensors in the handle of
the front door
The vehicle is locked/unlocked when the key is at a maximum distance of around
1.5 m from the handle on the front door or from the handle of the boot lid.
33Unlocking and locking
Page 36 of 222
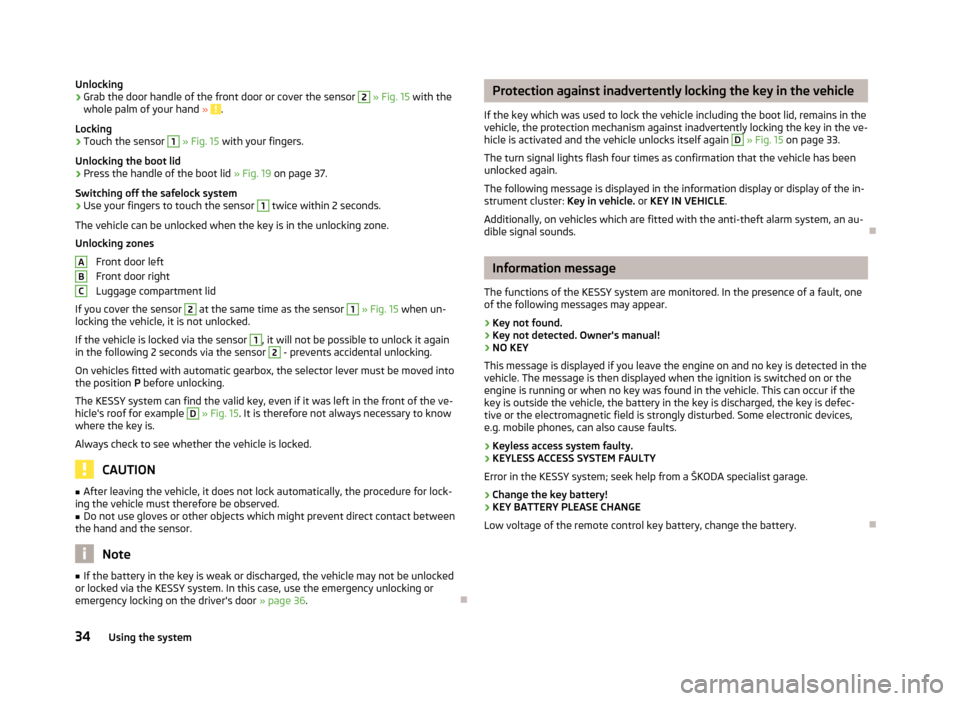
Unlocking›Grab the door handle of the front door or cover the sensor 2 » Fig. 15 with the
whole palm of your hand » .
Locking
›
Touch the sensor
1
» Fig. 15 with your fingers.
Unlocking the boot lid
›
Press the handle of the boot lid » Fig. 19 on page 37.
Switching off the safelock system
›
Use your fingers to touch the sensor
1
twice within 2 seconds.
The vehicle can be unlocked when the key is in the unlocking zone.
Unlocking zones
Front door left
Front door right
Luggage compartment lid
If you cover the sensor
2
at the same time as the sensor
1
» Fig. 15 when un-
locking the vehicle, it is not unlocked.
If the vehicle is locked via the sensor
1
, it will not be possible to unlock it again
in the following 2 seconds via the sensor
2
- prevents accidental unlocking.
On vehicles fitted with automatic gearbox, the selector lever must be moved into the position P before unlocking.
The KESSY system can find the valid key, even if it was left in the front of the ve-
hicle's roof for example
D
» Fig. 15 . It is therefore not always necessary to know
where the key is.
Always check to see whether the vehicle is locked.
CAUTION
■ After leaving the vehicle, it does not lock automatically, the procedure for lock-
ing the vehicle must therefore be observed.■
Do not use gloves or other objects which might prevent direct contact between
the hand and the sensor.
Note
■ If the battery in the key is weak or discharged, the vehicle may not be unlocked
or locked via the KESSY system. In this case, use the emergency unlocking or emergency locking on the driver's door » page 36.ABCProtection against inadvertently locking the key in the vehicle
If the key which was used to lock the vehicle including the boot lid, remains in the
vehicle, the protection mechanism against inadvertently locking the key in the ve-
hicle is activated and the vehicle unlocks itself again D
» Fig. 15 on page 33.
The turn signal lights flash four times as confirmation that the vehicle has been
unlocked again.
The following message is displayed in the information display or display of the in-
strument cluster: Key in vehicle. or KEY IN VEHICLE .
Additionally, on vehicles which are fitted with the anti-theft alarm system, an au- dible signal sounds.
Information message
The functions of the KESSY system are monitored. In the presence of a fault, one of the following messages may appear.
› Key not found.
› Key not detected. Owner's manual!
› NO KEY
This message is displayed if you leave the engine on and no key is detected in the vehicle. The message is then displayed when the ignition is switched on or the
engine is running or when no key was found in the vehicle. This can occur if the
key is outside the vehicle, the battery in the key is discharged, the key is defec-
tive or the electromagnetic field is strongly disturbed. Some electronic devices,
e.g. mobile phones, can also cause faults.
› Keyless access system faulty.
› KEYLESS ACCESS SYSTEM FAULTY
Error in the KESSY system; seek help from a ŠKODA specialist garage.
› Change the key battery!
› KEY BATTERY PLEASE CHANGE
Low voltage of the remote control key battery, change the battery.
34Using the system