ECO mode SKODA OCTAVIA 2013 3.G / (5E) Columbus Navigation System Manual
[x] Cancel search | Manufacturer: SKODA, Model Year: 2013, Model line: OCTAVIA, Model: SKODA OCTAVIA 2013 3.G / (5E)Pages: 90, PDF Size: 5.21 MB
Page 23 of 90
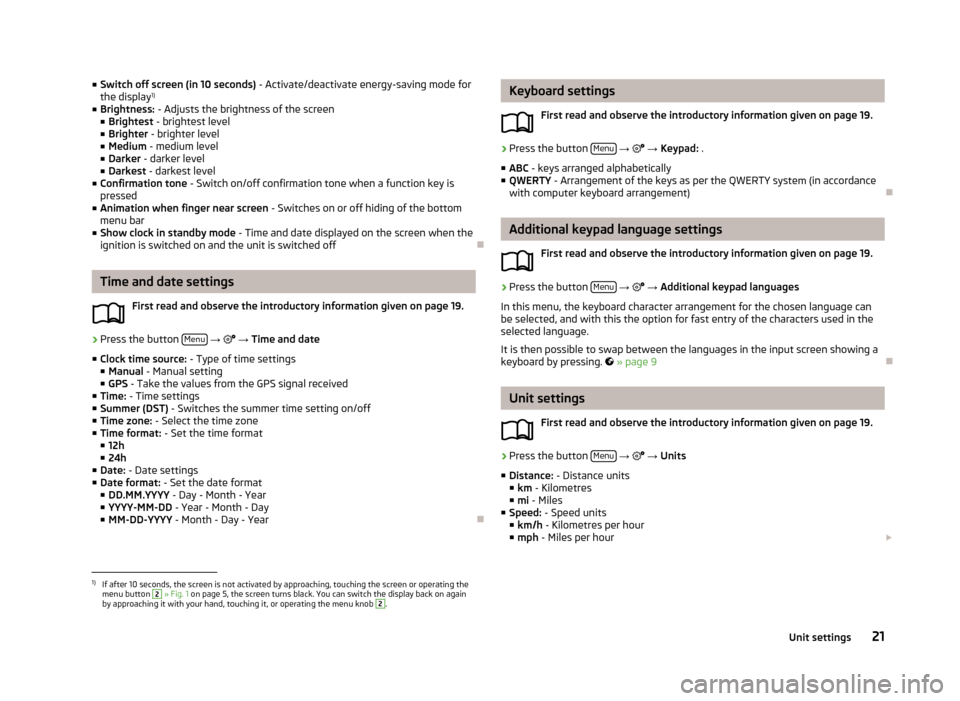
■Switch off screen (in 10 seconds) - Activate/deactivate energy-saving mode for
the display 1)
■ Brightness: - Adjusts the brightness of the screen
■ Brightest - brightest level
■ Brighter - brighter level
■ Medium - medium level
■ Darker - darker level
■ Darkest - darkest level
■ Confirmation tone - Switch on/off confirmation tone when a function key is
pressed
■ Animation when finger near screen - Switches on or off hiding of the bottom
menu bar
■ Show clock in standby mode - Time and date displayed on the screen when the
ignition is switched on and the unit is switched off
Time and date settings
First read and observe the introductory information given on page 19.
›
Press the button Menu
→
→ Time and date
■ Clock time source: - Type of time settings
■ Manual - Manual setting
■ GPS - Take the values from the GPS signal received
■ Time: - Time settings
■ Summer (DST) - Switches the summer time setting on/off
■ Time zone: - Select the time zone
■ Time format: - Set the time format
■ 12h
■ 24h
■ Date: - Date settings
■ Date format: - Set the date format
■ DD.MM.YYYY - Day - Month - Year
■ YYYY-MM-DD - Year - Month - Day
■ MM-DD-YYYY - Month - Day - Year
Keyboard settings
First read and observe the introductory information given on page 19.›
Press the button Menu
→ → Keypad: .
■ ABC - keys arranged alphabetically
■ QWERTY - Arrangement of the keys as per the QWERTY system (in accordance
with computer keyboard arrangement)
Additional keypad language settings
First read and observe the introductory information given on page 19.
›
Press the button Menu
→
→ Additional keypad languages
In this menu, the keyboard character arrangement for the chosen language can
be selected, and with this the option for fast entry of the characters used in the
selected language.
It is then possible to swap between the languages in the input screen showing a keyboard by pressing.
» page 9
Unit settings
First read and observe the introductory information given on page 19.
›
Press the button Menu
→
→ Units
■ Distance: - Distance units
■ km - Kilometres
■ mi - Miles
■ Speed: - Speed units
■ km/h - Kilometres per hour
■ mph - Miles per hour
1)
If after 10 seconds, the screen is not activated by approaching, touching the screen or operating the
menu button
2
» Fig. 1 on page 5, the screen turns black. You can switch the display back on again
by approaching it with your hand, touching it, or operating the menu knob
2
.
21Unit settings
Page 33 of 90
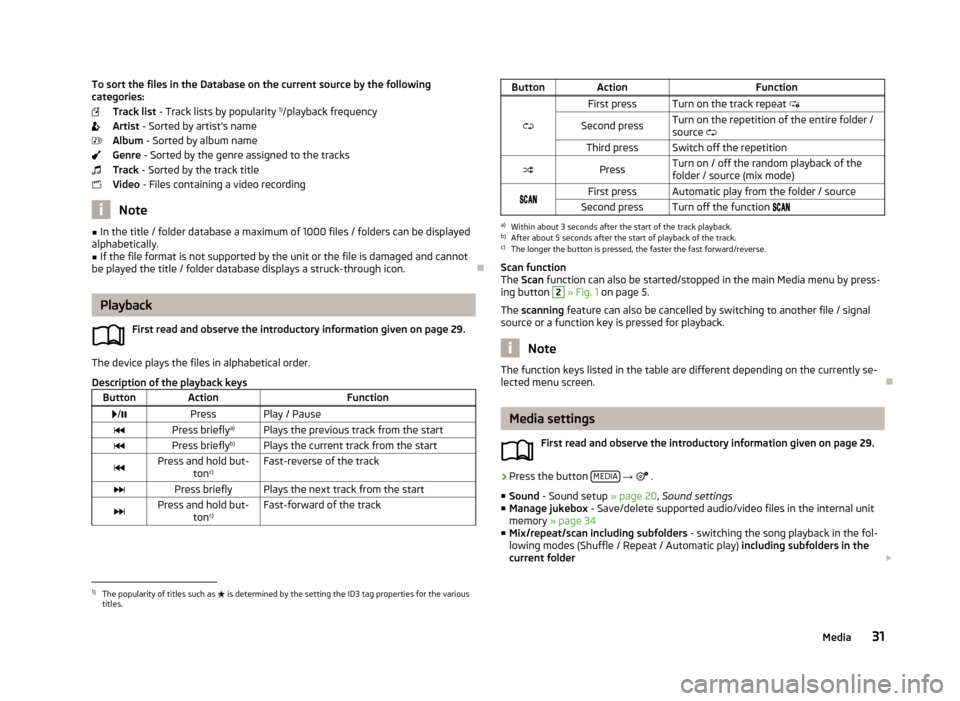
To sort the files in the Database on the current source by the followingcategories:
Track list - Track lists by popularity 1)
/playback frequency
Artist - Sorted by artist's name
Album - Sorted by album name
Genre - Sorted by the genre assigned to the tracks
Track - Sorted by the track title
Video - Files containing a video recording
Note
■
In the title / folder database a maximum of 1000 files / folders can be displayed
alphabetically.■
If the file format is not supported by the unit or the file is damaged and cannot
be played the title / folder database displays a struck-through icon.
Playback
First read and observe the introductory information given on page 29.
The device plays the files in alphabetical order.
Description of the playback keys
ButtonActionFunction /PressPlay / PausePress briefly a)Plays the previous track from the startPress brieflyb)Plays the current track from the startPress and hold but-
tonc)Fast-reverse of the trackPress brieflyPlays the next track from the startPress and hold but-
tonc)Fast-forward of the trackButtonActionFunction
First pressTurn on the track repeat
Second pressTurn on the repetition of the entire folder /
source Third pressSwitch off the repetitionPressTurn on / off the random playback of the
folder / source (mix mode)First pressAutomatic play from the folder / sourceSecond pressTurn off the function a)
Within about 3 seconds after the start of the track playback.
b)
After about 5 seconds after the start of playback of the track.
c)
The longer the button is pressed, the faster the fast forward/reverse.
Scan function
The Scan function can also be started/stopped in the main Media menu by press-
ing button
2
» Fig. 1 on page 5.
The scanning feature can also be cancelled by switching to another file / signal
source or a function key is pressed for playback.
Note
The function keys listed in the table are different depending on the currently se-
lected menu screen.
Media settings
First read and observe the introductory information given on page 29.
›
Press the button MEDIA
→
.
■ Sound - Sound setup » page 20, Sound settings
■ Manage jukebox - Save/delete supported audio/video files in the internal unit
memory » page 34
■ Mix/repeat/scan including subfolders - switching the song playback in the fol-
lowing modes (Shuffle / Repeat / Automatic play) including subfolders in the
current folder
1)
The popularity of titles such as
is determined by the setting the ID3 tag properties for the various
titles.
31Media
Page 44 of 90
ŠKODA permits the operation of telephones and two-way radio systems with a
professionally installed external aerial and a maximum transmission power of up to 10 watts.
Please ask at a specialist workshop about installing and operating telephones and two-way radio systems that have a transmission power of more than 10 W.
Operating telephones or two-way radio systems may interfere with the function- ality of the electronic systems in your vehicle.
The reasons for this are as follows:
› no external aerial;
› external aerial incorrectly installed;
› transmission power greater than 10 watts.
Note
■
We recommend that the installation of telephones and two-way radio systems
in a vehicle be carried out by a specialist garage.■
The telephone functions are dependent on the mobile network operators, as
well as the telephone being used. Further information is available from the mo-
bile network operator or to refer to the manual of the telephone.
■
In signal-free areas reception can be disturbed or a call may be disconnected.
■
Most modern electronic equipment is shielded from RF signals. In exceptional
cases, electronic equipment may not be shielded against the RF signals and tele-
phone service may be disrupted.
Main menu
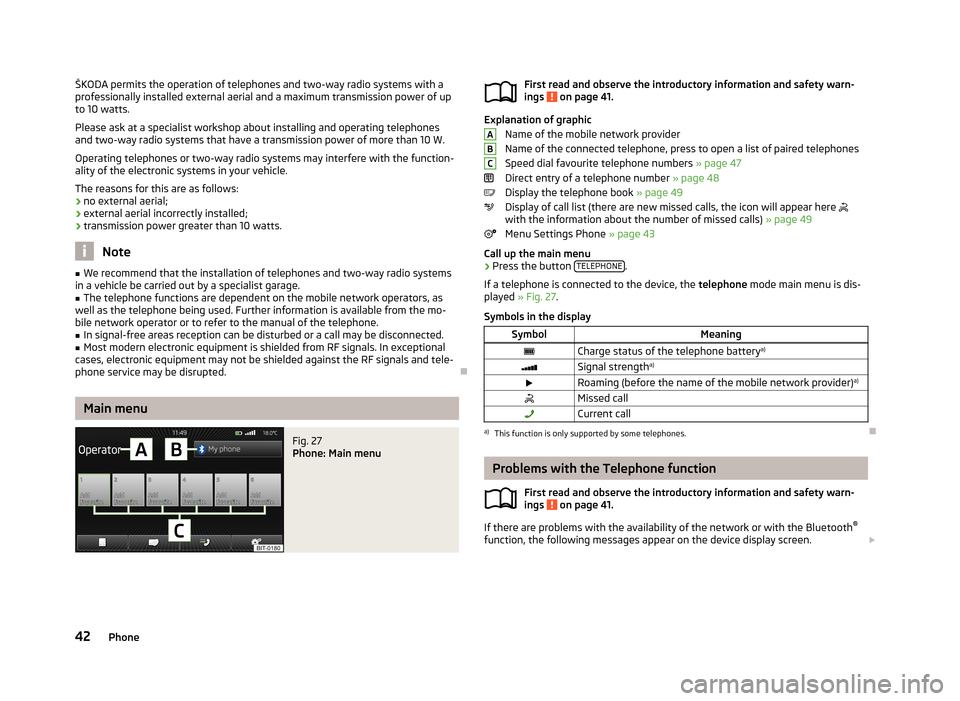
Fig. 27
Phone: Main menu
First read and observe the introductory information and safety warn-
ings on page 41.
Explanation of graphic
Name of the mobile network provider
Name of the connected telephone, press to open a list of paired telephones
Speed dial favourite telephone numbers » page 47
Direct entry of a telephone number » page 48
Display the telephone book » page 49
Display of call list (there are new missed calls, the icon will appear here
with the information about the number of missed calls) » page 49
Menu Settings Phone » page 43
Call up the main menu
›
Press the button TELEPHONE.
If a telephone is connected to the device, the telephone mode main menu is dis-
played » Fig. 27 .
Symbols in the display
SymbolMeaningCharge status of the telephone battery a)Signal strengtha)Roaming (before the name of the mobile network provider) a)Missed callCurrent calla)
This function is only supported by some telephones.
Problems with the Telephone function
First read and observe the introductory information and safety warn-
ings
on page 41.
If there are problems with the availability of the network or with the Bluetooth ®
function, the following messages appear on the device display screen.
ABC42Phone
Page 58 of 90
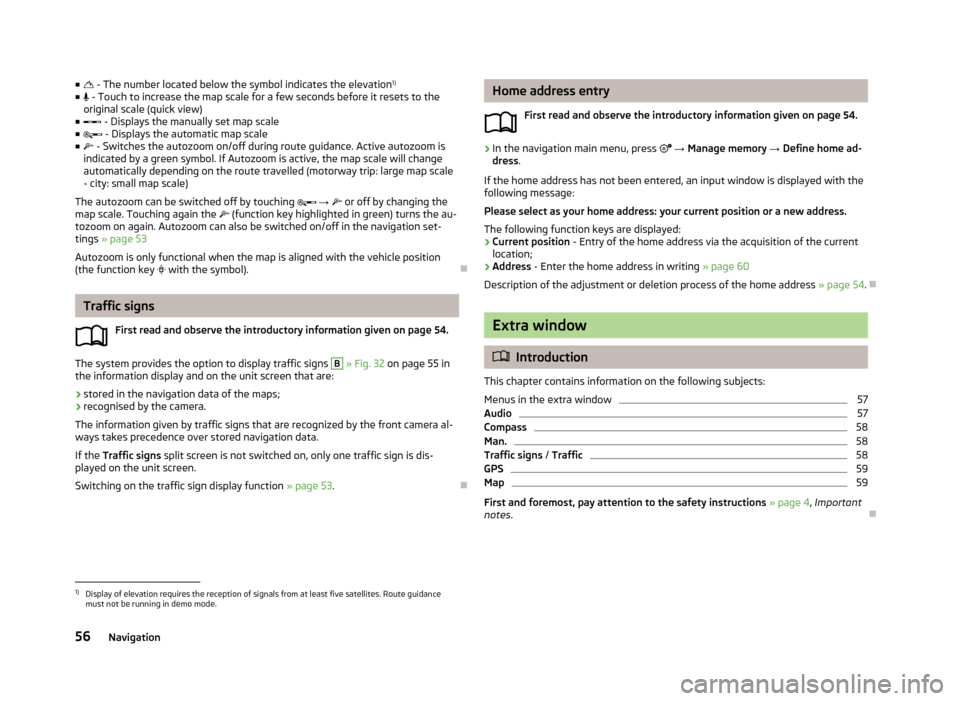
■ - The number located below the symbol indicates the elevation 1)
■ - Touch to increase the map scale for a few seconds before it resets to the
original scale (quick view)
■ - Displays the manually set map scale
■ - Displays the automatic map scale
■ - Switches the autozoom on/off during route guidance. Active autozoom is
indicated by a green symbol. If Autozoom is active, the map scale will change
automatically depending on the route travelled (motorway trip: large map scale
- city: small map scale)
The autozoom can be switched off by touching → or off by changing the
map scale. Touching again the (function key highlighted in green) turns the au-
tozoom on again. Autozoom can also be switched on/off in the navigation set-
tings » page 53
Autozoom is only functional when the map is aligned with the vehicle position
(the function key
with the symbol).
Traffic signs
First read and observe the introductory information given on page 54.
The system provides the option to display traffic signs
B
» Fig. 32 on page 55 in
the information display and on the unit screen that are:
› stored in the navigation data of the maps;
› recognised by the camera.
The information given by traffic signs that are recognized by the front camera al- ways takes precedence over stored navigation data.
If the Traffic signs split screen is not switched on, only one traffic sign is dis-
played on the unit screen.
Switching on the traffic sign display function » page 53.
Home address entry
First read and observe the introductory information given on page 54.›
In the navigation main menu, press → Manage memory → Define home ad-
dress .
If the home address has not been entered, an input window is displayed with the following message:
Please select as your home address: your current position or a new address.
The following function keys are displayed:
› Current position
- Entry of the home address via the acquisition of the current
location;
› Address
- Enter the home address in writing » page 60
Description of the adjustment or deletion process of the home address » page 54.
Extra window
Introduction
This chapter contains information on the following subjects:
Menus in the extra window
57
Audio
57
Compass
58
Man.
58
Traffic signs / Traffic
58
GPS
59
Map
59
First and foremost, pay attention to the safety instructions » page 4 , Important
notes .
1)
Display of elevation requires the reception of signals from at least five satellites. Route guidance
must not be running in demo mode.
56Navigation
Page 70 of 90
Route69Lane guidance69
First and foremost, pay attention to the safety instructions » page 4 , Important
notes .
Route calculation
First read and observe the introductory information given on page 67.
The route is calculated automatically according to the entered destination. The
calculation takes the settings of the route options » page 53 (route type, dynamic
route, etc.) into account.
The route is recalculated each time if you ignore driving recommendations or change the route. This process takes only a few seconds. Nav. announcements
can only then be re-transmitted.
If Demo mode is switched on » page 54, a prompt appears asking whether you
want the guidance to start in demo mode or normal mode.
Demo mode provides a travel simulation to the entered destination. It offers the
chance to travel the calculated route “virtually” on the device screen.
If an alternative route option is set, function keys are displayed, following the cal- culation, for the route types with information on the route length and the expec-ted travelling time.
Route Type
economically
quickly
short
Selecting the route type will start route guidance. After the route has been calculated, additional information specific to the selec-ted route is displayed on the function keys for the route types » page 53, e.g., use
of motorways
, Toll roads
and the like.
If the option for alternative routes is disabled, the route is calculated and route
guidance is started according to the preferred route » page 53.
It is possible to select a pre-calculated route before the calculation of the remain- ing routes is completed.
The unit tries to allow for continued guidance even if the navigation data is in-
complete or there is no data at all for the given area (e.g., one-way streets, road
types, etc.).
Interrupt and continue route guidance
If the ignition is switched off and on again and the key was left in the ignition (in
vehicles with the KESSY system, when the ignition was switched off):
› within 30 minutes - route guidance is continued, taking into account the calcu-
lated route
› Between 30 and 40 min - the screen switches to “standby” mode (energy-sav-
ing mode of the screen); the route guidance continues using the calculated route
› Between 40 min and 120 min - the unit screen displays the message
Continue
route guidance? ; after you confirm the message, the route guidance continues
using the calculated route;
› After 120 min - The route guidance is cancelled.
Switch ignition off and on again and remove the key temporarily (in vehicles with
the KESSY system, switch off the ignition and open the driver's door):
› Within 10 min - route guidance is continued, taking into account the calculated
route
› Between 10 min and 120 min - the screen switches to “standby mode” (energy-
saving mode of the screen); the unit screen displays the message Continue
route guidance? ; after you confirm the message, the route guidance continues
using the calculated route
› After 120 min - The route guidance is cancelled.
Explanation of graphic navigation instructions
First read and observe the introductory information given on page 67.
The graphical navigation instructions are displayed:› in the MAXI DOT display
» page 10;
› in the extra window of the device screen
» page 58.
68Navigation
Page 76 of 90
Vehicle
Vehicle systems
Vehicle settings
Introduction
This chapter contains information on the following subjects:
Selecting driving mode
74
Vehicle data
75
Auxiliary heater and ventilation
76
ESC system
77
Tyre
77
Driver assistance
77
Parking and manoeuvring
78
Light
78
mirrors and wiper
79
Opening and closing
79
Seats
79
Multifunction display
79
Service
80
Restore factory settings
80
Climatronic settings
80
First and foremost, pay attention to the safety instructions
» page 4 , Important
notes .
Settings relating to the vehicle systems can only be made when the ignition is
switched on.
Note■ The individual systems are described in the » Vehicle Owner's Manual .■If the functions of some systems are disabled, some functions, such as parts of
the ESC system, are switched on again automatically for security reasons, after
switching the ignition off and on.■
When you press the button CAR, the system displays the last displayed menu
.
Selecting driving mode
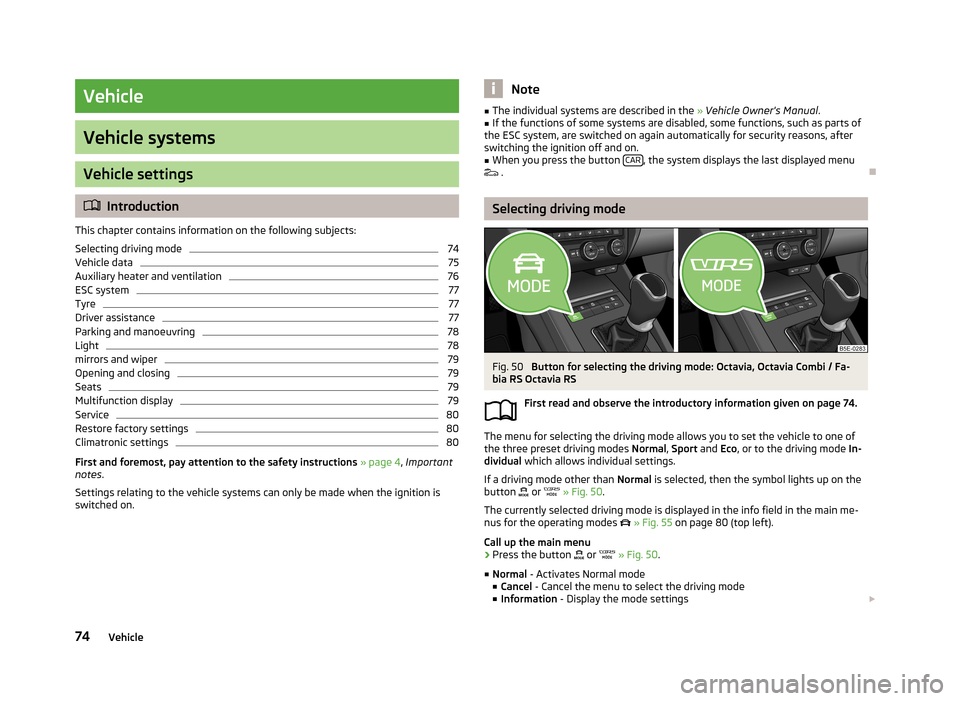
Fig. 50
Button for selecting the driving mode: Octavia, Octavia Combi / Fa-
bia RS Octavia RS
First read and observe the introductory information given on page 74.
The menu for selecting the driving mode allows you to set the vehicle to one of
the three preset driving modes Normal, Sport and Eco, or to the driving mode In-
dividual which allows individual settings.
If a driving mode other than Normal is selected, then the symbol lights up on the
button
or
» Fig. 50 .
The currently selected driving mode is displayed in the info field in the main me- nus for the operating modes
» Fig. 55 on page 80 (top left).
Call up the main menu
›
Press the button
or
» Fig. 50 .
■ Normal - Activates Normal mode
■ Cancel - Cancel the menu to select the driving mode
■ Information - Display the mode settings
74Vehicle
Page 77 of 90
■Sport - Activates Sport mode
■ Cancel - Cancel the menu to select the driving mode
■ Information - Display the mode settings
■ Eco - Activates the fuel-saving mode
■ Cancel - Cancel the menu to select the driving mode
■ Information - Display the mode settings
■ Individual - Activates the Individual mode
■ Cancel - Cancel the menu to select the driving mode
■ Setup - Individual setting
■ Steering: - Set the power steering characteristics
■ Normal - Normal
■ Sport - Sports
■ Engine: - Set the engine (drive) characteristics
■ Normal - Normal
■ Sport - Sports
■ Eco - Economical
■ ACC: - Set the vehicle acceleration when adaptive cruise control is activated
■ Normal - Normal
■ Sport - Sports
■ Eco - Economical
■ Dynamic bend lighting: - Set the characteristics of the adaptive headlights
■ Normal - Normal
■ Sport - Sports
■ Eco - Economical
■ Air conditioning: - Sets the Climatronic characteristics
■ Normal - Normal
■ Eco - Economical
■ Reset mode - Sets the profile Normal
Note
If you do not operate the unit for longer than approx. 10 seconds in the "Select
driving mode" menu, it will switch to the last selected menu or switch itself off.
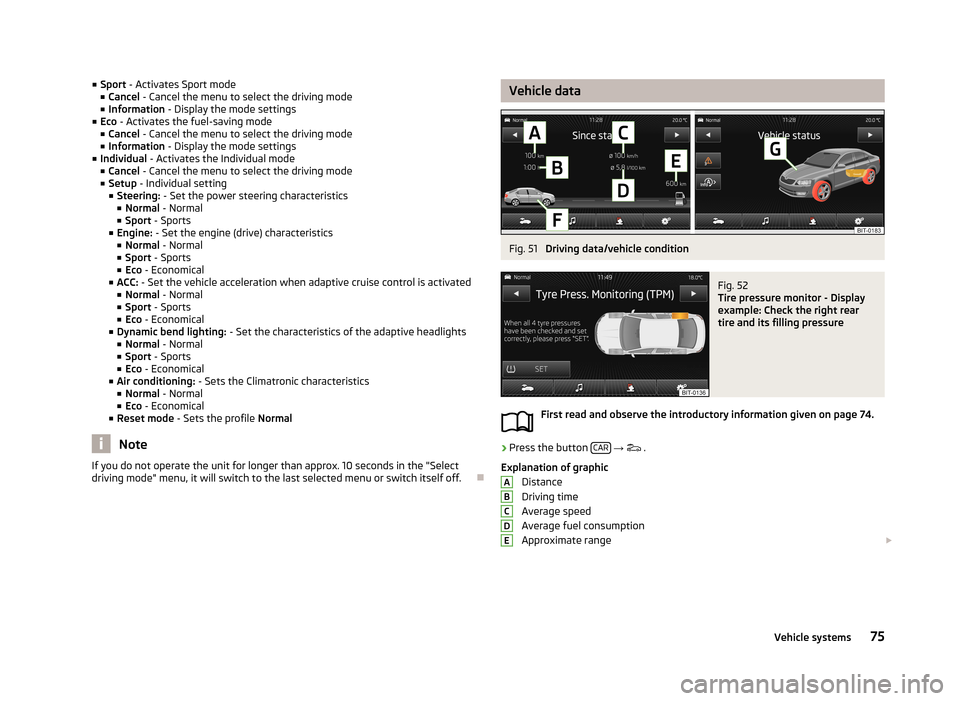
Vehicle dataFig. 51
Driving data/vehicle condition
Fig. 52
Tire pressure monitor - Display
example: Check the right rear
tire and its filling pressure
First read and observe the introductory information given on page 74.
›
Press the button CAR
→
.
Explanation of graphic Distance
Driving time
Average speed
Average fuel consumption
Approximate range
ABCDE75Vehicle systems
Page 79 of 90
ESC systemFirst read and observe the introductory information given on page 74.›
Press the button CAR
→ → ESC system: .
■ Activated - Switch on all components of the ESC system
■ ASR off - Switch off the ASR system
■ ESC sport - activation of ESC Sport
Tyre
First read and observe the introductory information given on page 74.
›
Press the button CAR
→
→ Tyres
■ TPMS - Tyre pressure monitoring system
■ SET - Start a new calibration process
■ Winter tyres - Sets the speed limit for winter tyres
■ Speed warning - Snow tyres speed warning on/off
■ Warning at - Sets the speed for the warning
Driver assistance
First read and observe the introductory information given on page 74.
›
Press the button CAR
→
→ Driver assistance
■ ACC (adaptive cruise control) - Sets the adaptive cruise control
■ Driving programme: - Set the vehicle acceleration when adaptive cruise con-
trol is activated 1)
■ Normal - Normal
■ Sport - Sports
■ Eco - Economical
■ Last distance selected - Last selected distance on/off
■
Distance: - Set the distance monitoring to the vehicles ahead
■ Very close - Very small distance
■ Close - Small distance
■ Medium - Medium distance
■ Far - Large distance
■ Very far - Very large distance
■ Front Assist (ambient traffic monitor. sys.) - Set the assistant for distance moni-
toring to the vehicles ahead ■ Active - Activate/deactivate the assistant
■ Advance warning - Activate/deactivate advance warning
■ Display distance warning - Activate/deactivate distance warnings
■ Lane Assist (lane departure warning sys.) - Settings for Lane Assist
■ Active - Activate/deactivate the assistant
■ Adaptive lane guidance - Activate/deactivate adaptive lane guidance
■ Traffic sign recognition - Settings for the traffic sign recognition assistant
■ Show in multifunction display (MFD) - Activate/deactivate the display of traf-
fic signs in the information display
■ Show traffic signs relevant to trailers - Activate/deactivate the display of
traffic signs relevant for trailer operation
■ Driver Alert System - Activate/deactivate the driver alert system
■ Proactive occupant protection - Activate/deactivate proactive passenger pro-
tection1)
This can be set in the menu on vehicles with a travel mode option » page 74, Selecting driving mode .
77Vehicle systems
Page 80 of 90
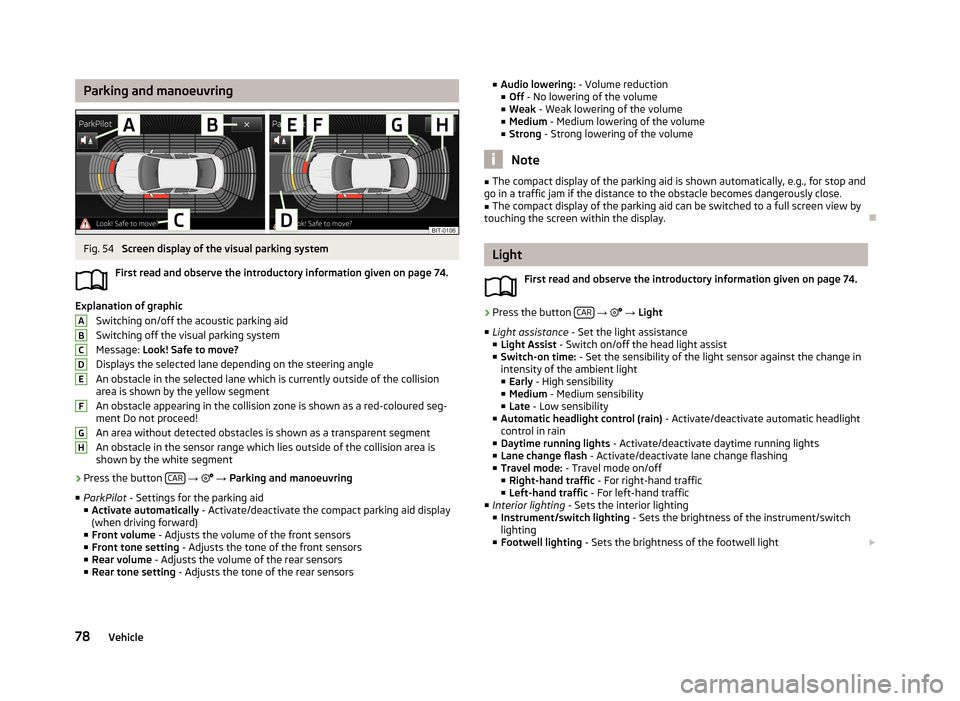
Parking and manoeuvringFig. 54
Screen display of the visual parking system
First read and observe the introductory information given on page 74.
Explanation of graphic Switching on/off the acoustic parking aidSwitching off the visual parking system
Message: Look! Safe to move?
Displays the selected lane depending on the steering angle An obstacle in the selected lane which is currently outside of the collisionarea is shown by the yellow segment
An obstacle appearing in the collision zone is shown as a red-coloured seg- ment Do not proceed!
An area without detected obstacles is shown as a transparent segment An obstacle in the sensor range which lies outside of the collision area is
shown by the white segment
›
Press the button CAR
→
→ Parking and manoeuvring
■ ParkPilot - Settings for the parking aid
■ Activate automatically - Activate/deactivate the compact parking aid display
(when driving forward)
■ Front volume - Adjusts the volume of the front sensors
■ Front tone setting - Adjusts the tone of the front sensors
■ Rear volume - Adjusts the volume of the rear sensors
■ Rear tone setting - Adjusts the tone of the rear sensors
ABCDEFGH■
Audio lowering: - Volume reduction
■ Off - No lowering of the volume
■ Weak - Weak lowering of the volume
■ Medium - Medium lowering of the volume
■ Strong - Strong lowering of the volume
Note
■
The compact display of the parking aid is shown automatically, e.g., for stop and
go in a traffic jam if the distance to the obstacle becomes dangerously close.■
The compact display of the parking aid can be switched to a full screen view by
touching the screen within the display.
Light
First read and observe the introductory information given on page 74.
›
Press the button CAR
→
→ Light
■ Light assistance - Set the light assistance
■ Light Assist - Switch on/off the head light assist
■ Switch-on time: - Set the sensibility of the light sensor against the change in
intensity of the ambient light
■ Early - High sensibility
■ Medium - Medium sensibility
■ Late - Low sensibility
■ Automatic headlight control (rain) - Activate/deactivate automatic headlight
control in rain
■ Daytime running lights - Activate/deactivate daytime running lights
■ Lane change flash - Activate/deactivate lane change flashing
■ Travel mode: - Travel mode on/off
■ Right-hand traffic - For right-hand traffic
■ Left-hand traffic - For left-hand traffic
■ Interior lighting - Sets the interior lighting
■ Instrument/switch lighting - Sets the brightness of the instrument/switch
lighting
■ Footwell lighting - Sets the brightness of the footwell light
78Vehicle
Page 83 of 90
■Automatic air recirculation - Automatic recirculated air mode on/off
■ Automatic auxiliary heater - Quick interior heating on/off
Note
■
If you do not operate the unit for longer than 10 seconds in the "Climatronic"
menu and Climatronic was not switched on before the menu was opened, the
unit will switch itself off.■
If you switch off the automatic mode of Climatronic by increasing or reducing
the fan speed, the coloured display of the airflow from the air outlets will not be
displayed.
81Vehicle systems