service interval SKODA OCTAVIA 2013 3.G / (5E) User Guide
[x] Cancel search | Manufacturer: SKODA, Model Year: 2013, Model line: OCTAVIA, Model: SKODA OCTAVIA 2013 3.G / (5E)Pages: 287, PDF Size: 18.55 MB
Page 159 of 287
The sensor function may be impaired in the events of one of the following.
› The sensor is covered by mud, snow or debris, for example.
› The sensor or its immediate surroundings are covered by other objects, for ex-
ample, a sticker is attached.
› When visibility is poor, (e.g. fog, heavy rain, thick snowfall).
If the sensor is dirty or does not have “visibility” for any other reason, the follow-
ing message appears in the instrument cluster display.
Front Assist: no sensor view.
Stop the car, switch off the engine and clean the sensor or eliminate the obstacle
causing the lack of“visibility”. Should Front Assist still be unavailable after the en-
gine is restarted, consult a specialist garage for help.WARNING■ If you suspect that the sensor is damaged, deactivate Front Assist. Have the
sensor checked by a specialist garage.■
The sensor can become misaligned by collisions or by damage to the front of
the vehicle, the wheel arch or the underside of the vehicle. This can lead to
impaired function of the Front Assist function - risk of accidents! If this is the
case, have the sensor checked by a specialist garage.
■
Any improperly carried out work to the front of the vehicle may cause the
sensor to become misaligned. We therefore recommend only having these
modifications and technical alterations carried out by a specialist garage. Please also observed the instructions in » page 200, Service work, adjust-
ments and technical alterations .
■
The area in front of and around the sensor must not be covered with stick-
ers, additional lights or similar items. This can lead to impaired function of the
sensor - risk of accidents!
WARNINGThe sensor may not be able to distinguish all objects correctly under certain
circumstances. You should therefore not use Front Assist in the following ca-
ses - risk of accidents!■
When driving through places where metal objects (such as metal buildings,
railroad tracks, etc.) can be found.
■
When driving through very divided and enclosed spaces (such as large-ca-
pacity garages, car ferries and the like.)
CAUTIONRemove the snow with a brush and the ice with a solvent-free de-icer.
Operation
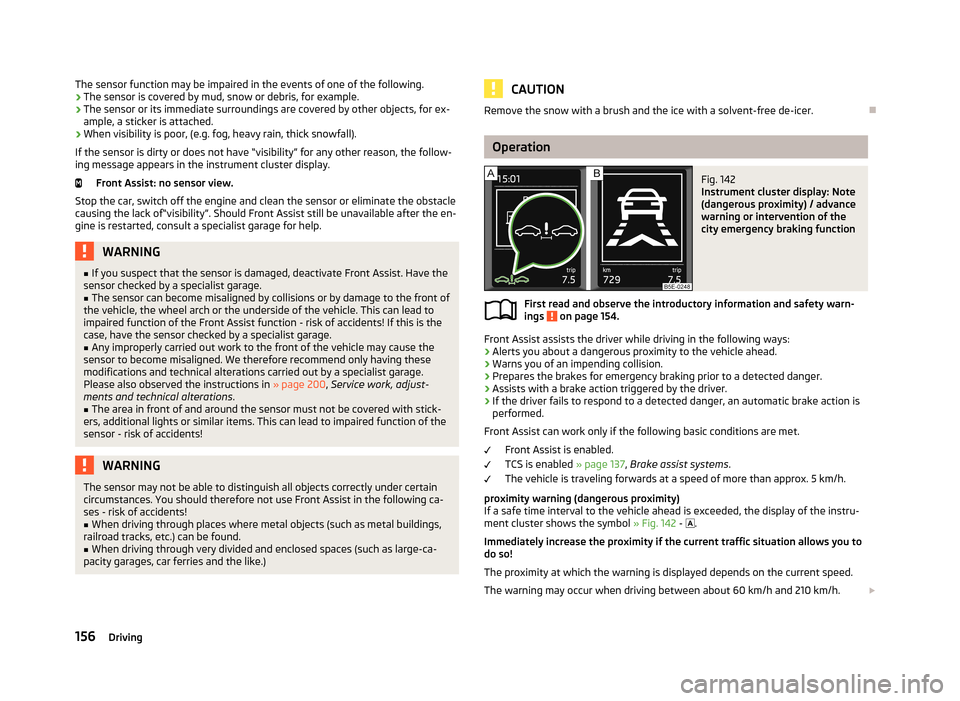
Fig. 142
Instrument cluster display: Note
(dangerous proximity) / advance
warning or intervention of the
city emergency braking function
First read and observe the introductory information and safety warn-
ings on page 154.
Front Assist assists the driver while driving in the following ways:
› Alerts you about a dangerous proximity to the vehicle ahead.
› Warns you of an impending collision.
› Prepares the brakes for emergency braking prior to a detected danger.
› Assists with a brake action triggered by the driver.
› If the driver fails to respond to a detected danger, an automatic brake action is
performed.
Front Assist can work only if the following basic conditions are met. Front Assist is enabled.
TCS is enabled » page 137, Brake assist systems .
The vehicle is traveling forwards at a speed of more than approx. 5 km/h.
proximity warning (dangerous proximity)
If a safe time interval to the vehicle ahead is exceeded, the display of the instru- ment cluster shows the symbol » Fig. 142 -
.
Immediately increase the proximity if the current traffic situation allows you to do so!
The proximity at which the warning is displayed depends on the current speed.
The warning may occur when driving between about 60 km/h and 210 km/h.
156Driving
Page 201 of 287
General Maintenance
Vehicle care
Service intervals
Introduction
This chapter contains information on the following subjects:
Overview of service intervals
198
Fixed service intervals QI1 - QI4
199
Variable service interval QI6
199
Information about the ŠKODA service
199
The service interval display in the instrument cluster will remind you to carry out every service stipulated by the manufacturer at the right time in order to prevent you from forgetting any.
Timely and proper performance of servicing works is one of the requirements for the settlement of potential warranty claims.
The completion of services can be verified by the validated service certificate and the corresponding receipts.
The specified service intervals are tailored to normal operating conditions.
In the case of difficult operating conditions, it is necessary to have some service
work performed before the date of the next service or between the specified
service intervals. This applies mainly to the cleaning or the replacement of the air
filter insert in regions with heavy dust pollution as well as checking and replacing
the toothed belt, but also to vehicles with diesel particle filters, which can put
greater strain on the engine oil.
These difficult conditions are: › Fuel with sulphur content;
› Frequent short trips;
› Longer periods of engine idling (e.g. taxis);
› Operation in areas with heavy dust pollution;
› Frequent trailer operation;
›
Predominantly stop-and-go traffic as is often the case in city driving, for exam-
ple;
› Operation predominantly during winter.
A service consultant at the specialist garage will tell you whether the operating conditions of your vehicle may make it necessary for service work to be carried
out between the normal service intervals.
Different service charges may apply from the particular scope of work required,
depending on the vehicle type and equipment and the status of your vehicle.
Note
■ The customer is responsible for covering the cost of all services including
changing or replenishing the oil, even during the warranty period, unless stated otherwise in the ŠKODA AUTO a.s. warranty terms or other agreements.■
You will be informed about the current service scopes for the particular service
work by the specialist garage.
Overview of service intervals
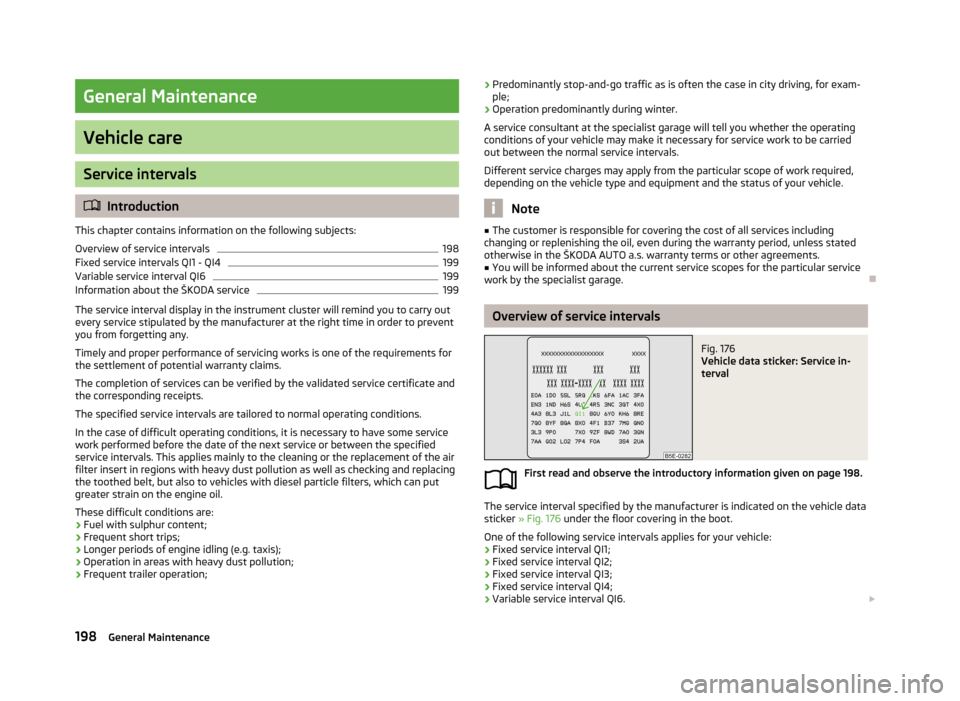
Fig. 176
Vehicle data sticker: Service in-
terval
First read and observe the introductory information given on page 198.
The service interval specified by the manufacturer is indicated on the vehicle data sticker » Fig. 176 under the floor covering in the boot.
One of the following service intervals applies for your vehicle: › Fixed service interval QI1;
› Fixed service interval QI2;
› Fixed service interval QI3;
› Fixed service interval QI4;
› Variable service interval QI6.
198General Maintenance
Page 202 of 287
In order to operate a vehicle with a variable service interval, it must only be fil-
led and topped up with the prescribed engine oil.
If this engine oil is not available, the oil change is subject to a fixed service inter-
val. In this case, the vehicle must be changed to the fixed service interval.
Note
■
The corresponding motor oil specifications » page 219.■A specialist garage can perform the changeover from the variable service inter-
val to the fixed service interval, or from the fixed service interval to the variable
service interval.
Fixed service intervals QI1 - QI4
First read and observe the introductory information given on page 198.
InspectionQI1 - QI4
After the first 30,000 km or 2 years a)
, then every
30,000 km or every 1 year a)
.Every 15,000 km or every 1 year a)
(applies to Rus-
sia).
Oil change service
QI1Every 5,000 km or every 1 year a)
.QI2Every 7,500 km or every 1 year a)
.QI3Every 10,000 km or every 1 year a)
.QI4Every 15,000 km or every 1 year a)
.Brake fluid
change First change after 3 years, then every 2 yearsa)
(whichever comes first).
WARNINGThe brake fluid must always be changed after the first 3 years and then every
2 years. Longer intervals between changing the brake fluid can cause vapour
bubbles to form in the brake system on sharp braking. This can impair the effi- ciency of the brakes – risk of accident!NoteFor diesel operation with a high sulphur content, the oil must be changed every
7500 km. Ask your specialist garage for information on the countries where diesel fuel has a high sulphur content.
Variable service interval QI6
First read and observe the introductory information given on page 198.
The service intervals depend on the intensity at which the vehicle is driven and
the local conditions in which the vehicle is used. For example, your vehicle is sub-
jected to different loads when driven over short distances than when driven over
long distances. The service intervals are therefore variable.
InspectionAfter the first 30,000 km or 2 years a)
, then every 30,000 km
or every 1 year a)
.Oil change serviceAccording to the service interval display (at the latest after
30,000 km or 2 years a)
).Brake fluid
changeFirst change after 3 years, then every 2 yearsa)
(whichever comes first).
WARNINGThe brake fluid must always be changed after the first 3 years and then every
2 years. Longer intervals between changing the brake fluid can cause vapour
bubbles to form in the brake system on sharp braking. This can impair the effi- ciency of the brakes – risk of accident!
Information about the ŠKODA service
First read and observe the introductory information given on page 198.
You have access to an extensive servicing network of ŠKODA Service Partners for
the maintenance of your vehicle.
199Vehicle care
Page 212 of 287
Regular and proper care helps to ensure efficiency and to maintain the value of
your vehicle.
We recommend using vehicle care products from ŠKODA Original Accessories. These are available from ŠKODA Partners. The usage instructions on the package
must be observed.WARNING■ Vehicle care products may be harmful to your health if not used according to
the instructions.■
Always store vehicle care products safely, in particular out of the reach of
children – risk of poisoning!
CAUTION
■ Be sure to check clothing for colourfastness to avoid any damage or visible
stains on the material (leather), panels and textiles.■
Remove fresh stains such as those from ball-point pens, ink, lipstick, shoe pol-
ish, etc., from the material (leather), panels and textiles as quickly as possible.
■
Air fresheners and scents can be hazardous to heath when the temperature in-
side the vehicle is high.
■
Do not attach scents or air fresheners to the dash panel – there is a risk of dam-
age to the dash panel.
■
Do not stick any stickers on the inside of the rear windows, the rear side win-
dows and in the vicinity of the heating elements on the windscreen or near the
window aerial. These may get damaged.
■
Do not clean the roof panelling with a brush – risk of damage to the surface of
the panelling.
■
Cleaner that contain solvents can damage the material being cleaned.
■
Apply only a small amount of the cleaning and care product.
For the sake of the environment
Used vehicle care product cans represent hazardous waste that is harmful to the
environment. These must be disposed of in accordance with national legal regula-
tions.NoteDue to the special tools and knowledge required, and to avoid any potential prob-
lems with the cleaning and care of the interior of your vehicle, we recommend
that cleaning and care of the interior of your vehicle be carried out by a ŠKODA service partner.
Natural leather
First read and observe the introductory information and safety warn-
ings
on page 208.
Leather is a natural material with specific properties, and requires regular clean-
ing and maintenance.
Depending on the amount of wear-and-tear, the leather should be cleaned on a
regular basis.
Dust and dirt in the pores and folds act as abrasive materials. This leads to severe corrosion and the premature brittleness of the leather surface.
We recommend that you remove dust regularly and at short intervals using a
cloth or vacuum cleaner.
Clean soiled leather surfaces with a water-dampened cotton or woollen cloth and
then dry with a clean, dry cloth »
.
Clean severely soiled areas with a cloth soaked in a mild soap solution (2 table-
spoons of neutral soap to 1 litre of water).
To remove stains , use a cleaning agent specially designed for this purpose.
Treat the leather regularly and at suitable intervals using a suitable leather care
product.
CAUTION
■ Ensure that no part of the leather is soaked through during cleaning and that
no water gets into the seams. Otherwise, the leather could become brittle or
cracked.■
Avoid leaving the vehicle for lengthy periods in bright sunlight to avoid the
leather from bleaching. If the vehicle is parked in the open for lengthy periods, protect the leather from direct sunlight by covering it.
209Vehicle care
Page 222 of 287
CAUTION■Under no circumstances must radiator antifreeze or other additives be added to
the windscreen washer fluid.■
If the vehicle is fitted with a headlight cleaning system, only cleaning products
which do not attack the polycarbonate coating of the headlights must be added
to the windscreen washer fluid.
■
Do not remove the filter from the windscreen washer fluid reservoir when re-
plenishing it with liquid otherwise the liquid transportation system can be conta-
minated, which can cause the windscreen washer system to malfunction.
Engine oil
Introduction
This chapter contains information on the following subjects:
Specifications and capacity
219
Checking the oil level
220
Replenishing
221
Changing
221
The engine has been factory-filled with a high-grade oil that can be use through-
out the year - except in extreme climate zones.
The engine oils are undergoing continuous further development. Thus the infor-
mation stated in this Owner's Manual is only correct at the time of publication.
ŠKODA Service Partners are informed about the latest changes by the manufac-
turer. We therefore recommend that the oil change be completed by a ŠKODA
Service Partner.
The specifications (VW standards) stated in the following can be indicated sepa-
rately or together with other specifications on the bottle.
The oil capacities include oil filter change. Check the oil level when filling; do not
over fill. The oil level must be between the markings » page 220.
WARNING■
The engine compartment of your car is a hazardous area. The following
warning instructions must be followed at all times when working in the en-
gine compartment » page 215.■
Do not continue your journey if for some reason it is not possible to top
up the engine oil! Switch off the engine and seek assistance from a specialist
garage.
■
If the oil level is above level
A
» Fig. 184 on page 220, do not cointinue to
drive! Switch off the engine and seek assistance from a specialist garage.
CAUTION
Do not pour any additives into the engine oil – risk of serious damage to the en-
gine parts!
Note
■ Before a long drive we recommend that you purchase and carry with you engine
oil which complies with the specification for your vehicle.■
We recommend that you use oils from ŠKODA Original Accessories.
■
If your skin has come into contact with oil, it must be washed thoroughly.
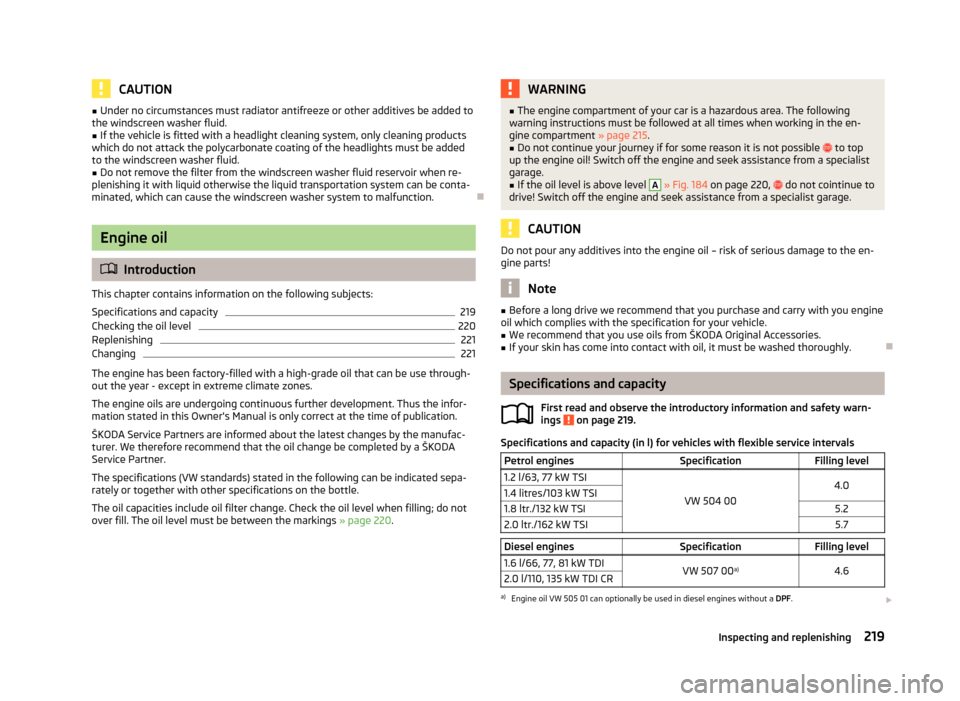
Specifications and capacity
First read and observe the introductory information and safety warn-
ings
on page 219.
Specifications and capacity (in l) for vehicles with flexible service intervals
Petrol enginesSpecificationFilling level1.2 l/63, 77 kW TSI
VW 504 00
4.01.4 litres/103 kW TSI1.8 ltr./132 kW TSI5.22.0 ltr./162 kW TSI5.7Diesel enginesSpecificationFilling level1.6 l/66, 77, 81 kW TDIVW 507 00 a)4.62.0 l/110, 135 kW TDI CRa)
Engine oil VW 505 01 can optionally be used in diesel engines without a
DPF.
219Inspecting and replenishing
Page 223 of 287
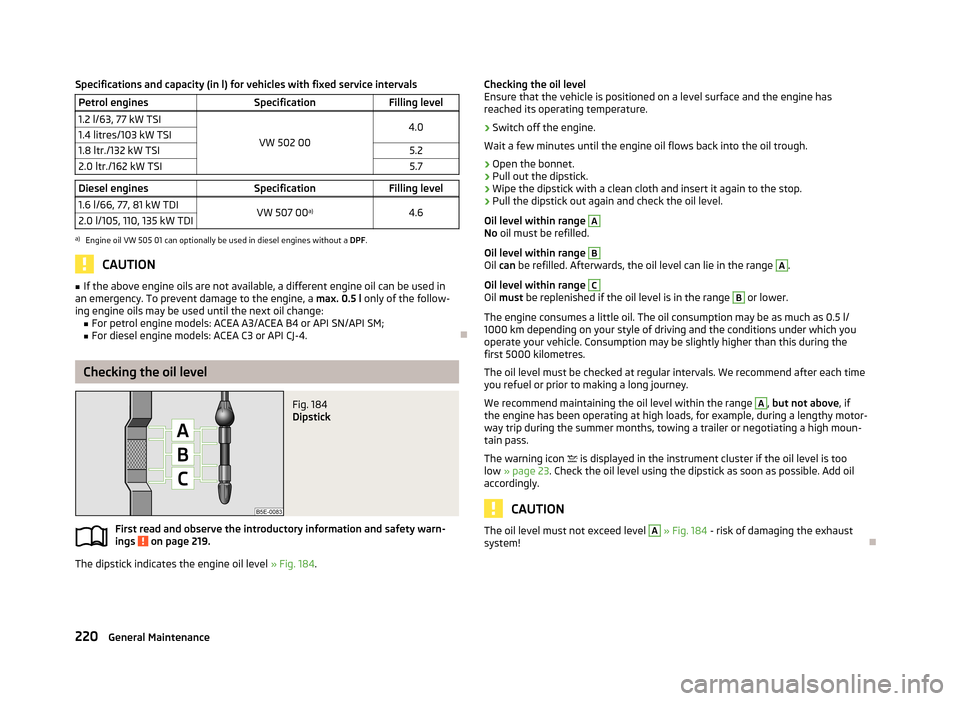
Specifications and capacity (in l) for vehicles with fixed service intervalsPetrol enginesSpecificationFilling level1.2 l/63, 77 kW TSI
VW 502 00
4.01.4 litres/103 kW TSI1.8 ltr./132 kW TSI5.22.0 ltr./162 kW TSI5.7Diesel enginesSpecificationFilling level1.6 l/66, 77, 81 kW TDIVW 507 00a)4.62.0 l/105, 110, 135 kW TDIa)
Engine oil VW 505 01 can optionally be used in diesel engines without a
DPF.
CAUTION
■
If the above engine oils are not available, a different engine oil can be used in
an emergency. To prevent damage to the engine, a max. 0.5 l only of the follow-
ing engine oils may be used until the next oil change: ■ For petrol engine models: ACEA A3/ACEA B4 or API SN/API SM;
■ For diesel engine models: ACEA C3 or API CJ-4.
Checking the oil level
Fig. 184
Dipstick
First read and observe the introductory information and safety warn-
ings on page 219.
The dipstick indicates the engine oil level » Fig. 184.
Checking the oil level
Ensure that the vehicle is positioned on a level surface and the engine has
reached its operating temperature.›
Switch off the engine.
Wait a few minutes until the engine oil flows back into the oil trough.
›
Open the bonnet.
›
Pull out the dipstick.
›
Wipe the dipstick with a clean cloth and insert it again to the stop.
›
Pull the dipstick out again and check the oil level.
Oil level within range
A
No oil must be refilled.
Oil level within range
B
Oil can be refilled. Afterwards, the oil level can lie in the range
A
.
Oil level within range
C
Oil must be replenished if the oil level is in the range
B
or lower.
The engine consumes a little oil. The oil consumption may be as much as 0.5 l/
1000 km depending on your style of driving and the conditions under which you
operate your vehicle. Consumption may be slightly higher than this during the
first 5000 kilometres.
The oil level must be checked at regular intervals. We recommend after each time
you refuel or prior to making a long journey.
We recommend maintaining the oil level within the range
A
, but not above , if
the engine has been operating at high loads, for example, during a lengthy motor-
way trip during the summer months, towing a trailer or negotiating a high moun-
tain pass.
The warning icon
is displayed in the instrument cluster if the oil level is too
low » page 23 . Check the oil level using the dipstick as soon as possible. Add oil
accordingly.
CAUTION
The oil level must not exceed level A » Fig. 184 - risk of damaging the exhaust
system!
220General Maintenance
Page 224 of 287
ReplenishingFirst read and observe the introductory information and safety warn-
ings
on page 219.
›
Check the oil level » page 220.
›
Unscrew the cap of the engine oil filler opening » Fig. 182 on page 218.
›
Replenish the oil in portions of 0.5 litres in accordance with the correct specifi-
cations » page 219 .
›
Check the oil level » page 220.
›
Carefully screw on the oil filler opening cap and push the dipstick in fully.
Changing
First read and observe the introductory information and safety warn-ings
on page 219.
The engine oil must be changed according to prescribed service inter-vals » page 198 or according to the service interval display » page 33.
Coolant
Introduction
This chapter contains information on the following subjects:
Capacity
222
Checking the coolant level
222
Replenishing
222
The coolant consists of water with a concentration of coolant additive. This mix-
ture guarantees antifreeze protection, protects the cooling/heater system
against corrosion and prevents the formation of scale.
Vehicles exported to countries with a mild climate are already factory-filled with
a coolant which offers antifreeze protection down to about -25 ℃. In these coun-
tries the concentration of coolant additive should be at least 40 %.
Vehicles exported to countries with a cold climate are already factory-filled with a
coolant which offers antifreeze protection down to about -35 °C. In these coun-
tries the concentration of coolant additive should be at least 50 %.
If a higher concentration of antifreeze is required for climatic reasons, the amount
of coolant additive can only be increased up to a maximum of 60 % (antifreeze
protection down to approx. -40 °C).
When refilling, only use antifreeze with the name specified on the coolant expan-
sion tank » Fig. 185 on page 222.WARNING■
The engine compartment of your car is a hazardous area. While working in
the engine compartment, be sure to observe the following warn- ings » page 215 .■
Do not continue your journey, if for some reason it is not possible to top
up the coolant under the prevailing conditions! Switch off the engine and seek
assistance from a specialist garage.
CAUTION
■ The amount of coolant additive in the coolant must never be allowed to be less
than 40 %.■
Over 60 % of coolant additive in the coolant reduces the antifreeze protection
and coolant effectiveness.
■
A coolant additive that does not comply with the correct specifications can sig-
nificantly reduce the corrosion protection.
■
Any faults resulting from corrosion may cause a loss of coolant and can conse-
quently result in major engine damage!
■
Do not fill the coolant above the mark
A
» Fig. 185 on page 222.
■
If a fault causes the engine to overheat, we recommend visiting a specialist ga-
rage, as otherwise serious engine damage may occur.
221Inspecting and replenishing
Page 231 of 287
Wheels
Tyres and wheel rims
Introduction
This chapter contains information on the following subjects:
Service life of tyres
229
New tyres
230
Unidirectional tyres
231
Tyre control display
231
Spare wheel
232
Full wheel trim
233
Wheel bolts
233
Wheel bolts
233WARNING■ The national legal requirements must be observed for the use of tyres.■Observe the national legal regulations relating to the use of snow chains
and the maximum vehicle speed with snow chains.WARNINGThe following instructions for the use of tyres must be observed.■During the first 500 km, new tyres do not offer optimum grip and appropri-
ate care should therefore be taken when driving – risk of accident!■
On all four wheels, use only radial tyres of the same type, size (rolling cir-
cumference) and the same tread pattern.
■
For safety reasons, do no replace tyres individually.
■
Never exceed the maximum permissible load bearing capacity for fitted
tyres – risk of accident!
■
Never exceed the maximum permissible speed for fitted tyres – risk of acci-
dent!
■
An incorrect wheel alignment at the front or rear impairs handling – risk of
accident!
WARNING (Continued)■ Unusual vibrations or pulling of the vehicle to one side could be a sign of
tyre damage. If there is any doubt that a wheel is damaged, immediately re-
duce your speed and stop! If no external damage is evident, drive slowly and
carefully to the nearest specialist garage to have the vehicle checked.■
Only use those tyres or wheel rims which have been approved by ŠKODA for
your model of vehicle. Failure to observe this instruction will adversely affect
the road safety of your vehicle – risk of accident!
WARNINGObserve the following information regarding damage and wear of tyres.■Never use tyres if you do not know anything about the condition and age.■
Never drive with damaged tyres – risk of accident!
■
Immediately replace damaged wheel rims or tyres.
■
You must have your tyres replaced with new ones at the latest when the
wear indicators have been worn down.
■
Worn tyres do not provide the necessary adhesion to the road surface par-
ticularly at high speeds on wet roads. One could experience “aquaplaning” (uncontrolled movements of the vehicle – “swimming” on a wet road surface).
WARNINGObserve the following information regarding the tyre inflation pressure.■The tyre control display does not absolve the driver of the responsibility to
ensure the correct tyre inflation pressure. Check the tyre inflation pressure at
regular intervals.■
Too low or too high inflation pressure impairs handling – risk of an accident!
■
If the inflation pressure is too low, the tyre must perform a greater rolling
resistance. At higher speeds the tyre will warm up as a result of this. This can
result in tread separation and a tyre blowout.
WARNINGObserve the following information regarding the wheel bolts.■The wheel bolts must be clean and must turn easily. Never treat them with
grease or oil. 228General Maintenance
Page 277 of 287

Practical equipment79
Storage compartments79
Comfort control window
49
COMING HOME60
Compartments79
Component protection202
Computer see multifunction display
29
Convenience consumers133
Convenience operation sliding / tilting roof (Octavia Estate)
53
sliding / tilting roof (Octavia)51
Coolant221
Checking222
indicator symbol22
Replenishing222
Temperature gauge13
warning messages22
CORNER See Fog lights with CORNER function
59
Correct seated position177
Driver178
Front passenger178
Instructions179
Rear seats178
Counter for distance driven14
Cruise control system Activating/deactivating
147
Changing the stored speed147
Storing and maintaining speed147
Switching off temporarily147
Warning light21
Cruise Control System146
Cup holders82
D
DAY LIGHT see Daylight running lights
55
Daylight running lights55
De-icing the windscreen and rear window64
Deactivating an airbag191
Decorative films206
Delayed locking of the boot lid see Boot lid
44
Diesel refer to Fuel
214
Diesel fuel Operation in winter
214
Diesel particulate filter24
information messages24
Digital Clock Time
14
Dipstick220
Disconnecting and reconnecting vehicle battery
227
Display12
Compass points28
Coolant temperature13
Correct gear changes27
Fuel supply13
Service interval33
Distance driven14
Door Child safety lock
40
Closing40
Emergency locking the driver's door248
Opening40
Door locking Emergency
248
Doors Emergency locking
248
Door warning28
double hooks93
Driver Steering Recommendation (DSR)139
Driving Abroad
136
Driving through water on streets135
Emissions263
Fuel consumption263
Driving economically Economical gear changing132
Driving mode161
driving mode select Normal mode
162
Driving through water135
DSR139
E
Economical driving
131
Ballast134
Driving at full throttle132
Idling132
Looking ahead131
Regular maintenance134
Saving energy134
Short distances133
Tyre inflation pressure133
Eco tips28
EDL139
Electrical power windows49
Button in the driver's door47, 48
Button in the rear doors48
Operational faults49
Electric luggage compartment lid Acoustic signals
46
Adjusting the top lid position46
Deleting the top lid position46
Force limiter44
Malfunctions47
manual operation44
Operating45
Electronic Differential Lock (EDL)139
Electronic immobiliser120
Electronic Stability Control (ESC)137
Emergency Automatic gearbox
249
Changing a wheel237
Door locking248
274Index
Page 279 of 287
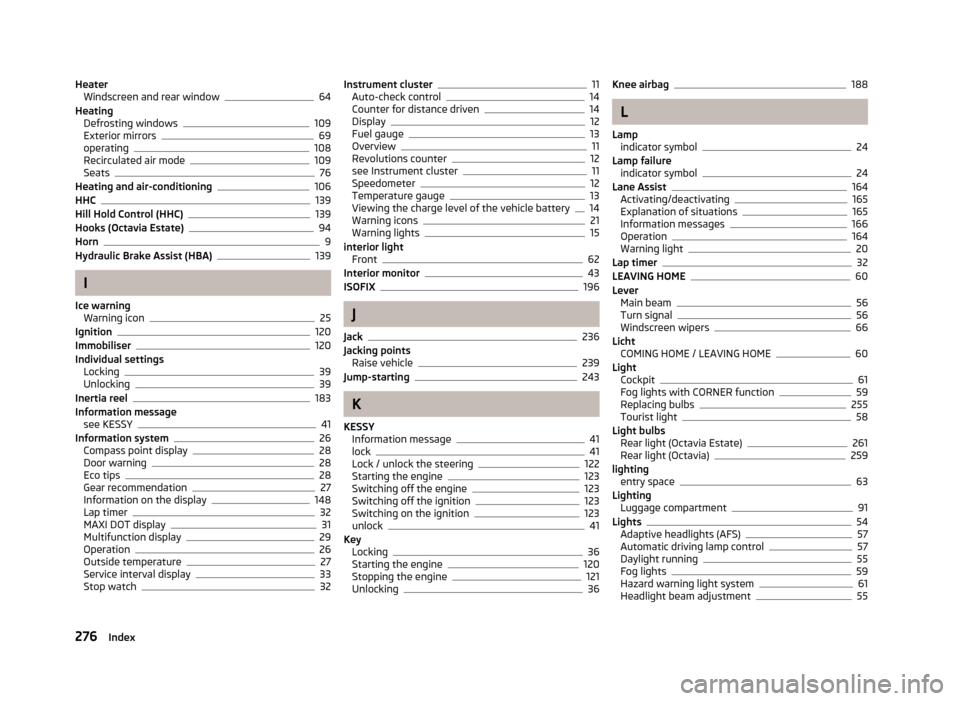
HeaterWindscreen and rear window64
Heating Defrosting windows
109
Exterior mirrors69
operating108
Recirculated air mode109
Seats76
Heating and air-conditioning106
HHC139
Hill Hold Control (HHC)139
Hooks (Octavia Estate)94
Horn9
Hydraulic Brake Assist (HBA)139
I
Ice warning Warning icon
25
Ignition120
Immobiliser120
Individual settings Locking
39
Unlocking39
Inertia reel183
Information message see KESSY
41
Information system26
Compass point display28
Door warning28
Eco tips28
Gear recommendation27
Information on the display148
Lap timer32
MAXI DOT display31
Multifunction display29
Operation26
Outside temperature27
Service interval display33
Stop watch32
Instrument cluster11
Auto-check control14
Counter for distance driven14
Display12
Fuel gauge13
Overview11
Revolutions counter12
see Instrument cluster11
Speedometer12
Temperature gauge13
Viewing the charge level of the vehicle battery14
Warning icons21
Warning lights15
interior light Front
62
Interior monitor43
ISOFIX196
J
Jack
236
Jacking points Raise vehicle
239
Jump-starting243
K
KESSY Information message
41
lock41
Lock / unlock the steering122
Starting the engine123
Switching off the engine123
Switching off the ignition123
Switching on the ignition123
unlock41
Key Locking
36
Starting the engine120
Stopping the engine121
Unlocking36
Knee airbag188
L
Lamp indicator symbol
24
Lamp failure indicator symbol
24
Lane Assist164
Activating/deactivating165
Explanation of situations165
Information messages166
Operation164
Warning light20
Lap timer32
LEAVING HOME60
Lever Main beam
56
Turn signal56
Windscreen wipers66
Licht COMING HOME / LEAVING HOME
60
Light Cockpit
61
Fog lights with CORNER function59
Replacing bulbs255
Tourist light58
Light bulbs Rear light (Octavia Estate)
261
Rear light (Octavia)259
lighting entry space
63
Lighting Luggage compartment
91
Lights54
Adaptive headlights (AFS)57
Automatic driving lamp control57
Daylight running55
Fog lights59
Hazard warning light system61
Headlight beam adjustment55
276Index