warning light SKODA OCTAVIA 2013 3.G / (5E) User Guide
[x] Cancel search | Manufacturer: SKODA, Model Year: 2013, Model line: OCTAVIA, Model: SKODA OCTAVIA 2013 3.G / (5E)Pages: 287, PDF Size: 18.55 MB
Page 22 of 287
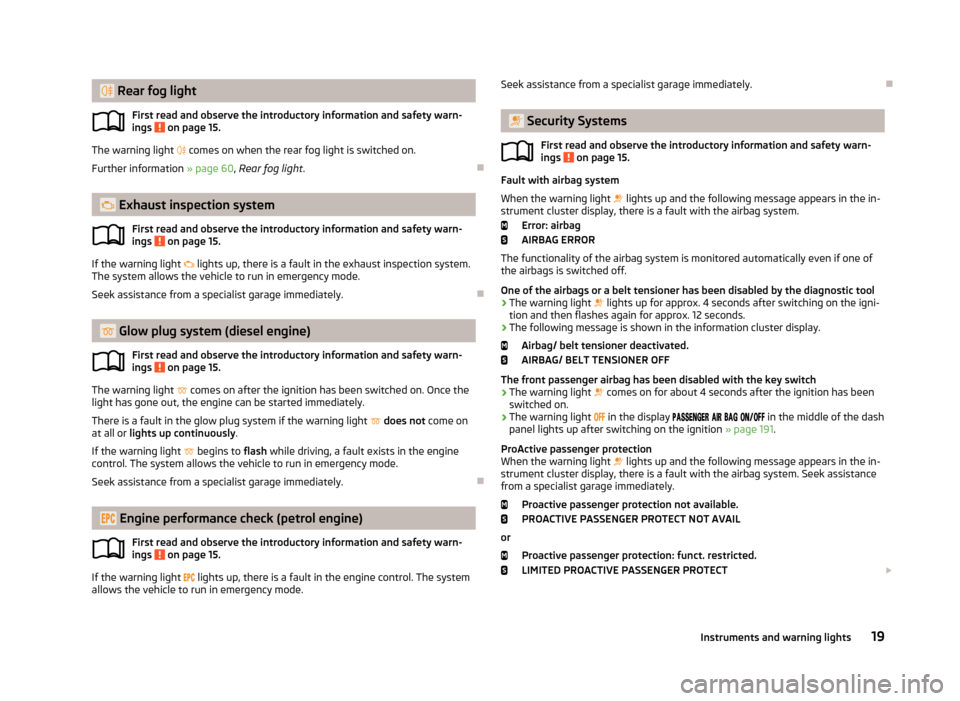
Rear fog lightFirst read and observe the introductory information and safety warn-
ings
on page 15.
The warning light comes on when the rear fog light is switched on.
Further information » page 60, Rear fog light .
Exhaust inspection system
First read and observe the introductory information and safety warn-
ings
on page 15.
If the warning light
lights up, there is a fault in the exhaust inspection system.
The system allows the vehicle to run in emergency mode.
Seek assistance from a specialist garage immediately.
Glow plug system (diesel engine)
First read and observe the introductory information and safety warn-ings
on page 15.
The warning light
comes on after the ignition has been switched on. Once the
light has gone out, the engine can be started immediately.
There is a fault in the glow plug system if the warning light
does not come on
at all or lights up continuously .
If the warning light
begins to flash while driving, a fault exists in the engine
control. The system allows the vehicle to run in emergency mode.
Seek assistance from a specialist garage immediately.
Engine performance check (petrol engine)
First read and observe the introductory information and safety warn-ings
on page 15.
If the warning light
lights up, there is a fault in the engine control. The system
allows the vehicle to run in emergency mode.
Seek assistance from a specialist garage immediately.
Security Systems
First read and observe the introductory information and safety warn-
ings
on page 15.
Fault with airbag system
When the warning light lights up and the following message appears in the in-
strument cluster display, there is a fault with the airbag system.
Error: airbag
AIRBAG ERROR
The functionality of the airbag system is monitored automatically even if one of
the airbags is switched off.
One of the airbags or a belt tensioner has been disabled by the diagnostic tool
› The warning light
lights up for approx. 4 seconds after switching on the igni-
tion and then flashes again for approx. 12 seconds.
› The following message is shown in the information cluster display.
Airbag/ belt tensioner deactivated.
AIRBAG/ BELT TENSIONER OFF
The front passenger airbag has been disabled with the key switch › The warning light
comes on for about 4 seconds after the ignition has been
switched on.
› The warning light
in the display
in the middle of the dash
panel lights up after switching on the ignition » page 191.
ProActive passenger protection When the warning light
lights up and the following message appears in the in-
strument cluster display, there is a fault with the airbag system. Seek assistance
from a specialist garage immediately.
Proactive passenger protection not available.PROACTIVE PASSENGER PROTECT NOT AVAIL
or Proactive passenger protection: funct. restricted.
LIMITED PROACTIVE PASSENGER PROTECT
19Instruments and warning lights
Page 23 of 287
WARNINGIf there is a fault in the safety system, have it checked immediately by a spe-
cialist garage. Otherwise, there is a risk of the systems not being activated in the event of an accident.
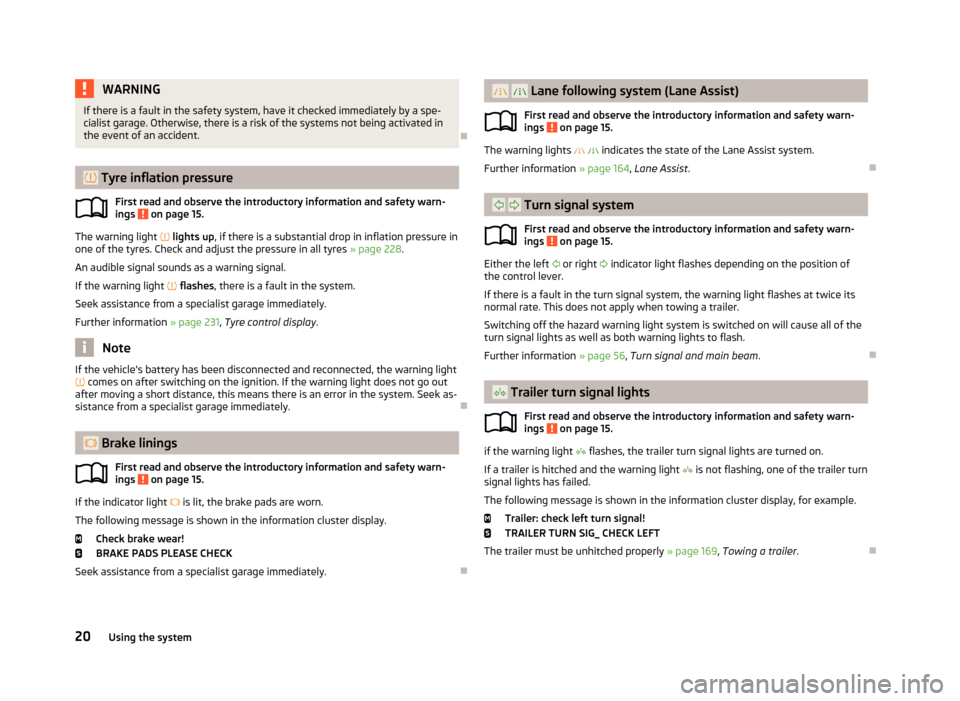
Tyre inflation pressure
First read and observe the introductory information and safety warn-
ings
on page 15.
The warning light
lights up , if there is a substantial drop in inflation pressure in
one of the tyres. Check and adjust the pressure in all tyres » page 228.
An audible signal sounds as a warning signal.
If the warning light
flashes , there is a fault in the system.
Seek assistance from a specialist garage immediately.
Further information » page 231, Tyre control display .
Note
If the vehicle's battery has been disconnected and reconnected, the warning light
comes on after switching on the ignition. If the warning light does not go out
after moving a short distance, this means there is an error in the system. Seek as-
sistance from a specialist garage immediately.
Brake linings
First read and observe the introductory information and safety warn-
ings
on page 15.
If the indicator light
is lit, the brake pads are worn.
The following message is shown in the information cluster display. Check brake wear!
BRAKE PADS PLEASE CHECK
Seek assistance from a specialist garage immediately.
Lane following system (Lane Assist)
First read and observe the introductory information and safety warn-
ings
on page 15.
The warning lights indicates the state of the Lane Assist system.
Further information » page 164, Lane Assist .
Turn signal system
First read and observe the introductory information and safety warn-ings
on page 15.
Either the left
or right
indicator light flashes depending on the position of
the control lever.
If there is a fault in the turn signal system, the warning light flashes at twice its
normal rate. This does not apply when towing a trailer.
Switching off the hazard warning light system is switched on will cause all of theturn signal lights as well as both warning lights to flash.
Further information » page 56, Turn signal and main beam .
Trailer turn signal lights
First read and observe the introductory information and safety warn-ings
on page 15.
if the warning light
flashes, the trailer turn signal lights are turned on.
If a trailer is hitched and the warning light
is not flashing, one of the trailer turn
signal lights has failed.
The following message is shown in the information cluster display, for example. Trailer: check left turn signal!
TRAILER TURN SIG_ CHECK LEFT
The trailer must be unhitched properly » page 169, Towing a trailer .
20Using the system
Page 24 of 287
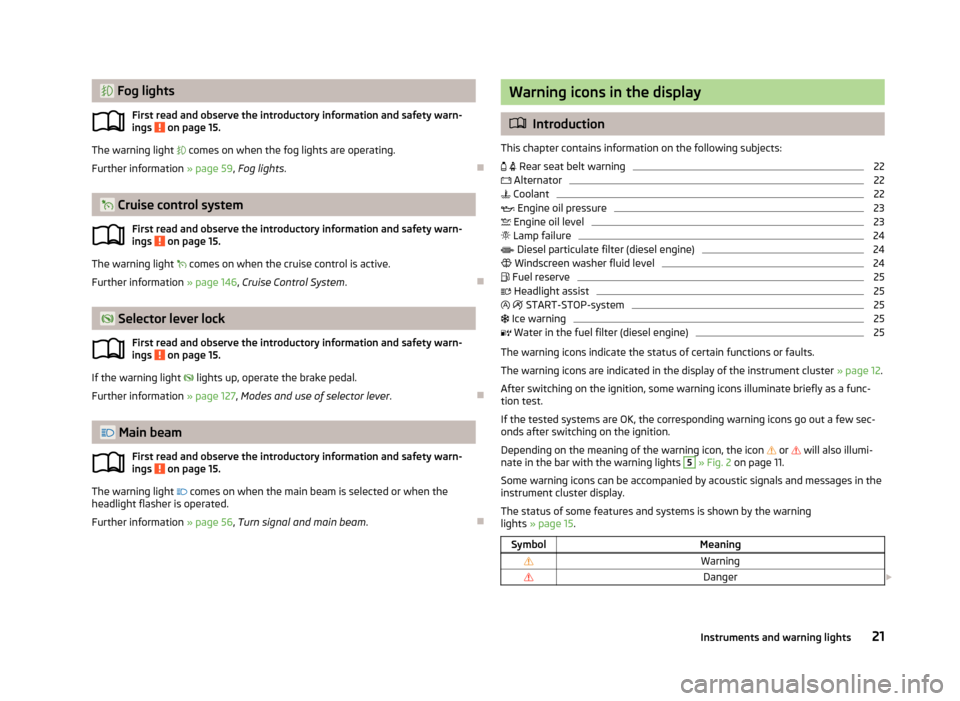
Fog lightsFirst read and observe the introductory information and safety warn-
ings
on page 15.
The warning light comes on when the fog lights are operating.
Further information » page 59, Fog lights .
Cruise control system
First read and observe the introductory information and safety warn-
ings
on page 15.
The warning light
comes on when the cruise control is active.
Further information » page 146, Cruise Control System .
Selector lever lock
First read and observe the introductory information and safety warn-
ings
on page 15.
If the warning light
lights up, operate the brake pedal.
Further information » page 127, Modes and use of selector lever .
Main beam
First read and observe the introductory information and safety warn-ings
on page 15.
The warning light
comes on when the main beam is selected or when the
headlight flasher is operated.
Further information » page 56, Turn signal and main beam .
Warning icons in the display
Introduction
This chapter contains information on the following subjects:
Rear seat belt warning
22
Alternator
22
Coolant
22
Engine oil pressure
23
Engine oil level
23
Lamp failure
24
Diesel particulate filter (diesel engine)
24
Windscreen washer fluid level
24
Fuel reserve
25
Headlight assist
25
START-STOP-system
25
Ice warning
25
Water in the fuel filter (diesel engine)
25
The warning icons indicate the status of certain functions or faults.
The warning icons are indicated in the display of the instrument cluster » page 12.
After switching on the ignition, some warning icons illuminate briefly as a func- tion test.
If the tested systems are OK, the corresponding warning icons go out a few sec-
onds after switching on the ignition.
Depending on the meaning of the warning icon, the icon
or
will also illumi-
nate in the bar with the warning lights
5
» Fig. 2 on page 11.
Some warning icons can be accompanied by acoustic signals and messages in the
instrument cluster display.
The status of some features and systems is shown by the warning
lights » page 15 .
SymbolMeaningWarningDanger 21Instruments and warning lights
Page 25 of 287
While the operational faults remain unrectified, the messages are always indica-
ted again. After they are displayed for the first time, the symbols or continue
to be indicated without any extra messages for the driver.
On vehicles with a colour MAXI DOT display some warning icons in the display are
in colour.WARNING■ Ignoring illuminated warning icons and related messages or instructions in
the display of the instrument cluster may lead to serious personal injury or
damage to the vehicle.■
If you have to stop for technical reasons, then park the vehicle at a safe dis-
tance from the traffic, switch off the engine and activate the hazard warning
light system » page 61. The warning triangle must be set up at the prescri-
bed distance - observe the national legal provisions when doing so.
■
The engine compartment of your car is a hazardous area. While working in
the engine compartment, be sure to observe the following warn-
ings » page 215 , Engine compartment .
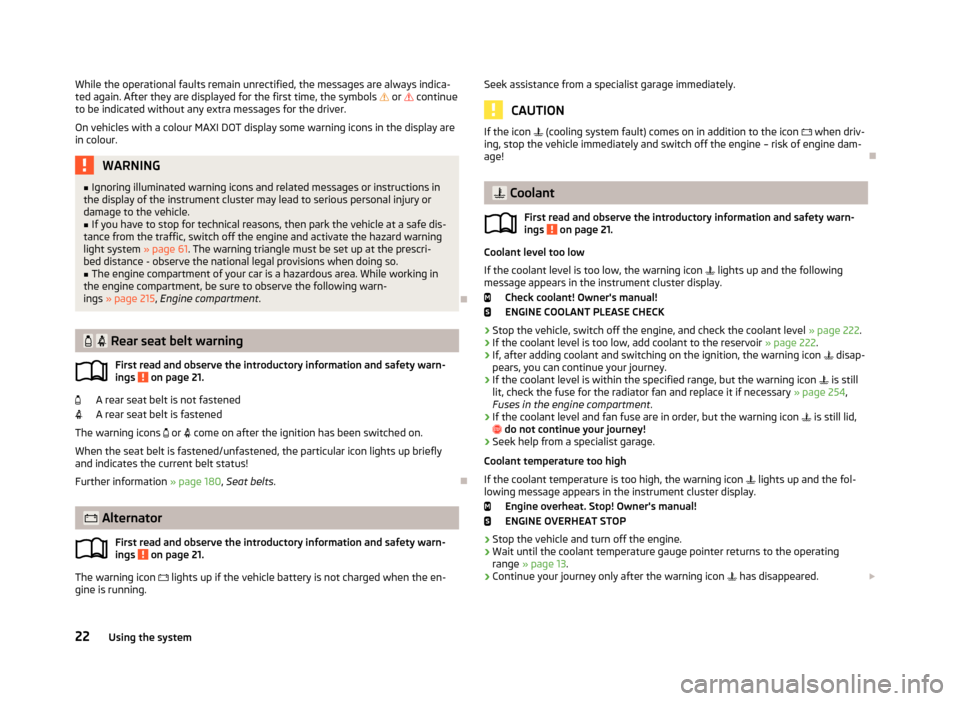
Rear seat belt warning
First read and observe the introductory information and safety warn-
ings
on page 21.
A rear seat belt is not fastened
A rear seat belt is fastened
The warning icons
or
come on after the ignition has been switched on.
When the seat belt is fastened/unfastened, the particular icon lights up briefly and indicates the current belt status!
Further information » page 180, Seat belts .
Alternator
First read and observe the introductory information and safety warn-
ings
on page 21.
The warning icon
lights up if the vehicle battery is not charged when the en-
gine is running.
Seek assistance from a specialist garage immediately.
CAUTION
If the icon (cooling system fault) comes on in addition to the icon when driv-
ing, stop the vehicle immediately and switch off the engine – risk of engine dam- age!
Coolant
First read and observe the introductory information and safety warn-ings
on page 21.
Coolant level too low
If the coolant level is too low, the warning icon
lights up and the following
message appears in the instrument cluster display.
Check coolant! Owner's manual!
ENGINE COOLANT PLEASE CHECK
› Stop the vehicle, switch off the engine, and check the coolant level
» page 222.
› If the coolant level is too low, add coolant to the reservoir
» page 222.
› If, after adding coolant and switching on the ignition, the warning icon
disap-
pears, you can continue your journey.
› If the coolant level is within the specified range, but the warning icon
is still
lit, check the fuse for the radiator fan and replace it if necessary » page 254,
Fuses in the engine compartment .
› If the coolant level and fan fuse are in order, but the warning icon
is still lid,
do not continue your journey!
› Seek help from a specialist garage.
Coolant temperature too high
If the coolant temperature is too high, the warning icon
lights up and the fol-
lowing message appears in the instrument cluster display.
Engine overheat. Stop! Owner's manual!
ENGINE OVERHEAT STOP
› Stop the vehicle and turn off the engine.
› Wait until the coolant temperature gauge pointer returns to the operating
range » page 13 .
› Continue your journey only after the warning icon
has disappeared.
22Using the system
Page 26 of 287
WARNING■If you have to stop for technical reasons, then park the vehicle at a safe dis-
tance from the traffic, switch off the engine and switch on the hazard warning lights » page 61 . The warning triangle must be set up at the prescribed dis-
tance - observe the national legal provisions when doing so.■
Carefully open the coolant expansion bottle. If the engine is hot, the cooling
system is pressurized – risk of scalding! It is therefore best to allow the engine
to cool down before removing the cap.
■
Do not touch the radiator fan. The radiator fan may switch itself on auto-
matically even if the ignition is off.
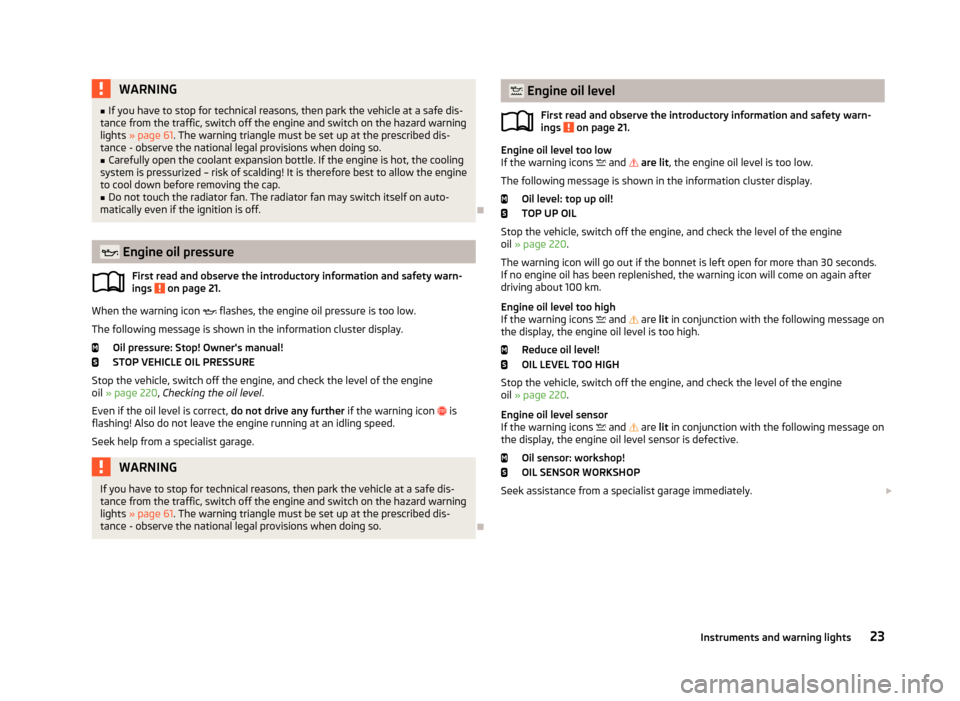
Engine oil pressure
First read and observe the introductory information and safety warn-
ings
on page 21.
When the warning icon
flashes, the engine oil pressure is too low.
The following message is shown in the information cluster display. Oil pressure: Stop! Owner's manual!
STOP VEHICLE OIL PRESSURE
Stop the vehicle, switch off the engine, and check the level of the engine
oil » page 220 , Checking the oil level .
Even if the oil level is correct, do not drive any further if the warning icon
is
flashing! Also do not leave the engine running at an idling speed.
Seek help from a specialist garage.
WARNINGIf you have to stop for technical reasons, then park the vehicle at a safe dis-
tance from the traffic, switch off the engine and switch on the hazard warning
lights » page 61 . The warning triangle must be set up at the prescribed dis-
tance - observe the national legal provisions when doing so.
Engine oil level
First read and observe the introductory information and safety warn-
ings
on page 21.
Engine oil level too low
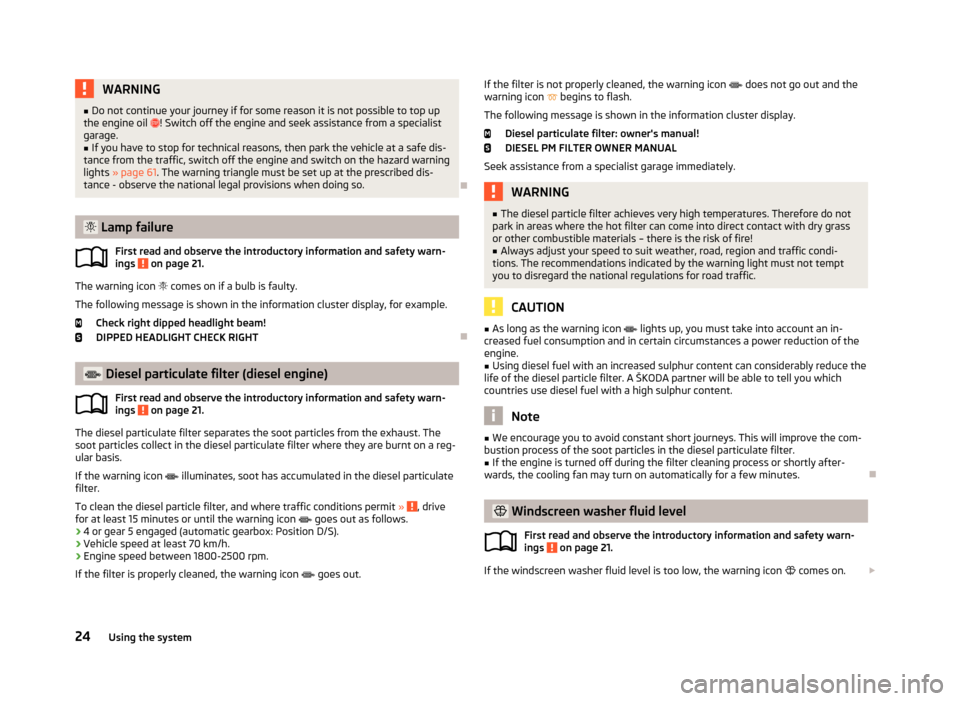
If the warning icons and are lit , the engine oil level is too low.
The following message is shown in the information cluster display. Oil level: top up oil!
TOP UP OIL
Stop the vehicle, switch off the engine, and check the level of the engine
oil » page 220 .
The warning icon will go out if the bonnet is left open for more than 30 seconds.
If no engine oil has been replenished, the warning icon will come on again after
driving about 100 km.
Engine oil level too high
If the warning icons
and
are lit in conjunction with the following message on
the display, the engine oil level is too high.
Reduce oil level!
OIL LEVEL TOO HIGH
Stop the vehicle, switch off the engine, and check the level of the engine
oil » page 220 .
Engine oil level sensor
If the warning icons
and
are lit in conjunction with the following message on
the display, the engine oil level sensor is defective.
Oil sensor: workshop!
OIL SENSOR WORKSHOP
Seek assistance from a specialist garage immediately.
23Instruments and warning lights
Page 27 of 287
WARNING■Do not continue your journey if for some reason it is not possible to top up
the engine oil ! Switch off the engine and seek assistance from a specialist
garage.■
If you have to stop for technical reasons, then park the vehicle at a safe dis-
tance from the traffic, switch off the engine and switch on the hazard warning
lights » page 61 . The warning triangle must be set up at the prescribed dis-
tance - observe the national legal provisions when doing so.
Lamp failure
First read and observe the introductory information and safety warn-
ings
on page 21.
The warning icon
comes on if a bulb is faulty.
The following message is shown in the information cluster display, for example. Check right dipped headlight beam!
DIPPED HEADLIGHT CHECK RIGHT
Diesel particulate filter (diesel engine)
First read and observe the introductory information and safety warn-ings
on page 21.
The diesel particulate filter separates the soot particles from the exhaust. The
soot particles collect in the diesel particulate filter where they are burnt on a reg-
ular basis.
If the warning icon
illuminates, soot has accumulated in the diesel particulate
filter.
To clean the diesel particle filter, and where traffic conditions permit »
, drive
for at least 15 minutes or until the warning icon
goes out as follows.
› 4 or gear 5 engaged (automatic gearbox: Position D/S).
› Vehicle speed at least 70 km/h.
› Engine speed between 1800-2500 rpm.
If the filter is properly cleaned, the warning icon
goes out.
If the filter is not properly cleaned, the warning icon does not go out and the
warning icon begins to flash.
The following message is shown in the information cluster display. Diesel particulate filter: owner's manual!DIESEL PM FILTER OWNER MANUAL
Seek assistance from a specialist garage immediately.WARNING■ The diesel particle filter achieves very high temperatures. Therefore do not
park in areas where the hot filter can come into direct contact with dry grass
or other combustible materials – there is the risk of fire!■
Always adjust your speed to suit weather, road, region and traffic condi-
tions. The recommendations indicated by the warning light must not tempt
you to disregard the national regulations for road traffic.
CAUTION
■ As long as the warning icon lights up, you must take into account an in-
creased fuel consumption and in certain circumstances a power reduction of the
engine.■
Using diesel fuel with an increased sulphur content can considerably reduce the
life of the diesel particle filter. A ŠKODA partner will be able to tell you which
countries use diesel fuel with a high sulphur content.
Note
■ We encourage you to avoid constant short journeys. This will improve the com-
bustion process of the soot particles in the diesel particulate filter.■
If the engine is turned off during the filter cleaning process or shortly after-
wards, the cooling fan may turn on automatically for a few minutes.
Windscreen washer fluid level
First read and observe the introductory information and safety warn-ings
on page 21.
If the windscreen washer fluid level is too low, the warning icon comes on.
24Using the system
Page 28 of 287
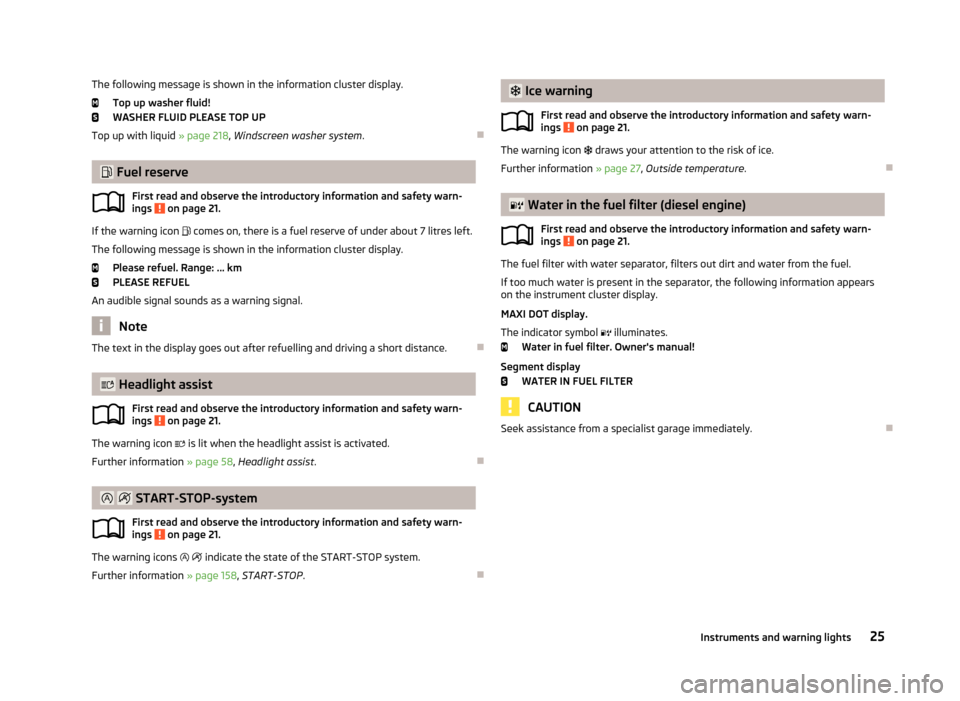
The following message is shown in the information cluster display.Top up washer fluid!
WASHER FLUID PLEASE TOP UP
Top up with liquid » page 218, Windscreen washer system .
Fuel reserve
First read and observe the introductory information and safety warn-ings
on page 21.
If the warning icon comes on, there is a fuel reserve of under about 7 litres left.
The following message is shown in the information cluster display. Please refuel. Range: ... km
PLEASE REFUEL
An audible signal sounds as a warning signal.
Note
The text in the display goes out after refuelling and driving a short distance.
Headlight assist
First read and observe the introductory information and safety warn-ings
on page 21.
The warning icon
is lit when the headlight assist is activated.
Further information » page 58, Headlight assist .
START-STOP-system
First read and observe the introductory information and safety warn- ings
on page 21.
The warning icons
indicate the state of the START-STOP system.
Further information » page 158, START-STOP .
Ice warning
First read and observe the introductory information and safety warn-ings
on page 21.
The warning icon draws your attention to the risk of ice.
Further information » page 27, Outside temperature .
Water in the fuel filter (diesel engine)
First read and observe the introductory information and safety warn-ings
on page 21.
The fuel filter with water separator, filters out dirt and water from the fuel.
If too much water is present in the separator, the following information appears on the instrument cluster display.
MAXI DOT display.
The indicator symbol illuminates.
Water in fuel filter. Owner's manual!
Segment display WATER IN FUEL FILTER
CAUTION
Seek assistance from a specialist garage immediately.
25Instruments and warning lights
Page 33 of 287
Range
The range indicates the distance you can still drive with your vehicle based on the
level of fuel in the tank and the same style of driving as before.
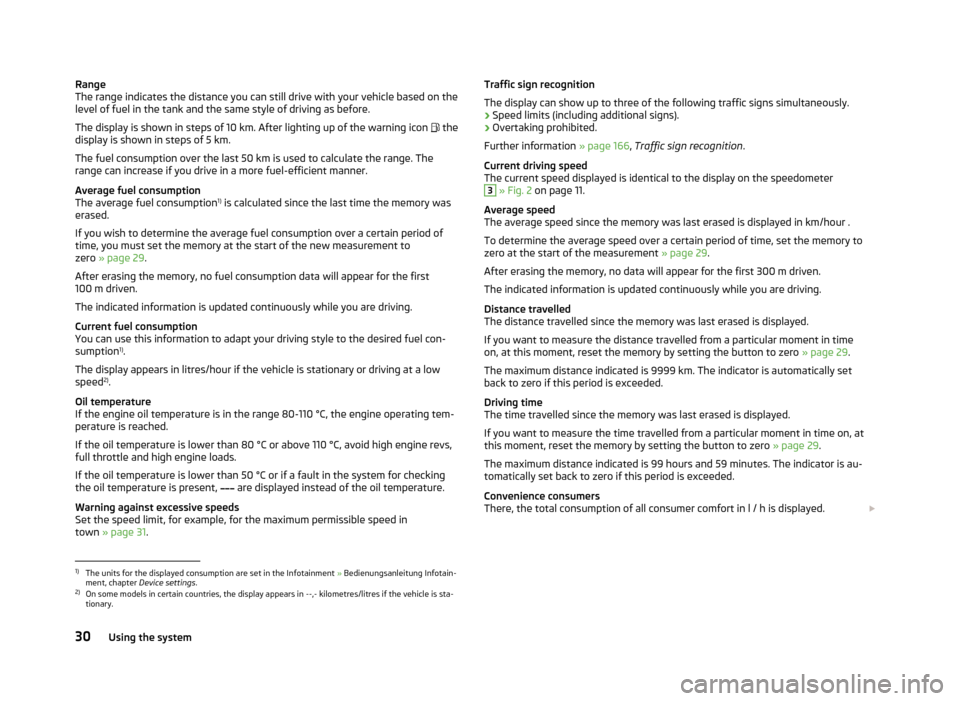
The display is shown in steps of 10 km. After lighting up of the warning icon the
display is shown in steps of 5 km.
The fuel consumption over the last 50 km is used to calculate the range. The
range can increase if you drive in a more fuel-efficient manner.
Average fuel consumption
The average fuel consumption 1)
is calculated since the last time the memory was
erased.
If you wish to determine the average fuel consumption over a certain period of
time, you must set the memory at the start of the new measurement to zero » page 29 .
After erasing the memory, no fuel consumption data will appear for the first
100 m driven.
The indicated information is updated continuously while you are driving.
Current fuel consumption
You can use this information to adapt your driving style to the desired fuel con-
sumption 1)
.
The display appears in litres/hour if the vehicle is stationary or driving at a low
speed 2)
.
Oil temperature
If the engine oil temperature is in the range 80-110 °C, the engine operating tem-
perature is reached.
If the oil temperature is lower than 80 °C or above 110 °C, avoid high engine revs,
full throttle and high engine loads.
If the oil temperature is lower than 50 °C or if a fault in the system for checking the oil temperature is present,
are displayed instead of the oil temperature.
Warning against excessive speeds
Set the speed limit, for example, for the maximum permissible speed in
town » page 31 .Traffic sign recognition
The display can show up to three of the following traffic signs simultaneously.
› Speed limits (including additional signs).
› Overtaking prohibited.
Further information » page 166, Traffic sign recognition .
Current driving speed
The current speed displayed is identical to the display on the speedometer3
» Fig. 2 on page 11.
Average speed
The average speed since the memory was last erased is displayed in km/hour .
To determine the average speed over a certain period of time, set the memory to
zero at the start of the measurement » page 29.
After erasing the memory, no data will appear for the first 300 m driven. The indicated information is updated continuously while you are driving.
Distance travelled
The distance travelled since the memory was last erased is displayed.
If you want to measure the distance travelled from a particular moment in time on, at this moment, reset the memory by setting the button to zero » page 29.
The maximum distance indicated is 9999 km. The indicator is automatically set
back to zero if this period is exceeded.
Driving time
The time travelled since the memory was last erased is displayed.
If you want to measure the time travelled from a particular moment in time on, at this moment, reset the memory by setting the button to zero » page 29.
The maximum distance indicated is 99 hours and 59 minutes. The indicator is au- tomatically set back to zero if this period is exceeded.
Convenience consumers
There, the total consumption of all consumer comfort in l / h is displayed.
1)
The units for the displayed consumption are set in the Infotainment
» Bedienungsanleitung Infotain-
ment, chapter Device settings .
2)
On some models in certain countries, the display appears in --,- kilometres/litres if the vehicle is sta-
tionary.
30Using the system
Page 38 of 287
Unlocking and opening
Unlocking and locking
Introduction
This chapter contains information on the following subjects:
Vehicle key
36
Unlocking/locking with the key
36
Unlocking/locking with the remote control
37
Unlocking/locking – KESSY
38
Safe securing system
38
Individual settings
39
Locking/unlocking the vehicle from the inside
39
Child safety lock
40
Opening/closing a door
40
Your car is equipped with a central locking system. The central locking system allows you to lock and unlock all doors, the fuel filler
flap and luggage compartment lid at the same time based on the current setting 1)
.
The safe securing system » page 38 is integrated in the central locking system.
Once the car is locked from the outside, the door locks are automatically blocked
by the safe securing system »
.
The following is true after unlocking 1)
› The doors, the boot lid and the fuel filler flap are unlocked.
› The interior light operated via the door contact illuminates.
› The safe securing system is switched off.
› The indicator light in the driver door stops flashing.
› The exterior mirrors are folded back into the driving position 2)
.
› The anti-theft alarm system is deactivated.
The following is true after locking 1)
.
› The doors, the boot lid and the fuel filler flap are locked.
› The interior light operated via the door contact goes out.
› The safe securing system is switched on.
› The warning light in the driver door begins flashing.
› The exterior mirrors are folded back into park 2)
.
› The anti-theft alarm system is activated.
Displaying an error
If the warning light in the driver's door initially flashes quickly for around 2 sec- onds, and then lights up for 30 seconds without interruption before flashing
again slowly, you will need to seek the assistance of a specialist garage.WARNING■ If the car is locked and the safe securing system is activated, there must not
be any person in the car as it is then not possible to open either a door or a window from the inside. The locked doors make it more difficult for rescuers
to get into the vehicle in an emergency – risk of death!■
Locked doors prevent unwanted entry into the vehicle from outside, for ex-
ample at road crossings.
Note
■ In the event of an accident in which the airbags are deployed, the locked doors
are automatically unlocked in order to enable rescuers to gain access to the vehi- cle.■
Only the driver's door can be unlocked or locked using the key if the central
locking system fails » page 36. The other doors and the boot lid can be emer-
gency locked or unlocked. ■ Emergency locking of the door » page 248.
■ Emergency unlocking of the luggage compartment lid » page 249.
1)
Depending on the individual setting » page 39.
2)
Applies only if the function is enabled in the Infotainment » Infotainment manual , chapter Vehicle
settings (press CAR) .
35Unlocking and opening
Page 40 of 287
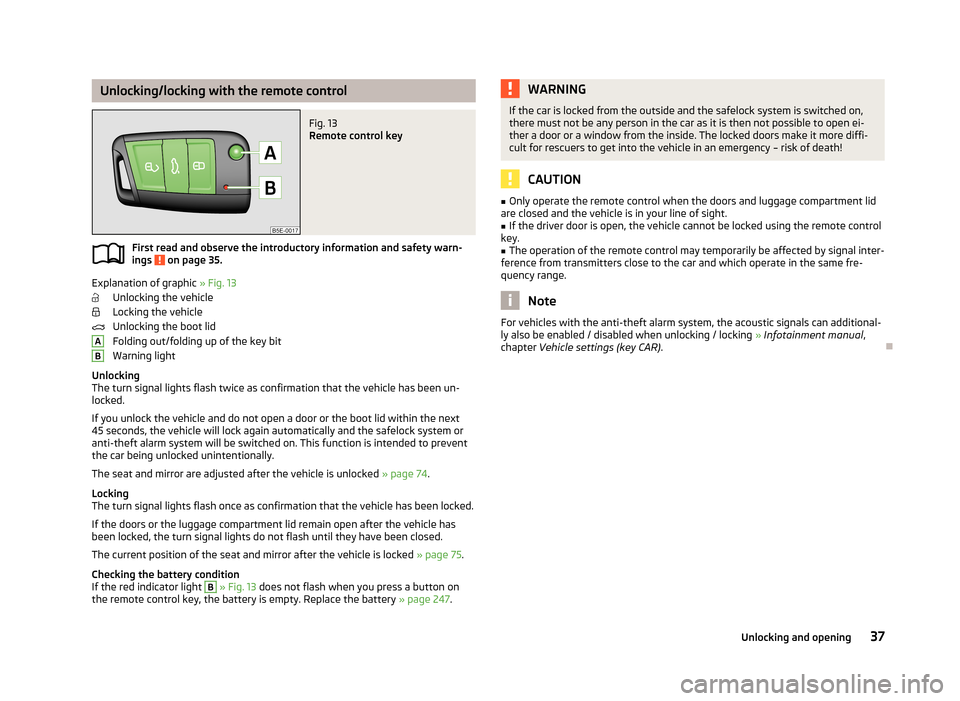
Unlocking/locking with the remote controlFig. 13
Remote control key
First read and observe the introductory information and safety warn-
ings on page 35.
Explanation of graphic » Fig. 13
Unlocking the vehicle
Locking the vehicle
Unlocking the boot lid
Folding out/folding up of the key bit Warning light
Unlocking
The turn signal lights flash twice as confirmation that the vehicle has been un-
locked.
If you unlock the vehicle and do not open a door or the boot lid within the next
45 seconds, the vehicle will lock again automatically and the safelock system or
anti-theft alarm system will be switched on. This function is intended to prevent
the car being unlocked unintentionally.
The seat and mirror are adjusted after the vehicle is unlocked » page 74.
Locking
The turn signal lights flash once as confirmation that the vehicle has been locked.
If the doors or the luggage compartment lid remain open after the vehicle has been locked, the turn signal lights do not flash until they have been closed.
The current position of the seat and mirror after the vehicle is locked » page 75.
Checking the battery condition If the red indicator light
B
» Fig. 13 does not flash when you press a button on
the remote control key, the battery is empty. Replace the battery » page 247.
ABWARNINGIf the car is locked from the outside and the safelock system is switched on,
there must not be any person in the car as it is then not possible to open ei-
ther a door or a window from the inside. The locked doors make it more diffi-
cult for rescuers to get into the vehicle in an emergency – risk of death!
CAUTION
■ Only operate the remote control when the doors and luggage compartment lid
are closed and the vehicle is in your line of sight.■
If the driver door is open, the vehicle cannot be locked using the remote control
key.
■
The operation of the remote control may temporarily be affected by signal inter-
ference from transmitters close to the car and which operate in the same fre-
quency range.
Note
For vehicles with the anti-theft alarm system, the acoustic signals can additional-
ly also be enabled / disabled when unlocking / locking » Infotainment manual ,
chapter Vehicle settings (key CAR) .
37Unlocking and opening