stop start SKODA OCTAVIA 2013 3.G / (5E) Owner's Guide
[x] Cancel search | Manufacturer: SKODA, Model Year: 2013, Model line: OCTAVIA, Model: SKODA OCTAVIA 2013 3.G / (5E)Pages: 287, PDF Size: 18.55 MB
Page 134 of 287
New brake padsFirst read and observe the introductory information given on page 130.
New brake pads initially do not provide optimal braking performance. They firstneed to be “run in”. Drive especially carefully for the first 200 km or so.
Economical driving and environmental sustainability
Introduction
This chapter contains information on the following subjects:
Looking ahead
131
Economical gear changing
132
Avoiding full throttle
132
Reducing idling
132
Avoiding short distances
133
Convenience consumers
133
Checking tyre inflation pressure
133
Avoiding unnecessary ballast
134
Regular maintenance
134
Saving electrical energy
134
Environmental compatibility
134
The technical requirements for low fuel usage and economic efficiency of the ve-
hicle have already been built into the vehicle at the works. ŠKODA places a partic-
ular emphasis on minimising negative effects on the environment.
It is necessary to take note of the guidelines given in this chapter in order tomake best use of these characteristics and to maintain their effectiveness.
Fuel consumption, environmental pollution and the wear to the engine, brakes
and tyres depend essentially on the following three factors:
› your personal style of driving.
› the conditions under which your vehicle is use,
› technical requirements.
The fuel economy by can be improved by 10 -15 % by always looking ahead and
driving in an economical way.
Fuel consumption is also be influenced by external factors which are beyond the
driver's control. Consumption increases during the winter or under difficult condi-
tions, on poor roads, etc.
Fuel consumption can vary considerably from the manufacturer's data, as a result
of outside temperatures, the weather and driving style.
The optimal engine speed should be obtained when accelerating, in order to
avoid a high fuel consumption and resonance of the vehicle.
CAUTION
All the speed and engine revolution figures apply only when the engine is at its
normal operating temperature.
Looking ahead
First read and observe the introductory information and safety warn-
ings
on page 131.
A vehicle's highest fuel consumption occurs when accelerating, therefore unnec-
essary accelerating and braking should be avoided. If looking ahead when driving, less braking and consequently less accelerating are required.
If possible, let your vehicle coast to a stop, or use the engine brake, if you can see that the next set of traffic lights is on red, for example.
131Starting-off and Driving
Page 135 of 287
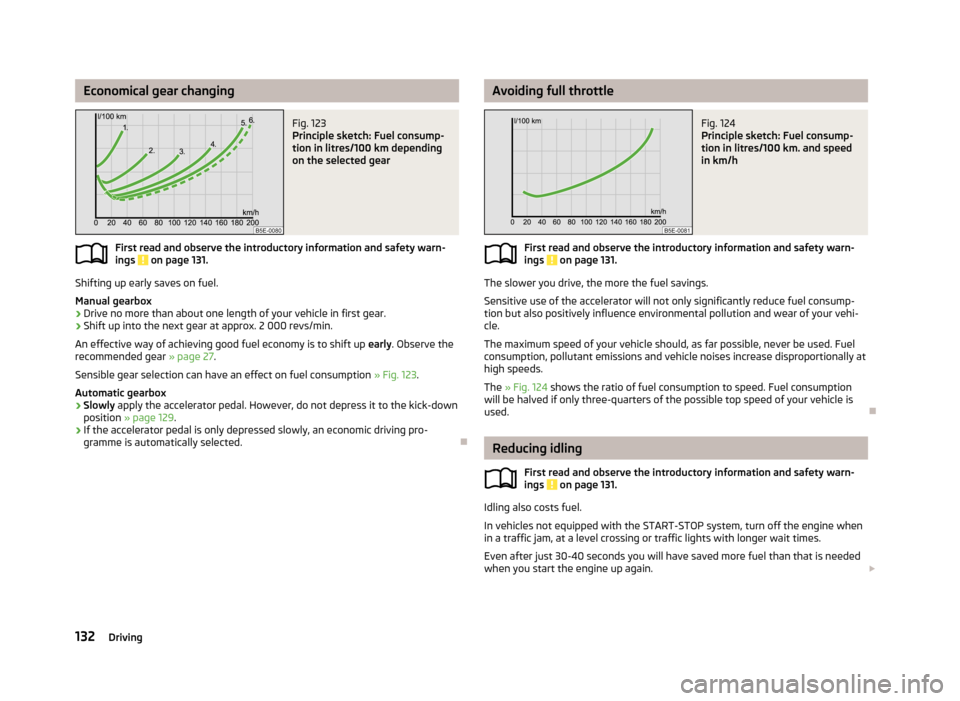
Economical gear changingFig. 123
Principle sketch: Fuel consump-
tion in litres/100 km depending
on the selected gear
First read and observe the introductory information and safety warn-
ings on page 131.
Shifting up early saves on fuel.
Manual gearbox › Drive no more than about one length of your vehicle in first gear.
› Shift up into the next gear at approx. 2 000 revs/min.
An effective way of achieving good fuel economy is to shift up early. Observe the
recommended gear » page 27.
Sensible gear selection can have an effect on fuel consumption » Fig. 123.
Automatic gearbox › Slowly
apply the accelerator pedal. However, do not depress it to the kick-down
position » page 129 .
› If the accelerator pedal is only depressed slowly, an economic driving pro-
gramme is automatically selected.
Avoiding full throttleFig. 124
Principle sketch: Fuel consump-
tion in litres/100 km. and speed
in km/h
First read and observe the introductory information and safety warn-
ings on page 131.
The slower you drive, the more the fuel savings.
Sensitive use of the accelerator will not only significantly reduce fuel consump- tion but also positively influence environmental pollution and wear of your vehi-
cle.
The maximum speed of your vehicle should, as far possible, never be used. Fuel
consumption, pollutant emissions and vehicle noises increase disproportionally at
high speeds.
The » Fig. 124 shows the ratio of fuel consumption to speed. Fuel consumption
will be halved if only three-quarters of the possible top speed of your vehicle is
used.
Reducing idling
First read and observe the introductory information and safety warn-
ings
on page 131.
Idling also costs fuel.
In vehicles not equipped with the START-STOP system, turn off the engine when in a traffic jam, at a level crossing or traffic lights with longer wait times.
Even after just 30-40 seconds you will have saved more fuel than that is needed
when you start the engine up again.
132Driving
Page 139 of 287
›Never stop in the water, do not reverse and do not switch the engine off.›Deactivate the START-STOP system before driving through water
» page 158.WARNING■
Driving through water, mud, sludge etc. can reduce the braking power and
extend the braking distance – risk of accident!■
Avoid abrupt and sudden braking immediately after water crossings.
■
After driving through bodies of water, the brakes must be cleaned and dried
as soon as possible by intermittent braking. Only apply the brakes for the pur-
pose of drying and cleaning the brake discs if the traffic conditions permit this.
Do not place any other road users in jeopardy.
CAUTION
■ When driving through bodies of water, some parts of the vehicle such as the
engine, gearbox, chassis or electrics can be severely damaged.■
Oncoming vehicles can generate water waves which can exceed the permissible
water level for your vehicle.
■
Potholes, mud or rocks can be hidden under the water making it difficult or im-
possible to drive through the body of water.
■
Do not drive through salt water. The salt can lead to corrosion. Any vehicle parts
that have come into contact with salt water must be rinsed immediately with
fresh water.
Note
After driving through water, we recommend having the vehicle checked by a spe-
cialist garage.
Driving abroad
Introduction
This chapter contains information on the following subjects:
Unleaded petrol
136
Headlights
136In certain countries it is also possible that the ŠKODA Partner network is limited
or has not been established yet. This is the reason why procuring certain spare
parts may be somewhat complicated and specialist garages may only be able to
make limited repairs.
Unleaded petrol
First read and observe the introductory information given on page 136.
A vehicle fitted with a petrol engine must always be refuelled with unleaded pet-rol » page 213 . Information regarding the locations of filling stations that offer
unleaded petrol is, for example, provided by the automobile associations.
Headlights
First read and observe the introductory information given on page 136.
The low beam of your headlights is set asymmetrically. It illuminates the side ofthe road on which the vehicle is being driven to a greater extent.
When driving in countries in which the traffic drives on the other side of the roadthan in your home country, the asymmetrical low beam may dazzle oncoming
drivers. In order to avoid this, the headlights must be adjusted at a specialist ga-
rage.
You can adjust the Xenon headlights yourself by setting the "tourist light" mode
in Infotainment » Operating instructions for Infotainment , chapter Vehicle set-
tings (button CAR) .
Note
You can find out more information on adjusting the headlights at a specialist ga-
rage.
136Driving
Page 147 of 287
If the driver changes the parking mode while searching for a parking space, the
symbol button must be pressed again.
Note
If the symbol (km / h) is shown in the display , the vehicle speed should be
reduced below 40 km / hr (parallel parking) or below 20 km / hr (Transverse park- ing) .
Parking
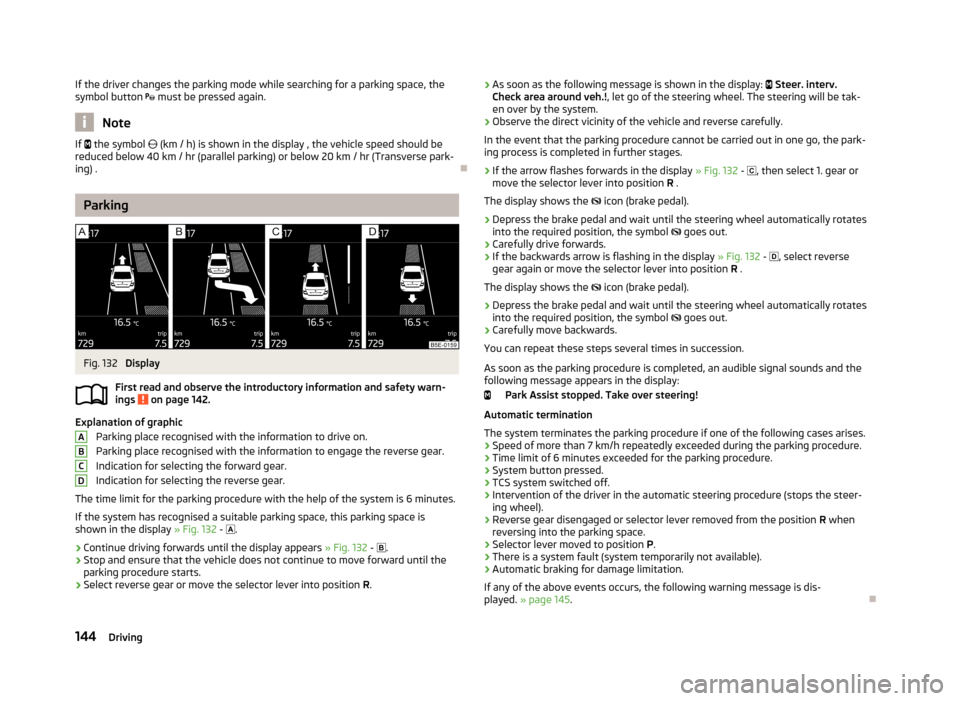
Fig. 132
Display
First read and observe the introductory information and safety warn- ings
on page 142.
Explanation of graphic
Parking place recognised with the information to drive on.
Parking place recognised with the information to engage the reverse gear.
Indication for selecting the forward gear.
Indication for selecting the reverse gear.
The time limit for the parking procedure with the help of the system is 6 minutes. If the system has recognised a suitable parking space, this parking space is
shown in the display » Fig. 132 -
.
›
Continue driving forwards until the display appears » Fig. 132 -
.
›
Stop and ensure that the vehicle does not continue to move forward until the
parking procedure starts.
›
Select reverse gear or move the selector lever into position R.
ABCD› As soon as the following message is shown in the display:
Steer. interv.
Check area around veh.! , let go of the steering wheel. The steering will be tak-
en over by the system.›
Observe the direct vicinity of the vehicle and reverse carefully.
In the event that the parking procedure cannot be carried out in one go, the park- ing process is completed in further stages.
›
If the arrow flashes forwards in the display » Fig. 132 - , then select 1. gear or
move the selector lever into position R .
The display shows the icon (brake pedal).
›
Depress the brake pedal and wait until the steering wheel automatically rotates
into the required position, the symbol goes out.
›
Carefully drive forwards.
›
If the backwards arrow is flashing in the display » Fig. 132 -
, select reverse
gear again or move the selector lever into position R .
The display shows the
icon (brake pedal).
›
Depress the brake pedal and wait until the steering wheel automatically rotates
into the required position, the symbol
goes out.
›
Carefully move backwards.
You can repeat these steps several times in succession.
As soon as the parking procedure is completed, an audible signal sounds and the
following message appears in the display:
Park Assist stopped. Take over steering!
Automatic termination
The system terminates the parking procedure if one of the following cases arises.
› Speed of more than 7 km/h repeatedly exceeded during the parking procedure.
› Time limit of 6 minutes exceeded for the parking procedure.
› System button pressed.
› TCS system switched off.
› Intervention of the driver in the automatic steering procedure (stops the steer-
ing wheel).
› Reverse gear disengaged or selector lever removed from the position
R when
reversing into the parking space.
› Selector lever moved to position
P.
› There is a system fault (system temporarily not available).
› Automatic braking for damage limitation.
If any of the above events occurs, the following warning message is dis-
played. » page 145 .
144Driving
Page 148 of 287
Manoeuvring out of a parallel parking spaceFirst read and observe the introductory information and safety warn-
ings
on page 142.
Manoeuvring out
›
Press the symbol button once
» Fig. 131 on page 143 .
›
Activate the turn signal for side of the vehicle where the parking space is out of
which you wish to manoeuvre.
›
Select reverse gear or move the selector lever into position R.
›
As soon as the following message is shown in the display: Steer. interv.
Check area around veh.! , let go of the steering wheel. The steering will be tak-
en over by the system.
›
Observe the direct vicinity of the vehicle and reverse carefully.
›
Follow the system instructions shown in the display.
As soon as the parking procedure is completed, an audible signal sounds and the
following message appears in the information display:
Please take over steering and drive on.
Automatic termination
The system terminates the manoeuvring procedure if one of the following cases
arises.
› Speed of more than 7 km/h exceeded during the manoeuvring procedure.
› System button pressed.
› TCS system switched off.
› Intervention of the driver in the automatic steering procedure (stops the steer-
ing wheel).
› There is a system fault (system temporarily not available).
› Automatic braking for damage limitation.
If any of the above events occurs, the following warning message is dis-
played. » page 145 .
Automatic brake assist
First read and observe the introductory information and safety warn-
ings
on page 142.
The system provides assistance to the driver with automatic brake assist. The au-
tomatic brake assist does not exempt the driver from his/her responsibility for
the accelerator, brake and clutch.
Automatic braking for preventing cancellations caused by excessive speeds
To prevent the speed from exceeding 7 km/h and to subsequently prevent can-
cellation of the parking procedure, automatic brake support is initiated. The park-
ing procedure can be resumed after automatic braking.
Automatic braking takes place only once per parking procedure.
Automatic braking for damage limitation
The system detects an imminent collision based on the driving speed and the dis-
tance from the obstacle, automatic brake support is initiated.
The system function is ended after this automatic brake assist for damage limita- tion.WARNING■ Automatic brake assist only works as an element of the assist function. The
driver must always be ready to brake the vehicle him/herself.■
Automatic brake assist is ended after around 1.5 seconds. Depress the brak-
ing pedal so that the vehicle does not start moving by itself.
Information messages
First read and observe the introductory information and safety warn-
ings
on page 142.
Park Assist stopped. Speed too high.
If a speed of 50 km / h is exceeded while searching for a parking space, the sys-
tem with the key symbol is must be reactivated.
Speed too high. Take over steering!
The parking procedure was ended because the speed was exceeded. Park with a
max. speed of 7 km/h.
Park Assist stopped. Driver steer. intervent.
The parking procedure is terminated due to a driver steering intervention. Park Assist finished. ASR deactivated.
The parking procedure cannot be carried out because the TCS system is deactiva-
ted. Activate the TCS.
ASR deactivated. Take over steering!
145Assist systems
Page 151 of 287
Briefly push the rocker button B into the RES/+ position in order to resume the
stored speed after the clutch or brake pedal is released.
Information on the display
Fig. 134
Instrument cluster display: Examples of status displays the CCS
First read and observe the introductory information and safety warn- ings
on page 146.
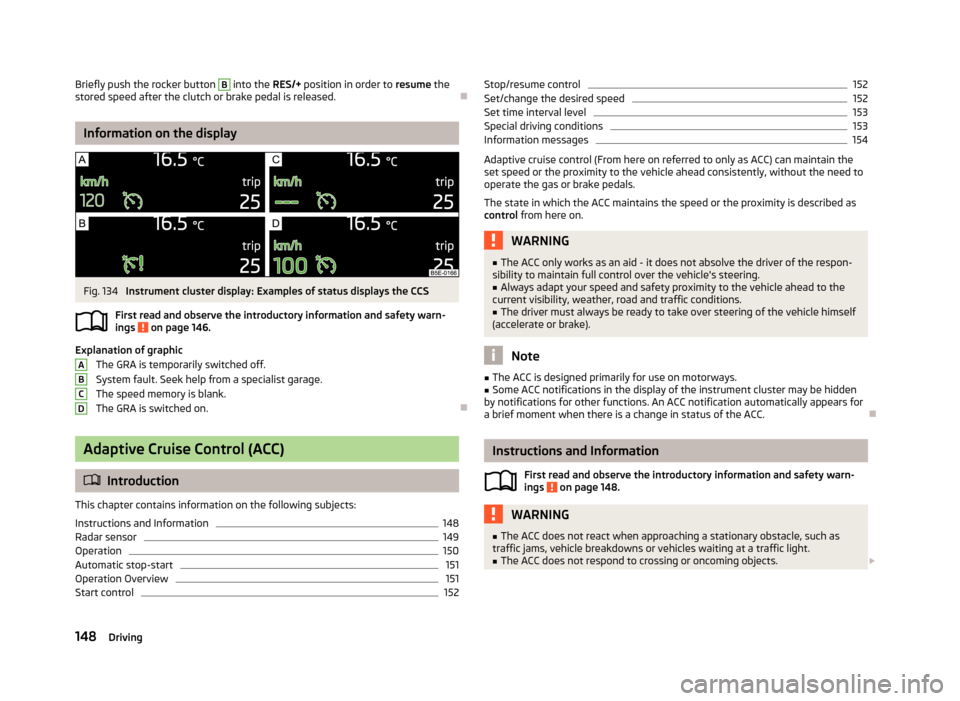
Explanation of graphic
The GRA is temporarily switched off.
System fault. Seek help from a specialist garage.
The speed memory is blank. The GRA is switched on.
Adaptive Cruise Control (ACC)
Introduction
This chapter contains information on the following subjects:
Instructions and Information
148
Radar sensor
149
Operation
150
Automatic stop-start
151
Operation Overview
151
Start control
152ABCDStop/resume control152Set/change the desired speed152
Set time interval level
153
Special driving conditions
153
Information messages
154
Adaptive cruise control (From here on referred to only as ACC) can maintain the
set speed or the proximity to the vehicle ahead consistently, without the need to
operate the gas or brake pedals.
The state in which the ACC maintains the speed or the proximity is described as
control from here on.
WARNING■
The ACC only works as an aid - it does not absolve the driver of the respon-
sibility to maintain full control over the vehicle's steering.■
Always adapt your speed and safety proximity to the vehicle ahead to the
current visibility, weather, road and traffic conditions.
■
The driver must always be ready to take over steering of the vehicle himself
(accelerate or brake).
Note
■ The ACC is designed primarily for use on motorways.■Some ACC notifications in the display of the instrument cluster may be hidden
by notifications for other functions. An ACC notification automatically appears for
a brief moment when there is a change in status of the ACC.
Instructions and Information
First read and observe the introductory information and safety warn-ings
on page 148.
WARNING■ The ACC does not react when approaching a stationary obstacle, such as
traffic jams, vehicle breakdowns or vehicles waiting at a traffic light.■
The ACC does not respond to crossing or oncoming objects. 148Driving
Page 152 of 287
WARNING (Continued)■If the ACC does not decelerate fast enough, immediately apply the vehicle's
footbrake.■
Control may only be resumed if the stored speed is not too high for the cur-
rent traffic conditions.
WARNINGFor safety reasons, do not use the ACC under the following conditions.■When driving in turning lanes, motorway exits or construction sites, to avoid
an unwanted acceleration to the stored speed.■
When visibility is poor, (e.g. fog, heavy rain, thick snowfall).
■
When road conditions are poor (e.g. ice, slippery road, gravel, dirt road).
■
When driving around “sharp” bends.
■
When riding on a steep gradient / high slope.
CAUTION
■ It is not possible to switch on the control on vehicles fitted with a manual
transmission if the first gear or reverse gear is engaged.■
It is not possible to switch on the control on vehicles fitted with an automatic
transmission , if the selector lever is in the position P, N or R .
■
The control may automatically switch off when some brake assist systems (e.g.
ESC) intervene, when the maximum permissible engine speed is exceeded, etc.
Note
■ The speed can only be set and stored when ACC is activated. The stored speed
may differ from the actual speed if a proximity control procedure is in progress at the time.■
Vehicles with an automatic transmission can decelerate to a standstill and start
again using the ACC.
■
The ACC reduces the speed by automatically releasing the accelerator or by
means of a braking procedure as appropriate. If the brakes are used for an auto-
matic speed reduction at any moments, then the brake light illuminates.
■
In case of failure of more than one brake light on the vehicle or on the electri-
cally connected trailer, the ACC becomes unavailable.
Radar sensorFig. 135
Mounting location of the radar
sensor
First read and observe the introductory information and safety warn-
ings on page 148.
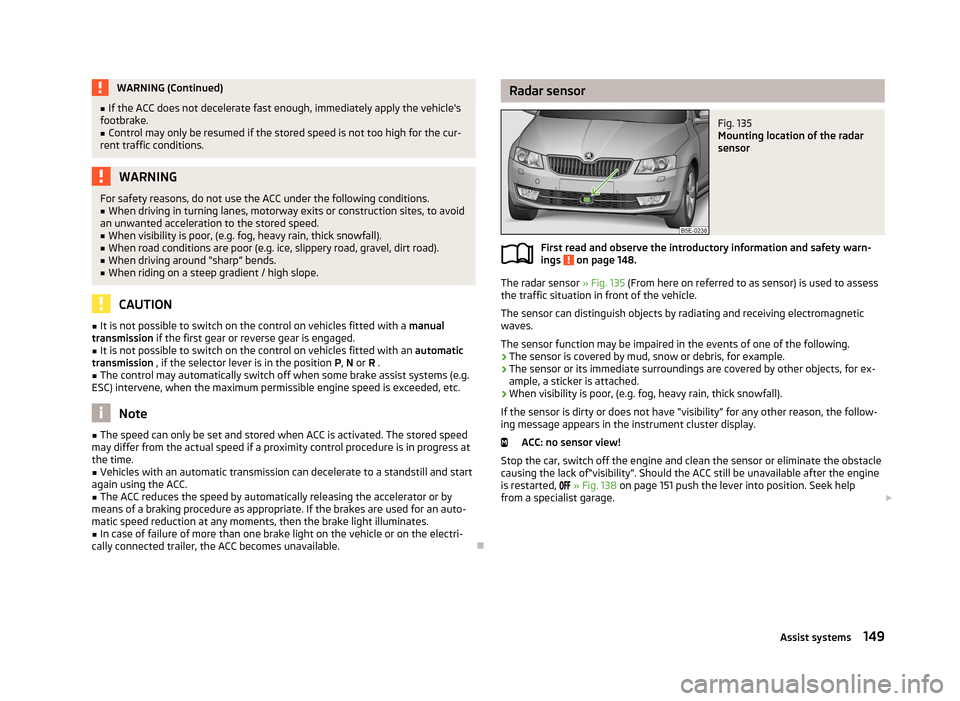
The radar sensor » Fig. 135 (From here on referred to as sensor) is used to assess
the traffic situation in front of the vehicle.
The sensor can distinguish objects by radiating and receiving electromagneticwaves.
The sensor function may be impaired in the events of one of the following.
› The sensor is covered by mud, snow or debris, for example.
› The sensor or its immediate surroundings are covered by other objects, for ex-
ample, a sticker is attached.
› When visibility is poor, (e.g. fog, heavy rain, thick snowfall).
If the sensor is dirty or does not have “visibility” for any other reason, the follow- ing message appears in the instrument cluster display.
ACC: no sensor view!
Stop the car, switch off the engine and clean the sensor or eliminate the obstacle
causing the lack of“visibility”. Should the ACC still be unavailable after the engine is restarted,
» Fig. 138 on page 151 push the lever into position. Seek help
from a specialist garage.
149Assist systems
Page 154 of 287
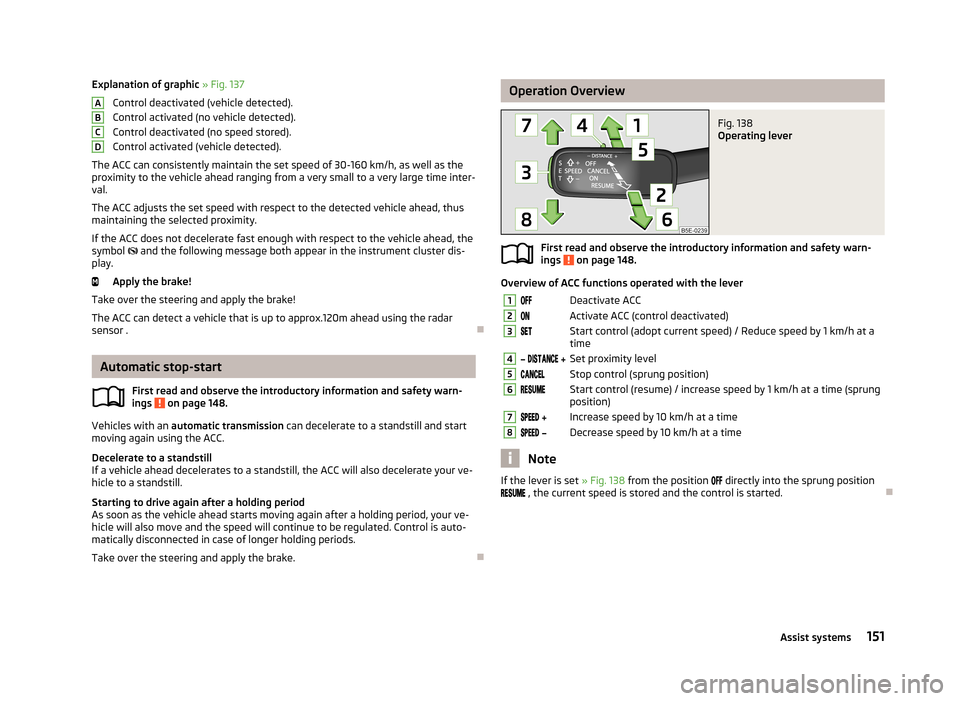
Explanation of graphic » Fig. 137
Control deactivated (vehicle detected).
Control activated (no vehicle detected).
Control deactivated (no speed stored).
Control activated (vehicle detected).
The ACC can consistently maintain the set speed of 30-160 km/h, as well as the
proximity to the vehicle ahead ranging from a very small to a very large time inter-
val.
The ACC adjusts the set speed with respect to the detected vehicle ahead, thus
maintaining the selected proximity.
If the ACC does not decelerate fast enough with respect to the vehicle ahead, the symbol
and the following message both appear in the instrument cluster dis-
play.
Apply the brake!
Take over the steering and apply the brake! The ACC can detect a vehicle that is up to approx.120m ahead using the radar
sensor .
Automatic stop-start
First read and observe the introductory information and safety warn-
ings
on page 148.
Vehicles with an automatic transmission can decelerate to a standstill and start
moving again using the ACC.
Decelerate to a standstill
If a vehicle ahead decelerates to a standstill, the ACC will also decelerate your ve-
hicle to a standstill.
Starting to drive again after a holding period As soon as the vehicle ahead starts moving again after a holding period, your ve-hicle will also move and the speed will continue to be regulated. Control is auto-
matically disconnected in case of longer holding periods.
Take over the steering and apply the brake.
ABCDOperation OverviewFig. 138
Operating lever
First read and observe the introductory information and safety warn-
ings on page 148.
Overview of ACC functions operated with the lever
1Deactivate ACC2Activate ACC (control deactivated)3Start control (adopt current speed) / Reduce speed by 1 km/h at a
time4 Set proximity level5Stop control (sprung position)6Start control (resume) / increase speed by 1 km/h at a time (sprung
position)7 Increase speed by 10 km/h at a time8 Decrease speed by 10 km/h at a time
Note
If the lever is set » Fig. 138 from the position directly into the sprung position
, the current speed is stored and the control is started.
151Assist systems
Page 155 of 287
Start controlFirst read and observe the introductory information and safety warn-
ings
on page 148.
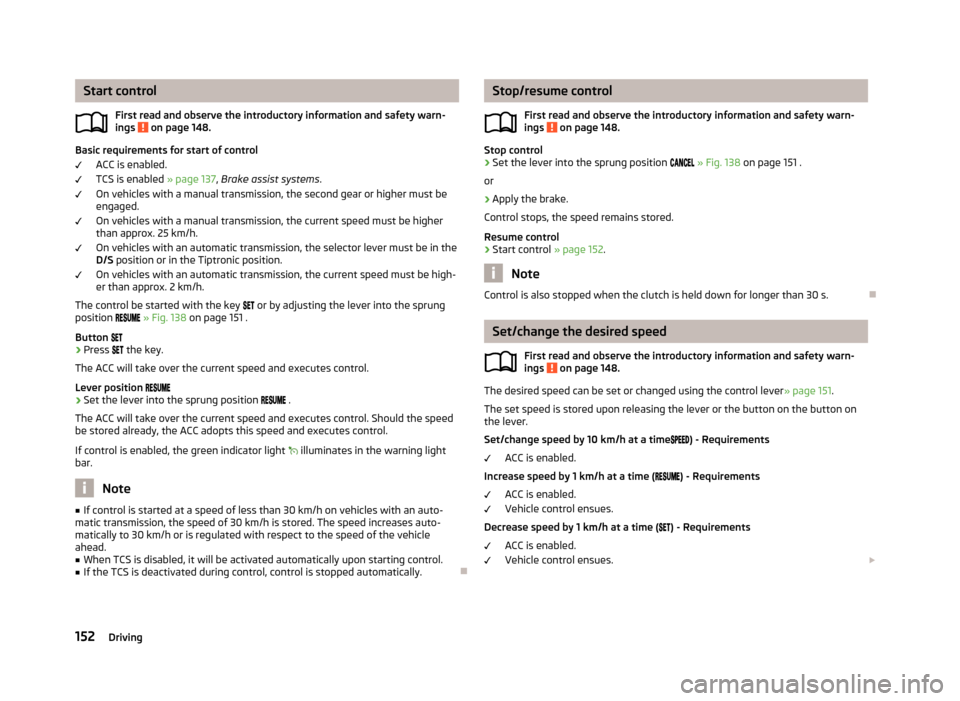
Basic requirements for start of control
ACC is enabled.
TCS is enabled » page 137, Brake assist systems .
On vehicles with a manual transmission, the second gear or higher must be
engaged.
On vehicles with a manual transmission, the current speed must be higher
than approx. 25 km/h.
On vehicles with an automatic transmission, the selector lever must be in the
D/S position or in the Tiptronic position.
On vehicles with an automatic transmission, the current speed must be high-
er than approx. 2 km/h.
The control be started with the key
or by adjusting the lever into the sprung
position
» Fig. 138 on page 151 .
Button
›
Press
the key.
The ACC will take over the current speed and executes control.
Lever position
›
Set the lever into the sprung position
.
The ACC will take over the current speed and executes control. Should the speed be stored already, the ACC adopts this speed and executes control.
If control is enabled, the green indicator light
illuminates in the warning light
bar.
Note
■ If control is started at a speed of less than 30 km/h on vehicles with an auto-
matic transmission, the speed of 30 km/h is stored. The speed increases auto-
matically to 30 km/h or is regulated with respect to the speed of the vehicle ahead.■
When TCS is disabled, it will be activated automatically upon starting control.
■
If the TCS is deactivated during control, control is stopped automatically.
Stop/resume control
First read and observe the introductory information and safety warn-ings
on page 148.
Stop control
›
Set the lever into the sprung position » Fig. 138 on page 151 .
or
›
Apply the brake.
Control stops, the speed remains stored.
Resume control
›
Start control » page 152.
Note
Control is also stopped when the clutch is held down for longer than 30 s.
Set/change the desired speed
First read and observe the introductory information and safety warn-
ings
on page 148.
The desired speed can be set or changed using the control lever » page 151.
The set speed is stored upon releasing the lever or the button on the button on
the lever.
Set/change speed by 10 km/h at a time
) - Requirements
ACC is enabled.
Increase speed by 1 km/h at a time (
) - Requirements
ACC is enabled.
Vehicle control ensues.
Decrease speed by 1 km/h at a time (
) - Requirements
ACC is enabled.
Vehicle control ensues.
152Driving
Page 156 of 287
Change speed by adopting the current speed) - Requirements
ACC is enabled.
The vehicle is moving at a speed other than that which is stored.
Note
■
If during control the speed is increased by pressing the accelerator, control is
temporarily stopped. Upon releasing the accelerator, control is automatically re-
sumed.■
If during control the speed is reduced by applying the brake, control is stopped.
Control needs to be restarted in order to resume » page 152.
■
If the vehicle is controlled by a lower speed than the stored speed, then the
current speed is stored by the first press of the button , press the button again
and the speed is reduced in increments of 1 km / h.
Set time interval level
First read and observe the introductory information and safety warn-ings
on page 148.
The proximity to the vehicle ahead can be set with the lever » Fig. 138 on page 151
or in the Infotainment » infotainment manual , chapter Vehicle settings (CAR but-
ton) .
Setting by means of the lever
›
Set the switch
in the sprung position or
-
» Fig. 138 on page 151.
The display of the instrument cluster shows line
2
» Fig. 136 on page 150, which
indicates the proximity.
›
Using the switch
on the lever, adjust line
2
to the desired proximity lev-
el.
Note
■ If the proximity is changed in the infotainment, the change will only come into
effect after a subsequent activation of the ACC.■
The proximity is dependent on the speed. The higher the speed, the greater the
proximity to the vehicle ahead.
■
On wet roads, a longer time interval to the vehicle ahead should always be se-
lected than on dry roads.
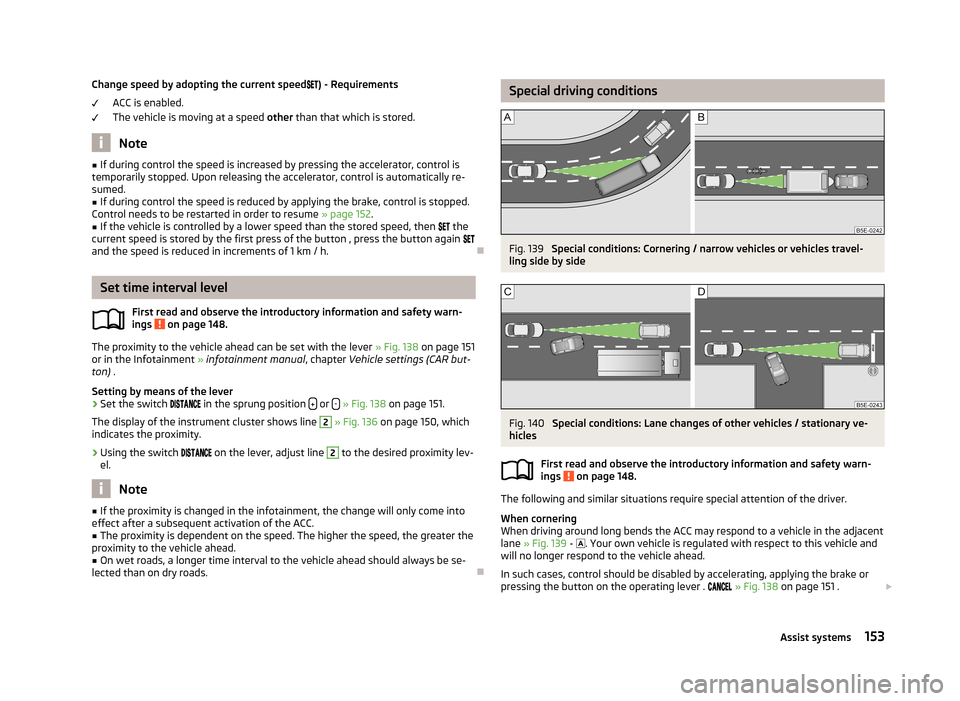
Special driving conditionsFig. 139
Special conditions: Cornering / narrow vehicles or vehicles travel-
ling side by side
Fig. 140
Special conditions: Lane changes of other vehicles / stationary ve-
hicles
First read and observe the introductory information and safety warn-
ings
on page 148.
The following and similar situations require special attention of the driver.
When cornering
When driving around long bends the ACC may respond to a vehicle in the adjacent
lane » Fig. 139 -
. Your own vehicle is regulated with respect to this vehicle and
will no longer respond to the vehicle ahead.
In such cases, control should be disabled by accelerating, applying the brake or
pressing the button on the operating lever .
» Fig. 138 on page 151 .
153Assist systems