ECU SKODA OCTAVIA 2013 3.G / (5E) Owner's Guide
[x] Cancel search | Manufacturer: SKODA, Model Year: 2013, Model line: OCTAVIA, Model: SKODA OCTAVIA 2013 3.G / (5E)Pages: 287, PDF Size: 18.55 MB
Page 216 of 287
›Place the filler cap onto the fuel filler neck and turn it clockwise until it securely
engages.›
Close the fuel filler flap until it clicks into place.
Check that the fuel filler flap is closed properly.
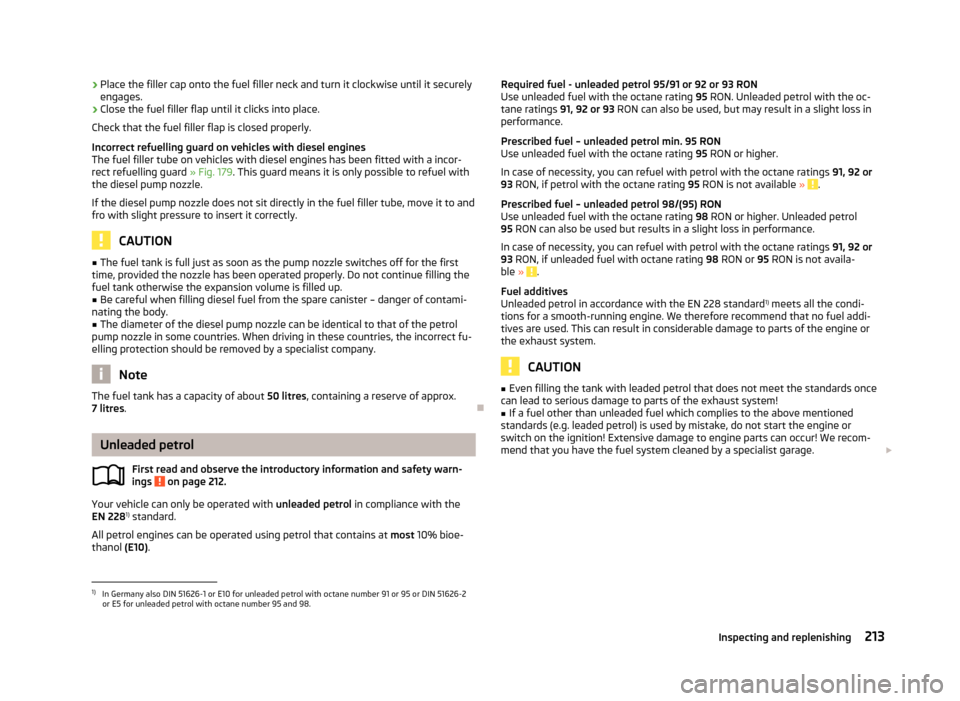
Incorrect refuelling guard on vehicles with diesel enginesThe fuel filler tube on vehicles with diesel engines has been fitted with a incor-rect refuelling guard » Fig. 179. This guard means it is only possible to refuel with
the diesel pump nozzle.
If the diesel pump nozzle does not sit directly in the fuel filler tube, move it to and fro with slight pressure to insert it correctly.
CAUTION
■ The fuel tank is full just as soon as the pump nozzle switches off for the first
time, provided the nozzle has been operated properly. Do not continue filling the fuel tank otherwise the expansion volume is filled up.■
Be careful when filling diesel fuel from the spare canister – danger of contami-
nating the body.
■
The diameter of the diesel pump nozzle can be identical to that of the petrol
pump nozzle in some countries. When driving in these countries, the incorrect fu-
elling protection should be removed by a specialist company.
Note
The fuel tank has a capacity of about 50 litres, containing a reserve of approx.
7 litres .
Unleaded petrol
First read and observe the introductory information and safety warn-
ings
on page 212.
Your vehicle can only be operated with unleaded petrol in compliance with the
EN 228 1)
standard.
All petrol engines can be operated using petrol that contains at most 10% bioe-
thanol (E10).
Required fuel - unleaded petrol 95/91 or 92 or 93 RON
Use unleaded fuel with the octane rating 95 RON. Unleaded petrol with the oc-
tane ratings 91, 92 or 93 RON can also be used, but may result in a slight loss in
performance.
Prescribed fuel – unleaded petrol min. 95 RON
Use unleaded fuel with the octane rating 95 RON or higher.
In case of necessity, you can refuel with petrol with the octane ratings 91, 92 or
93 RON, if petrol with the octane rating 95 RON is not available »
.
Prescribed fuel – unleaded petrol 98/(95) RON Use unleaded fuel with the octane rating 98 RON or higher. Unleaded petrol
95 RON can also be used but results in a slight loss in performance.
In case of necessity, you can refuel with petrol with the octane ratings 91, 92 or
93 RON, if unleaded fuel with octane rating 98 RON or 95 RON is not availa-
ble »
.
Fuel additives
Unleaded petrol in accordance with the EN 228 standard 1)
meets all the condi-
tions for a smooth-running engine. We therefore recommend that no fuel addi-
tives are used. This can result in considerable damage to parts of the engine or
the exhaust system.
CAUTION
■ Even filling the tank with leaded petrol that does not meet the standards once
can lead to serious damage to parts of the exhaust system!■
If a fuel other than unleaded fuel which complies to the above mentioned
standards (e.g. leaded petrol) is used by mistake, do not start the engine or
switch on the ignition! Extensive damage to engine parts can occur! We recom-
mend that you have the fuel system cleaned by a specialist garage.
1)
In Germany also DIN 51626-1 or E10 for unleaded petrol with octane number 91 or 95 or DIN 51626-2
or E5 for unleaded petrol with octane number 95 and 98.
213Inspecting and replenishing
Page 217 of 287
CAUTION■If, in an emergency, the vehicle has to be refuelled with petrol of a lower octane
number than the one prescribed, the journey must only be continued at medium
engine speeds and a low engine load. Driving at high engine revs or a high engine
load can severely damage the engine! Refuel using petrol of the prescribed oc-
tane number as soon as possible.■
Engine parts can be damaged if petrol with a lower octane number than the one
prescribed is used.
■
Even in the event of an emergency, petrol of a lower octane number than 91
RON must not be used, otherwise the engine can be severely damaged!
CAUTION
■ In no case may fuel additives with metal components be used, especially not
with manganese and iron content. LRP(lead replacement petrol) fuels with metal-
lic components may not be used. There is a risk of causing considerable damage
to parts of the engine or exhaust system!■
Fuels with metallic content may not be used. There is a risk of causing consider-
able damage to parts of the engine or exhaust system!
Note
■ Unleaded petrol that has a higher octane number than that required by the en-
gine can be used without limitations.■
On vehicles with prescribed unleaded petrol 95/91, 92 or 93 RON, the use of
petrol with a higher octane number than 95 RON does not result in a noticeable
power increase or a lower fuel consumption.
■
On vehicles using prescribed unleaded petrol of min. 95 RON, the use of petrol
with a higher octane number than 95 RON can increase the power and reduce
fuel consumption.
Diesel fuel
First read and observe the introductory information and safety warn-ings
on page 212.
Your vehicle can only be operated with diesel fuel that meets the EN 5901)
stand-
ard.
All diesel engines can be operated using diesel fuel with at most 7% biodiesel
(B7) 2)
.
On the Indian market, your vehicle will only be able to run on diesel fuel compli-
ant with standard IS 1460/Bharat IV. If diesel fuel which complies with this stand-
ard is not available, you can refuel with diesel fuel according to standard IS 1460/
Bharat III in case of emergency.
Operation in winter – Winter-grade diesel fuel
In the cold season, only use “winter-grade diesel fuel” which will still operate properly even at a temperature of -20 °C.
It is often the case in countries with different climatic conditions that diesel fuelsavailable have a different temperature characteristic. The ŠKODA Partners and
filling stations in the relevant country will be able to provide you with information
regarding the diesel fuels available.
Preheating fuel
The vehicle is fitted with a fuel filter preheating system. This secures operation of a vehicle using diesel fuel down to an environmental temperature of -24 ℃.
Diesel fuel additives
Additives, so-called “flow improvers ” (petrol and similar agents) should not be mixed with the diesel fuel. This can cause serious damage to engine or exhaust
system parts.
1)
In Germany also DIN 51628, in Austria ÖNORM C 1590, in Russia GOST R 52368-2005 / EN 590:2004.
2)
In Germany according to the DIN 52638 standard, in Austria ÖNORM C 1590, in France EN 590.
214General Maintenance
Page 219 of 287
WARNINGThe following warning instructions must be followed at all times when work-
ing in the engine compartment while the engine is running.■
Pay particular attention to moving engine parts (e.g. V-ribbed belt, alterna-
tor, radiator fan) and the high-voltage ignition unit – risk of death!
■
Never touch the electric wiring on the ignition system.
■
Avoid short circuits in the electrical system – particularly on the vehicle's
battery.
■
Always make sure that no jewellery, loose clothing or long hair can get
caught in rotating engine parts – risk of death! Always remove any jewellery,
tie back long hair and wear tight fitting clothing before completing any work.
WARNINGThe following warning instructions must be observed if work has to be carried
out on the fuel or electrical systems.■
Always disconnect the vehicle battery from the electrical system.
■
Do not smoke.
■
Never work near open flames.
■
Always have a functioning fire extinguisher nearby.
WARNING■ Read the information and warning instructions on the fluid containers.■Keep fluids in their original containers and keep out of reach of children!■
If you wish to work under the vehicle, you must secure the vehicle from roll-
ing away and support it with suitable supporting blocks: the car jack is not
sufficient for this – risk of injury!
■
Never cover the engine with additional insulation material (e.g. with a blan-
ket) – risk of fire!
■
The bonnet must always be properly closed when driving. This is why after
closing the bonnet, the lock must always be checked to ensure it has engaged
properly.
■
If you notice that the lock is not properly engaged while driving, stop the ve-
hicle immediately and close the bonnet – risk of accident!
CAUTION
Always top up using the correct specification of fluids. This may result in major
operating problems and also vehicle damage!For the sake of the environmentIn view of the requirements for the environmentally friendly disposal of fluids and
the special tools and knowledge required for such work, we recommend that flu-
ids be changed by a specialist garage.
Note
■ Please consult a specialist garage for any questions relating to fluids.■Fluids with the correct specifications can be purchased from ŠKODA Original Ac-
cessories.
216General Maintenance
Page 220 of 287
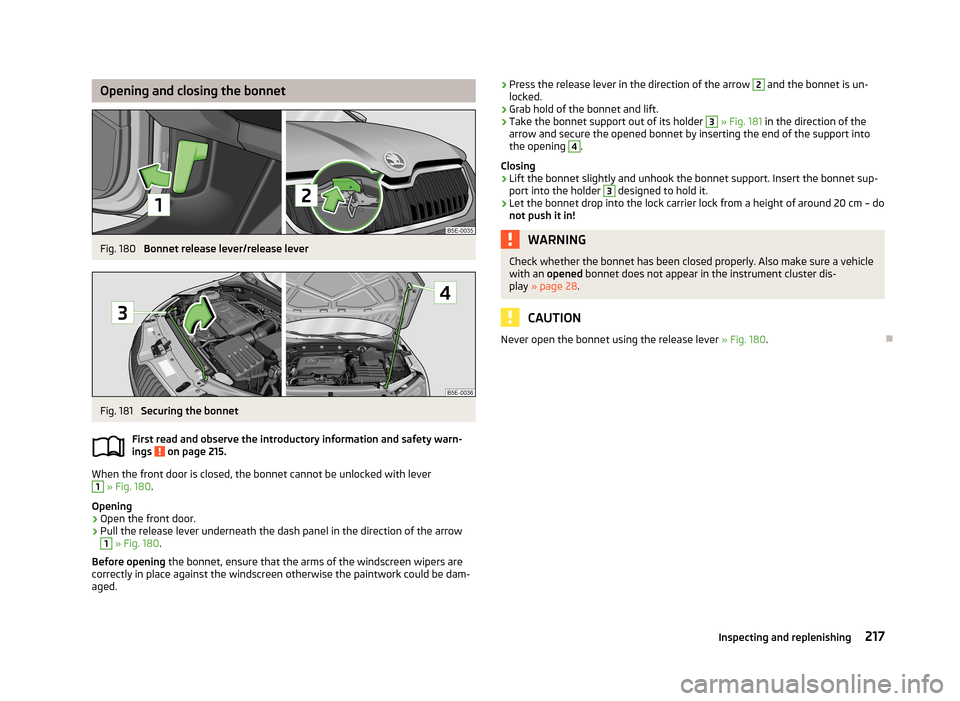
Opening and closing the bonnetFig. 180
Bonnet release lever/release lever
Fig. 181
Securing the bonnet
First read and observe the introductory information and safety warn-
ings
on page 215.
When the front door is closed, the bonnet cannot be unlocked with lever
1
» Fig. 180 .
Opening
›
Open the front door.
›
Pull the release lever underneath the dash panel in the direction of the arrow
1
» Fig. 180 .
Before opening the bonnet, ensure that the arms of the windscreen wipers are
correctly in place against the windscreen otherwise the paintwork could be dam- aged.
› Press the release lever in the direction of the arrow 2 and the bonnet is un-
locked.›
Grab hold of the bonnet and lift.
›
Take the bonnet support out of its holder
3
» Fig. 181 in the direction of the
arrow and secure the opened bonnet by inserting the end of the support into the opening
4
.
Closing
›
Lift the bonnet slightly and unhook the bonnet support. Insert the bonnet sup-
port into the holder
3
designed to hold it.
›
Let the bonnet drop into the lock carrier lock from a height of around 20 cm – do not push it in!
WARNINGCheck whether the bonnet has been closed properly. Also make sure a vehicle
with an opened bonnet does not appear in the instrument cluster dis-
play » page 28 .
CAUTION
Never open the bonnet using the release lever » Fig. 180.
217Inspecting and replenishing
Page 229 of 287

Checking the battery electrolyte levelFig. 188
Vehicle battery: Electrolyte level
indicator
First read and observe the introductory information and safety warn-
ings on page 224.
On vehicles with a vehicle battery fitted with a colour indicator, the so-called
magic eye » Fig. 188, the electrolyte level can be determined by looking at the
change in colour.
Air bubbles can influence the colour of the indicator. For this reason carefully
knock on the indicator before carrying out the check.
› Black colour – electrolyte level is correct.
› Colourless or light yellow colour – electrolyte level too low, the battery must be
replaced.
Vehicles with a START-STOP system are fitted with a battery control unit for checking the energy level for the recurring engine start.
We recommend that you have the acid level checked regularly by a specialist ga-
rage, especially in the following cases.
› High external temperatures.
› Longer day trips.
› After each charge.
Winter time
The vehicle battery only has a proportion of the starting power in lower tempera-
tures. A discharged vehicle battery may already freeze at temperatures just be-
low 0 °C .
We therefore recommend that you have the battery checked and, if necessary, re-
charged by a specialist garage before the start of the winter.
CAUTIONFor technical reasons, on vehicles with the description “AGM”, the electrolyte lev- el cannot be checked.
Note
The battery acid level is also checked regularly by a specialist garage as part of
the inspection service.
Charging
First read and observe the introductory information and safety warn-ings
on page 224.
A properly charged vehicle battery is essential for reliably starting the engine.
›
Switch off the ignition and all of the electrical components.
›
Only when performing a “quick-charge”, disconnect both battery cables (first of
all “negative”, then “positive”).
›
Attach the terminal clamps of the charger to the battery terminals (red = “posi- tive”, black = “negative”).
›
Plug the mains cable of the charger into the power socket and switch on the
device.
›
After charging has been successful: Switch off the charger and remove themains cable from the power socket.
›
Only then disconnect the charger's terminal clamps.
›
Reconnect the cables to the battery (first of all “positive”, then “negative”).
It is not necessary to disconnect the cables of the battery if you recharge the ve- hicle battery using low amperages (for example from a mini-charger). Refer to the
instructions of the charger manufacturer .
A charging current of 0.1 multiple of the total vehicle battery capacity (or lower) must be used until full charging is achieved.
It is necessary to disconnect both cables before charging the battery with high
amperages, so-called “ quick-charging”.
The vent plugs of the vehicle battery should not be opened for charging.
226General Maintenance
Page 235 of 287
›The wheels of one axle are loaded more heavily (e.g. when towing a trailer or
when driving uphill or downhill).
› Snow chains are mounted.
› The spare wheel is mounted.
› One wheel per axle was changed.
For vehicles with Infotainment 1)
it can be determined which tyres should be
checked » Manual Infotainment , chapter Vehicle settings (key CAR) .WARNING■
When the warning light illuminates, immediately reduce the speed and
avoid sudden steering and brake manoeuvres. Stop the vehicle as soon as
possible and inspect the tyres and their inflation pressure.■
Under certain circumstances (e.g. sporty style of driving, wintry or unpaved
roads) the may light up after a delay, or not at all.
CAUTION
■
The tyre control display does therefore not replace the regular tyre inflation
pressure control, as the system cannot detect an even loss of pressure.■
The system cannot warn in case of very rapid tyre inflation pressure loss, e.g. in
case of sudden tyre damage. In this case carefully bring the vehicle to a standstill
without sudden steering movements or sharp braking.
■
To ensure a proper functioning of the tyre control display, it is necessary to re-
peat the basic setting every 10000 km or once a year.
Spare wheel
Fig. 192
Luggage compartment: Spare
wheel
First read and observe the introductory information and safety warn-
ings on page 228.
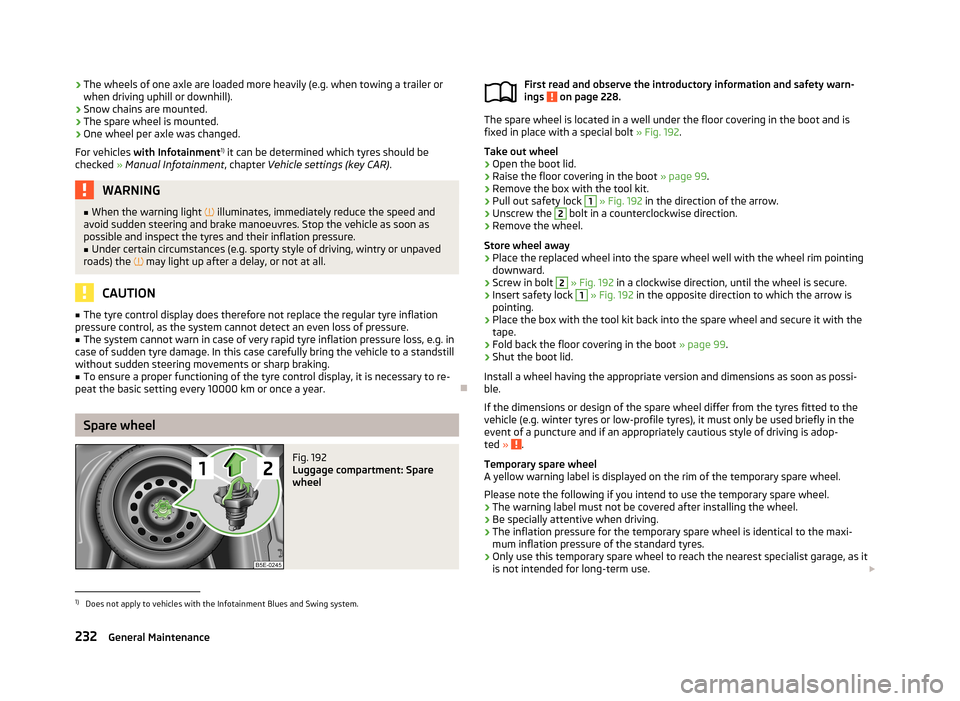
The spare wheel is located in a well under the floor covering in the boot and is
fixed in place with a special bolt » Fig. 192.
Take out wheel
›
Open the boot lid.
›
Raise the floor covering in the boot » page 99.
›
Remove the box with the tool kit.
›
Pull out safety lock
1
» Fig. 192 in the direction of the arrow.
›
Unscrew the
2
bolt in a counterclockwise direction.
›
Remove the wheel.
Store wheel away
›
Place the replaced wheel into the spare wheel well with the wheel rim pointing
downward.
›
Screw in bolt
2
» Fig. 192 in a clockwise direction, until the wheel is secure.
›
Insert safety lock
1
» Fig. 192 in the opposite direction to which the arrow is
pointing.
›
Place the box with the tool kit back into the spare wheel and secure it with the
tape.
›
Fold back the floor covering in the boot » page 99.
›
Shut the boot lid.
Install a wheel having the appropriate version and dimensions as soon as possi-
ble.
If the dimensions or design of the spare wheel differ from the tyres fitted to the
vehicle (e.g. winter tyres or low-profile tyres), it must only be used briefly in the
event of a puncture and if an appropriately cautious style of driving is adop-
ted »
.
Temporary spare wheel
A yellow warning label is displayed on the rim of the temporary spare wheel.
Please note the following if you intend to use the temporary spare wheel. › The warning label must not be covered after installing the wheel.
› Be specially attentive when driving.
› The inflation pressure for the temporary spare wheel is identical to the maxi-
mum inflation pressure of the standard tyres.
› Only use this temporary spare wheel to reach the nearest specialist garage, as it
is not intended for long-term use.
1)
Does not apply to vehicles with the Infotainment Blues and Swing system.
232General Maintenance
Page 236 of 287
WARNING■Never use the temporary spare wheel if it is damaged.■If the dimensions or design of the temporary spare wheel differ from the fit-
ted tyres, never drive faster than 80 km/h (or 50 mph).■
Avoid accelerating at full throttle, sharp braking and fast cornering.
CAUTION
Observe instructions on the warning sign of the emergency wheel.
Full wheel trim
First read and observe the introductory information and safety warn-
ings
on page 228.
Extracting
›
Hook the clamp found in the vehicle tool kit into the reinforced edge of the wheel trim.
›
Push the wheel wrench through the clamp, support on the tyre and pull off the
wheel trim.
Installing
›
Press the wheel trim onto the wheel rim at the valve opening provided.
›
Then press the trim into the wheel rim until its entire circumference locks cor- rectly in place.
CAUTION
■ Use the pressure of your hand only, do not strike the full wheel trim. Avoid
heavy knocks when the trim is not yet inserted in the wheel rim. This could cause damage to the guide and centring elements of the trim.■
When using the anti-theft wheel bolt, ensure that it is in the hole in the valve
area » page 240 , Securing wheels against theft .
■
If wheel trims are retrofitted it must be ensured that an adequate flow of air is
assured to cool the brake system.
Wheel boltsFig. 193
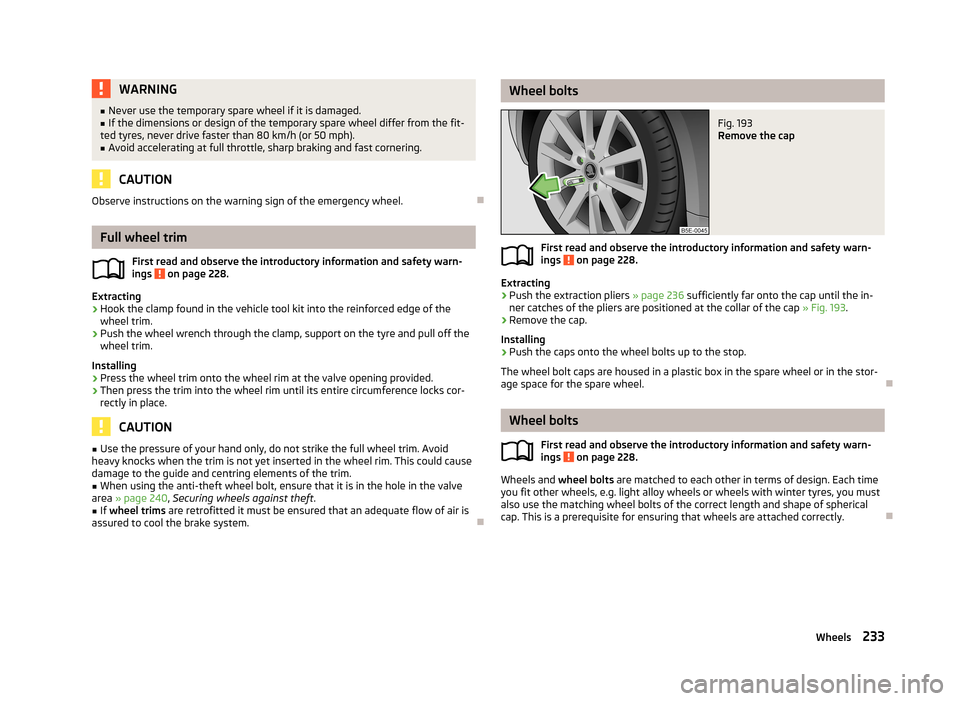
Remove the cap
First read and observe the introductory information and safety warn-
ings on page 228.
Extracting
›
Push the extraction pliers » page 236 sufficiently far onto the cap until the in-
ner catches of the pliers are positioned at the collar of the cap » Fig. 193.
›
Remove the cap.
Installing
›
Push the caps onto the wheel bolts up to the stop.
The wheel bolt caps are housed in a plastic box in the spare wheel or in the stor-
age space for the spare wheel.
Wheel bolts
First read and observe the introductory information and safety warn-ings
on page 228.
Wheels and wheel bolts are matched to each other in terms of design. Each time
you fit other wheels, e.g. light alloy wheels or wheels with winter tyres, you must
also use the matching wheel bolts of the correct length and shape of spherical cap. This is a prerequisite for ensuring that wheels are attached correctly.
233Wheels
Page 238 of 287

Do-it-yourself
Emergency equipment, and self-help
Emergency equipment
Introduction
This chapter contains information on the following subjects:
First aid kit and warning triangle
235
Fire extinguisher
236
Vehicle tool kit
236
First aid kit and warning triangle
Fig. 194
Placing of the first-aid kit
Fig. 195
Placing of the warning triangle: Octavia/Octavia Estate
First read and observe the introductory information given on page 235.
First-aid box
The first aid kit can be attached by a strap in the right-hand storage compartment
in the luggage compartment » Fig. 194.
Warning triangle – Octavia
The warning triangle can be attached to the rear wall trim panel with rubber
straps » Fig. 195 -
.
Warning triangle – Octavia Estate
The warning triangle can be secured with straps in the right storage compart-
ment in the luggage compartment » Fig. 195 -
.
WARNINGThe first-aid kit and warning triangle must always be secured safely so that
they do not come loose when making an emergency braking or in a vehicle
collision which could cause injuries to occupants.
Note
■ Pay attention to the expiration date of the first-aid kit.■We recommend using a first-aid box from ŠKODA Original Accessories available
from a ŠKODA Partner.
235Emergency equipment, and self-help
Page 239 of 287

Fire extinguisherFig. 196
Fire extinguisher
First read and observe the introductory information given on page 235.
The fire extinguisher is attached by two straps in a holder underneath the driver's
seat.
Removing/attaching
›
Loosen the two straps by pulling the buckles in the direction of the ar- row » Fig. 196 .
›
Remove the fire extinguisher.
Follow these steps in the reverse order for attachment.
Please read carefully the instructions which are attached to the fire extinguish-
er.
The fire extinguisher must be checked by an authorised person once a year. The
national legal requirements must be observed.
WARNINGThe fire extinguisher must always be secured safely so that they do not come loose when making an emergency braking or in a vehicle collision which could
cause injuries to occupants.
Note
■ The fire extinguisher must comply with national legal requirements.■Pay attention to the expiration date of the fire extinguisher. If the fire extin-
guisher is used after the expiration date, its proper function is not assured.■
The fire extinguisher is part of the scope of delivery in certain countries only.
Vehicle tool kitFig. 197
Vehicle tool kit
First read and observe the introductory information given on page 235.
The vehicle tool kit and the lifting jack are housed in a plastic box in the spare wheel or in the storage space for the spare wheel. There is also space here for
the removable ball rod for the trailer towing device. The box is attached with a
strap on the spare wheel.
The components of the vehicle tool kit (depending on vehicle equip- ment) » Fig. 197 .
Screwdriver
Key for removing and installing the tail light
Adapter for anti-theft wheel bolts Towing eye
Clamps for removing the wheel trims
Car jack
Crank for the jack
Wheel wrench
Extraction pliers for wheel bolt caps Replacement bulb set
Screw the jack back into its home position after use to allow you to store it in the
box with the toolkit.
12345678910236Do-it-yourself
Page 240 of 287
WARNING■The factory-supplied lifting jack is only intended for your model of vehicle.
Under no circumstances attempt to lift heavier vehicles or other loads – risk of
injury!■
Ensure that the vehicle tool kit is safely secured in the luggage compart-
ment.
■
Ensure that the box is always secured with the strap.
Changing a wheel
Introduction
This chapter contains information on the following subjects:
Preparation
237
Changing a wheel
238
Follow-up tasks
238
Loosening/tightening wheel bolts
239
Raising the vehicle
239
Securing wheels against theft
240WARNING■ If you are in flowing traffic, switch on the hazard warning light system and
set up the warning triangle at the prescribed distance! The national legal re-
quirements must be observed.■
Park the vehicle as far away as possible from the flow of traffic. Park on as
flat and firm a surface as possible.
■
If the vehicle is subsequently fitted with tyres which are different from
those it was fitted with at the works, follow these guidelines » page 230, New
tyres .
WARNINGObserve the following instructions for lifting the vehicle.■If the wheel has to be changed on a slope, first of all block the opposite
wheel with a stone or similar object to prevent the vehicle from unexpectedly
rolling away.■
Secure the base plate of the lifting jack with suitable means to prevent pos-
sible moving. A soft and slippery ground under the base plate may move the lifting jack, causing the vehicle to fall down. It is therefore always necessary to
place the lifting jack on a solid surface or use a wide and stable base. Use a non-slip base (e.g. a rubber foot mat) if the surface is smooth, such as cobbled
stones, tiled floor, etc.
■
Only attach the lifting jack to the attachment points provided for this pur-
pose.
■
Always raise the vehicle with the doors closed.
■
Never position any body parts, such as arms or legs under the vehicle, while
the vehicle is raised with a lifting jack.
■
Never start the engine with the vehicle sitting on the raised jack – risk of in-
jury.
CAUTION
■ The tightening torque specified for the wheel bolts for steel and light alloy
wheels is 120 Nm.■
If the wheel bolts are fastened too tightly, this can cause damage to the anti-
theft wheel bolt or the adapter.
Note
The national legal requirements must be observed when changing a wheel.
Preparation
First read and observe the introductory information and safety warn-
ings
on page 237.
Always change a wheel on a level surface as far as possible.
The following steps must be carried out before actually changing the wheel:
237Emergency equipment, and self-help