key SKODA OCTAVIA 2013 3.G / (5E) Swing Car Radio Manual
[x] Cancel search | Manufacturer: SKODA, Model Year: 2013, Model line: OCTAVIA, Model: SKODA OCTAVIA 2013 3.G / (5E)Pages: 45, PDF Size: 2.93 MB
Page 30 of 45
4-digit PIN code1)
and the possible functions:
■ Accept - Accepts the displayed PIN code
■ Change - To change the PIN code manually
■ Turn the menu button 2
» Fig. 1 on page 5 to navigate within the number
field, and press the menu button
2
to confirm the number selection.
■ Delete - Deletes mistyped PIN code number
■ OK - Accepts the entered PIN code
■ Cancel - Cancels the pairing process
If the hands-free system appears on the display of the mobile phone, enter the PIN within 30 seconds and wait, until the pairing is complete.
Pairing from the mobile phone
First read and observe the introductory information given on page 26.
Pairing
›
Have the mobile phone search for available Bluetooth ®
devices 2)
.
›
Select the hands-free system in the list of Bluetooth ®
devices.
The following messages will be displayed on the device display screen, depending on the type of mobile phone:
6-digit PIN code and the possible functions:
■ Accept - Accepts the displayed PIN code
■ Cancel - Cancels the pairing process
or
Screen for entering the PIN code 1 )
and the possible functions:
■ OK - Accepts the entered PIN code
■ Delete - Changes the entered PIN code
If the hands-free system appears on the display of the mobile phone, confirm the
pairing request and wait until the pairing is complete.
Fast connection to another paired mobile phone
First read and observe the introductory information given on page 26.
If you want to connect the device to another paired mobile phone, the existing
connection does not have to be terminated. The connection to the existing mo-
bile phone is automatically terminated by connecting to another mobile phone.
›
Press the PHONE button in the Telephone main menu.
A list of up to four previously connected mobile phones will appear.
›
Select the mobile phone to be connected with the hands-free system by con- firming the corresponding function key
3
» Fig. 1 on page 5.
The on-screen message Replace the connection with … with a new connection
with …? must be confirmed in order to ensure that the connection is established
successfully.
›
If the desired mobile phone does not appear in the list press the Search key and
search for paired devices.
›
Select the desired phone from the resulting list of paired devices by turning the
menu button
2
.
›
Confirm the connection by selecting Connect.
If the desired mobile phone did not appear in the list of the four previously con-
nected mobile phones and is not in the resulting list of paired devices, then the
mobile phone must be paired with the device » page 27.
1)
The newly entered PIN code must contain between 4 and 16 digits. The same PIN code must be en-
tered on both the hands-free system and the mobile phone.
2)
The hands-free system is indicated as SKODA_BT_... in the Bluetooth ®
device to be connected. ... is
replaced with the last four symbols of the VIN code of your vehicle. You can change the name of the hands-free system.
28Communication
Page 31 of 45
Automatic connectionFirst read and observe the introductory information given on page 26.
After the device is switched on, the system attempts to connect 1)
to the most re-
cently connected mobile phone 2)
. If the connection cannot be established, the
system will then attempt to connect to other previously connected phones one
by one.
The message Automatic connection... appears on the screen during the automat-
ic connection process.
If the phone was found, the following message appears on the screen: Connection successful
Telephone connected
If the phone was not found, the message Please connect a mobile telephone.
appears on the screen.
Disconnection
First read and observe the introductory information given on page 26.
The connection of a mobile phone to the device can be disconnected in one of the
following ways.
› By removing the ignition key (or switching off the ignition and opening the driv-
er's door in vehicles with the KESSY system).
› By disconnecting the hands-free system or switching off the Bluetooth ®
func-
tion on the mobile phone.
› By switching off the Bluetooth ®
function on the device » page 13.
› By disconnecting or deleting the paired device from the list of paired devi-
ces » page 13 .
Telephone functions
Introduction
This chapter contains information on the following subjects:
Enter a phone number
29
Contact list
30
call lists
31
Redialling the previous outgoing call
31
Telephone call
31
Conditions for successfully making telephone calls The ignition is switched on.
The mobile phone is connected to the hands-free system.
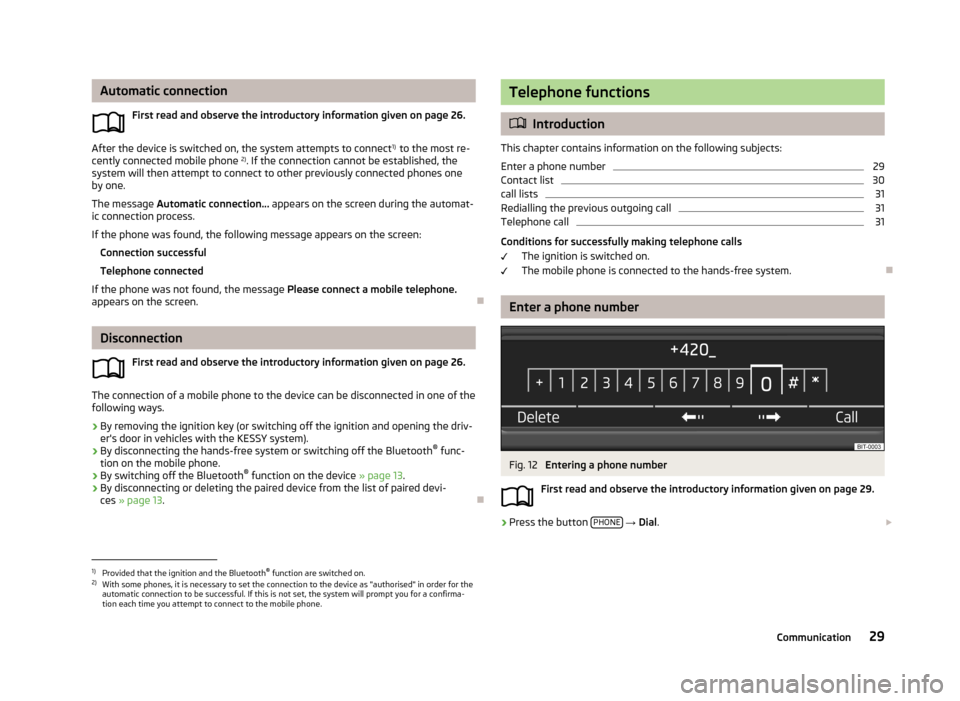
Enter a phone number
Fig. 12
Entering a phone number
First read and observe the introductory information given on page 29.
›
Press the button PHONE
→ Dial .
1)
Provided that the ignition and the Bluetooth®
function are switched on.
2)
With some phones, it is necessary to set the connection to the device as "authorised" in order for the
automatic connection to be successful. If this is not set, the system will prompt you for a confirma-
tion each time you attempt to connect to the mobile phone.
29Communication
Page 33 of 45
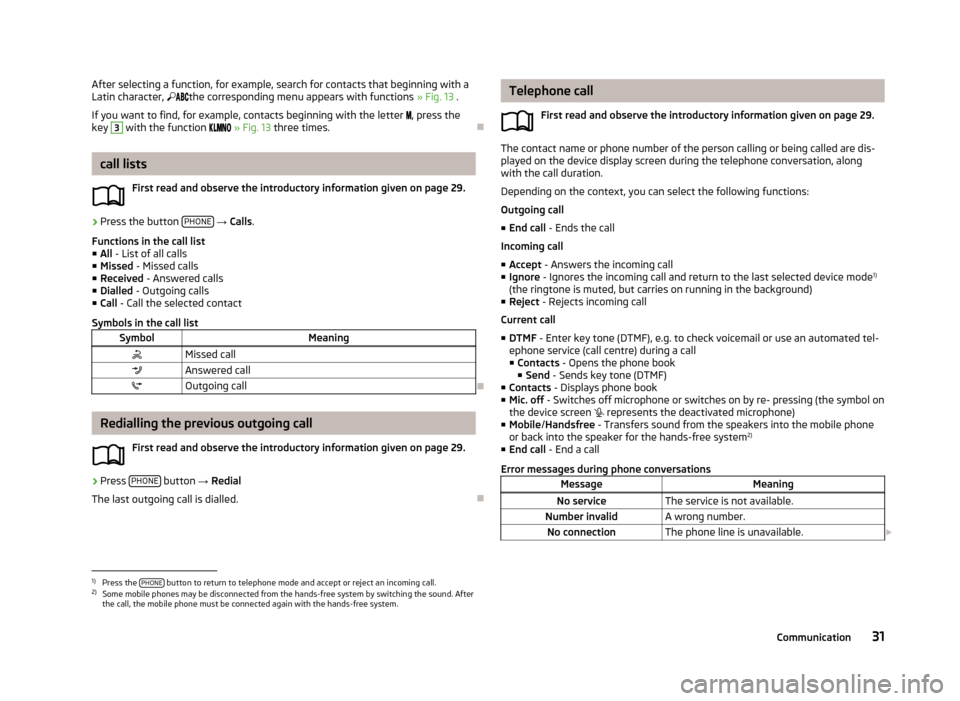
After selecting a function, for example, search for contacts that beginning with a
Latin character, the corresponding menu appears with functions » Fig. 13 .
If you want to find, for example, contacts beginning with the letter , press the
key 3
with the function » Fig. 13 three times.
call lists
First read and observe the introductory information given on page 29.
›
Press the button PHONE
→ Calls .
Functions in the call list
■ All - List of all calls
■ Missed - Missed calls
■ Received - Answered calls
■ Dialled - Outgoing calls
■ Call - Call the selected contact
Symbols in the call list
SymbolMeaningMissed callAnswered callOutgoing call
Redialling the previous outgoing call
First read and observe the introductory information given on page 29.
›
Press PHONE button
→ Redial
The last outgoing call is dialled.
Telephone call
First read and observe the introductory information given on page 29.
The contact name or phone number of the person calling or being called are dis-
played on the device display screen during the telephone conversation, along
with the call duration.
Depending on the context, you can select the following functions:
Outgoing call
■ End call - Ends the call
Incoming call ■ Accept - Answers the incoming call
■ Ignore - Ignores the incoming call and return to the last selected device mode 1)
(the ringtone is muted, but carries on running in the background)
■ Reject - Rejects incoming call
Current call
■ DTMF - Enter key tone (DTMF), e.g. to check voicemail or use an automated tel-
ephone service (call centre) during a call
■ Contacts - Opens the phone book
■ Send - Sends key tone (DTMF)
■ Contacts - Displays phone book
■ Mic. off - Switches off microphone or switches on by re- pressing (the symbol on
the device screen
represents the deactivated microphone)
■ Mobile /Handsfree - Transfers sound from the speakers into the mobile phone
or back into the speaker for the hands-free system 2)
■ End call - End a call
Error messages during phone conversations
MessageMeaningNo serviceThe service is not available.Number invalidA wrong number.No connectionThe phone line is unavailable.
1)
Press the
PHONE button to return to telephone mode and accept or reject an incoming call.
2)
Some mobile phones may be disconnected from the hands-free system by switching the sound. After
the call, the mobile phone must be connected again with the hands-free system.
31Communication
Page 38 of 45
■Mirrors - Adjusts the mirrors
■ Synchronous mirror adjustment - Activate/deactivate synchronous mirror ad-
justment
■ Lowering in reverse - Activates/deactivates the lowering of the front passen-
ger mirror when reversing
■ Fold in while parking - Activate/deactivate folding the mirror via the remote
control or by using the sensor in the handle (KESSY)
■ Wipers - Adjusts the windscreen wipers
■ Automatic wiping in rain - Activate/deactivate automatic windscreen wiping
in rain
■ Automatic rear wiper - Activate/deactivate automatic rear window wiping
Opening and closing
First read and observe the introductory information given on page 33.
›
Press the button CAR
→ Opening/closing .
■ Windows - Sets the window operation
■ Convenience opening - Sets the convenience opening
■ Off - Deactivates the convenience opening
■ All windows - All windows
■ Driver - Driver's window only
■ Central locking - Settings for opening and closing of doors
■ Door unlocking - Sets the door unlocking
■ All - All doors
■ Single door - Driver's door or driver's or passenger door with KESSY system
■ Driver side - Doors on the driver's side or on the driver's or passenger's side
with KESSY system
■ Automatic locking - Activates/deactivates automatic locking when setting off
and unlocking after removing the ignition key
■ Alarm system confirmation - Activates/deactivates acoustic signals when un-
locking/locking a vehicle with an anti-theft alarm system
Seats
First read and observe the introductory information given on page 33.
›
Press the button CAR
→ Seats .
■
Store driver's seat position on key - Activates/deactivates the storage of the
driver's seat position and exterior mirror position in the remote control key
when locking the vehicle
Setting Climatronic
Fig. 16
Climatronic main menu
First read and observe the introductory information given on page 33.
Call up the main menu
›
Press the button SETUP on the Climatronic control panel.
Explanation of graphic Function On - illuminated line
Function off - greyed-out line
Set interior temperature on driver's side
Set interior temperature on front passenger's side Set airflow direction
■ Profile - Sets the Climatronic operating mode
■ Light - Low power, quiet operation
■ Medium - Base power
■ Strong - High power
■ - Activates/deactivates automatic air recirculation
■ - Switches quick interior heating on/off
■ - Access to the auxiliary heater and ventilation settings » page 37
ABCDE36Vehicle systems
Page 39 of 45
Note■The Climatronic Profile mode can be set by re-pressing the key 3 » Fig. 1 on
page 5.■
If the device is not operated for longer than 10 seconds in the Climatronic menu,
it will switch to the most recently selected menu or switch itself off.
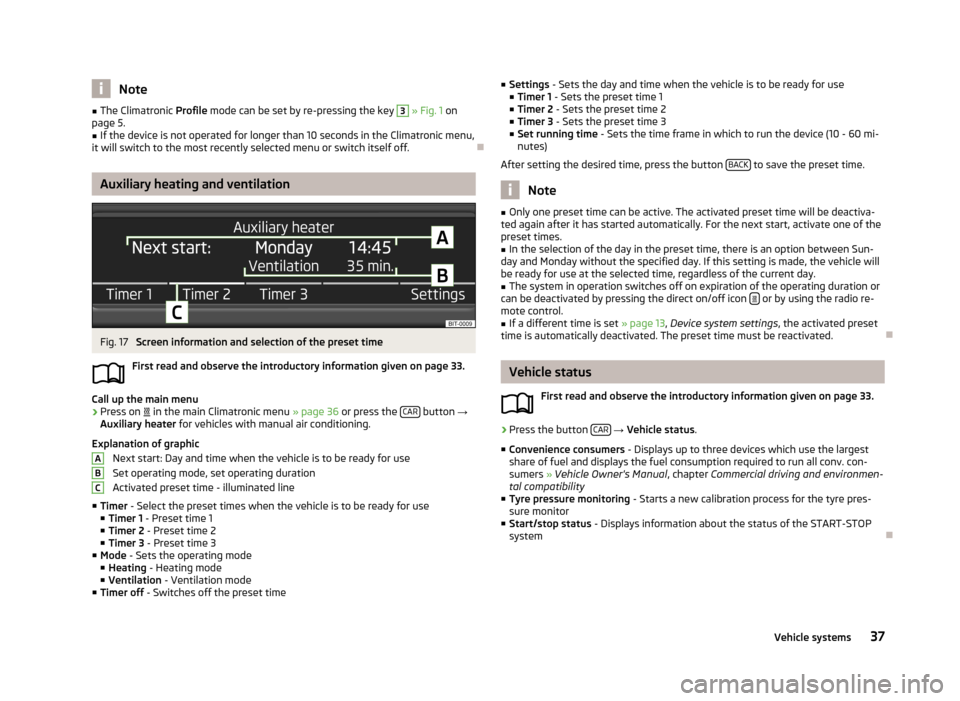
Auxiliary heating and ventilation
Fig. 17
Screen information and selection of the preset time
First read and observe the introductory information given on page 33.
Call up the main menu
›
Press on
in the main Climatronic menu » page 36 or press the CAR button
→
Auxiliary heater for vehicles with manual air conditioning.
Explanation of graphic Next start: Day and time when the vehicle is to be ready for use
Set operating mode, set operating duration
Activated preset time - illuminated line
■ Timer - Select the preset times when the vehicle is to be ready for use
■ Timer 1 - Preset time 1
■ Timer 2 - Preset time 2
■ Timer 3 - Preset time 3
■ Mode - Sets the operating mode
■ Heating - Heating mode
■ Ventilation - Ventilation mode
■ Timer off - Switches off the preset time
ABC■
Settings - Sets the day and time when the vehicle is to be ready for use
■ Timer 1 - Sets the preset time 1
■ Timer 2 - Sets the preset time 2
■ Timer 3 - Sets the preset time 3
■ Set running time - Sets the time frame in which to run the device (10 - 60 mi-
nutes)
After setting the desired time, press the button BACK
to save the preset time.
Note
■
Only one preset time can be active. The activated preset time will be deactiva-
ted again after it has started automatically. For the next start, activate one of the preset times.■
In the selection of the day in the preset time, there is an option between Sun-
day and Monday without the specified day. If this setting is made, the vehicle will
be ready for use at the selected time, regardless of the current day.
■
The system in operation switches off on expiration of the operating duration or
can be deactivated by pressing the direct on/off icon or by using the radio re-
mote control.
■
If a different time is set » page 13, Device system settings , the activated preset
time is automatically deactivated. The preset time must be reactivated.
Vehicle status
First read and observe the introductory information given on page 33.
›
Press the button CAR
→ Vehicle status .
■ Convenience consumers - Displays up to three devices which use the largest
share of fuel and displays the fuel consumption required to run all conv. con- sumers » Vehicle Owner's Manual , chapter Commercial driving and environmen-
tal compatibility
■ Tyre pressure monitoring - Starts a new calibration process for the tyre pres-
sure monitor
■ Start/stop status - Displays information about the status of the START-STOP
system
37Vehicle systems
Page 41 of 45
Index
A
Adjusting the volume
6
AF12
AM17
Anti-theft device4
Audio16
Media18
Multifunction steering wheel8
Radio16
Audio streaming22
Automatic headlight in rain35
Automatic locking36
Automatic rear windscreen35
Automatic windscreen wiping in rain35
AUX12, 23
Auxiliary heating and ventilation Settings
37
B
Bluetooth
13
Update15
Bluetooth audio22
Bluetooth player22
Bluetooth update15
C
CD
21
Climatronic Automatic mode
36
Automatic recirculation36
Operating mode36
COMING HOME35
Communication24
Component protection4
Convenience consumers37
D
Date
13
Daytime running lights35
Declaration of conformity4
Description and operation of the device5
Description of the device5
Device Settings
11
Device display13
Device display screen7
Device operation Device
7
Operating lever8
Device Settings11
Display in device display screen7
Driving mode33
E
Eco-Tips
38
F
Factory settings
13
Fatigue detection34
File formats19
Find radio station16
FM17
Folding down the exterior mirrors - folding in while parking
35
Frequency band17
H
Head Light Assist
35
I
ID3-Tag
12
Important notes4
Instrument lighting35
Introductory information4
Component protection4
Declaration of conformity4
L
Lane change flash
35
Language13
LEAVING HOME35
Light sensor - light switch-on35
M
MAXI DOT
8
Audio8
Telephone10
MDI23
Media18
Additional functions settings21
AUX23
Bluetooth audio22
CD21
File formats19
Operation20
SD memory card22
Select source19
Settings12
Supported media19
USB23
Memory function of the remote control key36
Mix12, 21
Multifunction display38
Multifunction steering wheel Audio
8
Telephone10
39Index