language SKODA OCTAVIA 2014 3.G / (5E) Amundsen Infotainment Navigation System Manual
[x] Cancel search | Manufacturer: SKODA, Model Year: 2014, Model line: OCTAVIA, Model: SKODA OCTAVIA 2014 3.G / (5E)Pages: 77, PDF Size: 4.64 MB
Page 10 of 77
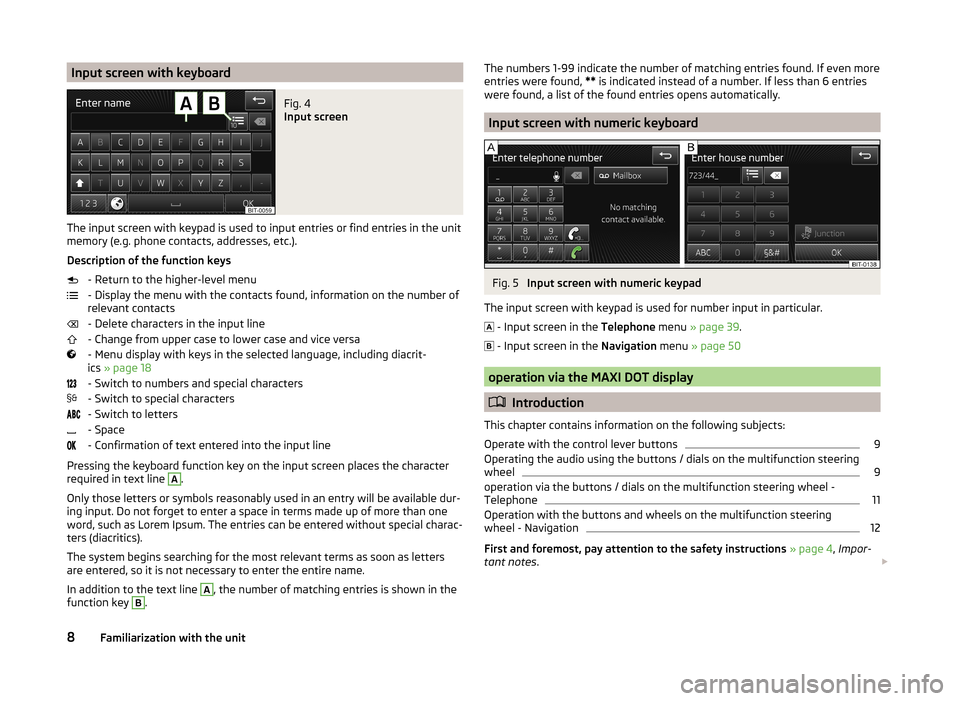
Input screen with keyboardFig. 4
Input screen
The input screen with keypad is used to input entries or find entries in the unit
memory (e.g. phone contacts, addresses, etc.).
Description of the function keys - Return to the higher-level menu
- Display the menu with the contacts found, information on the number of
relevant contacts
- Delete characters in the input line
- Change from upper case to lower case and vice versa
- Menu display with keys in the selected language, including diacrit-
ics » page 18
- Switch to numbers and special characters
- Switch to special characters
- Switch to letters
- Space
- Confirmation of text entered into the input line
Pressing the keyboard function key on the input screen places the character required in text line
A
.
Only those letters or symbols reasonably used in an entry will be available dur-
ing input. Do not forget to enter a space in terms made up of more than one
word, such as Lorem Ipsum. The entries can be entered without special charac-
ters (diacritics).
The system begins searching for the most relevant terms as soon as letters
are entered, so it is not necessary to enter the entire name.
In addition to the text line
A
, the number of matching entries is shown in the
function key
B
.
The numbers 1-99 indicate the number of matching entries found. If even more
entries were found, ** is indicated instead of a number. If less than 6 entries
were found, a list of the found entries opens automatically.
Input screen with numeric keyboard
Fig. 5
Input screen with numeric keypad
The input screen with keypad is used for number input in particular.
- Input screen in the
Telephone menu » page 39 .
- Input screen in the
Navigation menu » page 50
operation via the MAXI DOT display
Introduction
This chapter contains information on the following subjects:
Operate with the control lever buttons
9
Operating the audio using the buttons / dials on the multifunction steering
wheel
9
operation via the buttons / dials on the multifunction steering wheel -
Telephone
11
Operation with the buttons and wheels on the multifunction steering
wheel - Navigation
12
First and foremost, pay attention to the safety instructions » page 4 , Impor-
tant notes .
8Familiarization with the unit
Page 16 of 77
CAUTIONFor some languages voice control is not available. The device will notify the
user of this via a text message which is displayed after setting the device lan-
guage screen » page 16 .
Note
■
No navigation announcements or traffic announcements are played while
you are using voice control.■
Some voice commands must be spelled out, depending on the language of
communication selected, such as Card “S D ” One source selection.
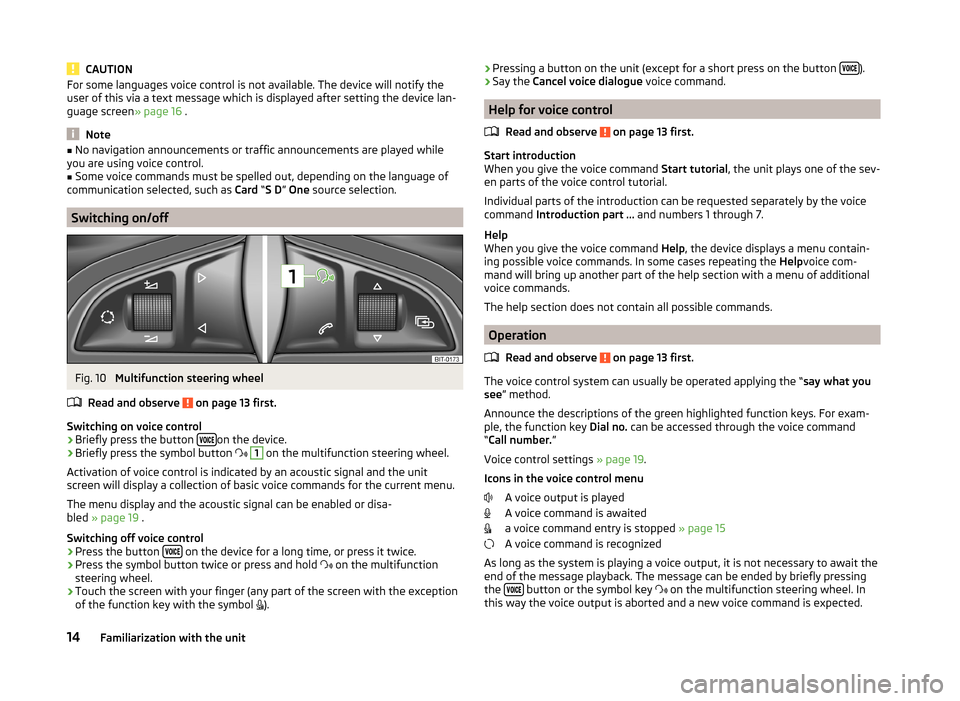
Switching on/off
Fig. 10
Multifunction steering wheel
Read and observe
on page 13 first.
Switching on voice control › Briefly press the button
on the device.
› Briefly press the symbol button
1
on the multifunction steering wheel.
Activation of voice control is indicated by an acoustic signal and the unit
screen will display a collection of basic voice commands for the current menu.
The menu display and the acoustic signal can be enabled or disa-
bled » page 19 .
Switching off voice control › Press the button
on the device for a long time, or press it twice.
› Press the symbol button twice or press and hold
on the multifunction
steering wheel.
› Touch the screen with your finger (any part of the screen with the exception
of the function key with the symbol
).
› Pressing a button on the unit (except for a short press on the button
).
› Say the
Cancel voice dialogue voice command.
Help for voice control
Read and observe
on page 13 first.
Start introduction
When you give the voice command Start tutorial, the unit plays one of the sev-
en parts of the voice control tutorial.
Individual parts of the introduction can be requested separately by the voice
command Introduction part ... and numbers 1 through 7.
Help
When you give the voice command Help, the device displays a menu contain-
ing possible voice commands. In some cases repeating the Helpvoice com-
mand will bring up another part of the help section with a menu of additional
voice commands.
The help section does not contain all possible commands.
Operation
Read and observe
on page 13 first.
The voice control system can usually be operated applying the “ say what you
see ” method.
Announce the descriptions of the green highlighted function keys. For exam-
ple, the function key Dial no. can be accessed through the voice command
“ Call number. ”
Voice control settings » page 19.
Icons in the voice control menu A voice output is played
A voice command is awaited
a voice command entry is stopped » page 15
A voice command is recognized
As long as the system is playing a voice output, it is not necessary to await the
end of the message playback. The message can be ended by briefly pressing
the
button or the symbol key
on the multifunction steering wheel. In
this way the voice output is aborted and a new voice command is expected.
14Familiarization with the unit
Page 18 of 77
Voice commands for querying route informationFunctionVoice commandInformation concerning dis-
tance to the destinationdistance to destinationInformation concerning time
of arrival at destinationarrival timeInformation concerning driv-
ing time to the destinationDriving time
Voice commands for the symbols in the settings menu for the map display
SymbolVoice commandMap “2 D ”Map “3 D ”Destination mapOverview map
Voice commands for the symbols to operate the map display
SymbolVoice commandOrientation zoomPosition mapAutozoomScale ... > Meter | Kilometre | Yards | Miles
e.g. Scale five kilometres
The destination address must be defined by saying the town and street name
and then the house number step-by-step in accordance with the system an-
nouncements. The navigation data must contain the house number.
The house number and a further address supplement in the form of a number can be said where necessary. The system will then offer the number combina-
tion it has found if the house number and the further address supplement,
where appropriate, exists in the street entered.
Device settings
Setup menu
Introduction
This chapter contains information on the following subjects:
Main menu
16
Sound settings
17
Screen settings
18
Time and date settings
18
Keyboard settings
18
Additional keypad language settings
18
Unit settings
19
Voice control settings
19
Restore factory settings
19
Bluetooth ®
settings
19
First and foremost, pay attention to the safety instructions » page 4 , Impor-
tant notes .
This chapter covers the basic settings for the unit.
Additional settings are described in the individual menus ■ Radio » page 24
■ Media » page 27
■ Telephone » page 35
■ Navigation » page 44
■ Vehicle system settings » page 62
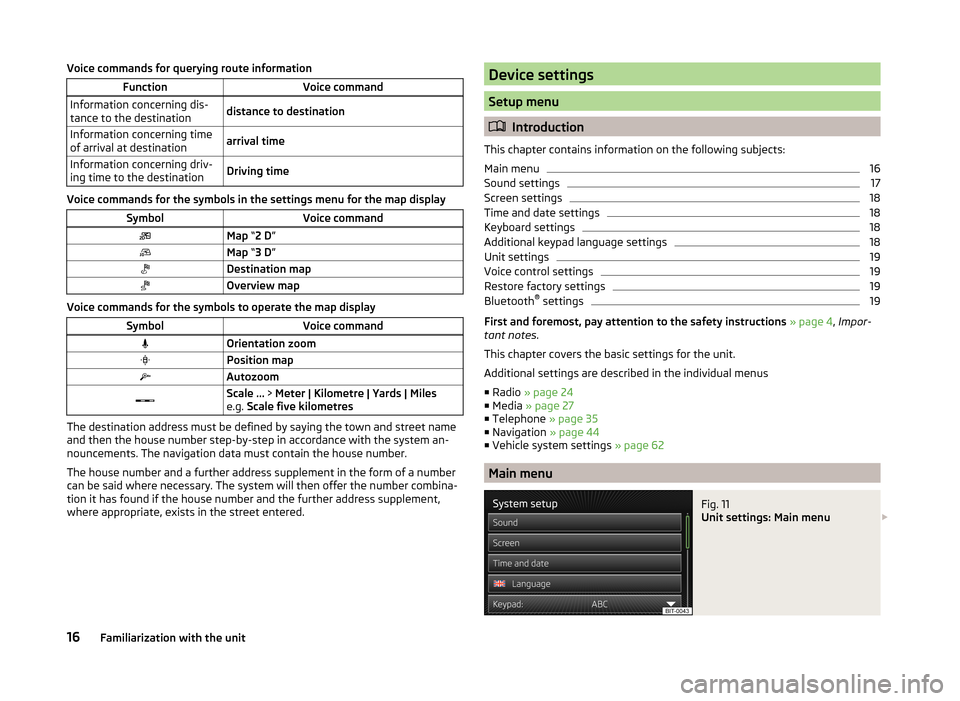
Main menu
Fig. 11
Unit settings: Main menu
16Familiarization with the unit
Page 19 of 77
The basic parameters for the unit can be set from the Main menu.
Call up the main menu›
Press
→ the function key with the symbol
.
Menus in the main menu for unit setup
■ Sound - Sound settings » page 17
■ Screen - Screen settings » page 18
■ Time and date - Time and date settings » page 18
■ Language - Set the device language 1)
■ Keypad: - Keypad display for text entry » page 18
■ More keypad languages - Enables you to enter characters other than those
available for the selected language » page 18
■ Units - Unit settings » page 19
■ Voice control - Voice control settings » page 19
■ Remove SD card 1 safely - Safe removal of the SD card from slot 1
■ Remove SD card 2 safely - Safe removal of the SD card from slot 2
■ Remove USB device safely - Safe removal of USB device
■ Factory settings - Reset to factory settings » page 19
■ Bluetooth - Settings for the Bluetooth ®
function » page 19
■ System information - Displays system information
■ Device part number: ... - Part number of the unit
■ Hardware: ... - Hardware used
■ Software: ... - Software version
■ Navigation database: ... - Version of the navigation data
■ Media Codec: … ... - Media codec version
■ Update software - manual software upgrade
■ Copyright - Information on licences and copyrights are only available in Eng-
lish
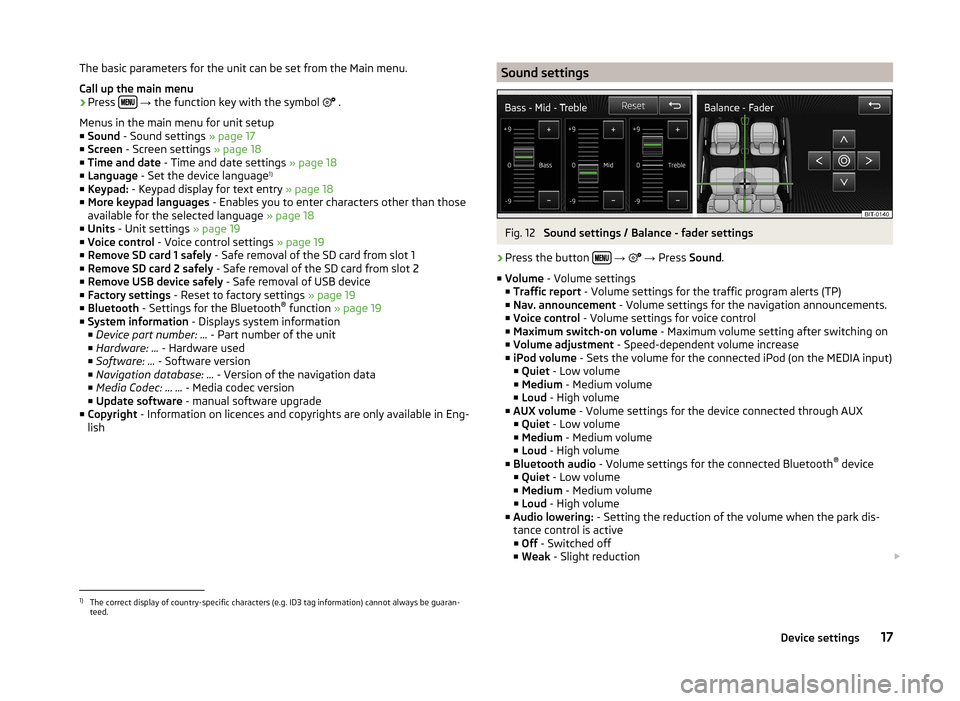
Sound settingsFig. 12
Sound settings / Balance - fader settings
›
Press the button
→
→ Press Sound .
■ Volume - Volume settings
■ Traffic report - Volume settings for the traffic program alerts (TP)
■ Nav. announcement - Volume settings for the navigation announcements.
■ Voice control - Volume settings for voice control
■ Maximum switch-on volume - Maximum volume setting after switching on
■ Volume adjustment - Speed-dependent volume increase
■ iPod volume - Sets the volume for the connected iPod (on the MEDIA input)
■ Quiet - Low volume
■ Medium - Medium volume
■ Loud - High volume
■ AUX volume - Volume settings for the device connected through AUX
■ Quiet - Low volume
■ Medium - Medium volume
■ Loud - High volume
■ Bluetooth audio - Volume settings for the connected Bluetooth ®
device
■ Quiet - Low volume
■ Medium - Medium volume
■ Loud - High volume
■ Audio lowering: - Setting the reduction of the volume when the park dis-
tance control is active ■ Off - Switched off
■ Weak - Slight reduction
1)
The correct display of country-specific characters (e.g. ID3 tag information) cannot always be guaran-
teed.
17Device settings
Page 20 of 77
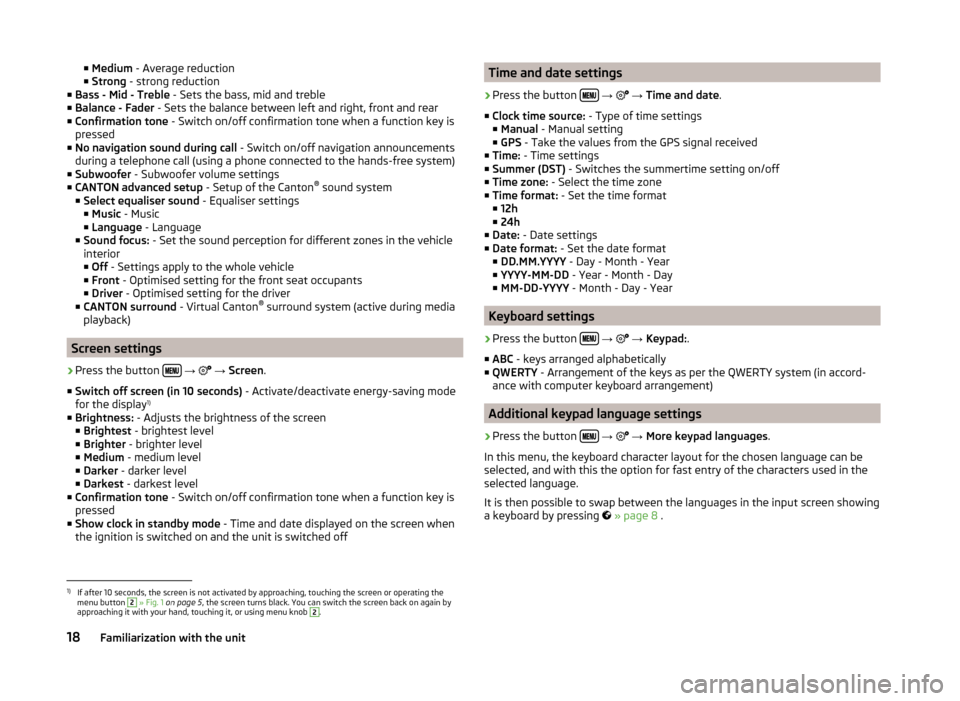
■Medium - Average reduction
■ Strong - strong reduction
■ Bass - Mid - Treble - Sets the bass, mid and treble
■ Balance - Fader - Sets the balance between left and right, front and rear
■ Confirmation tone - Switch on/off confirmation tone when a function key is
pressed
■ No navigation sound during call - Switch on/off navigation announcements
during a telephone call (using a phone connected to the hands-free system)
■ Subwoofer - Subwoofer volume settings
■ CANTON advanced setup - Setup of the Canton®
sound system
■ Select equaliser sound - Equaliser settings
■ Music - Music
■ Language - Language
■ Sound focus: - Set the sound perception for different zones in the vehicle
interior ■ Off - Settings apply to the whole vehicle
■ Front - Optimised setting for the front seat occupants
■ Driver - Optimised setting for the driver
■ CANTON surround - Virtual Canton®
surround system (active during media
playback)
Screen settings
›
Press the button
→
→ Screen .
■ Switch off screen (in 10 seconds) - Activate/deactivate energy-saving mode
for the display 1)
■ Brightness: - Adjusts the brightness of the screen
■ Brightest - brightest level
■ Brighter - brighter level
■ Medium - medium level
■ Darker - darker level
■ Darkest - darkest level
■ Confirmation tone - Switch on/off confirmation tone when a function key is
pressed
■ Show clock in standby mode - Time and date displayed on the screen when
the ignition is switched on and the unit is switched off
Time and date settings›
Press the button
→
→ Time and date .
■ Clock time source: - Type of time settings
■ Manual - Manual setting
■ GPS - Take the values from the GPS signal received
■ Time: - Time settings
■ Summer (DST) - Switches the summertime setting on/off
■ Time zone: - Select the time zone
■ Time format: - Set the time format
■ 12h
■ 24h
■ Date: - Date settings
■ Date format: - Set the date format
■ DD.MM.YYYY - Day - Month - Year
■ YYYY-MM-DD - Year - Month - Day
■ MM-DD-YYYY - Month - Day - Year
Keyboard settings
›
Press the button
→
→ Keypad: .
■ ABC - keys arranged alphabetically
■ QWERTY - Arrangement of the keys as per the QWERTY system (in accord-
ance with computer keyboard arrangement)
Additional keypad language settings
›
Press the button
→
→ More keypad languages .
In this menu, the keyboard character layout for the chosen language can be
selected, and with this the option for fast entry of the characters used in the
selected language.
It is then possible to swap between the languages in the input screen showing
a keyboard by pressing
» page 8 .
1)
If after 10 seconds, the screen is not activated by approaching, touching the screen or operating the
menu button
2
» Fig. 1 on page 5 , the screen turns black. You can switch the screen back on again by
approaching it with your hand, touching it, or using menu knob
2
.
18Familiarization with the unit
Page 71 of 77
Index
A
ACC
65
Additional keyboard languages18
Address50
Adjusting Volume
6
Adjust vehicle systems ESC system
64
Advanced settings45
AM21
Anti-theft protection4
Apple device31
ASR64
Audio21
Media26
Radio21
Automatic distance control65
Automatic front window wipers in rain66
Automatic headlight in rain66
Automatic locking66
Automatic rear window wipers66
Automatic station search22
AUX30
Auxiliary heater and ventilation Settings
64
B
Bluetooth Connect device to phone
36
Settings19
Switch on/off19
Visibility19
Bluetooth audio29
Bluetooth player29
C
CD
29
Climatronic automatic air recirculation
67
Automatic operation67
mode67
COMING HOME66
Communication33
Phonebox35
Component protection4
Control lever9
Convenience consumer63
D
DAB
21
Settings25
Station information,24
Data Convenience consumer
63
Travel63
Vehicle status63
Date18
Daytime running lights66
Declaration of conformity4
Description of the device5
Destination details60
Destination entry50
Address50
From the list52
Home address52
Map51
Options50
Own destination53
POI53
Destination import53
Destination management60
Destination details60
Stopover60
Device operation Control lever9
MAXI DOT display8
Multifunction steering wheel9, 11, 12
Device pairing37
device screen important notes
5
keyboard8
numerical keyboard8
Digital radio reception Settings
25
display5
Display7
Door release66
Driving mode62
Driving Mode Selection62
Dynamic route Switch on/off
59
E
Eco tips
67
Enter in map51
ESC sport64
External input AUX
30
MEDIA IN31
USB31
Extra window47
Audio48
Compass48
Menus47
Switch on/off47
F
Factory settings
19 , 67
Fatigue detection65
File formats28
Requirements and restrictions28
69Index
Page 72 of 77
FM21
Settings24
Folders List Media
26
Folding down the exterior mirrors - folding in while parking
66
Frequency rang See Main Menu
21
Front Assist65
Fuelling options45
Function key7
Function keys7
G
Graphical navigation instructions
49
Graphic navigation instructions57
H
Head Light Assist
66
Home address46, 52
I
important notes touch screen
5
Important notes4
In map51
Input screen Language characters
18
Input screen with keyboard8
Input screen with numeric keyboard8
Instrument lighting66
Intelligent window control66
Introductory information4
iPod31
K
keyboard
8
Keyboard18
L
Lane Assist
65
Lane change flash66
Lane guidance58
LEAVING HOME66
Light sensor - light switch-on time66
List of available stations Radio
22
M
Main menu Media
26
Navigation43
Telephone34
Unit settings16
Manage memory46
Manoeuvre Graphic navigation instructions
57
Navigation announcements57
Map45
Display46
Introductory information46
Lane guidance58
Main menu46
Operation47
Map operation46
MAXI DOT8
MAXI DOT-Display Telephone
11
MAXI DOT display Media
9
Navigation12
operation8
Radio9
Media26
AUX30
Bluetooth audio29
CD29
File formats28
Folder List26
Main menu26
MEDIA IN31
Multifunction steering wheel9
Operation26
Playback27
Requirements and restrictions28
Scan27
SD memory card30
Select signal source26
Settings27
Signal source27
Supported media28
USB30
Voice control13
MEDIA IN31
Memory function of the remote control key66
menu Device settings
16
Menu Media
26
Radio21
Setup16
Telephone33
Multifunction display67
Multifunction steering wheel Media
9
Navigation12
Radio9
Telephone11
Multimedia AUX
30
USB30
Mute6
My destinations Menu
52
N
navigation
56
70Index
Page 74 of 77
SeatsSettings66
Select frequency range See main menu
21
Selection of travel mode62
Select radio station See main menu
21
Select signal source Media
26
Semi-automatic station search22
Settings Additional keyboard languages
18
Bluetooth19
DAB25
Device16
Driving mode62
FM24
Keyboard18
Language16
Manage favourites39
Map display46
Media27
Navigation44
Radio24
Restore factory settings19
Screen18
Sound17
Telephone35
Time and date18
Units19
User profile39
Voice control19
Volume6
Setting vehicle systems Auxiliary heater and ventilation
64
Parking and manoeuvring65
Restore factory settings67
Setup16
Set vehicle systems Tires
64
Signal source27
Sound17
Speed limit for snow tires64
Split screen Geographical coordinates
49
GPS49
Manoeuvre49
Navigation announcement49
Traffic49
Traffic signs49
START-STOP63
Station See main menu
21
Status line7
Stopover60
Switching off Volume
6
Switching the unit off5
Switching the unit on5
Switch voice control on/off
14
Synchronous adjustment of both mirrors66
T
Telephone
33
Bluetooth profile36
Conference41
Dial telephone38
Disconnection39
Fast connection38
Functions39
Main menu34
Multifunction steering wheel11
On screen messages34
Pairing37
Settings35
Telephone conference41
Telephone conversation41
Telephone functions39
Tilt the mirror surface - lower in reverse66
Time18
Tire pressure monitor63, 64
TMC Traffic information
58
touch screen5
TP (traffic report)23
Traffic58
Dynamic route59
Information59
Operation59
Traffic information TMC
58
Traffic information (TP)23
Traffic reports58
Information59
Operation59
Traffic signs47, 49
Travel light - travel mode66
U
Unit menus
6
Unit operation7
In the unit screen7
Unit screen7
Units19
Unit screen Operation
7
USB30, 31
V
vCard
53
Vehicle equipment Declaration of conformity
4
Vehicle identification number67
Vehicle settings62
Vehicle systems62
72Index