stop start SKODA OCTAVIA 2014 3.G / (5E) Owner's Manual
[x] Cancel search | Manufacturer: SKODA, Model Year: 2014, Model line: OCTAVIA, Model: SKODA OCTAVIA 2014 3.G / (5E)Pages: 280, PDF Size: 35.53 MB
Page 5 of 280
Table of Contents
On-board literature4
Notes
5
Structure and more information about the
Owner's manual
6
Abbreviations
Safety
Passive Safety
8
General information
8
Correct and safe seated position
9
Seat belts
12
Using seat belts
12
Inertia reel and belt pretensioners
15
Airbag system
16
Description of the airbag system
16
Airbag overview
17
Deactivating airbags
21
Transporting children safely
22
Child seat
22
Fastening elements
25
Using the system
Cockpit
29
Overview
28
Instruments and warning lights
30
Instrument cluster
30
Warning lights
34
Warning icons in the display
40
Information system
45
Driver information system
45
Driving data (Multifunction display)
47MAXI DOT display50Service interval display53
Unlocking and opening
54
Unlocking and locking
54
Anti-theft alarm system
59
Luggage compartment lid
60
Electric boot lid
61
Power windows
64
Mechanical windows
66
Panorama sliding-/tilting roof - Version 1
67
Panorama sliding-/tilting roof - Version 2
68
Lights and visibility
71
Lights
71
Interior lights
78
Visibility
80
Windscreen wipers and washers
81
Rear mirror
83
Seats and head restraints
86
Seats and head restraints
86
Seat features
90
Transporting and practical equipment
94
Useful equipment
94
Luggage compartment
103
Variable loading floor in the luggage
compartment (Estate)
110
Net partition
112
Roof rack
113
Heating and air conditioning
116
Heating, ventilation, cooling
116
Auxiliary heating (auxiliary heating and
ventilation)
121
Communication
124
SmartGate
124Driving
Starting-off and Driving126
Starting and stopping the engine using the key
126
Starting or stopping the engine by pressing
button
128
Brakes and parking
130
Manual shifting of gears and pedals
132
Automatic gearbox
133
Retraction and economical driving
136
Driving through water and driving off of
made-up roads
137
Assist systems
138
Braking and stabilisation systems
138
Parking aid
140
Optical Parking Assistant (rear view camera)
143
Park assist
144
Cruise Control System
148
Adaptive Cruise Control (ACC)
149
Front Assistant
155
START-STOP
158
Selection of travel mode (Driving Mode
Selection)
160
ProActive passenger protection
161
Lane Assist
162
Traffic sign recognition
164
Fatigue detection (break recommendation)
166
Tyre pressure monitoring
167
Hitch and trailer
169
Hitch
169
Trailer
1742Table of Contents
Page 32 of 280
Using the system
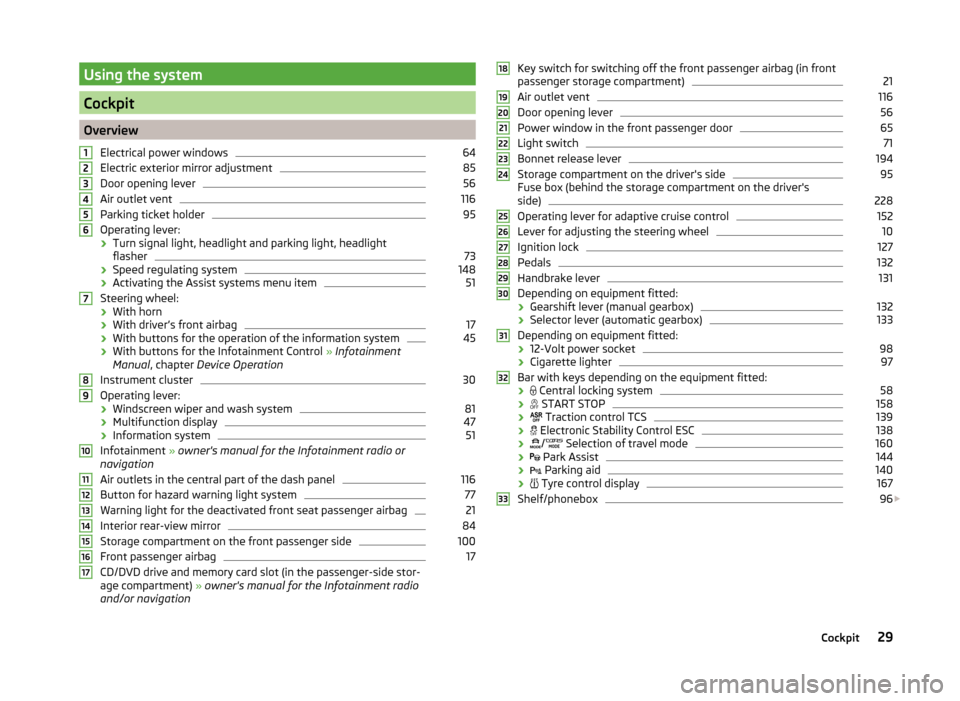
Cockpit
OverviewElectrical power windows
64
Electric exterior mirror adjustment
85
Door opening lever
56
Air outlet vent
116
Parking ticket holder
95
Operating lever:
› Turn signal light, headlight and parking light, headlight
flasher
73
› Speed regulating system
148
›Activating the Assist systems menu item
51
Steering wheel:
› With horn
› With driver’s front airbag
17
›With buttons for the operation of the information system
45
›With buttons for the Infotainment Control
» Infotainment
Manual , chapter Device Operation
Instrument cluster
30
Operating lever: › Windscreen wiper and wash system
81
›Multifunction display
47
›Information system
51
Infotainment
» owner's manual for the Infotainment radio or
navigation
Air outlets in the central part of the dash panel
116
Button for hazard warning light system
77
Warning light for the deactivated front seat passenger airbag
21
Interior rear-view mirror
84
Storage compartment on the front passenger side
100
Front passenger airbag
17
CD/DVD drive and memory card slot (in the passenger-side stor-
age compartment) » owner's manual for the Infotainment radio
and/or navigation
1234567891011121314151617Key switch for switching off the front passenger airbag (in front
passenger storage compartment)21
Air outlet vent
116
Door opening lever
56
Power window in the front passenger door
65
Light switch
71
Bonnet release lever
194
Storage compartment on the driver's side
95
Fuse box (behind the storage compartment on the driver's
side)
228
Operating lever for adaptive cruise control
152
Lever for adjusting the steering wheel
10
Ignition lock
127
Pedals
132
Handbrake lever
131
Depending on equipment fitted:
› Gearshift lever (manual gearbox)
132
›Selector lever (automatic gearbox)
133
Depending on equipment fitted:
› 12-Volt power socket
98
›Cigarette lighter
97
Bar with keys depending on the equipment fitted:
›
Central locking system
58
›
START STOP
158
›
Traction control TCS
139
›
Electronic Stability Control ESC
138
›
/
Selection of travel mode
160
›
Park Assist
144
›
Parking aid
140
›
Tyre control display
167
Shelf/phonebox
96
1819202122232425262728293031323329Cockpit
Page 37 of 280
Viewing the charge level vehicle batteryRead and observe
on page 30 first.
›
Switch off the ignition.
›
Press and hold the button
6
» Fig. 22 on page 31 until the Battery status or
BATTERY SOC is shown in the display.
›
Release button
6
- the current charge level 1)
of the vehicle battery is dis-
played in %.
›
Wait about 4 seconds or press the
6
key, the system returns to the home
setting.
Warning lights
Introduction
This chapter contains information on the following subjects:
Automatic Transmission
35
Handbrake
35
Brake system
35
Seat belt warning light
36
Adaptive Cruise Control (ACC)
36
Central warning light
36
Power steering/steering lock (KESSY system)
36
Traction Control System (ASR)
37
Traction control system (TCS) deactivated
37
Electronic Stability Control (ESC)
37
Antilock brake system (ABS)
37
Rear fog light
38
Exhaust inspection system
38
Glow plug system (diesel engine)
38
Engine performance check (petrol engine)
38
Security systems
38
Tyre pressure
39
Brake linings
39
Lane following system (Lane Assist)
39
Turn signal system
39
Trailer turn signal lights40 Fog lights40
Cruise control system
40
Brake pedal (automatic transmission)
40
Natural gas operation
40
Main beam
40
The warning lights indicate certain functions or faults.
Some warning lights can be accompanied by acoustic signals and messages in
the display of the instrument cluster.
After switching on the ignition, some warning lights light up briefly as a func-
tion test.
If the tested systems are OK, the corresponding warning lights go out a few
seconds after switching on the ignition or after starting the engine.
The condition of some features and systems is shown by the warning icons on
the display » page 40.
The warning lights are at the following locations in the instrument clus-
ter » Fig. 22 on page 31 .
› Revolutions counter
1
›Speedometer
3
›Bar with warning lights
5WARNING■
Ignoring illuminated warning lights and related messages or instructions
in the display of the instrument cluster may lead to serious personal injury
or damage to the vehicle.■
If you have to stop for technical reasons, then park the vehicle at a safe
distance from the traffic, switch off the engine and activate the hazard
warning light system » page 77. The warning triangle must be set up at
the prescribed distance - observe the national legal provisions when doing
so.
■
The engine compartment of your car is a hazardous area. While working in
the engine compartment, be sure to observe the following warn-
ings » page 192 , Engine compartment .
1)
Applies to vehicles with START-STOP system.
34Using the system
Page 39 of 280
Seat belt warning lightRead and observe
on page 34 first.
The warning light
illuminates as a reminder for the driver and front passen-
ger to fasten seat belts.
The indicator light
goes off after the respective seat belt is fastened.
If the driver or front passenger has not fastened their seat belt and the vehicle
speed is more than 30 km/h, the warning light
flashes and you will hear an
acoustic signal.
If the seat belt is not fastened by the driver or front passenger during the next
approx. 2 seconds, the warning signal is deactivated and the warning light
lights up permanently .
Adaptive Cruise Control (ACC)
Read and observe
on page 34 first.
If the warning light
lights up , the delay of the ACC is not sufficient.
The following message is shown in the information cluster display. Apply the brake!
Further information » page 149, Adaptive Cruise Control (ACC) .
Central warning light
Read and observe
on page 34 first.
When the warning light or
lights up , the additional information in the dis-
play of the instrument cluster » page 40, Warning icons in the display
or » page 47 , Auto-check control must be observed.
Power steering/steering lock (KESSY system)
Read and observe
on page 34 first.
Power steering
If the indicator light
illuminates , this indicates a complete failure of the
power steering and the steering assist has failed (significantly higher steering
forces). Seek assistance from a specialist garage immediately.
If the indicator light illuminates , this indicates a partial failure of the power
steering and the steering forces can be greater. Seek assistance from a spe-
cialist garage immediately.
Steering lock (KESSY system)
As long as the warning light
is flashing , the steering lock cannot be re-
leased.
The following message is shown in the information cluster display. Move the steering wheel!
MOVE STEERING WHEEL
› Move the steering wheel slightly back and forth, thereby facilitating unlock-
ing the steering lock.
If the steering does also not unlock then, the help of a specialist garage is re-
quired.
If the warning light
flashes and a beep sounds, the electric steering lock is
faulty.
The following message is shown in the information cluster display. Steering lock: Workshop!
STEERING WORKSHOP
Seek assistance from a specialist garage immediately.
If the warning light
flashes and a beep sounds, the electric steering lock is
faulty.
The following message is shown in the information cluster display. Steering lock faulty. Stop!
STOP VEHICLE STEERING FAULTY
Park the vehicle,
stop driving . After switching off the ignition, it is then no
longer possible to lock the steering, to activate the electrical components (e.g.
radio, navigation system), to switch on the ignition again and to start the en-
gine. Seek help from a specialist garage.
Note
If the vehicle's battery has been disconnected and reconnected, the warning
light comes on after switching on the ignition. The warning light should go
out after driving a short distance. If warning light
does not go out once the
engine has been restarted and the vehicle has been driven for a short period
of time, this indicates a system error. Seek assistance from a specialist garage
immediately.36Using the system
Page 42 of 280
WARNINGWhen a fault in the airbag system occurs, there is a risk of the system not
being triggered in the event of an accident. Therefore, this must be
checked immediately by a specialized garage.
Tyre pressure
Read and observe
on page 34 first.
The warning light lights up
If the warning light illuminates while driving, this means that one of the
tyres has undergone a pressure change.
An audible signal sounds as a warning signal.
›
Immediately reduce speed and avoid sudden steering and braking manoeu-
vres.
›
Stop the vehicle, turn the ignition off and check the tyres and their inflation
pressure » page 204 .
›
Correct the tyre pressure if necessary or replace the affected
wheel » page 214 or use the repair kit » page 218.
›
Store the tyre pressure values in the system » page 167.
The indicator light flashes for about 1 min. and then remains lit
If the warning light flashes for approximately 1 minute and then remains lit,
there may be a fault in the tyre pressure monitoring system.
›
Stop the vehicle, turn the ignition off and start the engine again.
If the warning light flashes after starting the engine again, there is a system
error.
Seek help from a specialist garage.
The illumination of the warning light can have the following reasons.
› The vehicle is loaded on one side. Distribute loads as evenly as possible.
› The wheels of one axle are loaded more heavily (e.g. when towing a trailer or
when driving uphill or downhill).
› Snow chains are mounted.
› A wheel has been changed.
Store the tyre pressure values in the system » page 167.
CAUTIONUnder certain circumstances (e.g. sporty style of driving, wintry or unpaved
roads) the warning light in the instrument cluster can be delayed or does
not light up at all.
Note
If the vehicle's battery has been disconnected and reconnected, the warning
light comes on after switching on the ignition. If the warning light does not
go out after moving a short distance, this means there is an error in the sys-
tem. Seek help from a specialist garage.
Brake linings
Read and observe
on page 34 first.
If the indicator light
is illuminated , the brake pads are worn.
The following message is shown in the information cluster display. Check brake wear!
BRAKE PADS PLEASE CHECK
Seek assistance from a specialist garage immediately.
Lane following system (Lane Assist)
Read and observe
on page 34 first.
The warning lights
indicates the state of the Lane Assist system.
Further information » page 162, Lane Assist .
Turn signal system
Read and observe
on page 34 first.
Either the left
or the right
warning light flashes depending on the position
of the turn signal lever.
If there is a fault in the turn signal system, the warning light flashes at twice
its normal rate. This does not apply when towing a trailer.
Switching off the hazard warning light system is switched on will cause all of
the turn signal lights as well as both warning lights to flash.
39Instruments and warning lights
Page 43 of 280
Trailer turn signal lightsRead and observe
on page 34 first.
If the warning light
flashes , the trailer turn signal lights are turned on.
If a trailer is hitched and the warning light
is not flashing , one of the trailer
turn signal lights has failed.
The following message is shown in the information cluster display, for exam-
ple.
Trailer: check left turn signal!
TRAILER TURN SIG_ CHECK LEFT
The trailer must be unhitched properly » page 169, Hitch and trailer .
Fog lights
Read and observe
on page 34 first.
The warning light
illuminates when the fog lights are operating.
Cruise control system
Read and observe
on page 34 first.
The indicator light
is illuminated when the cruise control system and auto-
matic distance control are switched on.
Brake pedal (automatic transmission)
Read and observe
on page 34 first.
If the warning light
illuminates , operate the brake pedal.
Natural gas operation
Read and observe
on page 34 first.
If the warning light
is lit, the vehicle is powered by natural gas.
Main beam
Read and observe
on page 34 first.
The warning light
illuminates when the main beam or the headlight flasher
is operated.
Warning icons in the display
Introduction
This chapter contains information on the following subjects:
Rear seat belt warning
41
Alternator
41
Coolant
41
Engine oil pressure
42
Engine oil level
42
Lamp failure
43
Diesel particulate filter (diesel engine)
43
Windscreen washer fluid level
43
Fuel reserve
43
Headlight assist
44
START-STOP-system
44
Display of a low temperature
44
Water in the fuel filter (diesel engine)
44
Adaptive Cruise Control (ACC)
44
Distance warning (Front Assistant)
44
Advance warning/emergency brake (Front Assistant)
45
The warning icons indicate the status of certain functions or faults.
The warning icons are indicated in the display of the instrument clus-
ter » page 31 .
Depending on the meaning, the symbol or
in the bar lists up simultane-
ously with the corresponding control symbol, with indicator lights
5
» Fig. 22
on page 31 .
SymbolMeaningDangerWarning 40Using the system
Page 44 of 280
While the operational faults remain unrectified, the messages are always indi-
cated again. After they are displayed for the first time, the symbols or
continue to be displayed without any extra messages for the driver.
Some warning icons can be accompanied by acoustic signals and messages in
the instrument cluster display.
After switching on the ignition, some warning icons illuminate briefly as a
function test.
If the tested systems are OK, the corresponding warning lights go out a few
seconds after switching on the ignition or after starting the engine.
The status of some features and systems is shown by the warning
lights » page 34 .
On vehicles with a colour MAXI DOT display some warning icons in the display
are in colour.WARNING■ Ignoring illuminated warning icons and related messages or instructions
in the display of the instrument cluster may lead to serious personal injury
or damage to the vehicle.■
If you have to stop for technical reasons, then park the vehicle at a safe
distance from the traffic, switch off the engine and activate the hazard
warning light system » page 77. The warning triangle must be set up at
the prescribed distance - observe the national legal provisions when doing
so.
■
The engine compartment of your car is a hazardous area. While working in
the engine compartment, be sure to observe the following warn-
ings » page 192 , Engine compartment .
Rear seat belt warning
Read and observe
on page 41 first.
A rear seat belt is not fastened
A rear seat belt is fastened
The warning icons or
light up after the ignition has been switched on.
When the seat belt is fastened/unfastened, the particular icon lights up briefly
and indicates the current belt status.
Alternator
Read and observe
on page 41 first.
The warning icon
lights up if the vehicle battery is not charged when the
engine is running.
Seek assistance from a specialist garage immediately.
CAUTION
If symbol lights up in addition to symbol while driving, stop driving -
there is a risk of engine damage! Switch off the engine and seek assistance
from a specialist garage.
Coolant
Read and observe
on page 41 first.
Coolant level too low
If the coolant level is too low, the warning icon
lights up and the following
message appears in the instrument cluster display.
Check coolant! Owner's manual!
ENGINE COOLANT PLEASE CHECK
› Stop the vehicle, switch off the engine, and check the coolant lev-
el » page 198 .
› If the coolant level is too low, add coolant to the reservoir
» page 198.
If the indicator light
does not illuminate after adding coolant and switching
on the engine, you may continue your journey.
If the coolant is within the specified range and the warning symbol is still
lit
after switching on the ignition, then there may be a malfunction of the cooling
fan.
› Switch off the ignition.
› Check the fuse for the radiator fan, replace if necessary
» page 230, Fuses in
the engine compartment .
If the coolant level and fan fuse are OK and the warning symbol
lights up
again after switching on the ignition,
do not continue driving!
Seek help from a specialist garage.
41Instruments and warning lights
Page 45 of 280
Coolant temperature too high
If the coolant temperature is too high, the warning icon lights up and the
following message appears in the instrument cluster display.
Engine overheat. Stop! Owner's manual!
ENGINE OVERHEAT STOP
› Stop the vehicle and turn off the engine.
› Switch on the ignition and wait until the coolant temperature pointer returns
to the operating range » page 32.
› Continue your journey only after the warning icon
has disappeared.WARNING■
Carefully open the coolant expansion bottle. If the engine is hot, the cool-
ing system is pressurized – risk of scalding! It is therefore best to allow the
engine to cool down before removing the cap.■
Do not touch the radiator fan. The radiator fan may switch itself on auto-
matically even if the ignition is off - risk of injury!
CAUTION
■ Additional headlights and other attached components in front of the air inlet
impair the cooling efficiency of the coolant.■
Never cover the radiator - there is a risk of the engine overheating.
Engine oil pressure
Read and observe
on page 41 first.
When the warning light
is flashing , the engine oil pressure is too low.
The following message is shown in the information cluster display. Oil pressure: Stop! Owner's manual!
STOP VEHICLE OIL PRESSURE
›
Stop the vehicle, switch off the engine, and check the level of the engine
oil » page 196 , Checking the oil level .
›
If the oil pressure is too low, top up the engine oil » page 197.
If the oil level is within the specified range and the warning symbol
starts
to flash again after the engine is started,
do not continue driving! Switch off
the engine and seek assistance from a specialist garage.
CAUTIONIf for some reason it is not possible to top up the engine oil under the current
circumstances, do not continue driving! Switch off the engine and seek as-
sistance from a specialist garage.
Engine oil level
Read and observe
on page 41 first.
Engine oil level too low
If the warning icons and
are lit , the engine oil level is too low.
The following message is shown in the information cluster display. Oil level: add oil!
ADD OIL
› Stop the vehicle, switch off the engine, and check the engine oil lev-
el » page 196 .
The warning icon will go out if the bonnet is left open for more than 30 sec-
onds. If no engine oil has been replenished, the warning icon will come on
again after driving about 100 km.
Engine oil level too high
If the warning icons and
are
lit in conjunction with the following message
on the display, the engine oil level is too high.
Reduce oil level!
OIL LEVEL TOO HIGH
› Stop the vehicle, switch off the engine, and check the engine oil lev-
el » page 196 .
Engine oil level sensor
If the warning icons and
are
lit in conjunction with the following message
on the display, the engine oil level sensor is defective.
Oil sensor: Workshop!
OIL SENSOR WORKSHOP
Seek assistance from a specialist garage immediately.
CAUTION
If for some reason it is not possible to top up the engine oil under the current
circumstances, do not continue driving! Switch off the engine and seek as-
sistance from a specialist garage.42Using the system
Page 47 of 280
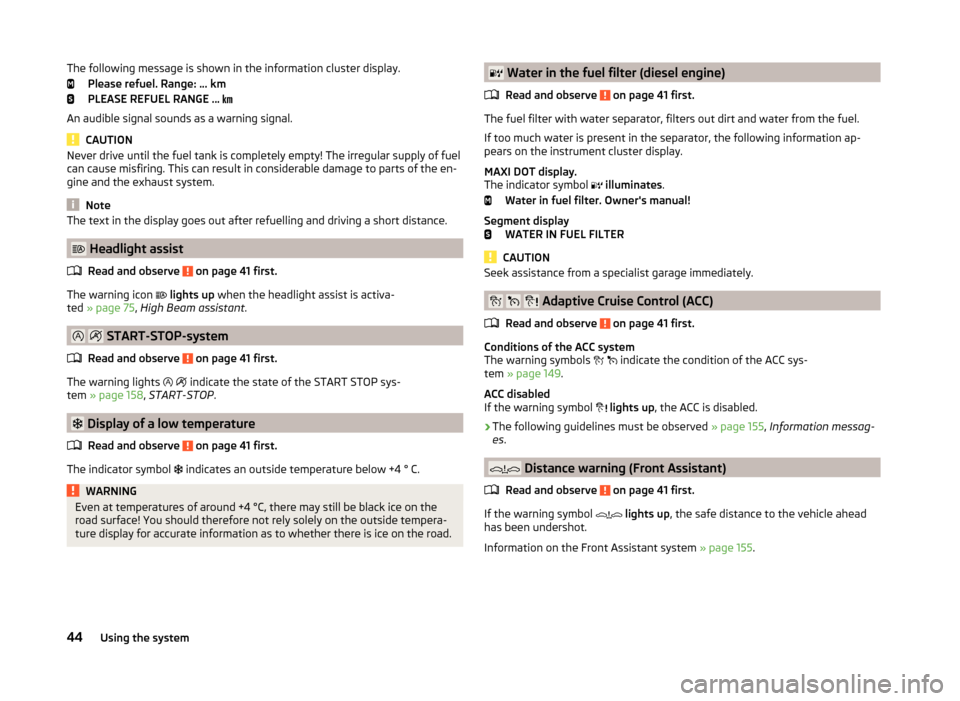
The following message is shown in the information cluster display.Please refuel. Range: ... km
PLEASE REFUEL RANGE …
An audible signal sounds as a warning signal.
CAUTION
Never drive until the fuel tank is completely empty! The irregular supply of fuel
can cause misfiring. This can result in considerable damage to parts of the en-
gine and the exhaust system.
Note
The text in the display goes out after refuelling and driving a short distance.
Headlight assist
Read and observe
on page 41 first.
The warning icon
lights up when the headlight assist is activa-
ted » page 75 , High Beam assistant .
START-STOP-system
Read and observe
on page 41 first.
The warning lights
indicate the state of the START STOP sys-
tem » page 158 , START-STOP .
Display of a low temperature
Read and observe
on page 41 first.
The indicator symbol
indicates an outside temperature below +4 ° C.
WARNINGEven at temperatures of around +4 °C, there may still be black ice on the
road surface! You should therefore not rely solely on the outside tempera-
ture display for accurate information as to whether there is ice on the road. Water in the fuel filter (diesel engine)
Read and observe
on page 41 first.
The fuel filter with water separator, filters out dirt and water from the fuel.
If too much water is present in the separator, the following information ap-
pears on the instrument cluster display.
MAXI DOT display.
The indicator symbol
illuminates .
Water in fuel filter. Owner's manual!
Segment display WATER IN FUEL FILTER
CAUTION
Seek assistance from a specialist garage immediately.
Adaptive Cruise Control (ACC)
Read and observe
on page 41 first.
Conditions of the ACC system
The warning symbols
indicate the condition of the ACC sys-
tem » page 149 .
ACC disabled
If the warning symbol
lights up , the ACC is disabled.
›
The following guidelines must be observed » page 155, Information messag-
es .
Distance warning (Front Assistant)
Read and observe
on page 41 first.
If the warning symbol
lights up , the safe distance to the vehicle ahead
has been undershot.
Information on the Front Assistant system » page 155.
44Using the system
Page 54 of 280

Main menuFig. 31
Operating lever: Button to open
the menu item wizard
Read and observe on page 50 first.
Operating the MAXI DOT display » page 46.
Main menu items (depending on vehicle equipment) ■ Driving data » page 47
■ Assist systems » page 162 , » page 155
■ Navigation » operating instructions for Infotainment , chapter Navigation
system (NAV button)
■ Audio » operating instructions for Infotainment , chapter Audio (MEDIA but-
ton)
■ Telephone » operating instructions for Infotainment , chapter Communica-
tion (PHONE button)
■ Vehicle » page 47 , Auto-check control
■ Lap timer » page 51 , Lap timer (Stop watch)
Menu item wizard
In the menu item Assist systems the Front Assist and the Lane Assist can be
confirmed and activated or deactivated .
The menu item Assist systems in the main menu can also be opened by press-
ing the button
A
on the control lever » Fig. 31.
Note■
If the MAXI DOT display shows warning messages, these messages must be
confirmed in order to access the main menu » page 46, Using the information
system .■
For vehicles with Infotainment, the language of the MAXI DOT display can be
set in the Infotainment » Infotainment operating instructions , chapter Device
settings (SETUP key) .
■
For vehicles without infotainment, the language of the MAXI DOT displays
can only be adjusted by a specialist garage.
Lap timer (Stop watch)
Read and observe
on page 50 first.
The Laptimer function offers the possibility of calculating the lap time, for ex-
ample when driving on a race course. The measured time is shown in the dis-
play.
Operation of the lap timer function » page 46, Using the information system .
The calculated times are displayed in minutes, seconds and deciseconds.
Activate Laptimer function › From the main menu of the display select the menu item
Lap timer.
The following functions are available.
■ Start - start the timing manually or continue the interrupted measurement
■ Since start - Start the timer automatically upon start-up
■ Statistics - Evaluate and reset the measured times
Time measurement
Manually start the measurement
› Select the menu item
Lap timer - Start .
Start the measurement automatically
› Select the menu item
Lap timer - Since start . Timing will begin automatically
when starting up.
Start timing of next round
› Select the menu item
New lap during timing.
During timing, information about the fastest and the last lap time are also
shown in the display.
51Information system