warning light SKODA OCTAVIA 2014 3.G / (5E) Owners Manual
[x] Cancel search | Manufacturer: SKODA, Model Year: 2014, Model line: OCTAVIA, Model: SKODA OCTAVIA 2014 3.G / (5E)Pages: 280, PDF Size: 35.53 MB
Page 179 of 280
Trailer operation
Driving speed
For safety reasons, do not drive faster than 80 km/h when hitching a trailer.
Immediately reduce your speed as soon as even the slightest swaying of the
trailer is detected. Never attempt to stop the trailer from “swaying” by acceler-
ating.
Brakes
Apply the brakes in good time! If the trailer is fitted with a trailer brake, apply
the brakes gently at first, then brake firmly. This will avoid brake jolts resulting
from the trailer wheels locking.
On downhill sections shift down a gear in good time to also use the engine as
a brake.
Engine overheating
If the needle for the coolant temperature gauge moves into the right-hand
area or the red area of the scale, the speed must be reduced immediately.
Stop and switch off the engine if the warning symbol in the instrument clus-
ter » page 41 lights up.
The following information must be observed » page 41,
Coolant
.
The coolant temperature can be reduced by switching on the heating.WARNING■ Always drive particularly carefully with the trailer.■Adapt your speed to the conditions of the road surface and to the traffic
situation.
CAUTION
If you tow a trailer frequently, you should also have your vehicle inspected be-
tween service intervals.
Anti-theft alarm system
If the vehicle is locked, the alarm is activated when the electrical connection to
the trailer is interrupted.
Always switch off the anti-theft alarm system before a trailer is coupled or un-
coupled » page 59 .
Conditions for including a trailer in the anti-theft alarm system.
The vehicle is factory-fitted with an anti-theft alarm system and a towing
device.
The trailer is electrically connected to the towing vehicle by means of the
trailer socket.
The electrical system of the vehicle and trailer is functional.
the vehicle is locked with the vehicle key and the anti-theft alarm system
is activated.
CAUTION
For technical reasons, trailers with rear LED lights cannot be connected to the
anti-theft alarm system.176Driving
Page 184 of 280
Washing by handRead and observe
and on page 180 first.
Soak the dirt with plenty of water and rinse as well as possible.
Clean the vehicle with a soft sponge, a washing glove or a washing brush.
Work from the top to the bottom – starting with the roof.
For stubborn dirt, agents specifically intended for this purpose are to be used. Wash out the sponge or washing glove thoroughly at short intervals.
Clean wheels, door sills and similar parts last. Use a second sponge for such areas.
Give the vehicle a good rinse after washing it and dry it off using a chamois
leather.
WARNINGProtect your hands and arms from sharp-edged metal parts when cleaning
the underfloor or the inside of the wheel housings or the wheel trims – risk
of cuts!
CAUTION
■ Only apply slight pressure when cleaning the vehicle's paintwork.■Do not wash your vehicle in bright sunlight – risk of paint damage.
Automatic car wash systems
Read and observe
and on page 180 first.
The usual precautionary measures must be taken before washing the vehicle
in an automatic car wash system (e.g. closing the windows and the sliding/tilt-
ing roof etc.).
If your vehicle is fitted with any particular attached parts, such as a spoiler,
roof rack system, two-way radio aerial etc., it is best to consult the operator of
the car wash system beforehand.
After an automatic wash with wax treatment, the lips of the wipers should be
cleaned with cleaning agents specially designed for the purpose, and then de-
greased.
CAUTIONFold in the exterior mirrors to prevent damage before washing the vehicle in
an automatic car wash system. Never manually fold in electric exterior mirrors -
always use the electric controls.
Washing with a high-pressure cleaner
Read and observe
and on page 180 first.
When washing the vehicle with a high-pressure cleaner, the instructions for
use of the equipment must be observed. This applies in particular to the pres-
sure used and to the spraying distance .
Maintain a sufficiently large distance to the parking aid sensors and soft mate-
rials such as rubber hoses or insulation material.
CAUTION
■ If washing the vehicle in the winter using a hose or high-pressure cleaner,
ensure that the jet of water is not aimed directly at the locking cylinders or the
door/panel joints – risk of freezing!■
To avoid damaging the parking aid sensors while cleaning with high-pressure
cleaners or steam jets, the sensors must only be directly sprayed for short pe-
riods while a minimum distance of 10 cm must be observed.
Note
See also Washing cars with decorative films using a high-pressure clean-
er » page 183 .
Cleaning vehicle exterior
Introduction
This chapter contains information on the following subjects:
Vehicle paint work
182
Plastic parts
182
Rubber seals
183
Chrome parts
183
Decorative films
183
Windows and external mirrors
183
Headlight glasses
184
Camera lens
184
181Care and maintenance
Page 187 of 280
■Do not remove snow or ice from glass parts using warm or hot water – risk of
cracks forming in the glass.■
Make sure that when removing snow and ice from the windows, the labels
attached to the vehicle by the factory are not damaged.
CAUTION
Information for cleaning windows■Do not clean the inside of the windows with sharp-edged objects or corro-
sive and acidic cleaning agents – there is a risk of damaging the heating ele-
ments or window aerial.■
When drying the windows after washing the vehicle, do not use window
leathers that have been used to polish the bodywork. Residues of preserva-
tives in the window leather can dirty the window and reduce visibility.
Headlight glasses
Read and observe
and on page 182 first.
Clean plastic front headlight lenses using clean, warm water and soap.
CAUTION
■The headlights are never to be wiped dry - there is a risk of damaging the
protective lacquer and the headlight glass subsequently developing cracks.■
Do not use sharp objects to clean the glasses - there is a risk of damaging
the protective lacquer and the headlight glasses subsequently developing
cracks.
■
Do not use any aggressive cleaning or chemical solvent products to clean the
headlights – risk of damaging the headlight lenses.
Camera lens
Read and observe
and on page 182 first.
Moisten the lens of the rear view camera first with clean water and then dry
with a dry cloth.
Remove the snow from the lens with a brush and the ice from the lens with
de-icing agents specifically developed for these purposes.
CAUTION■ Remove snow or ice on the lens with warm or hot water - there is a risk of
damaging the lens.■
Never use cleaners containing abrasive effect to clean the lens.
■
Never use pressurized water or steam jet to clean the lens.
Door closing cylinder
Read and observe
and on page 182 first.
Specific products must be used for de-icing door lock cylinders.
CAUTION
Make sure that as little water as possible gets into the locking cylinder when
washing the vehicle - there is a risk of freezing the lock cylinder!
Cavity protection
Read and observe
and on page 182 first.
All the cavities of your vehicle which are at risk from corrosion are protected
for life by a layer of protective wax applied in the factory.
Wax protection does not require to be inspected or re-treated.
If any small amount of wax flow out of the cavities at high temperatures, these
must be removed with a plastic scraper and the stains cleaned using a petrole-
um cleaner.
WARNINGSafety regulations should be observed when using petroleum cleaner to re-
move wax – risk of fire!
Jack
Read and observe
and on page 182 first.
The jack is maintenance-free.
If necessary, the moving parts of the jack should be lubricated with a suitable
lubricant.
184General Maintenance
Page 188 of 280
WheelsRead and observe
and on page 182 first.
Wheel rims
Also thoroughly wash the wheel rims when washing the vehicle on a regular
basis.
Regularly remove salt and brake abrasion, otherwise the rim material will be
corroded.
Light alloy wheels
After washing thoroughly and treat the wheel rims with a protective product
for light alloy wheels.
For the treatment of wheel rims do not use products which may cause damage
to the paint on the rims.
CAUTION
■ Damage to the paint layer on the wheel rims must be touched up immediate-
ly.■
Severe layers of dirt on the wheels can also result in wheel imbalance. This
may show itself in the form of a wheel vibration which is transmitted to the
steering wheel which, in certain circumstances, can cause premature wear of
the steering. This means it is necessary to remove the dirt.
Towing hitch and mounting recess
Read and observe
and on page 182 first.
Seal the mounting recess with the cap to prevent any ingress of dirt.
In the event of dirt, clean the interior surfaces of the mounting recess and
treat with a suitable preservative.
Always check the ball head before attaching a trailer. Apply suitable grease
where necessary.
Include the protective cap when stowing away the ball rod to protect the boot
from getting contaminated.
CAUTION
Apply grease to the inner part of the mounting recess. Make sure you do not
remove any grease.Under-body protection
Read and observe
and on page 182 first.
The underside of your vehicle is already permanently protected by the factory
against chemical and mechanical influences.
It is not possible to guarantee that the protective coating will not suffer any
damage as the vehicle is driven.
We recommend having the protective coating underneath the vehicle and the
chassis checked — preferably before the beginning of winter and at the end of
winter.
WARNINGNever use additional underbody protection or anti-corrosion agents for ex-
haust pipes, catalytic converters, diesel particle filters or heat shields.
When the engine reaches its operating temperature, these substances
might ignite - risk of fire!
Wiper blades
Read and observe
and on page 182 first.
Clean the wiper blades regularly with a glass cleaner. The wiper blades should
be cleaned with a sponge or cloth if they are heavily soiled by insect residues,
for example.
The wiper blades can become soiled with wax residues after washing in auto-
matic vehicle wash systems for example » page 181.
Interior care
Introduction
This chapter contains information on the following subjects:
Natural leather
186
Artificial leather, materials and Alcantara ®
187
Seat covers
187
Safety belts
187
185Care and maintenance
Page 189 of 280
We recommend using vehicle care products from ŠKODA Original Accessories.
These are available from ŠKODA Partners. The usage instructions on the pack-
age must be observed.WARNING■ Vehicle care products may be harmful to your health if not used according
to the instructions.■
Always keep the vehicle care products safe from people who are not com-
pletely independent, e.g. children - there is a danger of poisoning!
■
Air fresheners and scents can be hazardous to heath when the tempera-
ture inside the vehicle is high.
CAUTION
■ Be sure to check clothing for colourfastness to avoid any damage or visible
stains on the material (leather), panels and textiles.■
Remove fresh stains such as those from ball-point pens, ink, lipstick, shoe
polish, etc., from the material (leather), panels and textiles as quickly as possi-
ble.
■
Do not attach scents or air fresheners to the dash panel – there is a risk of
damage to the dash panel.
■
Do not attach any stickers to the filaments or glass antenna - there is risk of
damage.
■
Do not clean the roof panelling with a brush – risk of damage to the surface
of the panelling.
■
Cleaner that contain solvents can damage the material being cleaned.
■
Apply only a small amount of the cleaning and care product.
For the sake of the environment
Used vehicle care product cans represent hazardous waste that is harmful to the environment. These must be disposed of in accordance with national legal
regulations.
Note
Due to the special tools and knowledge required, and to avoid any potential
problems with the cleaning and care of the interior of your vehicle, we recom-
mend that cleaning and care of the interior of your vehicle be carried out by a
ŠKODA service partner.Natural leather
Read and observe
and on page 186 first.
The leather needs, depending on the strain placed on it, regular cleaning and
maintenance.
Dust and dirt in pores and creases cause abrasions on the surface and lead to
premature embrittlement of the leather surface. Therefore, they must be re-
moved regularly at short intervals with a cloth or vacuum cleaner.
Clean soiled leather surfaces with a water-dampened cotton or woollen cloth and then dry with a clean, dry cloth »
.
Clean severely soiled areas with a cloth soaked in a mild soap solution (2 ta-
blespoons of neutral soap to 1 litre of water).
To remove stains , use a cleaning agent specially designed for this purpose.
Treat the leather periodically with a suitable leather protector and use a skin
care cream with light blocker and impregnation after each cleaning.
CAUTION
■ Ensure that no part of the leather is soaked through during cleaning and that
no water gets into the seams. Otherwise, the leather could become brittle or
cracked.■
Avoid leaving the vehicle for lengthy periods in bright sunlight to avoid the
leather from bleaching. If the vehicle is parked in the open for lengthy periods,
protect the leather from direct sunlight by covering it.
■
The use of an additional mechanical steering wheel lock may damage the
leather surface of the steering wheel.
■
Some clothing materials, e.g. dark denim, do not have sufficient colour fast-
ness. This can cause damage or clearly visible discolouration to seat covers,
even when used correctly. This applies particularly to light-coloured seat cov-
ers. This does not relate to a fault in the seat cover, but rather to poor colour
fastness of the clothing textiles.
■
Sharp-edged objects on items of clothing such as zip fasteners, rivets, sharp-
edged belts etc may leave permanent scratches or signs of rubbing on the sur-
face or damage these. Such damage cannot be subsequently recognised as a
justified complaint.
Note
During the use of the vehicle, minor visible changes can occur on the leather
parts of the covers (e. g wrinkles or creases as a result of the stress of the cov-
ers).186General Maintenance
Page 190 of 280
Artificial leather, materials and Alcantara®
Read and observe
and on page 186 first.
Artificial leather
Clean artificial leather with a damp cloth.
If this method does not completely clean the artificial leather, use a mild soap
solution or cleaning products specially designed for this purpose.
Fabric
Clean upholstery cover materials and cloth trims on doors, luggage compart-
ment cover, etc. using specific cleaning agents, e.g., dry foam.
Use a soft sponge, brush, or commercially available microfibre cloth.
Use a cloth and a cleaning agent specifically designed for this purpose to clean the roof trim.
Remove any lumps on the cover fabric and any fabric residue using a brush.
Remove stubborn hair using a “cleaning glove”.
Alcantara ®
Dust and dirt in pores, creases and seams may chafe and damage the surface.
Therefore, they must be removed regularly at short intervals with a cloth or
vacuum cleaner.
Minor changes in colour caused by use are normal.
CAUTION
■ For Alcantara ®
seat covers, do not use any solvents, floor wax, shoe cream,
stain remover, leather cleaners or similar agents.■
Avoid leaving the vehicle in bright sunlight for long periods of time in order
to stop the artificial leather, materials or Alcantara ®
from bleaching. During ex-
tended periods of standing outdoors, protect artificial leather, fabrics or Alcan-
tara ®
by covering.
■
Some clothing materials, e.g. dark denim, do not have sufficient colour fast-
ness. This can cause damage or clearly visible discolouration to seat covers,
even when used correctly. This applies particularly to light-coloured seat cov-
ers. This does not relate to a fault in the seat cover, but rather to poor colour
fastness of the clothing textiles.
Seat covers
Read and observe
and on page 186 first.
Electrically heated seats
Use a specific cleaning agent such as dry foam or similar to clean the cov-
ers. »
.
Seats without seat heating
Thoroughly vacuum the seat covers with a vacuum cleaner before cleaning.
Clean the seat covers with a damp cloth or cleaning products specially de-
signed for this purpose.
Indented points arising on the fabrics by everyday use, can be removed by
brushing against the direction of hair with a damp brush.
Always clean all parts of the covers, so that there are no visible edges. Then
allow the seat to dry completely.
CAUTION
■ Do not clean the covers of electrically heated seats either with water or with
other liquids - there is a risk of damaging the seat heating system.■
Regularly remove dust from the seat covers using a vacuum cleaner.
■
Electrically heated seats must not be dried after cleaning by switching on the
heater.
■
Do not sit on wet seats - risk of seat deformation.
■
Always clean the seats from “seam to seam”.
Safety belts
Read and observe
and on page 186 first.
Wash dirty seat belts with mild soapy water.
Remove coarse dirt with a soft brush.
WARNING■ The seat belts must not be removed for cleaning.■Never clean the seat belts chemically as chemical cleaning products could
destroy the fabric.■
The seat belts must not be allowed to come into contact with corrosive
liquids (e.g. acids).
■
The seat belts must be fully dried before being rolled up.
187Care and maintenance
Page 192 of 280
›Remove the pump nozzle from the fuel filler tube and put it back in the
pump.›
Place the filler cap onto the fuel filler neck and turn it in the opposite direc-
tion to arrow
3
until it securely engages.
›
Close the fuel filler flap until it clicks into place.
Check that the fuel filler flap is closed properly.
Incorrect refuelling guard on vehicles with diesel engines
The fuel filler tube on vehicles with diesel engines has been fitted with a in-
correct refuelling guard » Fig. 181. This guard means it is only possible to refuel
with the diesel pump nozzle.
If the diesel pump nozzle does not sit directly in the fuel filler tube, move it to
and fro with slight pressure to insert it correctly.
WARNINGInstructions for filling the reserve canister■Never fill the reserve can inside the vehicle.■
Never place the reserve can on the vehicle.
■
Always place the reserve can on the floor.
■
The national legal requirements must be observed if carrying a spare can-
ister in the vehicle.
■
We do not recommend carrying any fuel canisters in your vehicle for safe-
ty reasons. in the event of an accident this can get damaged and fuel may
escape – risk of fire!
CAUTION
■ The fuel tank is full just as soon as the pump nozzle switches off for the first
time, provided the nozzle has been operated properly. Not continue refuelling.■
Be careful when filling diesel fuel from the spare canister and then do this
slowly and cautiously – danger of contaminating the body.
■
The diameter of the diesel pump nozzle can be identical to that of the petrol
pump nozzle in some countries. When driving in these countries, the incorrect
fuelling protection should be removed by a specialist company.
Note
The fuel tank has a capacity of about 50 litres, including a reserve of approx.
6 litres .Lead-free petrol
Read and observe
and on page 188 first.
The vehicle can only be operated with unleaded petrol that meets the EN 2281)
standard.
All petrol engines can be operated using petrol that contains at most 10% bio-
ethanol (E10).
Required fuel - unleaded petrol 95/91 or 92 or 93 RON
Use unleaded fuel with the octane rating 95 RON. Unleaded petrol with the
octane ratings 91, 92 or 93 RON can also be used, but may result in a slight
loss in performance and slightly increased fuel consumption »
.
Prescribed fuel – unleaded petrol min. 95 RON
Use unleaded fuel with the octane rating 95 RON or higher.
If unleaded gasoline is not available with the octane number 95 RON, in an
emergency petrol with the octane rating of 91, 92 and 93 RON can be used to
fill the tank, but this leads to a slight loss of performance and a slightly in-
creased fuel consumption »
.
Prescribed fuel – unleaded petrol 98/(95) RON
Use unleaded fuel with the octane rating 98 RON or higher. Unleaded petrol
95 RON can also be used but this results in a slight loss in performance and
slightly increased fuel consumption.
In case of an emergency, you can refuel with petrol with the octane ratings 91,
92 or 93 RON, if unleaded fuel with octane rating 98 RON or 95 RON is not
available »
.
Fuel additives
Unleaded petrol in accordance with the EN 228 standard 1)
meets all the condi-
tions for a smooth-running engine. We therefore recommend that no fuel ad-
ditives are used. This can result in considerable damage to parts of the engine
or the exhaust system.
1)
In Germany also DIN 51626-1 or E10 for unleaded petrol with octane number 91 or 95 or DIN 51626-2 or E5
for unleaded petrol with octane number 95 and 98.
189Inspecting and replenishing
Page 198 of 280
NoteThe location of the inspection points in the engine compartment of petrol and
diesel engines is practically identical.
Radiator fan
Read and observe
and on page 193 first.
The radiator fan is powered by an electric motor. Operation is controlled ac-
cording to the temperature of the coolant.
WARNINGAfter switching off the ignition, the fan can intermittently continue to oper-
ate for approx. 10 minutes.
Windscreen washer system
Fig. 186
Windscreen washer fluid reser-
voir
Read and observe and on page 193 first.
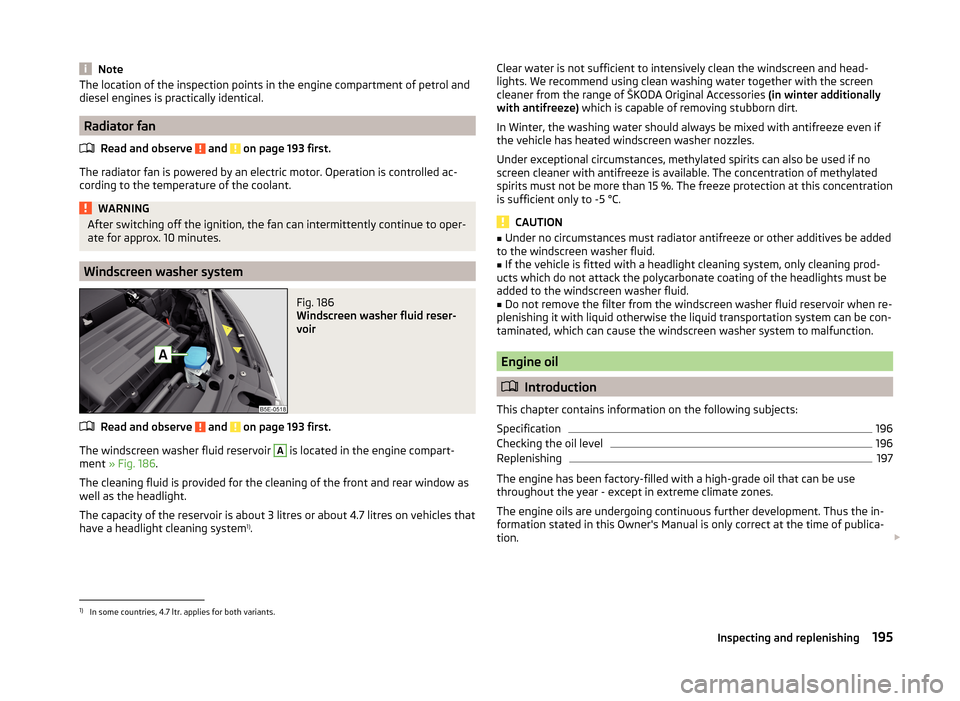
The windscreen washer fluid reservoir
A
is located in the engine compart-
ment » Fig. 186 .
The cleaning fluid is provided for the cleaning of the front and rear window as
well as the headlight.
The capacity of the reservoir is about 3 litres or about 4.7 litres on vehicles that
have a headlight cleaning system 1)
.
Clear water is not sufficient to intensively clean the windscreen and head-
lights. We recommend using clean washing water together with the screen
cleaner from the range of ŠKODA Original Accessories (in winter additionally
with antifreeze) which is capable of removing stubborn dirt.
In Winter, the washing water should always be mixed with antifreeze even if
the vehicle has heated windscreen washer nozzles.
Under exceptional circumstances, methylated spirits can also be used if no
screen cleaner with antifreeze is available. The concentration of methylated
spirits must not be more than 15 %. The freeze protection at this concentration
is sufficient only to -5 °C.
CAUTION
■ Under no circumstances must radiator antifreeze or other additives be added
to the windscreen washer fluid.■
If the vehicle is fitted with a headlight cleaning system, only cleaning prod-
ucts which do not attack the polycarbonate coating of the headlights must be
added to the windscreen washer fluid.
■
Do not remove the filter from the windscreen washer fluid reservoir when re-
plenishing it with liquid otherwise the liquid transportation system can be con-
taminated, which can cause the windscreen washer system to malfunction.
Engine oil
Introduction
This chapter contains information on the following subjects:
Specification
196
Checking the oil level
196
Replenishing
197
The engine has been factory-filled with a high-grade oil that can be use
throughout the year - except in extreme climate zones.
The engine oils are undergoing continuous further development. Thus the in- formation stated in this Owner's Manual is only correct at the time of publica-
tion.
1)
In some countries, 4.7 ltr. applies for both variants.
195Inspecting and replenishing
Page 200 of 280
Dipstick » Fig. 187
The oil level must be within this range.
The oil can be checked and topped up, if the following conditions are satisfied. The vehicle stands on a horizontal surface.
The engine operating temperature is reached.
The engine is turned off.
The bonnet is open.
Checking the level›
Wait a few minutes until the engine oil flows back into the oil trough.
›
Pull out the dipstick.
›
Wipe the dipstick with a clean cloth and insert it again to the stop.
›
Pull the dipstick out again and check the oil level.
›
Re-insert the dipstick.
The engine consumes a little oil. The oil consumption may be as much as 0.5 l/
1000 km depending on your style of driving and the conditions under which
you operate your vehicle. Consumption may be slightly higher than this during
the first 5 000 km.
The oil level must be checked at regular intervals.
In case of low oil level, the display of the instrument cluster shows a check
mark and the corresponding message
» page 42. Check the oil level using
the dipstick as soon as possible. Add oil accordingly.
CAUTION
■ The oil level must never be above the A range » Fig. 187 – there is a risk of
damaging the exhaust system!■
If for some reason it is not possible to top up the engine oil under the current
circumstances,
do not continue driving! Switch off the engine and seek as-
sistance from a specialist garage.
■
If the oil level is above level
A
,
do not continue to drive! Switch off the
engine and seek assistance from a specialist garage.
Replenishing
Read and observe
and on page 196 first.
›
Unscrew the cap of the engine oil filler opening » Fig. 185 on page 194 .
›
Replenish the oil in portions of 0.5 litres in accordance with the correct speci-
fications » page 196 .
›
Check the oil level » page 196.
A›Screw the lid of the engine oil filler closed carefully.›Pull the dipstick out as far as the stop.
Coolant
Introduction
This chapter contains information on the following subjects:
Checking the coolant level
198
Replenishing
198
The coolant provides cooling for the motor.
It consists of water and coolant additive with additives that protect the cooling
system against corrosion and prevents furring.
The coolant additive level in the coolant must be at least 40%.
The coolant additive may be increased to a maximum of 60%.
The correct mixing ratio of water and coolant additive is to be checked if nec- essary by a specialist garage or is to be restored if necessary.
The description of the coolant is shown in the coolant expansion reser-
voir » Fig. 188 on page 198 .
WARNINGThe engine compartment of your car is a hazardous area. The following
warning instructions must be followed at all times when working in the en- gine compartment » page 192.■
The coolant is harmful to health.
■
Avoid contact with the coolant.
■
Coolant vapours are harmful to health.
■
Never open the end cover of the coolant expansion reservoir while the
engine is still warm. The cooling system is pressurized!
■
When opening the end cover of the coolant expansion reservoir, cover it
with a cloth to protect your face, hands and arms from hot steam or hot
coolant.
■
If any coolant splashes into your eyes, immediately rinse out your eyes
with clear water and contact a doctor as soon as possible.
■
Always keep the coolant in the original container, safe from people who
are not completely independent, especially children - there is a danger of
poisoning!
197Inspecting and replenishing
Page 201 of 280
WARNING (Continued)■If coolant is swallowed, consult a doctor immediately.■Never spill operating fluids over the hot engine - risk of fire.
CAUTION
■If for some reason it is not possible to top up the coolant under the current
circumstances, do not continue driving! Switch off the engine and seek as-
sistance from a specialist garage.■
If the expansion tank is empty, do not top up with coolant. The system could
aerate - risk of engine damage,
do not continue driving! Switch off the en-
gine and seek assistance from a specialist garage.
■
The amount of coolant additive in the coolant must never be allowed to be
less than 40 %.
■
Over 60 % of coolant additive in the coolant reduces the antifreeze protec-
tion and coolant effectiveness.
■
A coolant additive that does not comply with the correct specification can
significantly reduce the corrosion protection of the cooling system.
■
Any faults resulting from corrosion may cause a loss of coolant and can con-
sequently result in major engine damage!
■
Do not fill the coolant above the mark
A
» Fig. 188 on page 198 .
■
If an error occurs, leading to the engine overheating, the help of a professio-
nal garage is to be sought - there is a risk of serious engine damage occurring.
■
Additional headlights and other attached components in front of the air inlet
impair the cooling efficiency of the coolant.
■
Never cover the radiator - there is a risk of the engine overheating.
Note
On vehicles that are fitted with an auxiliary heater (auxiliary heating and venti-
lation), the coolant capacity is approx. 1 l larger.
Checking the coolant level
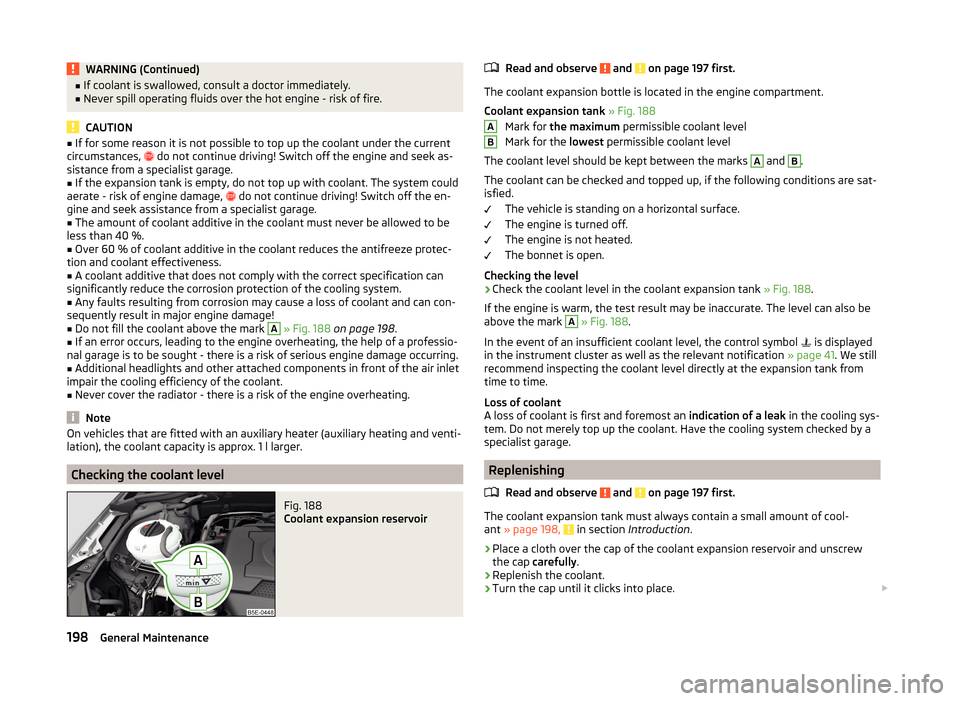
Fig. 188
Coolant expansion reservoir
Read and observe and on page 197 first.
The coolant expansion bottle is located in the engine compartment.
Coolant expansion tank » Fig. 188
Mark for the maximum permissible coolant level
Mark for the lowest permissible coolant level
The coolant level should be kept between the marks
A
and
B
.
The coolant can be checked and topped up, if the following conditions are sat-
isfied.
The vehicle is standing on a horizontal surface.
The engine is turned off.
The engine is not heated.
The bonnet is open.
Checking the level
›
Check the coolant level in the coolant expansion tank » Fig. 188.
If the engine is warm, the test result may be inaccurate. The level can also be
above the mark
A
» Fig. 188 .
In the event of an insufficient coolant level, the control symbol is displayed
in the instrument cluster as well as the relevant notification » page 41. We still
recommend inspecting the coolant level directly at the expansion tank from
time to time.
Loss of coolant
A loss of coolant is first and foremost an indication of a leak in the cooling sys-
tem. Do not merely top up the coolant. Have the cooling system checked by a
specialist garage.
Replenishing
Read and observe
and on page 197 first.
The coolant expansion tank must always contain a small amount of cool-
ant » page 198, in section Introduction .
›
Place a cloth over the cap of the coolant expansion reservoir and unscrew
the cap carefully .
›
Replenish the coolant.
›
Turn the cap until it clicks into place.
AB198General Maintenance