start stop button SKODA OCTAVIA 2014 3.G / (5E) User Guide
[x] Cancel search | Manufacturer: SKODA, Model Year: 2014, Model line: OCTAVIA, Model: SKODA OCTAVIA 2014 3.G / (5E)Pages: 280, PDF Size: 35.53 MB
Page 136 of 280

In the driver's footwell, only a footmat, which is attached to the two corre-
sponding attachment points may be used.
Only use factory-supplied footmats or footmats from the range of ŠKODAOrigi-
nal Accessories, which are fitted to two attachment points.WARNINGNo objects may be placed in the driver's footwell – risk due to obstruction
or limitation of pedal operation.
Automatic gearbox
Introduction
This chapter contains information on the following subjects:
Modes and use of selector lever
133
Selector lever lock
134
Manual shifting of gears (Tiptronic)
134
Starting-off and driving
135
The automatic transmission performs automatic gear changes.
The modes of the automatic transmission can be adjusted by the driver by
means of the selector lever.
WARNING■ No throttle when it is set before starting the mode for moving forward
with the selector lever - there is a risk of accident!■
Never move the selector lever to mode R or P when driving – risk of an
accident!
■
When the vehicle is stationery and the engine is running, you need to
hold the vehicle with the brake pedal in mode D, S or R. Even when the en-
gine is idling, the power transmission is never completely interrupted – the
vehicle creeps.
■
When leaving the vehicle, the selector lever is always to put in the P
mode. Otherwise the vehicle could then start to move and potentially cause
an accident.
CAUTION■ If the selector lever is moved to mode N while driving, the accelerator pedal
must be released and you will need to wait until the engine has reached its
idling speed before moving the selector lever to a forward driving mode again.■
When the outdoor temperature is below -10 ° C, the selector lever when
starting must always be in P mode.
■
When stopping on a slope, never try to hold the vehicle using the accelerator
pedal – this may lead to gear damage.
Note
After the ignition is switched off, the ignition key can only be withdrawn if the
selector lever is in the position P.
Modes and use of selector lever
Fig. 134
Selection lever / lock button / display
Read and observe
and on page 133 first.
When the ignition is switched on, the gearbox mode and the currently selected
gear are indicated in the display » Fig. 134.
The following modes can be selected with the selector lever » Fig. 134.
P
– Parking mode
The driven wheels are locked mechanically in this mode.
The parking mode must only be selected when the vehicle is stationary.
R
– Reverse gear
Reverse gear can only be engaged when the vehicle is stationary and the en-
gine is at idling speed.
133Starting-off and Driving
Page 138 of 280
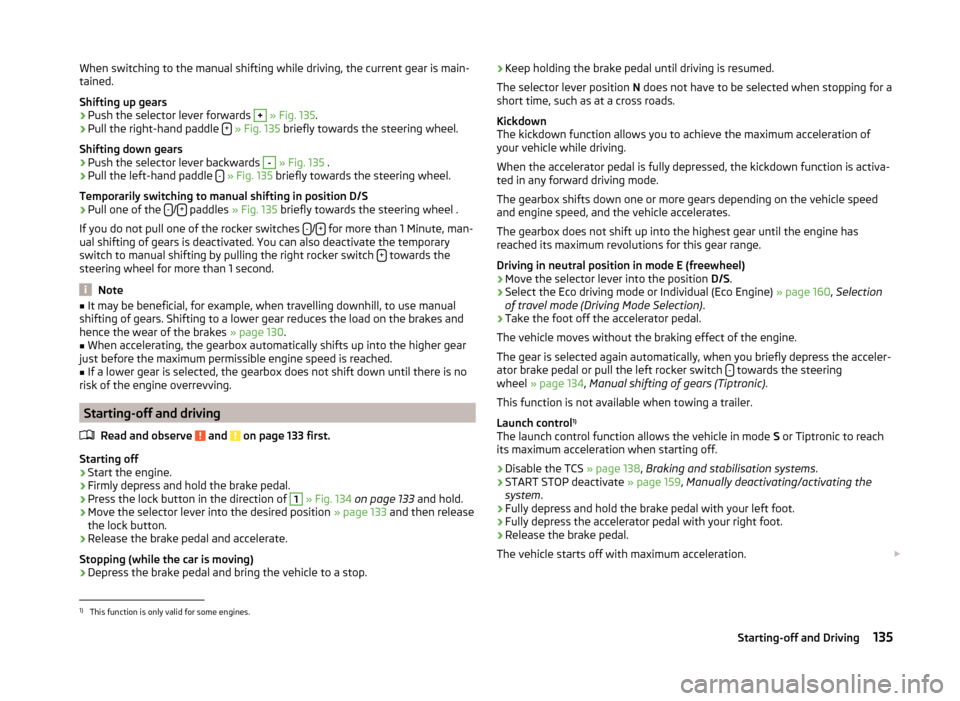
When switching to the manual shifting while driving, the current gear is main-
tained.
Shifting up gears›
Push the selector lever forwards
+
» Fig. 135 .
›
Pull the right-hand paddle +
» Fig. 135 briefly towards the steering wheel.
Shifting down gears
›
Push the selector lever backwards
-
» Fig. 135 .
›
Pull the left-hand paddle -
» Fig. 135 briefly towards the steering wheel.
Temporarily switching to manual shifting in position D/S
›
Pull one of the -/+ paddles
» Fig. 135 briefly towards the steering wheel .
If you do not pull one of the rocker switches -
/+ for more than 1 Minute, man-
ual shifting of gears is deactivated. You can also deactivate the temporary
switch to manual shifting by pulling the right rocker switch +
towards the
steering wheel for more than 1 second.
Note
■ It may be beneficial, for example, when travelling downhill, to use manual
shifting of gears. Shifting to a lower gear reduces the load on the brakes and
hence the wear of the brakes » page 130.■
When accelerating, the gearbox automatically shifts up into the higher gear
just before the maximum permissible engine speed is reached.
■
If a lower gear is selected, the gearbox does not shift down until there is no
risk of the engine overrevving.
Starting-off and driving
Read and observe
and on page 133 first.
Starting off
›
Start the engine.
›
Firmly depress and hold the brake pedal.
›
Press the lock button in the direction of
1
» Fig. 134 on page 133 and hold.
›
Move the selector lever into the desired position » page 133 and then release
the lock button.
›
Release the brake pedal and accelerate.
Stopping (while the car is moving)
›
Depress the brake pedal and bring the vehicle to a stop.
› Keep holding the brake pedal until driving is resumed.
The selector lever position N does not have to be selected when stopping for a
short time, such as at a cross roads.
Kickdown
The kickdown function allows you to achieve the maximum acceleration of
your vehicle while driving.
When the accelerator pedal is fully depressed, the kickdown function is activa-
ted in any forward driving mode.
The gearbox shifts down one or more gears depending on the vehicle speed
and engine speed, and the vehicle accelerates.
The gearbox does not shift up into the highest gear until the engine has
reached its maximum revolutions for this gear range.
Driving in neutral position in mode E (freewheel)›
Move the selector lever into the position D/S.
›
Select the Eco driving mode or Individual (Eco Engine) » page 160, Selection
of travel mode (Driving Mode Selection) .
›
Take the foot off the accelerator pedal.
The vehicle moves without the braking effect of the engine.
The gear is selected again automatically, when you briefly depress the acceler-
ator brake pedal or pull the left rocker switch -
towards the steering
wheel » page 134 , Manual shifting of gears (Tiptronic) .
This function is not available when towing a trailer.
Launch control 1)
The launch control function allows the vehicle in mode S or Tiptronic to reach
its maximum acceleration when starting off.
›
Disable the TCS » page 138, Braking and stabilisation systems .
›
START STOP deactivate » page 159, Manually deactivating/activating the
system .
›
Fully depress and hold the brake pedal with your left foot.
›
Fully depress the accelerator pedal with your right foot.
›
Release the brake pedal.
The vehicle starts off with maximum acceleration.
1)
This function is only valid for some engines.
135Starting-off and Driving
Page 139 of 280
Reactivate the TCS and START-STOP when the desired speed has been
reached.WARNINGRapid acceleration, particularly on slippery roads, can lead to loss of control
of the vehicle – risk of accident!
Retraction and economical driving
Introduction
This chapter contains information on the following subjects:
Driving in
136
Tips for economical driving
136
The fuel consumption, degree of pollution and vehicle wear depend on driving
style, road condition, weather conditions and the like.
Driving in
Driving in the engine
The engine has to be run in during the first 1500 kilometres. During this period,
the driving style decides on the quality of the driving-in process.
During the first 1 000 km we recommend not driving faster than 3/4 of the
maximum permissible engine speed, not to drive at full throttle and to dis-
pense with the trailer.
In the area of 1,000 to 1,500 kilometres the engine load can be increased up
to the maximum permitted engine speed.
New tyres
New tyres have to be “run in” since they do not offer optimal grip at first.
Drive especially carefully for the first 500 km or so.
New brake pads
New brake pads have to first “grind in” because these do not initially have the
best possible braking effect.
Drive especially carefully for the first 200 km or so.
Tips for economical driving
To achieve the lowest possible fuel consumption, the following instructions
must be observed.
Looking ahead when driving
Avoid unnecessary acceleration and braking.
Switch in an energy saving and timely manner Observe the recommended gear » page 46.
Avoid full throttle and high speeds
Fuel consumption will be halved if only three-quarters of the possible top
speed of your vehicle is used.
Reducing idling
When the engine is switched off, such as when waiting in a traffic jam, the fuel
economy is already greater after 30 - 40 s than the fuel quantity which is re-
quired for engine re-start.
Avoid short distances
When driving a short distance of less than about 4 km, the engine cannot
reach its operating temperature. As long as the engine has not reached oper-
ating temperature, the fuel consumption is significantly higher than with the
engine hot.
Pay attention to the correct tyre inflation pressure being maintained
Further information » page 204.
Avoid unnecessary ballast
Per 100 kg of weight, consumption increases by about 1 l/100 km. At a speed of
100-120 km/h, a vehicle fitted with a roof rack cross member without a load
will use about 10 % more fuel than normal due to the increased aerodynamic
drag.
Saving electricity
Electrical consumers (e.g. seat heating, air conditioning and the like) only turn
on for as long as necessary.
In Infotainment, the display is shown of up to three consumers which are cur-
rently showing the highest degree of fuel consumption » Infotainment operat-
ing instructions , chapter Vehicle settings (CAR button) .136Driving
Page 149 of 280

Finding a perpendicular parking space›Drive past the parking space at up to 20 km/h and a distance of 0.5 – 1.5 m.›
Press the symbol buttontwice
» Fig. 144 .
The display shows the following » Fig. 144 -
.
The search area for the parking space on the driver's side is automatically indi-
cated on the display.
Activate the turn signal on the driver's side if you wish to park on this side of
the road. In the display the search area for the parking space is indicated on
the driver's side.
If suitable parking space is found, its parameters are stored until another suit-
able parking space has been found or until a distance of 10 m had been driven
after finding the parking space.
If the driver changes the parking mode while searching for a parking space, the
symbol button must be pressed again.
Note
If the symbol
(km / h) is shown in the display , the vehicle speed should be
reduced below 40 km / hr (parallel parking) or below 20 km / hr (Transverse
parking) .
Parking
Fig. 145
Display
Read and observe
and on page 145 first.
Display » Fig. 145
Parking place recognised with the information to drive on.
Parking place recognised with the information to engage the reverse gear.
Indication for selecting the forward gear.
Indication for selecting the reverse gear.
If the system has recognised a suitable parking space, this parking space is
shown in the display » Fig. 145 -
.›
Continue driving forwards until the display appears » Fig. 145 -
.
›
Stop and ensure that the vehicle does not continue to move forward until
the parking procedure starts.
›
Select reverse gear or move the selector lever into position R.
›
As soon as the following message is shown in the display: Steer. interv. ac-
tive Check area around veh.! , let go of the steering wheel. The steering will
be taken over by the system.
›
Observe the direct vicinity of the vehicle and reverse carefully.
If necessary, the parking procedure can be continued with further steps.
›
If the forward arrow flashes in the display » Fig. 145 -
, engage 1st gear or
move the selector lever to position D/S.
The display shows the icon (brake pedal).
›
Depress the brake pedal and wait until the steering wheel automatically ro-
tates into the required position, the symbol goes out.
›
Carefully drive forwards.
›
If the backwards arrow is flashing in the display
» Fig. 145 -
, select reverse
gear again or move the selector lever into position R .
The display shows the icon (brake pedal).
›
Depress the brake pedal and wait until the steering wheel automatically ro-
tates into the required position, the symbol goes out.
›
Carefully move backwards.
You can repeat these steps several times in succession.
As soon as the parking procedure is completed, an audible signal sounds and
the following message appears in the display.
Park Assist stopped. Take over steering!
Automatic brake assist when speeding
If a velocity of 7 km / h is exceeded during the parking manoeuvre for the first time, the speed will be automatically reduced by the system to less than 7 km /
h. This prevents the parking manoeuvre from aborting.
146Driving
Page 155 of 280
Automatic stop-startRead and observe
and on page 150 first.
Vehicles with an automatic transmission can decelerate to a standstill and
start moving again using the ACC.
Decelerate to a standstill
If a vehicle ahead decelerates to a standstill, the ACC will also decelerate your
vehicle to a standstill.
Starting to drive again after a holding period
As soon as the vehicle ahead starts moving again after a holding period, your
vehicle will also move and the speed will continue to be regulated. Control is
automatically disconnected in case of longer holding periods.
Depress the brake pedal.
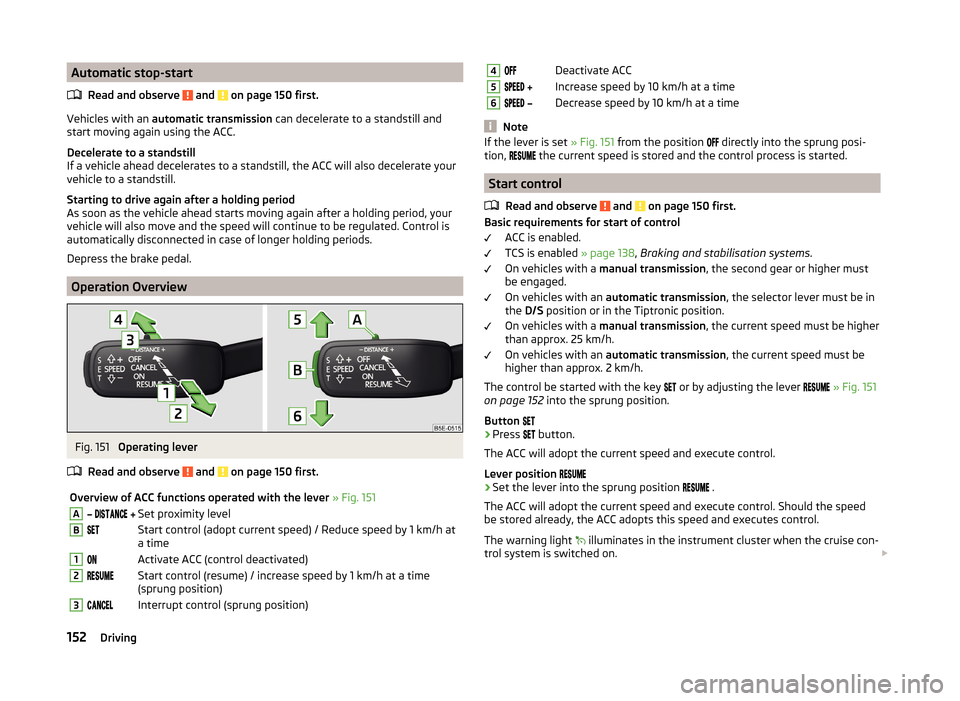
Operation Overview
Fig. 151
Operating lever
Read and observe
and on page 150 first.
Overview of ACC functions operated with the lever » Fig. 151A Set proximity levelBStart control (adopt current speed) / Reduce speed by 1 km/h at
a time1Activate ACC (control deactivated)2Start control (resume) / increase speed by 1 km/h at a time
(sprung position)3Interrupt control (sprung position)4Deactivate ACC5 Increase speed by 10 km/h at a time6 Decrease speed by 10 km/h at a time
Note
If the lever is set » Fig. 151 from the position directly into the sprung posi-
tion, the current speed is stored and the control process is started.
Start control
Read and observe
and on page 150 first.
Basic requirements for start of control ACC is enabled.
TCS is enabled » page 138, Braking and stabilisation systems .
On vehicles with a manual transmission , the second gear or higher must
be engaged.
On vehicles with an automatic transmission , the selector lever must be in
the D/S position or in the Tiptronic position.
On vehicles with a manual transmission , the current speed must be higher
than approx. 25 km/h.
On vehicles with an automatic transmission , the current speed must be
higher than approx. 2 km/h.
The control be started with the key or by adjusting the lever
» Fig. 151
on page 152 into the sprung position.
Button
›
Press button.
The ACC will adopt the current speed and execute control.
Lever position
›
Set the lever into the sprung position .
The ACC will adopt the current speed and execute control. Should the speed
be stored already, the ACC adopts this speed and executes control.
The warning light illuminates in the instrument cluster when the cruise con-
trol system is switched on.
152Driving
Page 156 of 280

Note■If control is started at a speed of less than 30 km/h on vehicles with an auto-
matic transmission, the speed of 30 km/h is stored. The speed increases auto-
matically to 30 km/h or is regulated with respect to the speed of the vehicle
ahead.■
When TCS is disabled, it will be activated automatically upon starting control.
■
If the TCS is deactivated during control, control is stopped automatically.
Stop/resume control
Read and observe
and on page 150 first.
Stop control
›
Set the lever into the sprung position
» Fig. 151 on page 152 .
or
›
Apply the brake.
Control stops, the speed remains stored.
Resume control
›
Start control » page 152.
WARNINGControl may only be resumed if the stored speed is not too high for the cur-
rent traffic conditions.
Note
Control is also stopped when the clutch is held down for longer than 30 s.
Set/change the desired speed
Read and observe
and on page 150 first.
The desired speed can be set or changed using the control lever » page 152.
The set speed is stored upon releasing the lever or the button on the button
on the lever.
Setting/changing the speed by 10 km/h at a time ( ) - requirements
ACC is enabled.
Increasing the speed by 1 km/h at a time ( ) - requirements
ACC is enabled.
Vehicle control taking place.
Decreasing the speed by 1 km/h at a time (
) - requirements
ACC is enabled.
Vehicle control taking place.
Changing the speed by adopting the current speed (
) - requirements
ACC is enabled.
The vehicle is moving at a speed other than that which is stored.
Note
■
If during control the speed is increased by pressing the accelerator, control is
temporarily stopped. Upon releasing the accelerator, control is automatically
resumed.■
If during control the speed is reduced by applying the brake, control is stop-
ped. Control needs to be restarted in order to resume » page 152.
■
If the vehicle is controlled by a lower speed than the stored speed, then
the current speed is stored the first time the button is pressed. Press the but-
ton again
and the speed is reduced in increments of 1 km/h.
Set time interval level
Read and observe
and on page 150 first.
The proximity to the vehicle ahead can be set with the lever » Fig. 151 on
page 152 or in Infotainment » infotainment manual , chapter Vehicle settings
(CAR button) .
Setting by means of the lever
›
Set the switch into the sprung position or - » Fig. 151
on page 152 .
The display of the instrument cluster shows line
2
» Fig. 149 on page 151 ,
which indicates the proximity.
›
Using the switch on the lever, adjust line
2
to the desired distance
level.
153Assist systems
Page 160 of 280
The pre-warning display can occur in the following situations.› If there is a risk of collision with a moving obstacle at a driving speed range
of approx. 30 km/h to approx. 210 km/h.
› If there is a risk of collision with a stationary obstacle at a driving speed
range of approx. 30 km/h to approx. 85 km/h.
When the advance warning is issued, the brake pedal must be pressed or the
moving obstacle avoided!
Acute alert
If the driver does not react to the advance warning, the system briefly applies
the brake automatically via an active brake intervention to draw attention to
the potential danger of a collision again.
Automatic Braking
If the driver fails to respond to the acute warning, the system starts to apply
the brakes automatically with increasing stopping power in several stages.
Brake Support
If the driver does not brake sufficiently in the event of an impending collision,
the system automatically increases the braking force.
The brake support only occurs as long as the brake pedal is being firmly press-
ed down.
Note
■ If an automatic brake intervention is triggered by the system, the pressure in
the brake system increases and the brake pedal cannot be operated with the
normal pedal stroke.■
The automatic braking interventions can be cancelled by pressing the accel-
erator pedal or by means of a steering intervention.
Activating/deactivating
Read and observe
and on page 155 first.
The function is automatically activated each time the ignition is switched on.
The system should only be disabled in exceptional cases »
.
The system can be activated or deactivated in one of two ways. › In the instrument cluster display
» page 51, Menu item wizard .
› In Infotainment
» Infotainment operating instructions , chapter Vehicle set-
tings (CAR button) .
The following functions can be activated or deactivated separately in infotain-
ment.
› Distance warning
› Advance warning
Once one of these functions has been deactivated, it remains disabled even
after switching the ignition off and on.WARNINGIn the following situations, Front Assistant should be deactivated for safety
reasons.■
When the vehicle is being towed away.
■
When the vehicle is on a rolling test bench.
■
If an unfounded warning was issued or a system action carried out.
■
When on a truck, car ferry or similar.
Information messages
Read and observe
and on page 155 first.
The information messages are shown in the instrument cluster display. Front Assist: No sensor view.
The sensor is soiled or covered.
Stop the vehicle, switch off the engine and clean the sensor or remove the
item causing the lack of visibility » Fig. 154 on page 155 .
If the message appears again after starting the engine, the system should be disabled » page 157 . Seek help from a specialist garage.
Front Assist not available.
The system is not available for an unknown reason.
Stop the vehicle, switch off the engine and then start it again.
If the message appears again after starting the engine, the system should be
disabled » page 157 . Seek help from a specialist garage.
157Assist systems
Page 161 of 280
START-STOP
Introduction
This chapter contains information on the following subjects:
Operating conditions of the system
158
Operation in vehicles with manual gearbox
158
Operation in vehicles with automatic gearbox
159
System related automatic start-up
159
Manually deactivating/activating the system
159
Information messages
160
The START-STOP system (hereinafter referred to as the system) saves fuel and
reduces polluting emissions and CO 2 emissions by turning the engine off, e.g.
when stopping at traffic lights, and starting the engine again when moving off.
WARNING■ Never let the vehicle roll with the engine switched off.■The brake servo unit and power steering only operate if the engine is run-
ning.
Operating conditions of the system
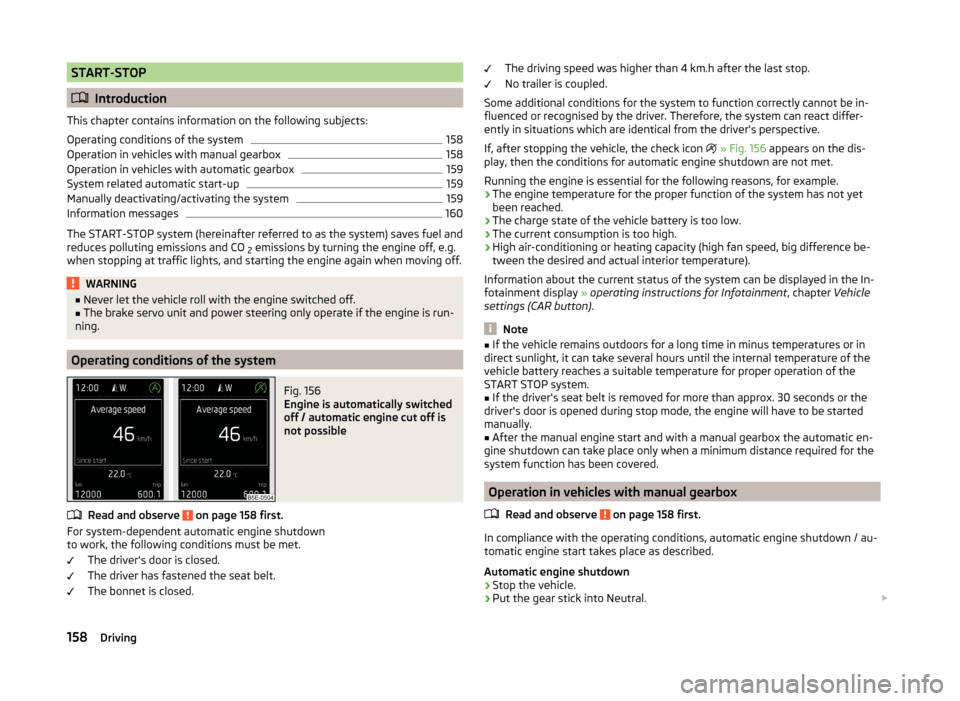
Fig. 156
Engine is automatically switched
off / automatic engine cut off is
not possible
Read and observe on page 158 first.
For system-dependent automatic engine shutdown
to work, the following conditions must be met.
The driver's door is closed.
The driver has fastened the seat belt.
The bonnet is closed.
The driving speed was higher than 4 km.h after the last stop.
No trailer is coupled.
Some additional conditions for the system to function correctly cannot be in-
fluenced or recognised by the driver. Therefore, the system can react differ-
ently in situations which are identical from the driver's perspective.
If, after stopping the vehicle, the check icon
» Fig. 156 appears on the dis-
play, then the conditions for automatic engine shutdown are not met.
Running the engine is essential for the following reasons, for example.
› The engine temperature for the proper function of the system has not yet
been reached.
› The charge state of the vehicle battery is too low.
› The current consumption is too high.
› High air-conditioning or heating capacity (high fan speed, big difference be-
tween the desired and actual interior temperature).
Information about the current status of the system can be displayed in the In-
fotainment display » operating instructions for Infotainment , chapter Vehicle
settings (CAR button) .
Note
■
If the vehicle remains outdoors for a long time in minus temperatures or in
direct sunlight, it can take several hours until the internal temperature of the
vehicle battery reaches a suitable temperature for proper operation of the
START STOP system.■
If the driver's seat belt is removed for more than approx. 30 seconds or the
driver's door is opened during stop mode, the engine will have to be started
manually.
■
After the manual engine start and with a manual gearbox the automatic en-
gine shutdown can take place only when a minimum distance required for the
system function has been covered.
Operation in vehicles with manual gearbox
Read and observe
on page 158 first.
In compliance with the operating conditions, automatic engine shutdown / au-
tomatic engine start takes place as described.
Automatic engine shutdown
›
Stop the vehicle.
›
Put the gear stick into Neutral.
158Driving
Page 162 of 280

›Release the clutch pedal.
Automatic engine shutdown then occurs and the indicator symbol appears in
the display
» Fig. 156 on page 158 .
Automatic engine start›
Depress the clutch pedal.
The automatic re-start process takes place and the indicator symbol
goes
out.
Operation in vehicles with automatic gearbox
Read and observe
on page 158 first.
In compliance with the operating conditions, automatic engine shutdown / au-
tomatic engine start takes place as described.
Automatic engine shutdown
›
Bring the vehicle to a stop and depress the brake pedal.
Automatic engine shutdown then occurs and the indicator symbol appears in
the display
» Fig. 156 on page 158 .
Automatic engine start
›
Release the brake pedal.
The automatic re-start process takes place and the indicator symbol goes
out.
Further information on automatic transmission
Engine shut down takes place when the selector lever is in positions P, D/S , N
and in Tiptronic mode.
When the selector lever is in position P the engine remains shut down after
you release the brake pedal. The engine starts automatically by pressing the
gas pedal or by moving the selector lever into a different mode and releasing
the brake pedal.
If the engine is off due to the automatic and the selector lever is put to the R
position then the automatic starts the engine.
If the gear selector is moved from position R to the position D/S or N the vehi-
cle must reach a speed of more than 10 km / h before the automatic engine
shutdown starts.
There is no automatic engine shutdown when the system detects a vehicle
moving due to a large steering angle.
No automatic engine shutdown takes place when the vehicle is moving at low
speed (e.g. during a traffic jam or when tuning) and remains stationary after
pressing the brake pedal lightly. Automatic engine shutdown takes place if you
press the brake pedal down with more force.
System related automatic start-up
Read and observe
on page 158 first.
When the engine is off, the system can automatically start the engine beforethe desired journey continues. Some possible reasons for this are:
› The vehicle begins to roll, e.g. on a slope.
› The brake pedal has been actuated several times.
› The current consumption is too high.
Manually deactivating/activating the system
Fig. 157
Button for the START-STOP sys-
tem
Read and observe on page 158 first.
Deactivating/activating
›
Press the symbol button
» Fig. 157 .
When start-stop mode is deactivated, the warning light in the button lights up.
Note
■ If the system is deactivated when the engine is turned off automatically,
then the automatic start process takes place.■
Selecting the driving mode Eco when the system is deactivated will automat-
ically activate the system » page 160, Selection of travel mode (Driving Mode
Selection) .
159Assist systems
Page 163 of 280

Information messagesRead and observe
on page 158 first.
The information messages are shown in the instrument cluster display. Start the engine manually!
START MANUALLY
One of the conditions for automatic engine start is not satisfied or the driver's
seat belt is not fastened. The engine must be started manually.
On vehicles with the starter button, the ignition is turned off by the first press of the starter button; the start process is only initiated when the button is
pressed for the second time.
Error: start-stop system
START STOP ERROR
A system error is present. Seek help from a specialist garage.
Selection of travel mode (Driving Mode Selection)
Introduction
This chapter contains information on the following subjects:
Selection
160
Normal Mode
160
Sportmode
160
Ecomode
161
Individualmode
161
By selecting the driving mode, the driving behavior can be adapted to the de-
sired mode of operation.
The following modes of Normal, Sport, Eco, Individual are available.
The set driving mode remains stored even after switching the ignition on and
off.
WARNING■ The system only serves to support and does not relieve the driver of the
responsibility for the vehicle operation.■
Adjust the speed and driving style to the current visibility, weather, road
and traffic conditions.
SelectionFig. 158
Button for selecting the driving mode: Version 1/version 2
Read and observe
on page 160 first.
›
Press the symbol button or
» Fig. 158 .
The menu is displayed on the infotainment screen.
The mode is changed by repeatedly pressing the symbol button or
or in
the Infotainment display » Infotainment operating instructions , chapter Vehi-
cle settings .
If a driving mode other than Normal is selected, then the symbol lights up on
the button or
» Fig. 158 .
WARNINGSetting the driving mode while driving can distract you from other traffic –
risk of accident.
Normal Mode
Read and observe
on page 160 first.
This mode is suitable for common everyday use.
SportmodeRead and observe
on page 160 first.
This mode is suitable for a sporty driving style.
Selecting this mode primarily affects the function of the following systems.
160Driving