door lock SKODA OCTAVIA 2014 3.G / (5E) Owner's Guide
[x] Cancel search | Manufacturer: SKODA, Model Year: 2014, Model line: OCTAVIA, Model: SKODA OCTAVIA 2014 3.G / (5E)Pages: 280, PDF Size: 35.53 MB
Page 220 of 280
Their positions are indicated by embossed markings B in the side of the lower
beam.
Raising the vehicle›
Insert the crank
7
into the mount on the jack
6
» page 212 .
›
Support the base plate of the jack with its entire surface resting on level
ground and ensure that the lever is positioned vertically to the jacking
point » Fig. 202 .
›
Use the crank to raise the jack until its claw encloses the bar » Fig. 202.
›
Continue to raise the jack until the wheel is just lifted off the ground.
WARNING■
Choose a flat and firm surface for jacking the vehicle.■If the wheel has to be changed on a slope, first of all block the opposite
wheel with a stone or similar object to prevent the vehicle from unexpect-
edly rolling away.■
Secure the base plate of the lifting jack with suitable means to prevent
possible moving. A soft and slippery ground under the base plate may move
the lifting jack, causing the vehicle to fall down. It is therefore always nec-
essary to place the lifting jack on a solid surface or use a wide and stable
base. Use a non-slip base (e.g. a rubber foot mat) if the surface is smooth,
such as cobbled stones, tiled floor, etc.
■
Only attach the lifting jack to the attachment points provided for this pur-
pose.
■
Always raise the vehicle with the doors closed.
■
Never position any body parts, such as arms or legs under the vehicle,
while the vehicle is raised with a lifting jack.
■
When the vehicle is raised, never start the engine.
CAUTION
It is important to ensure that the jack is correctly attached to the bar of the
lower beam, as otherwise there is a risk of damage to the vehicle.Anti-theft wheel boltsFig. 203
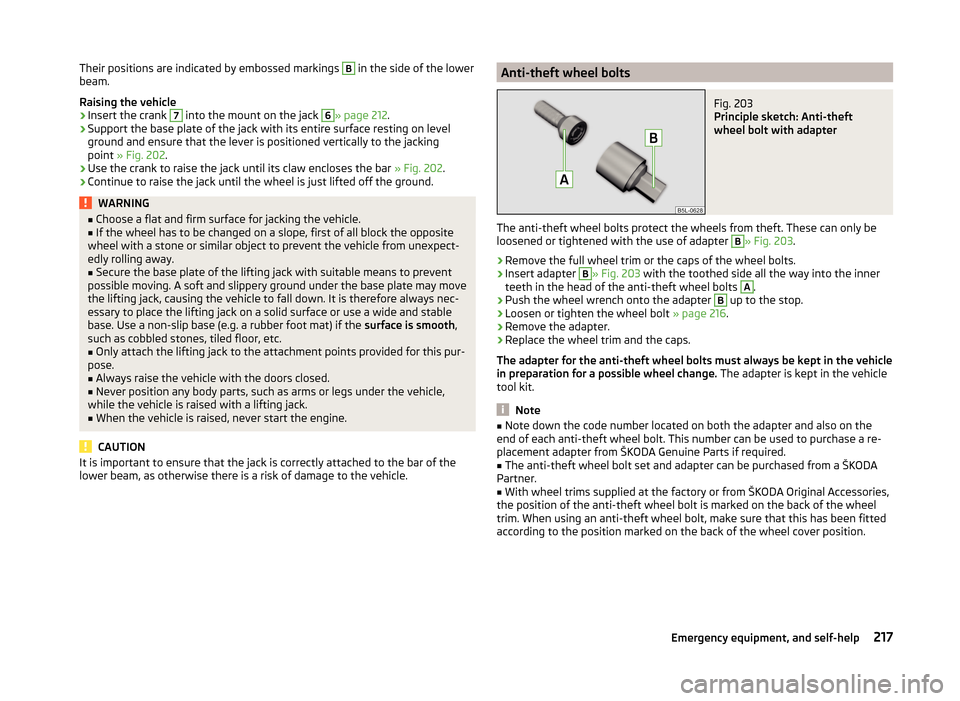
Principle sketch: Anti-theft
wheel bolt with adapter
The anti-theft wheel bolts protect the wheels from theft. These can only be
loosened or tightened with the use of adapter
B
» Fig. 203 .
›
Remove the full wheel trim or the caps of the wheel bolts.
›
Insert adapter
B
» Fig. 203 with the toothed side all the way into the inner
teeth in the head of the anti-theft wheel bolts
A
.
›
Push the wheel wrench onto the adapter
B
up to the stop.
›
Loosen or tighten the wheel bolt » page 216.
›
Remove the adapter.
›
Replace the wheel trim and the caps.
The adapter for the anti-theft wheel bolts must always be kept in the vehicle
in preparation for a possible wheel change. The adapter is kept in the vehicle
tool kit.
Note
■ Note down the code number located on both the adapter and also on the
end of each anti-theft wheel bolt. This number can be used to purchase a re-
placement adapter from ŠKODA Genuine Parts if required.■
The anti-theft wheel bolt set and adapter can be purchased from a ŠKODA
Partner.
■
With wheel trims supplied at the factory or from ŠKODA Original Accessories,
the position of the anti-theft wheel bolt is marked on the back of the wheel
trim. When using an anti-theft wheel bolt, make sure that this has been fitted
according to the position marked on the back of the wheel cover position.
217Emergency equipment, and self-help
Page 228 of 280
›Press any button on the remote control key.›Unlock the door with the key via the lock cylinder within 1 minute of pressing
the button.
replace battery in the remote control the auxiliary heating
(auxiliary heating)
Fig. 212
Radio remote control: Battery
cover
Read and observe on page 224 first.
The battery is located under a cover on the back of the radio remote con-
trol » Fig. 212 .
›
Insert a flat, blunt object, such as a coin, into the gap of the battery cover.
›
Turn the cover against the direction of the arrow up to the mark to open the
cover.
›
Replace the battery.
›
Return the battery cover.
›
Turn the cover in the direction of the arrow up to the initial marking, engage.
Emergency unlocking/locking
Introduction
This chapter contains information on the following subjects:
Unlocking/locking the driver's door
225
Locking the door without a locking cylinder
226
Unlocking the tailgate
226
Selector lever-emergency unlocking
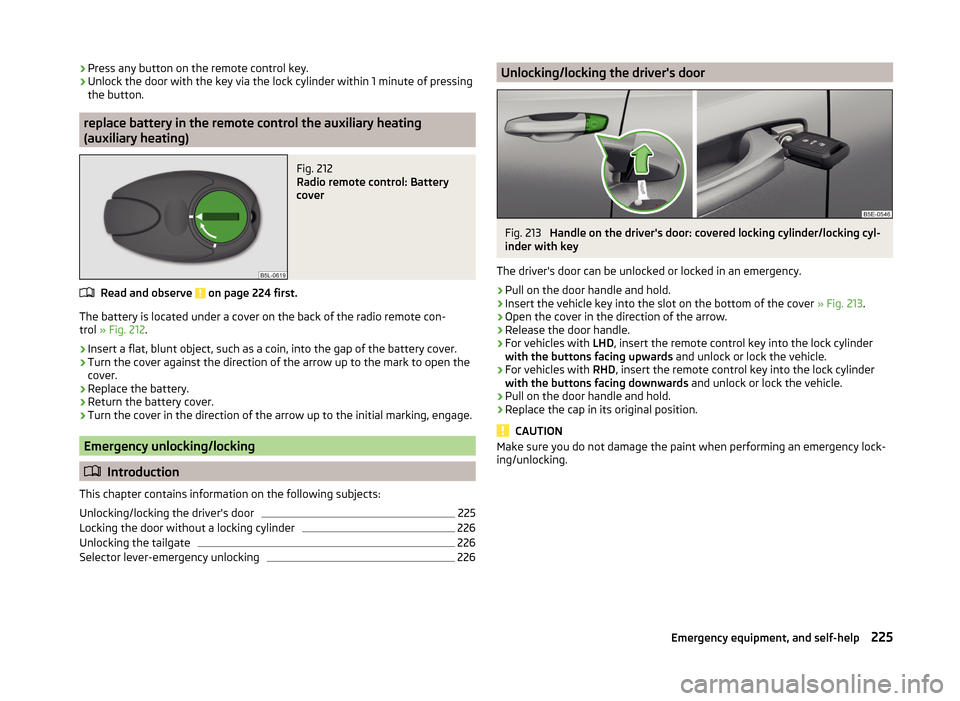
226Unlocking/locking the driver's doorFig. 213
Handle on the driver's door: covered locking cylinder/locking cyl-
inder with key
The driver's door can be unlocked or locked in an emergency.
›
Pull on the door handle and hold.
›
Insert the vehicle key into the slot on the bottom of the cover » Fig. 213.
›
Open the cover in the direction of the arrow.
›
Release the door handle.
›
For vehicles with LHD, insert the remote control key into the lock cylinder
with the buttons facing upwards and unlock or lock the vehicle.
›
For vehicles with RHD, insert the remote control key into the lock cylinder
with the buttons facing downwards and unlock or lock the vehicle.
›
Pull on the door handle and hold.
›
Replace the cap in its original position.
CAUTION
Make sure you do not damage the paint when performing an emergency lock-
ing/unlocking.225Emergency equipment, and self-help
Page 229 of 280
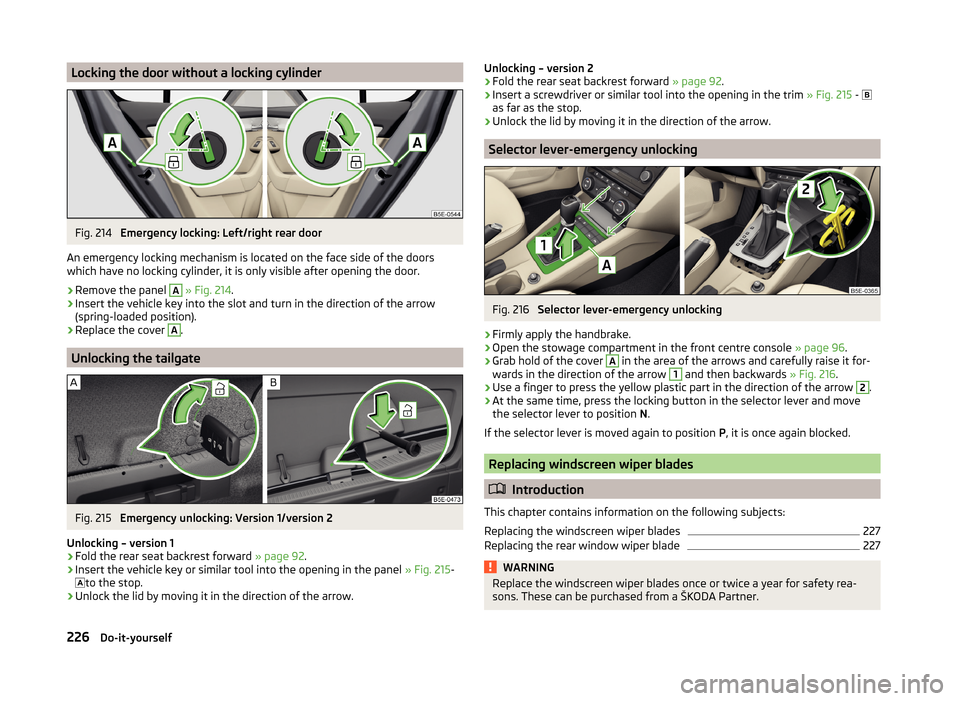
Locking the door without a locking cylinderFig. 214
Emergency locking: Left/right rear door
An emergency locking mechanism is located on the face side of the doors
which have no locking cylinder, it is only visible after opening the door.
›
Remove the panel
A
» Fig. 214 .
›
Insert the vehicle key into the slot and turn in the direction of the arrow
(spring-loaded position).
›
Replace the cover
A
.
Unlocking the tailgate
Fig. 215
Emergency unlocking: Version 1/version 2
Unlocking – version 1
›
Fold the rear seat backrest forward » page 92.
›
Insert the vehicle key or similar tool into the opening in the panel » Fig. 215-
to the stop.
›
Unlock the lid by moving it in the direction of the arrow.
Unlocking – version 2›Fold the rear seat backrest forward
» page 92.›
Insert a screwdriver or similar tool into the opening in the trim » Fig. 215 -
as far as the stop.
›
Unlock the lid by moving it in the direction of the arrow.
Selector lever-emergency unlocking
Fig. 216
Selector lever-emergency unlocking
›
Firmly apply the handbrake.
›
Open the stowage compartment in the front centre console » page 96.
›
Grab hold of the cover
A
in the area of the arrows and carefully raise it for-
wards in the direction of the arrow
1
and then backwards » Fig. 216.
›
Use a finger to press the yellow plastic part in the direction of the arrow
2
.
›
At the same time, press the locking button in the selector lever and move
the selector lever to position N.
If the selector lever is moved again to position P, it is once again blocked.
Replacing windscreen wiper blades
Introduction
This chapter contains information on the following subjects:
Replacing the windscreen wiper blades
227
Replacing the rear window wiper blade
227WARNINGReplace the windscreen wiper blades once or twice a year for safety rea-
sons. These can be purchased from a ŠKODA Partner.226Do-it-yourself
Page 233 of 280
No.Consumer12Radio13Belt tensioner - driver's side14Air blower for air conditioning,heating15Electric steering lock16Signal amplifier for telephone, telephone preinstallation17Instrument cluster18Not assigned19KESSY control unit20Operating lever underneath the steering wheel21Not assigned22Towing hitch - contact in the socket23Light - right24Panorama roof25Control unit for central locking front door right, power windows -
left26Heated front seats27Music amplifier28Towing hitch - left light29CNG relay30Not assigned31Headlight - left32Parking aid (Park Assist)33Airbag switch for hazard warning lights
34
TCS, ESC button, tyre control display, pressure sensor for air-condi-
tioning, reverse light switch, interior mirror with automatic dim-
ming, START-STOP button, telephone preinstallation, control for
heating of rear seats, sensor for air-conditioning, 230 V power
socket, sport-sound generator35Headlight, headlamp beam adjustment, diagnostic connector, cam-
era, radar36Headlight right37Headlight left38Towing hitch - right lightNo.Consumer39Control unit for central locking front door - right, power windows -
front and rear right4012-Volt power socket41Not assigned42Control unit for central locking rear door - left, right, headlight
cleaning system, windscreen wipers43Visor for gas discharge bulbs, interior lighting44Towing hitch - contact in the socket45Control unit for control of seat adjustment46230-Volt power socket47Rear window wiper48Not assigned49Coil on starter relay, clutch pedal switch50Opening the boot lid51Belt tensioner - front passenger side52Not assigned53Relay for rear window heater
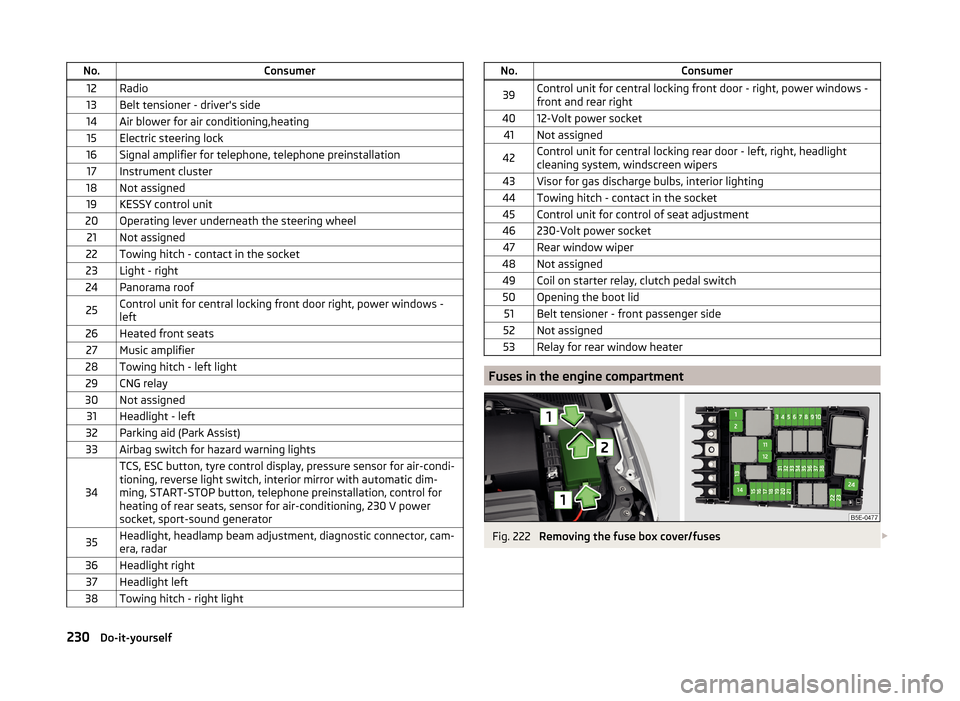
Fuses in the engine compartment
Fig. 222
Removing the fuse box cover/fuses
230Do-it-yourself
Page 264 of 280
Automatic gearbox modes133
Automatic load deactivation203
automatic transmission selector lever lock defect
134
Automatic transmission Kickdown
135
Launch control135
Selector lever lock134
Automatic Transmission Malfunction
35
Warning light35
warning messages35
Auxiliary heating (auxiliary heating and ventila- tion)
121
Adjust122
Radio remote control123
Switching on/off122
B
Ball head Check fitting
172
Ready position170
Ball rod assembling, step 1
171
assembling, step 2171
Ready position170
removing, step 1172
removing, step 2173
Battery In the remote control key
224
Belts12
Belt tensioners15
Bonnet Closing
194
Opening194
Boot Class N1 vehicles
110
See Boot lid61
Boot lid automatic locking61
Closing61
Opening61
Brake information messages
35
warning light35
Brake booster131
brake fluid specification
199
Brake fluid199
Checking199
information messages35
Brake linings warning light
39
Brake pedal (automatic transmission) Indicator light
40
brakes Driving in
136
Brakes Brake booster
131
Brake fluid199
Braking and stabilisation systems138
Handbrake131
Brakes and parking130
Braking Information on braking
130
Break recommendation See Fatigue detection
166
Bulbs Replacing
231
Buttons in the door Power windows
64
C
Camera Lens care
184
Camera lens care
184
Car computersee multifunction display47
Care and maintenance177
cargo cover roll-up cargo cover
108
Cargo element108
Caring for the vehicle exterior Towing hitch
185
Car park132
Car park ticket holder95
Carrier Roof rack
113
Cavity protection184
Central locking54
Problems58
Central locking button58
Central warning light Indicator light
36
Change bulb for additional parking light
233
bulb for fog lights - Version 1234
bulb for fog lights - Version 2234
bulb for high beam233
bulb for the parking light233
bulb in the rear light - Version 1236
bulb in the rear light - Version 2237
daytime running light bulb233
light bulb in tail light235
Changing Engine oil
195
Wheels214
Changing a wheel Follow-up tasks
215
Preparation214
Removing and refitting a wheel215
Charging a vehicle battery202
Check Fit ball head properly
172
261Index
Page 265 of 280
CheckingBattery electrolyte level201
Brake fluid199
Coolant198
Engine oil196
Oil level196
Windscreen washer fluid195
Checks Statutory checks
177
Children and safety22
Child safety Side airbag
24
Child safety lock58
Child safety seat Use of child safety seats
25
Child seat Classification
25
ISOFIX25
on the front passenger seat23
TOP TETHER27
Use of ISOFIX child seats26
Chrome parts see vehicle care
183
Cigarette lighter97
cleaning chrome parts
183
Cleaning Alcantara
187
and maintaining belts187
artificial leather187
headlight glasses184
materials187
natural leather186
plastic parts182
seats covers of the electrically heated seats187
wheels185
Cleaning safety belt
187
Cleaning seat covers
187
Cleaning the interiorartificial leather187
Seat covers187
Cleaning the outside of the vehicle Decorative films
183
Cleaning the vehicle exterior Camera lens
184
Cavity protection184
Door locking cylinder184
Headlight glasses184
Under-body protection185
wheels185
Windows and external mirrors183
Cleaning vehicle180
Cleaning vehicle exterior181
Plastic parts182
Rubber seals183
Vehicle paint work182
Wiper blades185
Clean interior Safety belt
187
clean outside of vehicle chrome parts
183
Climatronic air distribution control
117
Operating elements119
Closing sun roof - Version 1
67
- Version 269
Clothes hook101
CNG192
Indicator light40
Natural gas reserve display32
refuelling191
Refuelling191
Sticker192
Cockpit 12-Volt power outlet
98
Ashtray97
Cigarette lighter97
General view29
Lighting78
storage compartments94
useful equipment94
Comfort control window
66
comfort controls sun roof - Version 1
68
sun roof - Version 270
COMING HOME77
compartments94
Component protection179
Components of the puncture repair kit218
Compressed natural gas see CNG
192
Computer see multifunction display
47
convenience turn signal73
Coolant197
Checking198
Indicator symbol41
Information messages41
Replenishing198
Temperature gauge32
Cooling system cost-effective use
121
malfunctions121
CORNER See Fog lights with CORNER function
76
Correct seated position9
Driver9
Front passenger10
Instructions11
Rear seats11
Counter for distance driven33
cruise control operation
148
operation Description149
Cruise control system Warning light
40
262Index
Page 266 of 280
Cruise Control System148
Cup holders96
D
DAY LIGHT see Daylight running lights
72
Daylight running lights72
De-icing windows
183
De-icing the windscreen and rear window80
Deactivating an airbag21
Decorative films183
Delayed locking of the boot lid see boot lid
61
Departure angle244, 245
Diesel refer to Fuel
190
Diesel fuel Operation in winter
190
Diesel particulate filter43
information messages43
Digital Clock Time
33
Dipstick196
Disconnecting and reconnecting vehicle battery
202
Display31
Compass points52
Coolant temperature32
Gear changes46
Natural gas reserve32
Petrol / Diesel reserve33
Service interval53
Disposal Acceptance and recycling of used vehicles
180
Distance driven33
Distance warning Warning symbol
44
DoorChild safety lock58
Closing56
Emergency locking226
Emergency locking the driver's door225
Opening56
Door warning47
double hooks105
Driver Steering Recommendation (DSR)139
Driving Driving through water
137
Emissions239
Fuel consumption239
off of made-up roads137
Driving in Brake linings
136
engine136
Tyres136
Driving mode160
driving mode select Normal mode
160
Driving Mode Selection160
Driving off of made-up roads137
Driving through water137
DSR139
E
ECO-TIP
52
Eco-tips52
Economical driving Tips
136
EDL139
Electrical power windows66
Operational faults66
Electric boot lid Force limit
61
Manual operation61
Electric luggage compartment lid Acoustic signals63
Adjusting the top lid position63
Deleting the top lid position63
Malfunctions63
Operating62
Electronic Differential Lock (EDL)139
Electronic immobilizer126
Electronic Stability Control (ESC)138
emergency replace battery in the remote control
225
Emergency Changing a wheel
214
Hazard warning light system77
Jump-starting220
Locking the door without a locking cylinder226
Locking the driver's door225
Selector lever-unlocking226
Switching off the engine by pressing a button 129
Towing the using the tow hitch
223
Towing the vehicle221
Tyre repair218
Unlocking the driver's door225
Unlocking the tailgate226
Emergency equipment Fire extinguisher
211
First-aid kit 211
Jack212
Reflective vest211
Vehicle tool kit212
Warning triangle211
Emergency spare wheel Changing
213
Emissions239
Engine Information messages
41
Engine compartment192
Brake fluid199
Overview194
Vehicle battery200
263Index
Page 268 of 280

Hydraulic Brake Assist (HBA)140
I
Ice scrapers
183
Ignition lock127
Immobilizer126
Individual settings Locking
57
Unlocking57
Inertia reel15
Information system45
Compass point display52
Door warning47
Eco-tips52
Gear recommendation46
Lap timer51
MAXI DOT display50
Multifunction display47
Operation46
Outside temperature46
Service interval display53
Stop watch51
Instrument cluster30
Auto-check control47
Counter for distance driven33
Display31
Overview31
Revolutions counter31
Speedometer32
Temperature gauge32
Viewing the charge level of the vehicle battery 34
Warning icons
40
Warning lights34
Interior care185
Natural leather186
Interior light Front
78
Interior lights Rear
79
Interior monitor60
ISOFIX25
J
Jack
212
Maintenance184
Jump-starting220
K
KESSY Locking
56
Unlocking56
Key Locking
55
Starting the engine127
Stopping the engine127
Switching off the ignition127
Switching on the ignition127
Unlocking55
Knee airbag18
L
Lamp failure Warning symbol
43
Lamps Warning symbol
43
Lane Assist162
Activating/deactivating164
Information messages164
Operation163
Warning light39
Lap timer51
Leather Natural leather care
186
LEAVING HOME77
Lever Main beam
73
Turn signal73
Levers Windscreen wipers
82
LichtCOMING HOME / LEAVING HOME77
light travel mode
74
Light Cockpit
78
Fog lights with CORNER function76
High beam assistant75
Replacing bulbs231
tourist light74
lighting entry space
80
Lighting Luggage compartment
103
Lights71
Adaptive headlights (AFS)74
Automatic driving lamp control73
Daylight running72
Fog lights76
Hazard warning light system77
Headlight beam range regulation71
Headlight flasher73
Low beam71
Main beam73
Parking lights71, 78
Rear fog light76
Switching on and off71
Turn signal73
Warning lights34
Locking Individual settings
57
KESSY56
Key55
Remote control55
Locking/unlocking the steering lock Starter button
128
Locking and unlocking the vehicle from the in- side
58
Locking the door without a locking cylinder Emergency
226
265Index
Page 270 of 280
Original accessories178
Outside temperature46
Overview Engine compartment
194
Warning icons40
Warning lights34
P
Park assist
144
Departing from a parallel parking space147
Finding a parking space145
Information messages147
Parking146
Park Assist automatic emergency braking
147
Operation145
Parking132
Park assist144
Parking aid140
Parking aid140
Automatic system activation when moving for- ward
143
Function141
Road display142
Parking lights71
Park the vehicle see Parking
132
Part replacement177
Passive safety Before setting off
8
Driving safety8
Safety equipment8
Passive Safety8
Payload239
Pedals132
Footmats132
Petrol see fuel
189
Phonebox96
Plastic parts182
Polishing vehicle paint work see vehicle care
182
Positioning the jack
216
Power limit Sun roof - Version 1
67
Sun roof - Version 269
Power outlet 12 V
98
Power steering Warning light
36
Power windows64
Button in the front passenger door65
Button in the rear doors65
Buttons in the driver's door64
Practical equipment Reflective vest
211
Practical features 12-Volt power outlet
98
Storage pockets on the front seats101
Waste container98
Proactive passenger protection Indicator light
38
ProActive passenger protection161
Function162
Puncture repair kit218
R
Radiator fan
195
Radio4
Radio remote control Auxiliary heating
123
Raising the vehicle216
Rear-view mirror Exterior mirrors
85
Fold in passenger mirror85
Synchronous adjustment of the rear-view mir- ror
85
Rear fog light76
Warning light38
Rear mirror83
Interior mirror84
Rear view camera143
Rear window - heater80
Refuelling188
Fuel188
Fuel - natural gas191
Remote control Locking
55
Replacing the battery224
Synchronisation process224
Unlocking55
Remote control key Replacing the battery
224
Removable through-loading bag102
Repairs and technical alterations177
Replace the battery in the auxiliary heating (auxiliary heating) in the remote control
225
Replacing Bulb for the licence plate light
235
Bulbs231
Fuses228
Fuses – engine compartment230
Fuses – LHD228
Fuses – RHD229
Low beam bulb233
Rear window wiper blade227
Vehicle battery202
windscreen wiper blades227
Replenishing Coolant
198
Engine oil197
Windscreen washer fluid195
Retraction and economical driving136
Reversing camera143
Lens care184
Revolutions counter31
267Index
Page 272 of 280
Starting the engineKey127
Starter button129
START STOP Information messages
160
Steering lock (KESSY system) Warning light
36
Steering wheel10
Stop see Parking
132
Stopping the engine Key
127
Stop watch51
Storage94
Storage compartment Glasses compartment
100
in the front centre console96
in the rear centre console101
on the driver's side95
on the front passenger side100
under the front arm rest99
Storage compartments94
Storage pockets on the front seats101
Storing seats
89
Storing skis94
Stowage compartments in the doors
95
Sun roof Closing roller blind - Version 2
69
Opening roller blind - Version 269
operation - Version 167
operation - Version 269
Roller blind - Version 168
Sun screen81
sun visors81
Switching lights on and off71
Switching off the engine Starter button
129
Switching off the ignition Key127
Starter button129
Switching on the ignition Key
127
Starter button129
Synchronous adjustment of the rear-view mir- ror
85
T
Taking care of your vehicle Automatic car wash system
181
High-pressure cleaner181
Washing by hand181
Wash system181
TCS Operation
139
Warning light37
Technical data238
Through-loading bag102
Tiptronic134
Tools212
TOP TETHER27
Tow hitch Accessories
173
Towing221
Towing device Description
169
Towing eye front
222
Rear223
Towing hitch Operation and maintenance
185
Towing protection60
Traction Control System (TCS)139
Traffic sign recognition164
Function165
Information messages166
Traffic signs see Traffic sign recognition164
Trailer174
13-pin socket174
Attaching and detaching174
loading175
Safety eyelet174
Trailer operation176
Trailer operation169, 176
Trailer stabilisation (TSA)140
Transmission Warning messages
35
Transport Luggage compartment
103
Roof rack113
Transporting94
Transporting children safely22
Triangle211
TSA140
Turn signal73
Turn signal system Warning light
39, 40
Tyrea Damage
206
Tyre load-bearing capacity see Wheels
207
Tyre pressure204
Warning light39
Tyre pressure monitoring167
Display39
Infotainment display168
Saving tyre pressure values167
Saving tyre pressure values - button168
Saving tyre pressure values - Infotainment168
Tyre repair General information
219
Preparations219
Pressure test220
Sealing and inflating the tyre219
269Index