airbag off SKODA OCTAVIA TOUR 2009 1.G / (1U) Owner's Manual
[x] Cancel search | Manufacturer: SKODA, Model Year: 2009, Model line: OCTAVIA TOUR, Model: SKODA OCTAVIA TOUR 2009 1.G / (1U)Pages: 226, PDF Size: 13.11 MB
Page 4 of 226
Contents3
ContentsLayout of this Owner's Manual
(explanations)
. . . . . . . . . . . . . . . . . . . . . . . . . .
Using the system
. . . . . . . . . . . . . . . . . . . . . .
Cockpit
. . . . . . . . . . . . . . . . . . . . . . . . . . . . . . . . . . . . . . . .
Overview . . . . . . . . . . . . . . . . . . . . . . . . . . . . . . . . . . . .
The brief instruction
. . . . . . . . . . . . . . . . . . . . . . . . . .
Basic functions and important information . . . . .
Instruments and Indicator/Warning Lights
. . .
General view of the instrument cluster . . . . . . . . .
Engine revolutions counter . . . . . . . . . . . . . . . . . . . .
Coolant temperature gauge . . . . . . . . . . . . . . . . . . .
Fuel gauge . . . . . . . . . . . . . . . . . . . . . . . . . . . . . . . . . . .
Speedometer . . . . . . . . . . . . . . . . . . . . . . . . . . . . . . . .
Counter for distance driven . . . . . . . . . . . . . . . . . . .
Service Interval Display . . . . . . . . . . . . . . . . . . . . . . .
Digital clock . . . . . . . . . . . . . . . . . . . . . . . . . . . . . . . . . .
Multi-functional indicator (onboard computer)*
Information display* . . . . . . . . . . . . . . . . . . . . . . . . . .
Auto Check Control . . . . . . . . . . . . . . . . . . . . . . . . . . .
Warning lights . . . . . . . . . . . . . . . . . . . . . . . . . . . . . . . .
Unlocking and locking
. . . . . . . . . . . . . . . . . . . . . . . .
Key . . . . . . . . . . . . . . . . . . . . . . . . . . . . . . . . . . . . . . . . . .
Changing the battery of the radio remote control
Electronic immobiliser . . . . . . . . . . . . . . . . . . . . . . . .
Locking . . . . . . . . . . . . . . . . . . . . . . . . . . . . . . . . . . . . . .
Child safety lock . . . . . . . . . . . . . . . . . . . . . . . . . . . . . .
Central locking system* . . . . . . . . . . . . . . . . . . . . . . .
Remote control* . . . . . . . . . . . . . . . . . . . . . . . . . . . . . .
Synchonisation of the remote control . . . . . . . . . .
Anti-theft alarm system* . . . . . . . . . . . . . . . . . . . . . . Power windows* . . . . . . . . . . . . . . . . . . . . . . . . . . . . .
Electric sliding/tilting roof* . . . . . . . . . . . . . . . . . . . .
Lights and Visibility
. . . . . . . . . . . . . . . . . . . . . . . . . . .
Lights . . . . . . . . . . . . . . . . . . . . . . . . . . . . . . . . . . . . . . . .
Interior lighting . . . . . . . . . . . . . . . . . . . . . . . . . . . . . . .
Visibility . . . . . . . . . . . . . . . . . . . . . . . . . . . . . . . . . . . . .
Windshield wiper and wash system . . . . . . . . . . . .
Rear-view mirror . . . . . . . . . . . . . . . . . . . . . . . . . . . . .
Seats and Storage
. . . . . . . . . . . . . . . . . . . . . . . . . . . . .
Front seats . . . . . . . . . . . . . . . . . . . . . . . . . . . . . . . . . . .
Adjusting front seats electrically* . . . . . . . . . . . . . .
Head restraints . . . . . . . . . . . . . . . . . . . . . . . . . . . . . . .
Rear seats . . . . . . . . . . . . . . . . . . . . . . . . . . . . . . . . . . . .
Pedals . . . . . . . . . . . . . . . . . . . . . . . . . . . . . . . . . . . . . . .
luggage compartment . . . . . . . . . . . . . . . . . . . . . . . .
Net partition (Combi)* . . . . . . . . . . . . . . . . . . . . . . . .
The roof rack* . . . . . . . . . . . . . . . . . . . . . . . . . . . . . . . .
Note holder . . . . . . . . . . . . . . . . . . . . . . . . . . . . . . . . . .
Ashtray* . . . . . . . . . . . . . . . . . . . . . . . . . . . . . . . . . . . . .
Cigarette lighter*, power sockets . . . . . . . . . . . . . . .
Storage compartments . . . . . . . . . . . . . . . . . . . . . . . .
Heating and air conditioning system
. . . . . . . . .
Air outlet vents . . . . . . . . . . . . . . . . . . . . . . . . . . . . . . .
Heating . . . . . . . . . . . . . . . . . . . . . . . . . . . . . . . . . . . . . .
Air conditioning system* . . . . . . . . . . . . . . . . . . . . . .
Climatronic* (automatic air conditioning) . . . . . .
Starting-off and Driving
. . . . . . . . . . . . . . . . . . . . . . .
Setting steering wheel position . . . . . . . . . . . . . . . .
Ignition lock . . . . . . . . . . . . . . . . . . . . . . . . . . . . . . . . . .
Starting the engine . . . . . . . . . . . . . . . . . . . . . . . . . . .
Switching off the engine . . . . . . . . . . . . . . . . . . . . . . .
Shifting . . . . . . . . . . . . . . . . . . . . . . . . . . . . . . . . . . . . . .
Handbrake . . . . . . . . . . . . . . . . . . . . . . . . . . . . . . . . . . . Rear parking aid* . . . . . . . . . . . . . . . . . . . . . . . . . . . . .
Cruise control system (CCS)* . . . . . . . . . . . . . . . . . .
Communication
. . . . . . . . . . . . . . . . . . . . . . . . . . . . . .
Multifunction steering wheel* . . . . . . . . . . . . . . . . .
Mobile phone, handsfree-system* . . . . . . . . . . . . .
Mobile phones and two-way radio systems . . . . .
Safety
. . . . . . . . . . . . . . . . . . . . . . . . . . . . . . . . . . . . . .
Passive Safety
. . . . . . . . . . . . . . . . . . . . . . . . . . . . . . . . .
Basic information . . . . . . . . . . . . . . . . . . . . . . . . . . . .
Correct seated position . . . . . . . . . . . . . . . . . . . . . . .
Seat belts
. . . . . . . . . . . . . . . . . . . . . . . . . . . . . . . . . . . . . .
Why seat belts? . . . . . . . . . . . . . . . . . . . . . . . . . . . . . .
The physical principle of a frontal collision . . . . .
Important safety information regarding the use of
seat belts . . . . . . . . . . . . . . . . . . . . . . . . . . . . . . . . . . . .
How are seat belts correctly fastened? . . . . . . . . .
Belt tensioners . . . . . . . . . . . . . . . . . . . . . . . . . . . . . . .
Airbag system
. . . . . . . . . . . . . . . . . . . . . . . . . . . . . . . . .
Description of the airbag system . . . . . . . . . . . . . . .
Front airbag . . . . . . . . . . . . . . . . . . . . . . . . . . . . . . . . . .
Side airbags* . . . . . . . . . . . . . . . . . . . . . . . . . . . . . . . . .
Deactivating an airbag . . . . . . . . . . . . . . . . . . . . . . . .
Transporting children safely
. . . . . . . . . . . . . . . . . .
What you should know about transporting
children! . . . . . . . . . . . . . . . . . . . . . . . . . . . . . . . . . . . . .
Child seat . . . . . . . . . . . . . . . . . . . . . . . . . . . . . . . . . . . .
Attaching a child seat using the “ISOFIX” system
6
7
9
9
10
10
16
16
16
16
17
17
18
18
19
19
23
25
27
35
35
36
36
37
37
38
41
42
43 44
46
49
49
53
54
55
58
60
60
61
64
65
67
68
73
75
77
77
78
79
83
83
83
85
89
94
94
95
95
97
97
9898
99
102
102
103
104
105
105
105
106
110
110
111
111
112
115
117
117
118
121
122
125
125
128
131
s2ig.book Page 3 Monday, November 10, 2008 11:20 AM
Page 29 of 226
Instruments and Indicator/Warning Lights
28
WARNING
•
If you do not pay attention to the wa rning lights coming on and the corre-
sponding descriptions and warning notes, this may result in severe body
injuries or major vehicle damage.
•
The engine compartment of your car is a hazardous area. There is a risk
of injuries, scalding, accidents and fire when working in the engine compartment, e.g. inspecting and replenis
hing oil and other fluids. It is also
essential to obse rve all warnings ⇒page 162.
Note
•
Arrangement of the indicator lights depends on the model and model version.
The symbols shown in the following function al description are to be found as indi-
cator lights in the instrument cluster.
•
Operational faults are shown in the inst rument cluster as red symbols (priority
1 - danger) or yellow symbols (priority 2 - warning).
Turn signal system
Either the left
or right
indicator light flashes depending on the position of the
turn signal lever.
The indicator light flashes at twice its normal rate if a turn signal light fails. This does
not apply when towing a trailer.
Switching off the hazard warning light system is switched on will cause all of the
turn signal lights as well as both indicator lights to flash.
Further information about the turn signal system ⇒page 52.
Turn signal system for vehicles towing a trailer
*
The warning light
flashes together with the other turn signal lights only if the
vehicle is towing a trailer.
The indicator light does not flash if a turn signal light on the trailer or on the vehicle
is not operating.
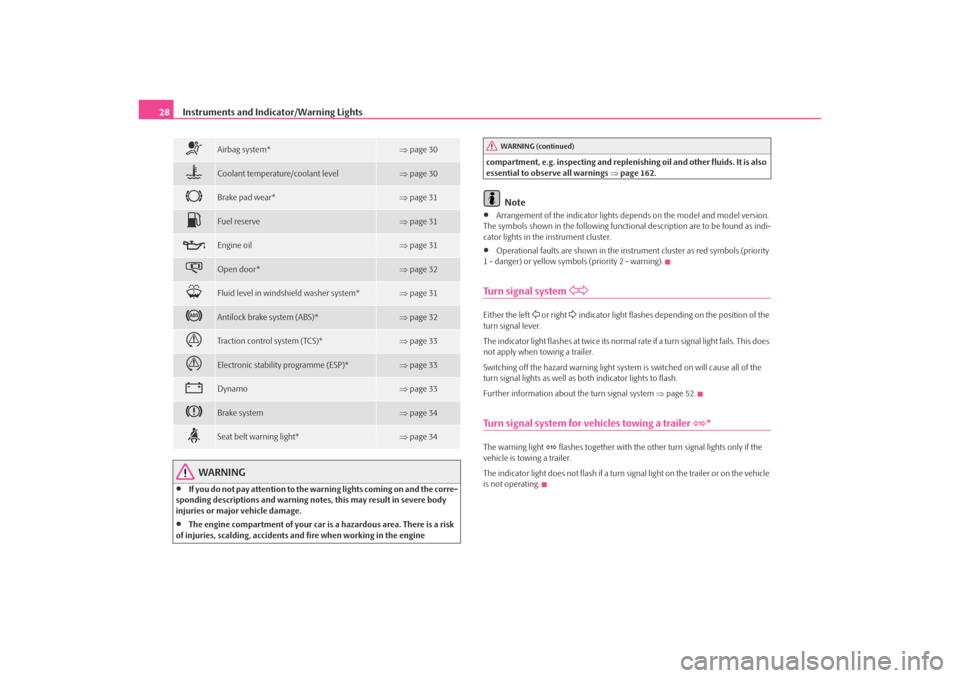
Airbag system*
⇒ page 30
Coolant temperature/coolant level
⇒page 30
Brake pad wear*
⇒page 31
Fuel reserve
⇒page 31
Engine oil
⇒page 31
Open door*
⇒page 32
Fluid level in windshield washer system*
⇒page 31
Antilock brake system (ABS)*
⇒page 32
Traction control system (TCS)*
⇒page 33
Electronic stability programme (ESP)*
⇒page 33
Dynamo
⇒page 33
Brake system
⇒page 34
Seat belt warning light*
⇒page 34
WARNING (continued)
s2ig.book Page 28 Monday, November 10, 2008 11:20 AM
Page 31 of 226
Instruments and Indicator/Warning Lights
30Glow plug system
(diesel engine)
The warning light
lights up for a cold engine when switching on the ignition
(pre-heat position) 2 ⇒ page 95. Start the engine just as soon as the indicator light
goes out.
The glow plug indicator light will come on for about 1 second if the engine is at a
normal operating temperature or if the outside temperature is above +5°C. This
means that you can start the engine right away.
There is a fault in the glow plug system if the warning light
does not come on
at all or lights up continuously . Contact a specialist garage as soon as possible to
obtain assistance.
If the warning light
begins to flash while driving, a fault exists in the engine
control. The engine management system selects an emergency programme which
enables you to drive to the nearest specialist garage by adopting a gentle style of
driving.
The following text will be displayed in the information display*:
ENGINE WORKSHOP!
Airbag system
Monitoring the airbag system
The warning light
comes on for a few seconds when the ignition is switched on.
There is a fault in the system if the warn ing light does not go out or comes on or
flashes while driving ⇒. This also applies if the warning light does not come on
when the ignition is switched on.
The following text will be displayed in the information display*:
AIRBAG FAULT
The functionality of the airbag system is also monitored electronically, when one
airbag has been switched off
Front airbag or side pass enger airbag deactivated us ing the diagnostic equip-
ment:
•
The warning light
lights up for 3 seconds after switching on the ignition and
then flashes again for 12 seconds.
Front passenger airbags switched off using the switch for front passenger
airbags* in storage compartment on the front passenger side:
•
The warning light
comes on for 3 seconds after the ignition has been
switched on.
•
The deactivation of the airb ag is indicated by the lighting up of the indicator
light
in the interior lighting ⇒page 123.
WARNING
Have the airbag system ch ecked immediately by a specialist garage if a fault
exists. Otherwise, there is a risk of th e airbag not being activated in the event
of an accident.
Note
Further information about switching off airbags ⇒page 122.Coolant temperature/ Coolant quantity
The warning light comes on for a few seconds
2) when the ignition is switched
on.
The coolant temperature is too high or the coolant level too low if the warning light
does not go out or flashes while driving.
3 peeps sound as an additional warning signal.
In this case stop and switch the engine off and check the coolant level; top up the
coolant as necessary.
Do not continue your journey if for some reason it is not possible under the
conditions prevailing to top up with coolant. Keep the engine switched off and 2)The warning light on vehicles fitted with information display does not come on after
switching the ignition on, but only if the coola nt temperature is too high or the coolant level
is too low.
s2ig.book Page 30 Monday, November 10, 2008 11:20 AM
Page 41 of 226
Unlocking and locking
40
NoteThe opened driver door cannot be locked. It must be locked separately after closing
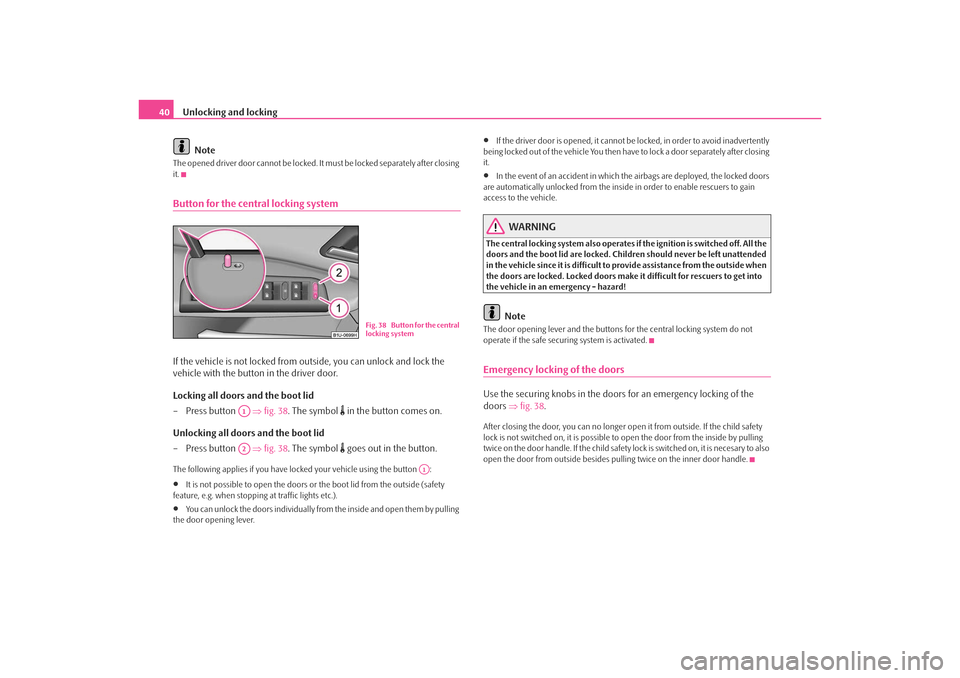
it.Button for the central locking systemIf the vehicle is not locked from outside, you can unlock and lock the
vehicle with the button in the driver door.
Locking all doors and the boot lid
– Press button ⇒ fig. 38. The symbol
in the button comes on.
Unlocking all doors and the boot lid
– Press button ⇒ fig. 38. The symbol goes out in the button.
The following applies if you have lo cked your vehicle using the button :•
It is not possible to open the doors or the boot lid from the outside (safety
feature, e.g. when stopping at traffic lights etc.).
•
You can unlock the doors individually from the inside and open them by pulling
the door opening lever.
•
If the driver door is opened, it cannot be locked, in order to avoid inadvertently
being locked out of the vehicle You then have to lock a door separately after closing
it.
•
In the event of an accident in which the airbags are deployed, the locked doors
are automatically unlocked from the inside in order to enable rescuers to gain
access to the vehicle.
WARNING
The central locking system al so operates if the ignition is switched off. All the
doors and the boot lid are locked. Children should never be left unattended
in the vehicle since it is difficult to provide assistance from the outside when
the doors are locked. Locked doors make it difficult for rescuers to get into
the vehicle in an emergency - hazard!
Note
The door opening lever and the buttons for the central locking system do not
operate if the safe securing system is activated.Emergency locking of the doorsUse the securing knobs in the doors for an emergency locking of the
doors ⇒fig. 38 .After closing the door, you can no longer open it from outside. If the child safety
lock is not switched on, it is possible to open the door from the inside by pulling
twice on the door handle. If the child safety lock is switched on, it is necesary to also
open the door from outside besides pu lling twice on the inner door handle.
Fig. 38 Button for the central
locking system
A1A2
A1
s2ig.book Page 40 Monday, November 10, 2008 11:20 AM
Page 52 of 226
Lights and Visibility51
Using the system
Safety
Driving Tips
General Maintenance
Breakdown assistance
Technical Data
Headlamp range adjustment
Once the low beam is switched on you can then adapt the range of
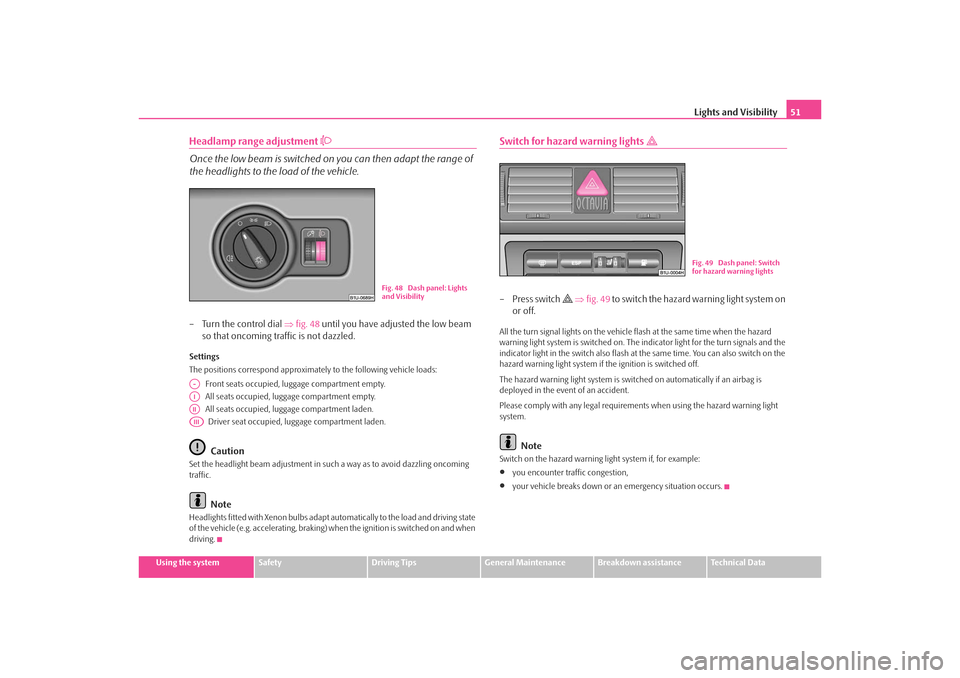
the headlights to the load of the vehicle.– Turn the control dial ⇒fig. 48 until you have adjusted the low beam
so that oncoming traffic is not dazzled.Settings
The positions correspond approximat ely to the following vehicle loads:
Front seats occupied, luggage compartment empty.
All seats occupied, lugg age compartment empty.
All seats occupied, lugg age compartment laden.
Driver seat occupied, lu ggage compartment laden.
Caution
Set the headlight beam adjustment in such a way as to avoid dazzling oncoming
traffic.
Note
Headlights fitted with Xenon bulbs adapt au tomatically to the load and driving state
of the vehicle (e.g. accelerating, braking) when the ignition is switched on and when
driving.
Switch for hazard warning lights
–Press switch
⇒ fig. 49 to switc h the haz ard wa rning lig ht system on
or off.
All the turn signal lights on the vehicle flash at the same time when the hazard
warning light system is switched on. The indicator light for the turn signals and the
indicator light in the switch also flash at the same time. You can also switch on the
hazard warning light system if the ignition is switched off.
The hazard warning light system is switched on automatically if an airbag is
deployed in the event of an accident.
Please comply with any legal requirements when using the hazard warning light
system.
Note
Switch on the hazard warning light system if, for example:•
you encounter traffic congestion,
•
your vehicle breaks down or an emergency situation occurs.
Fig. 48 Dash panel: Lights
and Visibility
A-AIAIIAIII
Fig. 49 Dash panel: Switch
for hazard warning lights
s2ig.book Page 51 Monday, November 10, 2008 11:20 AM
Page 63 of 226
Seats and Storage
62•
In view of the fact that the seats can also be adjusted when the ignition is
switched off (even when ignition key withdrawn), you should never leave
children unattended in the car.
•
The backrests must not be angled too far back when driving otherwise
this will affect proper operation of th e seat belts and of the airbag system -
risk of injury!Note
If the movement of the seat is inadverten tly interrupted during an adjustment, once
again press the switch in the appropriate direction and continue with the adjust-
ment of the seat to the end.Storing settingStoring seat and exterior mirror settings for driving forward
– Switch on the ignition.
– Adjust the seat ⇒page 61.
– Adjust both exterior mirrors ⇒page 58. – Press one of the memory buttons and hold the button pressed for
about 3 seconds until an audible sign al confirms that the setting has
been stored. The setting of this button was stored.
Storing exterior mirror setting for reversing*
– Switch on the ignition.
– Turn the exterior mirror control to position
⇒ page 58.
– Engage reverse gear.
– Move the right exterior mirror into the desired position ⇒page 58.
– Press one of the memory buttons and hold the button pressed for about 3 seconds until an audible sign al confirms that the setting has
been stored. The setting of the selected button was stored.
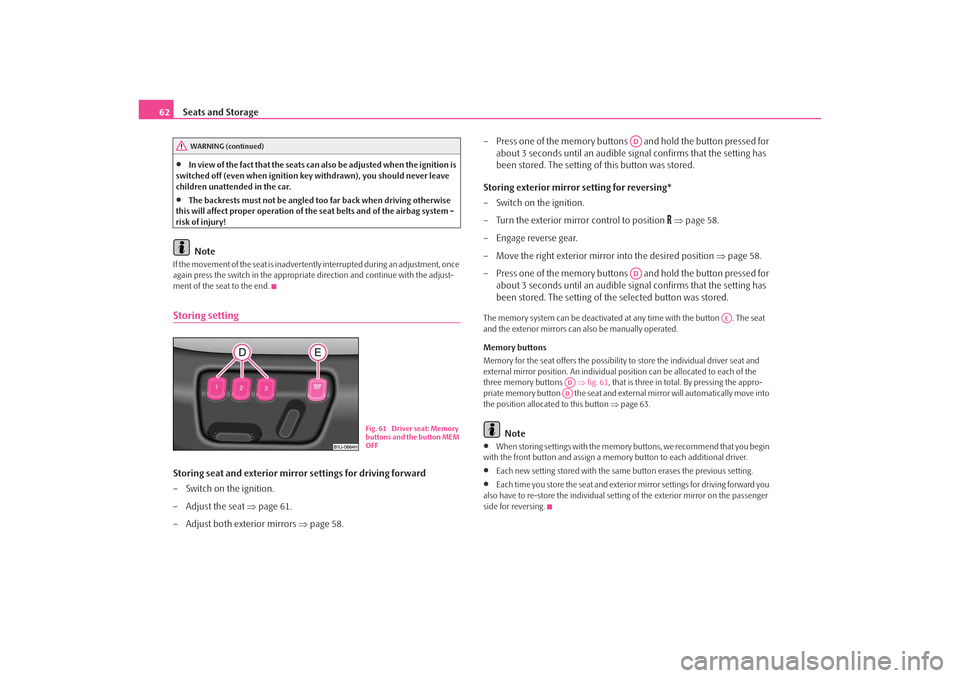
The memory system can be deactivated at any time with the button . The seat
and the exterior mirrors can also be manually operated.
Memory buttons
Memory for the seat offers the possibility to store the individual driver seat and
external mirror position. An individual po sition can be allocated to each of the
three memory buttons ⇒fig. 61 , that is three in total. By pressing the appro-
priate memory button the seat and extern al mirror will automatically move into
the position allocated to this button ⇒page 63.
Note
•
When storing settings with the memory buttons, we recommend that you begin
with the front button and assign a memory button to each additional driver.
•
Each new setting stored with the same button erases the previous setting.
•
Each time you store the seat and exterior mirror settings for driving forward you
also have to re-store the individual settin g of the exterior mirror on the passenger
side for reversing.
WARNING (continued)
Fig. 61 Driver seat: Memory
buttons and the button MEM
OFF
ADAD
AE
ADAD
s2ig.book Page 62 Monday, November 10, 2008 11:20 AM
Page 95 of 226
Starting-off and Driving
94Starting-off and DrivingSetting steering wheel positionYou can set the height and the forward/back position of the steering
wheel to the desired position.
– Adjust the driver seat ⇒page 60.
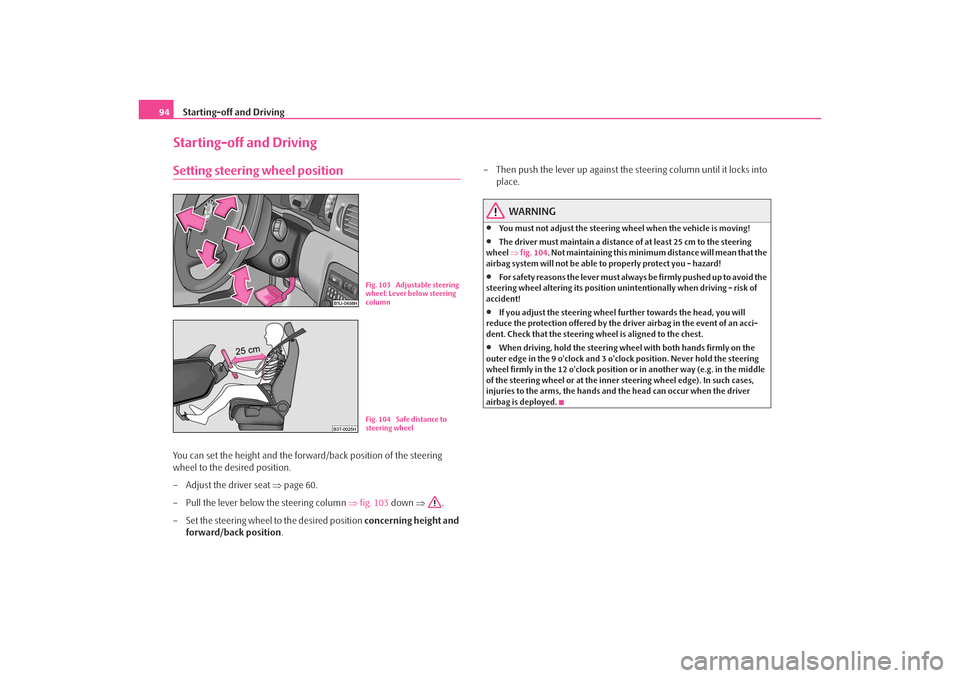
– Pull the lever below the steering column ⇒fig. 103 down ⇒.
– Set the steering wheel to the desired position concerning height and
forward/back position . – Then push the lever up against the
steering column until it locks into
place.
WARNING
•
You must not adjust the steering wh eel when the vehicle is moving!
•
The driver must maintain a distance of at least 25 cm to the steering
wheel ⇒fig. 104 . Not maintaining this minimum distance will mean that the
airbag system will not be able to properly protect you - hazard!
•
For s afe ty re a so ns t he le ve r m ust al wa y s b e fi rm ly pus he d up to a voi d the
steering wheel alteri ng its position unintentionally when driving - risk of
accident!
•
If you adjust the steer ing wheel further towards the head, you will
reduce the protection offered by the driver airbag in the event of an acci-
dent. Check that the steering wh eel is aligned to the chest.
•
When driving, hold the steering wheel with both hands firmly on the
outer edge in the 9 o'clock and 3 o'clock position. Never hold the steering
wheel firmly in the 12 o'clock position or in another way (e.g. in the middle
of the steering wheel or at the inner steering wheel edge). In such cases,
injuries to the arms, the hands and the head can occur when the driver
airbag is deployed.
Fig. 103 Adjustable steering
wheel: Lever below steering
columnFig. 104 Safe distance to
steering wheel
s2ig.book Page 94 Monday, November 10, 2008 11:20 AM
Page 105 of 226
Communication
104
– Plug the adapter cable into the mobile phone socket. The socket is located on the mobile phone mount below.
– Switch on the ignition.
– Wait approximately 20 seconds, switch off the ignition and pull the ignition key out of the ignition lock.
– Insert the mobile phone into the adapter (as specified in manufac- turer's instructions) and switch on the ignition.
Removing the mobile phone with the adapter
– Press the button and remove the mobile telephone.An initialisation mu st be carried out:•
after the first connection of the adapter,
•
after reconnecting the battery,
•
after pulling out the adapter cable from the power socket for the mobile phone.
This enables you to make full use of the ad vantages of a normal carphone (“hands-
free system” using a microphone integrated in the vehicle, optimal transmission of
signals using an external aerial etc.). The battery of the mobile phone is also
constantly charged.
Please contact your specialist garage if there are any points which are not clear.
Please also refer to the additional instructions ⇒page 104.
Mobile phones and two-way radio systemsThe installation of a mobile phone and two-way radio system in a vehicle should
only be carried out by a specialist garage.
Škoda Auto a.s. permits the operation of mobile phones and two-way radio
systems with a professionally installed ex ternal aerial and a maximum transmission
power of up to 10 watts. It is essential that you inform a specialist
garage about the possibilites to assemble
and operate mobile phones and two-way ra dio sets which have a power output of
more than 10 W. The Škoda Service Partners can provide you with details about the
technical possibilities for retrofitting of mobile telephones and radio transmitters.
Operation of mobile phones or two-way radio systems may interfere with func-
tioning of the electronic systems of your vehicle. The reasons for this may be:
•
no external aerial
•
external aerial incorrectly installed
•
transmission power greater than 10 watts.
You should therefore not operate a mobile phone or two-way radio system
inside the vehicle without the use of an external aerial, or with an external aerial
which has been incorrectly installed.
You should also be aware of the fact that only an external aerial makes it possible
to achieve the optimal range of such equipment.
WARNING
•
If a mobile phone or two-way radio sy stem is operated inside the vehicle
without using an external aerial, or wi th an external aerial which has been
incorrectly installed, the result can be excessive electromagnetic fields
which may cause harm to your health.
•
Please concentrate fully at all times on your driving!
•
You must not install two-way radio systems, mobile phones or mounts
on the covers of the airbags or within the immediate deployment range of
airbags. This might result in injuries to the occupants in th e event of an acci-
dent.Note
Please also refer to the operating instru ctions of the mobile phones and two-way
radio systems.
AA
AC
s2ig.book Page 104 Monday, November 10, 2008 11:20 AM
Page 106 of 226
Passive Safety105
Using the system
Safety
Driving Tips
General Maintenance
Breakdown assistance
Technical Data
SafetyPassive SafetyBasic informationDriving the safe way
Passive safety measures reduce the risk of injury in accident situa-
tions.In this section you will find important inform ation, tips and notes on the subject of
passive safety in your vehicle. We ha ve combined everything here which you
should be familiar with, for example, regarding seat belts, airbags, child seats and
safety of children. It is therefore importan t, in particular, to comply with the notes
and warnings in this section for your own interest and in the interest of those trav-
elling with you.
WARNING
•
This chapter contains important information on how to use the vehicle
for the driver and his occupants. You will find further information on safety,
which concerns you and those travelling with you, in the following chapters
of this Owner's Manual.
•
The complete on-board literature should always be in the vehicle. This
applies in particular, if you rent out or sell the vehicle.
Safety equipment
The safety equipment is part of the occupant protection and it can
reduce the risk of injuries in accident situations.“Do not put at risk” your safety and the safety of those travelling with you . In the
event of an accident, the safety equipmen t can reduce the risk of injuries. The
following list contains part of th e safety equipment in your vehicle:
•
three-point seat belts for all the seats,*,
•
belt force limiter for front seats*,
•
belt tensioner for front seats*,
•
seat belt height adjuster for front seats,
•
front airbags*,
•
side airbags*,
•
anchoring points for child seat using the “ISOFIX” system,
•
head restraint adjustable for height,
•
adjustable steering column.
The specified safety equipment works toge ther, in order to optimally protect you
and those travelling with you in accident situations. The safety equipment does not
protect you or the people travelling with you, if you or your occupants adopt an
incorrect seated position or the equipmen t is not correctly adjusted or used.
Fo r t h i s re a s o n y o u w i l l b e p ro v i d e d w i th i n fo rm a ti o n o n w hy t h i s e q u i p m e nt i s v e r y
important, how it protects you and the o ccupants, what should be observed when
using the equipment and how you and the pe ople travelling with you can make full
use of the existing safety equipment. This Owner's Manual contains important
warning notes, which you and those travelli ng with you should pay attention to in
order to reduce a risk of injury.
Safety concerns everybody!
Before setting off
The driver is always fully responsible for his occupants and for the
operating safety of the vehicle.For your own safety and the safety of the people travelling with you, please pay
attention to the following points before setting off:
s2ig.book Page 105 Monday, November 10, 2008 11:20 AM
Page 108 of 226

Passive Safety107
Using the system
Safety
Driving Tips
General Maintenance
Breakdown assistance
Technical Data
•
Adjust the backrest so that you are able to reach the highest point of the
steering wheel with your arms at a slight angle.
•
Adjust the head restraint so that the top edge of the head restraint is at the same
level as the upper part of your head ⇒page 106, fig. 114 .
•
Fasten the seat belt correctly ⇒page 112, “How are seat belts correctly
fastened?”.
Manual driver seat adjustment ⇒page 60, “Adjusting the front seats”.
Electrical driver seat adjustment ⇒page 61, “Adjusting front seats electrically*”.
WARNING
•
The front seats and the head restraints must always be adjusted to match
the body size of the seat occupant as well as the seat belts must always be
correctly fastened in order to provide an optimal protection for you and
your occupants.
•
The driver must maintain a distance of at least 25 cm to the steering
wheel ⇒page 106, fig. 113 . Not maintaining this minimum distance will
mean that the airbag system will not be able to properly protect you -
hazard!
•
When driving, hold the steering whee l with both hands firmly on the
outer edge in the 9 o'clock and 3 o'clock position. Never hold the steering
wheel firmly in the 12 o'clock position or in another way (e.g. in the middle
of the steering wheel or at the inner steering wheel edge). In such cases,
injuries to the arms, the hands and the head can occur when the driver
airbag is deployed.
•
The backrests must not be angled too far back when driving otherwise
this will affect proper operation of the seat belts and of the airbag system -
risk of injury!
•
Ensure that there are no objects in the footwell as any objects may get
behind the pedals during a driving or braking manoeuvre. You would then
no longer be able to operate the clutch, to brake or accelerate.
Correct seated position for the front passenger
The front passenger must maintain a distance of at least 25°cm from
the dash panel so that the combination of the airbag and the seat
belt offers the greatest possible safety when an airbag is deployed.For the safety of the front passenger and to reduce the risk of injury in the event of
an accident, we recommend the following setting:•
Adjust the front passenger seat as far as possible to the rear.
•
Adjust the head restraint so that the top edge of the head restraint is at the same
level as the upper part of your head ⇒page 106, fig. 114.
•
Fasten the seat belt correctly ⇒page 112, “How are seat belts correctly
fastened?”.
In exceptional cases the front passenger airbag can be deactivated ⇒page 122,
“Deactivating an airbag”.
Manual front passenger adjustment ⇒page 60, “Adjusting the front seats”.
Electrical front passenger seat adjustment ⇒page 61, “Adjusting front seats elec-
trically*”.
WARNING
•
The front seats and the head restraints must always be adjusted to match
the body size of the seat occupant as well as the seat belts must always be
correctly fastened in order to provide an optimal protection for you and
your occupants.
•
The front passenger must maintain a distance of at least 25 cm to the
dash panel. Not maintaining this mi nimum distance will mean that the
airbag system will not be able to properly protect you - hazard!
•
Always keep your feet in the footwell when the car is being driven - never
place your feet on the instrument panel, out of the window or on the
surfaces of the seats. You will be exposed to increased risk of injury if it
becomes necessary to apply the brake or in the event of an accident. If an
airbag is deployed, you may suffer fata l injuries when adopting an incorrect
seated position!
s2ig.book Page 107 Monday, November 10, 2008 11:20 AM