handbrake SKODA OCTAVIA TOUR 2009 1.G / (1U) Owner's Manual
[x] Cancel search | Manufacturer: SKODA, Model Year: 2009, Model line: OCTAVIA TOUR, Model: SKODA OCTAVIA TOUR 2009 1.G / (1U)Pages: 226, PDF Size: 13.11 MB
Page 4 of 226
Contents3
ContentsLayout of this Owner's Manual
(explanations)
. . . . . . . . . . . . . . . . . . . . . . . . . .
Using the system
. . . . . . . . . . . . . . . . . . . . . .
Cockpit
. . . . . . . . . . . . . . . . . . . . . . . . . . . . . . . . . . . . . . . .
Overview . . . . . . . . . . . . . . . . . . . . . . . . . . . . . . . . . . . .
The brief instruction
. . . . . . . . . . . . . . . . . . . . . . . . . .
Basic functions and important information . . . . .
Instruments and Indicator/Warning Lights
. . .
General view of the instrument cluster . . . . . . . . .
Engine revolutions counter . . . . . . . . . . . . . . . . . . . .
Coolant temperature gauge . . . . . . . . . . . . . . . . . . .
Fuel gauge . . . . . . . . . . . . . . . . . . . . . . . . . . . . . . . . . . .
Speedometer . . . . . . . . . . . . . . . . . . . . . . . . . . . . . . . .
Counter for distance driven . . . . . . . . . . . . . . . . . . .
Service Interval Display . . . . . . . . . . . . . . . . . . . . . . .
Digital clock . . . . . . . . . . . . . . . . . . . . . . . . . . . . . . . . . .
Multi-functional indicator (onboard computer)*
Information display* . . . . . . . . . . . . . . . . . . . . . . . . . .
Auto Check Control . . . . . . . . . . . . . . . . . . . . . . . . . . .
Warning lights . . . . . . . . . . . . . . . . . . . . . . . . . . . . . . . .
Unlocking and locking
. . . . . . . . . . . . . . . . . . . . . . . .
Key . . . . . . . . . . . . . . . . . . . . . . . . . . . . . . . . . . . . . . . . . .
Changing the battery of the radio remote control
Electronic immobiliser . . . . . . . . . . . . . . . . . . . . . . . .
Locking . . . . . . . . . . . . . . . . . . . . . . . . . . . . . . . . . . . . . .
Child safety lock . . . . . . . . . . . . . . . . . . . . . . . . . . . . . .
Central locking system* . . . . . . . . . . . . . . . . . . . . . . .
Remote control* . . . . . . . . . . . . . . . . . . . . . . . . . . . . . .
Synchonisation of the remote control . . . . . . . . . .
Anti-theft alarm system* . . . . . . . . . . . . . . . . . . . . . . Power windows* . . . . . . . . . . . . . . . . . . . . . . . . . . . . .
Electric sliding/tilting roof* . . . . . . . . . . . . . . . . . . . .
Lights and Visibility
. . . . . . . . . . . . . . . . . . . . . . . . . . .
Lights . . . . . . . . . . . . . . . . . . . . . . . . . . . . . . . . . . . . . . . .
Interior lighting . . . . . . . . . . . . . . . . . . . . . . . . . . . . . . .
Visibility . . . . . . . . . . . . . . . . . . . . . . . . . . . . . . . . . . . . .
Windshield wiper and wash system . . . . . . . . . . . .
Rear-view mirror . . . . . . . . . . . . . . . . . . . . . . . . . . . . .
Seats and Storage
. . . . . . . . . . . . . . . . . . . . . . . . . . . . .
Front seats . . . . . . . . . . . . . . . . . . . . . . . . . . . . . . . . . . .
Adjusting front seats electrically* . . . . . . . . . . . . . .
Head restraints . . . . . . . . . . . . . . . . . . . . . . . . . . . . . . .
Rear seats . . . . . . . . . . . . . . . . . . . . . . . . . . . . . . . . . . . .
Pedals . . . . . . . . . . . . . . . . . . . . . . . . . . . . . . . . . . . . . . .
luggage compartment . . . . . . . . . . . . . . . . . . . . . . . .
Net partition (Combi)* . . . . . . . . . . . . . . . . . . . . . . . .
The roof rack* . . . . . . . . . . . . . . . . . . . . . . . . . . . . . . . .
Note holder . . . . . . . . . . . . . . . . . . . . . . . . . . . . . . . . . .
Ashtray* . . . . . . . . . . . . . . . . . . . . . . . . . . . . . . . . . . . . .
Cigarette lighter*, power sockets . . . . . . . . . . . . . . .
Storage compartments . . . . . . . . . . . . . . . . . . . . . . . .
Heating and air conditioning system
. . . . . . . . .
Air outlet vents . . . . . . . . . . . . . . . . . . . . . . . . . . . . . . .
Heating . . . . . . . . . . . . . . . . . . . . . . . . . . . . . . . . . . . . . .
Air conditioning system* . . . . . . . . . . . . . . . . . . . . . .
Climatronic* (automatic air conditioning) . . . . . .
Starting-off and Driving
. . . . . . . . . . . . . . . . . . . . . . .
Setting steering wheel position . . . . . . . . . . . . . . . .
Ignition lock . . . . . . . . . . . . . . . . . . . . . . . . . . . . . . . . . .
Starting the engine . . . . . . . . . . . . . . . . . . . . . . . . . . .
Switching off the engine . . . . . . . . . . . . . . . . . . . . . . .
Shifting . . . . . . . . . . . . . . . . . . . . . . . . . . . . . . . . . . . . . .
Handbrake . . . . . . . . . . . . . . . . . . . . . . . . . . . . . . . . . . . Rear parking aid* . . . . . . . . . . . . . . . . . . . . . . . . . . . . .
Cruise control system (CCS)* . . . . . . . . . . . . . . . . . .
Communication
. . . . . . . . . . . . . . . . . . . . . . . . . . . . . .
Multifunction steering wheel* . . . . . . . . . . . . . . . . .
Mobile phone, handsfree-system* . . . . . . . . . . . . .
Mobile phones and two-way radio systems . . . . .
Safety
. . . . . . . . . . . . . . . . . . . . . . . . . . . . . . . . . . . . . .
Passive Safety
. . . . . . . . . . . . . . . . . . . . . . . . . . . . . . . . .
Basic information . . . . . . . . . . . . . . . . . . . . . . . . . . . .
Correct seated position . . . . . . . . . . . . . . . . . . . . . . .
Seat belts
. . . . . . . . . . . . . . . . . . . . . . . . . . . . . . . . . . . . . .
Why seat belts? . . . . . . . . . . . . . . . . . . . . . . . . . . . . . .
The physical principle of a frontal collision . . . . .
Important safety information regarding the use of
seat belts . . . . . . . . . . . . . . . . . . . . . . . . . . . . . . . . . . . .
How are seat belts correctly fastened? . . . . . . . . .
Belt tensioners . . . . . . . . . . . . . . . . . . . . . . . . . . . . . . .
Airbag system
. . . . . . . . . . . . . . . . . . . . . . . . . . . . . . . . .
Description of the airbag system . . . . . . . . . . . . . . .
Front airbag . . . . . . . . . . . . . . . . . . . . . . . . . . . . . . . . . .
Side airbags* . . . . . . . . . . . . . . . . . . . . . . . . . . . . . . . . .
Deactivating an airbag . . . . . . . . . . . . . . . . . . . . . . . .
Transporting children safely
. . . . . . . . . . . . . . . . . .
What you should know about transporting
children! . . . . . . . . . . . . . . . . . . . . . . . . . . . . . . . . . . . . .
Child seat . . . . . . . . . . . . . . . . . . . . . . . . . . . . . . . . . . . .
Attaching a child seat using the “ISOFIX” system
6
7
9
9
10
10
16
16
16
16
17
17
18
18
19
19
23
25
27
35
35
36
36
37
37
38
41
42
43 44
46
49
49
53
54
55
58
60
60
61
64
65
67
68
73
75
77
77
78
79
83
83
83
85
89
94
94
95
95
97
97
9898
99
102
102
103
104
105
105
105
106
110
110
111
111
112
115
117
117
118
121
122
125
125
128
131
s2ig.book Page 3 Monday, November 10, 2008 11:20 AM
Page 10 of 226
Cockpit9
Using the system
Safety
Driving Tips
General Maintenance
Breakdown assistance
Technical Data
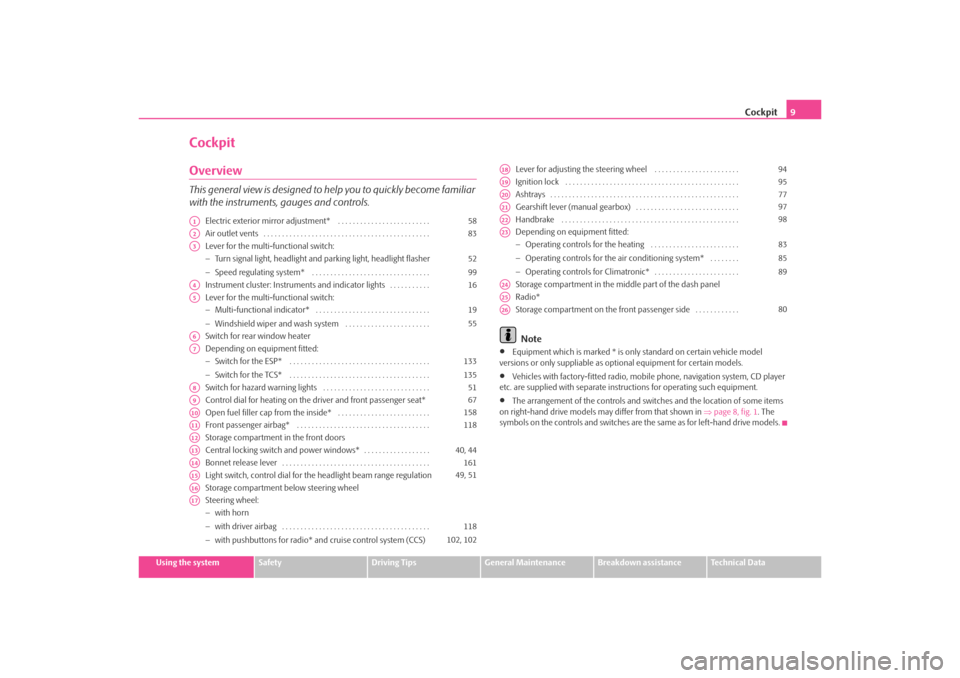
CockpitOverviewThis general view is designed to help you to quickly become familiar
with the instruments, gauges and controls.
Electric exterior mirror adjustment* . . . . . . . . . . . . . . . . . . . . . . . . .
Air outlet vents . . . . . . . . . . . . . . . . . . . . . . . . . . . . . . . . . . . . . . . . . . . . .
Lever for the multi-functional switch:
−Turn signal light, headlight and parking light, headlight flasher
− Speed regulating system* . . . . . . . . . . . . . . . . . . . . . . . . . . . . . . . .
Instrument cluster: Instrum ents and indicator lights . . . . . . . . . . .
Lever for the multi-functional switch:
− Multi-functional indicator* . . . . . . . . . . . . . . . . . . . . . . . . . . . . . . .
− Windshield wiper and wash system . . . . . . . . . . . . . . . . . . . . . . .
Switch for rear window heater
Depending on equipment fitted:
− Switch for the ESP* . . . . . . . . . . . . . . . . . . . . . . . . . . . . . . . . . . . . . .
− Switch for the TCS* . . . . . . . . . . . . . . . . . . . . . . . . . . . . . . . . . . . . . .
Switch for hazard warning lights . . . . . . . . . . . . . . . . . . . . . . . . . . . . .
Control dial for heating on the driver and front passenger seat*
Open fuel filler cap from the inside* . . . . . . . . . . . . . . . . . . . . . . . . .
Front passenger airbag* . . . . . . . . . . . . . . . . . . . . . . . . . . . . . . . . . . . .
Storage compartment in the front doors
Central locking switch and power windows* . . . . . . . . . . . . . . . . . .
Bonnet release lever . . . . . . . . . . . . . . . . . . . . . . . . . . . . . . . . . . . . . . . .
Light switch, control dial for the headlight beam range regulation
Storage compartment below steering wheel
Steering wheel:
− with horn
− with driver airbag . . . . . . . . . . . . . . . . . . . . . . . . . . . . . . . . . . . . . . . .
− with pushbuttons for radio* an d cruise control system (CCS) Lever for adjusting the steering wheel . . . . . . . . . . . . . . . . . . . . . . .
Ignition lock . . . . . . . . . . . . . . . . . . . . . . . . . . . . . . . . . . . . . . . . . . . . . . .
Ashtrays . . . . . . . . . . . . . . . . . . . . . . . . . . . . . . . . . . . . . . . . . . . . . . . . . . .
Gearshift lever (manual gearbox) . . . . . . . . . . . . . . . . . . . . . . . . . . . .
Handbrake . . . . . . . . . . . . . . . . . . . . . . . . . . . . . . . . . . . . . . . . . . . . . . . .
Depending on equipment fitted:
−
Operating controls for the heating . . . . . . . . . . . . . . . . . . . . . . . .
− Operating controls for the air conditioning system* . . . . . . . .
− Operating controls for Climatronic* . . . . . . . . . . . . . . . . . . . . . . .
Storage compartment in the middle part of the dash panel
Radio*
Storage compartment on the front passenger side . . . . . . . . . . . .
Note
•
Equipment which is marked * is only standard on certain vehicle model
versions or only suppliable as op tional equipment for certain models.
•
Vehicles with factory-fitted radio, mobile phone, navigation system, CD player
etc. are supplied with separate instru ctions for operating such equipment.
•
The arrangement of the controls and swit ches and the location of some items
on right-hand drive models may differ from that shown in ⇒page 8, fig. 1 . The
symbols on the controls and switches are the same as for left-hand drive models.
A1
58
A2
83
A3
52
99
A4
16
A5
19
55
A6A7
133
135
A8
51
A9
67
A10
158
A11
118
A12A13
40, 44
A14
161
A15
49, 51
A16A17
118
102, 102
A18
94
A19
95
A20
77
A21
97
A22
98
A23
83
85
89
A24A25A26
80
s2ig.book Page 9 Monday, November 10, 2008 11:20 AM
Page 33 of 226
Instruments and Indicator/Warning Lights
32Do not continue your journey if for some reason it is not possible under the
conditions prevailing to top up with oil. Keep the engine switched off and obtain
professional assistance from a specialist garage, otherwise it could lead to severe
engine damage.
Do not drive any further if the warning light remains on even if the oil is at the
correct level. Do not run the engine not at idling speed either. Contact the nearest
specialist garage to obtain professional assistance.
The following text will be displayed in the information display*:
STOP! OIL PRESS. STOP MOTOR! SERVICE MANUAL
The warning light
lights up yellow* (oil quantity too low)
If the warning light lights up yellow, there is not the correct quantity of oil in the
engine. Check as soon as possible the oil level or top up ⇒page 165 with engine
oil.
A peep sounds as an additional warning signal.
The following text will be displayed in the information display*:
CHECK OIL LEVEL
When opening the bonnet, the warning light goes out. If no engine oil has been
replenished, the warning light will come on again after driving about 100 km.
The warning light
flashes yellow* (engine oil level sensor faulty)
A fault on the engine oil level sensor is in dicated additionally by an audible signal
and the warning light coming on several times after the ignition has been switched
on.
In this case have the engine inspecte d without delay by a specialist garage.
The following text will be displayed in the information display*: OIL SENSOR WORKSHOP!
WARNING
•
If you must stop for technical reasons, then park the vehicle at a safe
distance from the traffic and switch off the engine and switch on the hazard
warning light system ⇒ page 51.
•
The red oil pressure light
is not an oil level indicator! One should
therefore check the oil level at regular intervals, preferably after every refu-
eling stop.
Open door*
The warning light
comes on, if one or several doors are opened.
The warning light on vehicles fitted with information display comes on when
switching the ignition off. If a door or the boot lid is opened.
The warning light on vehicles fitted with information display goes out after
switching the ignition off.
Antilock brake system (ABS) *
The warning light
shows the functionality of the ABS and the Electronic Differ-
ential Lock (EDL)*.
The warning light comes on for a few seconds after the ignition has been switched
on or when starting the engine. The warnin g light goes out after an automatic check
sequence has been completed.
A fault in the ABS
The system is not functioning properly if the ABS warning light
does not go out
within a few seconds after switching on the ig nition, does not light up at all or lights
up while driving. The vehicle will only be braked by the normal brake system. Visit
a specialist garage as quickly as possible and adjust your style of driving in the
meantime since you will not know how great the damage is.
Further information about ABS ⇒page 137, “Antilock brake system (ABS)*”.
A fault in the entire brake system
If the ABS warning light
comes on together with the brake system warning light
(handbrake must be released), there is a fault not only in the ABS but also in
another part of the brake system ⇒.WARNING (continued)
s2ig.book Page 32 Monday, November 10, 2008 11:20 AM
Page 35 of 226
Instruments and Indicator/Warning Lights
34If the warning light does not go out after the engine has started, or comes on when
driving, drive to the nearest specialist garage. The vehicle battery will be discharged
in this case so switch off all non-essential electrical components.
A peep sounds as an additional warning signal.
Caution
If the warning light
comes on when driving and in addition the warning light
(cooling system fault) also comes on in display, you must then stop the car imme-
diately and switch the engine off - risk of engine damage!
Brake system
The warning light
comes on for several seconds after the ignition is switched on.
If the warning light stays on when the ignition is switched on or comes on while
driving, there is a fault in the brake system. Visit the nearest specialist garage imme-
diately and have the brake system inspected.
The following text will be displayed in the information display*:
STOP BRAKE FLUID SERVICE MANUAL
3 peeps sound as an additional warning signal.
One should get used to high pedal forces, long braking distances and long free play
of the brake pedal when driving to the next specialist garage.
For further information on the brake system ⇒page 135, “Brakes”.
Handbrake applied
The warning light
also comes on if the handbrake is applied. An audible warning
is also given if you drive the vehicle for at least 3 seconds at a speed of more than 5
km/h.
The following text will be displayed in the information display*:
HANDBRAKE ON
WARNING
•
Pay attention to the following instru ctions before checking the brake
fluid level and opening the bonnet ⇒page 162, “Working in the engine
compartment”.
•
If the brake system warning light
does not go out a few seconds after
switching on the ignition or comes on when driving, stop immediately and
check the brake fluid in the reservoir ⇒page 169, “Brake fluid”. If the fluid
level has dropped below the MIN marking, do not drive any further - risk of
accident! Obtain prof essional assistance.
Seat belt warning light*
The warning light
comes on after the ignition is switched on as a reminder to
fasten the seat belt.
In the event that the driver is not restrained, a warning signal sounds for 6 seconds.
The following text will be displayed in the information display*:
FASTEN SEATBELT
Further information on the seat belts ⇒page 110, “Seat belts”.
s2ig.book Page 34 Monday, November 10, 2008 11:20 AM
Page 96 of 226
Starting-off and Driving95
Using the system
Safety
Driving Tips
General Maintenance
Breakdown assistance
Technical Data
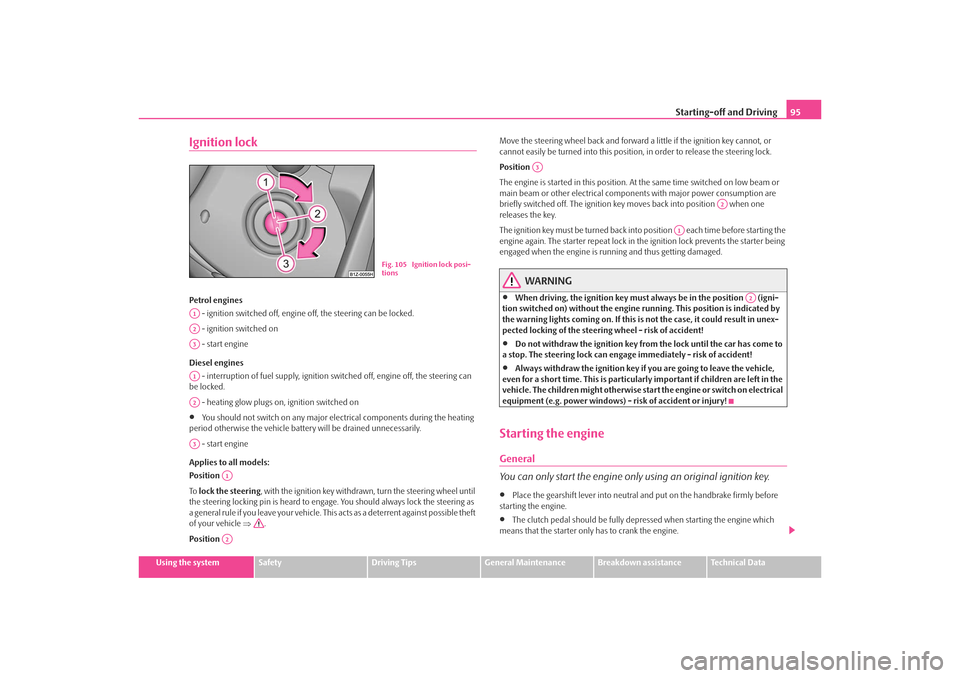
Ignition lockPetrol engines
- ignition switched off, engine off, the steering can be locked.
- ignition switched on
- start engine
Diesel engines - interruption of fuel supply, ignition switched off, engine off, the steering can
be locked.
- heating glow plugs on, ignition switched on•
You should not switch on any major elec trical components during the heating
period otherwise the vehicle batter y will be drained unnecessarily.
- start engine
Applies to all models:
Position
To lock the steering , with the ignition key withdrawn, turn the steering wheel until
the steering locking pin is heard to engage. You should always lock the steering as
a general rule if you leave your vehicle. This acts as a deterrent against possible theft
of your vehicle ⇒.
Position Move the steering wheel back and forward a little if the ignition key cannot, or
cannot easily be turned into
this position, in order to release the steering lock.
Position
The engine is started in this position. At the same time switched on low beam or
main beam or other electrical compon ents with major power consumption are
briefly switched off. The ignition key moves back into position when one
releases the key.
The ignition key must be turned back into position each time before starting the
engine again. The starter repeat lock in th e ignition lock prevents the starter being
engaged when the engine is running and thus getting damaged.
WARNING
•
When driving, the ignition key must always be in the position (igni-
tion switched on) without the engine running. This position is indicated by
the warning lights coming on. If this is not the case, it could result in unex-
pected locking of the steering wheel - risk of accident!
•
Do not withdraw the ignition key from the lock until the car has come to
a stop. The steering lock can engage immediately - risk of accident!
•
Always withdraw the ignition key if you are going to leave the vehicle,
even for a short time. This is particularly important if children are left in the
vehicle. The children might otherwise star t the engine or switch on electrical
equipment (e.g. power windows) - risk of accident or injury!
Starting the engineGeneral
You can only start the engine only using an original ignition key.•
Place the gearshift lever into neutral and put on the handbrake firmly before
starting the engine.
•
The clutch pedal should be fully depressed when starting the engine which
means that the starter only has to crank the engine.
Fig. 105 Ignition lock posi-
tions
A1A2A3A1A2A3
A1A2
A3
A2
A1
A2
s2ig.book Page 95 Monday, November 10, 2008 11:20 AM
Page 99 of 226
Starting-off and Driving
98HandbrakeApplying the handbrake
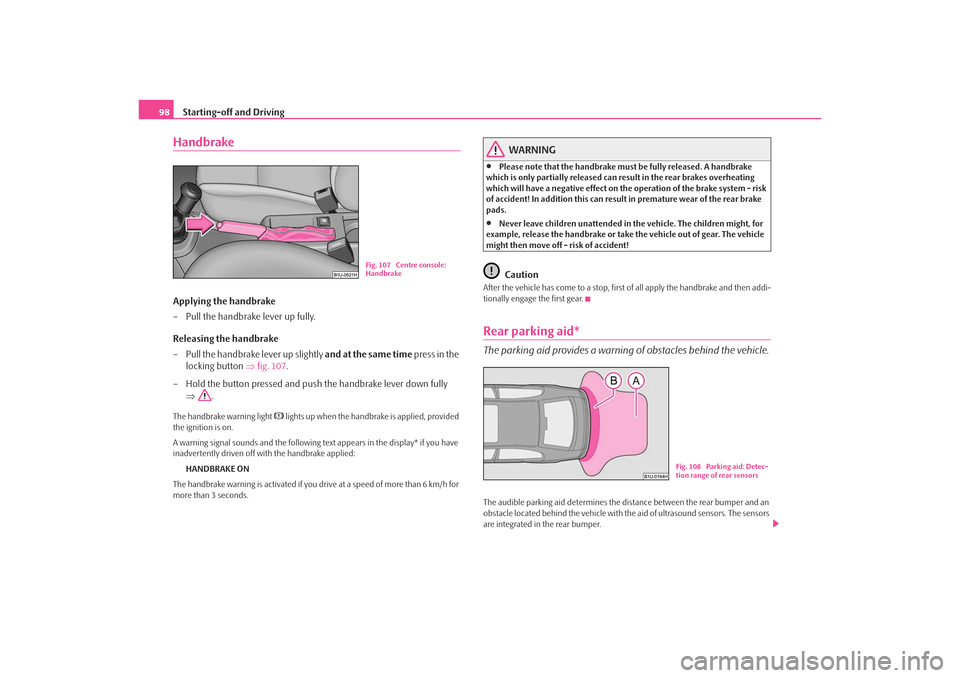
– Pull the handbrake lever up fully.
Releasing the handbrake
– Pull the handbrake lever up slightly and at the same time press in the
locking button ⇒fig. 107 .
– Hold the button pressed and push the handbrake lever down fully ⇒ .The handbrake warning light
lights up when the handbrake is applied, provided
the ignition is on.
A warning signal sounds and the following text appears in the display* if you have
inadvertently driven off with the handbrake applied:
HANDBRAKE ON
The handbrake warning is activated if you drive at a speed of more than 6 km/h for
more than 3 seconds.
WARNING
•
Please note that the handbrake must be fully released. A handbrake
which is only partially released can re sult in the rear brakes overheating
which will have a negative effect on the operation of the brake system - risk
of accident! In addition this can result in premature wear of the rear brake
pads.
•
Never leave children unattended in the vehicle. The children might, for
example, release the handbrake or take the vehicle out of gear. The vehicle
might then move off - risk of accident!Caution
After the vehicle has come to a stop, first of all apply the handbrake and then addi-
tionally engage the first gear.Rear parking aid*The parking aid provides a warning of obstacles behind the vehicle.The audible parking aid determines the di stance between the rear bumper and an
obstacle located behind the vehicle with the aid of ultrasound sensors. The sensors
are integrated in the rear bumper.
Fig. 107 Centre console:
Handbrake
Fig. 108 Parking aid: Detec-
tion range of rear sensors
s2ig.book Page 98 Monday, November 10, 2008 11:20 AM
Page 147 of 226
Towing a trailer
146should be attached to foldin g arms. Adjust the mirrors so that they provide you with
an adequate field of view to the rear.
Headlights
Before starting off with a hitched trailer, also check the setting of the headlights.
Alter the setting as necessary with the aid of the headlight beam adjuster
⇒ page 51.
Detachable ball head
The ball rod is detachable on vehicles wh ich feature a factory-fitted towing device.
It is stowed together with separate fitting instructions in the spare wheel well in the
luggage compartment of the vehicle.
Further information on the towing device ⇒page 147.
Note
•
We recommend that you also have yo ur vehicle inspected between service
intervals if you tow a trailer frequently.
•
The handbrake on the towing vehicle must be put on when coupling and
decoupling the trailer.
Driving Tips
Particular caution is required when towing a trailer.– Do not, as far as possible, drive with your vehicle unladen and the
trailer laden.
– Do not make full use of the legal maximum speeds. This applies in
particular to downhill sections.
– Apply the brakes in good time.
– Keep a check on the coolant temper ature gauge if the outside temper-
ature is high.
Distribution of weight
The distribution of the weight is very poor if your vehicle is unladen and the trailer
is laden. Maintain a particularly low speed if you cannot avoid driving with this
combination.
Driving speed
Do not drive faster than 80 km/hour for sa fety reasons. This also applies for coun-
tries in which higher speeds are allowed.
The fact that the driving stability of the vehicle + trailer combination reduces with
increasing speed means that the legally allowed speed should not be used when
there are unfavourable road, weather or wi nd conditions, particularly near acci-
dent black spots.
You must always reduce your speed immedi ately as soon as you detect even just
the slightest swaying of the trailer. On no account attempt to stop the trailer from
“swaying” by accelerating.
Apply the brakes in good time! If the trailer is fitted with a trailer brake, apply the
brakes gently at first and then brake firmly. This will avoid brake jolts resulting from
the trailer wheels locking. Shift down gears in good time before negotiating a
downhill section to allow the en gine to also act as a brake.
Engine overheating
Please keep a check on the coolant temperature gauge if you have to negotiate a
lengthy slope in a low gear at a high engi ne speed when the outside temperature is
very high ⇒page 16.
If the needle of the coolant temperature gauge moves into the right-hand area or
even the red area of the scale, reduce yo ur speed immediately. Stop and switch off
the engine if the warning light
in the instrument cluste r begins flashing. Wait a
few minutes and check the level of coolant in the coolant expansion bottle
⇒ page 167, “Inspecting the coolant level”.
Please refer to the following guidelines ⇒page 30, “Coolant temperature/ Coolant
quantity ”.
The coolant temperature can be reduced by switching on the heating.
Any increase in the cooling effect of the coolant fan through shifting down a gear
and increasing the engine speed is not possible since the fan speed is independent
s2ig.book Page 146 Monday, November 10, 2008 11:20 AM
Page 163 of 226
Inspecting and replenishing
162
– Take the bonnet support out of its holder and set it in the opening designed for it ⇒page 161, fig. 152 .
Closing the bonnet
– Lift the bonnet slightly and unhook the bonnet support. Press the bonnet support into the hold er designed to hold it.
– Allow the bonnet to drop from a height of about 30 cm into the lock - bonnet do not press down on it !
WARNING
•
Never open the bonnet if you see that steam or coolant is flowing out of
the engine compartment - risk of scaldi ng! Wait long enough until the steam
or coolant has stopped escaping.
•
For safety reasons, the bonnet must always be properly closed when
driving. One should therefore check that the lock has in fact engaged prop-
erly after closing the bonnet.
•
Stop your vehicle i mmediately while driving if yo u notice that the lock is
not properly engaged and close the bonn et properly - risk of an accident!
Working in the engine compartment
Particular care is required when carrying out any work in the engine
compartment!There is a risk of injuries, scalding, accidents and fire when working in the
engine compartment, e.g. inspecting an d replenishing oil and other fluids. For
this reason, it is essential to comply with the warning instructions stated
below and with the general applicable rules of safety. The engine compart-
ment of your car is a hazardous area ⇒ .
WARNING
•
Never open the bonnet if you see that steam or coolant is flowing out of
the engine compartment - risk of scaldi ng! Wait long enough until the steam
or coolant has stopped escaping.
•
Switch off the engine and pull out the ignition key.
•
Apply the handbrake firmly.
•
If your vehicle is fitted with a manual gearbox, move the gearshift lever
into Neutral.
•
Allow the engine to cool down.
•
Keep children clear of the engine compartment.
•
Never spill oil and other fluids over the hot engine. Such fluids (e.g. the
antifreeze contained in the coolant) may ignite!
•
Avoid short circuits in the electrical system - particularly on the battery.
•
Never place your hand into the radiator fan as long as the engine is still
warm. The fan might suddenly start running!
•
Never open the cap of the coolant expa nsion bottle as long as the engine
is still warm. The cooling system is pressurized!
•
Cover over the cap of the coolant expansion reservoir with a large cloth
when opening it as protection for your face, hands and arms from hot steam
or hot coolant.
•
Do not let objects, such as e.g cleaning cloth or tools lie in the engine
compartment.
•
If you wish to work under the vehicl e, you must secure the vehicle from
rolling away and support it with suitable supporting blocks: the car jack is
not sufficient for this - risk of injury!
•
In cases where it be necessary to carry out inspection work when the
engine is running there is an additional risk from rotating parts (e.g. the V-
ribbed belt, alternator, radiator fan) and from the high-voltage ignition
system. Please observe in addition the following:
−Never touch the electrical cabl es of the ignition system.
− Absolutely avoid any jewellery, loose items of clothing or long hair
from getting into the rotating part s of the engine - Hazard! Therefore
s2ig.book Page 162 Monday, November 10, 2008 11:20 AM
Page 186 of 226
Breakdown assistance185
Using the system
Safety
Driving Tips
General Maintenance
Breakdown assistance
Technical Data
repair can be undertaken on
the vehicle immediately. Please read the attached
instructions carefully before the repair.
The tyre repair kit is located in the right front well of the plastic part behind the
spare wheel.
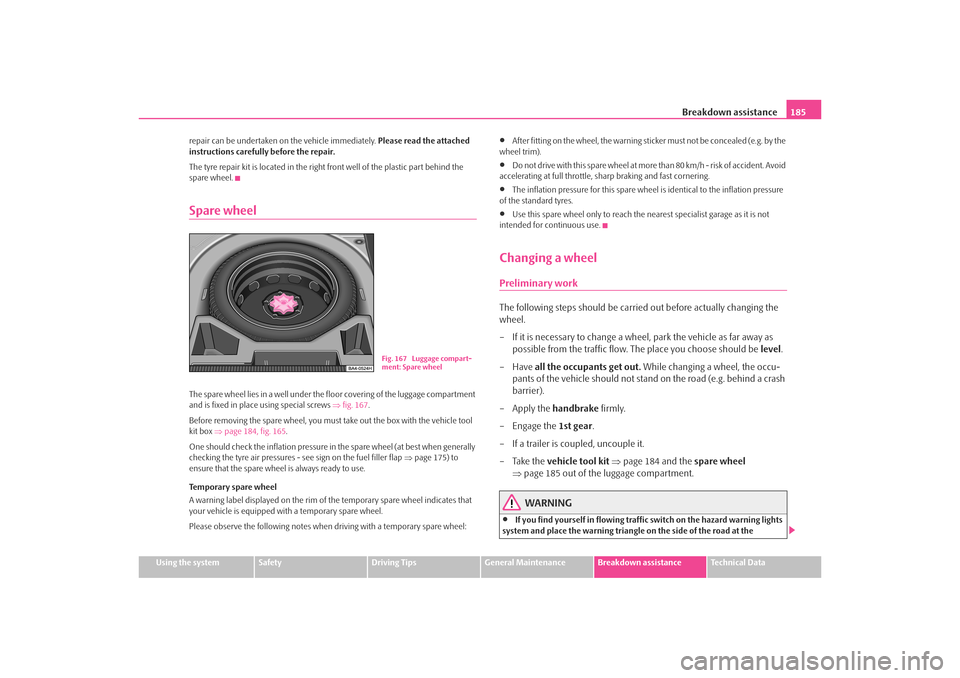
Spare wheelThe spare wheel lies in a well under the floor covering of the luggage compartment
and is fixed in place using special screws ⇒fig. 167 .
Before removing the spare wheel, you must take out the box with the vehicle tool
kit box ⇒page 184, fig. 165 .
One should check the inflation pressure in the spare wheel (at best when generally
checking the tyre air pressures - see sign on the fuel filler flap ⇒page 175) to
ensure that the spare wheel is always ready to use.
Temporary spare wheel
A warning label displayed on the rim of the temporary spare wheel indicates that
your vehicle is equipped with a temporary spare wheel.
Please observe the following notes when driving with a temporary spare wheel:
•
After fitting on the wheel, the warning st icker must not be concealed (e.g. by the
wheel trim).
•
D o n o t d r i v e w i t h th i s s p a re w h e e l a t m o re th a n 8 0 k m / h - ri s k o f a c c i d e n t. Av o i d
accelerating at full throttle, sharp braking and fast cornering.
•
The inflation pressure for this spare wheel is identical to the inflation pressure
of the standard tyres.
•
Use this spare wheel only to reach the nearest specialist garage as it is not
intended for continuous use.
Changing a wheelPreliminary workThe following steps should be carried out before actually changing the
wheel.
– If it is necessary to change a wheel, park the vehicle as far away as possible from the traffic flow. The place you choose should be level.
–Have all the occupants get out. While changing a wheel, the occu-
pants of the vehicle should not stan d on the road (e.g. behind a crash
barrier).
– Apply the handbrake firmly.
– Engage the 1st gear.
– If a trailer is coupled, uncouple it.
– Take the vehicle tool kit ⇒ page 184 and the spare wheel
⇒ page 185 out of the luggage compartment.
WARNING
•
If you find yourself in flowing traffic switch on the hazard warning lights
system and place the warning triangle on the side of the road at the
Fig. 167 Luggage compart-
ment: Spare wheel
s2ig.book Page 185 Monday, November 10, 2008 11:20 AM
Page 218 of 226
Index217
Index
AAbroad . . . . . . . . . . . . . . . . . . . . . . . . . . . . . . . . . . . . . 144
ABS . . . . . . . . . . . . . . . . . . . . . . . . . . . . . . . . . . . . . . . . . 137
Warning light . . . . . . . . . . . . . . . . . . . . . . . . . . . . . 32
Accessories . . . . . . . . . . . . . . . . . . . . . . . . . . . . . . . . . 181
Adjusting seats . . . . . . . . . . . . . . . . . . . . . . . . . . . 60, 106 electrically . . . . . . . . . . . . . . . . . . . . . . . . . . . . . . . . 61
Adjusting the steering wheel . . . . . . . . . . . . . . . . . . . 94
Air conditioning system . . . . . . . . . . . . . . . . . . . . . . . 85 Recirculated air mode . . . . . . . . . . . . . . . . . . . . . 88
Airbag . . . . . . . . . . . . . . . . . . . . . . . . . . . . . . . . . . . . . . 117 Deployment . . . . . . . . . . . . . . . . . . . . . . . . . . . . . 118
Front airbag . . . . . . . . . . . . . . . . . . . . . . . . . . . . . 118
Side airbag . . . . . . . . . . . . . . . . . . . . . . . . . . . . . . 121
Warning light . . . . . . . . . . . . . . . . . . . . . . . . . . . . . 30
Airbag system . . . . . . . . . . . . . . . . . . . . . . . . . . . . . . . 117 Warning light . . . . . . . . . . . . . . . . . . . . . . . . . . . . . 30
Airbags . . . . . . . . . . . . . . . . . . . . . . . . . . . . . . . . . . . . . 117
Alarm . . . . . . . . . . . . . . . . . . . . . . . . . . . . . . . . . . . . . . . . 43
Alternator Warning light . . . . . . . . . . . . . . . . . . . . . . . . . . . . . 33
Antilock brake system . . . . . . . . . . . . . . . . . . . . . . . . 137
Antilock brake system (ABS) Warning light . . . . . . . . . . . . . . . . . . . . . . . . . . . . . 32
Anti-theft alarm system . . . . . . . . . . . . . . . . . . . . . . . 43
Ashtray . . . . . . . . . . . . . . . . . . . . . . . . . . . . . . . . . . . . . . 77
Auto Check Control . . . . . . . . . . . . . . . . . . . . . . . . . . . 25 Auto Computer . . . . . . . . . . . . . . . . . . . . . . . . . . . . . . 19
Automatic seat adjustment . . . . . . . . . . . . . . . . . . . . 62
Automatic vehicle wash systems . . . . . . . . . . . . . . 150
Automatic wiper/washer system . . . . . . . . . . . . . . . 55
Avoiding damage to your vehicle . . . . . . . . . . . . . 144
BBattery . . . . . . . . . . . . . . . . . . . . . . . . . . . . . . . . . . 33, 170
change . . . . . . . . . . . . . . . . . . . . . . . . . . . . . . . . . . 173
Charge . . . . . . . . . . . . . . . . . . . . . . . . . . . . . . . . . . 172
Inspecting the electrolyte level . . . . . . . . . . . . 172
Operation in winter . . . . . . . . . . . . . . . . . . . . . . 172
Before setting off . . . . . . . . . . . . . . . . . . . . . . . . . . . . 105
Belt Warning light . . . . . . . . . . . . . . . . . . . . . . . . . . . . . 34
Belt tensioners . . . . . . . . . . . . . . . . . . . . . . . . . . . . . . 115
Belts . . . . . . . . . . . . . . . . . . . . . . . . . . . . . . . . . . . . . . . . 110
Bonnet . . . . . . . . . . . . . . . . . . . . . . . . . . . . . . . . . . 14, 161
Boot lid . . . . . . . . . . . . . . . . . . . . . . . . . . . . . . . . . . . . . . 41
Brake Handbrake . . . . . . . . . . . . . . . . . . . . . . . . . . . . . . . 98
Warning light . . . . . . . . . . . . . . . . . . . . . . . . . . . . . 34
Brake Assist . . . . . . . . . . . . . . . . . . . . . . . . . . . . . . . . . 137
Brake booster . . . . . . . . . . . . . . . . . . . . . . . . . . . . . . . 136
Brake fluid . . . . . . . . . . . . . . . . . . . . . . . . . . . . . . . . . . 169
Brake pads Warning light . . . . . . . . . . . . . . . . . . . . . . . . . . . . . 31 Brakes . . . . . . . . . . . . . . . . . . . . . . . . . . . . . . . . . . . . . . 135
Button for the central locking system . . . . . . . . . . . 40
Buttons on the driver's door
Power windows . . . . . . . . . . . . . . . . . . . . . . . . . . . 44
CCar jack . . . . . . . . . . . . . . . . . . . . . . . . . . . . . . . . . 184, 189
Car state . . . . . . . . . . . . . . . . . . . . . . . . . . . . . . . . . . . . . 25
Catalytic converter . . . . . . . . . . . . . . . . . . . . . . . . . . 140
Central locking system . . . . . . . . . . . . . . . . . . . . . . . . 38lock . . . . . . . . . . . . . . . . . . . . . . . . . . . . . . . . . . . . . . 39
unlock . . . . . . . . . . . . . . . . . . . . . . . . . . . . . . . . . . . 39
Changing a wheel . . . . . . . . . . . . . . . . . . . . . . . . . . . 185
Changing bulbs . . . . . . . . . . . . . . . . . . . . . . . . . . . . . 197
Changing the engine oil . . . . . . . . . . . . . . . . . . . . . . 166
Changing wheels around . . . . . . . . . . . . . . . . . . . . . 177
Charging the battery . . . . . . . . . . . . . . . . . . . . . . . . . 172 Warning light . . . . . . . . . . . . . . . . . . . . . . . . . . . . . 33
Check engine oil level . . . . . . . . . . . . . . . . . . . . . . . . 165
Child safety . . . . . . . . . . . . . . . . . . . . . . . . . . . . . . . . . 125 Side airbag . . . . . . . . . . . . . . . . . . . . . . . . . . . . . . 127
Child safety lock . . . . . . . . . . . . . . . . . . . . . . . . . . . . . . 37
Child safety seat on the front passenger seat . . . . . . . . . . . . . . . 126
Safety information . . . . . . . . . . . . . . . . . . . . . . . 125
s2ig.book Page 217 Monday, November 10, 2008 11:20 AM