spare wheel SKODA OCTAVIA TOUR 2009 1.G / (1U) Owner's Manual
[x] Cancel search | Manufacturer: SKODA, Model Year: 2009, Model line: OCTAVIA TOUR, Model: SKODA OCTAVIA TOUR 2009 1.G / (1U)Pages: 226, PDF Size: 13.11 MB
Page 5 of 226
Contents
4Driving Tips
. . . . . . . . . . . . . . . . . . . . . . . . . . . . . .
Intelligent Technology
. . . . . . . . . . . . . . . . . . . . . . . .
Electronic stability programme (ESP)* . . . . . . . . . .
Brakes . . . . . . . . . . . . . . . . . . . . . . . . . . . . . . . . . . . . . . .
Brake booster . . . . . . . . . . . . . . . . . . . . . . . . . . . . . . . .
Antilock brake system (ABS)* . . . . . . . . . . . . . . . . . .
Brake Assist* . . . . . . . . . . . . . . . . . . . . . . . . . . . . . . . . .
Driving and the Environment
. . . . . . . . . . . . . . . . .
The first 1 500 kilometres and then afterwards . .
Catalytic converter . . . . . . . . . . . . . . . . . . . . . . . . . . . .
Driving in an economical and environmentally
conscious manner . . . . . . . . . . . . . . . . . . . . . . . . . . . .
Environmental compatibility . . . . . . . . . . . . . . . . . . .
Motoring abroad . . . . . . . . . . . . . . . . . . . . . . . . . . . . .
Avoiding damage to your vehicle . . . . . . . . . . . . . .
To w i n g a t r a i l e r
. . . . . . . . . . . . . . . . . . . . . . . . . . . . . . . .
Towing a trailer . . . . . . . . . . . . . . . . . . . . . . . . . . . . . . .
Detachable towing device* . . . . . . . . . . . . . . . . . . . .
General Maintenance
. . . . . . . . . . . . . . .
Taking care of your ve hicle and cleaning the
vehicle
. . . . . . . . . . . . . . . . . . . . . . . . . . . . . . . . . . . . . . . . .
General . . . . . . . . . . . . . . . . . . . . . . . . . . . . . . . . . . . . . .
Care of the exterior of vehicle . . . . . . . . . . . . . . . . . .
Care of the interior of vehicle . . . . . . . . . . . . . . . . . .
Fuel
. . . . . . . . . . . . . . . . . . . . . . . . . . . . . . . . . . . . . . . . . . . .
Petrol . . . . . . . . . . . . . . . . . . . . . . . . . . . . . . . . . . . . . . . .
Diesel . . . . . . . . . . . . . . . . . . . . . . . . . . . . . . . . . . . . . . .
Refuelling . . . . . . . . . . . . . . . . . . . . . . . . . . . . . . . . . . . .
Emergency release of fuel filler flap . . . . . . . . . . . .
Inspecting and replenishing
. . . . . . . . . . . . . . . . . .
Engine compartment . . . . . . . . . . . . . . . . . . . . . . . . .
Engine oil . . . . . . . . . . . . . . . . . . . . . . . . . . . . . . . . . . . .
Cooling system . . . . . . . . . . . . . . . . . . . . . . . . . . . . . . .
Brake fluid . . . . . . . . . . . . . . . . . . . . . . . . . . . . . . . . . . . Battery . . . . . . . . . . . . . . . . . . . . . . . . . . . . . . . . . . . . . . .
Windshield washer system . . . . . . . . . . . . . . . . . . . .
Wheels and Tyres
. . . . . . . . . . . . . . . . . . . . . . . . . . . . . .
Wheels . . . . . . . . . . . . . . . . . . . . . . . . . . . . . . . . . . . . . .
Accessories, changes and replacement of partsAccessories and replacement parts . . . . . . . . . . . . .
Technical changes . . . . . . . . . . . . . . . . . . . . . . . . . . . .Breakdown assistance
. . . . . . . . . . . . . .
Breakdown assistance
. . . . . . . . . . . . . . . . . . . . . . . .
First-aid box*, Warning triangle* and bulb set . . .
Fire extinguisher* . . . . . . . . . . . . . . . . . . . . . . . . . . . . .
Vehicle tool kit . . . . . . . . . . . . . . . . . . . . . . . . . . . . . . . .
Spray for repairing a tyre* . . . . . . . . . . . . . . . . . . . . .
Tyre repair kit* . . . . . . . . . . . . . . . . . . . . . . . . . . . . . . . .
Spare wheel . . . . . . . . . . . . . . . . . . . . . . . . . . . . . . . . . .
Changing a wheel . . . . . . . . . . . . . . . . . . . . . . . . . . . . .
Jump-starting . . . . . . . . . . . . . . . . . . . . . . . . . . . . . . . .
Tow-starting and towing vehicle . . . . . . . . . . . . . . .
Fuses and light bulbs
. . . . . . . . . . . . . . . . . . . . . . . . . .
Electric fuses . . . . . . . . . . . . . . . . . . . . . . . . . . . . . . . . .
Bulbs . . . . . . . . . . . . . . . . . . . . . . . . . . . . . . . . . . . . . . . .
Technical Data
. . . . . . . . . . . . . . . . . . . . . . . . . .
Technical Data
. . . . . . . . . . . . . . . . . . . . . . . . . . . . . . . . .
General information . . . . . . . . . . . . . . . . . . . . . . . . . .
Used abbreviations . . . . . . . . . . . . . . . . . . . . . . . . . . .
Performances . . . . . . . . . . . . . . . . . . . . . . . . . . . . . . . .
Weight . . . . . . . . . . . . . . . . . . . . . . . . . . . . . . . . . . . . . . .
Identification details . . . . . . . . . . . . . . . . . . . . . . . . . .
Fuel consumption according to the regulations
(99/100/EU) . . . . . . . . . . . . . . . . . . . . . . . . . . . . . . . . . .
Dimensions . . . . . . . . . . . . . . . . . . . . . . . . . . . . . . . . . .
1.4 ltr./55 kW - EU4 . . . . . . . . . . . . . . . . . . . . . . . . . . .
1.6 ltr./75 kW - EU4/EU2 DDK . . . . . . . . . . . . . . . . . .
1.8 ltr./110 kW - EU4/EU3D . . . . . . . . . . . . . . . . . . . . 1.9 ltr./66 kW TDI - EU3 . . . . . . . . . . . . . . . . . . . . . . . .
1.9 ltr./74 kW TDI PD - EU4 . . . . . . . . . . . . . . . . . . . .
Vehicles of the Octavia Combi group N1 . . . . . . . .
Vehicles of the Octavia Combi group - Vehicles for
reconstruction . . . . . . . . . . . . . . . . . . . . . . . . . . . . . . . .
Index
. . . . . . . . . . . . . . . . . . . . . . . . . . . . . . . . . . . . . . . .
133
133
133
135
136
137
137
139
139
140
140
143
144
144
145
145
147
149
149
149
149
154
157
157
157
158
159
161
161
164
167
169 170
174
175
175
181
181
181
183
183
183
183
184
184
184
185
185
190
191
194
194
197
203
203
203
203
203
203
203
204
205
206
208
210212
214
216
216
217
s2ig.book Page 4 Monday, November 10, 2008 11:20 AM
Page 70 of 226
Seats and Storage69
Using the system
Safety
Driving Tips
General Maintenance
Breakdown assistance
Technical Data
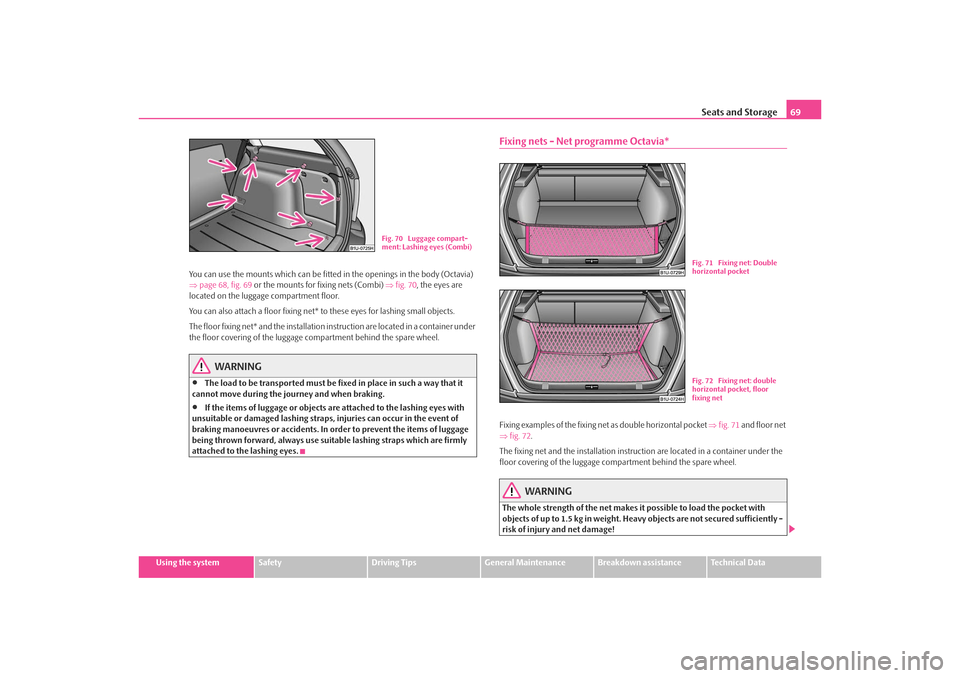
You can use the mounts which can be fitted
in the openings in the body (Octavia)
⇒ page 68, fig. 69 or the mounts for fixing nets (Combi) ⇒ fig. 70, the eyes are
located on the luggage compartment floor.
You can also attach a floor fixing net* to these eyes for lashing small objects.
The floor fixing net* and the installation instruction are located in a container under
the floor covering of the luggage compartment behind the spare wheel.
WARNING
•
The load to be transported must be fi xed in place in such a way that it
cannot move during the journey and when braking.
•
If the items of luggage or objects are attached to the lashing eyes with
unsuitable or damaged lashing straps, injuries can occur in the event of
braking manoeuvres or ac cidents. In order to prevent the items of luggage
being thrown forward, always use suitable lashing straps which are firmly
attached to the lashing eyes.
Fixing nets - Net programme Octavia*Fixing examples of the fixing net as double horizontal pocket ⇒fig. 71 and floor net
⇒ fig. 72 .
The fixing net and the installation instru ction are located in a container under the
floor covering of the luggage compartment behind the spare wheel.
WARNING
The whole strength of the net makes it possible to load the pocket with
objects of up to 1.5 kg in weight. Heavy objects are not secured sufficiently -
risk of injury and net damage!
Fig. 70 Luggage compart-
ment: Lashing eyes (Combi)
Fig. 71 Fixing net: Double
horizontal pocketFig. 72 Fixing net: double
horizontal pocket, floor
fixing net
s2ig.book Page 69 Monday, November 10, 2008 11:20 AM
Page 71 of 226
Seats and Storage
70
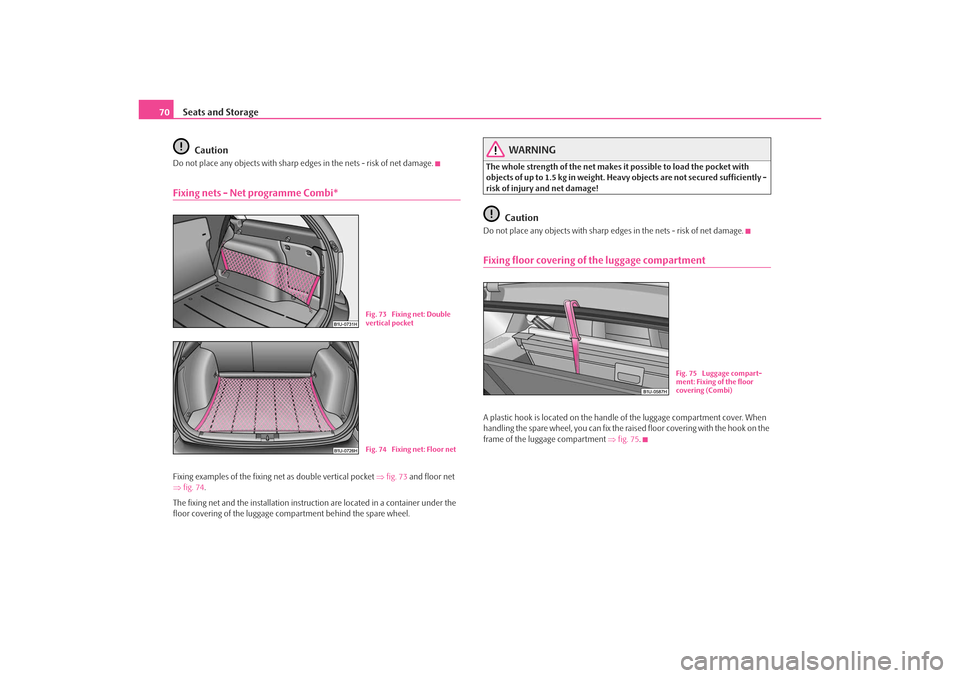
CautionDo not place any objects with sharp edge s in the nets - risk of net damage.Fixing nets - Net programme Combi*Fixing examples of the fixing net as double vertical pocket ⇒fig. 73 and floor net
⇒ fig. 74 .
The fixing net and the installation instru ction are located in a container under the
floor covering of the luggage co mpartment behind the spare wheel.
WARNING
The whole strength of the net makes it possible to load the pocket with
objects of up to 1.5 kg in weight. Heavy objects are not secured sufficiently -
risk of injury and net damage!
Caution
Do not place any objects with sharp edges in the nets - risk of net damage.Fixing floor covering of the luggage compartmentA plastic hook is located on the handle of the luggage compartment cover. When
handling the spare wheel, you can fix the ra ised floor covering with the hook on the
frame of the luggage compartment ⇒fig. 75 .
Fig. 73 Fixing net: Double
vertical pocketFig. 74 Fixing net: Floor net
Fig. 75 Luggage compart-
ment: Fixing of the floor
covering (Combi)
s2ig.book Page 70 Monday, November 10, 2008 11:20 AM
Page 147 of 226
Towing a trailer
146should be attached to foldin g arms. Adjust the mirrors so that they provide you with
an adequate field of view to the rear.
Headlights
Before starting off with a hitched trailer, also check the setting of the headlights.
Alter the setting as necessary with the aid of the headlight beam adjuster
⇒ page 51.
Detachable ball head
The ball rod is detachable on vehicles wh ich feature a factory-fitted towing device.
It is stowed together with separate fitting instructions in the spare wheel well in the
luggage compartment of the vehicle.
Further information on the towing device ⇒page 147.
Note
•
We recommend that you also have yo ur vehicle inspected between service
intervals if you tow a trailer frequently.
•
The handbrake on the towing vehicle must be put on when coupling and
decoupling the trailer.
Driving Tips
Particular caution is required when towing a trailer.– Do not, as far as possible, drive with your vehicle unladen and the
trailer laden.
– Do not make full use of the legal maximum speeds. This applies in
particular to downhill sections.
– Apply the brakes in good time.
– Keep a check on the coolant temper ature gauge if the outside temper-
ature is high.
Distribution of weight
The distribution of the weight is very poor if your vehicle is unladen and the trailer
is laden. Maintain a particularly low speed if you cannot avoid driving with this
combination.
Driving speed
Do not drive faster than 80 km/hour for sa fety reasons. This also applies for coun-
tries in which higher speeds are allowed.
The fact that the driving stability of the vehicle + trailer combination reduces with
increasing speed means that the legally allowed speed should not be used when
there are unfavourable road, weather or wi nd conditions, particularly near acci-
dent black spots.
You must always reduce your speed immedi ately as soon as you detect even just
the slightest swaying of the trailer. On no account attempt to stop the trailer from
“swaying” by accelerating.
Apply the brakes in good time! If the trailer is fitted with a trailer brake, apply the
brakes gently at first and then brake firmly. This will avoid brake jolts resulting from
the trailer wheels locking. Shift down gears in good time before negotiating a
downhill section to allow the en gine to also act as a brake.
Engine overheating
Please keep a check on the coolant temperature gauge if you have to negotiate a
lengthy slope in a low gear at a high engi ne speed when the outside temperature is
very high ⇒page 16.
If the needle of the coolant temperature gauge moves into the right-hand area or
even the red area of the scale, reduce yo ur speed immediately. Stop and switch off
the engine if the warning light
in the instrument cluste r begins flashing. Wait a
few minutes and check the level of coolant in the coolant expansion bottle
⇒ page 167, “Inspecting the coolant level”.
Please refer to the following guidelines ⇒page 30, “Coolant temperature/ Coolant
quantity ”.
The coolant temperature can be reduced by switching on the heating.
Any increase in the cooling effect of the coolant fan through shifting down a gear
and increasing the engine speed is not possible since the fan speed is independent
s2ig.book Page 146 Monday, November 10, 2008 11:20 AM
Page 148 of 226
Towing a trailer147
Using the system
Safety
Driving Tips
General Maintenance
Breakdown assistance
Technical Data
of the engine speed. One should also not
drop a gear for this reason when towing
a trailer as long as the engine can manage the slope without any drop in speed.
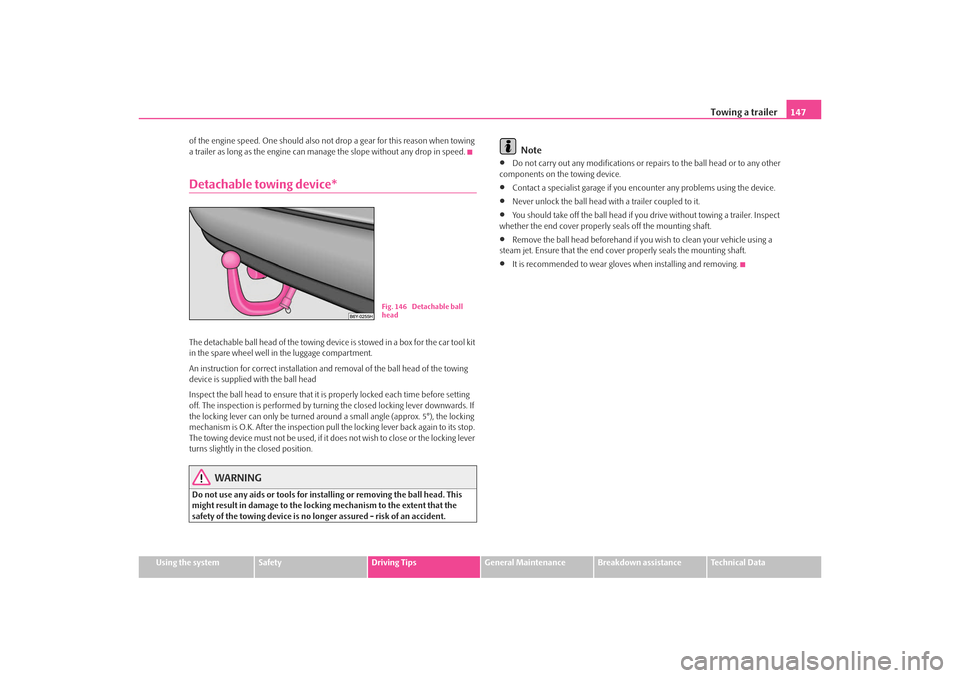
Detachable towing device*The detachable ball head of the towing device is stowed in a box for the car tool kit
in the spare wheel well in the luggage compartment.
An instruction for correct installation and removal of the ball head of the towing
device is supplied with the ball head
Inspect the ball head to ensure that it is properly locked each time before setting
off. The inspection is performed by turnin g the closed locking lever downwards. If
the locking lever can only be turned around a small angle (approx. 5°), the locking
mechanism is O.K. After the inspection pull the locking lever back again to its stop.
The towing device must not be used, if it does not wish to close or the locking lever
turns slightly in the closed position.
WARNING
Do not use any aids or tools for installing or removing the ball head. This
might result in damage to the lockin g mechanism to the extent that the
safety of the towing device is no longer assured - risk of an accident.
Note
•
Do not carry out any modifications or re pairs to the ball head or to any other
components on the towing device.
•
Contact a specialist garage if you en counter any problems using the device.
•
Never unlock the ball head with a trailer coupled to it.
•
You should take off the ball head if yo u drive without towing a trailer. Inspect
whether the end cover properly seals off the mounting shaft.
•
Remove the ball head beforehand if yo u wish to clean your vehicle using a
steam jet. Ensure that the end cover properly seals the mounting shaft.
•
It is recommended to wear gloves when installing and removing.
Fig. 146 Detachable ball
head
s2ig.book Page 147 Monday, November 10, 2008 11:20 AM
Page 176 of 226
Wheels and Tyres175
Using the system
Safety
Driving Tips
General Maintenance
Breakdown assistance
Technical Data
Wheels and TyresWheelsGeneral information•
New tyres do not offer optimal grip at first and should therefore be run in for
about 500 km at a moderate speed and an appropriately cautious style of driving.
You will also profit from longer tyre life.
•
The tread depth of new tyres may differ because of design features and the
configuration of the tread (depending on the type of tyre and the manufacturer).
•
Drive over curbs on the side of the road and other such obstacles slowly and,
where possible, at a right angles in order to avoid damage to tyres and wheel trims.
•
Inspect your tyres from time to time for damage (punctures, cuts, splits and
bulges). Remove foreign bodies from the tyre profile.
•
Damage to tyres and wheels is frequent ly not visible. Unusual vibrations or
pulling of the vehicle to one side could be a sign of tyre damage. Please reduce
your speed immediately and stop if you suspect that a wheel is damaged.
Inspect the tyres for signs of damage (bulges, splits, etc.). If no visible damage is
present, please drive at an appropriatel y slow speed and carefully to the nearest
specialist garage in order to have your vehicle inspected.
•
Also protect your tyres from contact with oil, grease and fuel.
•
Immediately replace any dust caps of the valves which have got lost.
•
Mark wheels before removing them so th at their previous direction of running
can be maintained when mounted them again.
•
Always store wheels or tyres which been removed in a cool, dry and, where
possible, dark place. Tyres which are not fixed to a wheel trim should be stored
upright.
WARNING
•
New tyres during the first 500 km do not offer optimal grip and should
therefore be run appropriately - risk of accident!
•
Never drive with damaged tyres - risk of accident!
Note
Please observe the various differing legal requirements regarding tyres.Tyre lifeThe life of your tyres very much depends on the following points:
Tyre pressure
The working life of tyres will be shortened considerably if the tyres are insufficiently
or over-inflated and this will have an advers e effect on the handling of your vehicle.
Correctly inflated tyres are of partic ular importance when travelling at high
speeds . It is therefore good to check the pr essure at least once a month and also
before setting off on a long trip. Plea se do not forget the spare wheel when
checking the tyres.
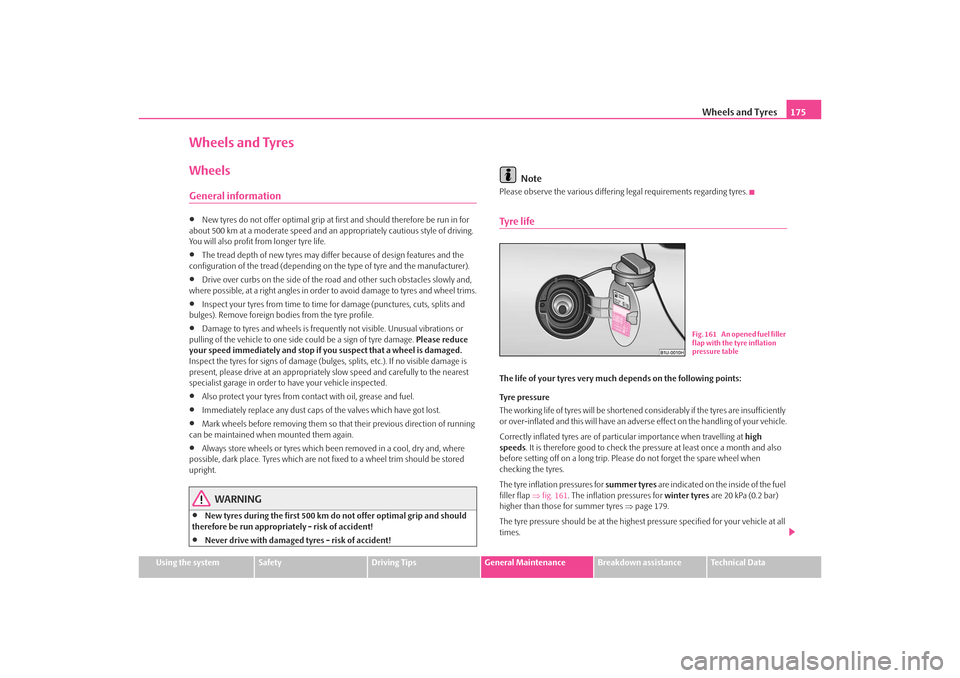
The tyre inflation pressures for summer tyres are indicated on the inside of the fuel
filler flap ⇒fig. 161 . The inflation pressures for winter tyres are 20 kPa (0.2 bar)
higher than those for summer tyres ⇒page 179.
The tyre pressure should be at the highest pressure specified for your vehicle at all
times.
Fig. 161 An opened fuel filler
flap with the tyre inflation
pressure table
s2ig.book Page 175 Monday, November 10, 2008 11:20 AM
Page 179 of 226
Wheels and Tyres
178The date of manufacture is a lso s tated on the tyre wal l (poss ibly o nl y on the inside
of wheel):
DOT ... 50 08...
means, for example, that the tyre was manufactured in the 50th week of the year
2008.
Any spare wheel which differs from the tyres fitted to the vehicle (e.g. winter tyres
or low-profile tyres) should only be used only for a short time in the event of a
puncture and when adopting an appropriately cautious style of driving. It should be
replaced as quickly as po ssible by a normal wheel.
WARNING
•
Only use those tyres or wheel rims which have been approved for your
model of Škoda Auto a.s. vehicle. Failure to observe this instruction will
adversely affect the road safety of your vehicle - risk of accident! Approval
and licencing of your vehicle on public roads may also become void as a
result.
•
You must on no account drive at a higher speed than is permissible for
your tyres - risk of an accident resulting from tyre damage and loss of
control over your vehicle.
•
Tyres which are 6 years old or more should only be fitted in exceptional
cases and when adopting an appropriately cautious style of driving.
•
Never fit tyres which have already been used without having adequate
knowledge of their previous history. Ty res age even if they have not been
used at all or only very little. A spare tyre must only be used in exceptional
cases and only then when adopting an appropriately cautious style of
driving.
•
Do not, where possible, replace indivi dual tyres but at least replace them
on both wheels of a given axle at the same time. Always fit the tyres with the
deeper tread depth to the front wheels.For the sake of the environment
Old tyres must be disposed of in conformity with the appropriate regulations.
Note
It is not normally possible to fit wheels from other models of cars for technical
reasons. This may also apply in certain circumstances to the wheels of the same
type of vehicle.Wheel boltsWheels and wheel bolts are matched to each other in terms of design. Each time
you fit other wheels - e.g. light alloy wheels or wheels with winter tyres - you must
therefore also use the matching wheel bolts of the correct length and shape of
spherical cap. This is essent ial to ensure that the wheels are tightly fitted and that
the brake system operates properly.
If you retrofit wheel trims (or have this done), please also ensure that an adequate
flow of air remains assured for cooling the brake system.
The specialist garages are instructed in the technical possibilities which exist
regarding converting or retrofitti ng wheels, tyres and wheel trim.
WARNING
•
In case of incorrect treatment of th e wheel bolts, the wheel can loosen
when the car is moving - risk of accident!
•
The wheel bolts must be clean and must turn easily. However, they must
never be treated with grease or oil.
•
If the wheel bolts are tightened to a too low tightening torque, the rim
can lossen when the car is moving - risk of accident! A tightening torque
which is too high can damage the bolts and threads and this can result in
permanent deformation of the contact surfaces on the rims.Caution
The prescribed tightening torque of the wh eel bolts for steel and light alloy wheels
is 120 Nm.
s2ig.book Page 178 Monday, November 10, 2008 11:20 AM
Page 184 of 226
Breakdown assistance183
Using the system
Safety
Driving Tips
General Maintenance
Breakdown assistance
Technical Data
Breakdown assistanceBreakdown assistanceFirst-aid box*, Warning triangle* and bulb setA space for stowing the first-aid box and the bulb set is located in a well of the
plastic part under the floor covering of the luggage compartment behind the spare
wheel.
A space for the warning triangle is located in the luggage compartment.
Note
•
Pay attention to the use-by-date of the contents of the first-aid box.
•
If you equip your vehi cle additionally with a warning triangle or with a first-aid
box, you can purchase these from the range of Škoda Original Accessories.
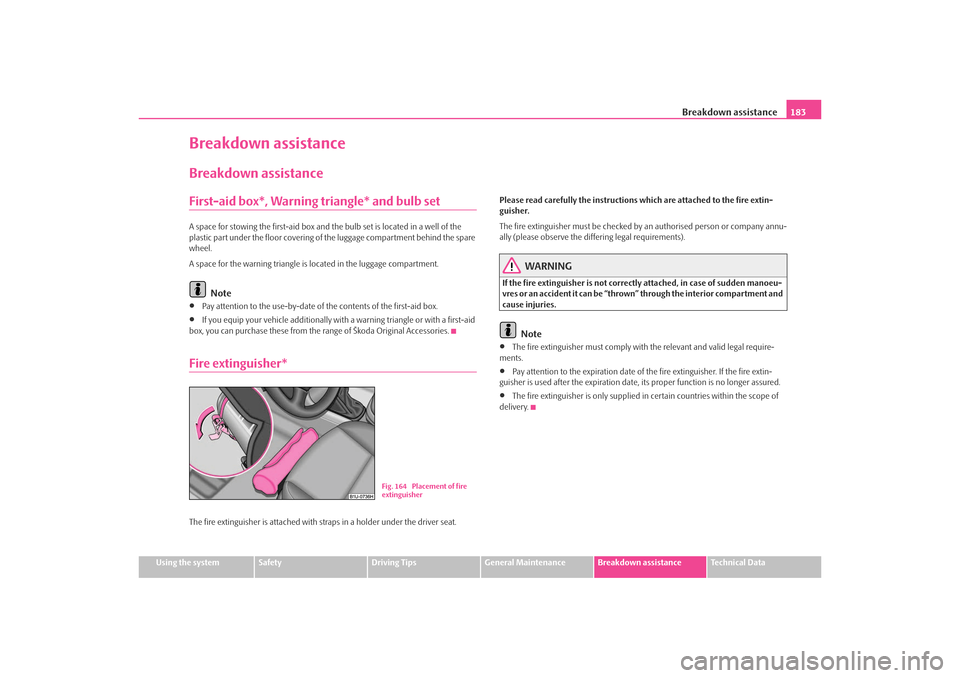
Fire extinguisher*The fire extinguisher is attached with straps in a holder under the driver seat. Please read carefully the
instructions which are atta ched to the fire extin-
guisher.
The fire extinguisher must be checked by an authorised person or company annu-
ally (please observe the differing legal requirements).
WARNING
If the fire extinguisher is not correctly attached, in case of sudden manoeu-
vres or an accident it can be “thrown” through the interior compartment and
cause injuries.
Note
•
The fire extinguisher must comply with the relevant and valid legal require-
ments.
•
Pay attention to the expiration date of the fire extinguisher. If the fire extin-
guisher is used after the expiration date, its proper function is no longer assured.
•
The fire extinguisher is only supplied in certain countries within the scope of
delivery.
Fig. 164 Placement of fire
extinguisher
s2ig.book Page 183 Monday, November 10, 2008 11:20 AM
Page 185 of 226
Breakdown assistance
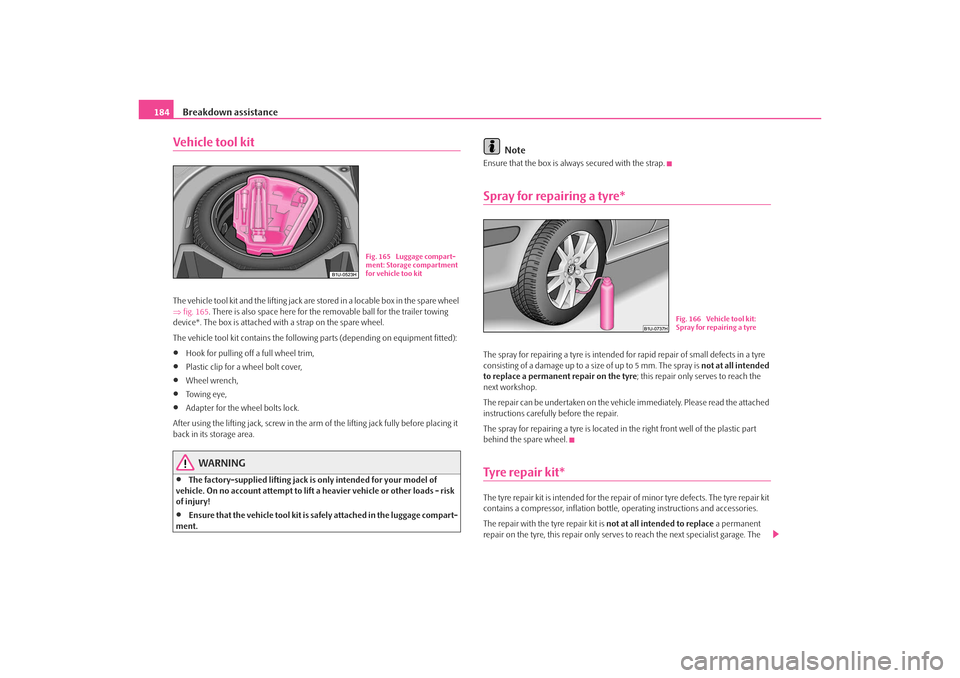
184Vehicle tool kitThe vehicle tool kit and the lifting jack are stored in a locable box in the spare wheel
⇒ fig. 165 . There is also space here for the removable ball for the trailer towing
device*. The box is attached with a strap on the spare wheel.
The vehicle tool kit contains the following parts (depending on equipment fitted):•
Hook for pulling off a full wheel trim,
•
Plastic clip for a wheel bolt cover,
•
Wheel wrench,
•
Towing eye,
•
Adapter for the wheel bolts lock.
After using the lifting jack, screw in the arm of the lifting jack fully before placing it
back in its storage area.
WARNING
•
The factory-supplied lifting jack is only intended for your model of
vehicle. On no account attempt to lift a heavier vehicle or other loads - risk
of injury!
•
Ensure that the vehicle tool kit is safely attached in the luggage compart-
ment.
Note
Ensure that the box is alwa ys secured with the strap.Spray for repairing a tyre*The spray for repairing a tyre is intended fo r rapid repair of small defects in a tyre
consisting of a damage up to a si ze of up to 5 mm. The spray is not at all intended
to replace a permanent repair on the tyre; this repair only serves to reach the
next workshop.
The repair can be undertaken on the vehicl e immediately. Please read the attached
instructions carefully before the repair.
The spray for repairing a tyre is located in the right front well of the plastic part
behind the spare wheel.Tyre repair kit*The tyre repair kit is intended for the repair of minor tyre defects. The tyre repair kit
contains a compressor, inflation bottle, operating instructions and accessories.
The repair with the tyre repair kit is not at all intended to replace a permanent
repair on the tyre, this repair only serves to reach the next specialist garage. The
Fig. 165 Luggage compart-
ment: Storage compartment
for vehicle too kit
Fig. 166 Vehicle tool kit:
Spray for repairing a tyre
s2ig.book Page 184 Monday, November 10, 2008 11:20 AM
Page 186 of 226
Breakdown assistance185
Using the system
Safety
Driving Tips
General Maintenance
Breakdown assistance
Technical Data
repair can be undertaken on
the vehicle immediately. Please read the attached
instructions carefully before the repair.
The tyre repair kit is located in the right front well of the plastic part behind the
spare wheel.
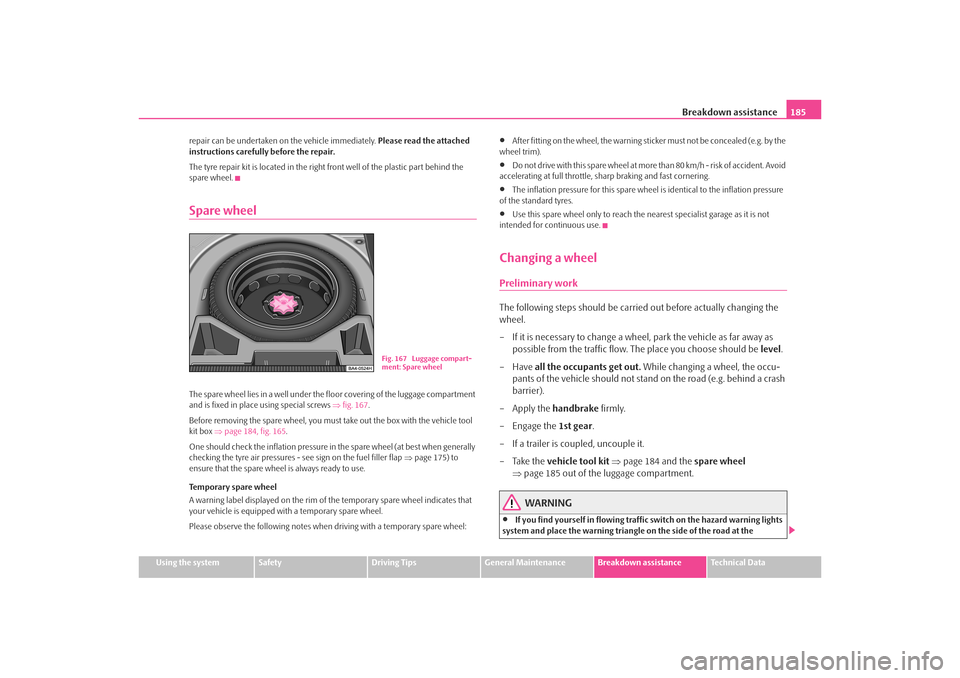
Spare wheelThe spare wheel lies in a well under the floor covering of the luggage compartment
and is fixed in place using special screws ⇒fig. 167 .
Before removing the spare wheel, you must take out the box with the vehicle tool
kit box ⇒page 184, fig. 165 .
One should check the inflation pressure in the spare wheel (at best when generally
checking the tyre air pressures - see sign on the fuel filler flap ⇒page 175) to
ensure that the spare wheel is always ready to use.
Temporary spare wheel
A warning label displayed on the rim of the temporary spare wheel indicates that
your vehicle is equipped with a temporary spare wheel.
Please observe the following notes when driving with a temporary spare wheel:
•
After fitting on the wheel, the warning st icker must not be concealed (e.g. by the
wheel trim).
•
D o n o t d r i v e w i t h th i s s p a re w h e e l a t m o re th a n 8 0 k m / h - ri s k o f a c c i d e n t. Av o i d
accelerating at full throttle, sharp braking and fast cornering.
•
The inflation pressure for this spare wheel is identical to the inflation pressure
of the standard tyres.
•
Use this spare wheel only to reach the nearest specialist garage as it is not
intended for continuous use.
Changing a wheelPreliminary workThe following steps should be carried out before actually changing the
wheel.
– If it is necessary to change a wheel, park the vehicle as far away as possible from the traffic flow. The place you choose should be level.
–Have all the occupants get out. While changing a wheel, the occu-
pants of the vehicle should not stan d on the road (e.g. behind a crash
barrier).
– Apply the handbrake firmly.
– Engage the 1st gear.
– If a trailer is coupled, uncouple it.
– Take the vehicle tool kit ⇒ page 184 and the spare wheel
⇒ page 185 out of the luggage compartment.
WARNING
•
If you find yourself in flowing traffic switch on the hazard warning lights
system and place the warning triangle on the side of the road at the
Fig. 167 Luggage compart-
ment: Spare wheel
s2ig.book Page 185 Monday, November 10, 2008 11:20 AM