towing SKODA OCTAVIA TOUR 2010 2.G / (1Z) Owner's Manual
[x] Cancel search | Manufacturer: SKODA, Model Year: 2010, Model line: OCTAVIA TOUR, Model: SKODA OCTAVIA TOUR 2010 2.G / (1Z)Pages: 199, PDF Size: 12.09 MB
Page 5 of 199

Contents
4
Driving Tips
. . . . . . . . . . . . . . . . . . . . . . . . . . . . . .
Intelligent Technology
. . . . . . . . . . . . . . . . . . . . . . . .
Electronic stability programme (ESP)* . . . . . . . . . .
Brakes . . . . . . . . . . . . . . . . . . . . . . . . . . . . . . . . . . . . . . .
Brake booster . . . . . . . . . . . . . . . . . . . . . . . . . . . . . . . .
Antilock brake system (ABS) . . . . . . . . . . . . . . . . . . .
Brake Assist* . . . . . . . . . . . . . . . . . . . . . . . . . . . . . . . . .
Electromechanical power steering . . . . . . . . . . . . .
Tyre inflation pressure-control system* . . . . . . . . .
Driving and the Environment
. . . . . . . . . . . . . . . . .
The first 1 500 kilometres and then afterwards . .
Catalytic converter . . . . . . . . . . . . . . . . . . . . . . . . . . . .
Driving in an economical and environmentally
conscious manner . . . . . . . . . . . . . . . . . . . . . . . . . . . .
Environmental compatibility . . . . . . . . . . . . . . . . . . .
Motoring abroad . . . . . . . . . . . . . . . . . . . . . . . . . . . . .
Avoiding damage to your vehicle . . . . . . . . . . . . . .
Driving through bodies of water on roads . . . . . . .
Towing a trailer
. . . . . . . . . . . . . . . . . . . . . . . . . . . . . . . .
Towing a trailer . . . . . . . . . . . . . . . . . . . . . . . . . . . . . . .
General Maintenance
. . . . . . . . . . . . . . .
Taking care of your ve hicle and cleaning the
vehicle
. . . . . . . . . . . . . . . . . . . . . . . . . . . . . . . . . . . . . . . . .
General . . . . . . . . . . . . . . . . . . . . . . . . . . . . . . . . . . . . . .
Care of the exterior of vehicle . . . . . . . . . . . . . . . . . .
Care of the interior of vehicle . . . . . . . . . . . . . . . . . .
Fuel
. . . . . . . . . . . . . . . . . . . . . . . . . . . . . . . . . . . . . . . . . . . .
Petrol . . . . . . . . . . . . . . . . . . . . . . . . . . . . . . . . . . . . . . . .
Diesel . . . . . . . . . . . . . . . . . . . . . . . . . . . . . . . . . . . . . . .
Refuelling . . . . . . . . . . . . . . . . . . . . . . . . . . . . . . . . . . . .
Inspecting and replenishing
. . . . . . . . . . . . . . . . . .
Engine compartment . . . . . . . . . . . . . . . . . . . . . . . . .
Engine oil . . . . . . . . . . . . . . . . . . . . . . . . . . . . . . . . . . . .
Cooling system . . . . . . . . . . . . . . . . . . . . . . . . . . . . . . .
Brake fluid . . . . . . . . . . . . . . . . . . . . . . . . . . . . . . . . . . . Battery . . . . . . . . . . . . . . . . . . . . . . . . . . . . . . . . . . . . . . .
Windshield washer system . . . . . . . . . . . . . . . . . . . . .
Wheels and Tyres
. . . . . . . . . . . . . . . . . . . . . . . . . . . . . .
Wheels . . . . . . . . . . . . . . . . . . . . . . . . . . . . . . . . . . . . . . .
Accessories, changing and replacing parts
. . .
Accessories and replacement parts . . . . . . . . . . . . .
Technical changes . . . . . . . . . . . . . . . . . . . . . . . . . . . . .
Vehicles of category N1 . . . . . . . . . . . . . . . . . . . . . . . .
Breakdown assistance
. . . . . . . . . . . . . .
Breakdown assistance
. . . . . . . . . . . . . . . . . . . . . . . . .
First-aid box* and Warning triangle* (Octavia) . . .
First-aid box* and warning triangle* (Estate car) .
Fire extinguisher* . . . . . . . . . . . . . . . . . . . . . . . . . . . . .
Vehicle tool kit . . . . . . . . . . . . . . . . . . . . . . . . . . . . . . . .
Spare wheel* . . . . . . . . . . . . . . . . . . . . . . . . . . . . . . . . .
Tyre repair kit* . . . . . . . . . . . . . . . . . . . . . . . . . . . . . . . .
Changing a wheel . . . . . . . . . . . . . . . . . . . . . . . . . . . . .
Jump-starting . . . . . . . . . . . . . . . . . . . . . . . . . . . . . . . . .
Tow-starting and towing vehicle . . . . . . . . . . . . . . . .
Fuses and light bulbs
. . . . . . . . . . . . . . . . . . . . . . . . . .
Electric fuses . . . . . . . . . . . . . . . . . . . . . . . . . . . . . . . . . .
Bulbs . . . . . . . . . . . . . . . . . . . . . . . . . . . . . . . . . . . . . . . . .
Technical Data
. . . . . . . . . . . . . . . . . . . . . . . . . .
Technical Data
. . . . . . . . . . . . . . . . . . . . . . . . . . . . . . . . .
General information . . . . . . . . . . . . . . . . . . . . . . . . . . .
Used abbreviations . . . . . . . . . . . . . . . . . . . . . . . . . . . .
Performances . . . . . . . . . . . . . . . . . . . . . . . . . . . . . . . . .
Weight . . . . . . . . . . . . . . . . . . . . . . . . . . . . . . . . . . . . . . .
Identification details . . . . . . . . . . . . . . . . . . . . . . . . . . .
Fuel consumption based on ECE regulations and EC
guidelines . . . . . . . . . . . . . . . . . . . . . . . . . . . . . . . . . . . .
Dimensions . . . . . . . . . . . . . . . . . . . . . . . . . . . . . . . . . .
Engine oil specifications . . . . . . . . . . . . . . . . . . . . . . .
1.4 ltr./59 kW - EU5 . . . . . . . . . . . . . . . . . . . . . . . . . . . . 1.6 ltr./75 kW - EU4, EU2 . . . . . . . . . . . . . . . . . . . . . .
2.0 l/81 kW TDI CR EU4 . . . . . . . . . . . . . . . . . . . . . . .
Index
. . . . . . . . . . . . . . . . . . . . . . . . . . . . . . . . . . . . . . . .
111111111113114115115116116118118119119122123123124125125129129129129133136136137137139139141143145
146150151151157157157157159159159159159159160160161165167169169172179179179179179179179180180180182
184186189
s2bs.2.book Page 4 Monday, September 27, 2010 9:53 AM
Page 39 of 199
Unlocking and locking
38
opening the door in order to deactiva te the anti-theft alarm system. The alarm will be
triggered if you do not switch on the ignition within 15 seconds.
When is the alarm triggered?
The following security areas of the locked vehicle are monitored:
Bonnet,
Boot lid,
Doors,
Ignition lock,
vehicle's angle of inclinationpage 38, “Interior monitor* and Towing protection
monitoring*”,
Vehicle interior page 38, “Interior monitor* and Towing protection moni-
toring*”,
A drop in voltage of the on-board power supply.
An alarm is immediately triggered if either of the two battery terminals is disconnected
while the anti-theft alarm system is activated.
How is the alarm switched off?
You switch the alarm off if you unlock the vehi cle with the radio remote control or if you
switch the ignition on.Note
The working life of the alarm siren is 6 years. More detailed information is available
by a specialist garage.
Before leaving the vehicle, check that all the doors and windows are closed in order
to ensure that the anti-theft alarm system is fully operational.
Coding of the radio remote control and th e receiver unit precludes the use of the
radio remote control from other vehicles.
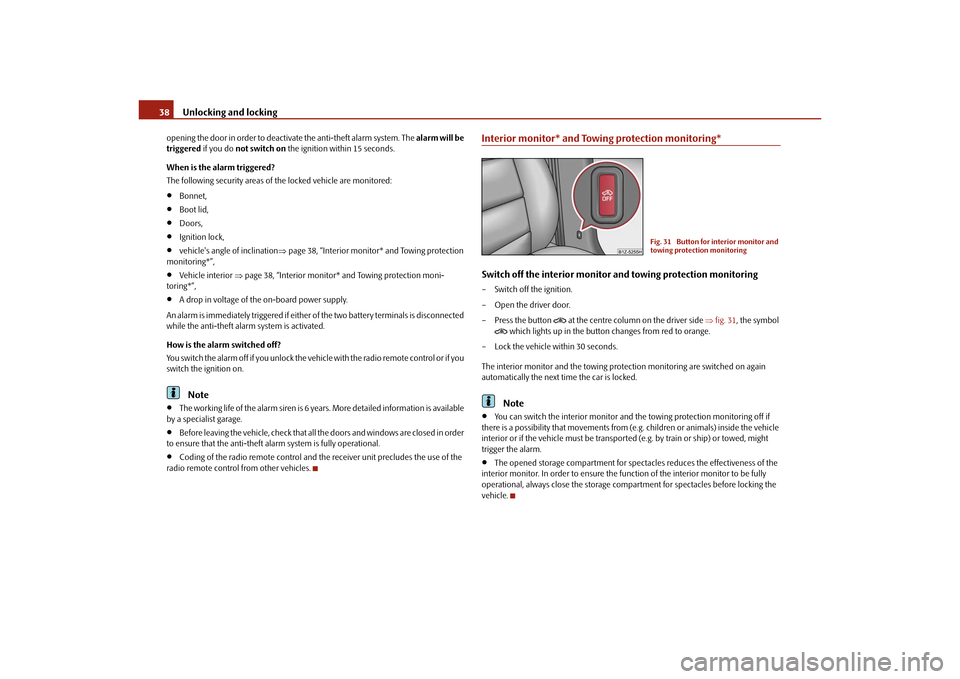
Interior monitor* and Towing protection monitoring*Switch off the interior monitor and towing protection monitoring– Switch off the ignition.
– Open the driver door.
–Press the button
at the centre column on the driver side fig. 31 , the symbol
which lights up in the button changes from red to orange.
– Lock the vehicle within 30 seconds.
The interior monitor and the towing protec tion monitoring are switched on again
automatically the next ti me the car is locked.Note
You can switch the interior monitor and th e towing protection monitoring off if
there is a possibility that movements from (e.g. children or animals) inside the vehicle
interior or if the vehicle must be transported (e.g. by train or ship) or towed, might
trigger the alarm.
The opened storage compartment for spectacles reduces the effectiveness of the
interior monitor. In order to ensure the func tion of the interior monitor to be fully
operational, always close the storage comp artment for spectacles before locking the
vehicle.
Fig. 31 Button for interior monitor and
towing protection monitoring
s2bs.2.book Page 38 Monday, September 27, 2010 9:53 AM
Page 44 of 199
Lights and Visibility43
Using the system
Safety
Driving Tips
General Maintenance
Breakdown assistance
Technical Data
Deactivating the function daylight driving lights– Pull the turn signal light lever towards the steering wheel up to 3 seconds after
switching on the ignition and at the same time, slide it to the bottom and hold it in
this position for at least 3 seconds.Activating the function daylight driving lights– Pull the turn signal light lever towards the steering wheel up to 3 seconds after
switching on the ignition and at the same time, slide it to the top and hold it in this
position for at least 3 seconds.
The daytime driving light is a combination of low-beam and parking light (front and
rear), including licence plate light.
When the daylight driving lights are switched on, the lighting of the instrument cluster
is switched on as well.Fog lights*
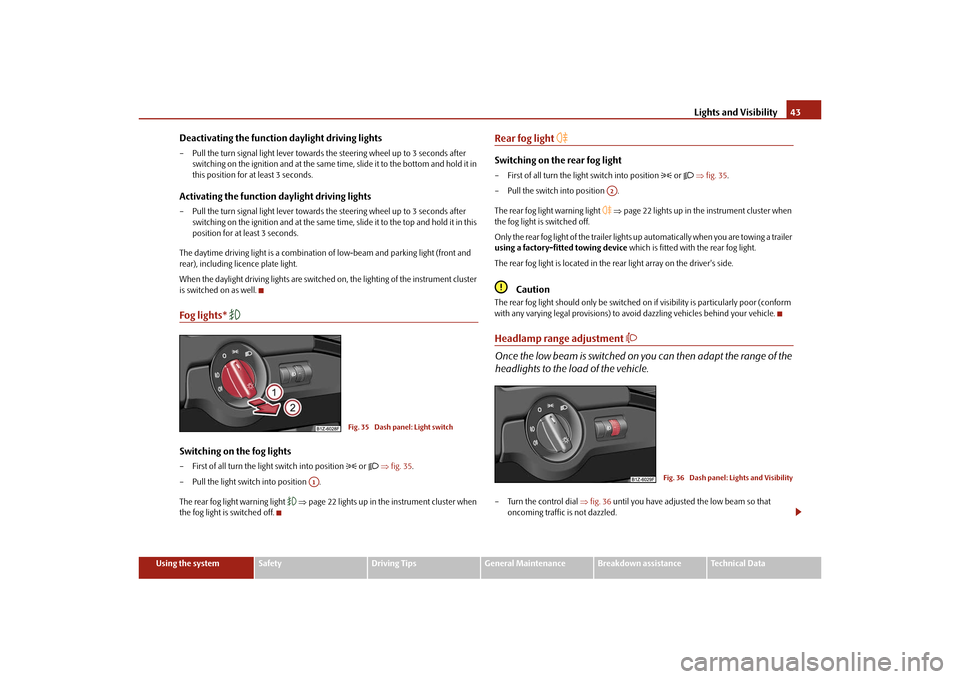
Switching on the fog lights– First of all turn the light switch into position
or fig. 35 .
– Pull the light switch into position .
The rear fog light warning light
page 22 lights up in the instrument cluster when
the fog light is switched off.
Rear fog light
Switching on the rear fog light– First of all turn the light switch into position
or fig. 35 .
– Pull the switch into position .
The rear fog light warning light
page 22 lights up in the instrument cluster when
the fog light is switched off.
Only the rear fog light of the trailer lights up automatically when you are towing a trailer
using a factory-fitted towing device which is fitted with the rear fog light.
The rear fog light is located in the rear light array on the driver's side.
Caution
The rear fog light should only be switched on if visibility is particularly poor (conform
with any varying legal provisions) to avoi d dazzling vehicles behind your vehicle.Headlamp range adjustment
Once the low beam is switched on you can then adapt the range of the
headlights to the load of the vehicle.– Turn the control dial fig. 36 until you have adjusted the low beam so that
oncoming traffic is not dazzled.
Fig. 35 Dash panel: Light switch
A1
A2
Fig. 36 Dash panel: Lights and Visibility
s2bs.2.book Page 43 Monday, September 27, 2010 9:53 AM
Page 79 of 199
Starting-off and Driving
78
You should not switch on any major elec trical components during the heating
period. Otherwise the ve hicle battery will be drained unnecessarily.
- start engine
Applies to all models:
Position
To lock the steering , with the ignition key withdrawn, turn the steering wheel until the
steering locking pin is heard to engage. You should always lock the steering as a general
rule if you leave your vehicle. This acts as a deterrent against possible theft of your
vehicle .
Position
Move the steering wheel back and forward a little if the ignition key cannot, or cannot
easily be turned into this position, in order to release the steering lock.
Position
The engine is started in this position. At the same time any switched on low beam or
main beam or other electrical components with major electrical consumers are briefly
switched off. The ignition key moves back into position after being released.
The ignition key must be turned back into position each time before starting the
engine again. The starter repeat lock in th e ignition lock prevents the starter being
engaged when the engine is r unning and thus getting damaged.
WARNING
When driving, the ignition key must always be in the position (ignition
switched on) without the engine running. This position is indicated by the
warning lights coming on. If this is not the case, it could result in unexpected
locking of the steering wh eel - risk of accident!
Do not withdraw the ignition key from the lock until the vehicle has come to
a stop. The steering lock can engage immediately - risk of accident!
Always withdraw the ignition key if you are going to leave the vehicle, even
for a short time. This is particularly important if children are left in the vehicle.
Children might otherwise st art the engine or switch on electrical equipment
(e.g. power windows) - risk of accident or injury!
Starting the engineGeneral
You can only start the engine only using an original ignition key.
Place the gearshift lever into neutral and put on the handbrake firmly before
starting the engine.
Before starting, it is necessary to depres s the clutch pedal and to keep it pressed
down until the engine starts. If you try and start the engine without pressing the clutch
pedal, the engine will not start. A message in the information display of the instrument
cluster will also appear indicate th e need to press the clutch pedal.
Let go of the ignition key as soon as the engine starts otherwise you may damage
the starter.
The engine running noises may louder at first be louder for a short time after starting
the cold engine until oil pressure can be built up in the hydraulic valve clearance
compensation. This is quite normal and is not an operating problem.
If the engine does not start ...
You can use the battery of anothe r vehicle as a jump-start aid page 165.
It is only possible to tow-start vehicles fi tted with a manual gearbox. The tow-starting
distance must not be more than 50 metres. Observe the following
guidelines page 167, “Tow-starting and towing vehicle”.
WARNING
Never run the engine in non ventilated or enclosed areas. The exhaust gases
of the engine contain besides the odou rless and colourless carbon monoxide a
poisonous gas - hazard! Carbon mono xide can cause unconsciousness and
death.
Never leave your vehicle unattended with the engine running.Caution
The starter may only be operated (ignitio n key position ), if the engine is not
running. If the starter is imme diately operated after switchin g off the engine, the starter
or the engine can be damaged.
A3
A1A2A3
A2
A1
A2
A3
s2bs.2.book Page 78 Monday, September 27, 2010 9:53 AM
Page 82 of 199
Starting-off and Driving81
Using the system
Safety
Driving Tips
General Maintenance
Breakdown assistance
Technical Data
WARNING
Please note that the handbrake must be fully released. A handbrake which
is only partially released can result in the rear brakes overheating which will
have a negative effect on the operation of the brake system - risk of accident! In
addition this can result in premature wear of the rear brake pads.
Never leave children unattended in the vehicle. Children might, for
example, release the handbrake or take the vehicle out of gear. The vehicle
might then move off - risk of accident!Caution
Each time the vehicle is parked, first of all apply the handbrake and then additionally
engage the 1st gear.Rear parking aid*The parking aid provides a warning of obstacles behind the vehicle.The audible parking aid determines the distan ce from the rear bumper to an obstacle
behind the car with the aid of ultrasound sensors. These ultrasound sensors are inte-
grated in the rear bumper.
Range of sensors
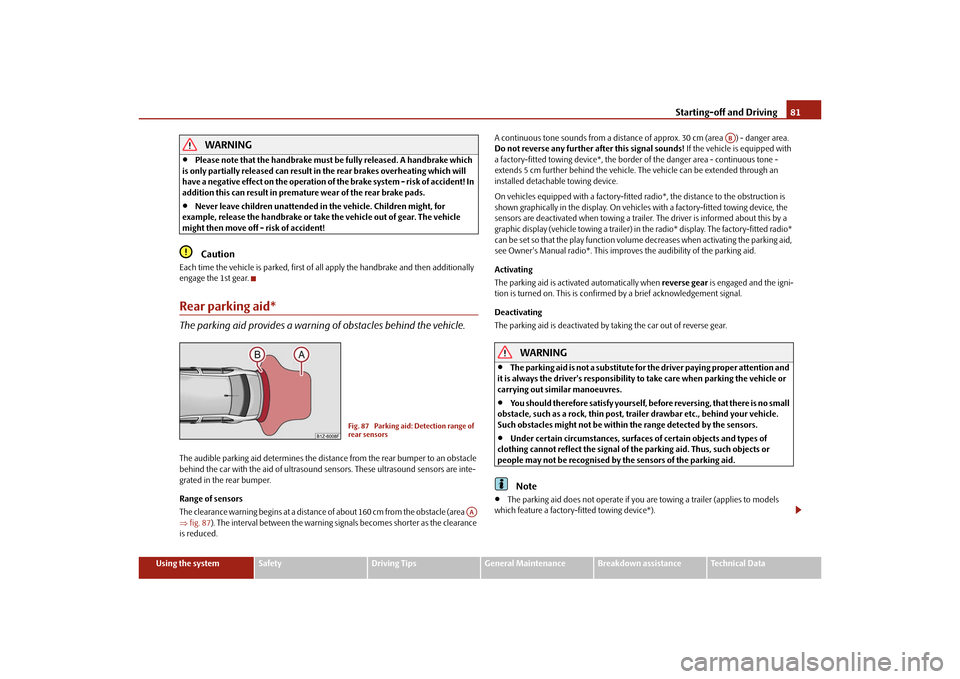
The clearance warning begins at a distance of about 160 cm from the obstacle (area
fig. 87 ). The interval between the warning signals becomes shorter as the clearance
is reduced. A continuous tone sounds from
a distance of approx. 30 cm (area ) - danger area.
Do not reverse any further after this signal sounds! If the vehicle is equipped with
a factory-fitted towing device*, the border of the danger area - continuous tone -
extends 5 cm further behind the vehicle. The vehicle can be extended through an
installed detachable towing device.
On vehicles equipped with a factory-fitted radio*, the distance to the obstruction is
shown graphically in the display. On vehicles with a factory-fitted towing device, the
sensors are deactivated when towing a traile r. The driver is informed about this by a
graphic display (vehicle towing a trailer) in the radio* display. The factory-fitted radio*
can be set so that the play function volume decreases when activating the parking aid,
see Owner's Manual radio*. This improves the audibility of the parking aid.
Activating
The parking aid is activated automatically when reverse gear is engaged and the igni-
tion is turned on. This is confirmed by a brief acknowledgement signal.
Deactivating
The parking aid is deactivated by ta king the car out of reverse gear.
WARNING
The parking aid is not a substitute for the driver paying proper attention and
it is always the driver's responsibility to take care when parking the vehicle or
carrying out similar manoeuvres.
You should therefore satisfy yourself, before reversing, that there is no small
obstacle, such as a rock, thin post, trai ler drawbar etc., behind your vehicle.
Such obstacles might not be within the range detected by the sensors.
Under certain circumstances, surfaces of certain objects and types of
clothing cannot reflect the signal of the parking aid. Thus, such objects or
people may not be recognised by the sensors of the parking aid.Note
The parking aid does not operate if you are towing a trailer (applies to models
which feature a factory-fitted towing device*).
Fig. 87 Parking aid: Detection range of
rear sensors
AA
AB
s2bs.2.book Page 81 Monday, September 27, 2010 9:53 AM
Page 117 of 199

Intelligent Technology
116
Electromechanical power steeringThe power steering enables you to steer the vehicle with le ss physical force.
With the electromechanical power steering , the steering assist is automatically
adapted to the speed and to the steering angle.
It is still possible to fully steer the vehicle if the power steering fails or if the engine is
not running (vehicle being towed in). The only difference is that greater physical effort
is required.
If there is a fault in the power steering, the warning light
or lights up in the instru-
ment cluster page 24.
WARNING
Contact your specialist garage if the power steering is defective.Tyre inflation pressure-control system*The tyre inflation pressure-control system compares with the aid of the ABS sensors
the speed and also the rolling circumference of the individual wheels. If the rolling
circumference of a wheel is changed, the warning light
lights up in the instrument
cluster page 27 and an audible signal sounds. The rolling circumference of the tyre
can change if:
the tyre inflation pressure is too low,
the structure of the tyre is damaged,
the vehicle is loaded on one side,
the wheels of an axle are loaded heavily (e.g. when towing a trailer or when driving
uphill or downhill),
snow chains are mounted,
the temporary spare wheel is mounted,
one wheel per axle was changed.
Basic setting of tyre inflation pressure-control system
After changing the tyre inflation pressures, after changing one or several wheels, the
position of a wheel on the vehicle (e.g. ex changing the wheels between the axles) or
when the warning light lights up while drivin g, a basic setting of the system must be
carried out as follows.
Inflate all tyres to the specified inflation pressure page 151.
Switch on the ignition.
Press button fig. 113 for more than 2 seconds. While pressing the button,
the warning light
lights up. At the same time the memory of the system is erased
and the new calibration is started, which is confirmed with an audible signal and then
the warning light goes out.
If the warning light
does not go out after the basic setting, there is a fault in the
system. Have the vehicle inspected by your nearest specialist garage.
Warning light
lights up
I f t h e t y re i n f l a t i o n p re s s u re o f a t l e a s t o n e wheel is insufficiently inflated in comparison
to the stored basic va lue, the warning light
lights up.
Warning light
flashes
If the warning light flashes, there is a system fault. Have the vehicle inspected by your
nearest specialist garage.
WARNING
When the warning light
lights up, immediately reduce the speed and
avoid sudden steering and brake manoeuvr es. Please stop the vehicle without
delay at the nearest possible stop and in spect the tyres and their inflation pres-
sures.
Fig. 113 Button for setting the tyre
inflation pressure control value
s2bs.2.book Page 116 Monday, September 27, 2010 9:53 AM
Page 120 of 199

Driving and the Environment119
Using the system
Safety
Driving Tips
General Maintenance
Breakdown assistance
Technical Data
Catalytic converterProper operation of the emission cont rol system (catalytic converter) is
of major significance for driving your vehicle in an environmentally
conscious way.Please refer to the following guidelines:
– For vehicles with petrol engine only refuel with unleaded petrol page 136,
“Grades of petrol”.
– Never run the fuel tank completely empty.
– Do not switch off the ignition while you are driving the vehicle.
– Do not pour too much engine oil into the engine page 142, “Replenishing
engine oil”.
– Do not tow-start the vehicle over a distance of more than 50 metres page 167,
“Tow-starting and towing vehicle”.
If you drive your vehicle in a country in which unleaded petrol is not available, you
must have the catalytic converter replaced la ter when driving the vehicle into a country
in which use of a catalyti c converter is mandatory.
WARNING
In view of the high temperatures which may be produced in the catalytic
converter, one should always park a vehicle in such a way that the catalytic
converter cannot come into contact with easily flammable materials below the
vehicle - a risk of fire!
Never use additional underbody protection or corrosion-protection agents
for the exhaust pipes, catalytic converters or heat shields. Such substances
might ignite when driving - risk of fire!Caution
Vehicles fitted with catalytic converter shou ld never be allowed to let the fuel tank
to run completely empty. An irregular fuel supply can result in poor ignition or
misfiring. Unburnt fuel may get into the exhaust system and damage the catalytic
converter.
Filling the tank even only once with lead ed petrol will result in the catalytic
converter being destroyed.
If you detect misfir ing, a drop in performance or irregular engine running when
driving, reduce your speed immediately and have the vehicle inspected by the nearest
specialist garage. The symptoms described ma y be caused by a fault in the ignition
system. Unburnt fuel may get into the exhaust system and damage the catalytic
converter.For the sake of the environment
Even if the exhaust system is operating pr operly, a sulphur-like exhaust odour may be
produced under certain oper ating conditions of the engine. This depends on the
sulphur content of the fuel. It is often sufficient to refuel with unleaded premium-grade
petrol of a different brand or at a different filling station.Driving in an economical and environmentally
conscious mannerGeneral
Your personal style of driving is a major factor.Your fuel consumption, any pollution of the environmental and the wear-and-tear to
the engine, brakes and tyres, depe nd essentially on three factors:
your personal style of driving,
the conditions under which your vehicle is operated,
technical aspects.
You can easily improve your fuel economy by 10 - 15 percent by driving in an econom-
ical way with foresight. This section is intended to provide you with a number of tips on
how to protect the environment and at the same time save money.
The fuel consumption can naturally also be influenced by factors which are beyond the
driver's control. It is, for example, normal for the fuel consumption to increase in
winter and under worsened cond itions such as poor road conditions, towing a trailer,
etc.
s2bs.2.book Page 119 Monday, September 27, 2010 9:53 AM
Page 126 of 199

Towing a trailer125
Using the system
Safety
Driving Tips
General Maintenance
Breakdown assistance
Technical Data
Towing a trailerTo w i n g a t r a i l e rTechnical requirementsYour vehicle is designed primarily for tr ansporting persons and luggage. It can,
however, also be used for towing a traile r - provided certain technical equipment is
fitted.
If your vehicle has already been supplied with a factory-fitted towing device then
everything that is necessary for towing a trai ler in technical terms, and in terms of the
law, has already been taken into account.
Your vehicle is fitted with a 13-pin power socket for the electrical connection between
the vehicle and trailer. If the trailer which you wish to tow has a 7-pin connector, you
can use a suitable adapter
6) from Škoda original accessories.
This work must be carried out in accordance with the manufacturer's specifications if
a towing device is retrofitted.
Authorised Škoda Service Partners can provid e information about retrofitting a towing
device and for any necessary modifications to the cooling system.
WARNING
We recommend that you have the towing device from Škoda original accesso-
ries installed by an authorised Škoda Service Partner. He is familiar with all the
relevant details relating to retrofitting such equipment. There is a risk of an
accident if the towing device is not properly fitted!General MaintenanceTrailer load
The permissible trailer load must on no account be exceeded. You can negotiate appropriately steeper inclin
es and descents if you do not make full
use of the permissible trailer load.
The trailer loads specified only apply for altitudes up to 1 000 metres above mean sea
level. The fact that the engine power outp ut drops with increasing height due to a
lowering of air pressure and thus the abil ity to climb, means that the towed weight
must be reduced by 10 % for every further increase of 1 000 metres in height above
sea level. The towed weight is the weight of the (laden) vehicle and the (laden) trailer
together. One should take this into account before driving up to higher altitudes.
The trailer and drawbar load information on the type plate of the towing device
are merely test data for the towing device The data relating to your vehicle, which
is often less than this test data, can be found in your vehicle registration docu-
ments.
Distribution of the load
Distribute the load in the trailer in such a way that any heavy items are located as close
as possible to the axle. Secure th e items to prevent them slipping.
Tyre inflation pressure
Select the tyre inflation pressure on yo ur vehicle for that of “fully laden”, page 151.
The inflation pressure of the tyres fitted to the trailer adjust in accordance with the
manufacturer's recommendation.
Exterior mirrors
You have to have additional exterior mirrors fitted if you are not able to see the traffic
behind the trailer with the standard rear-view mirrors. Both exterior mirrors should be
attached to folding arms. Adjust the mirrors so that they provide you with an adequate
field of view to the rear.
Headlights
Before starting off with a hitched trailer, al so check the setting of the headlights. Alter
the setting as necessary with the aid of the headlight beam adjuster page 43.
Detachable ball head
The ball rod is detachable on vehicles whic h feature a factory-fitted towing device.6)In some countries the adapter is supplied with the towing device.
s2bs.2.book Page 125 Monday, September 27, 2010 9:53 AM
Page 127 of 199
Towing a trailer
126
Further information on the towing device page 126.
Note
We recommend that you also have your vehicle inspected between service inter-
vals if you tow a trailer frequently.
The handbrake on the towing vehicle must be put on when coupling and decou-
pling the trailer.
Driving Tips
Particular caution is required when towing a trailer.– Do not, as far as possible, drive with your vehicle unladen and the trailer laden.
– Do not make full use of the legal maximum speeds. This applies in particular to downhill sections.
– Apply the brakes in good time.
– Keep a check on the coolant temperature gauge if the outside temperature is high.
Distribution of weight
The distribution of the weight is very poor if your vehicle is unladen and the trailer is
laden. Maintain a particularly low speed if you cannot avoid driving with this combina-
tion.
Driving speed
Do not drive faster than 80 km/hour for safety reasons. This also applies for countries
in which higher speeds are allowed.
The fact that the driving stability of the vehicle + trailer combination reduces with
increasing speed means that the legally allo wed speed should not be used when there
are unfavourable road, weather or wind cond itions, particularly near accident black
spots.
You must always reduce your speed immediat ely as soon as you detect even just the
slightest swaying of the trailer. On no account attempt to stop the trailer from
“swaying” by accelerating.
Apply the brakes in good time! If the trailer is fitted with a trailer brake, apply the
brakes gently at first and then brake firmly. This will avoid brake jolts resulting from the trailer wheels locking. Shift down gears in good time before negotiating a downhill
section to allow the engine
to also act as a brake.
Engine overheating
Please keep a check on the coolant temperature gauge if you have to negotiate a
lengthy slope in a low gear at a high engi ne speed when the outside temperature is
very high page 16, “Engine coolant temperature Display”.
If the needle of the coolant temperature gaug e moves into the right-hand area or even
the red area of the scale, reduce your speed immediately. Stop and switch off the
engine if the warning light
in the instrument cluster begins flashing. Wait a few
minutes and check the level of coolant in the coolant expansion bottle page 143,
“Inspecting the coolant level”.
Please refer to the following guidelines page 25, “Coolant temperature/coolant
level ”.
The coolant temperature can be reduced by switching on the heating.
Any increase in the cooling effect of the coolant fan through shifting down a gear and
increasing the engine speed is not possible since the fan speed is independent of the
engine speed. One should also not drop a gear for this reason when towing a trailer as
long as the engine can manage th e slope without any drop in speed.
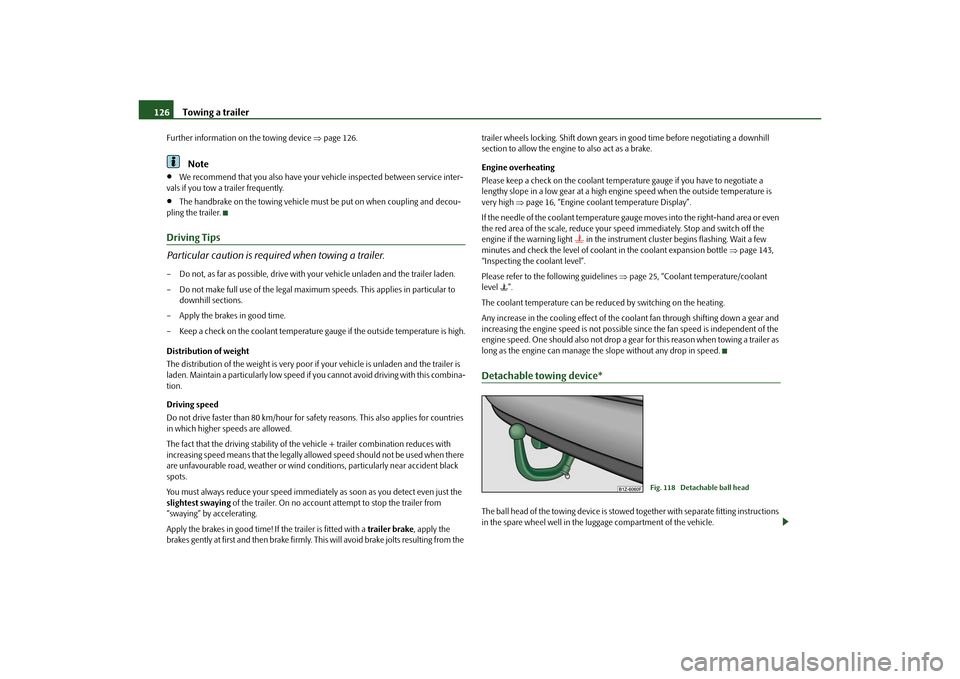
Detachable towing device*The ball head of the towing device is stowed together with separate fitting instructions
in the spare wheel well in the luggage compartment of the vehicle.
Fig. 118 Detachable ball head
s2bs.2.book Page 126 Monday, September 27, 2010 9:53 AM
Page 128 of 199

Towing a trailer127
Using the system
Safety
Driving Tips
General Maintenance
Breakdown assistance
Technical Data
Inspect the ball head to ensure that it is pr
operly locked each time before setting off.
The inspection is performed by turning th e closed locking lever downwards. If the
locking lever can only be turned around a small angle (approx. 5°), the locking mecha-
nism is O.K. After the inspection pull the locking lever back again to its stop. The towing
device must not be used, if it does not wish to close or the locking lever turns slightly
in the closed position.
WARNING
Do not use any aids or tools for installing or removing the ball head. This might
result in damage to the locking mechanism to the extent that the safety of the
towing device is no longer assured - risk of an accident.
Note
Do not carry out any modifications or re pairs to the ball head or to any other
components on the towing device.
Contact a specialist garage if you en counter any problems using the device.
Never unlock the ball head with a trailer coupled to it.
You should take off the ball head if you drive without towing a trailer. Inspect
whether the end cover properly seals off the mounting shaft.
Remove the ball head beforehand if you wi sh to clean your vehicle using a steam
jet. Ensure that the end cover properly seals the mounting shaft.
It is recommended to wear gloves when installing and removing.
s2bs.2.book Page 127 Monday, September 27, 2010 9:53 AM