airbag SKODA RAPID SPACEBACK 2016 1.G User Guide
[x] Cancel search | Manufacturer: SKODA, Model Year: 2016, Model line: RAPID SPACEBACK, Model: SKODA RAPID SPACEBACK 2016 1.GPages: 184, PDF Size: 28.1 MB
Page 22 of 184
WARNING (Continued)■Children are exposed to an increased risk of injury in the event of an acci-
dent if they lean forward or adopt an incorrect seated position when the
vehicle is moving. This particularly applies to children who are transported
on the front passenger seat as they can suffer severe, or even fatal injuries
if the airbag system is deployed!■
Pay particular attention to the information provided by the manufacturer
of the child safety seat regarding the correct routing of the belt. Seat belts
which are not correctly adjusted can themselves cause injuries even in mi-
nor accidents.
■
Safety belts must be checked to ensure that they are running properly.
One should also ensure that the belt is not damaged by sharp-edged fit-
tings.
■
When installing the child seat on the back seat, the corresponding front
seat must be adjusted so that there is no contact between the front seat
and the child seat or the child being transported in a child seat.
■
When installing a child seat in which the child faces forward, adjust the
head restraints so that they are as high as possible.
■
If the headrests still prevent the child seat from being installed, even in
the highest position, you will need to remove them » page 65. After re-
moving the child seat, refit the head restraints.
Note
We recommend that you use child seats from ŠKODA Original Accessories.
These child seats were developed and also tested for use in ŠKODA vehicles.
They meet the ECE-R 44 standard.Use of a child seat on the front passenger seat
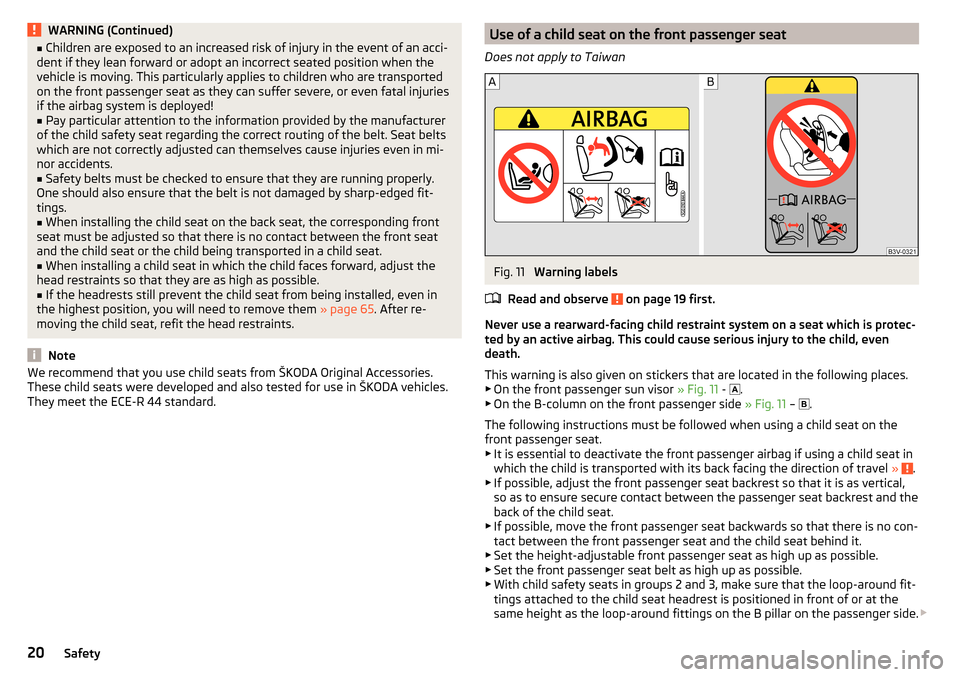
Does not apply to TaiwanFig. 11
Warning labels
Read and observe
on page 19 first.
Never use a rearward-facing child restraint system on a seat which is protec-
ted by an active airbag. This could cause serious injury to the child, even
death.
This warning is also given on stickers that are located in the following places.
▶ On the front passenger sun visor » Fig. 11 -
.
▶ On the B-column on the front passenger side » Fig. 11 –
.
The following instructions must be followed when using a child seat on the
front passenger seat.
▶ It is essential to deactivate the front passenger airbag if using a child seat in
which the child is transported with its back facing the direction of travel »
.
▶ If possible, adjust the front passenger seat backrest so that it is as vertical,
so as to ensure secure contact between the passenger seat backrest and the
back of the child seat.
▶ If possible, move the front passenger seat backwards so that there is no con-
tact between the front passenger seat and the child seat behind it.
▶ Set the height-adjustable front passenger seat as high up as possible.
▶ Set the front passenger seat belt as high up as possible.
▶ With child safety seats in groups 2 and 3, make sure that the loop-around fit-
tings attached to the child seat headrest is positioned in front of or at the
same height as the loop-around fittings on the B pillar on the passenger side.
20Safety
Page 23 of 184
Adjust the height of the front passenger seat belt so that the belt does not
“jam” in the return pulley. In the event of an accident, there is the risk of in-
jury to the neck of the child carried due to the seat belt!WARNING■ Never use a rear-facing child seat on the front passenger seat if the pas-
senger airbag is activated. This child safety seat is positioned in the deploy-
ment area of the front passenger airbag. The airbag may cause the child se-
vere, or even fatal injuries, in the event of it being deployed.■
Once a child seat in which the child is transported with its back to the di-
rection of travel is no longer being used on the passenger seat, the front
passenger airbag should be reactivated.
Use of a child seat on the front passenger seat
Applies to Taiwan
Fig. 12
Warning labels
Read and observe on page 19 first.
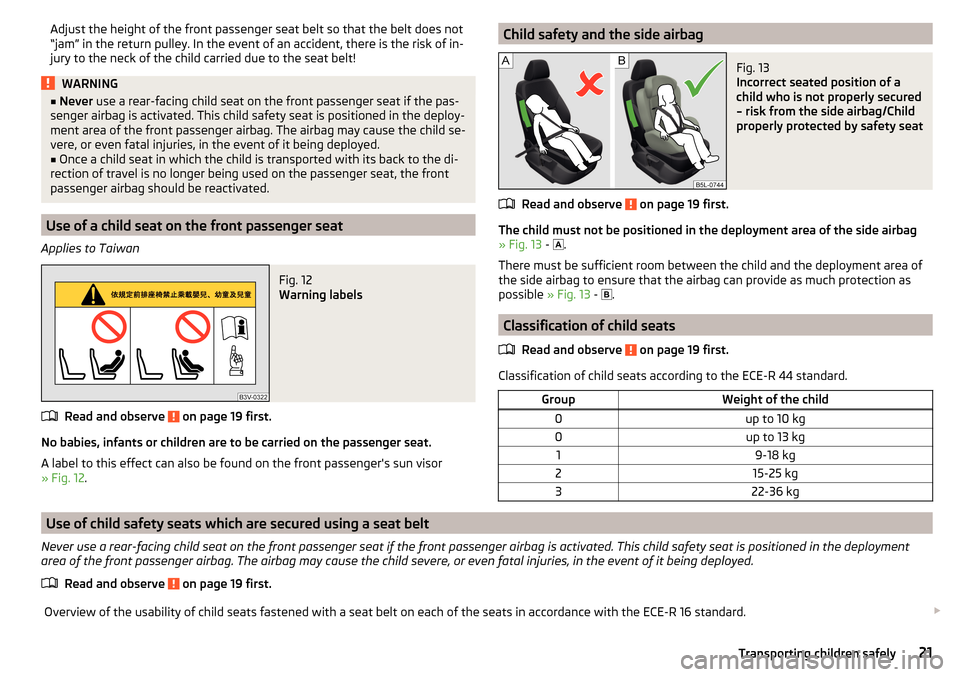
No babies, infants or children are to be carried on the passenger seat.
A label to this effect can also be found on the front passenger's sun visor
» Fig. 12 .
Child safety and the side airbagFig. 13
Incorrect seated position of a
child who is not properly secured
– risk from the side airbag/Child
properly protected by safety seat
Read and observe on page 19 first.
The child must not be positioned in the deployment area of the side airbag » Fig. 13 -
.
There must be sufficient room between the child and the deployment area of
the side airbag to ensure that the airbag can provide as much protection as
possible » Fig. 13 -
.
Classification of child seats
Read and observe
on page 19 first.
Classification of child seats according to the ECE-R 44 standard.
GroupWeight of the child0up to 10 kg0up to 13 kg19-18 kg215-25 kg322-36 kg
Use of child safety seats which are secured using a seat belt
Never use a rear-facing child seat on the front passenger seat if the front passenger airbag is activated. This child safety seat is positioned in the deployment
area of the front passenger airbag. The airbag may cause the child severe, or even fatal injuries, in the event of it being deployed.
Read and observe
on page 19 first.
Overview of the usability of child seats fastened with a seat belt on each of the seats in accordance with the ECE-R 16 standard. 21Transporting children safely
Page 25 of 184
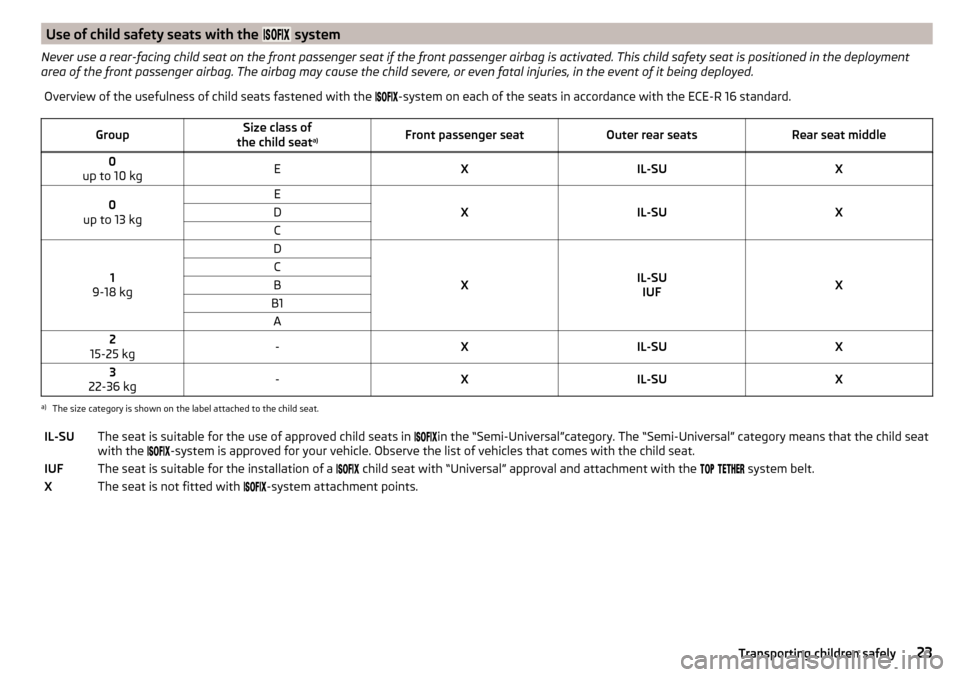
Use of child safety seats with the system
Never use a rear-facing child seat on the front passenger seat if the front passenger airbag is activated. This child safety seat is positioned in the deployment
area of the front passenger airbag. The airbag may cause the child severe, or even fatal injuries, in the event of it being deployed.Overview of the usefulness of child seats fastened with the -system on each of the seats in accordance with the ECE-R 16 standard.GroupSize class of
the child seat a)Front passenger seatOuter rear seatsRear seat middle0
up to 10 kgEXIL-SUX0
up to 13 kgE
XIL-SUX
DC
1
9-18 kg
D
XIL-SU IUFX
CBB1A2
15-25 kg-XIL-SUX3
22-36 kg-XIL-SUXa)
The size category is shown on the label attached to the child seat.
IL-SUThe seat is suitable for the use of approved child seats in in the “Semi-Universal”category. The “Semi-Universal” category means that the child seat
with the
-system is approved for your vehicle. Observe the list of vehicles that comes with the child seat.IUFThe seat is suitable for the installation of a child seat with “Universal” approval and attachment with the system belt.XThe seat is not fitted with -system attachment points.23Transporting children safely
Page 29 of 184
Using the system
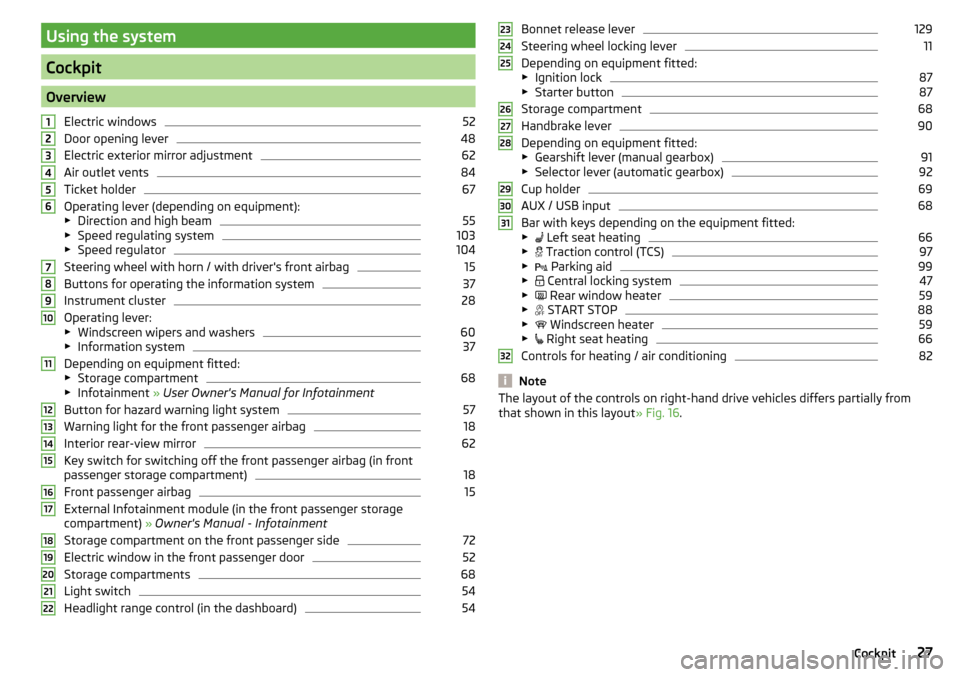
Cockpit
OverviewElectric windows
52
Door opening lever
48
Electric exterior mirror adjustment
62
Air outlet vents
84
Ticket holder
67
Operating lever (depending on equipment):
▶ Direction and high beam
55
▶Speed regulating system
103
▶Speed regulator
104
Steering wheel with horn / with driver's front airbag
15
Buttons for operating the information system
37
Instrument cluster
28
Operating lever:
▶ Windscreen wipers and washers
60
▶Information system
37
Depending on equipment fitted:
▶ Storage compartment
68
▶Infotainment » User Owner's Manual for Infotainment
Button for hazard warning light system
57
Warning light for the front passenger airbag
18
Interior rear-view mirror
62
Key switch for switching off the front passenger airbag (in front
passenger storage compartment)
18
Front passenger airbag
15
External Infotainment module (in the front passenger storage
compartment) » Owner's Manual - Infotainment
Storage compartment on the front passenger side
72
Electric window in the front passenger door
52
Storage compartments
68
Light switch
54
Headlight range control (in the dashboard)
5412345678910111213141516171819202122Bonnet release lever129
Steering wheel locking lever
11
Depending on equipment fitted:
▶ Ignition lock
87
▶Starter button
87
Storage compartment
68
Handbrake lever
90
Depending on equipment fitted:
▶ Gearshift lever (manual gearbox)
91
▶Selector lever (automatic gearbox)
92
Cup holder
69
AUX / USB input
68
Bar with keys depending on the equipment fitted:
▶ Left seat heating
66
▶
Traction control (TCS)
97
▶
Parking aid
99
▶
Central locking system
47
▶
Rear window heater
59
▶
START STOP
88
▶
Windscreen heater
59
▶
Right seat heating
66
Controls for heating / air conditioning
82
Note
The layout of the controls on right-hand drive vehicles differs partially from
that shown in this layout » Fig. 16.2324252627282930313227Cockpit
Page 31 of 184
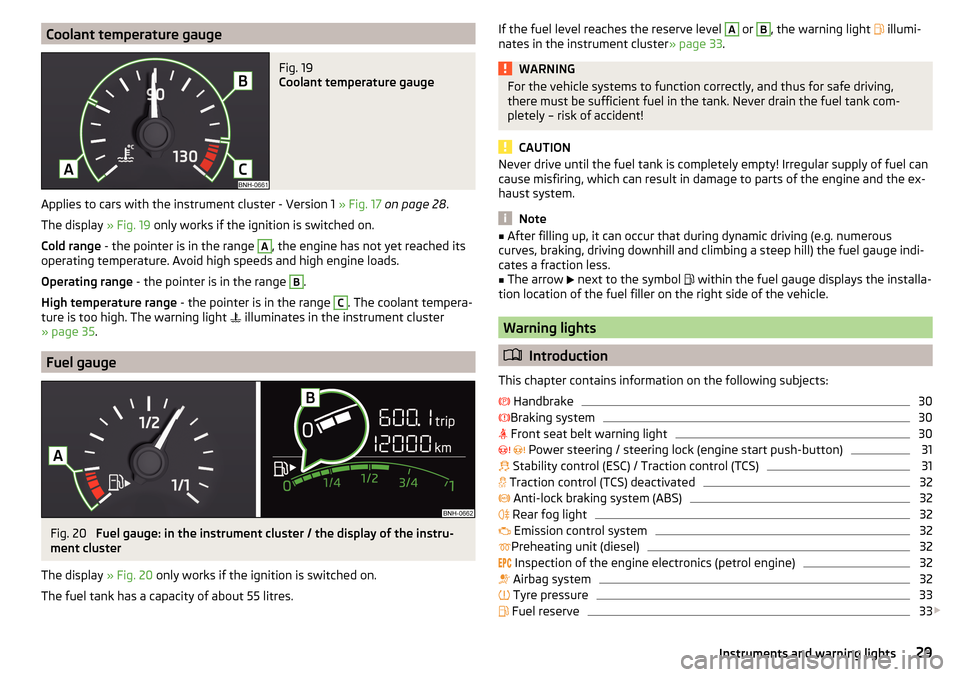
Coolant temperature gaugeFig. 19
Coolant temperature gauge
Applies to cars with the instrument cluster - Version 1 » Fig. 17 on page 28 .
The display » Fig. 19 only works if the ignition is switched on.
Cold range - the pointer is in the range
A
, the engine has not yet reached its
operating temperature. Avoid high speeds and high engine loads.
Operating range - the pointer is in the range
B
.
High temperature range - the pointer is in the range
C
. The coolant tempera-
ture is too high. The warning light illuminates in the instrument cluster
» page 35 .
Fuel gauge
Fig. 20
Fuel gauge: in the instrument cluster / the display of the instru-
ment cluster
The display » Fig. 20 only works if the ignition is switched on.
The fuel tank has a capacity of about 55 litres.
If the fuel level reaches the reserve level A or B, the warning light illumi-
nates in the instrument cluster » page 33.WARNINGFor the vehicle systems to function correctly, and thus for safe driving,
there must be sufficient fuel in the tank. Never drain the fuel tank com-
pletely – risk of accident!
CAUTION
Never drive until the fuel tank is completely empty! Irregular supply of fuel can
cause misfiring, which can result in damage to parts of the engine and the ex-
haust system.
Note
■ After filling up, it can occur that during dynamic driving (e.g. numerous
curves, braking, driving downhill and climbing a steep hill) the fuel gauge indi-
cates a fraction less.■
The arrow
next to the symbol
within the fuel gauge displays the installa-
tion location of the fuel filler on the right side of the vehicle.
Warning lights
Introduction
This chapter contains information on the following subjects:
Handbrake
30
Braking system
30
Front seat belt warning light
30
Power steering / steering lock (engine start push-button)
31
Stability control (ESC) / Traction control (TCS)
31
Traction control (TCS) deactivated
32
Anti-lock braking system (ABS)
32
Rear fog light
32
Emission control system
32
Preheating unit (diesel)
32
Inspection of the engine electronics (petrol engine)
32
Airbag system
32
Tyre pressure
33
Fuel reserve
33
29Instruments and warning lights
Page 34 of 184
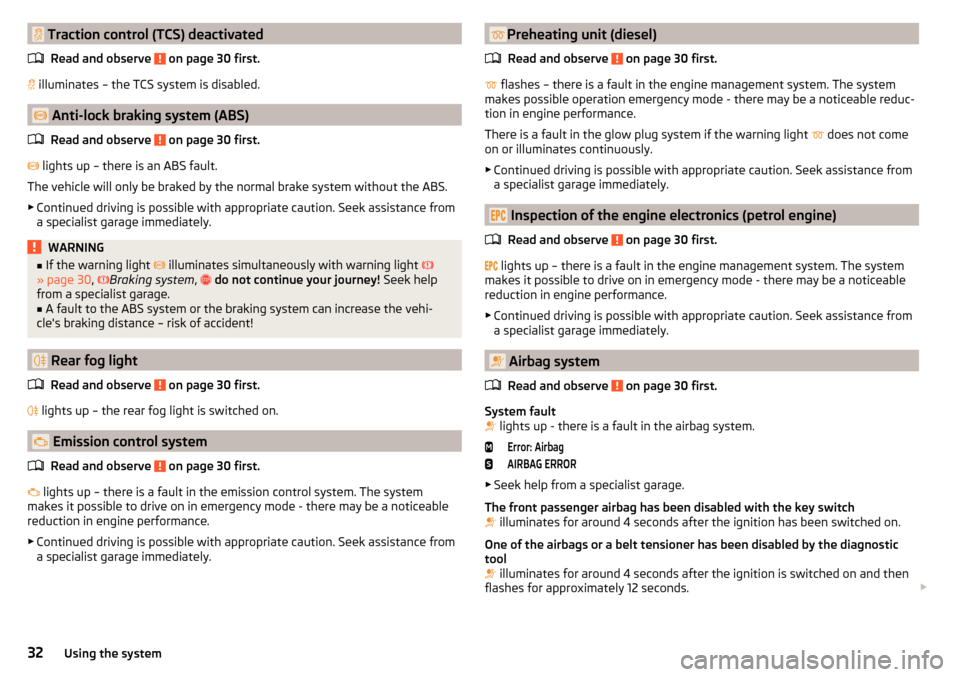
Traction control (TCS) deactivatedRead and observe
on page 30 first.
illuminates – the TCS system is disabled.
Anti-lock braking system (ABS)
Read and observe
on page 30 first.
lights up – there is an ABS fault.
The vehicle will only be braked by the normal brake system without the ABS.
▶ Continued driving is possible with appropriate caution. Seek assistance from
a specialist garage immediately.
WARNING■ If the warning light illuminates simultaneously with warning light
» page 30 , Braking system , do not continue your journey! Seek help
from a specialist garage.■
A fault to the ABS system or the braking system can increase the vehi-
cle's braking distance – risk of accident!
Rear fog light
Read and observe
on page 30 first.
lights up – the rear fog light is switched on.
Emission control system
Read and observe
on page 30 first.
lights up – there is a fault in the emission control system. The system
makes it possible to drive on in emergency mode - there may be a noticeable
reduction in engine performance.
▶ Continued driving is possible with appropriate caution. Seek assistance from
a specialist garage immediately.
Preheating unit (diesel)
Read and observe
on page 30 first.
flashes – there is a fault in the engine management system. The system
makes possible operation emergency mode - there may be a noticeable reduc-
tion in engine performance.
There is a fault in the glow plug system if the warning light
does not come
on or illuminates continuously.
▶ Continued driving is possible with appropriate caution. Seek assistance from
a specialist garage immediately.
Inspection of the engine electronics (petrol engine)
Read and observe
on page 30 first.
lights up – there is a fault in the engine management system. The system
makes it possible to drive on in emergency mode - there may be a noticeable
reduction in engine performance.
▶ Continued driving is possible with appropriate caution. Seek assistance from
a specialist garage immediately.
Airbag system
Read and observe
on page 30 first.
System fault
lights up - there is a fault in the airbag system.
Error: AirbagAIRBAG ERROR
▶
Seek help from a specialist garage.
The front passenger airbag has been disabled with the key switch
illuminates for around 4 seconds after the ignition has been switched on.
One of the airbags or a belt tensioner has been disabled by the diagnostic
tool
illuminates for around 4 seconds after the ignition is switched on and then
flashes for approximately 12 seconds.
32Using the system
Page 35 of 184
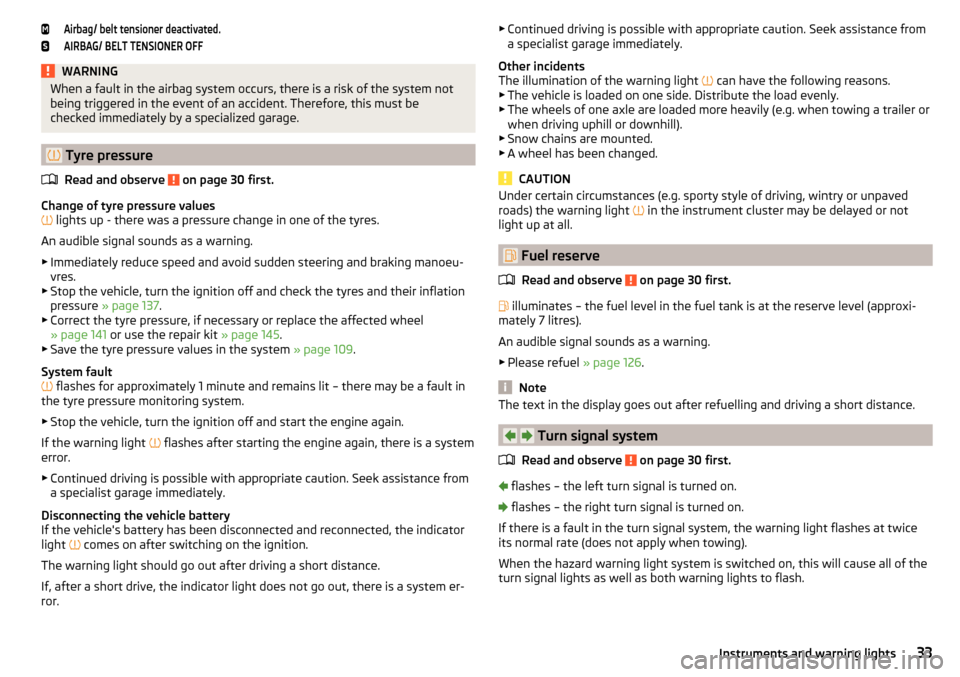
Airbag/ belt tensioner deactivated.AIRBAG/ BELT TENSIONER OFFWARNINGWhen a fault in the airbag system occurs, there is a risk of the system not
being triggered in the event of an accident. Therefore, this must be
checked immediately by a specialized garage.
Tyre pressure
Read and observe
on page 30 first.
Change of tyre pressure values
lights up - there was a pressure change in one of the tyres.
An audible signal sounds as a warning. ▶ Immediately reduce speed and avoid sudden steering and braking manoeu-
vres.
▶ Stop the vehicle, turn the ignition off and check the tyres and their inflation
pressure » page 137 .
▶ Correct the tyre pressure, if necessary or replace the affected wheel
» page 141 or use the repair kit » page 145.
▶ Save the tyre pressure values in the system » page 109.
System fault
flashes for approximately 1 minute and remains lit – there may be a fault in
the tyre pressure monitoring system.
▶ Stop the vehicle, turn the ignition off and start the engine again.
If the warning light flashes after starting the engine again, there is a system
error.
▶ Continued driving is possible with appropriate caution. Seek assistance from
a specialist garage immediately.
Disconnecting the vehicle battery
If the vehicle's battery has been disconnected and reconnected, the indicator
light comes on after switching on the ignition.
The warning light should go out after driving a short distance.
If, after a short drive, the indicator light does not go out, there is a system er-
ror.
▶
Continued driving is possible with appropriate caution. Seek assistance from
a specialist garage immediately.
Other incidents
The illumination of the warning light
can have the following reasons.
▶ The vehicle is loaded on one side. Distribute the load evenly.
▶ The wheels of one axle are loaded more heavily (e.g. when towing a trailer or
when driving uphill or downhill).
▶ Snow chains are mounted.
▶ A wheel has been changed.
CAUTION
Under certain circumstances (e.g. sporty style of driving, wintry or unpaved
roads) the warning light in the instrument cluster may be delayed or not
light up at all.
Fuel reserve
Read and observe
on page 30 first.
illuminates – the fuel level in the fuel tank is at the reserve level (approxi-
mately 7 litres).
An audible signal sounds as a warning. ▶ Please refuel » page 126.
Note
The text in the display goes out after refuelling and driving a short distance.
Turn signal system
Read and observe
on page 30 first.
flashes – the left turn signal is turned on.
flashes – the right turn signal is turned on.
If there is a fault in the turn signal system, the warning light flashes at twice
its normal rate (does not apply when towing).
When the hazard warning light system is switched on, this will cause all of the turn signal lights as well as both warning lights to flash.
33Instruments and warning lights
Page 59 of 184
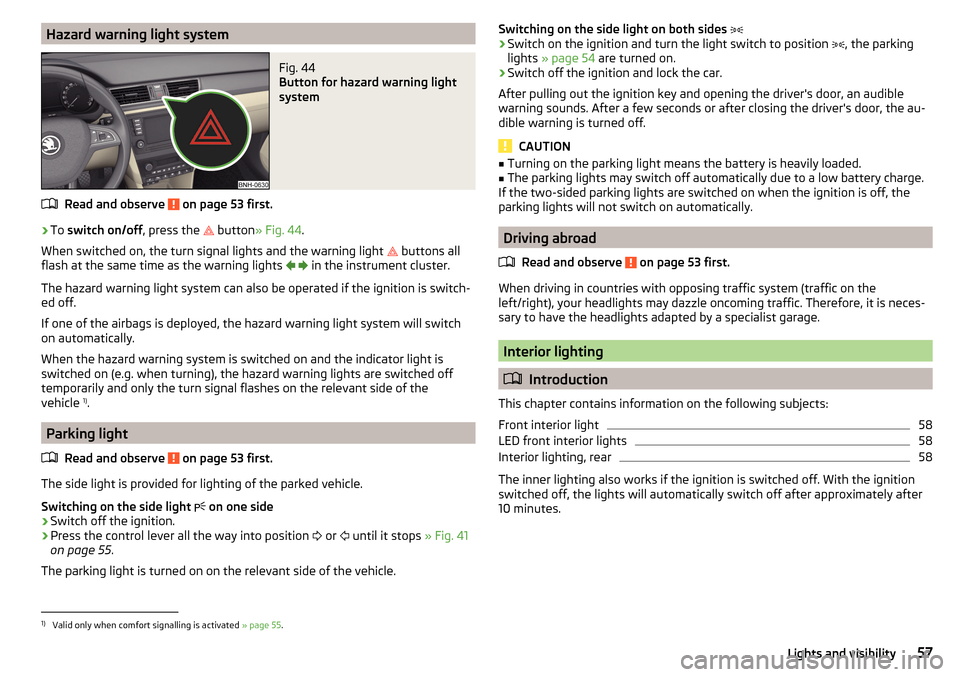
Hazard warning light systemFig. 44
Button for hazard warning light
system
Read and observe on page 53 first.
›
To switch on/off , press the
button
» Fig. 44 .
When switched on, the turn signal lights and the warning light buttons all
flash at the same time as the warning lights
in the instrument cluster.
The hazard warning light system can also be operated if the ignition is switch-
ed off.
If one of the airbags is deployed, the hazard warning light system will switch
on automatically.
When the hazard warning system is switched on and the indicator light is
switched on (e.g. when turning), the hazard warning lights are switched off
temporarily and only the turn signal flashes on the relevant side of the
vehicle 1)
.
Parking light
Read and observe
on page 53 first.
The side light is provided for lighting of the parked vehicle.
Switching on the side light on one side
›
Switch off the ignition.
›
Press the control lever all the way into position
or
until it stops
» Fig. 41
on page 55 .
The parking light is turned on on the relevant side of the vehicle.
Switching on the side light on both sides ›Switch on the ignition and turn the light switch to position , the parking
lights » page 54 are turned on.›
Switch off the ignition and lock the car.
After pulling out the ignition key and opening the driver's door, an audible
warning sounds. After a few seconds or after closing the driver's door, the au-
dible warning is turned off.
CAUTION
■ Turning on the parking light means the battery is heavily loaded.■The parking lights may switch off automatically due to a low battery charge.
If the two-sided parking lights are switched on when the ignition is off, the
parking lights will not switch on automatically.
Driving abroad
Read and observe
on page 53 first.
When driving in countries with opposing traffic system (traffic on the
left/right), your headlights may dazzle oncoming traffic. Therefore, it is neces-
sary to have the headlights adapted by a specialist garage.
Interior lighting
Introduction
This chapter contains information on the following subjects:
Front interior light
58
LED front interior lights
58
Interior lighting, rear
58
The inner lighting also works if the ignition is switched off. With the ignition
switched off, the lights will automatically switch off after approximately after
10 minutes.
1)
Valid only when comfort signalling is activated » page 55.
57Lights and visibility
Page 70 of 184
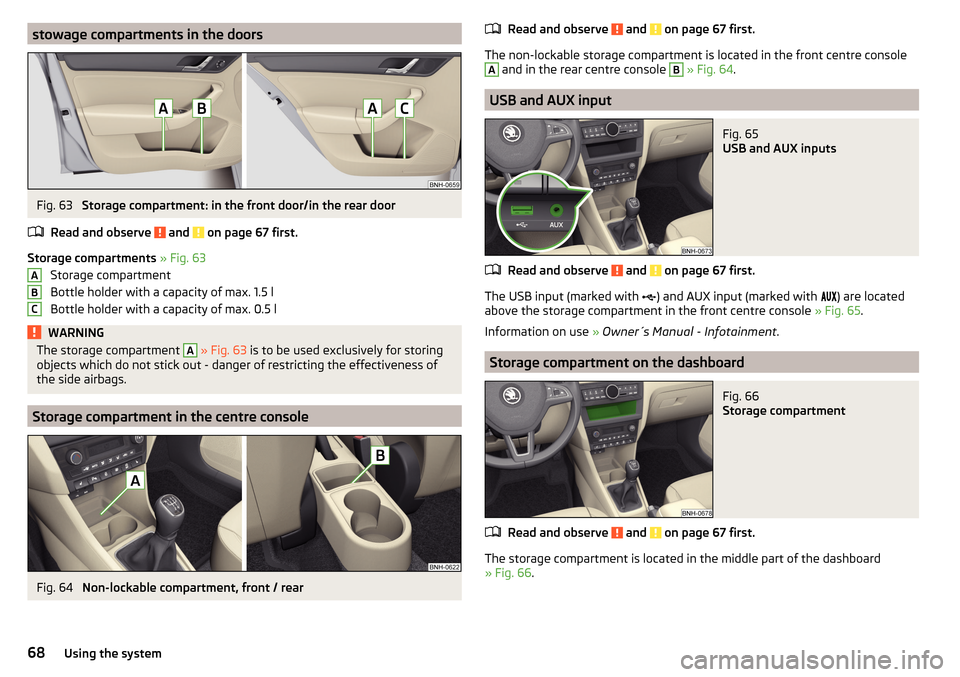
stowage compartments in the doorsFig. 63
Storage compartment: in the front door/in the rear door
Read and observe
and on page 67 first.
Storage compartments » Fig. 63
Storage compartment
Bottle holder with a capacity of max. 1.5 l
Bottle holder with a capacity of max. 0.5 l
WARNINGThe storage compartment A » Fig. 63 is to be used exclusively for storing
objects which do not stick out - danger of restricting the effectiveness of
the side airbags.
Storage compartment in the centre console
Fig. 64
Non-lockable compartment, front / rear
ABCRead and observe and on page 67 first.
The non-lockable storage compartment is located in the front centre console
A
and in the rear centre console
B
» Fig. 64 .
USB and AUX input
Fig. 65
USB and AUX inputs
Read and observe and on page 67 first.
The USB input (marked with
) and AUX input (marked with
) are located
above the storage compartment in the front centre console » Fig. 65.
Information on use » Owner´s Manual - Infotainment .
Storage compartment on the dashboard
Fig. 66
Storage compartment
Read and observe and on page 67 first.
The storage compartment is located in the middle part of the dashboard
» Fig. 66 .
68Using the system
Page 75 of 184
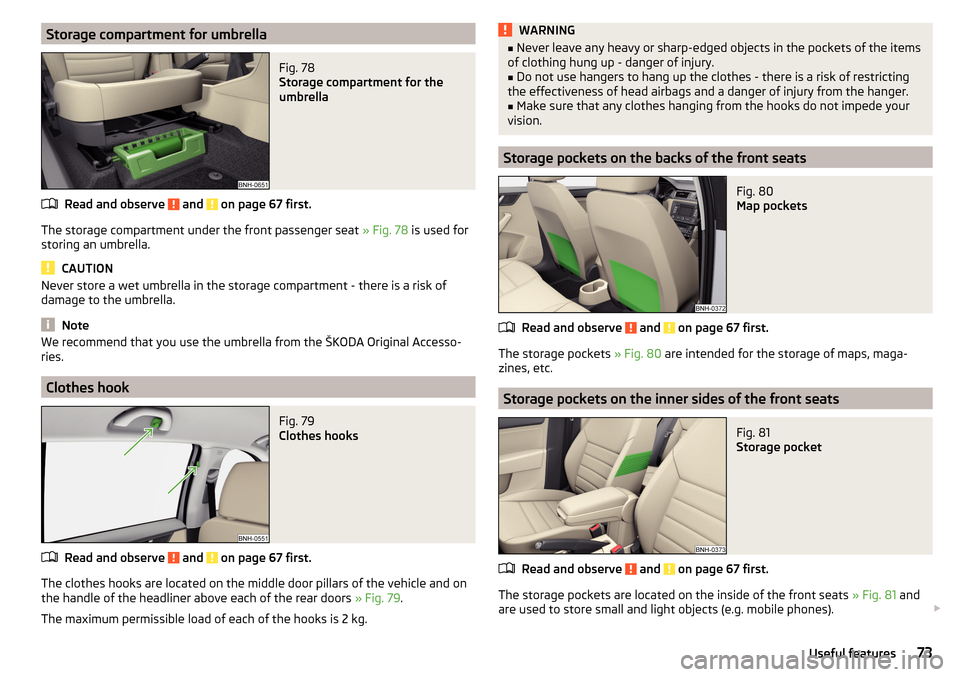
Storage compartment for umbrellaFig. 78
Storage compartment for the
umbrella
Read and observe and on page 67 first.
The storage compartment under the front passenger seat » Fig. 78 is used for
storing an umbrella.
CAUTION
Never store a wet umbrella in the storage compartment - there is a risk of
damage to the umbrella.
Note
We recommend that you use the umbrella from the ŠKODA Original Accesso-
ries.
Clothes hook
Fig. 79
Clothes hooks
Read and observe and on page 67 first.
The clothes hooks are located on the middle door pillars of the vehicle and on the handle of the headliner above each of the rear doors » Fig. 79.
The maximum permissible load of each of the hooks is 2 kg.
WARNING■ Never leave any heavy or sharp-edged objects in the pockets of the items
of clothing hung up - danger of injury.■
Do not use hangers to hang up the clothes - there is a risk of restricting
the effectiveness of head airbags and a danger of injury from the hanger.
■
Make sure that any clothes hanging from the hooks do not impede your
vision.
Storage pockets on the backs of the front seats
Fig. 80
Map pockets
Read and observe and on page 67 first.
The storage pockets » Fig. 80 are intended for the storage of maps, maga-
zines, etc.
Storage pockets on the inner sides of the front seats
Fig. 81
Storage pocket
Read and observe and on page 67 first.
The storage pockets are located on the inside of the front seats » Fig. 81 and
are used to store small and light objects (e.g. mobile phones).
73Useful features