display SKODA ROOMSTER 2010 1.G Owner's Guide
[x] Cancel search | Manufacturer: SKODA, Model Year: 2010, Model line: ROOMSTER, Model: SKODA ROOMSTER 2010 1.GPages: 231, PDF Size: 12.91 MB
Page 91 of 231
Starting-off and Driving
90
switch on again after some time if the co olant temperature rises because of an accu-
mulation of heat in the engine or if the engine is warm and the engine compartment is
additionally heated by strong sunlight.
This is why particular care is required when carrying out any work in the engine
compartment page 162, “Working in the engine compartment”.
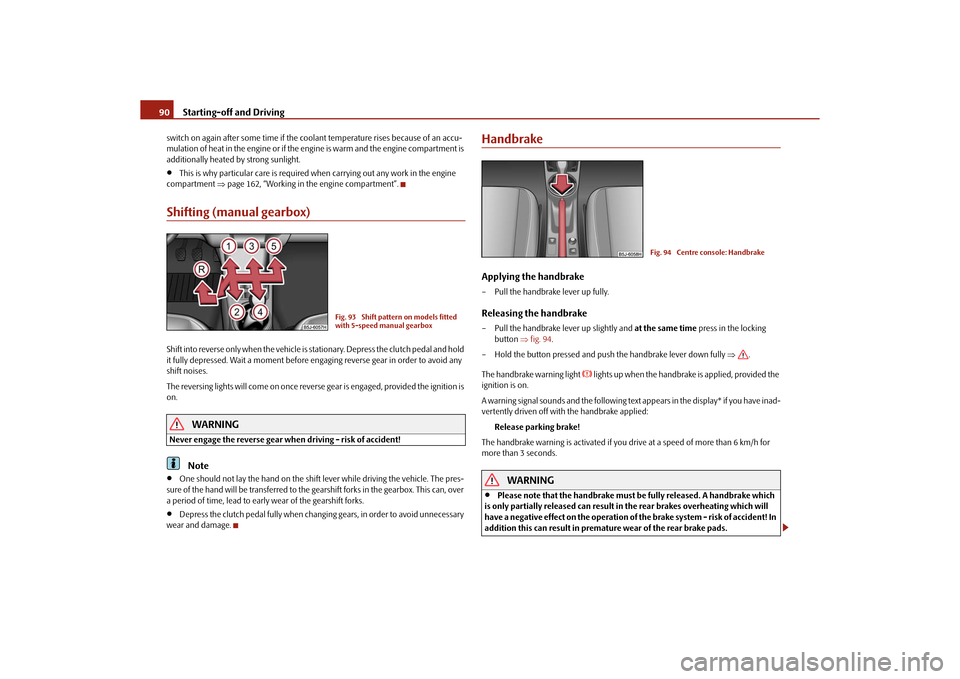
Shifting (manual gearbox)Shift into reverse only when the vehicle is stationary. Depress the clutch pedal and hold
it fully depressed. Wait a moment before en gaging reverse gear in order to avoid any
shift noises.
The reversing lights will come on once reverse gear is engaged, provided the ignition is
on.
WARNING
Never engage the reverse gear when driving - risk of accident!
Note
One should not lay the hand on the shift lever while driving the vehicle. The pres-
sure of the hand will be transferred to the gearshift forks in the gearbox. This can, over
a period of time, lead to early wear of the gearshift forks.
Depress the clutch pedal fully when changi ng gears, in order to avoid unnecessary
wear and damage.
HandbrakeApplying the handbrake– Pull the handbrake lever up fully.Releasing the handbrake– Pull the handbrake lever up slightly and at the same time press in the locking
button fig. 94 .
– Hold the button pressed and push the handbrake lever down fully .
The handbrake warning light
lights up when the handbrak e is applied, provided the
ignition is on.
A warning signal sounds and the following text appears in the display* if you have inad-
vertently driven off with the handbrake applied:
Release parking brake!
The handbrake warning is activated if you drive at a speed of more than 6 km/h for
more than 3 seconds.
WARNING
Please note that the handbrake must be fully released. A handbrake which
is only partially released can result in the rear brakes overheating which will
have a negative effect on the operation of the brake system - risk of accident! In
addition this can result in premature wear of the rear brake pads.
Fig. 93 Shift pattern on models fitted
with 5-speed manual gearbox
Fig. 94 Centre console: Handbrake
s16g.4.book Page 90 Wednesda y, February 10, 2010 3:53 PM
Page 96 of 231
Automatic gearbox95
Using the system
Safety
Driving Tips
General Maintenance
Breakdown assistance
Praktik
Technical Data
– Press the Shiftlock button (button in ha
ndle of the selector lever), move the
selector lever into the desired position, e.g. in D, and then release the Shiftlock
button.
– Release the brake pedal and depress the accelerator .
Stop– The selector lever position N does not have to be selected when stopping just for
a short time, such as at a cross roads. It is absolutely sufficient to hold the stopped
vehicle stationary by depressing the foot brake. The engine can, however, be
allowed just to idle.Parking– Depress the brake pedal and hold it depressed.
– Apply the handbrake firmly.
– Press and Shiftlock button in the selector lever, move the selector lever to P and
then release the Shiftlock button.
The engine can only be started when the selector lever is in position P or N page 88.
At temperatures below -10 °C the engine can only be started in the selector lever posi-
tion P.
It is sufficient to engage selector lever position P when parking on a flat surface. When
parking on a slope you should first apply the handbrake firmly and then move the
selector lever into position P. This is to ensure that there is no excessive pressure acting
on the lock mechanism and that it is easier to subsequently move the selector lever out
of position P .
If the selector lever position N is selected by accident while driving it is first necessary
to release pressure on the accelerator pedal and wait for idling speed of the engine to
be reached before engaging a drive position in the selector lever.
WARNING
Do not depress the accelerator when changing the position of the selector
lever if the car is stationary and the engine is running - risk of accident!
Never move the selector lever into position R or P when driving - risk of an
accident!
If you are stopping at a hill (downhill section), never try to hold the car
stationary with the gear engaged by mean s of the “accelerator”, this means by
letting the clutch slip. This can lead to ov erheating of the clutch. If there is a risk
of overheating of the clutch due to overlo ad, the clutch is opened automatically
and the vehicle rolls backward - risk of accident!
If yo u m us t s to p a t a sl ope , d e pre s s a nd ho ld t he b ra ke pe d a l , s o t ha t y ou c a n
prevent the vehicle from rolling back.Caution
The double clutch on the automatic gear box DSG is equipped with an overload
protection. If you make use of the uphill func tion on a vehicle which is stationary or
driving slowly uphill, it will result in an increase of thermal stress of the clutches.
In the event that they overheat, the warning light
and a warning text page 23
appear in the information display*. In such a case bring the vehicle to a stop, switch off
the engine and wait until the warning light and the warning go out - risk of gearbox
damage! You can continue the trip as soon as the warning light and the warning go
out.
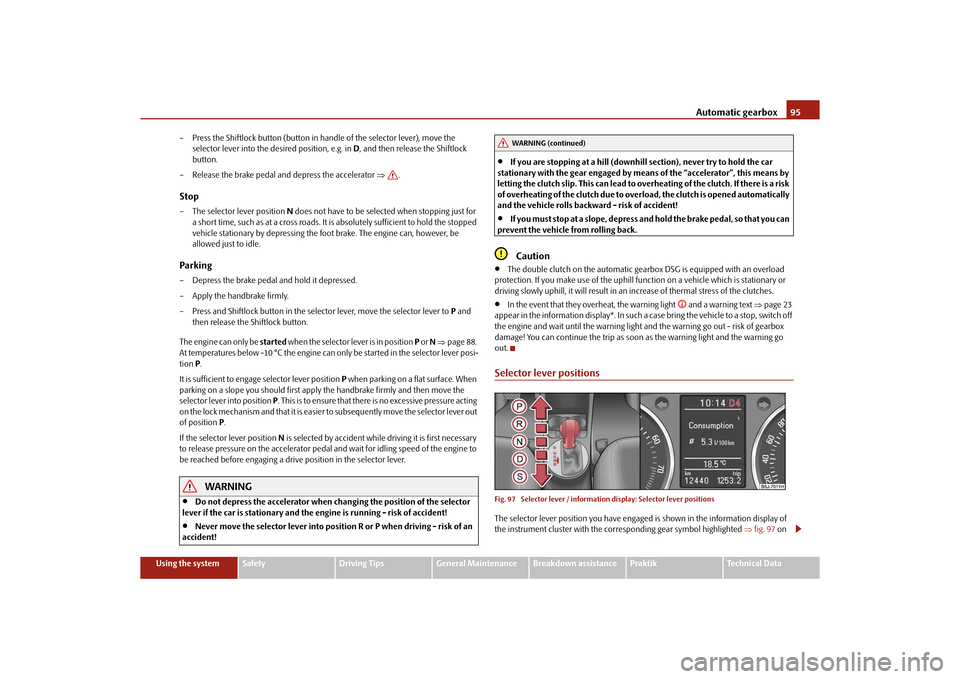
Selector lever positionsFig. 97 Selector lever / information display: Se lector lever positionsThe selector lever position you have engaged is shown in the information display of
the instrument cluster with the corresponding gear symbol highlighted fig. 97 on
WARNING (continued)
s16g.4.book Page 95 Wednesda y, February 10, 2010 3:53 PM
Page 97 of 231
Automatic gearbox
96
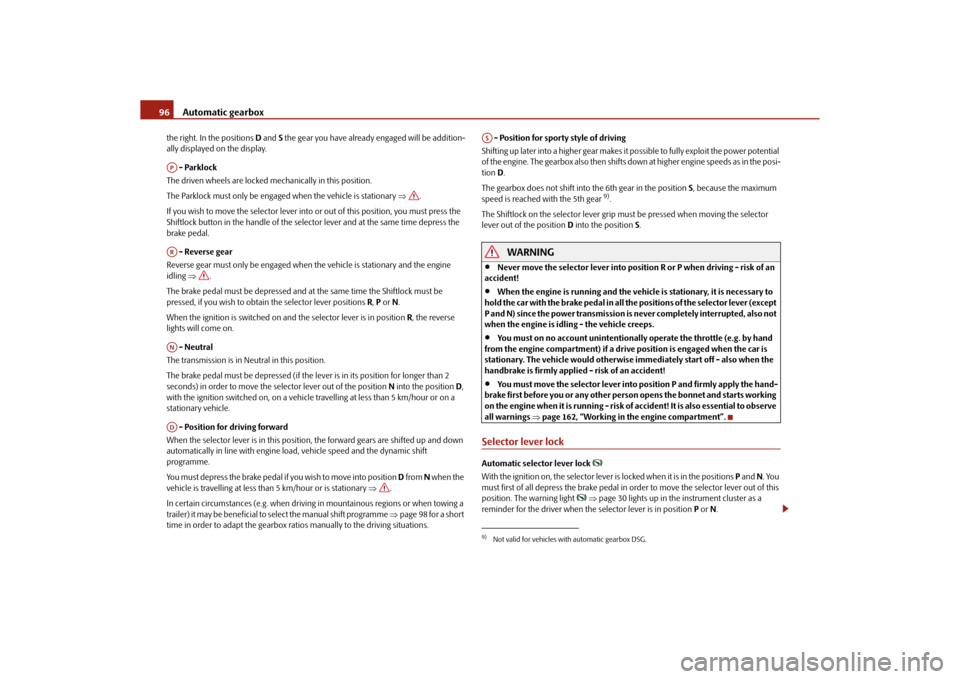
the right. In the positions D and S the gear you have already engaged will be addition-
ally displayed on the display.
- Parklock
The driven wheels are locked mechanically in this position.
The Parklock must only be engage d when the vehicle is stationary .
If you wish to move the selector lever into or out of this position, you must press the
Shiftlock button in the handle of the selector lever and at the same time depress the
brake pedal.
- Reverse gear
Reverse gear must only be engaged when the vehicle is stationary and the engine
idling .
The brake pedal must be depressed and at the same time the Shiftlock must be
pressed, if you wish to obtain the selector lever positions R, P or N.
When the ignition is switched on an d the selector lever is in position R, the reverse
lights will come on.
- Neutral
The transmission is in Neutral in this position.
The brake pedal must be depressed (if the le ver is in its position for longer than 2
seconds) in order to move the selector lever out of the position N into the position D,
with the ignition switched on, on a vehicle travelling at less than 5 km/hour or on a
stationary vehicle.
- Position for driving forward
When the selector lever is in this position , the forward gears are shifted up and down
automatically in line with engine lo ad, vehicle speed and the dynamic shift
programme.
You must depress the brake pedal if you wish to move into position D from N when the
vehicle is travelling at less th an 5 km/hour or is stationary .
In certain circumstances (e.g. when driving in mountainous regions or when towing a
trailer) it may be beneficial to select the manual shift programme page 98 for a short
time in order to adapt the gearbox rati os manually to the driving situations. - Position for sporty style of driving
Shifting up later into a higher gear makes it possible to fully exploit the power potential
of the engine. The gearbox also then shifts down at higher engine speeds as in the posi-
tion D.
The gearbox does not shift into the 6th gear in the position S, because the maximum
speed is reached with the 5th gear
9).
The Shiftlock on the selector lever grip mu st be pressed when moving the selector
lever out of the position D into the position S.
WARNING
Never move the selector lever into position R or P when driving - risk of an
accident!
When the engine is running and the vehi cle is stationary, it is necessary to
hold the car with the brake pedal in all the positions of the selector lever (except
P and N) since the power transmission is never completely interrupted, also not
when the engine is idling - the vehicle creeps.
You must on no account unintentionally operate the throttle (e.g. by hand
from the engine compartment) if a driv e position is engaged when the car is
stationary. The vehicle would otherwise immediately start off - also when the
handbrake is firmly applied - risk of an accident!
You must move the selector lever into position P and firmly apply the hand-
brake first before you or any other person opens the bonnet and starts working
on the engine when it is running - risk of accident! It is also essential to observe
all warnings page 162, “Working in the engine compartment”.
Selector lever lockAutomatic selector lever lock
With the ignition on, the selector lever is locked when it is in the positions P and N. You
must first of all depress the brake pedal in or der to move the selector lever out of this
position. The warning light
page 30 lights up in the instrument cluster as a
reminder for the driver when the selector lever is in position P or N.
APARANAD
9)Not valid for vehicles with automatic gearbox DSG.AS
s16g.4.book Page 96 Wednesda y, February 10, 2010 3:53 PM
Page 99 of 231

Automatic gearbox
98
Tiptronic
The Tiptronic allows the driver to also shift gears manually.Fig. 98 Manual shifting: Selector lever / large information displayThe selector lever position you have engaged is indicated in the information display of
the instrument cluster together with the engaged gear fig. 98 on the right.Switching over to manual shifting– Push the selector lever to the right out of position D. After switching over, the
current engaged gear is indicated in the display.Shifting up gears– One-touch forward of the selector lever (in the Tiptronic position) fig. 98 .Shifting down gears– One-touch back of the selector lever (in the Tiptronic position) .
It is possible to switch over to manual both when the car is stationary and also when
driving.
When you accelerate, the gearbox shifts up automatically into the higher gear just
before the maximum permissible engine speed is reached.
If you select a lower gear, the automatic gearbox does not shift down until there is no
risk of the engine overrevving.
If you operate the kickdown function, the gearbox shifts into a lower gear in line with
the vehicle speed and engine speed.
Emergency programme
An emergency programme exists in the event of a fault in the system.The gearbox operates in a corresponding emergency programme if there are func-
tional faults in the gearbox electronics. This is indicated by all of the segments in the
display lighting up or going out.
A functional fault can ha ve the following effect:
The gearbox only shifts into certain gears.
The reverse gear R cannot be used.
The manual shift programme (Tiptronic) is switched off in the emergency mode.
If the gearbox has switched over to emergency mode, drive to the nearest
specialist garage in order to have the fault rectified.
Selector lever-emergency unlockingIn case of interruption of the power supply (e.g. flat vehicle battery, defective fuse) or
defect of the selector lever lock, the select or lever can no longer be shifted from the
position P in the normal way and the vehicle ca n no longer be moved. The selector
lever must be unlocked in case of emergency.
– Apply the handbrake firmly.
– Carefully pull up the front left and right cover.
– Pull up rear cover.
– Use the finger to press the yellow plastic part downwards fig. 99 .
A+
A-
Fig. 99 Selector lever-emergency
unlocking
s16g.4.book Page 98 Wednesda y, February 10, 2010 3:53 PM
Page 103 of 231
Communication
102
To ensure an optimum signal transmission, always leave the telephone with the
adapter* in the telephone mount.
Furthermore the volume can be changed indivi dually during the call at any time with
the button for setting the radio* or navigation system* or with the buttons on the
multifunction steering wheel*.
WARNING
Pay attention primarily to the traffic situation! As the driver you are fully
responsible for road safety. Use the teleph one system only to such an extent, so
that you are in full control of your vehicle at any time.
Note
Please also refer to the additional instructions page 101.
Should you have any questions, please contact an authorised Škoda Service
Par tner.
Phone PhonebookA phone phonebook is part of the mobile ph one preinstallation with voice control. In
the phone phonebook there are 2 500 free memory locations available. This phone
phonebook can be used in line with the mobile telephone.
After the first connection of the telephone, the system begins to load the phone book
from the phone and the SIM card into the memory of the control unit.
Each time the telephone has established a new connection with the handsfree-system,
an update of the relevant phone book is performed. The updating can take a few
minutes. During this time the phone book, which was stored after the last update was
completed, is available. Newly stored te lephone numbers are only shown after the
updating has ended.
If the number of contacts loaded exceed s 2 500, the phone book is not complete.
If a telephone event (e.g. incoming or outgoing call, dialogue of the voice control)
occurs during the updating pr ocedure, the updating is interrupted. After the telephone
event has ended, the updating starts anew.
Note
It a yellow or red warning symbol lights up in the information display, the menu phone-
book cannot be selected.Connection of the mobile phone with the handsfree-systemIn order to connect a mobile phone with the handsfree-system, it is necessary to
connect the telephone to the handsfree-system. Detailed information on this is
provided in the operating instructions of your mobile phone. The following steps must
be carried out for the connection:
– Activate the Bluetooth
® in your telephone and the visibility of the mobile phone.
– Switch on the ignition.
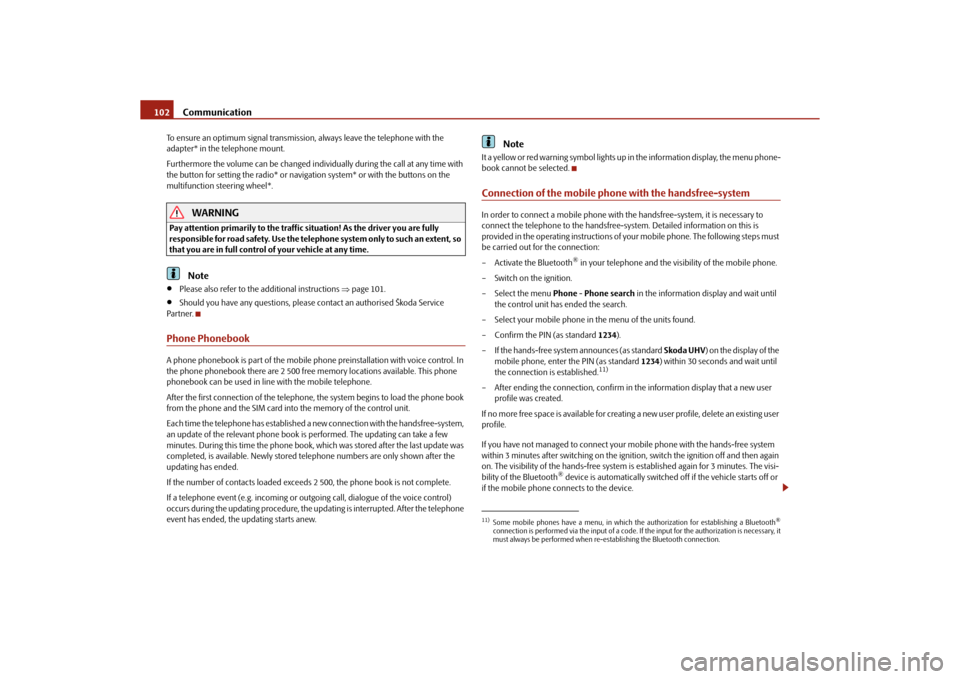
– Select the menu Phone - Phone search in the information display and wait until
the control unit has ended the search.
– Select your mobile phone in the menu of the units found.
–Confirm the PIN (as standard 1234).
– If the hands-free system announces (as standard Skoda UHV) on the display of the
mobile phone, enter the PIN (as standard 1234) within 30 seconds and wait until
the connection is established.
11)
– After ending the connection, confirm in the information display that a new user profile was created.
If no more free space is available for creating a new user profile, delete an existing user
profile.
If you have not managed to connect your mobile phone with the hands-free system
within 3 minutes after switching on the ignition, switch the ignition off and then again
on. The visibility of the hands-free system is established again for 3 minutes. The visi-
bility of the Bluetooth
® device is automatically switched off if the vehicle starts off or
if the mobile phone connects to the device.
11)Some mobile phones have a menu, in which the authorization for establishing a Bluetooth
®
connection is performed via the input of a code. If the input for the authorization is necessary, it
must always be performed when re-e stablishing the Bluetooth connection.
s16g.4.book Page 102 Wednesday, February 10, 2010 3:53 PM
Page 104 of 231
Communication103
Using the system
Safety
Driving Tips
General Maintenance
Breakdown assistance
Praktik
Technical Data
During the connecting procedur
e, no other mobile phone may be connected with the
hands-free system.
Up to four mobile phones can be paired to the hands-free system, whereby only one
mobile phone can communicate with the hands-free system.
Connection with an already paired mobile phone
After switching on the ignition, the connect ion is automatically established for the
already paired mobile phone
11). Check on the mobile unit if the automatic connection
was established.
Ending the connection
By withdrawing the ignition key.
By disconnecting the device in the information display.
By disconnecting the device in the mobile phone.
Solving connection problems
If the system announces No paired phone found , check the operating state of the
telephone:
Is the telephone switched on?
Is the PIN code entered?
Is Bluetooth
® active?
Is the visibility of the mobile phone active?
Was the telephone already paired with the handsfree-system?
WARNING
In the event of air transport, the Bluetooth
® function of the handsfree-system
must be switched off by a specialist garage!
Note
Not valid for all mobile phones which enable a communication via Bluetooth
®.
You can ask at an authorised Škoda Service Partner if your telephone is compatible
with the universal telephone preinstallation GSM II.
Please operate your mobile phone exclusiv ely with a suitable adapter in order to
keep a low radiation in the vehicle.
Inserting the mobile phone into the adapter ensures an optimal sending and
receiving power and offers at the same ti me the advantage of the battery charging.
The range of the Bluetooth
® connection to the handsfree-system is restricted to
the vehicle interior. The range is dependent on local factors, e.g. obstacles between the
devices and mutual interferences with other de vices. If your mobile phone is e.g. in a
jacket pocket, this can lead to diffic ulties when establishing the Bluetooth
® connection
with the handsfree-system or the data transfer.
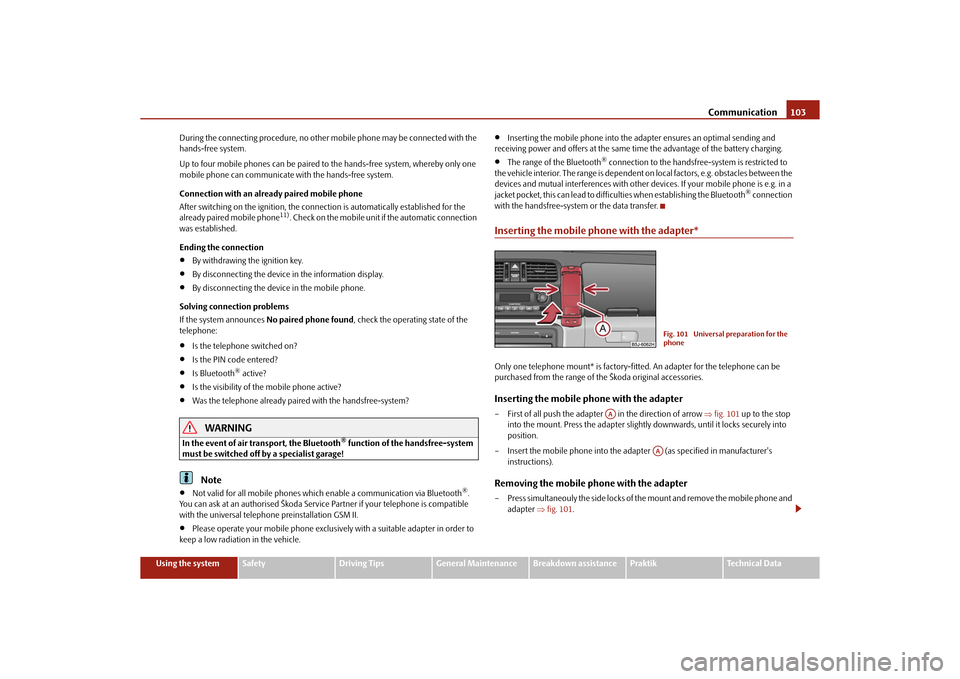
Inserting the mobile phone with the adapter*Only one telephone mount* is factory-fitted. An adapter for the telephone can be
purchased from the range of the Škoda original accessories.Inserting the mobile phone with the adapter– First of all push the adapter in the direction of arrow fig. 101 up to the stop
into the mount. Press the adapter slightly downwards, until it locks securely into
position.
– Insert the mobile phone into the adapter (as specified in manufacturer's instructions).Removing the mobile phone with the adapter– Press simultaneouly the side locks of the mount and remove the mobile phone and adapter fig. 101 .
Fig. 101 Universal preparation for the
phone
AA
AA
s16g.4.book Page 103 Wednesda y, February 10, 2010 3:53 PM
Page 106 of 231
Communication105
Using the system
Safety
Driving Tips
General Maintenance
Breakdown assistance
Praktik
Technical Data
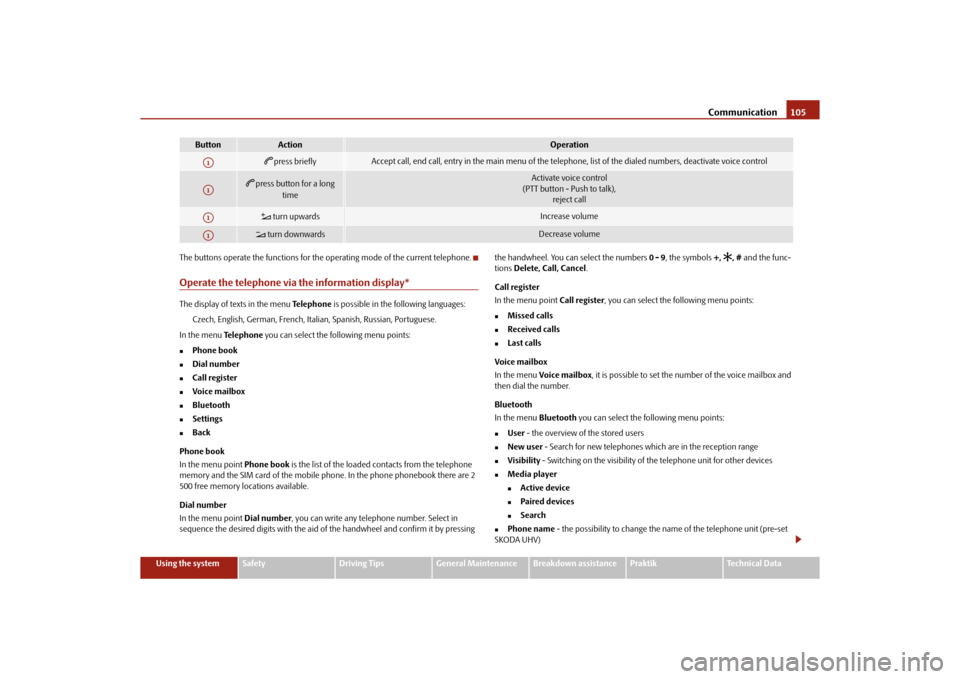
The buttons operate the functions for the operating mode of the current telephone.
Operate the telephone via the information display*The display of texts in the menu
Te l e p h o n e is possible in the following languages:
Czech, English, German, French, Italian, Spanish, Russian, Portuguese.
In the menu Te l e p h o n e you can select the following menu points:
Phone book
Dial number
Call register
Voice mailbox
Bluetooth
Settings
Back
Phone book
In the menu point Phone book is the list of the loaded contacts from the telephone
memory and the SIM card of the mobile phone. In the phone phonebook there are 2
500 free memory locations available.
Dial number
In the menu point Dial number, you can write any telephone number. Select in
sequence the desired digits with the aid of the handwheel and confirm it by pressing the handwheel. You can select the numbers 0 - 9
, the symbols +,
, # and the func-
tions Delete, Call, Cancel .
Call register
In the menu point Call register, you can select the following menu points:
Missed calls
Received calls
Last calls
Voice mailbox
In the menu Voice mailbox , it is possible to set the number of the voice mailbox and
then dial the number.
Bluetooth
In the menu Bluetooth you can select the following menu points:
User - the overview of the stored users
New user - Search for new telephones which are in the reception range
Visibility - Switching on the visibility of the telephone unit for other devices
Media player
Active device
Paired devices
Search
Phone name - the possibility to change the name of the telephone unit (pre-set
SKODA UHV)
Button
Action
Operation
press briefly
Accept call, end call, entry in the main menu of the telephone, list of the dialed numbers, deactivate voice control
press button for a long
time
Activate voice control
(PTT button - Push to talk), reject call
turn upwards
Increase volume
turn downwards
Decrease volume
A1A1A1A1
s16g.4.book Page 105 Wednesda y, February 10, 2010 3:53 PM
Page 123 of 231
Airbag system
122
Function of the side airbags
Risk of injury to the upper part of the body is reduced by fully inflated
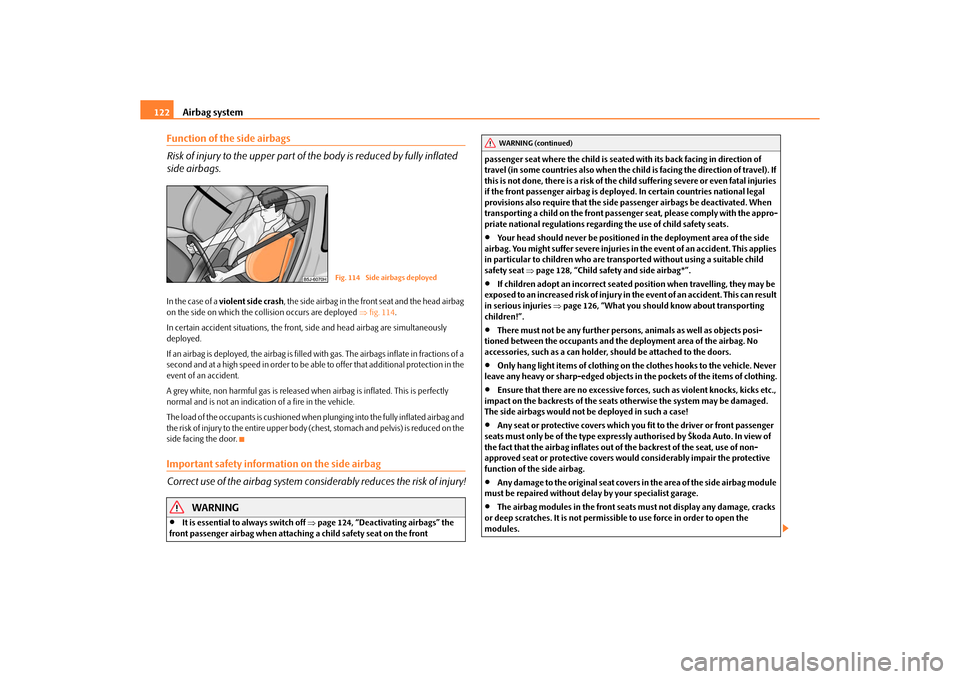
side airbags.In the case of a violent side crash , the side airbag in the front seat and the head airbag
on the side on which the collision occurs are deployed fig. 114 .
In certain accident situations, the front, side and head airbag are simultaneously
deployed.
If an airbag is deployed, the airbag is filled with gas. The airbags inflate in fractions of a
second and at a high speed in order to be able to offer that additional protection in the
event of an accident.
A grey white, non harmful gas is released when airbag is inflated. This is perfectly
normal and is not an indicati on of a fire in the vehicle.
The load of the occupants is cushioned when plunging into the fully inflated airbag and
the risk of injury to the entire upper body (chest, stomach and pelvis) is reduced on the
side facing the door.Important safety information on the side airbag
Correct use of the airbag system cons iderably reduces the risk of injury!
WARNING
It is essential to always switch off page 124, “Deactivating airbags” the
front passenger airbag when attachin g a child safety seat on the front passenger seat where the child is seated
with its back facing in direction of
travel (in some countries also when the chil d is facing the direction of travel). If
this is not done, there is a risk of the ch ild suffering severe or even fatal injuries
if the front passenger airbag is deploy ed. In certain countries national legal
provisions also require that the side passenger airbags be deactivated. When
transporting a child on the front passenger seat, please comply with the appro-
priate national regulations regarding the use of child safety seats.
Your head should never be positioned in the deployment area of the side
airbag. You might suffer severe injuries in the event of an accident. This applies
in particular to children who are transported without using a suitable child
safety seat page 128, “Child safety and side airbag*”.
If children adopt an incorrect seated position when travelling, they may be
exposed to an increased risk of injury in the event of an accident. This can result
in serious injuries page 126, “What you should know about transporting
children!”.
There must not be any further persons, animals as well as objects posi-
tioned between the occupants and the deployment area of the airbag. No
accessories, such as a can holder, should be attached to the doors.
Only hang light items of clothing on the clothes hooks to the vehicle. Never
leave any heavy or sharp-ed ged objects in the pockets of the items of clothing.
Ensure that there are no excessive forc es, such as violent knocks, kicks etc.,
impact on the backrests of the seats otherwise the system may be damaged.
The side airbags would not be deployed in such a case!
Any seat or protective covers which you fit to the driver or front passenger
seats must only be of the type expressly authorised by Škoda Auto. In view of
the fact that the airbag inflates out of the backrest of the seat, use of non-
approved seat or protective covers would considerably impair the protective
function of the side airbag.
Any damage to the original seat covers in the area of the side airbag module
must be repaired without delay by your specialist garage.
The airbag modules in the front seats must not display any damage, cracks
or deep scratches. It is not permissible to use force in order to open the
modules.
Fig. 114 Side airbags deployed
WARNING (continued)
s16g.4.book Page 122 Wednesda y, February 10, 2010 3:53 PM
Page 126 of 231
Airbag system125
Using the system
Safety
Driving Tips
General Maintenance
Breakdown assistance
Praktik
Technical Data
switching off the airbag is indicated in the middle of the dash panel on the right by
the lighting up of the indicator light in the display
fig. 117 .
Note
A specialist garage will be able to advise you whether national legislation in your
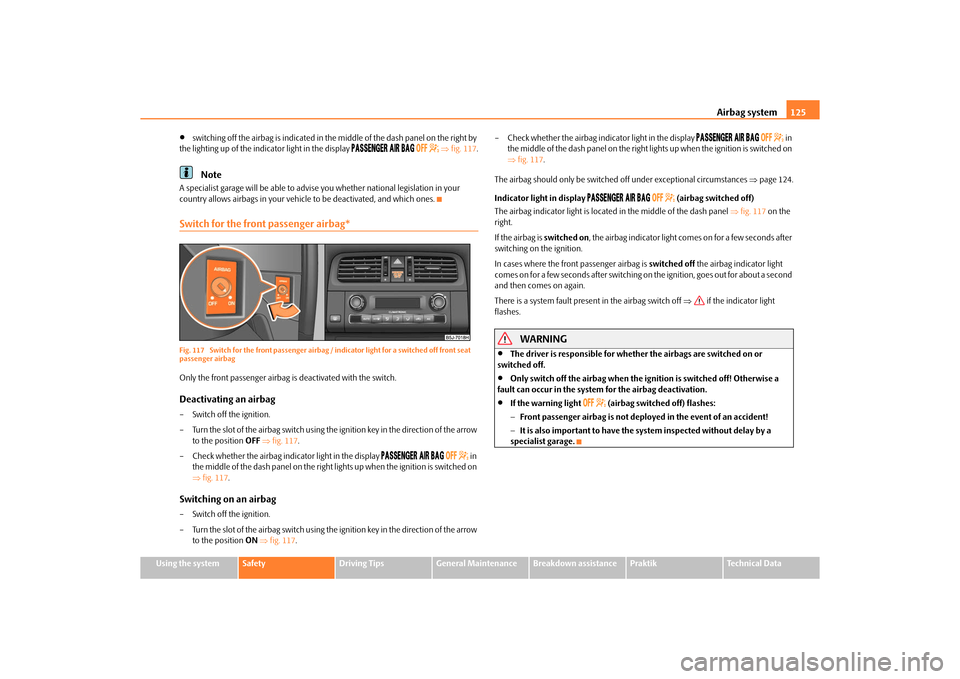
country allows airbags in your vehicl e to be deactivated, and which ones.Switch for the front passenger airbag*Fig. 117 Switch for the front passenger airbag / indicator light for a switched off front seat
passenger airbagOnly the front passenger airbag is deactivated with the switch.Deactivating an airbag– Switch off the ignition.
– Turn the slot of the airbag switch using the ignition key in the direction of the arrow
to the position OFF fig. 117 .
– Check whether the airbag indicator light in the display
in
the middle of the dash panel on the right lights up when the ignition is switched on
fig. 117 .
Switching on an airbag– Switch off the ignition.
– Turn the slot of the airbag switch using the ignition key in the direction of the arrow
to the position ON fig. 117 . – Check whether the airbag indicator light in the display
in
the middle of the dash panel on the right lights up when the ignition is switched on
fig. 117 .
The airbag should only be switched off under exceptional circumstances page 124.
Indicator light in display
(airbag switched off)
The airbag indicator light is located in the middle of the dash panel fig. 117 on the
right.
If the airbag is switched on, the airbag indicator light comes on for a few seconds after
switching on the ignition.
In cases where the front passenger airbag is switched off the airbag indicator light
comes on for a few seconds after switching on the ignition, goes out for about a second
and then comes on again.
There is a system fault present in the airbag switch off if the indicator light
flashes.
WARNING
The driver is responsible for whethe r the airbags are switched on or
switched off.
Only switch off the airbag when the ignition is switched off! Otherwise a
fault can occur in the system for the airbag deactivation.
If the warning light
(airbag switched off) flashes:
Front passenger airbag is not deployed in the event of an accident!
It is also important to have the system inspected without delay by a
specialist garage.
s16g.4.book Page 125 Wednesda y, February 10, 2010 3:53 PM
Page 144 of 231
Driving and the Environment143
Using the system
Safety
Driving Tips
General Maintenance
Breakdown assistance
Praktik
Technical Data
guidelines given in this chapter in order to
make best use of these characteristics and
to maintain their effectiveness.
Looking ahead when driving
A vehicle's highest fuel consumption occurs it accelerates.Avoid accelerating and braking unnecessarily. If you drive with forsight you will not
need to brake so often and will also then not have to accelerate so much. Let your
vehicle coast to a stop, for example, if this is possible, when you see that the next set of
traffic lights is at red.Shifting gears and saving energy
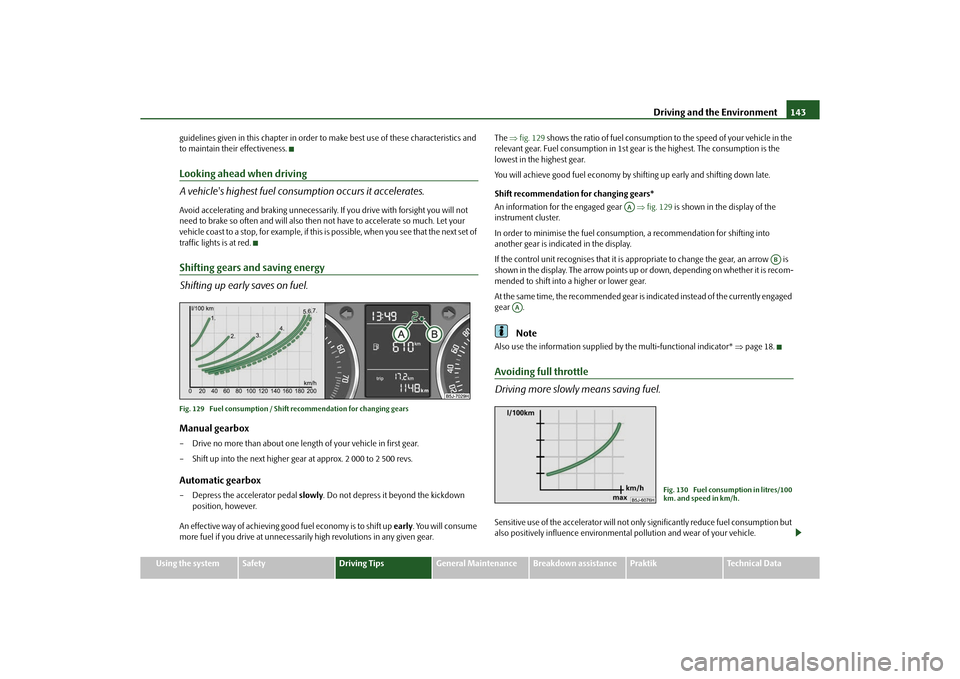
Shifting up early saves on fuel.Fig. 129 Fuel consumption / Shift recommendation for changing gearsManual gearbox– Drive no more than about one length of your vehicle in first gear.
– Shift up into the next higher gear at approx. 2 000 to 2 500 revs.Automatic gearbox– Depress the accelerator pedal slowly. Do not depress it beyond the kickdown
position, however.
An effective way of achieving good fuel economy is to shift up early. You will consume
more fuel if you drive at unnecessaril y high revolutions in any given gear. The
fig. 129 shows the ratio of fuel consumption to the speed of your vehicle in the
relevant gear. Fuel consumption in 1st gear is the highest. The consumption is the
lowest in the highest gear.
You will achieve good fuel economy by shif ting up early and shifting down late.
Shift recommendation for changing gears*
An information for the engaged gear fig. 129 is shown in the display of the
instrument cluster.
In order to minimise the fuel consumptio n, a recommendation for shifting into
another gear is indicated in the display.
If the control unit recognises that it is appropriate to change the gear, an arrow is
shown in the display. The arrow points up or down, depending on whether it is recom-
mended to shift into a higher or lower gear.
At the same time, the recommended gear is indicated instead of the currently engaged
gear .
Note
Also use the information supplied by the multi-functional indicator* page 18.Avoiding full throttle
Driving more slowly means saving fuel.Sensitive use of the accelerator will not only significantly reduce fuel consumption but
also positively influence environmenta l pollution and wear of your vehicle.
AA
AB
AA
Fig. 130 Fuel consumption in litres/100
km. and speed in km/h.
s16g.4.book Page 143 Wednesday, February 10, 2010 3:53 PM