tow SKODA ROOMSTER 2010 1.G Owner's Manual
[x] Cancel search | Manufacturer: SKODA, Model Year: 2010, Model line: ROOMSTER, Model: SKODA ROOMSTER 2010 1.GPages: 231, PDF Size: 12.91 MB
Page 4 of 231
Contents3
Using the system
Safety
Driving Tips
General Maintenance
Breakdown assistance
Praktik
Technical Data
ContentsLayout of this Owner's Manual
(explanations)
. . . . . . . . . . . . . . . . . . . . . . . . . .
Using the system
. . . . . . . . . . . . . . . . . . . . . .
Cockpit
. . . . . . . . . . . . . . . . . . . . . . . . . . . . . . . . . . . . . . . .
General view . . . . . . . . . . . . . . . . . . . . . . . . . . . . . . . . .
The brief instruction
. . . . . . . . . . . . . . . . . . . . . . . . . .
Basic functions and important information . . . . .
Instruments and warning lights
. . . . . . . . . . . . . . .
Overview of the instrument cluster . . . . . . . . . . . . .
Engine revolutions counter . . . . . . . . . . . . . . . . . . . .
Speedometer . . . . . . . . . . . . . . . . . . . . . . . . . . . . . . . .
Coolant temperature gauge* . . . . . . . . . . . . . . . . . .
Fuel gauge* . . . . . . . . . . . . . . . . . . . . . . . . . . . . . . . . . .
Counter for distance driven . . . . . . . . . . . . . . . . . . .
Service Interval Display . . . . . . . . . . . . . . . . . . . . . . .
Digital clock . . . . . . . . . . . . . . . . . . . . . . . . . . . . . . . . . .
Multi-functional indicator (onboard computer)*
MAXI DOT display (information display)* . . . . . . .
Auto Check Control . . . . . . . . . . . . . . . . . . . . . . . . . . .
Warning lights . . . . . . . . . . . . . . . . . . . . . . . . . . . . . . . .
Unlocking and locking
. . . . . . . . . . . . . . . . . . . . . . . .
Key . . . . . . . . . . . . . . . . . . . . . . . . . . . . . . . . . . . . . . . . . .
Locking . . . . . . . . . . . . . . . . . . . . . . . . . . . . . . . . . . . . . .
Child safety lock . . . . . . . . . . . . . . . . . . . . . . . . . . . . . .
Central locking system* . . . . . . . . . . . . . . . . . . . . . . .
Remote control* . . . . . . . . . . . . . . . . . . . . . . . . . . . . . .
Anti-theft alarm system* . . . . . . . . . . . . . . . . . . . . . .
Interior monitor* and Towing protection monitoring*
Electrical power windows* . . . . . . . . . . . . . . . . . . . .
Panorama roof* . . . . . . . . . . . . . . . . . . . . . . . . . . . . . .
Lights and Visibility
. . . . . . . . . . . . . . . . . . . . . . . . . . . .
Lights . . . . . . . . . . . . . . . . . . . . . . . . . . . . . . . . . . . . . . . .
Interior lighting . . . . . . . . . . . . . . . . . . . . . . . . . . . . . . .
Visibility . . . . . . . . . . . . . . . . . . . . . . . . . . . . . . . . . . . . . .
Windshield wiper and wash system . . . . . . . . . . . . .
Rear mirror . . . . . . . . . . . . . . . . . . . . . . . . . . . . . . . . . . .
Seats and Storage
. . . . . . . . . . . . . . . . . . . . . . . . . . . . . .
Front seats . . . . . . . . . . . . . . . . . . . . . . . . . . . . . . . . . . . .
Head restraints . . . . . . . . . . . . . . . . . . . . . . . . . . . . . . . .
Heating the front seats* . . . . . . . . . . . . . . . . . . . . . . .
Rear seats . . . . . . . . . . . . . . . . . . . . . . . . . . . . . . . . . . . .
Pedals . . . . . . . . . . . . . . . . . . . . . . . . . . . . . . . . . . . . . . . .
luggage compartment . . . . . . . . . . . . . . . . . . . . . . . . .
Variable loading floor in the luggage compartment*
Bicycle holder in the luggage compartment* . . . .
The roof luggage rack system* . . . . . . . . . . . . . . . . .
Front cup holder . . . . . . . . . . . . . . . . . . . . . . . . . . . . . .
Rear cup holder* . . . . . . . . . . . . . . . . . . . . . . . . . . . . . .
Parking ticket holder . . . . . . . . . . . . . . . . . . . . . . . . . . .
Ashtray* . . . . . . . . . . . . . . . . . . . . . . . . . . . . . . . . . . . . . .
Cigarette lighter* and power sockets* . . . . . . . . . .
Storage compartments . . . . . . . . . . . . . . . . . . . . . . . .
Heating and air conditioning system
. . . . . . . . . .
Air outlet vents . . . . . . . . . . . . . . . . . . . . . . . . . . . . . . . .
Recirculated air mode . . . . . . . . . . . . . . . . . . . . . . . . .
Heating . . . . . . . . . . . . . . . . . . . . . . . . . . . . . . . . . . . . . .
Climatic (semi-automatic air conditioning system)*
Climatronic* (automatic air conditioning) . . . . . . .
Starting-off and Driving
. . . . . . . . . . . . . . . . . . . . . . .
Setting steering wheel position . . . . . . . . . . . . . . . . .
Ignition lock . . . . . . . . . . . . . . . . . . . . . . . . . . . . . . . . . .
Starting the engine . . . . . . . . . . . . . . . . . . . . . . . . . . . .
Switching off the engine . . . . . . . . . . . . . . . . . . . . . . .
Shifting (manual gearbox) . . . . . . . . . . . . . . . . . . . . . .
Handbrake . . . . . . . . . . . . . . . . . . . . . . . . . . . . . . . . . . . Parking aid* . . . . . . . . . . . . . . . . . . . . . . . . . . . . . . . . . .
Cruise control system (CCS)* . . . . . . . . . . . . . . . . . .
Automatic gearbox
. . . . . . . . . . . . . . . . . . . . . . . . . . . .
Automatic gearbox* . . . . . . . . . . . . . . . . . . . . . . . . . .
Communication
. . . . . . . . . . . . . . . . . . . . . . . . . . . . . . .
Multifunction steering wheel* . . . . . . . . . . . . . . . . .
Universal telephone preinstallation GSM II* . . . . .
Voice control . . . . . . . . . . . . . . . . . . . . . . . . . . . . . . . . .
Music playback via Bluetooth® . . . . . . . . . . . . . . . .
Inputs AUX-IN* and MDI* . . . . . . . . . . . . . . . . . . . . .
Safety
. . . . . . . . . . . . . . . . . . . . . . . . . . . . . . . . . . . . . . .
Passive Safety
. . . . . . . . . . . . . . . . . . . . . . . . . . . . . . . . .
Basic information . . . . . . . . . . . . . . . . . . . . . . . . . . . . .
Correct seated position . . . . . . . . . . . . . . . . . . . . . . .
Seat belts
. . . . . . . . . . . . . . . . . . . . . . . . . . . . . . . . . . . . . .
Why seat belts? . . . . . . . . . . . . . . . . . . . . . . . . . . . . . . .
The physical principle of a frontal collision . . . . . .
Important safety information regarding the use of seat
belts . . . . . . . . . . . . . . . . . . . . . . . . . . . . . . . . . . . . . . . . .
How are seat belts correctly fastened? . . . . . . . . . .
Belt tensioner . . . . . . . . . . . . . . . . . . . . . . . . . . . . . . . .
Airbag system
. . . . . . . . . . . . . . . . . . . . . . . . . . . . . . . . .
Description of the airbag system . . . . . . . . . . . . . . .
Front airbags . . . . . . . . . . . . . . . . . . . . . . . . . . . . . . . . .
Side airbags* . . . . . . . . . . . . . . . . . . . . . . . . . . . . . . . . .
Head airbags* . . . . . . . . . . . . . . . . . . . . . . . . . . . . . . . .
Deactivating airbags . . . . . . . . . . . . . . . . . . . . . . . . . .
Transporting children safely
. . . . . . . . . . . . . . . . . .
What you should know about transporting children!
Child seat . . . . . . . . . . . . . . . . . . . . . . . . . . . . . . . . . . . .
Attaching a child seat using the “ISOFIX” system*
Attaching child seat using the “Top Tether” system
679910101515151616161717181822232534343535364041424345
4646515253555757585959626266687071717272727378787879818487878788899090
91929494100100101106107107109109109110113113113114115116118118119121123124126126128131132
s16g.4.book Page 3 Wednesda y, February 10, 2010 3:53 PM
Page 5 of 231
Contents
4
Driving Tips
. . . . . . . . . . . . . . . . . . . . . . . . . . . . . .
Intelligent Technology
. . . . . . . . . . . . . . . . . . . . . . . .
Electronic stability programme (ESP)* . . . . . . . . . .
Brakes . . . . . . . . . . . . . . . . . . . . . . . . . . . . . . . . . . . . . . .
Brake booster . . . . . . . . . . . . . . . . . . . . . . . . . . . . . . . .
Antilock brake system (ABS) . . . . . . . . . . . . . . . . . . .
Brake Assist* . . . . . . . . . . . . . . . . . . . . . . . . . . . . . . . . .
Uphill Start Assist* . . . . . . . . . . . . . . . . . . . . . . . . . . . .
Electrohydraulic power steering . . . . . . . . . . . . . . .
Tyre pressure monitoring system* . . . . . . . . . . . . . .
Diesel particle filter* (diesel engine) . . . . . . . . . . . .
Driving and the Environment
. . . . . . . . . . . . . . . . .
The first 1 500 kilometres and then afterwards . .
Catalytic converter . . . . . . . . . . . . . . . . . . . . . . . . . . . .
Driving in an economical and environmentally
conscious manner . . . . . . . . . . . . . . . . . . . . . . . . . . . .
Environmental compatibility . . . . . . . . . . . . . . . . . . .
Motoring abroad . . . . . . . . . . . . . . . . . . . . . . . . . . . . .
Avoiding damage to your vehicle . . . . . . . . . . . . . .
Driving through bodies of water on roads . . . . . . .
Towing a trailer
. . . . . . . . . . . . . . . . . . . . . . . . . . . . . . . .
Towing a trailer . . . . . . . . . . . . . . . . . . . . . . . . . . . . . . .
General Maintenance
. . . . . . . . . . . . . . .
Taking care of your ve hicle and cleaning the
vehicle
. . . . . . . . . . . . . . . . . . . . . . . . . . . . . . . . . . . . . . . . .
General . . . . . . . . . . . . . . . . . . . . . . . . . . . . . . . . . . . . . .
Care of the exterior of vehicle . . . . . . . . . . . . . . . . . .
Care of the interior of vehicle . . . . . . . . . . . . . . . . . .
Fuel
. . . . . . . . . . . . . . . . . . . . . . . . . . . . . . . . . . . . . . . . . . . .
Petrol . . . . . . . . . . . . . . . . . . . . . . . . . . . . . . . . . . . . . . . .
Diesel . . . . . . . . . . . . . . . . . . . . . . . . . . . . . . . . . . . . . . .
Refuelling . . . . . . . . . . . . . . . . . . . . . . . . . . . . . . . . . . . .
Inspecting and replenishing
. . . . . . . . . . . . . . . . . .
Engine compartment . . . . . . . . . . . . . . . . . . . . . . . . .
Engine oil . . . . . . . . . . . . . . . . . . . . . . . . . . . . . . . . . . . . Cooling system . . . . . . . . . . . . . . . . . . . . . . . . . . . . . . .
Brake fluid . . . . . . . . . . . . . . . . . . . . . . . . . . . . . . . . . . . .
Battery . . . . . . . . . . . . . . . . . . . . . . . . . . . . . . . . . . . . . . .
Windshield washer system . . . . . . . . . . . . . . . . . . . . .
Wheels and Tyres
. . . . . . . . . . . . . . . . . . . . . . . . . . . . . .
Wheels . . . . . . . . . . . . . . . . . . . . . . . . . . . . . . . . . . . . . . .
Accessories, changes and replacement of partsAccessories and replacement parts . . . . . . . . . . . . .
Technical changes . . . . . . . . . . . . . . . . . . . . . . . . . . . . .
Vehicles of category N1 . . . . . . . . . . . . . . . . . . . . . . . .Breakdown assistance
. . . . . . . . . . . . . .
Breakdown assistance
. . . . . . . . . . . . . . . . . . . . . . . . .
First-aid box* and Warning triangle* . . . . . . . . . . . .
Fire extinguisher* . . . . . . . . . . . . . . . . . . . . . . . . . . . . .
Vehicle tool kit . . . . . . . . . . . . . . . . . . . . . . . . . . . . . . . .
Tyre repair kit . . . . . . . . . . . . . . . . . . . . . . . . . . . . . . . . .
Spare wheel* . . . . . . . . . . . . . . . . . . . . . . . . . . . . . . . . .
Changing a wheel . . . . . . . . . . . . . . . . . . . . . . . . . . . . .
Jump-starting . . . . . . . . . . . . . . . . . . . . . . . . . . . . . . . . .
Tow-starting and towing vehicle . . . . . . . . . . . . . . . .
Fuses and light bulbs
. . . . . . . . . . . . . . . . . . . . . . . . . .
Electric fuses . . . . . . . . . . . . . . . . . . . . . . . . . . . . . . . . . .
Bulbs . . . . . . . . . . . . . . . . . . . . . . . . . . . . . . . . . . . . . . . . .
Praktik
. . . . . . . . . . . . . . . . . . . . . . . . . . . . . . . . . . . . . .
Praktik
. . . . . . . . . . . . . . . . . . . . . . . . . . . . . . . . . . . . . . . . .
Lashing eyes . . . . . . . . . . . . . . . . . . . . . . . . . . . . . . . . . .
Adjustable safety partition behind the front seats
Fixing of the loading floor . . . . . . . . . . . . . . . . . . . . . .
Adjustment of the safety partition . . . . . . . . . . . . . .
Emergency unlocking of the loading area door . .
Technical Data
. . . . . . . . . . . . . . . . . . . . . . . . . .
Technical Data
. . . . . . . . . . . . . . . . . . . . . . . . . . . . . . . .
General information . . . . . . . . . . . . . . . . . . . . . . . . . .
Used abbreviations . . . . . . . . . . . . . . . . . . . . . . . . . . .
Performances . . . . . . . . . . . . . . . . . . . . . . . . . . . . . . . .
Weight . . . . . . . . . . . . . . . . . . . . . . . . . . . . . . . . . . . . . . .
Identification details . . . . . . . . . . . . . . . . . . . . . . . . . .
Fuel consumption according to the ECE standards and
EU guidelines . . . . . . . . . . . . . . . . . . . . . . . . . . . . . . . .
Dimensions . . . . . . . . . . . . . . . . . . . . . . . . . . . . . . . . . .
Engine oil specifications . . . . . . . . . . . . . . . . . . . . . . .
1.2 ltr./51 kW - EU5 / EU2 DDK . . . . . . . . . . . . . . . . .
1.2 ltr./63 kW TSI - EU5 . . . . . . . . . . . . . . . . . . . . . . . .
1.2 ltr./77 kW TSI - EU5 . . . . . . . . . . . . . . . . . . . . . . . .
1.6 ltr./66 kW TDI CR DPF - EU5 . . . . . . . . . . . . . . . .
1.6 ltr./77 kW TDI CR DPF - EU5 . . . . . . . . . . . . . . . .
Index
. . . . . . . . . . . . . . . . . . . . . . . . . . . . . . . . . . . . . . . .
133133133135136136137137137138139141141142142145146146147148148151151151151155158158158159161161163
165167168172173173179179179179181181181181181182182183186188191191196203203203203203204204
205205205205205205205206207208210212214216218221
s16g.4.book Page 4 Wednesda y, February 10, 2010 3:53 PM
Page 22 of 231
Instruments and warning lights21
Using the system
Safety
Driving Tips
General Maintenance
Breakdown assistance
Praktik
Technical Data
Note
The amount of fuel consumed will not be indicated.RangeThe estimated range in kilometres is shown on the display. It indicates the distance you
can still drive with your vehicle based on th e present level of fuel in the tank for the
same style of driving.
The readout is shown in steps of 10 km. After lighting up of the indicator light for the
fuel reserve the display is shown in steps of 5 km.
The fuel consumption for the last 50 km is taken as a basis for calculating the range. If
you drive in a more economical manner fr om this moment on, the range will be
increased accordingly.
If the memory is set to zero (after disconnecting the battery), th e fuel consumption of
10 ltr./100 km is calculated for the range; afterwards the value is adapted accordingly
to the style of driving.Distance drivenThe distance driven since the memory was last erased appears in the display
page 19. If you wish to calculate the distance driven as of a particular time, you must
erase the memory at this moment in time by pressing the button on the windshield
wiper lever page 19, fig. 18 .
The maximum distance indicated in both swit ch positions is 1.999 kilometres, on vehi-
cles which are fitted with information display* it is 9.999 kilometres. The indicator is set
back to null if this period is exceeded.Average speedThe average speed since the memory was last erased is shown in the display in
km/hour page 19. If you wish to determine the average speed over a certain period
of time, you must erase the memory at the start of the new measurement by pressing
the button on the windshield wiper lever page 19, fig. 18 .
A zero appears in the display for the first 100 m you drive after erasing the memory. The indicated value will be updated every 5 seconds while you are driving.
Current speed*The current speed which is identical to the display of the speedometer, is indicated on
the display
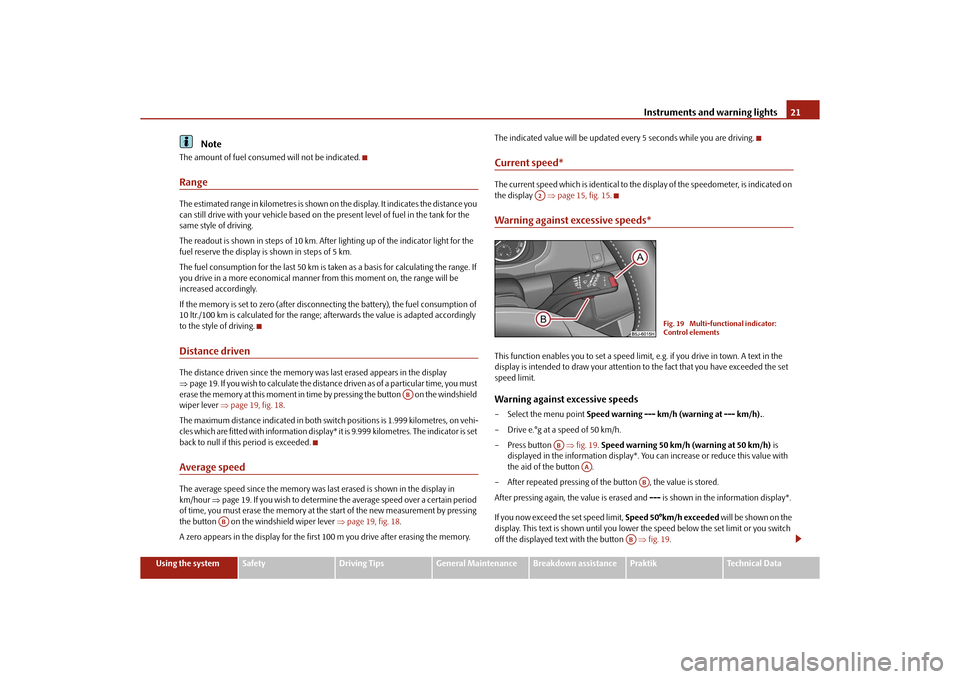
page 15, fig. 15 .Warning against excessive speeds*This function enables you to set a speed limit, e.g. if you drive in town. A text in the
display is intended to draw your attention to the fact that you have exceeded the set
speed limit.Warning against excessive speeds– Select the menu point Speed warning --- km/h (warning at --- km/h). .
– Drive e.°g at a speed of 50 km/h.
– Press button fig. 19 . Speed warning 50 km/h (warning at 50 km/h) is
displayed in the information display*. You can increase or reduce this value with
the aid of the button .
– After repeated pressing of th e button , the value is stored.
After pressing again, the value is erased and --- is shown in the information display*.
If you now exceed the set speed limit, Speed 50°km/h exceeded will be shown on the
display. This text is shown until you lower the speed below the set limit or you switch
off the displayed text with the button fig. 19.
AB
AB
A2
Fig. 19 Multi-functional indicator:
Control elements
AB
AA
AB
AB
s16g.4.book Page 21 Wednesda y, February 10, 2010 3:53 PM
Page 28 of 231
Instruments and warning lights27
Using the system
Safety
Driving Tips
General Maintenance
Breakdown assistance
Praktik
Technical Data
Rear fog light
The warning light
comes on when the rear fog lights are operating page 48.
Bulb failure
The warning light
comes on if a bulb is faulty:
up to 2 seconds after the ignition is switched on;
when switching on the defective light bulb.
The following text e.g will be displayed in the information display*: Check front right dipped beam!
The rear side lights and the licence plate li ghting require several light bulbs. The indi-
cator light
only lights up if all light bulbs of the licence plate lighting or the parking
light (in one rear light unit) are defective. Check regularly the function of the light
bulbs.
Alternator
The warning light
comes on after the ignition has been switched on. It should go
out after the engine has started.
If the warning light does not go out after the engine has started, or comes on when
driving, drive to the nearest specialist garage. The vehicle battery will be discharged in
this case so switch off all non- essential electrical components.
Caution
If the warning light
comes on when driving and in addition the warning light
(cooling system fault) also comes on in di splay, you must then stop the car immedi-
ately and switch the engine off - risk of engine damage!
Fog lights*
The warning light
comes on when the fog lights are operating page 48.
Electrohydraulic power steering
The warning light
comes on for a few seconds when the ignition is switched on.
If the warning light after switching on the ignition or when driving lights up continu-
ously, a fault exists in the electrohydraulic power steering. The power steering operates
with reduced steering assist or is completely without function.
Further information page 137.
WARNING
Contact your specialist garage if the power steering is defective.
Note
If the yellow warning light
goes out after starting the engine again and a short
drive, it is not necessary to visit a specialist garage.
If the battery has been di sconnected and reconnected, the yellow warning light
comes on after switching on the ignition. The warning light must go out after driving a
short distance.
There is no power-assisted steering su pport when the vehicle is being towed
without the engine running or when the powe r-assisted steering is defect. The vehicle
is fully steerable however. There is however increased force required to turn the
steering wheel.
EPC fault light
(petrol engine)
The
(Electronic Power Control) warning light comes on for a few seconds when the
ignition is switched on.
If the warning light
flashes after starting the engine or flashes while driving, a fault
exists in the engine control system. The engine management system selects an emer-
gency programme which enables you to drive to the nearest specialist garage by
adopting a gentle style of driving.
The following text will be displayed in the information display*:
Engine fault: Workshop!
s16g.4.book Page 27 Wednesda y, February 10, 2010 3:53 PM
Page 43 of 231
Unlocking and locking
42
A drop in voltage of the on-board power supply.
An alarm is immediately triggered if either of the two battery terminals is disconnected
while the anti-theft alarm system is activated.
How is the alarm switched off?
You switch the alarm off if you unlock the vehi cle with the radio remote control or if you
switch the ignition on.Note
The working life of the alarm siren is 5 years. More detailed information is available
by a specialist garage.
Before leaving the car, check that all the doors, windows and the electric
sliding/tilting roof* are properly closed in order to ensure that the anti-theft alarm
system is fully operational.
Coding of the radio remote control and th e receiver unit precludes the use of the
radio remote control from other vehicles.
Interior monitor* and Towing protection monitoring*The interior monitor and the towing protection monitoring detect
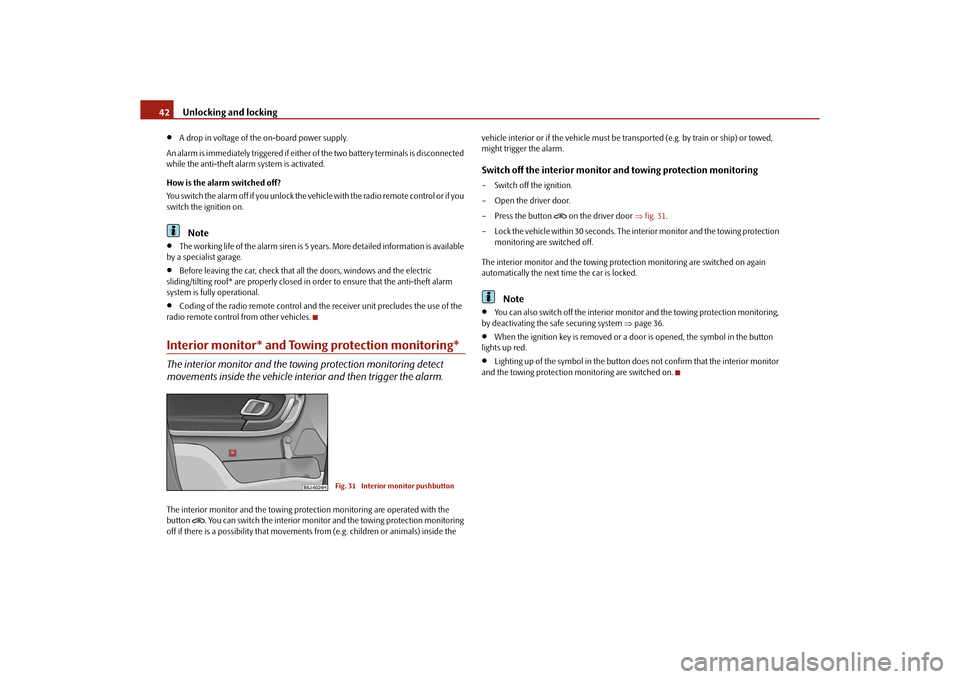
movements inside the vehicle interior and then trigger the alarm.The interior monitor and the towing protec tion monitoring are operated with the
button
. You can switch the interior monitor and the towing protection monitoring
off if there is a possibility that movements from (e.g. children or animals) inside the vehicle interior or if the vehi
cle must be transported (e.g. by train or ship) or towed,
might trigger the alarm.
Switch off the interior monitor and towing protection monitoring– Switch off the ignition.
– Open the driver door.
– Press the button
on the driver door fig. 31 .
– Lock the vehicle within 30 seconds. The in terior monitor and the towing protection
monitoring are switched off.
The interior monitor and the towing protec tion monitoring are switched on again
automatically the next ti me the car is locked.
Note
You can also switch off the interior moni tor and the towing protection monitoring,
by deactivating the sa fe securing system page 36.
When the ignition key is removed or a door is opened, the symbol in the button
lights up red.
Lighting up of the symbol in the button does not confirm that the interior monitor
and the towing protection monitoring are switched on.
Fig. 31 Interior monitor pushbutton
s16g.4.book Page 42 Wednesda y, February 10, 2010 3:53 PM
Page 49 of 231
Lights and Visibility
48
The adaptation of the halogen projector he adlights must be performed as follows
page 146.Fog lights*
Switching on the fog lights
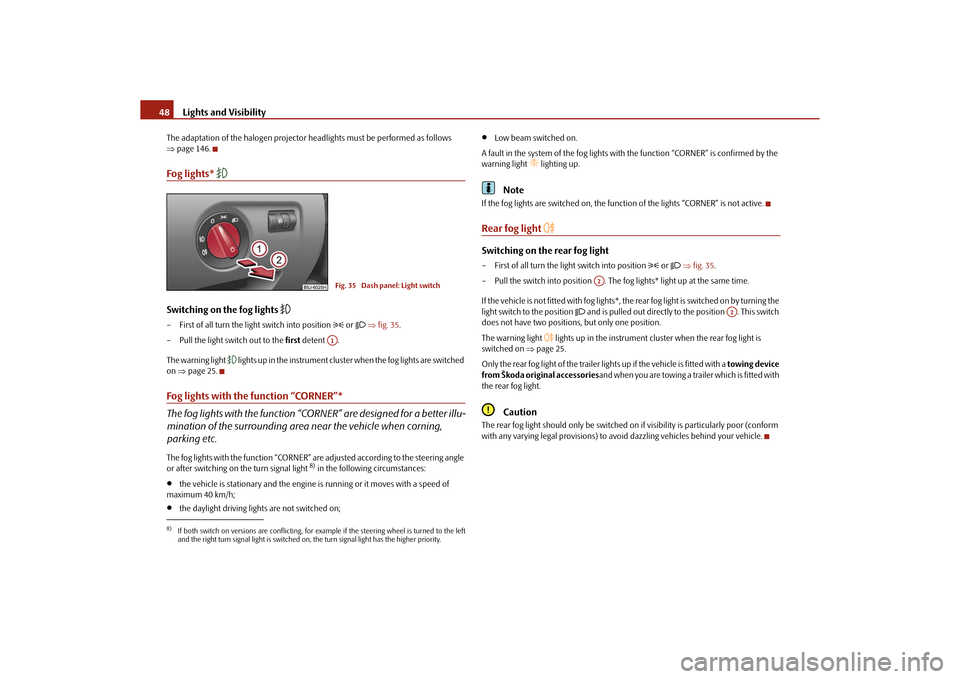
– First of all turn the light switch into position
or fig. 35 .
– Pull the light switch out to the first detent .
The warning light
l i g h t s u p i n t h e i n s t r u m e n t c l u s t e r when the fog lights are switched
on page 25.
Fog lights with the function “CORNER”*
The fog lights with the function “CORNER” are designed for a better illu-
mination of the surrounding area near the vehicle when corning,
parking etc.The fog lights with the function “CORNER” ar e adjusted according to the steering angle
or after switching on the turn signal light
8) in the following circumstances:
the vehicle is stationary and the engine is running or it moves with a speed of
maximum 40 km/h;
the daylight driving lights are not switched on;
Low beam switched on.
A fault in the system of the fog lights with the function “CORNER” is confirmed by the
warning light
lighting up.
Note
If the fog lights are switched on, the function of the lights “CORNER” is not active.Rear fog light
Switching on the rear fog light– First of all turn the light switch into position
or fig. 35 .
– Pull the switch into position . The fog lights* light up at the same time.
If the vehicle is not fitted with fog lights*, th e rear fog light is switched on by turning the
light switch to the position
and is pulled out directly to the position . This switch
does not have two position s, but only one position.
The warning light
lights up in the instrument cluster when the rear fog light is
switched on page 25.
Only the rear fog light of the trailer lights up if the vehicle is fitted with a towing device
from Škoda original accessories and when you are towing a trailer which is fitted with
the rear fog light.
Caution
The rear fog light should only be switched on if visibility is partic ularly poor (conform
with any varying legal provisions) to avoid dazzling vehicles behind your vehicle.
8)If both switch on versions are conflicting, for example if the steering wheel is turned to the left
and the right turn signal light is switched on, the turn signal light has the higher priority.
Fig. 35 Dash panel: Light switchA1
A2
A2
s16g.4.book Page 48 Wednesda y, February 10, 2010 3:53 PM
Page 51 of 231
Lights and Visibility
50
The turn signal
and main beam lever
The parking lights and headlight flas her are also switched on and off
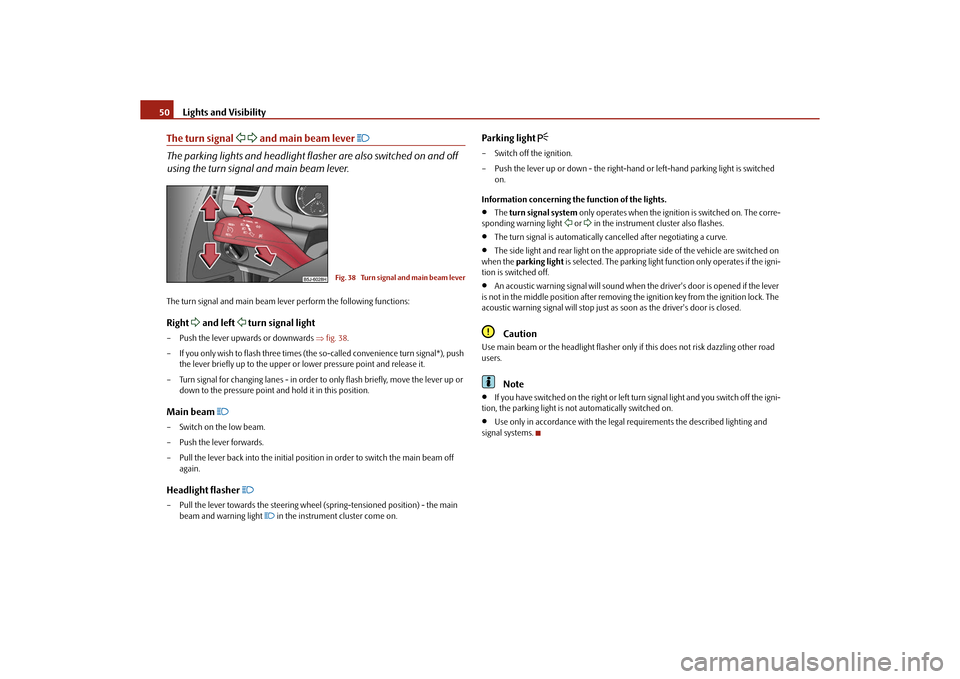
using the turn signal and main beam lever.The turn signal and main beam le ver perform the following functions:Right
and left
turn signal light
– Push the lever upwards or downwards fig. 38 .
– If you only wish to flash three times (the so-called convenience turn signal*), push
the lever briefly up to the upper or lower pressure point and release it.
– Turn signal for changing lanes - in order to only flash briefly, move the lever up or
down to the pressure point and hold it in this position.Main beam
– Switch on the low beam.
– Push the lever forwards.
– Pull the lever back into the initial positi on in order to switch the main beam off
again.Headlight flasher
– Pull the lever towards the steering wheel (spring-tensioned position) - the main beam and warning light
in the instrument cluster come on.
Parking light
– Switch off the ignition.
– Push the lever up or down - the right-hand or left-hand parking light is switched
on.
Information concerning the function of the lights.
The turn signal system only operates when the ignition is switched on. The corre-
sponding warning light
or in the instrument cluster also flashes.
The turn signal is automatically cancelled after negotiating a curve.
The side light and rear light on the appropriate side of the vehicle are switched on
when the parking light is selected. The parking light function only operates if the igni-
tion is switched off.
An acoustic warning signal will sound when the driver's door is opened if the lever
is not in the middle position after removing the ignition key from the ignition lock. The
acoustic warning signal will stop just as soon as the driver's door is closed.Caution
Use main beam or the headlight flasher only if this does not risk dazzling other road
users.
Note
If you have switched on the right or left turn signal light and you switch off the igni-
tion, the parking light is no t automatically switched on.
Use only in accordance with the legal requirements the described lighting and
signal systems.
Fig. 38 Turn signal and main beam lever
s16g.4.book Page 50 Wednesda y, February 10, 2010 3:53 PM
Page 53 of 231
Lights and Visibility
52Note
We recommend having the bulb replaced by a specialist garage.Luggage compartment lightThe lighting comes on automatically when th e boot lid is opened. If the lid remains
open for more than about 10 minutes, the luggage compartment lighting switches off
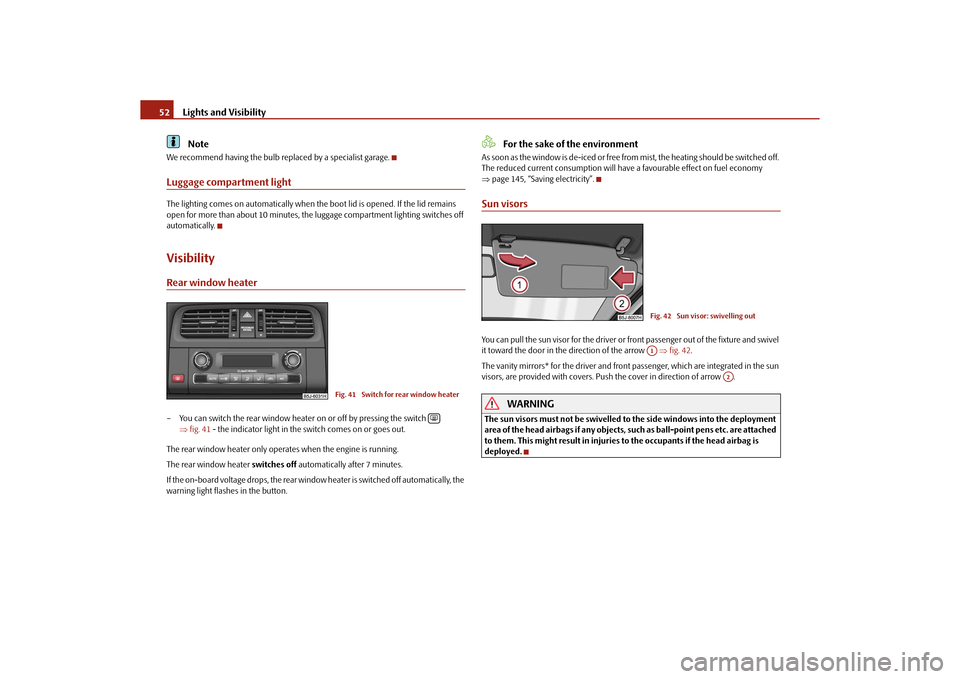
automatically.VisibilityRear window heater– You can switch the rear window heater on or off by pressing the switch
fig. 41 - the indicator light in the switch comes on or goes out.
The rear window heater only operates when the engine is running.
The rear wind ow heater switches off automatically after 7 minutes.
If the on-board voltage drops, the rear window heater is switched off automatically, the
warning light flashes in the button.
For the sake of the environment
As soon as the window is de-iced or free fr om mist, the heating should be switched off.
The reduced current consumption will have a favourable effect on fuel economy
page 145, “Saving electricity”.Sun visorsYou can pull the sun visor for the driver or front passenger out of the fixture and swivel
it toward the door in the direction of the arrow fig. 42 .
The vanity mirrors* for the driver and front passenger, which are integrated in the sun
visors, are provided with covers. Push the cover in direction of arrow .
WARNING
The sun visors must not be swivelled to the side windows into the deployment
area of the head airbags if any objects, su ch as ball-point pens etc. are attached
to them. This might result in injuries to the occupants if the head airbag is
deployed.
Fig. 41 Switch for rear window heater
Fig. 42 Sun visor: swivelling outA1
A2
s16g.4.book Page 52 Wednesda y, February 10, 2010 3:53 PM
Page 54 of 231
Lights and Visibility53
Using the system
Safety
Driving Tips
General Maintenance
Breakdown assistance
Praktik
Technical Data
Windshield wiper and wash systemWindshield wiper
You can operate the windscreen wipers and automatic wipe/wash
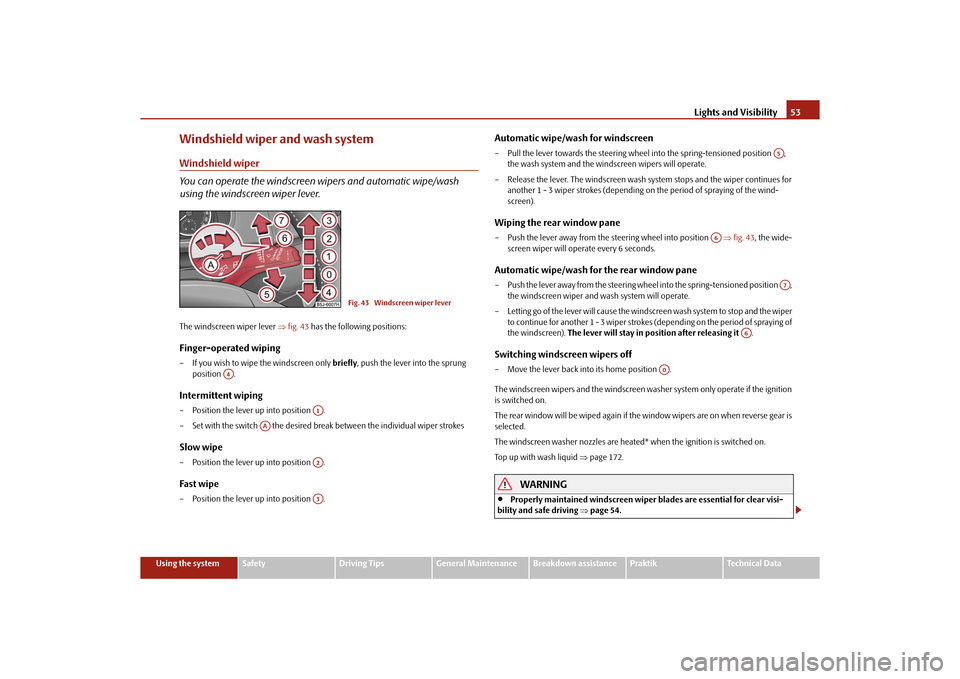
using the windscreen wiper lever.The windscreen wiper lever fig. 43 has the following positions:Finger-operated wiping– If you wish to wipe the windscreen only briefly, push the lever into the sprung
position .Intermittent wiping– Position the lever up into position .
– Set with the switch the desired brea k between the individual wiper strokesSlow wipe– Position the lever up into position .Fast wipe– Position the lever up into position .
Automatic wipe/wash for windscreen– Pull the lever towards the steering wheel into the spring-tensioned position ,
the wash system and the windscreen wipers will operate.
– Release the lever. The windscreen wash system stops and the wiper continues for another 1 - 3 wiper strokes (depending on the period of spraying of the wind-
screen).Wiping the rear window pane– Push the lever away from the st eering wheel into position fig. 43 , the wide-
screen wiper will operate every 6 seconds.Automatic wipe/wash for the rear window pane– Push the lever away from the steering wheel into the spring-tensioned position , the windscreen wiper and wash system will operate.
– Letting go of the lever will cause the windscreen wash system to stop and the wiper to continue for another 1 - 3 wiper strokes (depending on the period of spraying of
the windscreen). The lever will stay in position after releasing it .Switching windscreen wipers off– Move the lever back into its home position .
The windscreen wipers and the windscreen washer system only operate if the ignition
is switched on.
The rear window will be wiped again if the window wipers are on when reverse gear is
selected.
The windscreen washer nozzles are heated* when the ignition is switched on.
Top up with wash liquid page 172.
WARNING
Properly maintained windscreen wiper blades are essential for clear visi-
bility and safe driving page 54.
Fig. 43 Windscreen wiper lever
A4
A1
AA
A2A3
A5
A6
A7
A6
A0
s16g.4.book Page 53 Wednesda y, February 10, 2010 3:53 PM
Page 56 of 231
Lights and Visibility55
Using the system
Safety
Driving Tips
General Maintenance
Breakdown assistance
Praktik
Technical Data
You should clean the wiper blades regularly with a windscreen cleaner in
order to avoid any smears. Clean a wiper blad e with a sponge or cloth if it is very
dirty, for example from insect residues.
Replace the wiper blades once or twice a year for safety reasons. The wiper
blades are available from specialist garages.
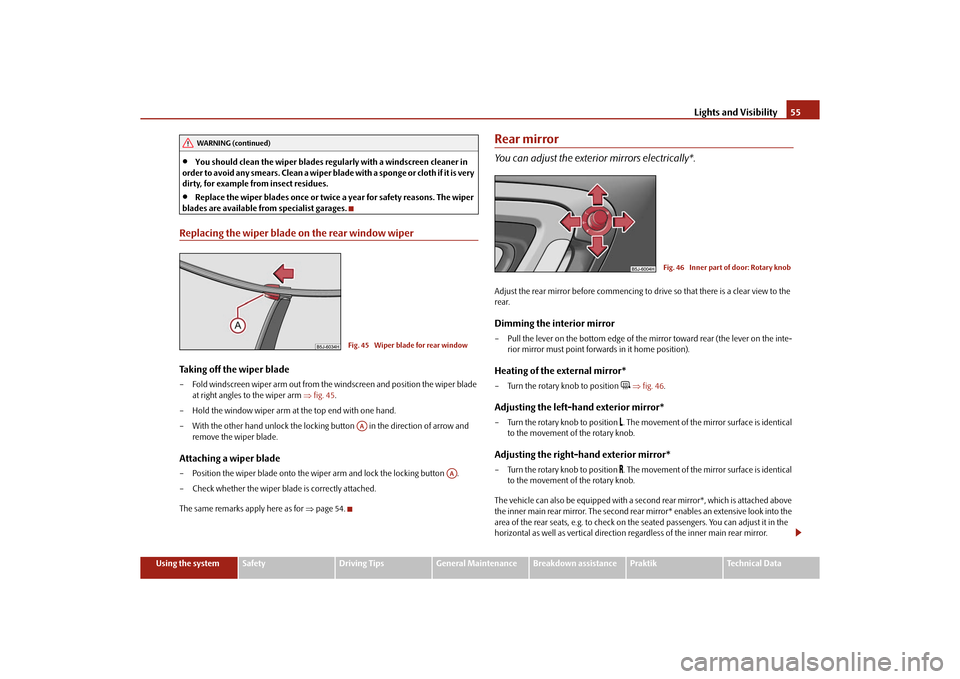
Replacing the wiper blade on the rear window wiperTaking off the wiper blade– Fold windscreen wiper arm out from the windscreen and position the wiper blade at right angles to the wiper arm fig. 45 .
– Hold the window wiper arm at the top end with one hand.
– With the other hand unlock the locking button in the direction of arrow and remove the wiper blade.Attaching a wiper blade– Position the wiper blade onto the wiper arm and lock the locking button .
– Check whether the wiper bl ade is correctly attached.
The same remarks apply here as for page 54.
Rear mirrorYou can adjust the exterior mirrors electrically*.Adjust the rear mirror before commencing to drive so that there is a clear view to the
rear.Dimming the interior mirror– Pull the lever on the bottom edge of the mirror toward rear (the lever on the inte-
rior mirror must point forwards in it home position).Heating of the external mirror*– Turn the rotary knob to position
fig. 46 .
Adjusting the left-hand exterior mirror*– Turn the rotary knob to position
. The movement of the mirror surface is identical
to the movement of the rotary knob.
Adjusting the right-hand exterior mirror*– Turn the rotary knob to position
. The movement of the mirror surface is identical
to the movement of the rotary knob.
The vehicle can also be equipp ed with a second rear mirror*, which is attached above
the inner main rear mirror. The second rear mirror* enables an extensive look into the
area of the rear seats, e.g. to check on the seated passengers. You can adjust it in the
horizontal as well as vertical direction re gardless of the inner main rear mirror.
WARNING (continued)
Fig. 45 Wiper blade for rear windowAA
AA
Fig. 46 Inner part of door: Rotary knob
s16g.4.book Page 55 Wednesday, February 10, 2010 3:53 PM