service SKODA ROOMSTER 2011 1.G Owner's Guide
[x] Cancel search | Manufacturer: SKODA, Model Year: 2011, Model line: ROOMSTER, Model: SKODA ROOMSTER 2011 1.GPages: 212, PDF Size: 3.3 MB
Page 143 of 212
General Maintenance
Taking care of your vehicle and cleaning the vehicle
General Proper care retains the commercial value of your vehicle.
Regular and proper care retains the value of your vehicle. It may also be one of
the requirements for the acceptance of warranty claims relating to corrosion dam-
age and paint defects on the bodywork.
We recommend you use care products from
ŠKODA Original Accessories which are
available from authorised ŠKODA Service Partners. Please follow the instructions
for use on the package. WARNING
● Care products may be harmful to your health if not used according to the
instructions.
● Always store care products in a safe place, out of the reach of children -
risk of poisoning! For the sake of the environment
● Always select environmentally-friendly products when purchasing vehicle care
products.
● Do not dispose of the packages with residues of care products in domestic
waste. Care of the exterior of vehicle
Washing the vehicle Frequent washing protects your vehicle.
The best protection for your vehicle against harmful environmental influences is
frequent washing and wax treatment. How often you should wash your vehicle
depends on a wide range of factors, such as:
● Frequency of use,
● The parking situation (garage, below trees etc.),
● Season of the year,
● Weather conditions,
● Environmental influences.
The longer insect residues, bird droppings, tree sap, road and industrial dust, tar,
soot particles, road salt and other aggressive deposits remain adhering to the
paintwork of your vehicle, the more detrimental their destructive effect can be.
High temperatures, such as those caused by intensive sun's rays, accentuate this
caustic effect.
It may therefore be necessary, in certain circumstances, to wash the car once a
week. It may also be sufficient, however, to wash the car once a month followed
by appropriate wax treatment.
It is essential to also thoroughly wash the underside of your vehicle at the end of
the winter road salting and gritting period. WARNING
When washing your vehicle in the winter: Water and ice in the brake system
can affect the braking efficiency - risk of accident! 141
Taking care of your vehicle and cleaning the vehicle Using the system Safety Driving Tips General Maintenance Breakdown assis-
tance Praktik Technical data
Page 145 of 212
A new layer of a high-quality hard wax polish can be applied to the clean body-
work after it has dried thoroughly. Even if you use a wax preserver regularly we
still recommend that you treat the paintwork of the vehicle at least twice a year
with hard wax.
CAUTION
Never apply wax to the windows.
Polishing Polishing is only necessary if the paintwork of your vehicle has become unattrac-
tive and if it is no longer possible to achieve a gloss with wax preservers.
You must treat the paintwork with a wax preserver if the polish you use does not
contain any preserving elements ⇒
page 142, Wax treatment. CAUTION
● You must not treat mat painted parts or plastic with polishing products or hard
wax.
● Do not polish the paintwork of the vehicle in a dusty environment, otherwise
the paintwork can be scratched.
Chrome parts First clean the chrome parts with a damp cloth and then polish them with a soft,
dry cloth. If this method does not completely clean chrome parts, use a specific
chrome care product.
CAUTION
Do not polish the chrome parts in a dusty environment, otherwise they can be
scratched.
Paint damage Slight damage to paintwork such as scratches, scuffs or traces of chip damage
must be touched up immediately with paint (Škoda painting pen)
before any cor-
rosion can result. You can of course have this work carried out by authorised
ŠKODA Service Partners.
The authorised
ŠKODA Service Partners have a range of matching touch-up pens
or spray cans available in the colour of your vehicle. The paint number of the original paintwork of your vehicle is indicated on the ve-
hicle data sticker ⇒
page 192.
Any corrosion which has already have formed must be removed thoroughly. Apply
a corrosion protection primer and then the paint to the affected point. You can of
course have this work carried out by authorised ŠKODA Service Partners.
Plastic parts External plastic parts are cleaned by normal washing. Plastic parts and synthetic
leather can also be treated with special solvent-free plastic cleaning agents if a
damp cloth is not sufficient. Paint care products are not suitable for plastic parts. CAUTION
Solvent-free cleaners attack the material and can damage it.
Windows Only use a plastic ice scraper for removing snow and ice from the windows and
mirrors. You should not move the ice scraper forward and backward but in one di-
rection on the window which you are cleaning in order to avoid any damage to the
surface of the glass.
You can best remove residues of rubber, oil, grease, wax or silicone by using a
special window cleaner or a special silicone remover.
You should also clean the windows regularly from the inside.
Do not use window leathers which you have used to polish the vehicle body to dry
off the windows. Residues of preservatives in the window leather can dirty the
window and reduce visibility.
Do not affix any stickers over the inside of the rear window to avoid damage to
the heating wires of the rear window heater . CAUTION
● Never remove snow or ice from the glass parts with warm or hot water - risk of
formation of cracks in the glass!
● When removing snow or ice from the windows and mirror lenses make sure
not to damage the paintwork of the vehicle. 143
Taking care of your vehicle and cleaning the vehicle Using the system Safety Driving Tips General Maintenance Breakdown assis-
tance Praktik Technical data
Page 146 of 212
The headlight lenses
Please do not use any aggressive cleaning or chemical solvent products for clean-
ing the front headlights - risk of damage to the plastic lenses. Please use soap
and clean warm water. CAUTION
Never wipe the headlights dry and do not use any sharp objects for cleaning the
plastic lenses, this may result in damage to the protective paintwork and conse-
quently in formation of cracks on the headlight lenses, e.g. through effect of
chemical products.
Door and window seals The rubber seals on the doors, boot lid, bonnet and windows remain supple and
last longer if you treat them regularly with a rubber care product (e.
g. with a spray
with silicone-free oil). You also avoid premature wear of the seals and prevent
leakages in this way. It is also easier to open the doors. Rubber seals which are
well cared for also do not stick together in cold winter weather.
Locking cylinder Use specific products for de-icing locking cylinders.
Note
When washing your vehicle, ensure that as little water as possible gets into the
locking cylinders.
Wheels Steel wheels
You should also thoroughly wash the wheels and wheel trims when giving your
vehicle its regular wash. This prevents any brake dust, dirt and road salt from
sticking to the wheel hubs. You can remove stubborn brake abrasion adhering to
the wheels with an industrial cleaner. Touch up any damage to the paintwork on
the wheels before rust is able to form. Light alloy wheels
Regular care of light alloy wheels is necessary in order to retain their decorative
appearance over long periods. It is particularly important to remove regularly any
road salt and brake abrasion from light alloy wheels, otherwise the light metal will
suffer. Wash thoroughly and then treat the wheels with a protective product for
light alloy wheels which does not contain any acidic components. We recommend
to apply a hard wax layer onto the wheel hubs every three months. You must not
use any products which cause abrasion when treating the wheel hubs. Any dam-
age to the paint layer on the wheel hubs must be touched up immediately. WARNING
One should remember when cleaning the wheels that moisture, ice and road
salt may adversely affect braking efficiency - risk of an accident! Note
Severe layers of dirt on the wheels can also result in wheel imbalance. This may
show itself in the form of a wheel vibration which is transmitted to the steering
wheel which, in certain circumstances, can cause premature wear of the steering.
This means it is necessary to remove the dirt.
Underbody protection The underside of your vehicle is protected for life against chemical and mechanical
influences.
One cannot, however, completely rule out damage to the protective layer
when
driving so we recommend that you inspect the protective layer on the underside
of your vehicle and on the chassis at certain intervals - this is best done at the be-
ginning and end of the winter - and to touch up any damaged areas.
The authorised ŠKODA Service Partners have suitable spray products available as
well as the necessary equipment and are familiar with the instructions for use.
Therefore, we recommend you have such touch-up work or additional corrosion
protection measures carried out by an authorised ŠKODA Service Partner. WARNING
Never use additional underbody protection or corrosion-protection agents for
the exhaust pipes, catalytic converters, diesel particle filter or heat shields.
When the engine reaches its operating temperature, these substances might
ignite - risk of fire! 144
Taking care of your vehicle and cleaning the vehicle
Page 155 of 212
–
Unscrew the cap of the engine oil filler opening.
– Pour in a suitable grade of oil in portions of 0.5 litres ⇒ page 194 .
– Inspect the oil level ⇒ page 152.
– Carefully screw on the cap of the filler opening and push the dipstick in fully. WARNING
● Avoid dripping oil onto hot parts of the engine when topping up will oil - a
risk of fire!
● Read and observe the warning notes ⇒
page 150, Working in the engine
compartment before working in the engine compartment. For the sake of the environment
The oil level must on no account be above the range a ⇒ page 152. Oil will other-
wise be drawn in through the crankcase ventilation and may pass through the ex-
haust system to atmosphere. The oil may combust in the catalytic converter and
damage it.
Changing engine oil The engine oil must be changed at the intervals stated in the Service schedule or
according to the service interval indicator
⇒ page 12. WARNING
● Only carry out the engine oil change, if you have the required professional
knowledge!
● Read and observe the warning notes ⇒
page 150, Working in the engine
compartment before working in the engine compartment.
● First of all, let the engine cool down, wear an eye protection and gloves -
risk of caustic burns due to hot oil. CAUTION
You must not pour any additives into the engine oil - risk of engine damage! Dam-
age, which results from such product, are excluded from the warranty. For the sake of the environment
● You must on no account pour oil into the ground or into the sewage system.
● In view of the problems involved in properly disposing of old oil, the necessary
special tools and the knowledge required for such work, we recommend that you
have the oil and oil filter change carried out by an authorised
ŠKODA Service Part-
ner. Note
After your skin has come in contact with the oil, you must thoroughly wash your
skin.
Cooling system
Coolant The job of the coolant is to cool the engine.
The cooling system does not require any maintenance under normal operating
conditions. The coolant consists of water with a concentration of coolant additive
of 40 %. This mixture not only provides antifreeze protection down to -25 °C but
also protects the cooling and heating system from corrosion. It also prevents the
formation of scale and significantly increases the boiling point of the coolant.
You must therefore not reduce the concentration of antifreeze agent in the cool-
ant by adding water, also not during the summer months or in countries with a
warm climate. The concentration of coolant additive in the coolant must be at
least 40 %.
You can increase the amount of antifreeze in the coolant if a higher concentration
of antifreeze is necessary for climatic reasons but only up to 60 % (antifreeze pro-
tection down to approx. -40 °C). The antifreeze protection tails off above that con-
centration.
Vehicles exported to countries with a cold climate (e.g. Sweden, Norway, Finland)
are already factory-filled with a coolant which offers antifreeze protection down
to about -35 °C. In these countries the concentration of coolant additive should be
at least 50 %.
Coolant
The cooling system is factory-filled with coolant (purple in colour), which complies
with the specification TL-VW
774 G. £ 153
Inspecting and Replenishing Using the system Safety Driving Tips General Maintenance Breakdown assis-
tance Praktik Technical data
Page 156 of 212
When refilling, we only recommend you use the same antifreeze described on the
antifreeze expansion tank.
Please contact an authorised
ŠKODA Service Partner if you have any questions re-
garding the coolant or if you wish to fill up with a different coolant.
An authorised ŠKODA Service Partner can also supply you with the correct coolant
additives.
Coolant capacity Petrol engines Capacities (in litres)
1.2 l/51 kW - EU5/EU2 DDK 5,5
1.2 l/63 kW TSI - EU5 7,7
1.2 l/77 kW TSI - EU5 7,7
1.4 l/63 kW - EU5 5,5
1.6 l/77 kW - EU4/EU2 DDK 5,5
Diesel engines Capacities (in litres)
1.2 l/55 kW TDI CR DPF - EU5 6,6
1.6 l/66 kW TDI CR DPF - EU5 8,4
1.6 l/77 kW TDI CR DPF - EU5 8,4
CAUTION
● Other coolant additives may cause operational problems which, in particular,
involves significantly reducing the anticorrosion effect.
● Any faults or problems resulting from corrosion may cause a loss of coolant
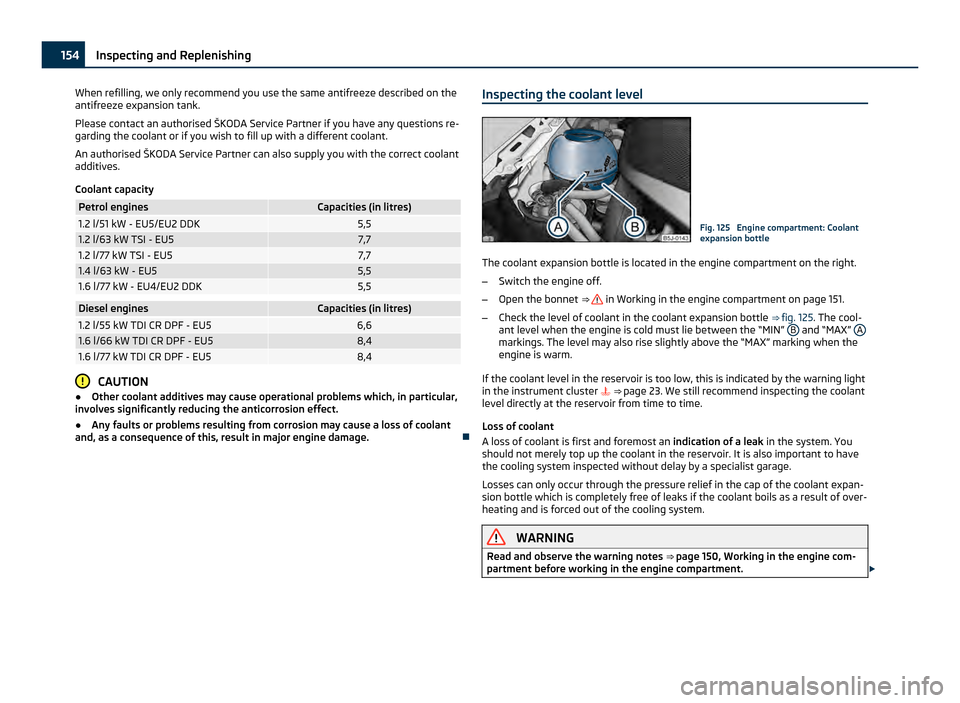
and, as a consequence of this, result in major engine damage. Inspecting the coolant level Fig. 125 Engine compartment: Coolant
expansion bottle
The coolant expansion bottle is located in the engine compartment on the right.
– Switch the engine off.
– Open the bonnet ⇒ in Working in the engine compartment on page 151.
– Check the level of coolant in the coolant expansion bottle ⇒ fig. 125 . The cool-
ant level when the engine is cold must lie between the
“MIN” B and “MAX”
A markings. The level may also rise slightly above the “MAX” marking when the
engine is warm.
If the coolant level in the reservoir is too low, this is indicated by the warning light
in the instrument cluster
⇒ page 23. We still recommend inspecting the coolant
level directly at the reservoir from time to time.
Loss of coolant
A loss of coolant is first and foremost an indication of a leak in the system. You
should not merely top up the coolant in the reservoir. It is also important to have
the cooling system inspected without delay by a specialist garage.
Losses can only occur through the pressure relief in the cap of the coolant expan-
sion bottle which is completely free of leaks if the coolant boils as a result of over-
heating and is forced out of the cooling system. WARNING
Read and observe the warning notes ⇒ page 150
, Working in the engine com-
partment before working in the engine compartment. £154
Inspecting and Replenishing
Page 158 of 212
Brake fluid
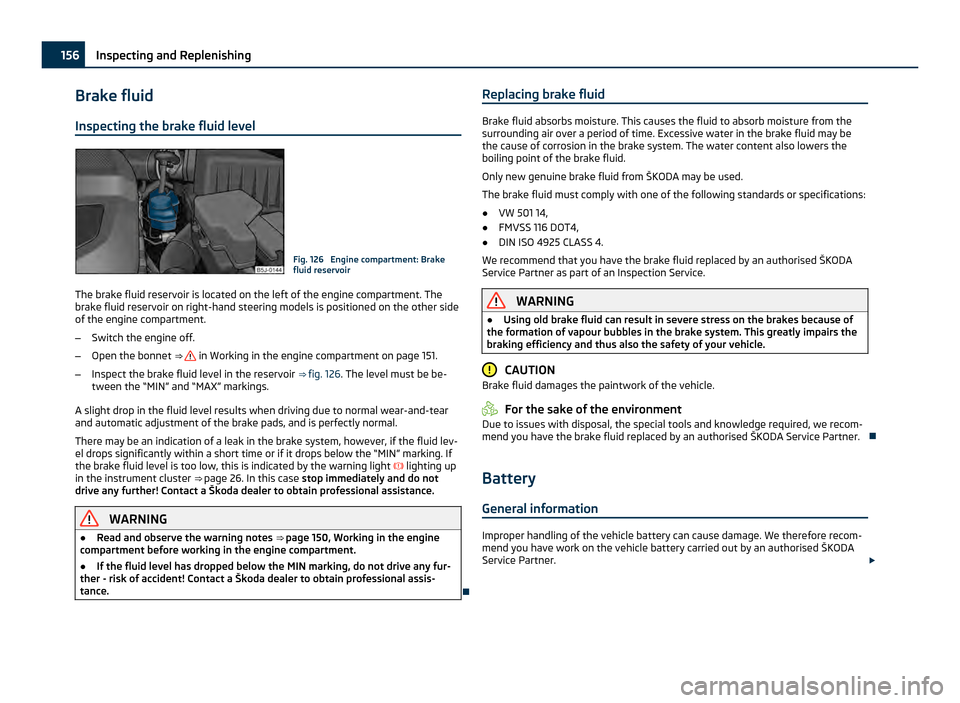
Inspecting the brake fluid level Fig. 126 Engine compartment: Brake
fluid reservoir
The brake fluid reservoir is located on the left of the engine compartment. The
brake fluid reservoir on right-hand steering models is positioned on the other side
of the engine compartment.
– Switch the engine off.
– Open the bonnet ⇒ in Working in the engine compartment on page 151.
– Inspect the brake fluid level in the reservoir ⇒ fig. 126 . The level must be be-
tween the “MIN” and “MAX” markings.
A slight drop in the fluid level results when driving due to normal wear-and-tear
and automatic adjustment of the brake pads, and is perfectly normal.
There may be an indication of a leak in the brake system, however, if the fluid lev-
el drops significantly within a short time or if it drops below the “MIN” marking. If
the brake fluid level is too low, this is indicated by the warning light lighting up
in the instrument cluster ⇒ page 26. In this case stop immediately and do not
drive any further! Contact a Škoda dealer to obtain professional assistance. WARNING
● Read and observe the warning notes ⇒
page 150, Working in the engine
compartment before working in the engine compartment.
● If the fluid level has dropped below the MIN marking, do not drive any fur-
ther - risk of accident! Contact a Škoda dealer to obtain professional assis-
tance. Replacing brake fluid Brake fluid absorbs moisture. This causes the fluid to absorb moisture from the
surrounding air over a period of time. Excessive water in the brake fluid may be
the cause of corrosion in the brake system. The water content also lowers the
boiling point of the brake fluid.
Only new genuine brake fluid from
ŠKODA may be used.
The brake fluid must comply with one of the following standards or specifications:
● VW 501 14,
● FMVSS 116 DOT4,
● DIN ISO 4925 CLASS 4.
We recommend that you have the brake fluid replaced by an authorised
ŠKODA
Service Partner as part of an Inspection Service. WARNING
● Using old brake fluid can result in severe stress on the brakes because of
the formation of vapour bubbles in the brake system. This greatly impairs the
braking efficiency and thus also the safety of your vehicle. CAUTION
Brake fluid damages the paintwork of the vehicle. For the sake of the environment
Due to issues with disposal, the special tools and knowledge required, we recom-
mend you have the brake fluid replaced by an authorised
ŠKODA Service Partner.
Battery General information Improper handling of the vehicle battery can cause damage. We therefore recom-
mend you have work on the vehicle battery carried out by an authorised
ŠKODA
Service Partner. £156
Inspecting and Replenishing
Page 160 of 212
Battery cover
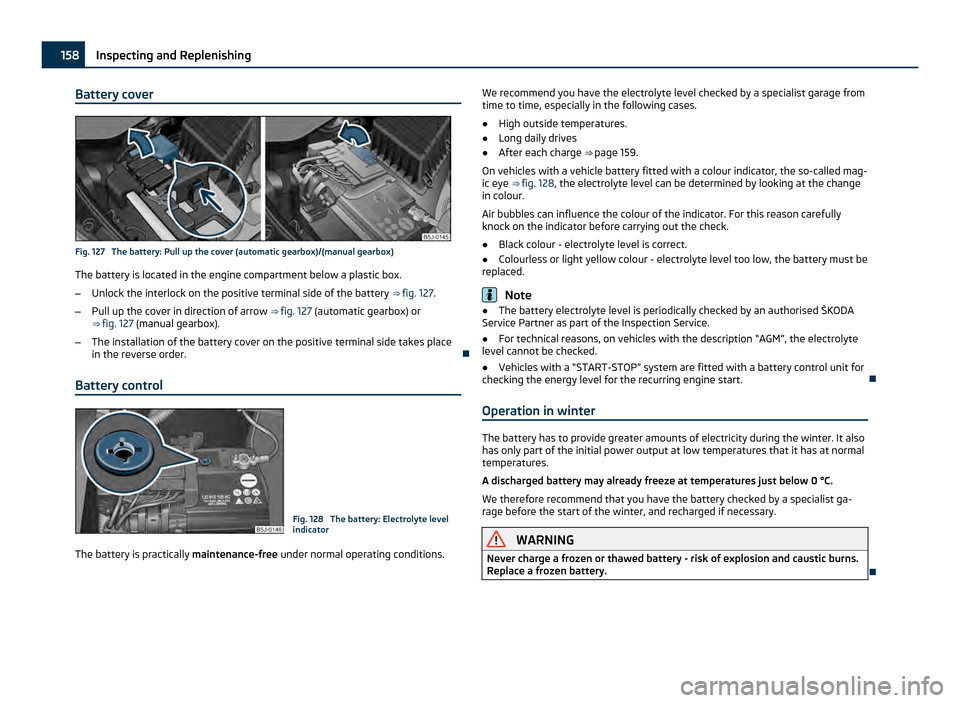
Fig. 127 The battery: Pull up the cover (automatic gearbox)/(manual gearbox)
The battery is located in the engine compartment below a plastic box.
– Unlock the interlock on the positive terminal side of the battery ⇒ fig. 127.
– Pull up the cover in direction of arrow ⇒ fig. 127 (automatic gearbox) or
⇒ fig. 127 (manual gearbox).
– The installation of the battery cover on the positive terminal side takes place
in the reverse order.
Battery control Fig. 128 The battery: Electrolyte level
indicator
The battery is practically maintenance-free under normal operating conditions. We recommend you have the electrolyte level checked by a specialist garage from
time to time, especially in the following cases.
● High outside temperatures.
● Long daily drives
● After each charge ⇒
page 159.
On vehicles with a vehicle battery fitted with a colour indicator, the so-called mag-
ic eye ⇒ fig. 128 , the electrolyte level can be determined by looking at the change
in colour.
Air bubbles can influence the colour of the indicator. For this reason carefully
knock on the indicator before carrying out the check.
● Black colour - electrolyte level is correct.
● Colourless or light yellow colour - electrolyte level too low, the battery must be
replaced. Note
● The battery electrolyte level is periodically checked by an authorised
ŠKODA
Service Partner as part of the Inspection Service.
● For technical reasons, on vehicles with the description “AGM”, the electrolyte
level cannot be checked.
● Vehicles with a “START-STOP” system are fitted with a battery control unit for
checking the energy level for the recurring engine start.
Operation in winter The battery has to provide greater amounts of electricity during the winter. It also
has only part of the initial power output at low temperatures that it has at normal
temperatures.
A discharged battery may already freeze at temperatures just below 0 °C.
We therefore recommend that you have the battery checked by a specialist ga-
rage before the start of the winter, and recharged if necessary. WARNING
Never charge a frozen or thawed battery - risk of explosion and caustic burns.
Replace a frozen battery. 158
Inspecting and Replenishing
Page 161 of 212
Charging the battery
A properly charged battery is essential for reliably starting the en-
gine.
– Read the warning notes ⇒ in General information on page 157 and
⇒ .
– Switch the ignition and all electrical components off.
– Only for “quick-charging”: Disconnect both battery cables (first of all “nega-
tive
”, then “positive”).
– Carefully attach the terminal clamps of the charger to the battery terminals
(red = “positive
”, black = “negative”).
– You can now plug the mains cable of the charger into the power socket and
switch on the charger.
– When charging is completed: switch the charger off and unplug the mains ca-
ble from the power socket.
– Only then should you disconnect the terminal clamps of the charger.
– Reconnect the cables to the battery (first of all “positive”, then “negative”).
It is not normally necessary to disconnect the cables of the battery if you recharge
the battery using low amperages (as for example from a mini-charger). Please al-
so refer to the instructions from the charger manufacturer.
A charging current of 0.1 of the total battery capacity (or lower) is that which
should be used until full charging is achieved.
It is, however, necessary to disconnect both cables before charging the battery
with high amperages, so-called
“quick-charging ”.
“Quick-charging” a battery is dangerous ⇒ in General information on page 157.
It requires a special charger and specialist knowledge. We recommend having the
quick charging of vehicle batteries undertaken by a specialist garage.
A discharged battery may already freeze at temperatures just below 0
°C ⇒ . We
recommend that you no longer use a battery which has thawed out because the
casing of the battery may be cracked through the formation of ice and this would
allow battery electrolyte to flow out.
The vent plugs of the battery should not be opened for charging. WARNING
● Never charge a frozen or thawed battery - risk of explosion and caustic
burns. Replace a frozen battery.
● Never charge a battery which has a too low electrolyte level - risk of explo-
sion and caustic burns. CAUTION
On vehicles with the “START/STOP” system, the pole terminal of the charger must
not be connected directly to the negative terminal of the vehicle battery, but only
to the engine earth ⇒ fig. 143.
Disconnecting and reconnecting the battery On disconnecting and reconnecting the battery the following functions are initially
deactivated or are no longer able to operate fault-free.
Operation Operating measure
Electrical power window (operational faults) ⇒ page 38
Enter the car stereo/radio navigation system
code number see operating instructions for the
car stereo/radio navigation sys-
tem
Setting the clock ⇒ page 13
Data in the multi-functional indicator are de-
leted. ⇒ page 14
We recommend having the vehicle checked by an authorised ŠKODA Service Part-
ner to ensure full functionality of all electrical systems.
Replacing the battery When replacing a battery, the new new battery must have the same capacity,
voltage (12
V), amperage and be the same size. Suitable types of vehicle battery
are available from an authorised ŠKODA Service Partner.
We recommend you have a battery change carried out by an authorised ŠKODA
Service Partner, who will properly install the new battery and dispose of the origi-
nal one. £ 159
Inspecting and Replenishing Using the system Safety Driving Tips General Maintenance Breakdown assis-
tance Praktik Technical data
Page 162 of 212
CAUTION
Vehicles with a “START-STOP” system are fitted with a special battery type which
allows the battery control unit to check the energy level for recurring engine start.
This battery must only be replaced by a battery of the same type. For the sake of the environment
Batteries contain poisonous substances such as sulphuric acid and lead. For this
reason, it must be disposed of properly. Under no circumstances must it be dis-
posed of in the communal rubbish.
Automatic consumer shut-off Under heavy load on the vehicle battery, the vehicle electrical system manage-
ment automatically takes various measures to avoid draining the vehicle battery.
●
The idling speed is raised to allow the generator to deliver more electricity to
the electrical system.
● If necessary, some electrical consumers are limited in their performance or are
temporarily switched off completely. Note
Despite such intervention by the vehicle electric system management, the vehicle
battery may be drained. For example, when the ignition is switched on a long time
with the engine turned off or the side or parking lights are turned on during lon-
ger parking.
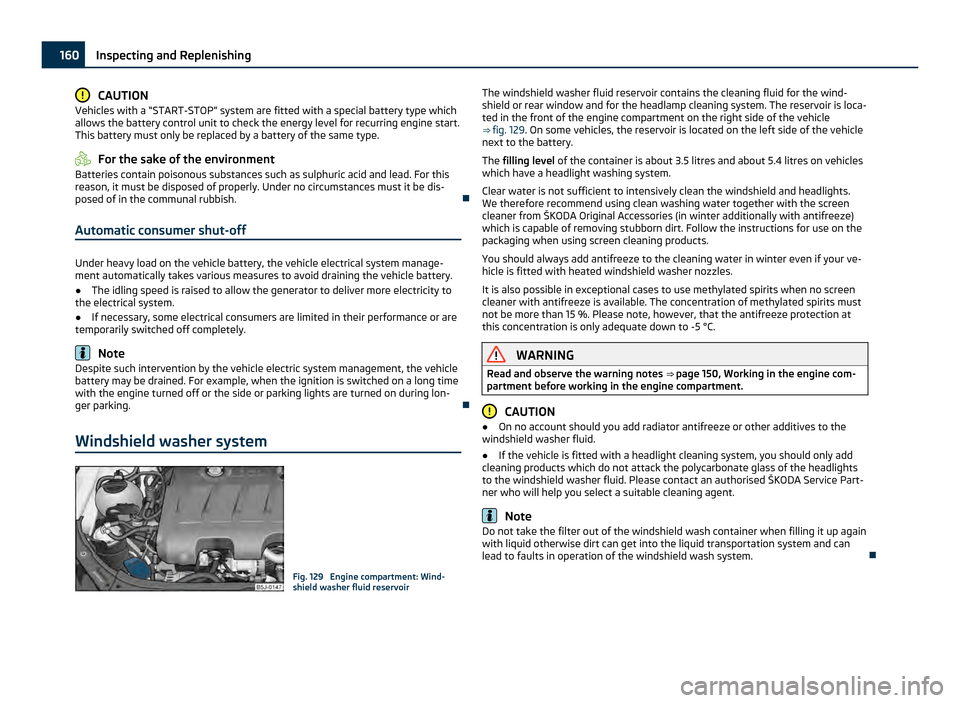
Windshield washer system Fig. 129 Engine compartment: Wind-
shield washer fluid reservoir The windshield washer fluid reservoir contains the cleaning fluid for the wind-
shield or rear window and for the headlamp cleaning system. The reservoir is loca-
ted in the front of the engine compartment on the right side of the vehicle
⇒ fig. 129
. On some vehicles, the reservoir is located on the left side of the vehicle
next to the battery.
The filling level of the container is about 3.5 litres and about 5.4 litres on vehicles
which have a headlight washing system.
Clear water is not sufficient to intensively clean the windshield and headlights.
We therefore recommend using clean washing water together with the screen
cleaner from
ŠKODA Original Accessories (in winter additionally with antifreeze)
which is capable of removing stubborn dirt. Follow the instructions for use on the
packaging when using screen cleaning products.
You should always add antifreeze to the cleaning water in winter even if your ve-
hicle is fitted with heated windshield washer nozzles.
It is also possible in exceptional cases to use methylated spirits when no screen
cleaner with antifreeze is available. The concentration of methylated spirits must
not be more than 15 %. Please note, however, that the antifreeze protection at
this concentration is only adequate down to -5 °C. WARNING
Read and observe the warning notes ⇒ page 150
, Working in the engine com-
partment before working in the engine compartment. CAUTION
● On no account should you add radiator antifreeze or other additives to the
windshield washer fluid.
● If the vehicle is fitted with a headlight cleaning system, you should only add
cleaning products which do not attack the polycarbonate glass of the headlights
to the windshield washer fluid. Please contact an authorised
ŠKODA Service Part-
ner who will help you select a suitable cleaning agent. Note
Do not take the filter out of the windshield wash container when filling it up again
with liquid otherwise dirt can get into the liquid transportation system and can
lead to faults in operation of the windshield wash system. 160
Inspecting and Replenishing
Page 165 of 212
WARNING
● You must have your tyres replaced with new ones at the latest when the
wear indicators have been worn down. The legally permissible minimum tread
depth should be observed.
● Worn tyres do not provide the necessary adhesion to the road surface at
high speeds on wet roads. One could experience “ aquaplaning” (uncontrolled
movements of the vehicle - “swimming” on a wet road surface).
Changing wheels around If significantly greater wear is present on the front tyres, we recommend changing
the front wheels around with the rear wheels. You will then obtain approximately
the same life for all the tyres.
It may be advantageous to swap the tyres over
“crosswise” when uneven wear
characteristic arise on the running surfaces of the tyres (but not in the case of uni-
directional tyres). We recommend that you contact an authorised ŠKODA Service
Partner. They have extensive knowledge about the possible combinations.
We recommend that you change the wheels around every 10 000 km in order to
achieve even wear on all wheels and to obtain optimal tyre life.
New tyres and wheels Tyres and wheel rims are important design elements. One should therefore use
the tyres and wheel rims which have been released for use by
ŠKODA. They are
exactly matched to the vehicle type and therefore contribute significantly to good
road holding and safe driving characteristics ⇒ .
Only fit radial tyres of the same type on all 4 wheels, size (rolling circumference)
and, if possible, the same tread pattern on one axle.
Authorised
ŠKODA Service Partners have access to the most current information
about which tyres we have released for use on your vehicle.
We recommend that you have any work relating to tyres or wheels carried out by
an authorised ŠKODA Service Partner. Authorised ŠKODA Service Partners have all
of the necessary special tools and replacement parts available plus the required
specialist knowledge and are also in a position to properly dispose of the old tyres.
A large number of authorised ŠKODA Service Partners also have an attractive
range of tyres and wheels available. The tyre/wheel combinations which are approved for your vehicle are indicated in
your vehicle documents. Approval and licensing may differ according to the legis-
lation prevailing in individual countries.
Proper knowledge of the tyre data makes it easier for you to select the correct
type of tyre. Tyres do, for example, have the following inscription on their walls:
185/65 R 14 86 T
What this means is: 185 Tyre width in mm
65 Height/width ratio in %
R Code letter for the type of tyre -
Radial 14 Diameter of wheel in inches
86 Load index
T Speed symbol
The following speed restrictions apply to tyres.
Speed symbol Permissible maximum speed
Q 160 km/h
R 170 km/h
S 180 km/h
T 190 km/h
U 200 km/h
H 210 km/h
V 240 km/h
W 270 km/h
The date of manufacture
is also stated on the tyre wall (possibly only on the in-
side of wheel).
DOT ... 20 11...
means, for example, that the tyre was manufactured in the 20th week of the year
20011.
Any spare wheel which differs from the tyres fitted to the vehicle (e.g. winter
tyres or low-profile tyres) should only be used only for a short time in the event of
a puncture and when adopting an appropriately cautious style of driving. It should
be replaced as quickly as possible by a normal wheel. £ 163
Wheels and Tyres Using the system Safety Driving Tips General Maintenance Breakdown assis-
tance Praktik Technical data