navigation SKODA SUPERB 2005 1.G / (B5/3U) DX Navigation System Manual
[x] Cancel search | Manufacturer: SKODA, Model Year: 2005, Model line: SUPERB, Model: SKODA SUPERB 2005 1.G / (B5/3U)Pages: 75, PDF Size: 3.09 MB
Page 41 of 75
RADIO NAVIGATION SYSTEM40
NAVIGATION
Storing the flagged destination in the Top
10 memory
Use the selection bar to move the flagged des-
tination. When the menu is activated, it will
appear at the top of the list. The existing entry
in the memory will be covered by the selection
bar. When you move the selection bar in the
list, the flagged destination will move as well.
•Turn the menu knob to move the flagged
destination to the desired position in the list
and press the menu knob to store the flagged
destination at this position.
Any existing entry at this position will be over-
written.
Now the main navigation menu will appear.
Selecting the flagged destination as
your destination
Accessing the enter destination menu
Mark and confirm the “Enter destination” menu
field in the main navigation menu to access
the enter destination menu.
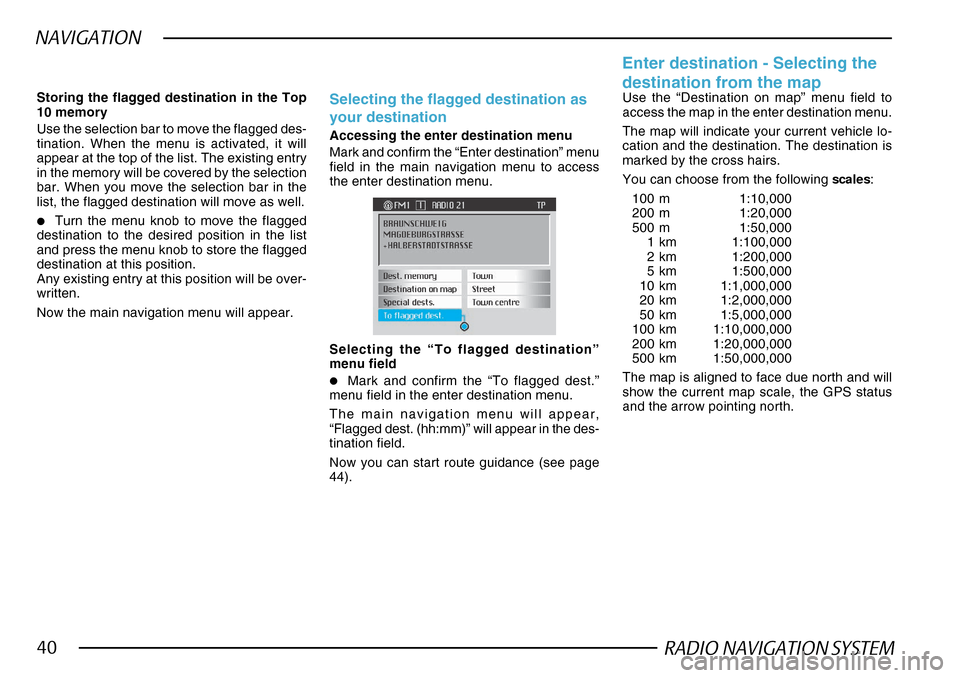
Selecting the “To flagged destination”
menu field
•Mark and confirm the “To flagged dest.”
menu field in the enter destination menu.
The main navigation menu will appear,
“Flagged dest. (hh:mm)” will appear in the des-
tination field.
Now you can start route guidance (see page
44).
Use the “Destination on map” menu field to
access the map in the enter destination menu.
The map will indicate your current vehicle lo-
cation and the destination. The destination is
marked by the cross hairs.
You can choose from the following scales:
100 m 1:10,000
200 m 1:20,000
500 m 1:50,000 1km 1:100,000
2km 1:200,000
5km 1:500,000
10 km 1:1,000,000
20 km 1:2,000,000
50 km 1:5,000,000
100 km 1:10,000,000
200 km 1:20,000,000
500 km 1:50,000,000
The map is aligned to face due north and will
show the current map scale, the GPS status
and the arrow pointing north.
Enter destination - Selecting the
destination from the map
Page 42 of 75
RADIO NAVIGATION SYSTEM41
NAVIGATION
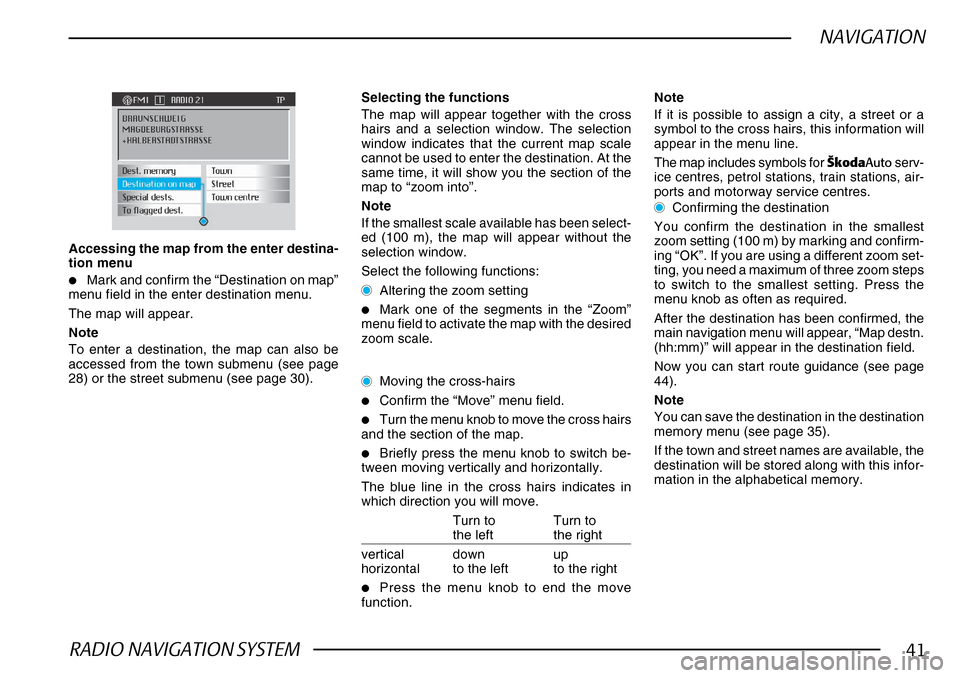
Accessing the map from the enter destina-
tion menu
•Mark and confirm the “Destination on map”
menu field in the enter destination menu.
The map will appear.
Note
To enter a destination, the map can also be
accessed from the town submenu (see page
28) or the street submenu (see page 30).
Selecting the functions
The map will appear together with the cross
hairs and a selection window. The selection
window indicates that the current map scale
cannot be used to enter the destination. At the
same time, it will show you the section of the
map to “zoom into”.
Note
If the smallest scale available has been select-
ed (100 m), the map will appear without the
selection window.
Select the following functions:
Altering the zoom setting
•Mark one of the segments in the “Zoom”
menu field to activate the map with the desired
zoom scale.
Moving the cross-hairs
•Confirm the “Move” menu field.
•Turn the menu knob to move the cross hairs
and the section of the map.
•Briefly press the menu knob to switch be-
tween moving vertically and horizontally.
The blue line in the cross hairs indicates in
which direction you will move.
Turn to Turn to
the left the right
vertical down up
horizontal to the left to the right
•Press the menu knob to end the move
function. Note
If it is possible to assign a city, a street or a
symbol to the cross hairs, this information will
appear in the menu line.
The map includes symbols for
·kodaAuto serv-
ice centres, petrol stations, train stations, air-
ports and motorway service centres.
Confirming the destination
You confirm the destination in the smallest
zoom setting (100 m) by marking and confirm-
ing “OK”. If you are using a different zoom set-
ting, you need a maximum of three zoom steps
to switch to the smallest setting. Press the
menu knob as often as required.
After the destination has been confirmed, the
main navigation menu will appear, “Map destn.
(hh:mm)” will appear in the destination field.
Now you can start route guidance (see page
44).
Note
You can save the destination in the destination
memory menu (see page 35).
If the town and street names are available, the
destination will be stored along with this infor-
mation in the alphabetical memory.
Page 43 of 75
RADIO NAVIGATION SYSTEM42
NAVIGATION
Route options
Planning route guidance and
calculating the route list
Use the “Route option” menu field in the main
navigation menu to plan route guidance and/
or to calculate a route list.
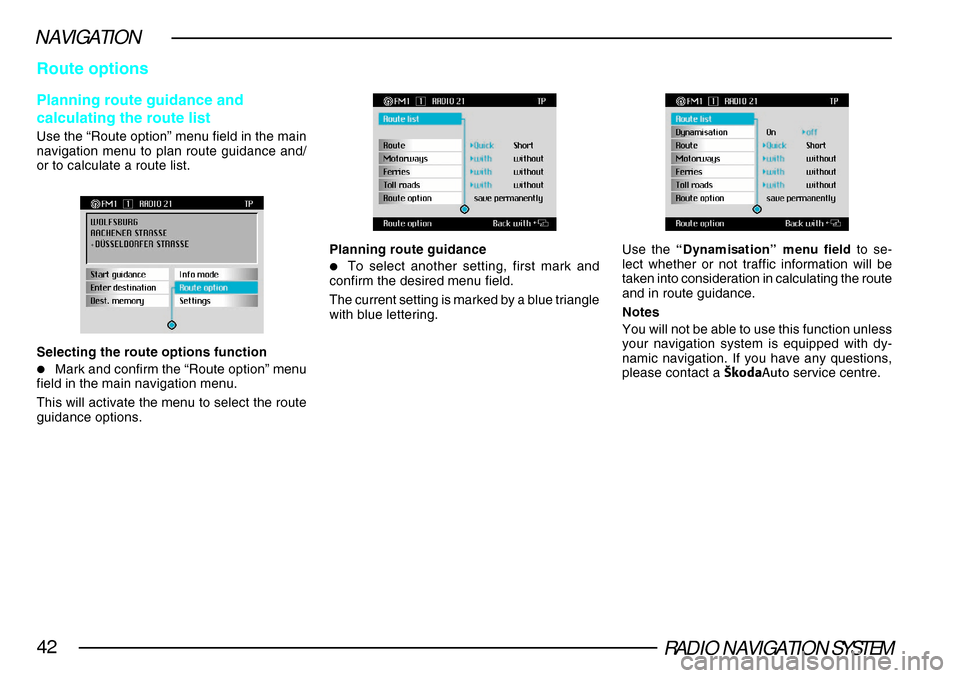
Selecting the route options function
•Mark and confirm the “Route option” menu
field in the main navigation menu.
This will activate the menu to select the route
guidance options.
Planning route guidance
•To select another setting, first mark and
confirm the desired menu field.
The current setting is marked by a blue triangle
with blue lettering.
Use the “Dynamisation” menu field to se-
lect whether or not traffic information will be
taken into consideration in calculating the route
and in route guidance.
Notes
You will not be able to use this function unless
your navigation system is equipped with dy-
namic navigation. If you have any questions,
please contact a ·kodaAuto service centre.
Page 44 of 75
RADIO NAVIGATION SYSTEM43
NAVIGATION
If the dynamisation function has been activat-
ed, it is no longer possible to change the route
options. A corresponding message will appear
in the display.
“Route” menu field - Here you can have the
route optimised according to driving time or the
driving route itself.
“Motorways”, “Ferries” and “Toll roads”
menu fields - Here you can select whether the
route is to be calculated with or without these
traffic options.
Note
If there is no reasonable route that can be cal-
culated using the options selected, route cal-
culation will find a route using motorways, fer-
ries or toll roads even if these options have
been excluded.
“Route option” menu field - This menu field
allows you to save the route options selected
as the standard setting.
If you do not save the route options, they will
only be used in the calculation of the next
routes entered.
As soon as the system has been switched off
for more than 30 minutes, the previously stored
route options will apply. Calculating the route list
•Mark and confirm the “Route list” menu field.
The following message will appear: “The route
list is being calculated. Please wait.” This proc-
ess can take several seconds, depending on
how long the route is.
Once the process has been completed, the
route list will appear.
The route list will remain in the display. The
entries appear along with information on their
distances. If any changes are made to the driv-
ing route, the route list will be updated. The
route sections will be listed along with infor-
mation on their length.
Note
Street names that have not been digitised will
be listed according to their road classification
(e.g. road classification 1 - national roadway). Paging in the route list:
down - turn the menu knob to the left
up - turn the menu knob to the right
To exit the route list:
Press
99 99
9 - this will return you to the “Route
option” menu.
Note
If it is not possible to calculate a route list, you
will see a corresponding message in the dis-
play.
Page 45 of 75
RADIO NAVIGATION SYSTEM44
NAVIGATION
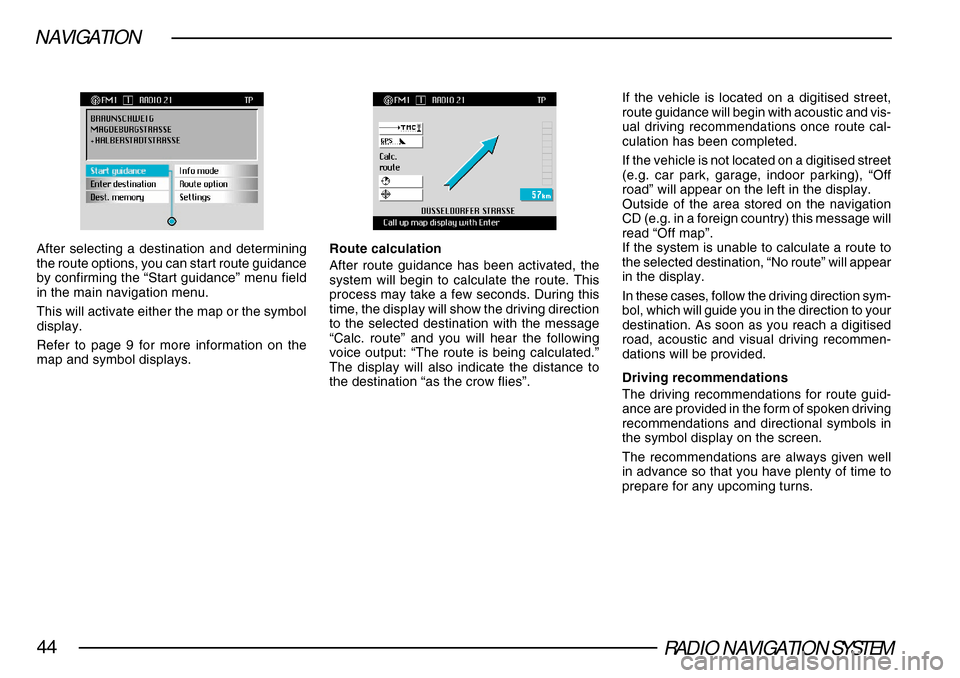
After selecting a destination and determining
the route options, you can start route guidance
by confirming the “Start guidance” menu field
in the main navigation menu.
This will activate either the map or the symbol
display.
Refer to page 9 for more information on the
map and symbol displays.Route calculation
After route guidance has been activated, the
system will begin to calculate the route. This
process may take a few seconds. During this
time, the display will show the driving direction
to the selected destination with the message
“Calc. route” and you will hear the following
voice output: “The route is being calculated.”
The display will also indicate the distance to
the destination “as the crow flies”.If the vehicle is located on a digitised street,
route guidance will begin with acoustic and vis-
ual driving recommendations once route cal-
culation has been completed.
If the vehicle is not located on a digitised street
(e.g. car park, garage, indoor parking), “Off
road” will appear on the left in the display.
Outside of the area stored on the navigation
CD (e.g. in a foreign country) this message will
read “Off map”.
If the system is unable to calculate a route to
the selected destination, “No route” will appear
in the display.
In these cases, follow the driving direction sym-
bol, which will guide you in the direction to your
destination. As soon as you reach a digitised
road, acoustic and visual driving recommen-
dations will be provided.
Driving recommendations
The driving recommendations for route guid-
ance are provided in the form of spoken driving
recommendations and directional symbols in
the symbol display on the screen.
The recommendations are always given well
in advance so that you have plenty of time to
prepare for any upcoming turns.
Page 46 of 75
RADIO NAVIGATION SYSTEM45
NAVIGATION
Important!
All the information provided during
route guidance can be considered only
as recommendations. The Road Traffic
Code always takes priority, even if the
driving recommendation should
contradict the Road Traffic Code.
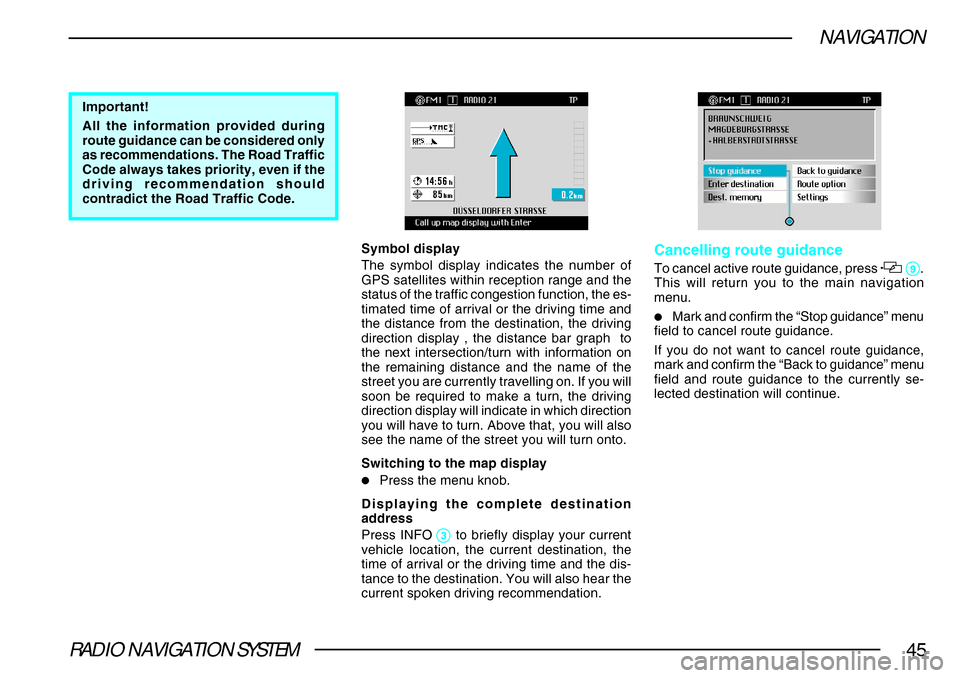
Symbol display
The symbol display indicates the number of
GPS satellites within reception range and the
status of the traffic congestion function, the es-
timated time of arrival or the driving time and
the distance from the destination, the driving
direction display , the distance bar graph to
the next intersection/turn with information on
the remaining distance and the name of the
street you are currently travelling on. If you will
soon be required to make a turn, the driving
direction display will indicate in which direction
you will have to turn. Above that, you will also
see the name of the street you will turn onto.
Switching to the map display
•Press the menu knob.
Displaying the complete destination
address
Press INFO
33 33
3 to briefly display your current
vehicle location, the current destination, the
time of arrival or the driving time and the dis-
tance to the destination. You will also hear the
current spoken driving recommendation.
Cancelling route guidance
To cancel active route guidance, press 99 99
9.
This will return you to the main navigation
menu.
•Mark and confirm the “Stop guidance” menu
field to cancel route guidance.
If you do not want to cancel route guidance,
mark and confirm the “Back to guidance” menu
field and route guidance to the currently se-
lected destination will continue.
Page 47 of 75
RADIO NAVIGATION SYSTEM46
NAVIGATION
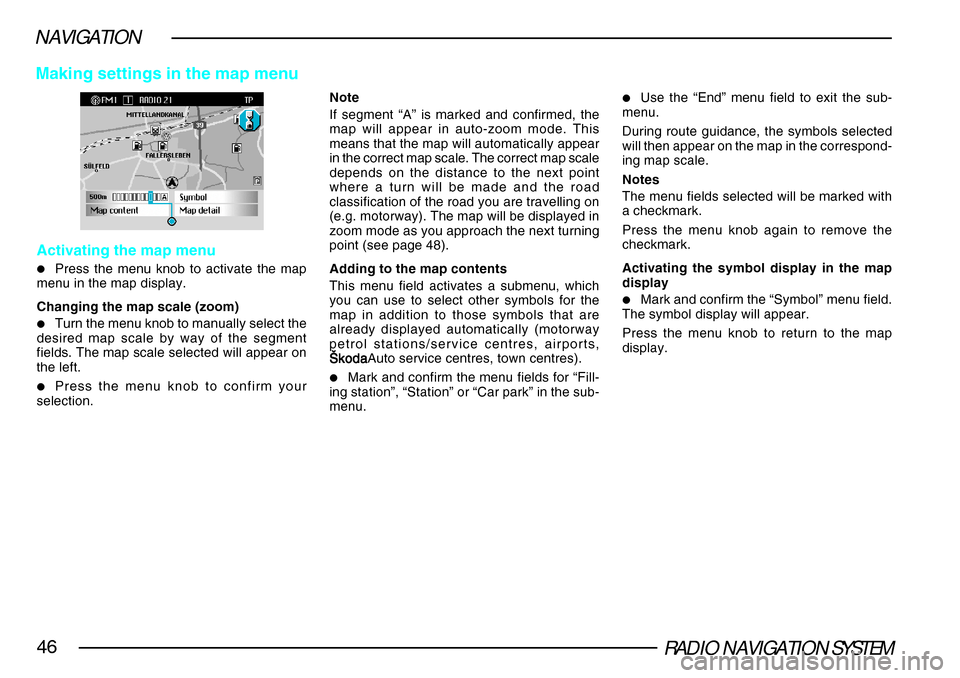
Activating the map menu
•Press the menu knob to activate the map
menu in the map display.
Changing the map scale (zoom)
•Turn the menu knob to manually select the
desired map scale by way of the segment
fields. The map scale selected will appear on
the left.
•Press the menu knob to confirm your
selection. Note
If segment “A” is marked and confirmed, the
map will appear in auto-zoom mode. This
means that the map will automatically appear
in the correct map scale. The correct map scale
depends on the distance to the next point
where a turn will be made and the road
classification of the road you are travelling on
(e.g. motorway). The map will be displayed in
zoom mode as you approach the next turning
point (see page 48).
Adding to the map contents
This menu field activates a submenu, which
you can use to select other symbols for the
map in addition to those symbols that are
already displayed automatically (motorway
petrol stations/service centres, airports,
·koda·koda ·koda·koda
·kodaAuto service centres, town centres).•Mark and confirm the menu fields for “Fill-
ing station”, “Station” or “Car park” in the sub-
menu.
•Use the “End” menu field to exit the sub-
menu.
During route guidance, the symbols selected
will then appear on the map in the correspond-
ing map scale.
Notes
The menu fields selected will be marked with
a checkmark.
Press the menu knob again to remove the
checkmark.
Activating the symbol display in the map
display
•Mark and confirm the “Symbol” menu field.
The symbol display will appear.
Press the menu knob to return to the map
display.
Making settings in the map menu
Page 48 of 75
RADIO NAVIGATION SYSTEM47
NAVIGATION
Selecting the menu field for “map
detail”
If you select the “Map detail” menu field, you
can choose the following settings in the sub-
menu that appears:
–Alignment
-In your driving direction
- In the direction of the destination
- Due north
- Automatic
– Map type
-Location map (displays your current ve-
hicle location)
- Overview map (displays your current ve-
hicle location and your destination)
- Destination map (displays your destina-
tion)
– Move
-Activates the move mode to view differ-
ent sections of the map
– Zoom setting
-Activates the Autozoom submenu to se-
lect the map scale using Autozoom
Selecting the “Alignment” menu field
•Confirm the “Alignment” menu field.
•Mark and confirm the desired alignment in
the following submenu.
Following this the map will appear, the mark
indicating your current vehicle location will be
placed in the centre of the map. Direction of travel
- The map will be shown
facing in the direction you are driving in all
scales and will turn to reflect any changes in
direction you make.
Direction of destination - The map will be
shown facing in the direction of the destina-
tion.
Northwards - The map will face due north.
Automatic - The map will be aligned depend-
ing on the map scale selected:
• 100 m - 2 km: In driving direction
•5 km - 500 km: Due north
Note
When this submenu is activated, the selection
bar will mark the last setting selected.
Selecting the “Map type” menu field
•Mark and confirm the “Map type” menu field.
•Mark and confirm the desired map type in
the following submenu.
The map type selected will then appear.
Map of location - The map section will indi-
cate the current vehicle location. There will be
no change in the scale and the alignment.
General map - Indicates the current vehicle
location and the destination.
Note
If the overview map is activated in the Autozo-
om mode, the map scale will change automat-
ically as you approach your destination. Map of destination
- Indicates the destination.
There will be no change in the scale and the
alignment.
Note
When this submenu is activated, the selection
bar will mark the last setting selected.
Selecting the “Move” menu field
Use this function to view neighbouring map
sections.
•Mark and confirm the “Move” menu field.
Following this, the cross hairs will appear on
the map.
Turn the menu knob to move the cross hairs
to the edge of the map to access the neigh-
bouring map section (see the section on
Moving the cross-hairs on page 41).
Page 49 of 75
RADIO NAVIGATION SYSTEM48
NAVIGATION
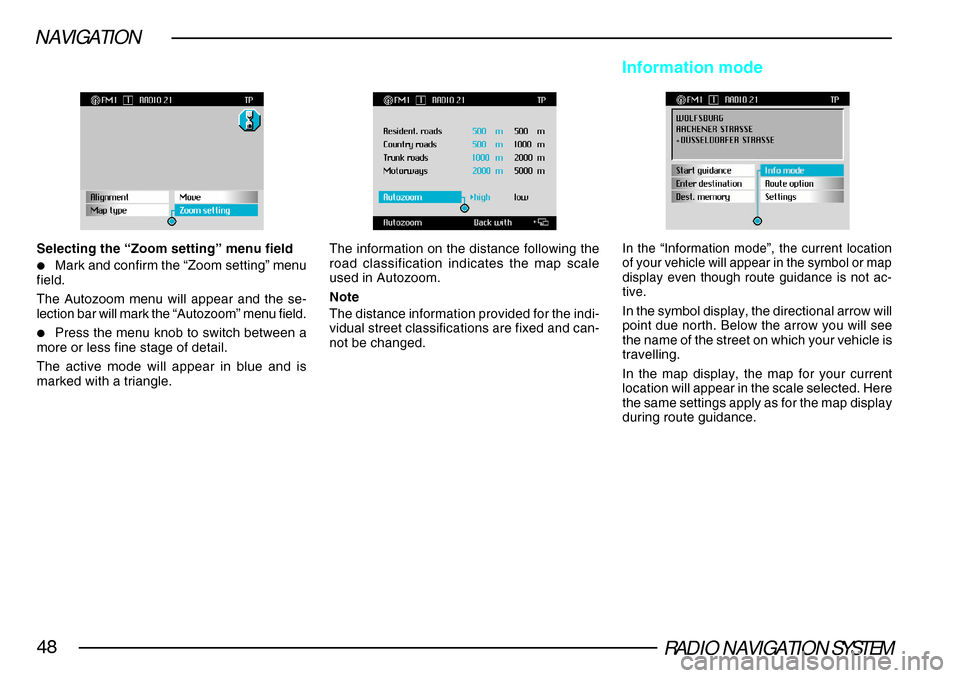
Selecting the “Zoom setting” menu field
•Mark and confirm the “Zoom setting” menu
field.
The Autozoom menu will appear and the se-
lection bar will mark the “Autozoom” menu field.
•Press the menu knob to switch between a
more or less fine stage of detail.
The active mode will appear in blue and is
marked with a triangle.
The information on the distance following the
road classification indicates the map scale
used in Autozoom.
Note
The distance information provided for the indi-
vidual street classifications are fixed and can-
not be changed.
Information mode
In the “Information mode”, the current location
of your vehicle will appear in the symbol or map
display even though route guidance is not ac-
tive.
In the symbol display, the directional arrow will
point due north. Below the arrow you will see
the name of the street on which your vehicle is
travelling.
In the map display, the map for your current
location will appear in the scale selected. Here
the same settings apply as for the map display
during route guidance.
Page 50 of 75
RADIO NAVIGATION SYSTEM49
NAVIGATION
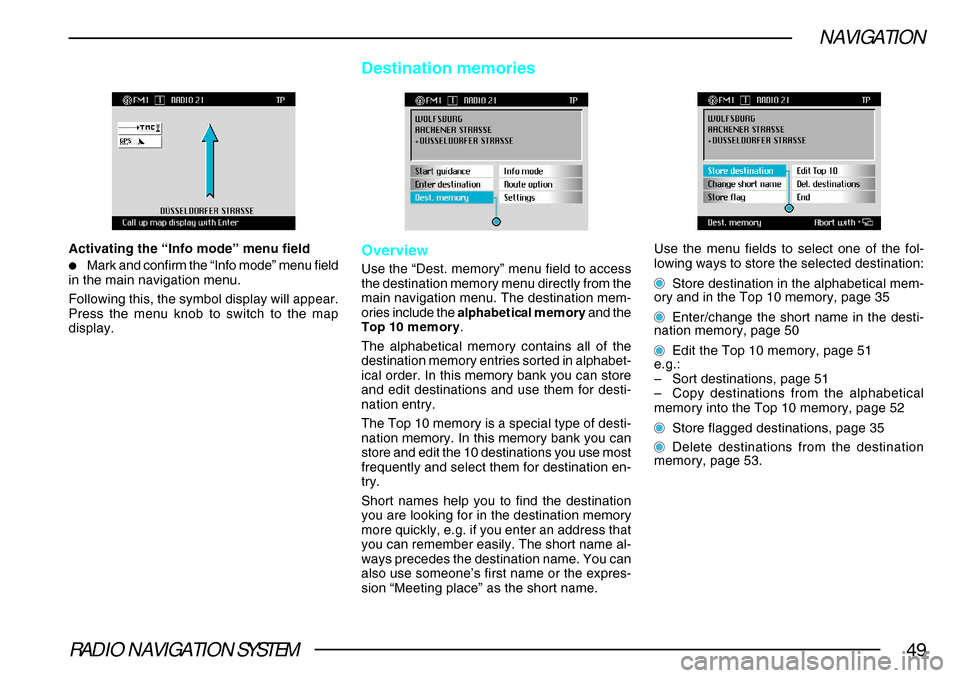
Activating the “Info mode” menu field
•Mark and confirm the “Info mode” menu field
in the main navigation menu.
Following this, the symbol display will appear.
Press the menu knob to switch to the map
display.
Destination memories
Overview
Use the “Dest. memory” menu field to access
the destination memory menu directly from the
main navigation menu. The destination mem-
ories include the alphabetical memory and the
Top 10 memory .
The alphabetical memory contains all of the
destination memory entries sorted in alphabet-
ical order. In this memory bank you can store
and edit destinations and use them for desti-
nation entry.
The Top 10 memory is a special type of desti-
nation memory. In this memory bank you can
store and edit the 10 destinations you use most
frequently and select them for destination en-
try.
Short names help you to find the destination
you are looking for in the destination memory
more quickly, e.g. if you enter an address that
you can remember easily. The short name al-
ways precedes the destination name. You can
also use someone’s first name or the expres-
sion “Meeting place” as the short name.
Use the menu fields to select one of the fol-
lowing ways to store the selected destination:
Store destination in the alphabetical mem-
ory and in the Top 10 memory, page 35
Enter/change the short name in the desti-
nation memory, page 50
Edit the Top 10 memory, page 51
e.g.:
– Sort destinations, page 51
– Copy destinations from the alphabetical
memory into the Top 10 memory, page 52
Store flagged destinations, page 35
Delete destinations from the destination
memory, page 53.