transmission SKODA SUPERB 2005 1.G / (B5/3U) DX Navigation System Manual
[x] Cancel search | Manufacturer: SKODA, Model Year: 2005, Model line: SUPERB, Model: SKODA SUPERB 2005 1.G / (B5/3U)Pages: 75, PDF Size: 3.09 MB
Page 21 of 75

RADIO NAVIGATION SYSTEM20
AUDIO
RDS-Regional
RDS-Regional RDS-Regional
RDS-Regional
RDS-Regional
Radio stations sometimes divide their program-
ming into regional programming at certain
times of the day. The 1st program in the NDR
network, for example, serves Schleswig-
Holstein, Hamburg and Lower Saxony, states
in northern Germany, with regional program-
ming with different contents.
At first, the system will tune into only those
alternative frequencies for the radio station se-
lected.
However, if the reception quality deteriorates
to the point that the radio might “lose” the sta-
tion, the system will also switch to frequencies
used by a “related” NDR 1 station. Because
these radio stations sometimes broadcast dif-
ferent contents, this might mean that you will
hear a different program.
Switching to regionally related stations
Switching to regionally related stations Switching to regionally related stations
Switching to regionally related stations
Switching to regionally related stations
As a rule, the system will only switch to other
frequencies for the same station with the same
PI code. However, if the reception deteriorates
beyond a certain point, the system will also
automatically switch to a regionally related
broadcasting network.
Use the RDS-Regional function in the “Audio
setting” menu to switch “RDS REG” to “auto”
or “off”.
auto - If you select this setting, the system will
switch to a regionally related transmission fre-
quency when station reception deteriorates
beyond a certain point.
off - switches the function off. Notes on RDS reception
Notes on RDS reception Notes on RDS reception
Notes on RDS reception
Notes on RDS reception
•After you switch the system on, the radio
will look for the best reception frequency for
the station you have tuned into. Depending on
your location and the number of alternate fre-
quencies, the system may remain mute for
several seconds.
•Depending on the strength of the reception
signal, it may take the system several minutes
to evaluate the RDS information.
•The system is unable to evaluate RDS in-
formation for very weak signals. In this case,
the station frequency will appear in place of
the station name in the status line or the infor-
mation field.
•When reception is poor (e.g. in mountain-
ous areas), the system will check the alternate
frequencies often. This means that the radio
might switch to mute briefly.
•If the radio frequently switches to mute or
experiences very poor reception in certain ar-
eas, it is possible to temporarily switch the RDS
function off.
Traffic information
Many FM stations transmit regular traffic infor-
mation for their reception areas.
After you select a radio station, the system will
check to see whether or not it broadcasts traf-
fic information.
•The radio station selected is a TP station
(“TP” will appear behind the station name in
the information field of the main radio menu). The system will remain tuned to this station.
The functions for “traffic information standby”
and “EON” are active.
•If the radio station you have tuned into is
not a traffic information station or is not within
reception range, the system will automatically
search for another traffic information station
within reception range (seek tuning start). The
following message will appear in the radio in-
formation display: “TP SEEK”.
Listening to a traffic announcement
Listening to a traffic announcement Listening to a traffic announcement
Listening to a traffic announcement
Listening to a traffic announcement
The system identifies a traffic announcement
by the traffic announcement code. As a result,
you will hear the traffic announcement even
when the radio or CD player has been set to
“very quiet”. Traffic announcements are trans-
mitted in mono. The message “Info” will ap-
pear in the radio information display. At the
same time, the announcement will be saved
in the Traffic Information Memory (TIM) (see
page 21).
Interrupting a traffic announcement
Interrupting a traffic announcement Interrupting a traffic announcement
Interrupting a traffic announcement
Interrupting a traffic announcement
If you want to interrupt a traffic announcement,
press TIM
11 11
1. The following traffic announce-
ments will be put through.
Cancelling traffic announcement standby
Cancelling traffic announcement standby Cancelling traffic announcement standby
Cancelling traffic announcement standby
Cancelling traffic announcement standby
Switch to an FM or AM station in the “Select
source” menu to cancel traffic announcement
standby.
Page 68 of 75

RADIO NAVIGATION SYSTEM67
TV
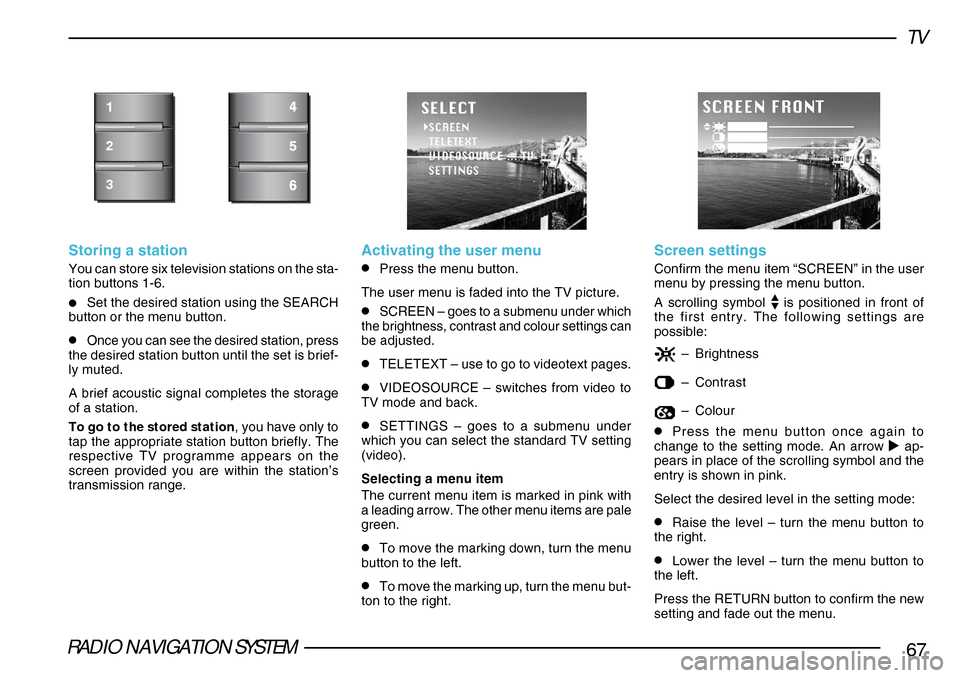
Storing a station
You can store six television stations on the sta-
tion buttons 1-6.
•Set the desired station using the SEARCH
button or the menu button.
•Once you can see the desired station, press
the desired station button until the set is brief-
ly muted.
A brief acoustic signal completes the storage
of a station.
To go to the stored station , you have only to
tap the appropriate station button briefly. The
respective TV programme appears on the
screen provided you are within the station’s
transmission range.
1
2
3
Activating the user menu
•Press the menu button.
The user menu is faded into the TV picture.
•SCREEN – goes to a submenu under which
the brightness, contrast and colour settings can
be adjusted.
•TELETEXT – use to go to videotext pages.
•VIDEOSOURCE – switches from video to
TV mode and back.
•SETTINGS – goes to a submenu under
which you can select the standard TV setting
(video).
Selecting a menu item
The current menu item is marked in pink with
a leading arrow. The other menu items are pale
green.
•To move the marking down, turn the menu
button to the left.
•To move the marking up, turn the menu but-
ton to the right.
Screen settings
Confirm the menu item “SCREEN” in the user
menu by pressing the menu button.
A scrolling symbol
is positioned in front of
the first entry. The following settings are
possible:
– Brightness
–Contrast
–Colour
•Press the menu button once again to
change to the setting mode. An arrow ap-
pears in place of the scrolling symbol and the
entry is shown in pink.
Select the desired level in the setting mode:
•Raise the level – turn the menu button to
the right.
•Lower the level – turn the menu button to
the left.
Press the RETURN button to confirm the new
setting and fade out the menu.