instrument cluster SKODA SUPERB 2006 1.G / (B5/3U) User Guide
[x] Cancel search | Manufacturer: SKODA, Model Year: 2006, Model line: SUPERB, Model: SKODA SUPERB 2006 1.G / (B5/3U)Pages: 281, PDF Size: 12.67 MB
Page 28 of 281
Instruments and Indicator/Warning Lights27
Using the systemSafetyDriving TipsGeneral MaintenanceBreakdown assistanceTechnical Data
Warning lights
Overview
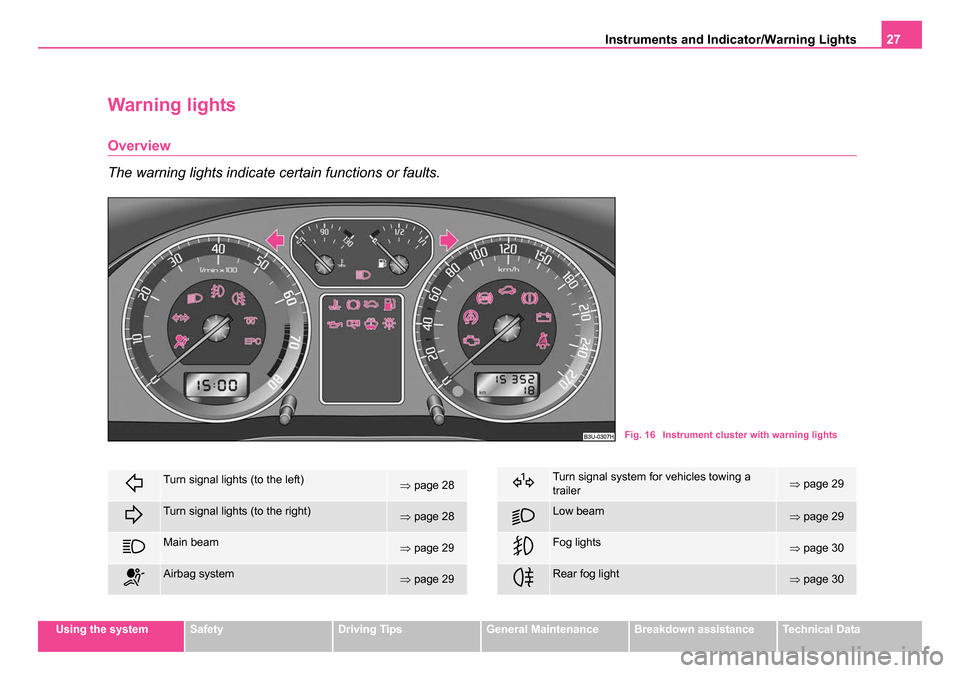
The warning lights indicate certain functions or faults.
Fig. 16 Instrument cluster with warning lights
Turn signal lights (to the left)⇒page 28
Turn signal lights (to the right)⇒page 28
Main beam⇒page 29
Airbag system⇒page 29
Turn signal system for vehicles towing a
trailer⇒page 29
Low beam⇒page 29
Fog lights⇒page 30
Rear fog light⇒page 30
NKO B5 20.book Page 27 Monday, July 3, 2006 2:09 PM
Page 29 of 281
Instruments and Indicator/Warning Lights
28
WARNING
•If you do not pay attention to the warning lights coming on and
the corresponding descriptions and warning notes, this may result
in severe body injuries or major vehicle damage.
•The engine compartment of your car is a hazardous area. There
is a risk of injuries, scalding, accid ents and fire when working in the
engine compartment, e.g. inspecting and replenishing oil and other
fluids. It is also essential to observe all warnings ⇒page 219.
Note
•Arrangement of the indicator lights depends on the model and model
version. The symbols shown in the following functional description are to
be found as indicator lights in the instrument cluster.
•Operational faults are shown in the display of the instrument cluster as
red symbols (priority 1 - danger) or yellow symbols (priority 2 - warning).
Turn signal system
Either the left or right indicator light flashes depending on the posi-
tion of the turn signal lever.
The indicator light flashes at twice its normal rate if a turn signal light fails.
This does not apply when towing a trailer.
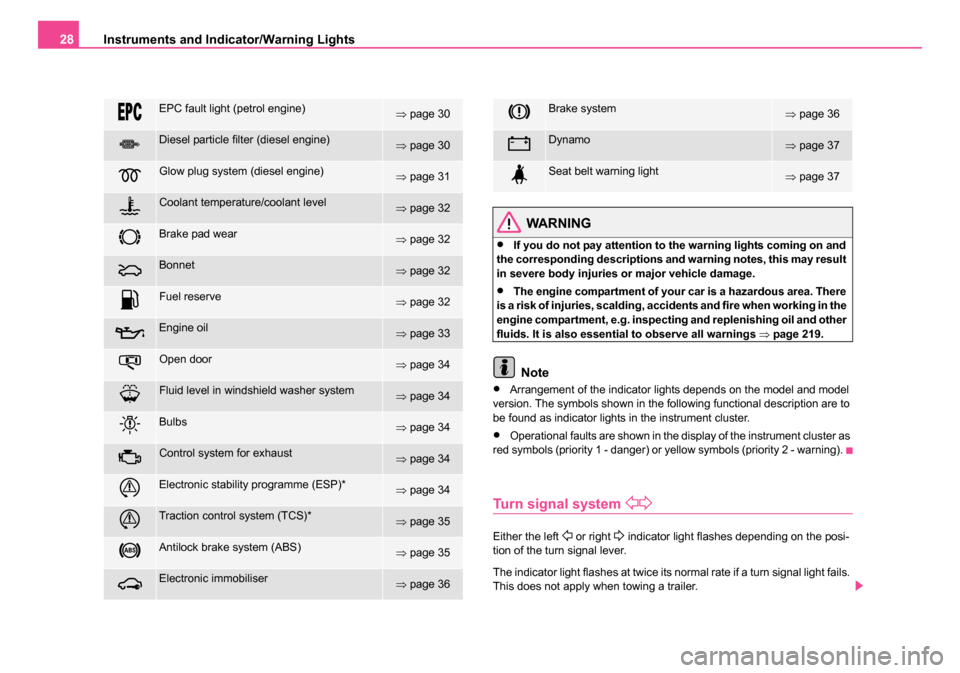
EPC fault light (petrol engine)⇒ page 30
Diesel particle filter (diesel engine)⇒page 30
Glow plug system (diesel engine)⇒page 31
Coolant temperature/coolant level⇒page 32
Brake pad wear⇒page 32
Bonnet⇒page 32
Fuel reserve⇒page 32
Engine oil⇒page 33
Open door⇒page 34
Fluid level in windshield washer system⇒page 34
Bulbs⇒page 34
Control system for exhaust⇒page 34
Electronic stability programme (ESP)*⇒page 34
Traction control system (TCS)*⇒page 35
Antilock brake system (ABS)⇒page 35
Electronic immobiliser⇒page 36
Brake system⇒page 36
Dynamo⇒page 37
Seat belt warning light⇒page 37
NKO B5 20.book Page 28 Monday, July 3, 2006 2:09 PM
Page 32 of 281
Instruments and Indicator/Warning Lights31
Using the systemSafetyDriving TipsGeneral MaintenanceBreakdown assistanceTechnical Data
tion procedure lasts about 2 to 3 minutes and is performed without driver
interference.
If the engine control unit detects that the operating conditions for a regen-
eration (combustion of deposited soot particles) of the diesel particle fiter
are not optimal, e.g. slow city driving, a warning light in the instrument
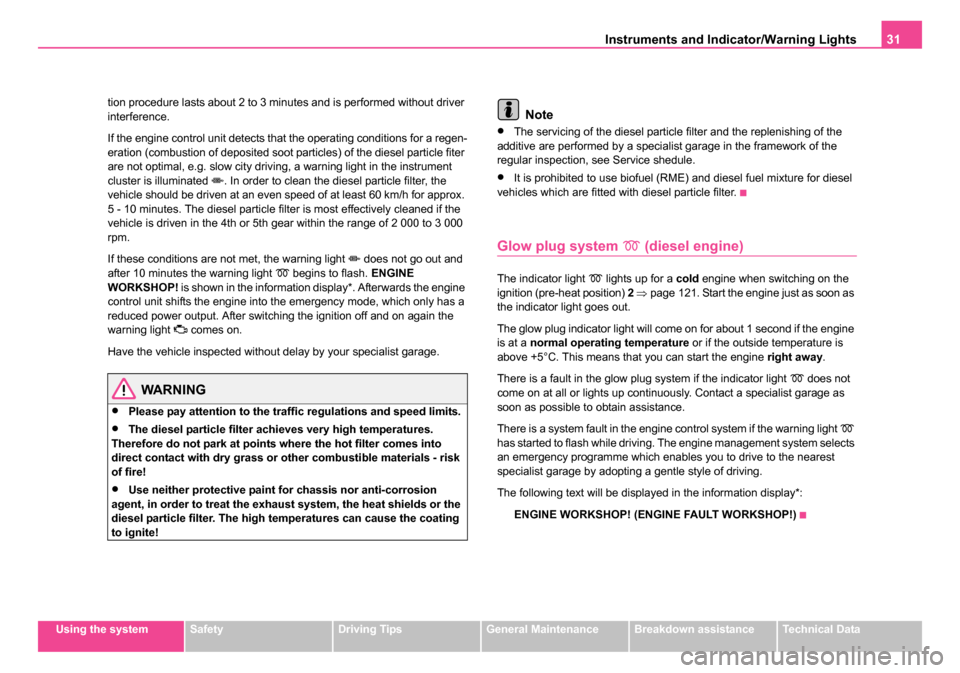
cluster is illuminated
. In order to clean the diesel particle filter, the
vehicle should be driven at an even speed of at least 60 km/h for approx.
5 - 10 minutes. The diesel particle filter is most effectively cleaned if the
vehicle is driven in the 4th or 5th gear within the range of 2 000 to 3 000
rpm.
If these conditions are not met, the warning light
does not go out and
after 10 minutes the warning light begins to flash. ENGINE
WORKSHOP! is shown in the information display*. Afterwards the engine
control unit shifts the engine into the emergency mode, which only has a
reduced power output. After switching the ignition off and on again the
warning light
comes on.
Have the vehicle inspected without delay by your specialist garage.
WARNING
•Please pay attention to the traffic regulations and speed limits.
•The diesel particle filter achieves very high temperatures.
Therefore do not park at points where the hot filter comes into
direct contact with dry grass or other combustible materials - risk
of fire!
•Use neither protective paint for chassis nor anti-corrosion
agent, in order to treat the exhaust system, the heat shields or the
diesel particle filter. The high temperatures can cause the coating
to ignite!
Note
•The servicing of the diesel particle filter and the replenishing of the
additive are performed by a specialist garage in the framework of the
regular inspection, see Service shedule.
•It is prohibited to use biofuel (RME) and diesel fuel mixture for diesel
vehicles which are fitted with diesel particle filter.
Glow plug system (diesel engine)
The indicator light lights up for a cold engine when switching on the
ignition (pre-heat position) 2 ⇒ page 121. Start the engine just as soon as
the indicator light goes out.
The glow plug indicator light will come on for about 1 second if the engine
is at a normal operating temperature or if the outside temperature is
above +5°C. This means that you can start the engine right away.
There is a fault in the glow plug system if the indicator light
does not
come on at all or lights up continuously. Contact a specialist garage as
soon as possible to obtain assistance.
There is a system fault in the engine control system if the warning light
has started to flash while driving. The engine management system selects
an emergency programme which enables you to drive to the nearest
specialist garage by adopting a gentle style of driving.
The following text will be displayed in the information display*:
ENGINE WORKSHOP! (ENGINE FAULT WORKSHOP!)
NKO B5 20.book Page 31 Monday, July 3, 2006 2:09 PM
Page 36 of 281
Instruments and Indicator/Warning Lights35
Using the systemSafetyDriving TipsGeneral MaintenanceBreakdown assistanceTechnical Data
The warning light will come on and remains on if the ESP is switched off
or if there is a fault in the system.
The fact that the ESP system operates together with the ABS means that
the ESP warning light will also come on if the ABS system is not operating
properly.
Further information on the ESP
⇒page 185, “Electronic stability
programme (ESP)*”.
Traction control system (TCS) *
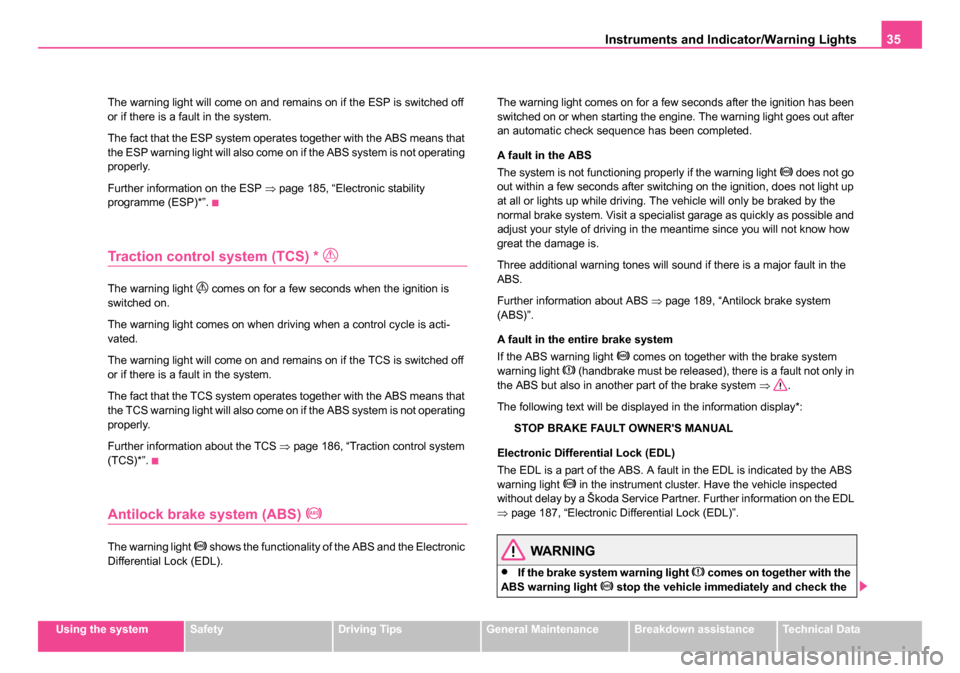
The warning light comes on for a few seconds when the ignition is
switched on.
The warning light comes on when driving when a control cycle is acti-
vated.
The warning light will come on and remains on if the TCS is switched off
or if there is a fault in the system.
The fact that the TCS system operates together with the ABS means that
the TCS warning light will also come on if the ABS system is not operating
properly.
Further information about the TCS ⇒page 186, “Traction control system
(TCS)*”.
Antilock brake system (ABS)
The warning light shows the functionality of the ABS and the Electronic
Differential Lock (EDL). The warning light comes on for a few seconds after the ignition has been
switched on or when starting the engine. The warning light goes out after
an automatic check sequence has been completed.
A fault in the ABS
The system is not functioning properly if the warning light
does not go
out within a few seconds after switching on the ignition, does not light up
at all or lights up while driving. The vehicle will only be braked by the
normal brake system. Visit a specialist garage as quickly as possible and
adjust your style of driving in the meantime since you will not know how
great the damage is.
Three additional warning tones will sound if there is a major fault in the
ABS.
Further information about ABS ⇒page 189, “Antilock brake system
(ABS)”.
A fault in the entire brake system
If the ABS warning light
comes on together with the brake system
warning light (handbrake must be released), there is a fault not only in
the ABS but also in another part of the brake system ⇒.
The following text will be displayed in the information display*:
STOP BRAKE FAULT OWNER'S MANUAL
Electronic Differential Lock (EDL)
The EDL is a part of the ABS. A fault in the EDL is indicated by the ABS
warning light
in the instrument cluster. Have the vehicle inspected
without delay by a Škoda Service Partner. Further information on the EDL
⇒ page 187, “Electronic Differential Lock (EDL)”.
WARNING
•If the brake system warning light comes on together with the
ABS warning light stop the vehicle immediately and check the
NKO B5 20.book Page 35 Monday, July 3, 2006 2:09 PM
Page 58 of 281
Lights and Visibility57
Using the systemSafetyDriving TipsGeneral MaintenanceBreakdown assistanceTechnical Data
•The switching on of the described lights should only be undertaken in
accordance with the legal requirements.
•In the event of cool or humid weather conditions, the headlights can be
misted up from inside.
−The temperature difference between interior and external area of
the headlight lenses is decisive.
− When the driving lights are switched on, the light outlet surfaces are
free from mist after a short period. The headlight lenses can possibly
mist up at the border areas.
− It also concerns reverse light and turn signal lights.
− This mist has no influence on the life of the lighting system.
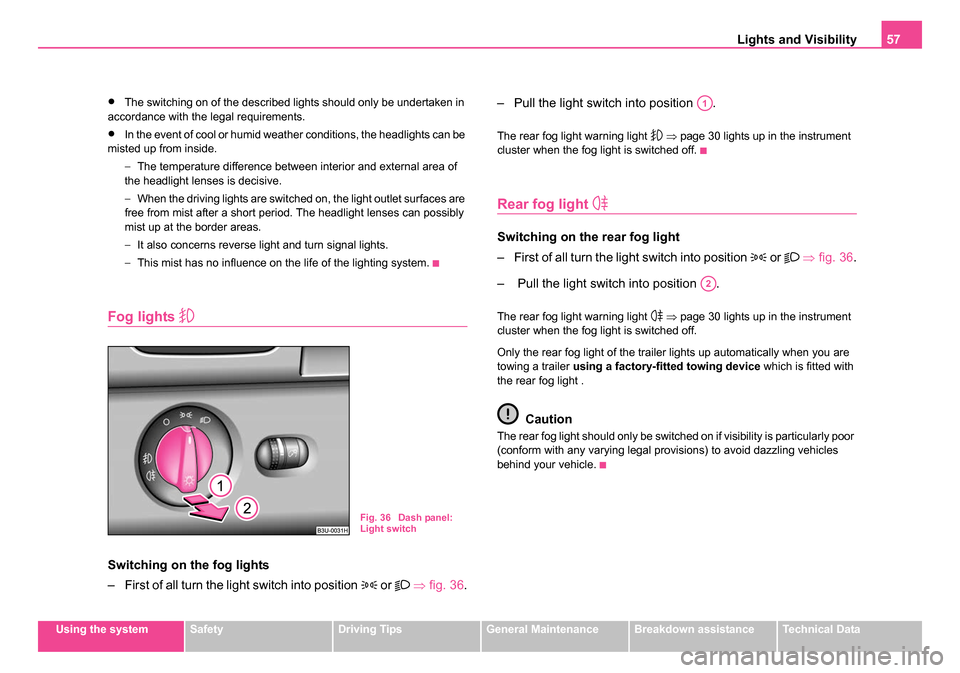
Fog lights
Switching on the fog lights
– First of all turn the light switch into position
or ⇒ fig. 36. – Pull the light switch into position .
The rear fog light warning light
⇒ page 30 lights up in the instrument
cluster when the fog light is switched off.
Rear fog light
Switching on the rear fog light
– First of all turn the light switch into position
or ⇒ fig. 36.
– Pull the light switch into position .
The rear fog light warning light ⇒ page 30 lights up in the instrument
cluster when the fog light is switched off.
Only the rear fog light of the trailer lights up automatically when you are
towing a trailer using a factory-fitted towing device which is fitted with
the rear fog light .
Caution
The rear fog light should only be switched on if visibility is particularly poor
(conform with any varying legal provisions) to avoid dazzling vehicles
behind your vehicle.
Fig. 36 Dash panel:
Light switch
A1
A2
NKO B5 20.book Page 57 Monday, July 3, 2006 2:09 PM
Page 61 of 281
Lights and Visibility
60
The turn signal and main beam lever perform the following func-
tions:
Right
and left turn signal light
– Push the lever upwards or downwards ⇒page 59, fig. 40 .
– Turn signal for changing lanes - in order to only flash briefly, move the lever up or down to the pressure point and hold it in
this position.
Main beam
– Switch on the low beam.
– Push the lever forwards.
– Pull the lever back into the initial position in order to switch the main beam off again.
Headlight flasher
– Pull on the lever of the steering wheel (sprung position) - the main beam and warning light in the instrument cluster come
on.
Parking light
– Switch off the ignition.
– Push the lever up or down - the right-hand or left-hand parking light is switched on.
Notes on light and indicator functions
•The turn signal system only operates when the ignition is switched
on. The corresponding indicator light or in the instrument cluster also
flashes.
•The turn signal is automatically cancelled after negotiating a curve.
•The side light and rear light on the appropriate side of the vehicle are
switched on when the parking light is selected. The parking light function
only operates if the ignition is switched off.
•An acoustic warning signal will sound when the driver's door is opened
if the lever is not in the middle position after removing the ignition key. The
acoustic warning signal will stop just as soon as the driver's door is closed.
Caution
Use main beam or the headlight flasher only if this does not risk dazzling
other road users.
Note
Use only in accordance with the legal requirements the described lighting
and signal systems.
Coming Home Function
This function makes it possible to switch on low or main beam for
a short time after leaving the car, e.g. to illuminate the path to
your front door, etc.
Selecting function
– Switch off the light.
– Switch off the ignition.
– Flash one time with the headlights.
– Open the door, the low beam lights up.
NKO B5 20.book Page 60 Monday, July 3, 2006 2:09 PM
Page 133 of 281

Automatic gearbox*
132
is never completely interrupted, also not when the engine is idling
- the vehicle "creeps".
Selector lever positions
The selector lever position you have engaged is shown in the information
display of the instrument cluster with the corresponding gear symbol high-
lighted ⇒fig. 124 .
P - Parklock
The driven wheels are locked mechanically in this position.
The Parklock must only be engaged when the vehicle is stationary ⇒.
If you wish to move the selector lever into or out of this position, you must
press the Shiftlock button in the handle of the selector lever and at the
same time depress the brake pedal.
R - Reverse
Reverse gear must only be engaged when the vehicle is stationary and
the engine idling ⇒.
The brake pedal must be depressed and at the same time the Shiftlock
must be pressed, if you wish to obtain the selector lever positions R, P or
N .
WARNING (continued)
Fig. 123 Selector lever
Fig. 124 Information
display: Selector lever
positions
NKO B5 20.book Page 132 Monday, July 3, 2006 2:09 PM
Page 163 of 281

Airbag system
162
Airbag system
Description of the airbag system
General information on the airbag system
The front airbag system is complementary to the three-point seat belts
and offers additional protection for the head and chest area of the driver
and passenger in the event of a frontal collision.
In the case of a violent side crash, the side and head airbags* reduce the
risk of injuries to the occupants on the part of the body facing the side of
the accident ⇒.
The airbag system is only functional after the ignition has been switched
on.
The operational readiness of the airbag system is monitored electroni-
cally. The airbag warning light comes on for a few seconds each time the
ignition is switched on.
The airbag system (according to vehicle equipment) essentially
consists of:
•an electronic control unit,
•the two front airbags,
•the side airbags,
•head airbags*
•an airbag warning light in the instrument cluster,
•a front passenger airbag switch* ⇒page 172,
•an indicator light for a switched off front seat passenger airbag* in the
middle of the dash panel ⇒page 172. A fault in the airbag system exists if:
•the airbag indicator light does not light up when the ignition is switched
on,
•the warning light does not go out after about 3 seconds after the igni-
tion is switched on,
•the airbag indicator light goes out and comes on again after the ignition
is switched on,
•the airbag indicator light comes on or flickers when driving,
•an airbag indicator light showing a switched-off front passenger
airbag* in the middle of the dash panel flashes.
WARNING
•To enable the occupants of a car to be protected with the
greatest possible effect when the airbag is deployed, the front
seats must be ⇒page 151, “Correct seated position” correctly
adjusted to match the body size of the occupant.
•If you do not fasten the seat belts when driving, lean too far
forward or adopt an incorrect seated position, you are exposing
yourself to increased risk of injury in the event of an accident.
•Have the airbag system checked immediately by a specialist
garage if a fault exists. Otherwise, there is a risk of the airbag not
being activated in the event of an accident.
•No modifications of any kind may be made to parts of the airbag
system.
•It is prohibited to manipulate individual parts of the airbag
system as this might result in the airbag being deployed.
NKO B5 20.book Page 162 Monday, July 3, 2006 2:09 PM
Page 172 of 281

Airbag system171
Using the systemSafetyDriving TipsGeneral MaintenanceBreakdown assistanceTechnical Data
Deactivating an airbag
Deactivating airbags
If any airbags have been deactivated, switch them on
again as soon as possible so that they are able to again
provide their proper protection.
There is the technical means installed within your vehicle to switch off the
front, side or head airbag (take out of commission).
This is why you should have the deactivation of the airbags carried out by
a specialist garage.
On vehicles equipped with the switch for deactivation of the airbags, you
can deactivate the front and side passenger airbag by means of this
switch ⇒page 172.
Deactivation of airbags is envisaged only for particular instances,
such as if:
•you must in exceptional cases use a child seat on the front
passenger seat where the child has its back to the direction of travel of the
vehicle (in some countries this must be in the direction of travel due to
other legal regulations applying) ⇒page 174, “Important safety informa-
tion regarding the use of child safety seats”
•you are not able to maintain the distance of at least 25 cm between
middle of steering wheel and chest, despite the driver seat being correctly
adjusted,
•special attachments are required in the area of the steering wheel
because of a physical disability,
•you have installed other seats (e.g. orthopaedic seats without side
airbags). Monitoring the airbag system
The functionality of the airbag system is also monitored electronically,
when one airbag has been switched off
If the airbag was switched off using diagnostic equipment:
•The warning light for the airbag system lights up for 3 seconds after
switching on the ignition and then flashes for 12 seconds afterwards in 2
second intervals.
Front passenger airbags switched off using the switch for front
passenger airbags* in stowage compartment on the front passenger
side:
•The airbag warning light comes on in the instrument cluster for about
3 seconds each time the ignition is switched on.
•Switching off airbags is indicated in the middle of the dash panel by the
lighting up of the indicator light ⇒ page 172, fig. 154 .
Note
Your Škoda Service Partner will be able to advise you whether national
legislation in your country allows airbags in your vehicle to be deactivated,
and which ones.
NKO B5 20.book Page 171 Monday, July 3, 2006 2:09 PM
Page 187 of 281

Intelligent Technology
186
The ESP warning light ⇒page 34 lights up in the instrument cluster when
there is a fault on the ESP.
Switching off
You can switch the ESP off and on again as you wish, by pressing the
button ⇒page 185, fig. 164 . The ESP warning light ⇒ page 34 lights up
in the instrument cluster when the ESP is switched off.
The ESP should normally always be switched on. It may be good practice
to switch the system off only in particular exceptional situations if you
desire wheel slip.
Examples:
•when driving with snow chains,
•when driving in deep snow or on a loose surface,
•when it is necessary to rock a car free when it has become stuck.
then you should switch on the ESP again.
WARNING
It is also not possible for the E SP to overcome the physical limits
of the vehicle. Even if a vehicle fitted with ESP you should still
always adapt your style of driving to the condition of the road
surface and the traffic situation. This particularly applies when
driving on slippery and wet roads. The increased safety offered
must not tempt you to take greater risks than otherwise - risk of an
accident!
Note
•All four wheels must be fitted with the same tyres in order to achieve
problem-free operation of the ESP. Differing rolling circumferences of the
tyres can lead to an undesirable reduction in the engine output.
•Changes to vehicle (e.g. on engine, on the brakes, on chassis or other
assignment of tyres and wheels) can influence the function of the ESP
⇒ page 242.
Traction control system (TCS)*
The traction control system prevents the driven wheels
from spinning when accelerating.
General
The TCS makes it much easier, and sometimes at all possible, to start off,
accelerate and climb a steep hill when the conditions of the road surface
are unfavourable.
Operating principle
The TCS switches on automatically when the engine is started and then
conducts a self-test. The system monitors the speeds of the driven wheels
with the aid of the ABS sensors. If the wheels are spinning, the force trans-
Fig. 165 TCS switch
NKO B5 20.book Page 186 Monday, July 3, 2006 2:09 PM