oil SKODA SUPERB 2007 1.G / (B5/3U) Owner's Manual
[x] Cancel search | Manufacturer: SKODA, Model Year: 2007, Model line: SUPERB, Model: SKODA SUPERB 2007 1.G / (B5/3U)Pages: 259, PDF Size: 14.71 MB
Page 5 of 259
Contents
4
Driving Tips. . . . . . . . . . . . . . . . . . . . . . . . . . . . . .
Intelligent Technology . . . . . . . . . . . . . . . . . . . . . . . .
Electronic stability programme (ESP)* . . . . . . . . . .
Brakes . . . . . . . . . . . . . . . . . . . . . . . . . . . . . . . . . . . . . . .
Brake booster . . . . . . . . . . . . . . . . . . . . . . . . . . . . . . . .
Antilock brake system (ABS) . . . . . . . . . . . . . . . . . . .
Brake Assist* . . . . . . . . . . . . . . . . . . . . . . . . . . . . . . . . .
Power steering . . . . . . . . . . . . . . . . . . . . . . . . . . . . . . .
Diesel particle filter* (diesel engine) . . . . . . . . . . . .
Driving and the Environment. . . . . . . . . . . . . . . . .
The first 1 500 kilometres and then afterwards . .
Catalytic converter . . . . . . . . . . . . . . . . . . . . . . . . . . . .
Driving in an economical and environmentally
conscious manner . . . . . . . . . . . . . . . . . . . . . . . . . . . .
Environmental compatibility . . . . . . . . . . . . . . . . . . .
Motoring abroad . . . . . . . . . . . . . . . . . . . . . . . . . . . . .
Avoiding damage to your vehicle . . . . . . . . . . . . . .
To w i n g a t r a i l e r. . . . . . . . . . . . . . . . . . . . . . . . . . . . . . . .
Towing a trailer . . . . . . . . . . . . . . . . . . . . . . . . . . . . . . .
Detachable towing device* . . . . . . . . . . . . . . . . . . . .
General Maintenance. . . . . . . . . . . . . . .
Taking care of your ve hicle and cleaning the
vehicle. . . . . . . . . . . . . . . . . . . . . . . . . . . . . . . . . . . . . . . . .
General . . . . . . . . . . . . . . . . . . . . . . . . . . . . . . . . . . . . . .
Care of the exterior of vehicle . . . . . . . . . . . . . . . . . .
Care of the interior of vehicle . . . . . . . . . . . . . . . . . .
Fuel. . . . . . . . . . . . . . . . . . . . . . . . . . . . . . . . . . . . . . . . . . . .
Petrol . . . . . . . . . . . . . . . . . . . . . . . . . . . . . . . . . . . . . . . .
Diesel . . . . . . . . . . . . . . . . . . . . . . . . . . . . . . . . . . . . . . .
Refuelling . . . . . . . . . . . . . . . . . . . . . . . . . . . . . . . . . . . .
Inspecting and Replenishing. . . . . . . . . . . . . . . . . .
Engine compartment . . . . . . . . . . . . . . . . . . . . . . . . .
Overview of the engine compartment . . . . . . . . . .
Engine oil . . . . . . . . . . . . . . . . . . . . . . . . . . . . . . . . . . . .
Cooling system . . . . . . . . . . . . . . . . . . . . . . . . . . . . . . . Brake fluid . . . . . . . . . . . . . . . . . . . . . . . . . . . . . . . . . . .
Battery . . . . . . . . . . . . . . . . . . . . . . . . . . . . . . . . . . . . . . .
Windshield washer system . . . . . . . . . . . . . . . . . . . .
Wheels and Tyres. . . . . . . . . . . . . . . . . . . . . . . . . . . . . .
Wheels . . . . . . . . . . . . . . . . . . . . . . . . . . . . . . . . . . . . . .
Accessories, changes and replacement of partsAccessories and replacement parts . . . . . . . . . . . . .
Technical changes . . . . . . . . . . . . . . . . . . . . . . . . . . . .
Breakdown assistance. . . . . . . . . . . . . .
Breakdown assistance . . . . . . . . . . . . . . . . . . . . . . . .
First-aid box* . . . . . . . . . . . . . . . . . . . . . . . . . . . . . . . . .
Warning triangle . . . . . . . . . . . . . . . . . . . . . . . . . . . . . .
Fire extinguisher* . . . . . . . . . . . . . . . . . . . . . . . . . . . . .
Vehicle tool kit . . . . . . . . . . . . . . . . . . . . . . . . . . . . . . . .
Spare wheel . . . . . . . . . . . . . . . . . . . . . . . . . . . . . . . . . .
Changing a wheel . . . . . . . . . . . . . . . . . . . . . . . . . . . . .
Jump-starting . . . . . . . . . . . . . . . . . . . . . . . . . . . . . . . .
Tow-starting and towing vehicle . . . . . . . . . . . . . . .
Fuses and light bulbs. . . . . . . . . . . . . . . . . . . . . . . . . .
Electric fuses . . . . . . . . . . . . . . . . . . . . . . . . . . . . . . . . .
Bulbs . . . . . . . . . . . . . . . . . . . . . . . . . . . . . . . . . . . . . . . .
Technical Data. . . . . . . . . . . . . . . . . . . . . . . . . .
Te c h n i c a l D a t a. . . . . . . . . . . . . . . . . . . . . . . . . . . . . . . . .
General comments . . . . . . . . . . . . . . . . . . . . . . . . . . .
Used abbreviations . . . . . . . . . . . . . . . . . . . . . . . . . . .
Performances . . . . . . . . . . . . . . . . . . . . . . . . . . . . . . . .
Weight . . . . . . . . . . . . . . . . . . . . . . . . . . . . . . . . . . . . . . .
Identification details . . . . . . . . . . . . . . . . . . . . . . . . . .
Fuel consumption according to the regulations
(99/100/EU) . . . . . . . . . . . . . . . . . . . . . . . . . . . . . . . . . .
Dimensions . . . . . . . . . . . . . . . . . . . . . . . . . . . . . . . . . .
2.0 ltr./85 kW - EU 4 . . . . . . . . . . . . . . . . . . . . . . . . . . .
1.8 ltr./110 kW - EU 4/EU 2 . . . . . . . . . . . . . . . . . . . . .
2.8 ltr./142 kW - EU 4 . . . . . . . . . . . . . . . . . . . . . . . . . . 2.8 ltr./140 kW - EU 2 . . . . . . . . . . . . . . . . . . . . . . . . . .
1,9 l/77 kW TDI PD - EU 4 . . . . . . . . . . . . . . . . . . . . . .
1,9 l/85 kW TDI PD - EU 4 . . . . . . . . . . . . . . . . . . . . . .
1,9 l/96 kW TDI PD - EU 3 . . . . . . . . . . . . . . . . . . . . . .
2.0 ltr./103 kW TDI DPF - EU 4 . . . . . . . . . . . . . . . . . .
2.5 ltr./120 kW TDI PD - EU 4 . . . . . . . . . . . . . . . . . . .
Index . . . . . . . . . . . . . . . . . . . . . . . . . . . . . . . . . . . . . . . .
155
155
155
158
158
159
159
160
160
162
162
163
163
167
167
168
169
169
171
173
173
173
173
178
181
181
181
182
184
184
186
186
189 191
193
197
199
199
205
205
205
207
207
207
207
207
208
209
209
215
217
220
220
222
227
227
227
227
227
227
227
228
228
230
232
234236
238
240
242
244
246
249
NKO B5 20.book Page 4 Friday, March 2, 2007 1:46 PM
Page 22 of 259
Instruments and Indicator/Warning Lights21
Using the systemSafetyDriving TipsGeneral MaintenanceBreakdown assistanceTechnical Data
Red symbols
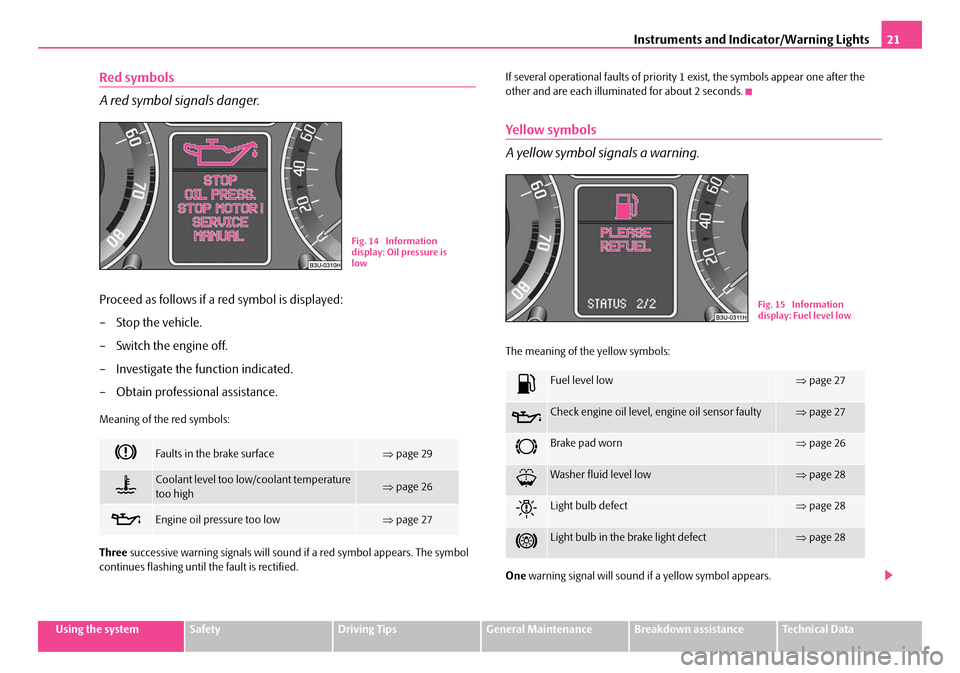
A red symbol signals danger.
Proceed as follows if a red symbol is displayed:
– Stop the vehicle.
– Switch the engine off.
– Investigate the function indicated.
– Obtain professional assistance.
Meaning of the red symbols:
Three successive warning signals will sound if a red symbol appears. The symbol
continues flashing until the fault is rectified. If several operational faults of priority 1 exist, the symbols appear one after the
other and are each illumi
nated for about 2 seconds.
Yellow symbols
A yellow symbol signals a warning.
The meaning of the yellow symbols:
One warning signal will sound if a yellow symbol appears.
Faults in the brake surface⇒page 29
Coolant level too low/coolant temperature
too high⇒page 26
Engine oil pressure too low⇒page 27
Fig. 14 Information
display: Oil pressure is
low
Fuel level low⇒page 27
Check engine oil level, engine oil sensor faulty⇒page 27
Brake pad worn⇒page 26
Washer fluid level low⇒page 28
Light bulb defect⇒page 28
Light bulb in the brake light defect⇒page 28
Fig. 15 Information
display: Fuel level low
NKO B5 20.book Page 21 Friday, March 2, 2007 1:46 PM
Page 24 of 259
Instruments and Indicator/Warning Lights23
Using the systemSafetyDriving TipsGeneral MaintenanceBreakdown assistanceTechnical Data
WARNING
•If you do not pay attention to the warning lights coming on and the corre-
sponding descriptions and warning notes, this may result in severe body
injuries or major vehicle damage.
•The engine compartment of your car is a hazardous area. There is a risk
of injuries, scalding, accidents and fire when working in the engine
compartment, e.g. inspecting and replenis hing oil and other fluids. It is also
essential to observe all warnings ⇒page 185.
Turn signal lights (to the left)⇒ page 24
Turn signal lights (to the right)⇒page 24
Main beam⇒page 24
Airbag system⇒page 24
Turn signal system for vehicles towing a trailer⇒page 24
Low beam⇒page 25
Fog lights⇒page 25
Rear fog light⇒page 25
EPC fault light (petrol engine)⇒page 25
Diesel particle filter (diesel engine)⇒page 25
Glow plug system (diesel engine)⇒page 26
Coolant temperature/coolant level⇒page 26
Brake pad wear⇒page 26
Bonnet⇒page 27
Fuel reserve⇒page 27
Engine oil⇒page 27
Open door⇒page 28
Fluid level in windshield washer system⇒page 28
Bulbs⇒page 28
Control system for exhaust⇒page 28
Electronic stability programme (ESP)*⇒page 28
Tra c t i o n c o n t r o l s y s t e m ( TC S ) *⇒page 28
Antilock brake system (ABS)⇒page 29
Electronic immobiliser⇒page 29
Brake system⇒page 29
Dynamo⇒page 30
Seat belt warning light⇒page 30
NKO B5 20.book Page 23 Friday, March 2, 2007 1:46 PM
Page 28 of 259
Instruments and Indicator/Warning Lights27
Using the systemSafetyDriving TipsGeneral MaintenanceBreakdown assistanceTechnical Data
Bonnet
The warning light comes on when the ignition is switched on if the bonnet is
unlocked.
Fuel reserve
The warning light comes on, if the fuel level is still below 8 litres.
A peep sounds as an addi tional warning signal.
The following text will be displayed in the information display*: PLEASE REFUEL
Engine oil
The warning light lights up red (low oil pressure)
The warning light comes on for a few seconds 2) when the ignition is switched on.
Stop the vehicle and switch the engine off if the warning light does not go off
after the engine has started or flashes while driving. Check the oil level and top up
with oil as necessary ⇒page 188.
3 peeps sound as an additional warning signal.
Do not continue your journey if for some reason it is not possible under the
conditions prevailing to top up with oil. Keep the engine switched off and obtain
professional assistance from a specialist garage, otherwise it could lead to severe
engine damage.
Do not drive any further if the warning light remains on even if the oil is at the
correct level. Do not run the engine not at idling speed either. Contact the nearest
specialist garage to obtain professional assistance. The following text will be displayed in the information display*:
STOP! OIL PRESS. STOP MOTOR! SERVICE MANUAL (STOP! OIL PRESSURE
STOP ENGINE! OWNER'S MANUAL)
The warning light
lights up yellow* (oil quantity too low)
If the warning light lights up yellow, there is not the correct quantity of oil in the
engine. Check as soon as possible the oil level or top up ⇒ page 188 with engine
oil.
A peep sounds as an ad ditional warning signal.
The following text will be displayed in the information display*: CHECK OIL LEVEL
The warning light will go out if the bonnet is left open for more than 30 seconds. If
no engine oil has been replenished, the warning light will come on again after
driving about 100 km.
The warning light
flashes yellow* (engine oil level sensor faulty)
A fault on the engine oil level sensor is in dicated additionally by an audible signal
and the warning light coming on several ti mes after the ignition has been switched
on.
In this case have the engine inspecte d without delay by a specialist garage.
The following text will be displayed in the information display*: OIL SENSOR WORKSHOP! (OIL SENSOR WORKSHOP)
WARNING
•If you must stop for technical reasons, then park the vehicle at a safe
distance from the traffic and switch off the engine and switch on the hazard
warning light system ⇒ page 48.
•The red oil pressure light is not an oil level indicator! One should
therefore check the oil level at regular intervals, preferably after every refu-
eling stop.
2)The warning light on vehicles fitted with information display does not come on after
switching the ignition on, but only if a fault exists or the engine oil level is too low.
NKO B5 20.book Page 27 Friday, March 2, 2007 1:46 PM
Page 102 of 259
Starting-off and Driving101
Using the systemSafetyDriving TipsGeneral MaintenanceBreakdown assistanceTechnical Data
Starting the engine
General
You can only start the engine only using an original ignition key.
•Place the gearshift lever into neutral (or place the selector lever to the position
P or N in the case of an automatic gearbox) and put on the handbrake firmly before
starting the engine.
•The clutch pedal should be fully depressed when starting the engine which
means that the starter only has to crank the engine.
•Let go of the key as soon as the engine starts otherwise there may be damage
to the starter.
The engine running noises may louder at first be louder for a short time after
starting the cold engine until oil pressure can be built up in the hydraulic valve
clearance compensation. This is quite normal and is not an operating problem.
If the engine does not start ...
You can use the battery of anothe r vehicle as a jump-start aid ⇒page 215.
It is only possible to tow-start vehicl es fitted with a manual gearbox. The tow-
starting distance must not be more than 50 metres ⇒page 217.
WARNING
•Never run the engine in non ventilat ed or enclosed areas. The exhaust
gases of the engine contain besides the odorless and colourless carbon
monoxide a poisonous gas - hazard! Carbon monoxide can cause uncon-
sciousness and death.
•Never leave your vehicle unattended with the engine running.
Caution
•The starter may only be operated (ignition key position ), if the engine is not
running. If the starter is immediately oper ated after switching off the engine, the
starter or the engine can be damaged.
•Avoid high engine revolutions, full throttle and high engine loads as long as the
engine has not yet reached it s normal operating temperature - risk of damaging the
engine!
•Vehicles which are fitted wi th an exhaust gas catalytic converter should not be
tow-started over a distance of more than 50 metres.
For the sake of the environment
Never warm up the engine when the vehicle is standing. Drive off right away.
Through this the engine reaches its operating temperature more rapidly and the
pollutant emissions are lower.
Petrol engines
These engines are fitted with a starter system which selects the correct fuel/air
mixture for every external air temperature.
•Do not operate accelerator before and when starting engine.
•Interrupt the attempt at starting after 10 seconds if the engine does not start
right awayand wait for about 30 seconds before repeating the attempt.
•It is possible that the fuse on the electric al fuel pump is defect if the engine still
does not start. Check the fuse and replace it if necessary ⇒page 220.
•If the engine does not start, contact th e nearest specialist garage to obtain
professional assistance.
It may be necessary, if the engine is very hot, to slightly depress the accelerator
after the engine has started.
Diesel engines
Glow plug system
Diesel engines are equipped with a glow plug system, the preglow period being
controlled automatically in line with the coolant temperature and outside temper-
ature.
The preglow indicator light
comes on after the ignition has been switched on.
A3
NKO B5 20.book Page 101 Friday, March 2, 2007 1:46 PM
Page 120 of 259

Communicating and Navigating119
Using the systemSafetyDriving TipsGeneral MaintenanceBreakdown assistanceTechnical Data
Loading magazine with CDs
–Grasp CD with the playback side to the bottom at the middle hole
and at the outer edge.
– Hold magazine with arrow illustration upwards ⇒fig. 129 .
– Insert individually CDs with the playback side to the bottom into
the magazine, until they lock in pl ace with a locking noise. Pay atten-
tion to the CD-order on the right side of the magazine ⇒fig. 129 .
Caution
•The magazine can take up to six standard CDs (diameter 12 cm). Please do not
use 8 cm “single CDs”!
•In order to avoid malfunctions of the chan ger, please never use a CD protective
foil or stabilizer (obtainable on the market as CD-accessory).
Take CDs out of the magazine
– Turn the release lever in direction of arrow ⇒fig. 130 .
– Slightly press out CDs through the opening on the reverse side of the magazine. Please make sure that the CDs do not fall down!
– Take CDs out of the magazine
Replay CD
On the radio display the following information can be displayed:
•SHFL (Shuffleplay).
•CD1 ... CD6 - compartment of CD magazine.
•NO CD - no CD in the magazine.
•TR01, TR02 etc. - title of the selected CD.
Note
For more details see Radio Owners Manual.
Fig. 129 Loading
changer with CDFig. 130 Take out CDs
NKO B5 20.book Page 119 Friday, March 2, 2007 1:46 PM
Page 133 of 259

Seat belts
132
•No two persons (also not children) should ever use a single seat belt
together.
•The maximum protection which seat belts can offer is only achieved if
you are correctly seated ⇒page 127, “Correct seated position”.
•The belt webbing must no t run across solid or fragile objects (e.g. spec-
tacles, ball-point pens, keys etc.) as this may be a cause of injuries.
•Bulky, loose clothing (e.g. a winter coat over a jacket) does not allow you
to be correctly seated and impairs proper operation of the seat belts.
•It is prohibited to use clamps or other objects to adjust seat belts (e.g. for
shortening the belts for smaller persons).
•The lock tongue should only be insert ed into the lock which is the correct
one for your seat. Wrong use of the safety belt will reduce its capacity to
protect and the risk of injury increases.
•The backrests of the front seats must not be tilted too far to the rear
otherwise the seatbelts can lose their effectiveness.
•The belt webbing must always be ke pt clean. Soiled belt webbing may
impair proper operation of the inertia reel ⇒page 179, “Seat belts”.
•The slot of the belt tongue must not be blocked by paper or similar
objects otherwise the belt tongue will not lock in place properly.
•Inspect the seat belts regularly to ensure they are in good condition. If
you find seat belts which have damage to the seat belt webbing, seat belt
connections, to the inertia reels or to the lock, the relevant safety belt must
be replaced by a specialist garage.
•The seat belts must not be removed or changed in any way. Do not make
an attempt to repair the seat belts yourself.
•Damaged seat belts which have been subjected to stress in an accident
and were therefore stretched, must be replaced - this is best done by a
specialist garage. The anchorage points of the belts must also be inspected.
The anchorage points for the be lts should also be checked.
•In certain countries it is possible to use seat belts which differ in terms of
their operation from the seat belts which are described on the pages which
follow.
How are seat belts correctly fastened?
Fastening three-point seat belts
Fasten your seat belt before starting!
– Correctly adjust the front seat and the head restraint before fastening
your seat belt ⇒page 127, “Correct seated position”.
WARNING (continued)
Fig. 140 Routing of
webbing over the shoul-
ders and the lap belt
Fig. 141 Routing of belt
webbing for an expectant
mother
NKO B5 20.book Page 132 Friday, March 2, 2007 1:46 PM
Page 159 of 259
Intelligent Technology
158
Brakes
What has a negative effect on braking efficiency?
Wear-and-tear
Wear-and-tear to the brake pads is greatly dependent on the operating conditions
of the vehicle and your style of driving. Particularly if you drive a great deal in towns
and over short distances or if you adopt a sporty style of driving, it may be neces-
sary to have the thickness of the brake pads inspected at a specialist garage
between the service inspections.
Wet roads or road salt
There may be a certain delay before the brakes take full effect under certain condi-
tions such as when driving through water, during heavy rain showers or after the
vehicle has been washed in an automatic vehicle wash, since the brake discs and
brake pads may be moist or even have a coating of ice on them in winter. You
should dry the brakes as soon as possib le (by applying and releasing the brakes
several times, if the road conditions and the traffic situation allows it).
There also may be a certain delay before the full braking efficiency is available when
driving on roads which have been treated wi th road salt if you have not used the
brakes for some considerable time beforeha nd. The layer of salt on the brake discs
and brake pads must first be rubb ed off when you apply the brakes.
Corrosion
Corrosion on the brake discs and dirt on th e bake pads occur if the vehicle has been
parked for a long period and if you do not make much use of the braking system.
We recommend cleaning the brake discs by firmly applying the brakes at a fairly
high speed if you do not make much use of the braking system or if surface corro-
sion is present ⇒.
Faults in the brake surface
If you notice that the braking distance has suddenly become longer and that the
brake pedal can be depressed further, it is possible that a brake circuit of the dual-
circuit brake system has failed. Drive, in such cases, to the nearest specialist garage
without delay in order to have the problem rectified. Drive at a reduced speed while
on your way to the dealer and adapt your style of driving to the higher brake pedal
pressure required. Low brake fluid level
An insufficient level of brake fluid may result in problems in the brake system. The
level of the brake fluid is monitored electronically
⇒page 29, “Brake system ”.
WARNING
•Only apply the brakes for the purpos e of drying and cleaning the brake
discs if the traffic conditions permit this. Do not place any other road users
in jeopardy.
•When retrospectively mounting a front spoiler, solid wheel hubs etc. one
must ensure that the air supply to the front wheel brakes is not reduced
otherwise the braking sy stem could run too hot.
•Allow for the fact that new brake pads do not achieve their full braking
efficiency until approximately 200 kilo metres. New brake pads must be first
“run in” before they develop their optimal friction force. You can, however,
compensate for this slightly reduced braking force by increasing the pres-
sure on the brake pedal. This guidelin e also applies to any new brake pads
installed at a future date.
Caution
•Never allow the brakes to ru b by applying slight pressure if you do not wish to
brake the vehicle. This causes the brakes to overheat and can also result in a longer
braking distance and excessive wear.
•Before negotiating a steep downhill sect ion, please reduce your speed, shift
down into the next lower gear (manual ge arbox) or select a lower driving stage
(automatic gearbox). This enables you to make full use of the braking power of the
vehicle and reduces the strain on the brakes . Any additional braking should be done
intermittently, not continuously.
Brake booster
The brake booster boosts the pressure which you generate with the brake pedal.
The necessary pressure is only gene rated when the engine is running.
NKO B5 20.book Page 158 Friday, March 2, 2007 1:46 PM
Page 161 of 259
Intelligent Technology
160
pedal firmly and hold it in this position in order to achieve the shortest possible
braking distance.
The Brake Assist is able to help you achieve a shorter braking distance in emergency
situations by rapidly producing the pressure required in the brake system. It fully
exploits the attributes of the ABS. After you release the brake pedal, the function of
the Brake Assist is automatically switched off and the brakes operate in the normal
way.
WARNING
•The Brake Assist is also not able to overcome the physical limits of your
car in terms of the braking distance required.
•Adapt your speed to the conditions of the road surface and to the traffic
situation.
•The increased safety offered by the Brake Assist must not tempt you to
take a greater safety risk than otherwise.
Power steering
Power steering assists the driver in steering the vehicle and reduces the physical
force needed for steering.
The steering characteristics can be changed by a specialist garage.
It is still possible to fully steer the vehicle if the power steering fails or if the engine
is not running (vehicle being towed in). The only difference is that greater physical
effort is required.
If the steering is turned to full lock when the car is stationary, you will place great
stresses on the power steering system. Turning the steering to full lock in such a
situation will be accompanied by noises. In addition, the idling speed of the engine
will drop briefly.
Caution
Do not leave the steering at full lock for more than 15 seconds when the engine is
running - risk of damagi ng the power steering!
Note
•Have the steering inspected as soon as po ssible by a specialist garage if there is
a leak or fault in the system.
•The power steering requires a special hydraulic oil. The oil reservoir is located
at the front left of the engine compartment ⇒page 186. The correct hydraulic oil
level is important for proper oper ation of the power steering system.
Diesel particle filter* (diesel engine)
In the diesel particle filter the resulting soot particles are collected
and burnt during the combustion of diesel fuel.
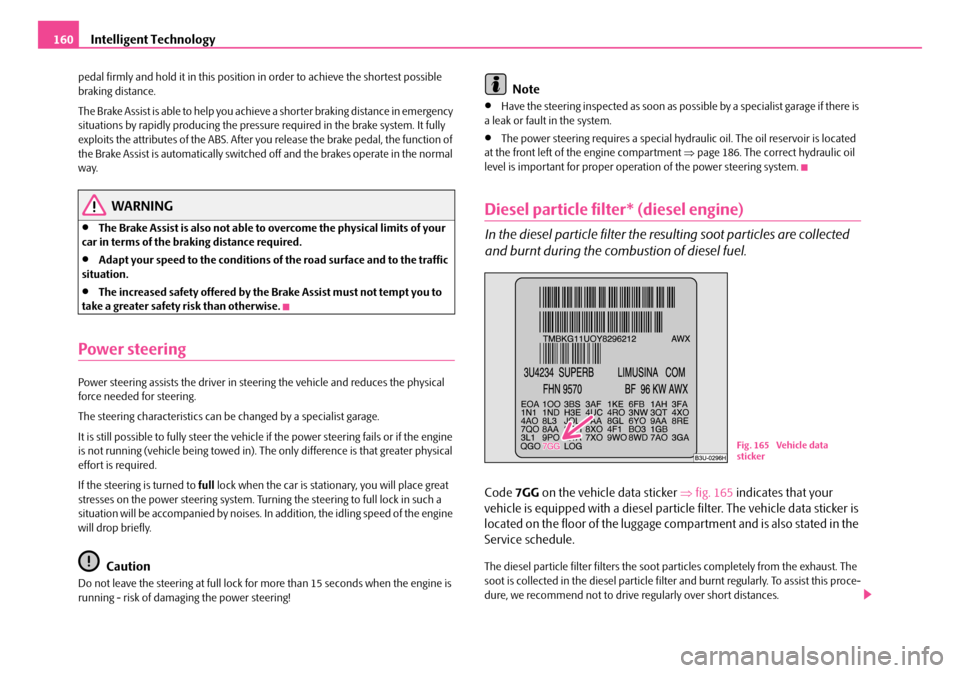
Code 7GG on the vehicle data sticker ⇒fig. 165 indicates that your
vehicle is equipped with a diesel particle filter. The vehicle data sticker is
located on the floor of the luggage com partment and is also stated in the
Service schedule.
The diesel particle filter filters the soot particles completely from the exhaust. The
soot is collected in the diesel particle filter and burnt regularly. To assist this proce-
dure, we recommend not to drive regularly over short distances.
Fig. 165 Vehicle data
sticker
NKO B5 20.book Page 160 Friday, March 2, 2007 1:46 PM
Page 164 of 259

Driving and the Environment163
Using the systemSafetyDriving TipsGeneral MaintenanceBreakdown assistanceTechnical Data
Catalytic converter
Proper operation of the emission co ntrol system (catalytic converter)
is of major significance for drivin g your vehicle in an environmen-
tally conscious way.
Please refer to the following guidelines:
– For vehicles with petrol engine only refuel with unleaded petrol
⇒ page 181, “Grades of petrol”.
– Never run the fuel tank completely empty.
– Do not switch off the ignition while you are driving the vehicle.
– Do not pour too much oil into the engine ⇒page 188, “Replenishing
engine oil”.
– Do not tow-start the vehicle over a distance of more than 50 metres ⇒page 218, “Tow-starting a vehicle”.
If you drive your vehicle in a country in which unleaded petrol is not available, you
must have the catalytic converter replaced later when driving the vehicle into a
country in which use of a cata lytic converter is mandatory.
WARNING
•In view of the high temperatures wh ich may be produced in the catalytic
converter, one should always park a vehicle in such a way that the catalytic
converter cannot come into contact with easily flammable materials below
the vehicle - a risk of fire!
•Never use additional underbody protection or corrosion-protection
agents for the exhaust pipes, catalytic converters or heat shields. Such
substances might ignite when driving - risk of fire!
Caution
•Vehicles fitted with catalytic converter sh ould never be allowed to let the fuel
tank to run completely empty. An irregular fuel supply can result in poor ignition or misfiring. Unburnt fuel may get into the
exhaust system and damage the catalytic
converter.
•Filling the tank even only once with leaded petrol will result in the catalytic
converter being destroyed.
•If you detect misfiring, a drop in perf ormance or irregular engine running when
driving, reduce your speed immediately and have the vehicle inspected by the
nearest specialist garage. The symptoms described may be caused by a fault in the
ignition system. Unburnt fuel may get into the exhaust system and damage the
catalytic converter.
For the sake of the environment
Even if the exhaust system is operating properly, a sulphur-like exhaust odour may
be produced under certain op erating conditions of the engine. This depends on the
sulphur content of the fuel. It is often sufficient to refuel with unleaded premium-
grade petrol of a different brand or at a different filling station.
Driving in an economical and environmentally
conscious manner
General
Your personal style of driving is a major factor.
Your fuel consumption, any pollution of the environmental and the wear-and-tear
to the engine, brakes and tyres, depend essentially on three factors:
•your personal style of driving,
•the conditions under which your vehicle is operated,
•technical aspects.
You can easily improve your fuel economy by 10 - 15 percent by driving in an
economical way with foresight. This section is intended to provide you with a
number of tips on how to protect the en vironment and at the same time save
money.
NKO B5 20.book Page 163 Friday, March 2, 2007 1:46 PM