towing SKODA SUPERB 2007 1.G / (B5/3U) Owner's Manual
[x] Cancel search | Manufacturer: SKODA, Model Year: 2007, Model line: SUPERB, Model: SKODA SUPERB 2007 1.G / (B5/3U)Pages: 259, PDF Size: 14.71 MB
Page 5 of 259
Contents
4
Driving Tips. . . . . . . . . . . . . . . . . . . . . . . . . . . . . .
Intelligent Technology . . . . . . . . . . . . . . . . . . . . . . . .
Electronic stability programme (ESP)* . . . . . . . . . .
Brakes . . . . . . . . . . . . . . . . . . . . . . . . . . . . . . . . . . . . . . .
Brake booster . . . . . . . . . . . . . . . . . . . . . . . . . . . . . . . .
Antilock brake system (ABS) . . . . . . . . . . . . . . . . . . .
Brake Assist* . . . . . . . . . . . . . . . . . . . . . . . . . . . . . . . . .
Power steering . . . . . . . . . . . . . . . . . . . . . . . . . . . . . . .
Diesel particle filter* (diesel engine) . . . . . . . . . . . .
Driving and the Environment. . . . . . . . . . . . . . . . .
The first 1 500 kilometres and then afterwards . .
Catalytic converter . . . . . . . . . . . . . . . . . . . . . . . . . . . .
Driving in an economical and environmentally
conscious manner . . . . . . . . . . . . . . . . . . . . . . . . . . . .
Environmental compatibility . . . . . . . . . . . . . . . . . . .
Motoring abroad . . . . . . . . . . . . . . . . . . . . . . . . . . . . .
Avoiding damage to your vehicle . . . . . . . . . . . . . .
To w i n g a t r a i l e r. . . . . . . . . . . . . . . . . . . . . . . . . . . . . . . .
Towing a trailer . . . . . . . . . . . . . . . . . . . . . . . . . . . . . . .
Detachable towing device* . . . . . . . . . . . . . . . . . . . .
General Maintenance. . . . . . . . . . . . . . .
Taking care of your ve hicle and cleaning the
vehicle. . . . . . . . . . . . . . . . . . . . . . . . . . . . . . . . . . . . . . . . .
General . . . . . . . . . . . . . . . . . . . . . . . . . . . . . . . . . . . . . .
Care of the exterior of vehicle . . . . . . . . . . . . . . . . . .
Care of the interior of vehicle . . . . . . . . . . . . . . . . . .
Fuel. . . . . . . . . . . . . . . . . . . . . . . . . . . . . . . . . . . . . . . . . . . .
Petrol . . . . . . . . . . . . . . . . . . . . . . . . . . . . . . . . . . . . . . . .
Diesel . . . . . . . . . . . . . . . . . . . . . . . . . . . . . . . . . . . . . . .
Refuelling . . . . . . . . . . . . . . . . . . . . . . . . . . . . . . . . . . . .
Inspecting and Replenishing. . . . . . . . . . . . . . . . . .
Engine compartment . . . . . . . . . . . . . . . . . . . . . . . . .
Overview of the engine compartment . . . . . . . . . .
Engine oil . . . . . . . . . . . . . . . . . . . . . . . . . . . . . . . . . . . .
Cooling system . . . . . . . . . . . . . . . . . . . . . . . . . . . . . . . Brake fluid . . . . . . . . . . . . . . . . . . . . . . . . . . . . . . . . . . .
Battery . . . . . . . . . . . . . . . . . . . . . . . . . . . . . . . . . . . . . . .
Windshield washer system . . . . . . . . . . . . . . . . . . . .
Wheels and Tyres. . . . . . . . . . . . . . . . . . . . . . . . . . . . . .
Wheels . . . . . . . . . . . . . . . . . . . . . . . . . . . . . . . . . . . . . .
Accessories, changes and replacement of partsAccessories and replacement parts . . . . . . . . . . . . .
Technical changes . . . . . . . . . . . . . . . . . . . . . . . . . . . .
Breakdown assistance. . . . . . . . . . . . . .
Breakdown assistance . . . . . . . . . . . . . . . . . . . . . . . .
First-aid box* . . . . . . . . . . . . . . . . . . . . . . . . . . . . . . . . .
Warning triangle . . . . . . . . . . . . . . . . . . . . . . . . . . . . . .
Fire extinguisher* . . . . . . . . . . . . . . . . . . . . . . . . . . . . .
Vehicle tool kit . . . . . . . . . . . . . . . . . . . . . . . . . . . . . . . .
Spare wheel . . . . . . . . . . . . . . . . . . . . . . . . . . . . . . . . . .
Changing a wheel . . . . . . . . . . . . . . . . . . . . . . . . . . . . .
Jump-starting . . . . . . . . . . . . . . . . . . . . . . . . . . . . . . . .
Tow-starting and towing vehicle . . . . . . . . . . . . . . .
Fuses and light bulbs. . . . . . . . . . . . . . . . . . . . . . . . . .
Electric fuses . . . . . . . . . . . . . . . . . . . . . . . . . . . . . . . . .
Bulbs . . . . . . . . . . . . . . . . . . . . . . . . . . . . . . . . . . . . . . . .
Technical Data. . . . . . . . . . . . . . . . . . . . . . . . . .
Te c h n i c a l D a t a. . . . . . . . . . . . . . . . . . . . . . . . . . . . . . . . .
General comments . . . . . . . . . . . . . . . . . . . . . . . . . . .
Used abbreviations . . . . . . . . . . . . . . . . . . . . . . . . . . .
Performances . . . . . . . . . . . . . . . . . . . . . . . . . . . . . . . .
Weight . . . . . . . . . . . . . . . . . . . . . . . . . . . . . . . . . . . . . . .
Identification details . . . . . . . . . . . . . . . . . . . . . . . . . .
Fuel consumption according to the regulations
(99/100/EU) . . . . . . . . . . . . . . . . . . . . . . . . . . . . . . . . . .
Dimensions . . . . . . . . . . . . . . . . . . . . . . . . . . . . . . . . . .
2.0 ltr./85 kW - EU 4 . . . . . . . . . . . . . . . . . . . . . . . . . . .
1.8 ltr./110 kW - EU 4/EU 2 . . . . . . . . . . . . . . . . . . . . .
2.8 ltr./142 kW - EU 4 . . . . . . . . . . . . . . . . . . . . . . . . . . 2.8 ltr./140 kW - EU 2 . . . . . . . . . . . . . . . . . . . . . . . . . .
1,9 l/77 kW TDI PD - EU 4 . . . . . . . . . . . . . . . . . . . . . .
1,9 l/85 kW TDI PD - EU 4 . . . . . . . . . . . . . . . . . . . . . .
1,9 l/96 kW TDI PD - EU 3 . . . . . . . . . . . . . . . . . . . . . .
2.0 ltr./103 kW TDI DPF - EU 4 . . . . . . . . . . . . . . . . . .
2.5 ltr./120 kW TDI PD - EU 4 . . . . . . . . . . . . . . . . . . .
Index . . . . . . . . . . . . . . . . . . . . . . . . . . . . . . . . . . . . . . . .
155
155
155
158
158
159
159
160
160
162
162
163
163
167
167
168
169
169
171
173
173
173
173
178
181
181
181
182
184
184
186
186
189 191
193
197
199
199
205
205
205
207
207
207
207
207
208
209
209
215
217
220
220
222
227
227
227
227
227
227
227
228
228
230
232
234236
238
240
242
244
246
249
NKO B5 20.book Page 4 Friday, March 2, 2007 1:46 PM
Page 24 of 259
Instruments and Indicator/Warning Lights23
Using the systemSafetyDriving TipsGeneral MaintenanceBreakdown assistanceTechnical Data
WARNING
•If you do not pay attention to the warning lights coming on and the corre-
sponding descriptions and warning notes, this may result in severe body
injuries or major vehicle damage.
•The engine compartment of your car is a hazardous area. There is a risk
of injuries, scalding, accidents and fire when working in the engine
compartment, e.g. inspecting and replenis hing oil and other fluids. It is also
essential to observe all warnings ⇒page 185.
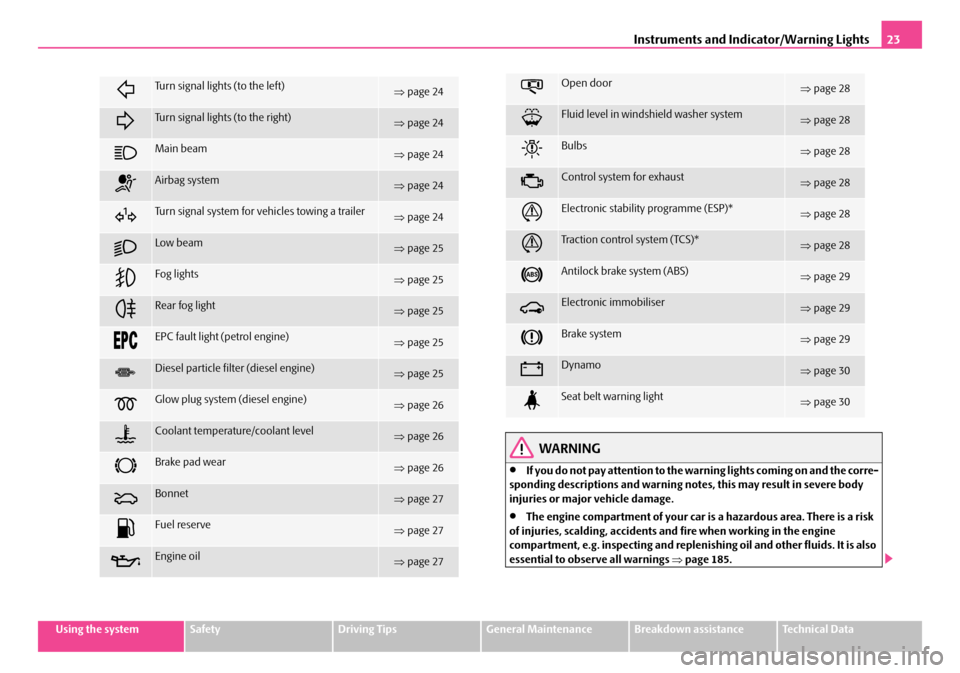
Turn signal lights (to the left)⇒ page 24
Turn signal lights (to the right)⇒page 24
Main beam⇒page 24
Airbag system⇒page 24
Turn signal system for vehicles towing a trailer⇒page 24
Low beam⇒page 25
Fog lights⇒page 25
Rear fog light⇒page 25
EPC fault light (petrol engine)⇒page 25
Diesel particle filter (diesel engine)⇒page 25
Glow plug system (diesel engine)⇒page 26
Coolant temperature/coolant level⇒page 26
Brake pad wear⇒page 26
Bonnet⇒page 27
Fuel reserve⇒page 27
Engine oil⇒page 27
Open door⇒page 28
Fluid level in windshield washer system⇒page 28
Bulbs⇒page 28
Control system for exhaust⇒page 28
Electronic stability programme (ESP)*⇒page 28
Tra c t i o n c o n t r o l s y s t e m ( TC S ) *⇒page 28
Antilock brake system (ABS)⇒page 29
Electronic immobiliser⇒page 29
Brake system⇒page 29
Dynamo⇒page 30
Seat belt warning light⇒page 30
NKO B5 20.book Page 23 Friday, March 2, 2007 1:46 PM
Page 25 of 259
Instruments and Indicator/Warning Lights
24
Note
•Arrangement of the indicator lights de pends on the model and model version.
The symbols shown in the following functional description are to be found as indi-
cator lights in the instrument cluster.
•Operational faults are shown in the disp lay of the instrument cluster as red
symbols (priority 1 - danger) or yell ow symbols (priority 2 - warning).
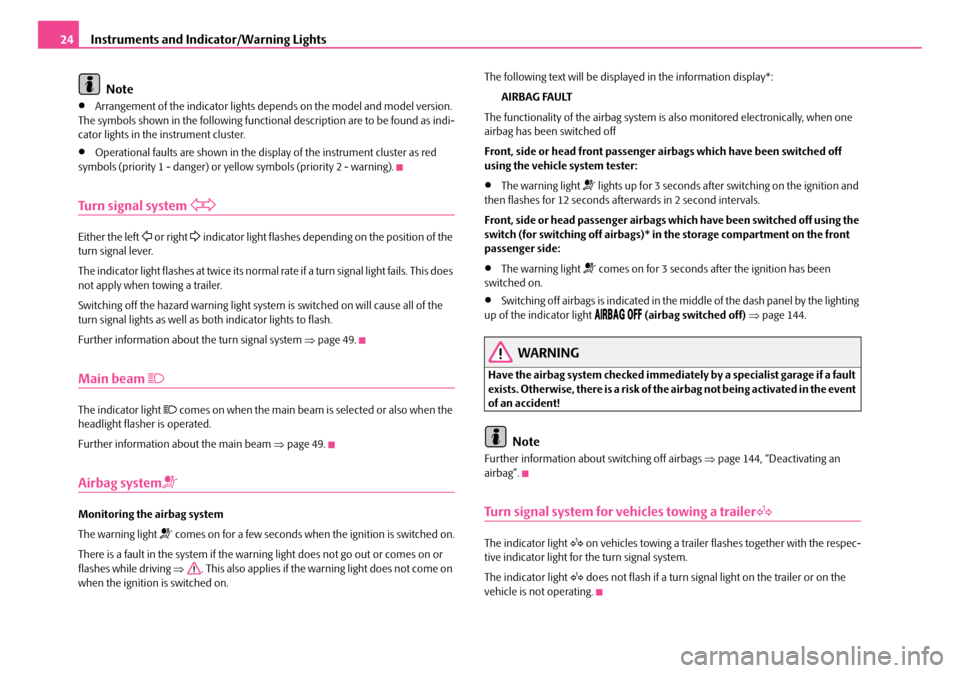
Turn signal system
Either the left or right indicator light flashes depending on the position of the
turn signal lever.
The indicator light flashes at twice its normal rate if a turn signal light fails. This does
not apply when towing a trailer.
Switching off the hazard warning light system is switched on will cause all of the
turn signal lights as well as both indicator lights to flash.
Further information about the turn signal system ⇒page 49.
Main beam
The indicator light comes on when the main beam is selected or also when the
headlight flasher is operated.
Further information about the main beam ⇒page 49.
Airbag system
Monitoring the airbag system
The warning light
comes on for a few seconds when the ignition is switched on.
There is a fault in the system if the warn ing light does not go out or comes on or
flashes while driving ⇒. This also applies if the warning light does not come on
when the ignition is switched on. The following text will be displayed in the information display*:
AIRBAG FAULT
The functionality of the airbag system is also monitored electronically, when one
airbag has been switched off
Front, side or head front passenger airbags which have been switched off
using the vehicle system tester:
•The warning light lights up for 3 seconds after switching on the ignition and
then flashes for 12 seconds afterwards in 2 second intervals.
Front, side or head passenger airbags which have been switched off using the
switch (for switching off airbags)* in the storage compartment on the front
passenger side:
•The warning light comes on for 3 seconds after the ignition has been
switched on.
•Switching off airbags is indicated in the middle of the dash panel by the lighting
up of the indicator light (airbag switched off) ⇒ page 144.
WARNING
Have the airbag system ch ecked immediately by a specialist garage if a fault
exists. Otherwise, there is a risk of th e airbag not being activated in the event
of an accident!
Note
Further information about switching off airbags ⇒page 144, “Deactivating an
airbag”.
Turn signal system for vehicles towing a trailer
The indicator light on vehicles towing a trailer flashes together with the respec-
tive indicator light for the turn signal system.
The indicator light
does not flash if a turn signal light on the trailer or on the
vehicle is not operating.
NKO B5 20.book Page 24 Friday, March 2, 2007 1:46 PM
Page 48 of 259
Lights and Visibility47
Using the systemSafetyDriving TipsGeneral MaintenanceBreakdown assistanceTechnical Data
−
This mist has no influence on th e life of the lighting system.
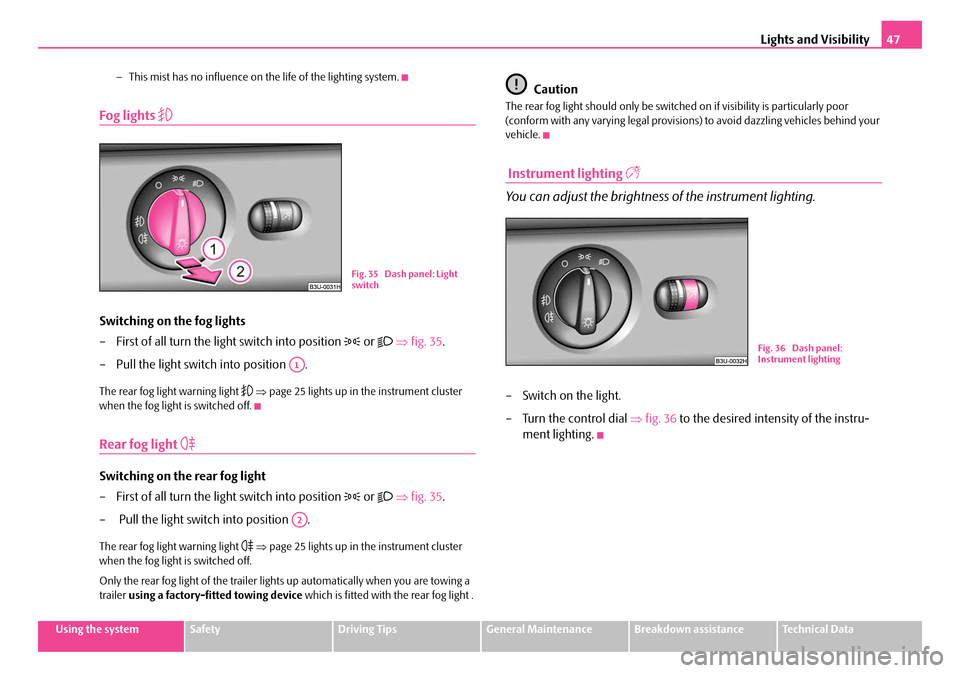
Fog lights
Switching on the fog lights
– First of all turn the light switch into position
or ⇒ fig. 35 .
– Pull the light switch into position .
The rear fog light warning light ⇒ page 25 lights up in the instrument cluster
when the fog light is switched off.
Rear fog light
Switching on the rear fog light
– First of all turn the light switch into position
or ⇒ fig. 35 .
– Pull the light switch into position .
The rear fog light warning light ⇒ page 25 lights up in the instrument cluster
when the fog light is switched off.
Only the rear fog light of the trailer lights up automatically when you are towing a
trailer using a factory-fitted towing device which is fitted with the rear fog light .
Caution
The rear fog light should only be switched on if visibility is particularly poor
(conform with any varying legal provisions) to avoid dazzling vehicles behind your
vehicle.
Instrument lighting
You can adjust the brightness of the instrument lighting.
– Switch on the light.
– Turn the control dial ⇒fig. 36 to the desired intensity of the instru-
ment lighting.
Fig. 35 Dash panel: Light
switch
A1
A2
Fig. 36 Dash panel:
Instrument lighting
NKO B5 20.book Page 47 Friday, March 2, 2007 1:46 PM
Page 73 of 259
Seats and Stowage
72
Through-loading bag*
The through-loading bag enables you to conveniently transport long
objects (such as skis) without damaging the interior of the car.
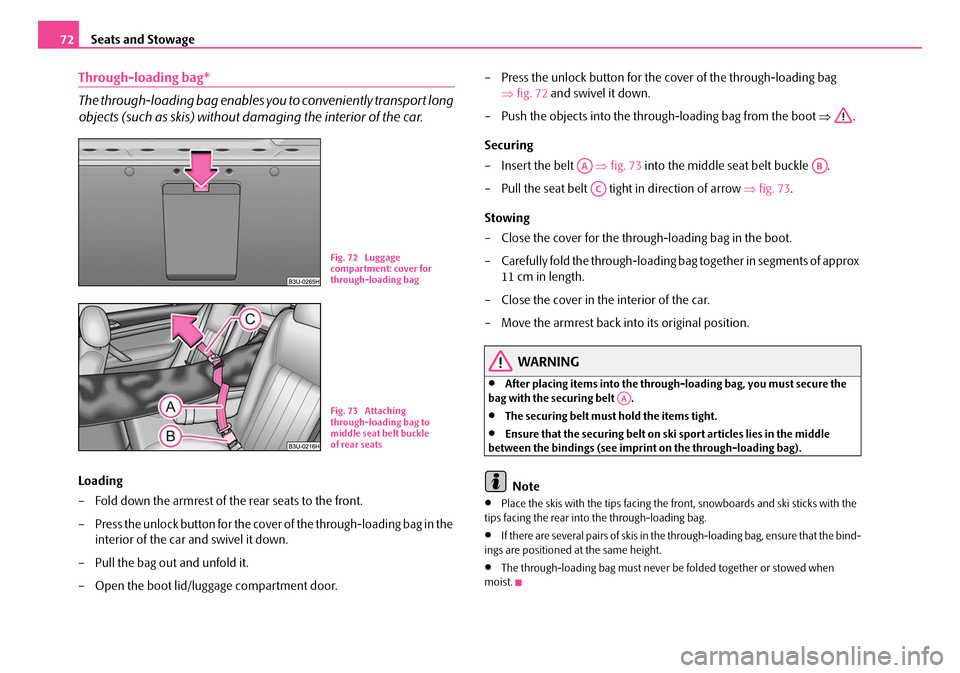
Loading
– Fold down the armrest of the rear seats to the front.
– Press the unlock button for the cover of the through-loading bag in the
interior of the car and swivel it down.
– Pull the bag out and unfold it.
– Open the boot lid/luggage compartment door. – Press the unlock button for the cover of the through-loading bag
⇒fig. 72 and swivel it down.
– Push the objects into the through-loading bag from the boot ⇒.
Securing
– Insert the belt ⇒fig. 73 into the middle seat belt buckle .
– Pull the seat belt tight in direction of arrow ⇒fig. 73 .
Stowing
– Close the cover for the through-loading bag in the boot.
– Carefully fold the through-loading bag together in segments of approx 11 cm in length.
– Close the cover in the interior of the car.
– Move the armrest back into its original position.
WARNING
•After placing items into the through- loading bag, you must secure the
bag with the securing belt .
•The securing belt must hold the items tight.
•Ensure that the securing belt on ski sport articles lies in the middle
between the bindings (see imprin t on the through-loading bag).
Note
•Place the skis with the tips facing the fr ont, snowboards and ski sticks with the
tips facing the rear into the through-loading bag.
•If there are several pairs of skis in the through-loading bag, ensure that the bind-
ings are positioned at the same height.
•The through-loading bag must never be folded together or stowed when
moist.
Fig. 72 Luggage
compartment: cover for
through-loading bag
B1Z-0042HB1Z-0042H
Fig. 73 Attaching
through-loading bag to
middle seat belt buckle
of rear seats
AAAB
AC
AA
NKO B5 20.book Page 72 Friday, March 2, 2007 1:46 PM
Page 77 of 259

Seats and Stowage
76
Opening folding box
You can transport the opened folding box in the secured end or middle
position against the partition of the luggage compartment.
Opening folding box
– Lower the folding box into the ready position ⇒page 75.
– Press the button marked “PUSH” ⇒fig. 80 . – Grasp the folding box at the handle and push it in direction of
arrow 1 against the partition of the luggage compartment into the
secured position. The lock below the button must be heard to engage.
If correctly locked, the button mark ed “PUSH” moves back into its
initial position.
– Raise the lid in direction of arrow 2 ⇒ fig. 81 .
– Press on the bottom part of the handle and open the compart- ments in the direction of arrow 3. The compartment wall must be
heard to engage in the slot in the bottom part of the box.
Moving folding box into secured middle position
– Press on the button marked “PUSH” ⇒fig. 81 and carefully push
the folding box into the secured mi ddle position. If correctly locked,
the button marked “PUSH” is moved back into its initial position.
You can now use the space which ha s become available for stowing
further items of luggage.
Caution
•The parts of the folding box can be dama ged if handled roughly or in an unpro-
fessional way.
•The maximum weight of goods to be loaded should not exceed 25 kg.
B1Z-0042HB1Z-0042H
Fig. 80 Luggage
compartment: folding
box
B1Z-0042HB1Z-0042HFig. 81 Opening folding
box
AB
AA
AB
AC
AD
AD
NKO B5 20.book Page 76 Friday, March 2, 2007 1:46 PM
Page 87 of 259
Seats and Stowage
86
WARNING
Use the stowage compartments in the door panels only for small items
which do not project out of the compartment in order to avoid any interfer-
ence with the proper operation of the side airbags.
Stowage compartment for umbrella*
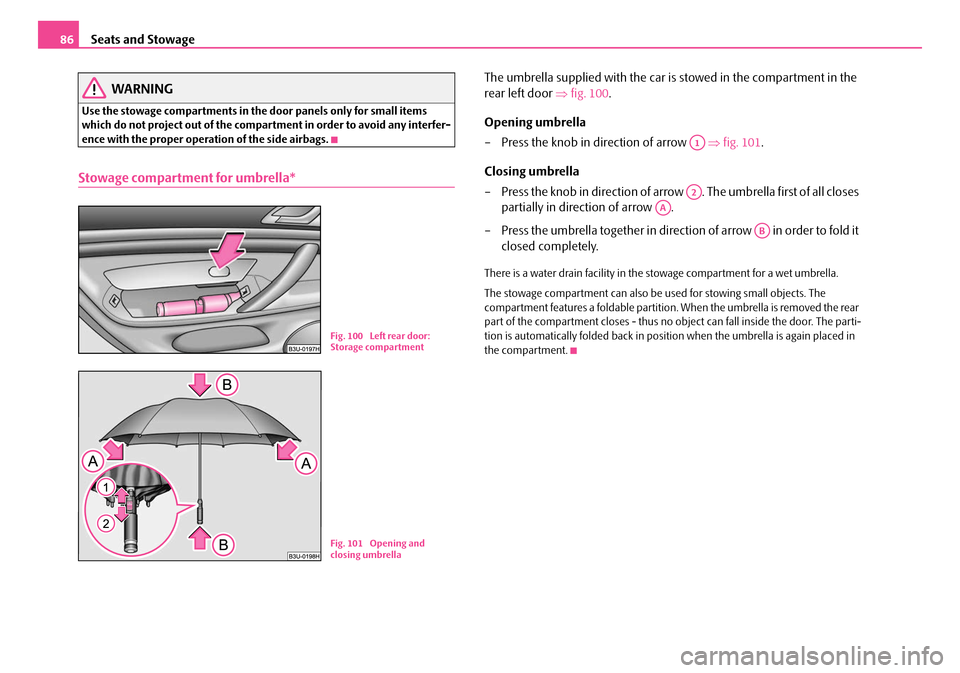
The umbrella supplied with the car is stowed in the compartment in the
rear left door ⇒fig. 100 .
Opening umbrella
– Press the knob in direction of arrow ⇒fig. 101 .
Closing umbrella
– Press the knob in direction of arrow . The umbrella first of all closes partially in direction of arrow .
– Press the umbrella together in direction of arrow in order to fold it closed completely.
There is a water drain facility in the stowage compartment for a wet umbrella.
The stowage compartment can also be used for stowing small objects. The
compartment features a foldable partition. When the umbrella is removed the rear
part of the compartment closes - thus no object can fall inside the door. The parti-
tion is automatically folded back in position when the umbrella is again placed in
the compartment.
B1Z-0042HB1Z-0042HFig. 100 Left rear door:
Storage compartment
Fig. 101 Opening and
closing umbrella
A1
A2
AA
AB
NKO B5 20.book Page 86 Friday, March 2, 2007 1:46 PM
Page 106 of 259
Starting-off and Driving105
Using the systemSafetyDriving TipsGeneral MaintenanceBreakdown assistanceTechnical Data
WARNING
•The parking aid is not a substitute fo r the driver paying proper attention
and it is always the driver's responsibility to take care when parking the
vehicle or carrying out similar manoeuvres.
•You should therefore satisfy yourself, before reversing, that there is no
small obstacle, such as a rock, thin po st, trailer drawbar etc., behind your
vehicle. Such an obstacle might not be within the range detected by the
sensors.
Note
•The parking aid does not operate if you are towing a trailer (applies to models
which feature a factory-fitted towing device*).
•If a warning signal sounds for about 3 se conds after switching the ignition on
and engaging reverse gear, and there is no obstacle close to your car, this indicates
a system fault. Have the fault rectified by a specialist workshop.
•The sensors must be kept clean and free of ice to enable the parking aid to
operate properly.
Front and rear parking aid*
The parking aid provides a warning of obstacles in front and behind
the vehicle.
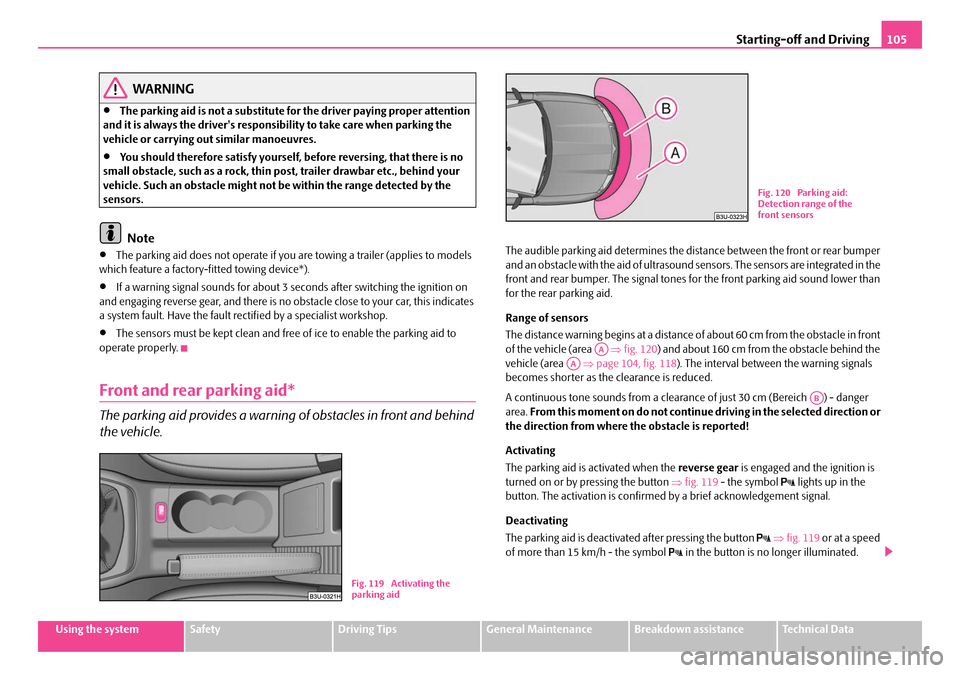
The audible parking aid determines the dist ance between the front or rear bumper
and an obstacle with the aid of ultrasound sensors. The sensors are integrated in the
front and rear bumper. The signal tones for the front parking aid sound lower than
for the rear parking aid.
Range of sensors
The distance warning begins at a distance of about 60 cm from the obstacle in front
of the vehicle (area ⇒fig. 120 ) and about 160 cm from the obstacle behind the
vehicle (area ⇒page 104, fig. 118 ). The interval between the warning signals
becomes shorter as the clearance is reduced.
A continuous tone sounds from a cleara nce of just 30 cm (Bereich ) - danger
area. From this moment on do not continue driving in the selected direction or
the direction from where the obstacle is reported!
Activating
The parking aid is activated when the reverse gear is engaged and the ignition is
turned on or by pressing the button ⇒fig. 119 - the symbol
lights up in the
button. The activation is confirmed by a brief acknowledgement signal.
Deactivating
The parking aid is deactivated after pressing the button
⇒ fig. 119 or at a speed
of more than 15 km/h - the symbol in the button is no longer illuminated.
B1Z-0042HB1Z-0042HFig. 119 Activating the
parking aid
B1Z-0042HB1Z-0042H
Fig. 120 Parking aid:
Detection range of the
front sensors
AAAA
AB
NKO B5 20.book Page 105 Friday, March 2, 2007 1:46 PM
Page 107 of 259
Starting-off and Driving
106
WARNING
•The parking aid is not a substitute fo r the driver paying proper attention
and it is always the driver's responsibility to take care when reversing the
vehicle or carrying out similar manoeuvres.
•You should therefore satisfy yourself, before reversing, that there is no
small obstacle, such as a rock, thin post, trailer drawbar etc., in front or
behind your vehicle. Such an obstacle might not be within the range
detected by the sensors.
Note
•Only the front parking aid operates if yo u are towing a trailer (applies only to
models which feature a factor y-fitted towing device*).
•If a warning signal sounds for about 3 seconds after activating the system and
there is no obstacle close to your car, th is indicates a system fault. The fault is
confirmed additionally when the symbol
flashes in the button ⇒page 105,
fig. 119 . Have the fault rectified by a specialist workshop.
•The sensors must be kept clean and free of ice to enable the parking aid to
operate properly.
Cruise control system (CCS)*
Introduction
The cruise control system (CCS) maintains a constant speed, more than 30 km/h (20
mph), once it has been set, without you having to depress th e accelerator pedal.
This is only possible within the range which is permitted by the power output and
braking power of the engine. The cruise control system makes it possible - particu-
larly on long journeys - for you to rest your “accelerator foot”.
WARNING
•The cruise control system must not, for safety reasons, be used in dense
traffic or on unfavourable road surfaces (such as icy roads, slippery roads or
loose chippings) - risk of accident!
•In order to prevent unintentional use of the cruise control system, always
switch off the system after use.
Note
•Models fitted with a manual gearbox: Always depress the clutch pedal if you
switch on the cruise control system when the gearbox is in Neutral. Otherwise the
engine can rev up unintentionally.
•The cruise control system is not able to maintain a constant speed when driving
on steep downhill sections. The weight of the vehicle increases the speed at which
it travels. One should shift down in good time to a lower gear or slow the vehicle
down by applying the foot brake.
•It is not possible on vehicl es fitted with an automatic gearbox to switch on the
cruise control system if the selector lever is in the position P, N , R or 2.
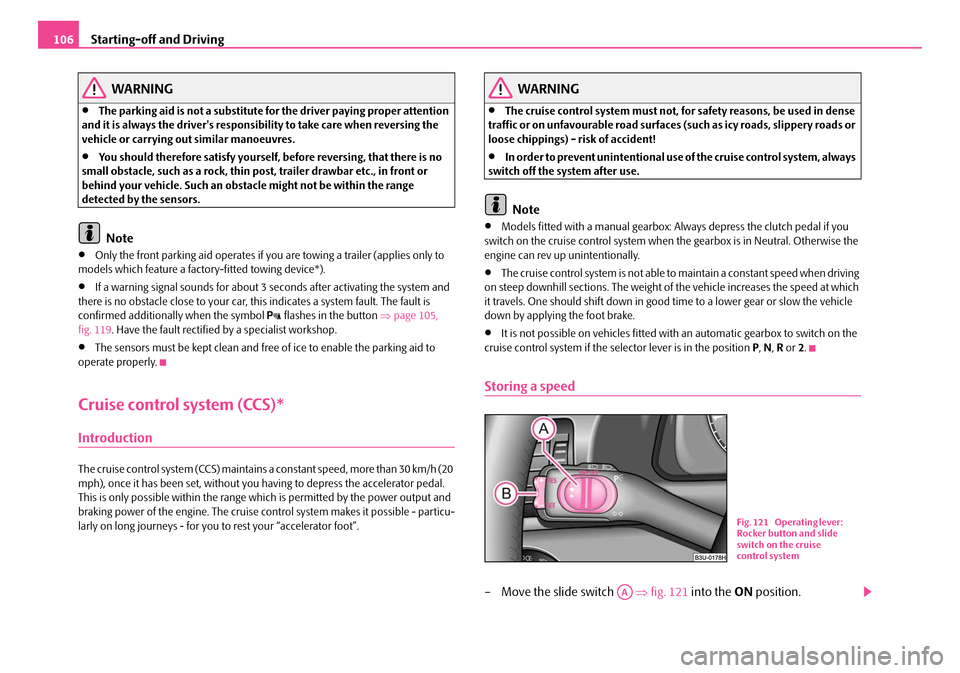
Storing a speed
– Move the slide switch ⇒fig. 121 into the ON position.
B1Z-0042HB1Z-0042H
Fig. 121 Operating lever:
Rocker button and slide
switch on the cruise
control system
AA
NKO B5 20.book Page 106 Friday, March 2, 2007 1:46 PM
Page 111 of 259
Automatic gearbox*
110
Selector lever positions
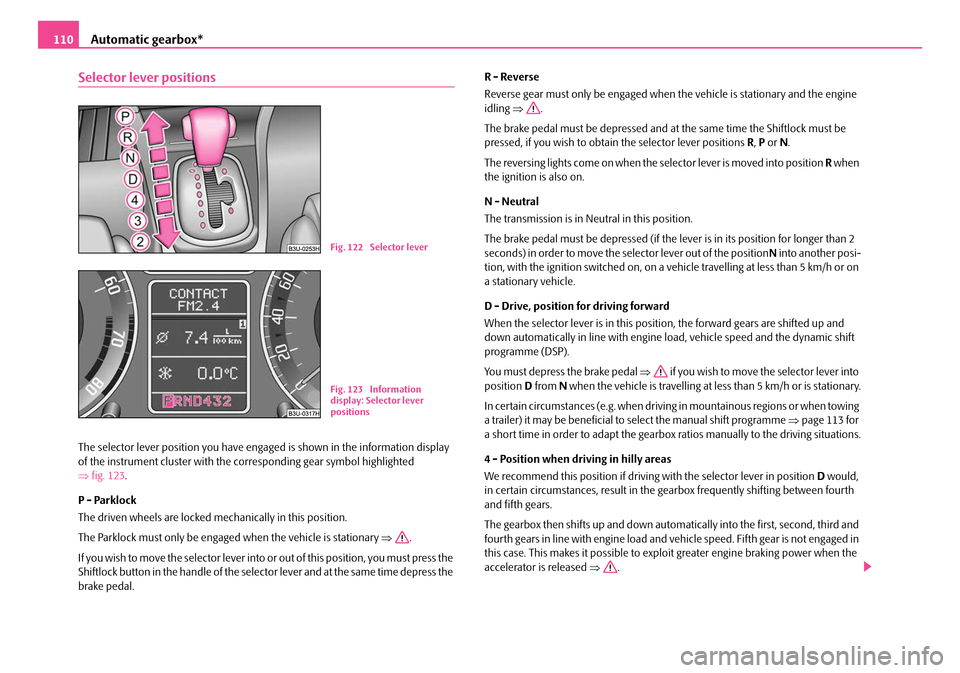
The selector lever position you have engaged is shown in the information display
of the instrument cluster with the co rresponding gear symbol highlighted
⇒ fig. 123 .
P - Parklock
The driven wheels are locked mechanically in this position.
The Parklock must only be engaged when the vehicle is stationary ⇒.
If you wish to move the select or lever into or out of this position, you must press the
Shiftlock button in the handle of the select or lever and at the same time depress the
brake pedal. R - Reverse
Reverse gear must only be engaged when
the vehicle is stationary and the engine
idling ⇒ .
The brake pedal must be depressed and at the same time the Shiftlock must be
pressed, if you wish to obtain the selector lever positions R, P or N.
The reversing lights come on when the selector lever is moved into position R when
the ignition is also on.
N - Neutral
The transmission is in Neutral in this position.
The brake pedal must be depressed (if the lever is in its position for longer than 2
seconds) in order to move the selector lever out of the position N into another posi-
tion, with the ignition switched on, on a vehicle travelling at less than 5 km/h or on
a stationary vehicle.
D - Drive, position for driving forward
When the selector lever is in this position, the forward gears are shifted up and
down automatically in line with engine load, vehicle speed and the dynamic shift
programme (DSP).
You must depress the brake pedal ⇒ if you wish to move the selector lever into
position D from N when the vehicle is travelling at less than 5 km/h or is stationary.
In certain circumstances (e.g. when driving in mountainous regions or when towing
a trailer) it may be beneficial to select the manual shift programme ⇒page 113 for
a short time in order to adapt the gearbox ratios manually to the driving situations.
4 - Position when driving in hilly areas
We recommend this position if driving with the selector lever in position D would,
in certain circumstances, result in the gearbox frequently shifting between fourth
and fifth gears.
The gearbox then shifts up and down automa tically into the first, second, third and
fourth gears in line with engine load and vehicle speed. Fifth gear is not engaged in
this case. This makes it possible to expl oit greater engine braking power when the
accelerator is released ⇒.
Fig. 122 Selector lever
Fig. 123 Information
display: Selector lever
positions
NKO B5 20.book Page 110 Friday, March 2, 2007 1:46 PM