front SKODA SUPERB 2010 2.G / (B6/3T) User Guide
[x] Cancel search | Manufacturer: SKODA, Model Year: 2010, Model line: SUPERB, Model: SKODA SUPERB 2010 2.G / (B6/3T)Pages: 287, PDF Size: 16.59 MB
Page 36 of 287
Instruments and warning lights35
Using the system
Safety
Driving Tips
General Maintenance
Breakdown assistance
Technical Data
On vehicles with information display* this
warning light is replaced by a vehicle
symbol.
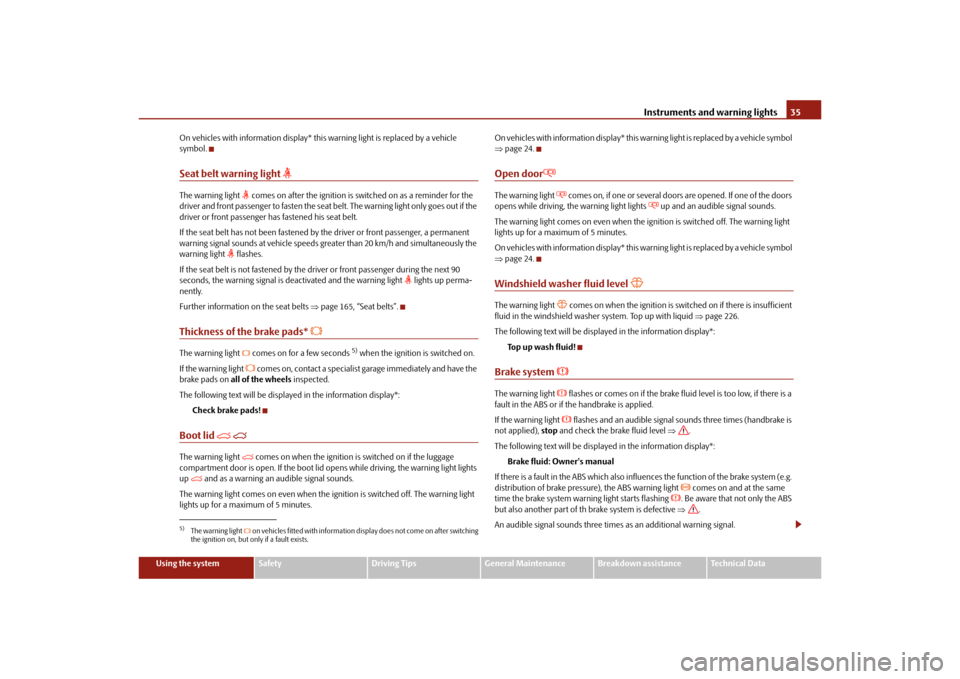
Seat belt warning light
The warning light
comes on after the ignition is sw itched on as a reminder for the
driver and front passenger to fasten the seat belt. The warning light only goes out if the
driver or front passenger has fastened his seat belt.
If the seat belt has not been fastened by the driver or front passenger, a permanent
warning signal sounds at vehicle speeds gr eater than 20 km/h and simultaneously the
warning light
flashes.
If the seat belt is not fastened by the dr iver or front passenger during the next 90
seconds, the warning signal is deactivated and the warning light
lights up perma-
nently.
Further information on the seat belts page 165, “Seat belts”.
Thickness of the brake pads*
The warning light comes on for a few seconds
5) when the ignition is switched on.
If the warning light
comes on, contact a specialist garage immediately and have the
brake pads on all of the wheels inspected.
The following text will be displayed in the information display*: Check brake pads!
Boot lid
The warning light
comes on when the ignition is switched on if the luggage
compartment door is open. If the boot lid op ens while driving, the warning light lights
up
and as a warning an audible signal sounds.
The warning light comes on even when the ig nition is switched off. The warning light
lights up for a maximum of 5 minutes. O n v e h i c l e s w i t h i n f o r m a t i o n d i s p l a y * t h i s w a
rning light is replaced by a vehicle symbol
page 24.
Open door
The warning light
comes on, if one or several doors are opened. If one of the doors
opens while driving, th e warning light lights
up and an audible signal sounds.
The warning light comes on even when the ig nition is switched off. The warning light
lights up for a maximum of 5 minutes.
O n v e h i c l e s w i t h i n f o r m a t i o n d i s p l a y * t h i s w a rning light is replaced by a vehicle symbol
page 24.
Windshield washer fluid level
The warning light
comes on when the ignition is swit ched on if there is insufficient
fluid in the windshield washer system. Top up with liquid page 226.
The following text will be displayed in the information display*: To p u p w a s h f l u i d !
Brake system
The warning light
flashes or comes on if the brake fluid level is too low, if there is a
fault in the ABS or if the handbrake is applied.
If the warning light flashes and an audible signal so unds three times (handbrake is
not applied), stop and check the brake fluid level .
The following text will be displayed in the information display*: Brake fluid: Owner's manual
If there is a fault in the ABS which also infl uences the function of the brake system (e.g.
distribution of brake pressure), the ABS warning light
comes on and at the same
time the brake system warn ing light starts flashing
. Be aware that not only the ABS
but also another part of th brake system is defective .
An audible signal sounds three times as an additional warning signal.
5)The warning light on vehicles fitted with information display does not come on after switching
the ignition on, but only if a fault exists.
s3fg.2.book Page 35 Friday, April 30, 2010 12:17 PM
Page 40 of 287
Unlocking and locking39
Using the system
Safety
Driving Tips
General Maintenance
Breakdown assistance
Technical Data
unlocked when opening. Afterwards you can open the boot lid by pressing the handle
on the lower edge of the boot lid
page 44.
Operation of the central locking system is possible:
with a remote control key page 49,
using the buttons for the central locking system page 42,
from the outside using the vehicle key page 43, “Emergency unlocking and
locking of the driver's door”.
Indicator light in the driver's door
After locking the vehicle the indicator light fl ashes for 2 seconds fast, then more slowly.
If the vehicle is locked and the safe securing system page 42 is not operating, the
indicator light in the driver door flashes for about 2 seconds fast, goes out and starts to
flash slowly after about 30 seconds.
If the indicator light first of all flashes fast for about 2 seconds, afterwards lights up for
about 30 seconds without interruption and th en flashes slowly, there is a fault in the
system of the central locking or in the inte rior monitor and in the towing protection
monitoring* page 51. Visit a specialist garage to obtain assistance.
Convenience operatio n of the windows
One can open and close the windows when opening and closing the vehicle
page 54.
Opening a single door*
This function makes it possible to only unlock the driver's door. The other doors and
the fuel filler flap remain locked and ar e only unlocked after repetitive unlocking.
You can have the function opening a single door activated by an authorised Škoda
Service Partner on request or you can activate it yourself with the aid of the Informa-
tion display* page 25.
Unlocking a vehicle side door*
This selection function enables to unlock both doors on the driver's side. The other
doors and the fuel filler flap remain locked and are only unlocked after repetitive
unlocking. You can have the function opening a single
door activated by an authorised Škoda
Service Partner on request or you can activate it yourself with the aid of the Informa-
tion display* page 25.
Unlocking the vehicle with the KESSY system*
This selection function enables to unlock all th e doors, individual doors, both doors on
the left and right vehicle side or to unlock the driver and front passenger door at the
same time. The other doors and the fuel fille r flap remain locked and are only unlocked
after repetitive unlocking using the unlock button on the remote control page 37,
fig. 23 or the button for the central locking system page 42, fig. 27 .
You can have the function opening a single door activated by an authorised Škoda
Service Partner on request or you can activate it yourself with the aid of the Informa-
tion display* page 25.
Automatic locking and unlocking*
All the doors and the boot lid are locked au tomatically once the car reaches a speed of
about 15 km/h.
If the ignition key is withdrawn, the car is then automatically unlocked again. In addi-
tion, it is possible for the driver or front pa ssenger to unlock the vehicle by pressing the
central locking button
page 42 or by pulling the door opening lever on one of the
front doors.
You can have the function of the automatic lo cking activated by a specialist garage on
request or you can also activate it yourself with the aid of the Information display*
page 25.
WARNING
Locking the doors prevents involuntary op ening in an exceptional situation (an
accident). Locked doors prevent unwanted entry into the vehicle from outside,
for example at road crossings. Locked do ors do, however, make it more difficult
for rescuers to get into the vehicle in an emergency - danger to life!
Note
In the event of an accident in which the airbags are deployed, the locked doors are
automatically unlocked in order to enable rescuers to gain access to the vehicle.
s3fg.2.book Page 39 Friday, April 30, 2010 12:17 PM
Page 41 of 287
Unlocking and locking
40
Only the driver's door can be unlocked or locked using the key if the central locking
system fails page 43, “Emergency unlocking and lo cking of the driver's door”. You
can lock or unlock manually the other doors and the boot lid.
Emergency locking of the door page 43.
Emergency unlocking of the boot lid page 48.
KESSY system* - DescriptionThe KESSY system (Keyless Entry Start Exit System) enables a comfort unlocking and
locking of the vehicle and a start-up without ac tively using the remote control key. It is
sufficient to carry the key with you, for example in your pocket, for unlocking and
locking the vehicle or for starting the engine.
The functions of the central locking system , the safe securing system* and the anti-
theft alarm system* correspond to vehicles without KESSY system. Only the control
elements are different.
Control elements of the system:
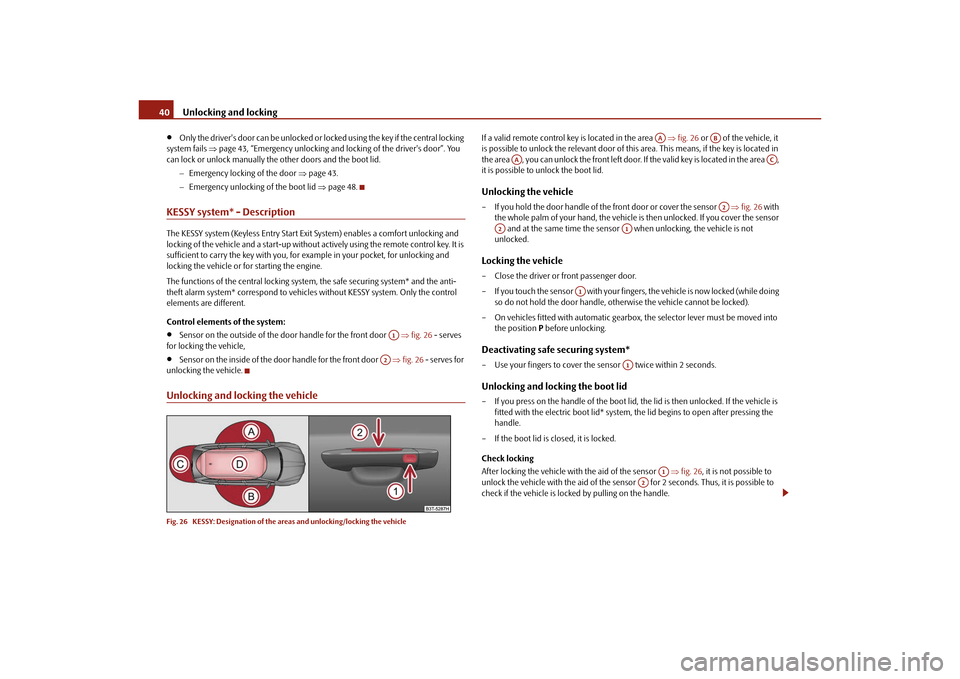
Sensor on the outside of the door handle for the front door fig. 26 - serves
for locking the vehicle,
Sensor on the inside of the d oor handle for the front door fig. 26 - serves for
unlocking the vehicle.
Unlocking and locking the vehicleFig. 26 KESSY: Designation of the areas and unlocking/locking the vehicle
If a valid remote control key is located in the area fig. 26 or of the vehicle, it
is possible to unlock the relevant door of this area. This means, if the key is located in
the area , you can unlock the front left door. If the valid key is located in the area ,
it is possible to unlock the boot lid.Unlocking the vehicle– If you hold the door handle of the front door or cover the sensor fig. 26 with
the whole palm of your hand, the vehicle is then unlocked. If you cover the sensor and at the same time the sensor when unlocking, the vehicle is not
unlocked.Locking the vehicle– Close the driver or front passenger door.
– If you touch the sensor with your finger s, the vehicle is now locked (while doing
so do not hold the door handle, othe rwise the vehicle cannot be locked).
– On vehicles fitted with automatic gearbox, the selector lever must be moved into
the position P before unlocking.Deactivating safe securing system*– Use your fingers to cover the sensor twice within 2 seconds.Unlocking and locking the boot lid– If you press on the handle of the boot lid, the lid is then unlocked. If the vehicle is
fitted with the electric boot lid* system, the lid begins to open after pressing the
handle.
– If the boot lid is closed, it is locked.
Check locking
After locking the vehicle with the aid of the sensor fig. 26 , it is not possible to
unlock the vehicle with the aid of the sensor for 2 seconds. Thus, it is possible to
check if the vehicle is locked by pulling on the handle.
A1
A2
AA
AB
AA
AC
A2
A2
A1
A1
A1
A1
A2
s3fg.2.book Page 40 Friday, April 30, 2010 12:17 PM
Page 42 of 287
Unlocking and locking41
Using the system
Safety
Driving Tips
General Maintenance
Breakdown assistance
Technical Data
Caution
After leaving the vehicle, it does not lock automatically, this is why you should pay
attention to the procedure for locking the vehicle page 40.
Note
If the vehicle battery or the battery in the remote control key is weak or discharged,
perhaps the vehicle cannot be unlocked or locked via KESSY. In such a case, use the
emergency unlocking or locking of the driver's door, see Owner's Manual.Further possibilites of lockingProtection against inadvertently locking the key in the vehicle
If the key, which was used to lock the vehicle, remains in the vehicle in the area
page 40, fig. 26 after locking and closing all of the doors including the boot lid, the
protection against inadvertently locking the key in the vehicle is activated and the
vehicle unlocks itself again.
You are informed about the activation of the protection against inadvertently locking
the key in the vehicle by the turn signal lights flashing and the message Key in vehicle
which appears in the information display* or Key in vehicle which appears in the
display of the instrument cluster. Additiona lly, on vehicles which are fitted with the
anti-theft alarm system*, an audible signal sounds.Messages in the instrument clusterA few warning and information texts of the KESSY system in the information display*
or in the display of the instrument cluster:
Key not found or No Key
This message is displayed when the engine is started and the system cannot detect a
valid key in the vehicle. This can occur if the key is outside the vehicle, the battery in the
key is discharged, the key is defective or the electromagnetic field is strongly disturbed.
This message is also displayed when the ignition is switched on or the engine is
running and the system cannot detect a valid key in the vehicle. Keyless defective or Check Keyless
There is a fault in the KESSY system, contact your specialist garage.
Renew key battery! or Key Battery
Low voltage is present in the battery of th
e remote control key, change the battery.
Parking the vehicleIf the vehicle is not unlocked within 60 hours, the sensors page 40, fig. 26 and
in the handle of the front passenger's d oor are automatically deactivated. For reac-
tivation, one of the following conditions must be met:
Unlocking the driver's door with the aid of the sensor page 40, fig. 26 ,
pressing the handle of the boot lid,
unlocking the vehicle using the button on the remote control key,
emergency unlocking of the driver 's door (see Owner's Manual).
If the vehicle is not unlocked within 90 hour s, the sensors and in the handle of
the driver's door are also automatically deactivated page 40, fig. 26. For reactiva-
tion, one of the following conditions must be met:
unlocking the vehicle using the button on the remote control key,
emergency unlocking of the driver 's door (see Owner's Manual).
Convenience operation of the windowsIf you hold your finger on the sensor page 40, fig. 26 for more than 2 seconds
while locking the vehicle, the opened windows and the panoramic sliding roof are
closed. If you lift your finger off the sens or , the closing process is interrupted. If you
touch the sensor again, the closing process of the windows and the panoramic
sliding roof continues.
If you immediately touch the sensor or pull on the handle during the closing
process of the windows and the panoramic sliding roof initiated by sensor , all of the
windows and the panoramic sliding roof are opened again.
AD
A1
A2
A2A1
A2
A1
A1
A1
A2
A1
s3fg.2.book Page 41 Friday, April 30, 2010 12:17 PM
Page 43 of 287
Unlocking and locking
42
Safe securingThe central locking system is equipped with a safe securing
6) system. Locking the
vehicle from the outside causes the door locks to be automatically blocked. It is not
possible to open the doors with the door handle either from the inside or from the
outside. This acts as an effective deterrent for attempts to break into your vehicle.
You can deactivate the safe securing system by locking twice within 2 seconds.
If the safe securing system is not operating:
the indicator light in the driver door flas hes for about 2 seconds fast, goes out and
starts to flash slowly after about 30 seconds,
is the filler flap locked.
The safe securing system is again activated the next time the vehicle is unlocked and
locked again.
If the vehicle is locked and the safe securing system is deactivated, you can open the
vehicle from the inside by pulling on the door opening lever.
WARNING
If the vehicle is locked from the outside and the safe securing system is acti-
vated, there must not be any person and animals in the vehicle as it is then not
possible to open either a door or a window from the inside. The locked doors
make it more difficult for rescuers to get into the vehicle in an emergency -
hazard!
Note
The anti-theft alarm system* is also activated with the deactivated safe securing
system when locking the vehicle. The interior monitor* is however not activated.
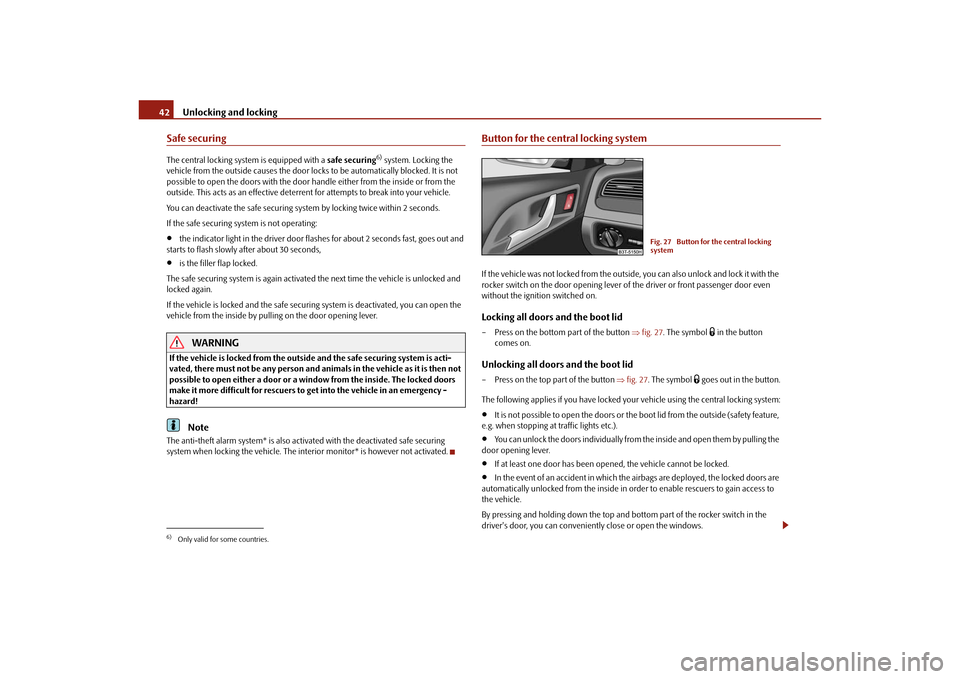
Button for the central locking systemIf the vehicle was not locked from the outside, you can also unlock and lock it with the
rocker switch on the door opening lever of the driver or front passenger door even
without the ignition switched on.Locking all doors and the boot lid– Press on the bottom part of the button fig. 27 . The symbol
in the button
comes on.
Unlocking all doors and the boot lid– Press on the top part of the button fig. 27 . The symbol
goes out in the button.
The following applies if you have locked yo ur vehicle using the central locking system:
It is not possible to open the doors or the boot lid from the outside (safety feature,
e.g. when stopping at traffic lights etc.).
You can unlock the doors individually from the inside and open them by pulling the
door opening lever.
If at least one door has been open ed, the vehicle cannot be locked.
In the event of an accident in which the airbags are deployed, the locked doors are
automatically unlocked from the inside in orde r to enable rescuers to gain access to
the vehicle.
By pressing and holding down the top and bottom part of the rocker switch in the
driver's door, you can conveniently close or open the windows.
6)Only valid for some countries.
Fig. 27 Button for the central locking
system
s3fg.2.book Page 42 Friday, April 30, 2010 12:17 PM
Page 45 of 287
Unlocking and locking
44
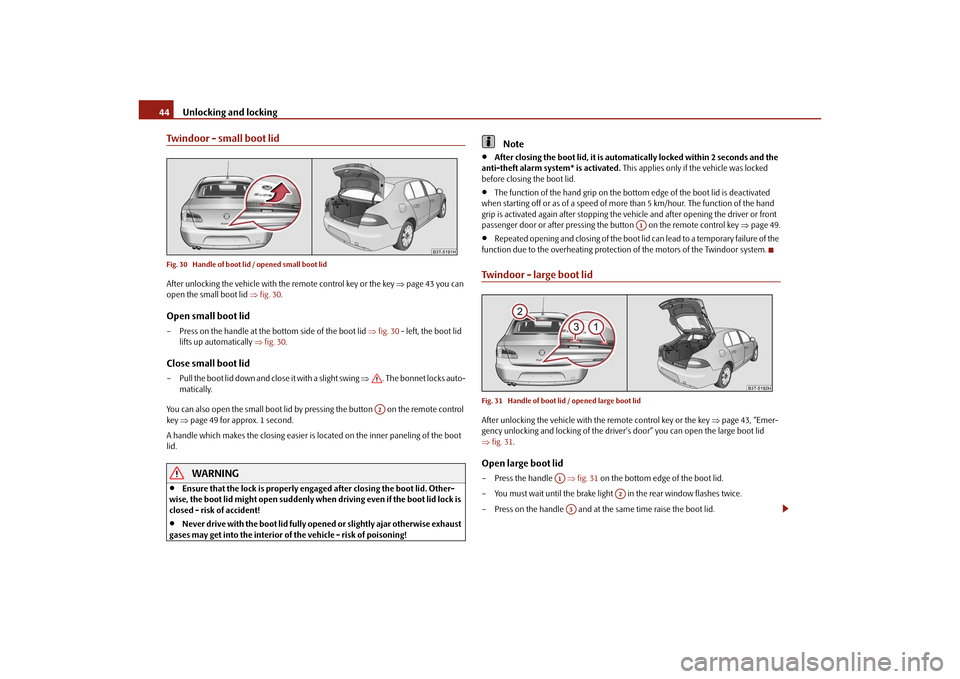
Twindoor - small boot lidFig. 30 Handle of boot lid / opened small boot lidAfter unlocking the vehicle with the remote control key or the key page 43 you can
open the small boot lid fig. 30 .Open small boot lid– Press on the handle at the bottom side of the boot lid fig. 30 - left, the boot lid
lifts up automatically fig. 30 .Close small boot lid– Pull the boot lid down and close it with a slight swing . The bonnet locks auto-
matically.
You can also open the small boot lid by pressing the button on the remote control
key page 49 for approx. 1 second.
A handle which makes the closing easier is located on the inner paneling of the boot
lid.
WARNING
Ensure that the lock is properly enga ged after closing the boot lid. Other-
wise, the boot lid might open suddenly when driving even if the boot lid lock is
closed - risk of accident!
Never drive with the boot lid fully open ed or slightly ajar otherwise exhaust
gases may get into the interior of the vehicle - risk of poisoning!
Note
After closing the boot lid, it is automatically locked within 2 seconds and the
anti-theft alarm system* is activated. This applies only if the vehicle was locked
before closing the boot lid.
The function of the hand grip on the bottom edge of the boot lid is deactivated
when starting off or as of a speed of more than 5 km/hour. The function of the hand
grip is activated again after stopping the ve hicle and after opening the driver or front
passenger door or after pressing the button on the remote control key page 49.
Repeated opening and closing of the boot li d can lead to a temporary failure of the
function due to the overheating protection of the motors of the Twindoor system.
Twindoor - large boot lidFig. 31 Handle of boot lid / opened large boot lidAfter unlocking the vehicle with th e remote control key or the key page 43, “Emer-
gency unlocking and locking of the driver's door” you can open the large boot lid
fig. 31 .Open large boot lid– Press the handle fig. 31 on the bottom edge of the boot lid.
– You must wait until the brake light in the rear window flashes twice.
– Press on the handle and at the same time raise the boot lid.
A2
A1
A1
A2
A3
s3fg.2.book Page 44 Friday, April 30, 2010 12:17 PM
Page 46 of 287
Unlocking and locking45
Using the system
Safety
Driving Tips
General Maintenance
Breakdown assistance
Technical Data
Close large boot lid– Pull the boot lid down and close it with a slight swing . The bonnet locks auto-
matically.
A handle which makes the closing easier is located on the inner paneling of the boot
lid.
WARNING
Ensure that the lock is properly engaged after closing the boot lid. Other-
wise, the boot lid might open suddenly when driving even if the boot lid lock is
closed - risk of accident!
Never drive with the boot lid fully open ed or slightly ajar otherwise exhaust
gases may get into the interior of the vehicle - risk of poisoning!Note
After closing the large boot lid, it is possib le to open the small boot lid after approx.
2 seconds.
After closing the boot lid, it is automatically locked within 2 seconds and the
anti-theft alarm sy stem* is activated. This applies only if the vehicle was locked
before closing the boot lid.
The function of the hand grip on the bott om edge of the boot lid is deactivated
when starting off or as of a speed of more than 5 km/hour. The function of the hand
grip is activated again after stopping the vehicle and after opening the driver or front
passenger door or after pressing the button on the remote control key page 49.
Repeated opening and closing of the boot lid can lead to a temporary failure of the
function due to the overheating protection of the motors of the Twindoor system.
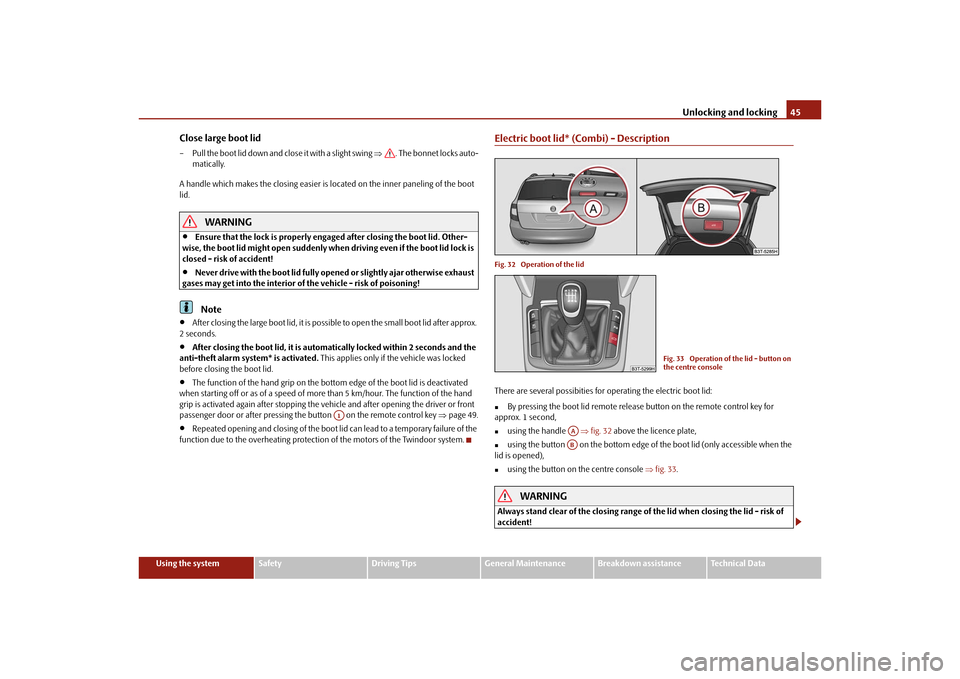
Electric boot lid* (Combi) - DescriptionFig. 32 Operation of the lidThere are several possibities for operating the electric boot lid:
By pressing the boot lid remote release button on the remote control key for
approx. 1 second,
using the handle fig. 32 above the licence plate,
using the button on the bottom edge of the boot lid (only accessible when the
lid is opened),
using the button on the centre console fig. 33 .
WARNING
Always stand clear of the closing range of the lid when closing the lid - risk of
accident!
A1
Fig. 33 Operation of the lid - button on
the centre console
AAAB
s3fg.2.book Page 45 Friday, April 30, 2010 12:17 PM
Page 53 of 287
Unlocking and locking
52Note
You can switch the interior monitor and th e towing protection monitoring off if
there is a possibility that movements from (e.g. children or animals) inside the vehicle
interior or if the vehicle must be transpor ted (e.g. by train or ship) or towed, might
trigger the alarm.
The opened storage compartment for spectacles* reduces the effectiveness of the
interior monitor. In order to ensure the function of the interior monitor to be fully
operational, always close the storage comp artment for spectacles before locking the
vehicle.
Power windowsButtons on the driver's doorThe power windows operate only when ignition is switched on.Opening a window – A window is opened by pressing lightly on the respective button in the door. The
process stops when one releases the button.
– Additionally you can open the window auto matically (fully opened) by pressing the
button up to the stop. Renewe d pressing of the button causes the window to stop
immediately.
Closing a window– A window is closed through pulling lightly on the respective button in the door. The closing process stops when one releases the button.
– Additionally you can close the window automatically (fully closed) by pulling the button up to the stop. Renewed pulling of the button causes the window to stop
immediately.
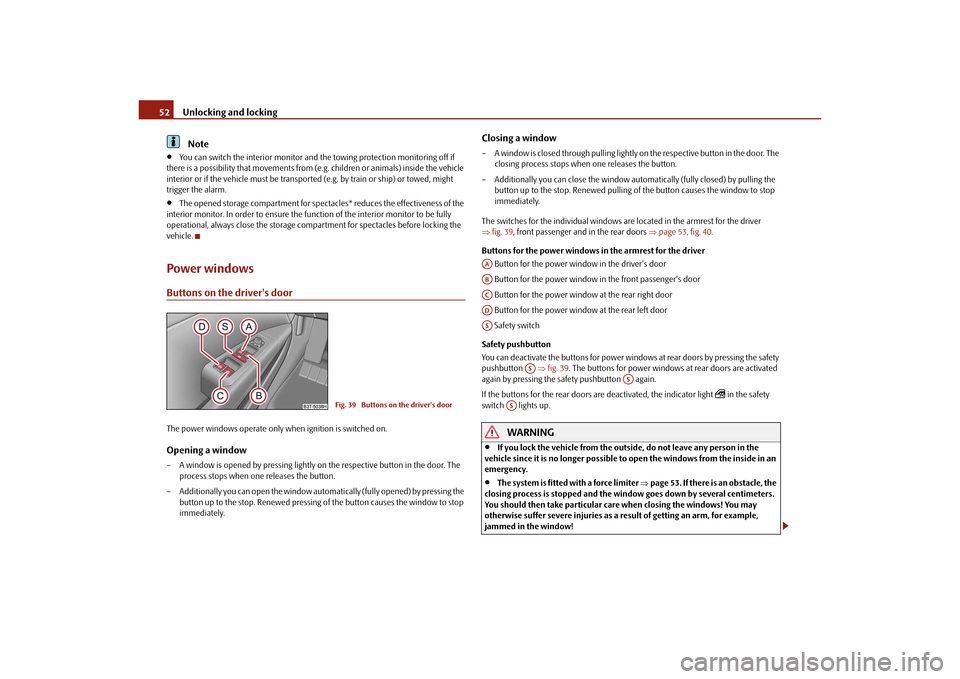
The switches for the individual windows are located in the armrest for the driver
fig. 39 , front passenger and in the rear doors page 53, fig. 40 .
Buttons for the power windows in the armrest for the driver
Button for the power window in the driver's door
Button for the power window in the front passenger's door
Button for the power window at the rear right door
Button for the power window at the rear left door
Safety switch
Safety pushbutton
You can deactivate the buttons for power wind ows at rear doors by pressing the safety
pushbutton fig. 39 . The buttons for power windows at rear doors are activated
again by pressing the safety pushbutton again.
If the buttons for the rear doors are deactivated, the indicator light
in the safety
switch lights up.
WARNING
If you lock the vehicle from the outside, do not leave any person in the
vehicle since it is no longer possible to open the windows from the inside in an
emergency.
The system is fitted with a force limiter page 53. If there is an obstacle, the
closing process is stopped and the window goes down by several centimeters.
You should then take particular care when closing the windows! You may
otherwise suffer severe injuries as a re sult of getting an arm, for example,
jammed in the window!
Fig. 39 Buttons on the driver's door
AAABACADAS
AS
AS
AS
s3fg.2.book Page 52 Friday, April 30, 2010 12:17 PM
Page 54 of 287
Unlocking and locking53
Using the system
Safety
Driving Tips
General Maintenance
Breakdown assistance
Technical Data
It is recommended to deactivate the el ectrically operated power windows in
the rear doors (safety pushbutton) page 52, fig. 39 when children are
being transported on the rear seats.Note
After switching the ignition off, it is still possible to open or close the windows for a
further 10 minutes. The automatic window cl osing will not operate during this time.
The power windows are switched off completely once you open the driver or front
passenger door.
When driving always use the existing he ating, air conditioning and ventilation
system for ventilating the interior of the vehicle. If the windows are opened, dust as
well as other dirt can get into the vehicle and in addition the wind noise is more at
certain speeds.
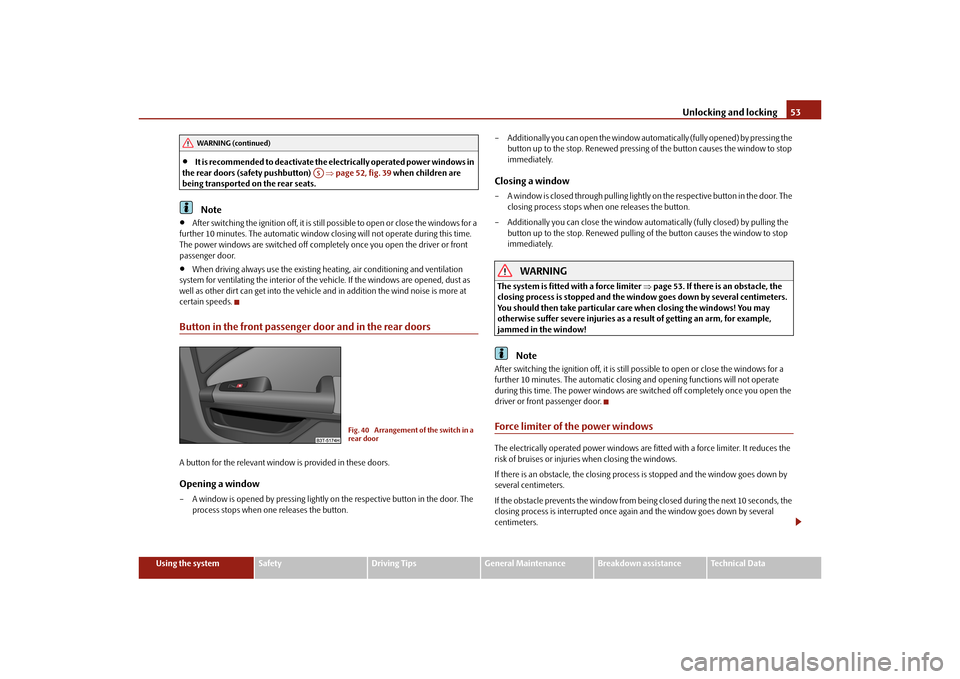
Button in the front passenger door and in the rear doorsA button for the relevant window is provided in these doors.Opening a window– A window is opened by pressing lightly on the respective button in the door. The
process stops when one releases the button. – Additionally you can open the window automatically (fully open
ed) by pressing the
button up to the stop. Renewed pressing of the button causes the window to stop
immediately.
Closing a window– A window is closed through pulling lightly on the respective button in the door. The closing process stops when one releases the button.
– Additionally you can close the window automatically (fully closed) by pulling the button up to the stop. Renewed pulling of the button causes the window to stop
immediately.
WARNING
The system is fitted with a force limiter page 53. If there is an obstacle, the
closing process is stopped and the window goes down by several centimeters.
You should then take particular care when closing the windows! You may
otherwise suffer severe injuries as a re sult of getting an arm, for example,
jammed in the window!
Note
After switching the ignition off, it is still possible to open or close the windows for a
further 10 minutes. The automatic closing and opening functions will not operate
during this time. The power windows are sw itched off completely once you open the
driver or front passenger door.Force limiter of the power windowsThe electrically operated power windows are fitted with a force limiter. It reduces the
risk of bruises or injuries when closing the windows.
If there is an obstacle, the closing proces s is stopped and the window goes down by
several centimeters.
If the obstacle prevents the window from being closed during the next 10 seconds, the
closing process is interrupted once agai n and the window goes down by several
centimeters.
WARNING (continued)
AS
Fig. 40 Arrangement of the switch in a
rear door
s3fg.2.book Page 53 Friday, April 30, 2010 12:17 PM
Page 56 of 287

Unlocking and locking55
Using the system
Safety
Driving Tips
General Maintenance
Breakdown assistance
Technical Data
You should then take particular care when closing the windows! You may
otherwise suffer severe injuries as a re
sult of getting an arm, for example,
jammed in the window!
Electric sliding/tilting roof*DescriptionThe sliding/tilting roof is operated by means of the control dial fig. 41 and only func-
tions when the ignition is switched on. The control dial has several positions.
After switching the ignition off, it is still possible to open, close and tilt the sliding/tilting
roof for approx. 10 minutes. It is no longer possible to operate the sliding/tilting roof
after opening one of the front doors, however.
Note
If the battery has been disconnected an d reconnected, it is possible that the
sliding/tilting roof does not close fully. Here you have to set the control dial to the
switch position and press it forward for about 10 seconds.
Opening and tiltingComfort position– Turn the switch to position fig. 41 .Opening fully– Turn the switch to position and hold it in this position (spring-tensioned posi-
tion).Tilting roof– Turn the switch to position .
When the sliding/tilting roof is in the comfort position, the intensity of the wind noise
is much less.
The sun screen is also opened automatically when the roof slides open.
Caution
It may be necessary during winter to remove any ice and snow in the area of the
sliding/tilting roof before opening it in order to prevent damaging the opening
mechanism.ClosingSliding closed/closing the sliding/tilting roof– Turn the switch to position fig. 41 .
Safety closing
The sliding/tilting roof is fitted with a force limiter. If an obstacle (e.g. ice) prevents
closing, the sliding/tilting roof stops and opens completely. You can close the
sliding/tilting roof completely without forc e limiter by pressing the switch to the
position fig. 41 at the front for as long as it takes for the sliding/tilting roof to close
completely .
WARNING (continued)
Fig. 41 Control dial for the power
sliding/tilting roof
AA
ACABADAA
AA
s3fg.2.book Page 55 Friday, April 30, 2010 12:17 PM