sensor SKODA SUPERB 2012 2.G / (B6/3T) Owner's Manual
[x] Cancel search | Manufacturer: SKODA, Model Year: 2012, Model line: SUPERB, Model: SKODA SUPERB 2012 2.G / (B6/3T)Pages: 235, PDF Size: 5.86 MB
Page 19 of 235
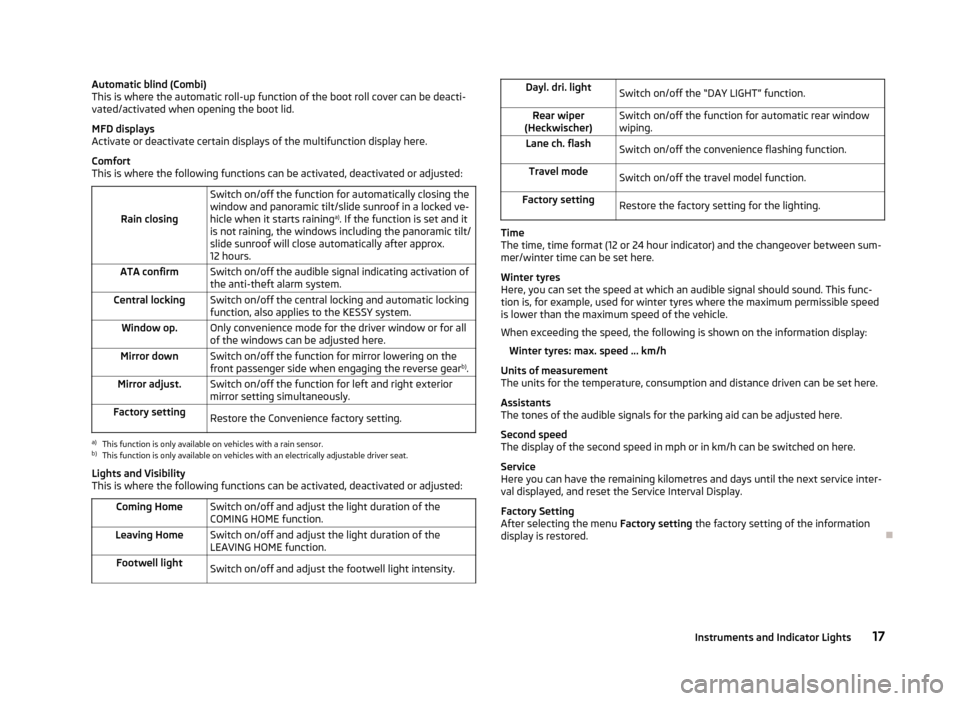
Automatic blind (Combi)
This is where the automatic roll-up function of the boot roll cover can be deacti-
vated/activated when opening the boot lid.
MFD displays
Activate or deactivate certain displays of the multifunction display here.
Comfort
This is where the following functions can be activated, deactivated or adjusted:
Rain closing Switch on/off the function for automatically closing the
window and panoramic tilt/slide sunroof in a locked ve-
hicle when it starts raining
a)
. If the function is set and it
is not raining, the windows including the panoramic tilt/
slide sunroof will close automatically after approx.
12 hours.
ATA confirm Switch on/off the audible signal indicating activation of
the anti-theft alarm system.
Central locking Switch on/off the central locking and automatic locking
function, also applies to the KESSY system.
Window op. Only convenience mode for the driver window or for all
of the windows can be adjusted here.
Mirror down Switch on/off the function for mirror lowering on the
front passenger side when engaging the reverse gear b)
.
Mirror adjust. Switch on/off the function for left and right exterior
mirror setting simultaneously.
Factory setting Restore the Convenience factory setting.a)
This function is only available on vehicles with a rain sensor.
b) This function is only available on vehicles with an electrically adjustable driver seat.
Lights and Visibility
This is where the following functions can be activated, deactivated or adjusted:
Coming Home Switch on/off and adjust the light duration of the
COMING HOME
function.
Leaving Home Switch on/off and adjust the light duration of the
LEAVING HOME function.
Footwell light Switch on/off and adjust the footwell light intensity. Dayl. dri. light
Switch on/off the “DAY LIGHT” function.
Rear wiper
(Heckwischer) Switch on/off the function for automatic rear window
wiping.
Lane ch. flash Switch on/off the convenience flashing function.
Travel mode Switch on/off the travel model function.
Factory setting Restore the factory setting for the lighting. Time
The time, time format (12 or 24 hour indicator) and the changeover between sum-
mer/winter time can be set here.
Winter tyres
Here, you can set the speed at which an audible signal should sound. This func-
tion is, for example, used for winter tyres where the maximum permissible speed
is lower than the maximum speed of the vehicle.
When exceeding the speed, the following is shown on the information display:
Winter tyres:
max. speed ... km/h
Units of measurement
The units for the temperature, consumption and distance driven can be set here.
Assistants
The tones of the audible signals for the parking aid can be adjusted here.
Second speed
The display of the second speed in mph or in km/h can be switched on here.
Service
Here you can have the remaining kilometres and days until the next service inter-
val displayed, and reset the Service Interval Display.
Factory Setting
After selecting the menu Factory setting the factory setting of the information
display is restored. Ð
17
Instruments and Indicator Lights
Page 20 of 235
Door, boot lid and bonnet warning
First read and observe the introductory information and safety warn-
ings on page 15.
If at least one door is open, or the boot or bonnet is open, the information display
indicates the relevant
open door or boot/bonnet.
An audible signal also sounds if the vehicle is travelling at more than 6
km/h.ÐAuto Check Control
First read and observe the introductory information and safety warn-
ings on page 15.
Vehicle condition
Certain functions and conditions of individual vehicle systems are checked contin-
uously when the ignition is switched on and also while driving.
Some error messages and other information are displayed in the information dis-
play. The messages are displayed at the same time as the symbols in the informa-
tion display or the indicator lights in the instrument cluster » page 18.
If there is at least one error message, the menu item Vehicle status is displayed
in the menu. After selecting this menu the first of the error messages is dis-
played. Several error messages are shown on the display under the message e.g.
1/3. This indicates that the first of a total of three error messages is being dis-
played.
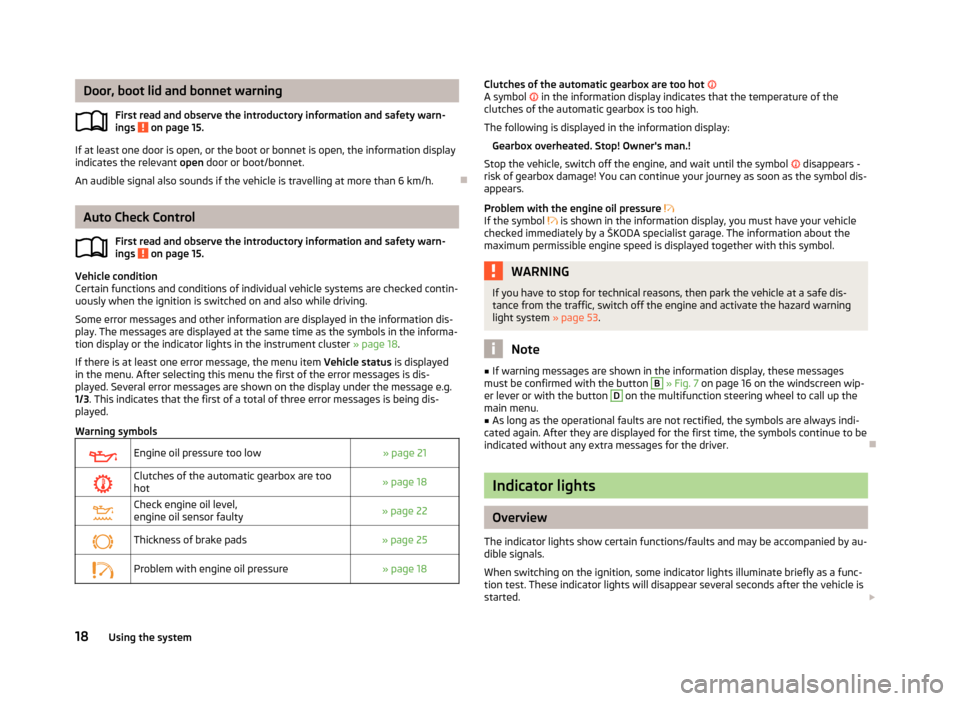
Warning symbols
Engine oil pressure too low
» page 21
Clutches of the automatic gearbox are too
hot » page 18
Check engine oil level,
engine oil sensor faulty
» page 22
Thickness of brake pads
» page 25
Problem with engine oil pressure
» page 18ä
ä
Clutches of the automatic gearbox are too hot
A symbol in the information display indicates that the temperature of the
clutches of the automatic gearbox is too high.
The following is displayed in the information display: Gearbox overheated. Stop! Owner's man.!
Stop the vehicle, switch off the engine, and wait until the symbol disappears -
risk of gearbox damage! You can continue your journey as soon as the symbol dis-
appears.
Problem with the engine oil pressure
If the symbol is shown in the information display, you must have your vehicle
checked immediately by a
ŠKODA specialist garage. The information about the
maximum permissible engine speed is displayed together with this symbol. WARNING
If you have to stop for technical reasons, then park the vehicle at a safe dis-
tance from the traffic, switch off the engine and activate the hazard warning
light system » page 53. Note
■ If warning messages are shown in the information display, these messages
must be confirmed with the button B
» Fig. 7 on page 16 on the windscreen wip-
er lever or with the button D
on the multifunction steering wheel to call up the
main menu. ■ As long as the operational faults are not rectified, the symbols are always indi-
cated again. After they are displayed for the first time, the symbols continue to be
indicated without any extra messages for the driver. Ð Indicator lights
Overview
The indicator lights show certain functions/faults and may be accompanied by au-
dible signals.
When switching on the ignition, some indicator lights illuminate briefly as a func-
tion test. These indicator lights will disappear several seconds after the vehicle is
started. £
18 Using the system
Page 24 of 235
If the indicator light
lights up, this indicates a complete failure of the power
steering and the steering assist has failed (significantly higher steering forces).
Seek help from a ŠKODA specialist garage.
Steering lock (KESSY system)
› While the indicator light
is flashing, the steering lock cannot be released. Fur-
ther information » page 105 , KESSY system .
› As long as the indicator light
is flashing, an audible signal is beeping and the
following appears in the information display: Steering column lock: Workshop! ,
the electrical steering lock is faulty. Seek help from a ŠKODA specialist garage.
› As long as the indicator light
is flashing, an audible signal is beeping and the
following appears in the information display: Steering column lock faulty. the
electrical steering lock is faulty. Park the car, do not continue the journey. Af-
ter switching off the ignition, it is then no longer possible to lock the steering,
to activate the electrical components (e.g. radio, navigation system), to switch
on the ignition again and to start the engine. Seek help from a ŠKODA specialist
garage. WARNING
If you have to stop for technical reasons, then park the vehicle at a safe dis-
tance from the traffic, switch off the engine and activate the hazard warning
light system » page 53. Note
If the vehicle battery has been disconnected and reconnected, the yellow indica-
tor light comes on after switching on the ignition. The indicator light must go
out after driving a short distance. If the yellow indicator light does not go out
after starting the engine again and a short drive, it is necessary to visit a
ŠKODA
specialist garage. ÐEngine oil level
The indicator light lights up (oil quantity too low)
The following is displayed in the information display:
Check oil level!
Stop the vehicle, switch off the engine, and check the level of the engine
oil » page 178. The indicator light will go out if the bonnet is left open for more than 30 seconds.
If no engine oil has been replenished, the indicator light will come on again after
driving about 100 km.
The indicator light flashes (engine oil level sensor faulty)
The following is displayed in the information display:
Oil sensor: Workshop!
If the engine oil level sensor is faulty, the indicator light flashes several times
and an audible signal sounds when the ignition is turned on.
Seek help from a
ŠKODA specialist garage. WARNING
If you have to stop for technical reasons, then park the vehicle at a safe dis-
tance from the traffic, switch off the engine and activate the hazard warning
light system » page 53. Ð Electronic Stability Control (ESC)
The indicator light flashes to show that the ESC is currently operating.
If the indicator light comes on immediately after you start the engine, the ESC
might be switched off due to technical reasons. Switch the ignition off and on
again. If the indicator light does not light up after you switch the engine back on,
the ESR is fully functional again.
If the indicator light lights up, there is a fault in the ESC.
The following is displayed in the information display: Error: Electronic Stability Control (ESC)
Seek help from a ŠKODA specialist garage.
Further information » page 110, Stabilisation Control (ESC) . Note
If the vehicle's battery has been disconnected and reconnected, the indicator
light comes on after switching on the ignition. The indicator light must go out
after driving a short distance. Ð
22 Using the system
Page 34 of 235
Synchronisation
If the vehicle cannot be unlocked by actuating the remote control system then it
is possible that the code in the key and the control unit in the vehicle are no lon-
ger synchronised. This can occur when the buttons on the radio-operated key are
actuated a number of times outside of the operative range of the equipment or
the battery on the remote control was replaced.
This means it is necessary to synchronise the code as follows:
› press any button on the remote control key;
› pressing of the button means that the door will unlock with the key within 1 mi-
nute. ÐKESSY system
Introductory information
The KESSY system (Keyless Entry Start Exit System) enables a comfort unlocking
and locking of the vehicle and a start-up without actively using the remote con-
trol key. The KESSY system is integrated in the central locking system.
The safe securing system and anti-theft alarm system correspond to vehicles
without the KESSY system. Only the control elements are different.
When unlocking and locking the vehicle or for starting the engine it suffices to
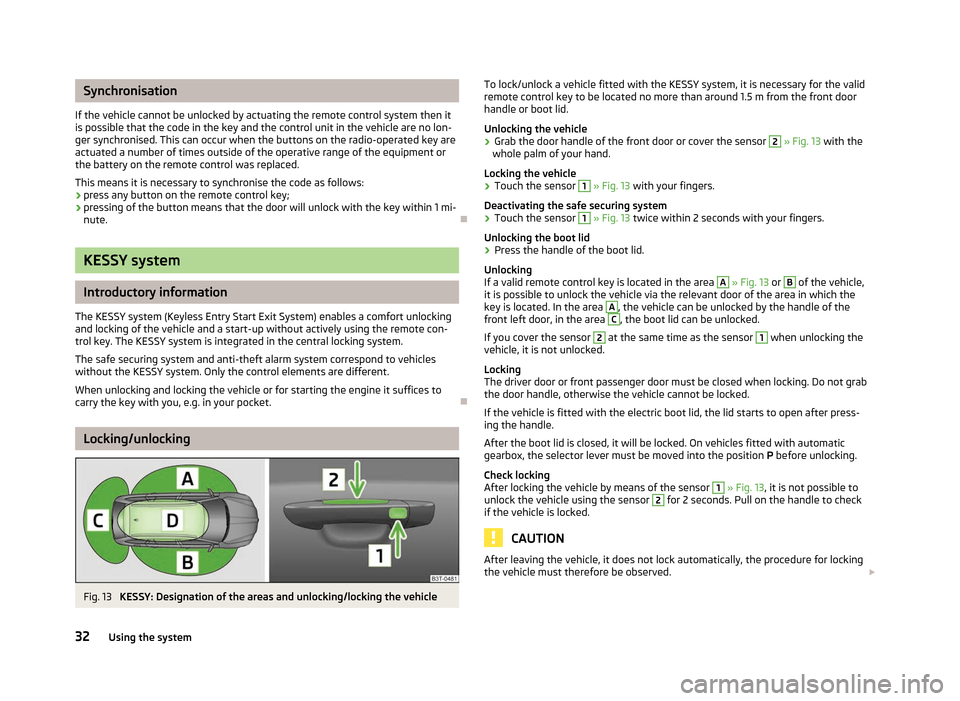
carry the key with you, e.g. in your pocket. ÐLocking/unlocking
Fig. 13
KESSY: Designation of the areas and unlocking/locking the vehicle To lock/unlock a vehicle fitted with the KESSY system, it is necessary for the valid
remote control key to be located no more than around 1.5
m from the front door
handle or boot lid.
Unlocking the vehicle
› Grab the door handle of the front door or cover the sensor 2
» Fig. 13 with the
whole palm of your hand.
Locking the vehicle
› Touch the sensor 1
» Fig. 13 with your fingers.
Deactivating the safe securing system
› Touch the sensor 1
» Fig. 13 twice within 2
seconds with your fingers.
Unlocking the boot lid
› Press the handle of the boot lid.
Unlocking
If a valid remote control key is located in the area A
» Fig. 13 or B
of the vehicle,
it is possible to unlock the vehicle via the relevant door of the area in which the
key is located. In the area A
, the vehicle can be unlocked by the handle of the
front left door, in the area C
, the boot lid can be unlocked.
If you cover the sensor 2
at the same time as the sensor 1
when unlocking the
vehicle, it is not unlocked.
Locking
The driver door or front passenger door must be closed when locking. Do not grab
the door handle, otherwise the vehicle cannot be locked.
If the vehicle is fitted with the electric boot lid, the lid starts to open after press-
ing the handle.
After the boot lid is closed, it will be locked. On vehicles fitted with automatic
gearbox, the selector lever must be moved into the position P before unlocking.
Check locking
After locking the vehicle by means of the sensor 1
»
Fig. 13, it is not possible to
unlock the vehicle using the sensor 2
for 2 seconds. Pull on the handle to check
if the vehicle is locked. CAUTION
After leaving the vehicle, it does not lock automatically, the procedure for locking
the vehicle must therefore be observed. £
32 Using the system
Page 35 of 235
Note
■ If the battery in the remote control key is weak or discharged, the vehicle may
not be unlocked or locked via the KESSY system. In this case, use the emergency
unlocking or emergency locking of the driver's door » page 35.
■ The KESSY system can find the valid key, even if it was left in the front area of
the vehicle's roof for example. Make sure you know where the valid remote con-
trol key is at all times. ■ When locking/unlocking the vehicle using the sensors 1
» Fig. 13 or 2
do not
use gloves or other objects that might prevent the hand from coming into direct
contact with the sensor.
■ If you unlock the vehicle by means of the sensor in the handle and do not open
a door or the boot lid within the next 30
seconds, the vehicle will lock again auto-
matically and the safe securing system or anti-theft alarm system will be reactiva-
ted. This function is intended to prevent the car being unlocked unintentionally. ÐProtection against inadvertently locking the key in the vehicle
If the key, which was used to lock the vehicle, remains in the vehicle in the area D
» Fig. 13 on page 32
after locking and closing all of the doors including the boot
lid, the protection against inadvertently locking the key in the vehicle is activated
and the vehicle unlocks itself again.
The following message is displayed in the information display or display of the in-
strument cluster: Key in vehicle. or KEY IN VEHICLE.
Additionally, on vehicles which are fitted with the anti-theft alarm system, an au-
dible signal sounds. ÐMessages in the instrument cluster display
■ Key not found. or No Key
This message is displayed when you wish to start the engine and the system can-
not detect a valid key in the vehicle. This can occur if the key is outside the vehi-
cle, the battery in the key is discharged, the key is defective or the electromag-
netic field is strongly disturbed. This message is also displayed when the ignition
is switched on or the engine is running and the system cannot detect a valid key
in the vehicle.
■ Keyless faulty. or CHECK KEYLESS.
Error in the KESSY system; seek help from a
ŠKODA specialist garage. ■
Renew key battery! or KEY BATTERY
Low voltage of the remote control key battery, change the battery. Ð Parking the vehicle
If the vehicle is not unlocked within 60 or 90 hours, the sensors 1
» Fig. 13
on
page 32 and 2
in the handle of the front passenger's door are automatically de-
activated.
Activation after 60 hours
› Unlock the driver's door using the sensor 2
» Fig. 13 on page 32
.
› Press the handle of the boot lid.
› Unlock the vehicle using the button on the remote control key,
› Unlocking the driver's door in an emergency
» page 35.
Activation after 90 hours
› Unlock the vehicle using the button on the remote control key,
› Unlocking the driver's door in an emergency
» page 35.Ð Anti-theft alarm system
Introductory information
The anti-theft alarm system increases the level of protection against people
seeking to break into the vehicle. The system triggers audible and visual warning
signals if an attempt is made to break into the vehicle.
How is the alarm system activated?
The anti-theft alarm system is activated when the vehicle is locked with the radio
remote control or the key in the driver's door . The door contact monitoring is ac-
tivated approx. 15 seconds after the locking. The interior and the towing protec-
tion monitoring are activated approx. 30 seconds after the locking. If a door is
opened during activation, the monitoring is only activated 5 seconds after closing.
How is the alarm system deactivated?
The alarm system is deactivated by pressing the unlock button on the radio re-
mote control. The anti-theft alarm system is reactivated if the vehicle is not
opened within 30 seconds after transmitting the radio signal.
The alarm system is also deactivated if you unlock the driver door using the key
within 45 seconds of locking the vehicle. £
33
Unlocking and locking
Page 44 of 235

Window in the front passenger door and the rear doors open/
close
Fig. 24
Arrangement of the button on
the rear door
First read and observe the introductory information and safety warn-
ings on page 40.
There is a button in the front passenger door and in the rear doors for that win-
dow.
Opening
› A window is opened by pressing lightly on the respective button in the door.
The opening process stops when one releases the button.
› Additionally, the window can be opened automatically (fully open) by pressing
the button to the stop. Renewed pressing of the button causes the window to
stop immediately.
Closing
› A window is closed through pulling lightly on the respective button in the door.
The closing process stops when one releases the button.
› Additionally, the window can be closed automatically (fully closed) by pulling
the button to the stop. Renewed pulling of the button causes the window to
stop immediately. ÐForce limiter of the power windows
First read and observe the introductory information and safety warn-
ings on page 40.
The electrically operated power windows are fitted with a force limiter. It reduces
the risk of bruises or injuries when closing the windows.
ä
ä If there is an obstacle, the closing process is stopped and the window goes down
by several centimetres.
If the obstacle prevents the window from being closed during the next 10 sec-
onds, the closing process is interrupted once again and the window goes down by
several centimetres.
If you attempt to close the window again within 10
seconds of the window being
moved down for the second time, even though the obstacle was not yet been re-
moved, the closing process is only stopped. During this time it is not possible to
automatically close the window. The force limiter is still switched on.
The force limiter is only switched off if you attempt to close the window again
within the next 10 seconds - the window will now close with full force!
If you wait longer than 10 seconds, the force limiter is switched on again. Ð Window convenience operation
First read and observe the introductory information and safety warn-
ings on page 40.
The electrically powered windows can be opened and closed as follows when un-
locking and locking the vehicle.
Opening
›
Press and hold the unlock button
on the remote control key.
› Press and hold the upper part of the central locking button in the driver's door.
Closing
› Press and hold the lock button
on the remote control key.
› Press and hold the lower part of the central locking button in the driver's door.
› Hold the key in the driver's lock in the lock position.
› With the KESSY system, cover the sensor 2
» Fig. 13 on page 32
.
You can interrupt the opening or closing process for the windows immediately by
releasing the key or the lock button. Ð
ä
42 Using the system
Page 46 of 235
CAUTION
During the winter it may be necessary to remove any ice and snow in the vicinity
of the sliding/tilting roof before opening it to prevent any damage to the opening
mechanism and seal. ÐConvenience operation
An open sliding/tilting roof can also be closed from the outside.
› Press and hold the lock button
on the remote control key or hold the key in
the locking cylinder of the driver's door in the lock position, or with the KESSY
system, keep your finger on the sensor 1
» Fig. 13 on page 32 » .
The closing operation stops immediately when you release the key or the lock
button. WARNING
Close the sliding/tilting roof carefully - risk of injury! The force limiter does not
operate with the convenience closing. ÐElectric sliding/tilting roof with solar cells
If there is sufficient bright sunlight, the solar cells on the sliding/tilting roof deliv-
er power for the fresh air blower. Further information » page 97, Climatronic
(automatic air conditioning system) .
The operation of the sliding/tilting roof with solar cells is the same as of a normal
sliding/tilting roof. Ð Emergency operation
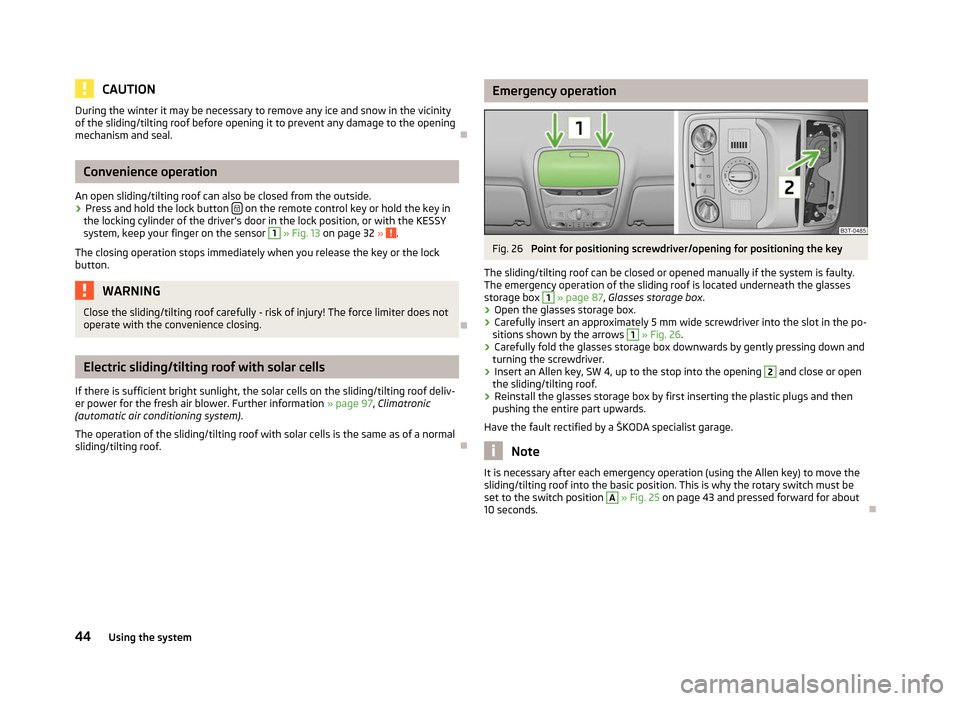
Fig. 26
Point for positioning screwdriver/opening for positioning the key
The sliding/tilting roof can be closed or opened manually if the system is faulty.
The emergency operation of the sliding roof is located underneath the glasses
storage box 1
» page 87,
Glasses storage box .
› Open the glasses storage box.
› Carefully insert an approximately 5 mm wide screwdriver into the slot in the po-
sitions shown by the arrows 1
» Fig. 26.
› Carefully fold the glasses storage box downwards by gently pressing down and
turning the screwdriver.
› Insert an Allen key, SW 4, up to the stop into the opening 2
and close or open
the sliding/tilting roof.
› Reinstall the glasses storage box by first inserting the plastic plugs and then
pushing the entire part upwards.
Have the fault rectified by a
ŠKODA specialist garage. Note
It is necessary after each emergency operation (using the Allen key) to move the
sliding/tilting roof into the basic position. This is why the rotary switch must be
set to the switch position A
» Fig. 25 on page 43 and pressed forward for about
10 seconds. Ð
44 Using the system
Page 48 of 235
Opening
›
Briefly press the button E
» Fig. 28
to open fully.
› Press and hold the button E
to open in the desired position. The opening proc-
ess stops when one releases the button.
Closing
› Briefly press the button F
» Fig. 28
to close fully.
› Press and hold the button F
to close in the desired position. The closing proc-
ess stops when one releases the button. ÐConvenience operation
The panoramic sliding roof and the sun screen can also be operated from the out-
side using the remote control key or when using the KESSY system with the aid
of the sensor 1
» Fig. 13 on page 32.
Closing
› Hold down the lock button
on the remote control key, or when using the
KESSY system, keep your finger on the sensor 1
» Fig. 13 on page 32
.
After releasing the button, or lifting your finger off the sensor 1
when using the
KESSY system, the closing process is immediately interrupted.
Tilting roof
› Press and hold the unlock button
on the remote control key.
When closing or tilting the panoramic sliding roof, the sun screen is closed or
opened at the same time. Note
■ The force limiter also operates for convenience closing.
■ The panoramic sliding roof can only be tilted and not opened with the conven-
ience operating feature. Ð Emergency operation
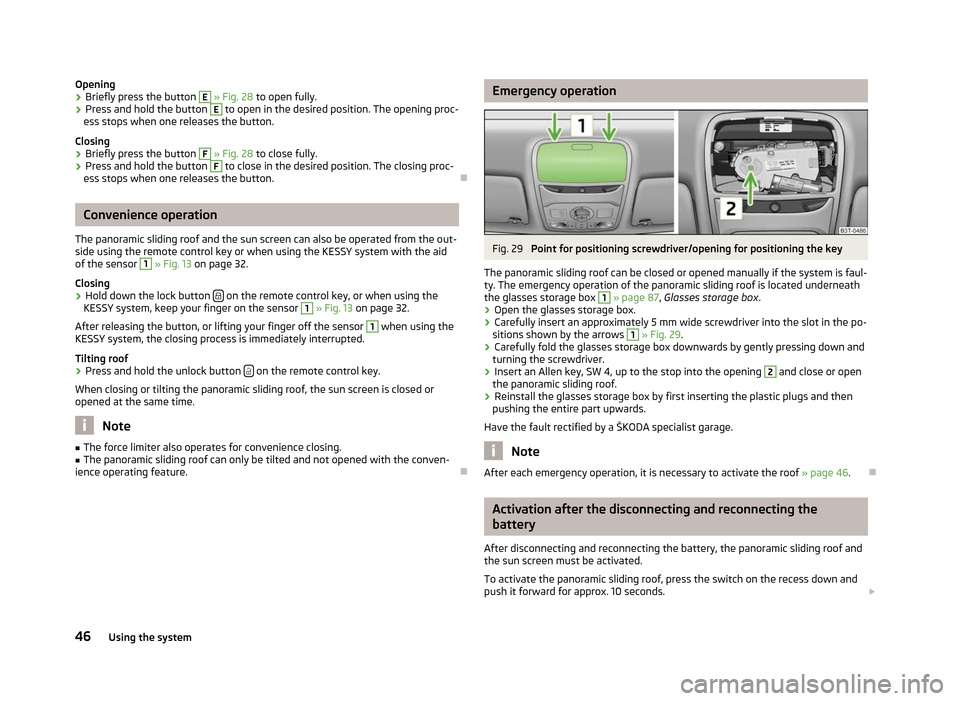
Fig. 29
Point for positioning screwdriver/opening for positioning the key
The panoramic sliding roof can be closed or opened manually if the system is faul-
ty. The emergency operation of the panoramic sliding roof is located underneath
the glasses storage box 1
» page 87,
Glasses storage box .
› Open the glasses storage box.
› Carefully insert an approximately 5 mm wide screwdriver into the slot in the po-
sitions shown by the arrows 1
» Fig. 29.
› Carefully fold the glasses storage box downwards by gently pressing down and
turning the screwdriver.
› Insert an Allen key, SW 4, up to the stop into the opening 2
and close or open
the panoramic sliding roof.
› Reinstall the glasses storage box by first inserting the plastic plugs and then
pushing the entire part upwards.
Have the fault rectified by a
ŠKODA specialist garage. Note
After each emergency operation, it is necessary to activate the roof » page 46.Ð Activation after the disconnecting and reconnecting the
battery
After disconnecting and reconnecting the battery, the panoramic sliding roof and
the sun screen must be activated.
To activate the panoramic sliding roof, press the switch on the recess down and
push it forward for approx. 10
seconds. £
46 Using the system
Page 50 of 235

Lights and visibility
Lights
ä
Introduction
This chapter contains information on the following subjects:
Switching lights on and off 49
DAY LIGHT function (Daylight driving light) 49
Automatic driving lamp control 49
Parking light 50
COMING HOME/LEAVING HOME function 50
Adaptive headlights (AHL) 51
Fog lights 52
Fog lights with the function CORNER 52
Rear fog lights 52
Instrument lighting 53
Headlight beam adjustment 53
Switches for the hazard warning light system 53
Turn signal and main beam lever 54
On models fitted with right-hand steering the position of certain switches differs
from that shown in » Fig. 30 on page
49. The symbols which mark the switch
positions are identical, however.
The low beam continues to shine while the ignition is switched on and the light
switch is in the position or . After switching off the ignition, the low beam
is switched off automatically and only the side lights come on. The side lights also
go out after the ignition key is removed. WARNING
■ Never drive with only the side lights on! The side lights are not bright
enough to light up the road sufficiently in front of you or to be seen by other
oncoming traffic. Therefore always switch on the low beam when it is dark or
if visibility is poor.
■ The automatic driving lamp control
only operates as a support and does
not release the driver from his responsibility to check the light and, if necessa-
ry, to switch on the light depending on the light conditions. The light sensor
cannot, for example, detect rain or snow. Under these conditions we recom-
mend switching on the low beam or fog lights! CAUTION
■ The activation of the lights should only be undertaken in accordance with na-
tional legal requirements.
■ The driver is always responsible for the correct settings and use of the lights. Note
■ If the light switch is in the position , the ignition key is removed and the driv-
er's door is open, an audible warning signal will sound. The audible warning signal
is switched off by means of the door contact when the driver's door is closed (ig-
nition off), however, the side lights remain on to illuminate the parked vehicle if
necessary. ■ If there is a fault in the light switch, the low beam comes on automatically.
■ In the event of cool or humid weather conditions, the headlights can be misted
up from inside. The temperature difference between interior and external area of
the headlight lenses is decisive. When the driving lights are switched on, the light
outlet surfaces are free from mist after a short period, although the headlight
lenses may still be misted up in the peripheral areas. It also concerns reverse light
and turn signal lights. This mist has no influence on the life of the lighting system. Ð
48 Using the system
Page 51 of 235

Switching lights on and off
Fig. 30
Dash panel: Light switch
First read and observe the introductory information and safety warn-
ings on page 48.
Switching on the parking light
›
Turn the light switch
» Fig. 30 to position .
Switching on the low beam and main beam
› Turn the light switch to position
.
› Push the main beam lever slightly forward in the spring-tensioned position to
switch on the main beam » Fig. 36 on page 54.
Switching off lights (except daylight driving lights)
› Turn the light switch to position 0. ÐDAY LIGHT function (Daylight driving light)
First read and observe the introductory information and safety warn-
ings on page 48.
Switching on daylight driving lights
›
Turn the ignition on and turn the light switch to position 0 or
.
Deactivating the function daylight driving lights
› Pull the turn signal light lever towards the steering wheel within 3
seconds of
switching on the ignition and at the same time, slide it downwards and hold it in
this position for at least 3
seconds.
ä
ä Activating the function daylight driving lights
› Pull the turn signal light lever towards the steering wheel within 3
seconds of
switching on the ignition and at the same time, slide it upwards and hold it in
this position for at least 3
seconds.
On vehicles with an information display, the daylight driving lights can also be ac-
tivated or deactivated via the menu:
■ Settings
■ Lights & Vision
On vehicles with separate lights for daylight driving lights in the fog lights, the
parking lights and the licence plate light do not come on when activating the
function daylight driving lights (neither front nor rear).
When the daylight driving lights are switched on, the lighting of the instrument
cluster is switched on as well. Ð Automatic driving lamp control
Fig. 31
Dash panel: Light switch
First read and observe the introductory information and safety warn-
ings on page 48.
Switching on
›
Turn the light switch
» Fig. 31 to position .
Switching off
› Turn the light switch to the position 0,
or .
If the light switch is in the position , the symbol illuminates when the ignition
is switched on next to the light switch. If the low beam is activated with the
light sensor, the symbol illuminates additionally next to the light switch. £
ä
49
Lights and visibility