change time SKODA SUPERB 2013 2.G / (B6/3T) Owner's Manual
[x] Cancel search | Manufacturer: SKODA, Model Year: 2013, Model line: SUPERB, Model: SKODA SUPERB 2013 2.G / (B6/3T)Pages: 274, PDF Size: 17.31 MB
Page 16 of 274
Reset trip counter for the distance driven›Press and hold the 7 » Fig. 2 on page 10 button.
Odometer
The odometer B
» Fig. 6 indicates the total distance the vehicle has travelled.
Note
If the second speed display is enabled on vehicles with a segment display, this
speed will be shown instead of the odometer.
Digital clock
First read and observe the introductory information and safety warn-ings
on page 10.
The clock is set with the buttons
3
and
7
» Fig. 2 on page 10.
Select the display that you wish to change with the button
3
and carry out the
change with the button
7
.
In vehicles equipped with the MAXI DOT display, it is also possible to set the clock
in the Time menu » page 29.
Display of the second speed
First read and observe the introductory information and safety warn-
ings
on page 10.
The display can show the current speed in mph 1)
.
This feature is provided for driving in countries with different speed units.
Maxi DOT display
The display of the second speed can be set in the menu item settings » page 29,
Settings .
Segment display
›
Press the
3
» Fig. 2 on page 10 key repeatedly, until the odometer display flash-
es » page 12 .
›
Press the
7
key while the display flashes.
The second speed is displayed instead of the odometer.
The display of the second speed can be disabled in the same way.
Display in rear centre console
Fig. 7
Centre console at rear: Display
First read and observe the introductory information and safety warn-
ings on page 10.
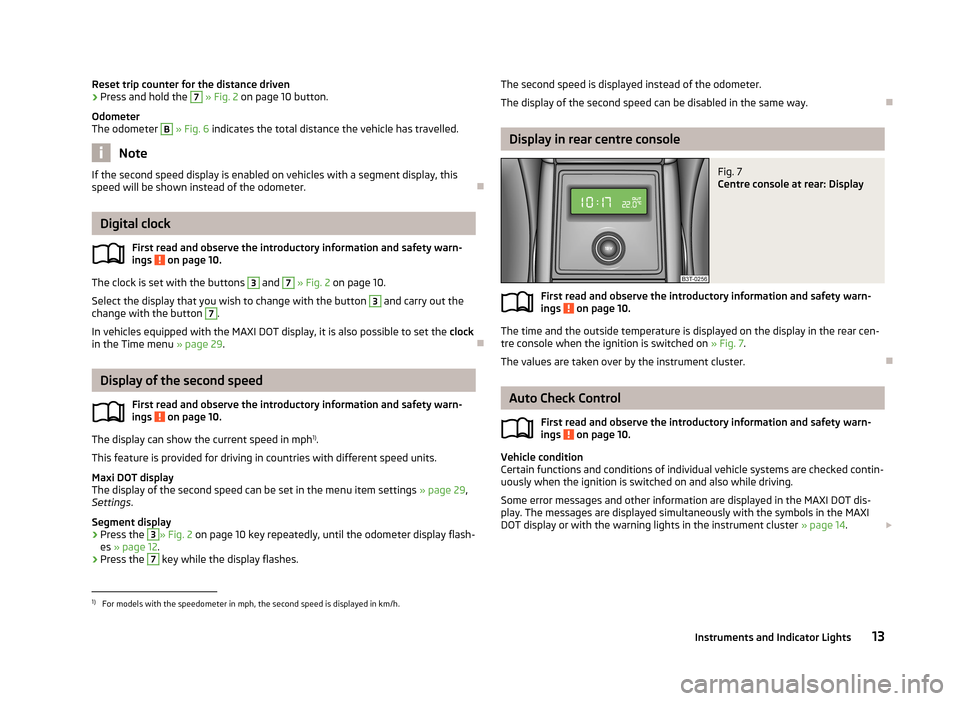
The time and the outside temperature is displayed on the display in the rear cen- tre console when the ignition is switched on » Fig. 7.
The values are taken over by the instrument cluster.
Auto Check Control
First read and observe the introductory information and safety warn-
ings
on page 10.
Vehicle condition
Certain functions and conditions of individual vehicle systems are checked contin-
uously when the ignition is switched on and also while driving.
Some error messages and other information are displayed in the MAXI DOT dis- play. The messages are displayed simultaneously with the symbols in the MAXI
DOT display or with the warning lights in the instrument cluster » page 14.
1)
For models with the speedometer in mph, the second speed is displayed in km/h.
13Instruments and Indicator Lights
Page 31 of 274
Warning against excessive speedsFirst read and observe the introductory information and safety warn-ings
on page 25.
Adjust the speed limit while the vehicle is stationary
›
Select the menu item Speed warning (MAXI DOT display) or (segment dis-
play).
›
Activate the speed limit option by confirming this menu item 1)
.
›
Set the desired speed limit, e.g. 50 km/h.
›
Store the speed limit by confirming the set value, or wait several seconds; your
settings will be saved automatically.
The speed limit can be adjusted from 30 km/h to 250 km/h in 5 km/h increments.
Adjusting the speed limit while the vehicle is moving
›
Select the menu item Speed warning (MAXI DOT display) or
(segment dis-
play).
›
Drive at the desired speed, e.g. 50 km/h.
›
Confirm the current speed as the speed limit.
If you wish to adjust the set speed limit, you can do so in 5 km/h intervals (e.g. the
accepted speed of 47 km/h increases to 50 km/h or decreases to 45 km/h).
›
Store the speed limit, or wait several seconds; your settings will be saved auto-
matically.
Change or disable speed limit
›
Select the menu item Speed warning (MAXI DOT display) or
(segment dis-
play).
›
By confirming the stored value, the speed limit is disabled.
›
By reconfirming, the option to change the speed limit is activated.
If the set speed limit is exceeded, an audible signal will sound as a warning. The menu item Speed warning (MAXI DOT display) or
(Segment display) appears in
the display at the same time as the set threshold.
The set driving mode is stored even after switching the ignition on and off.
MAXI DOT display
Introduction
This chapter contains information on the following subjects:
Main menu
28
Settings
29
The MAXI DOT display provides you with information about the current operating
state of your vehicle. It also provides you with data relating to the radio, mobile
phone, multifunction display (MFA), navigation system, automatic gear- box » page 139 and devices connected via the MDI input.
WARNINGConcentrate fully at all times on your driving! As the driver you are fully re-
sponsible for the operation of your vehicle.
Main menu
First read and observe the introductory information and safety warn-
ings
on page 28.
Press and hold button
A
or
C
» Fig. 8 on page 23 to activate the MAIN MENU.
By briefly pressing the
C
button you will reach one level higher.
Overview of the menu items in the main menu.
■ MFA (Multifunction display) » page 25
■ Audio » Operating instructions for the radio
■ Navigation » Operating instructions for the navigation system
■ Phone » page 110 ;
■ Aux. heating » page 107
■ Assist systems » page 161
■ Vehicle status » page 13
■ Settings » page 29
The Audio and Navigation menu items are only displayed when the factory-fitted
radio or navigation system is switched on.
1)
If no value is set the output value 30 km/h is automatically displayed.
28Using the system
Page 32 of 274
The Aux. heating menu item is only displayed if the vehicle is equipped with fac-
tory-fitted auxiliary heating.
The menu item Assistants is only displayed if the vehicle is fitted with fatigue de-
tection.
Note
■ If warning messages are displayed, these messages must be verified to access
the main menu » page 23, Using the information system .■
If the display is not activated at that moment, the menu always shifts to one of
the higher levels after approx. 10 seconds.
■
Using the factory-fitted radio or navigation system » Radio operating instruc-
tions or» navigation system operating instructions .
Settings
First read and observe the introductory information and safety warn-
ings
on page 28.
You can change certain settings by means of the MAXI DOT display. The current
menu item is shown in the top of the display under a line.
You can select the following menu options:
Language
You can set the language for the display texts here.
Automatic blind (Combi)
This is where the automatic roll-up function of the boot roll cover can be deacti-
vated/activated when opening the boot lid.
MFD displays
Activate or deactivate certain displays of the multifunction display here.
Comfort
The following functions can be activated, deactivated or adjusted here:
Rain closing
Activate/deactivate the function for automatically clos-
ing the window and the tilt/slide sunroof in a locked ve-
hicle when it starts raining a)
. If the function is set and it
is not raining, the windows including the panoramic tilt/
slide sunroof will close automatically after approx. 12 hours.ATA confirmActivate/deactivate the audible signalling the activationof the anti-theft alarm system.Central lockingActivate/deactivate the central locking and automatic
locking function, also applies to the KESSY system.Window op.Only convenience mode for the driver window or for all
of the windows can be adjusted here.Mirror downActivate/deactivate the function for mirror lowering on
the front passenger side when engaging the reverse gear b)
.Mirror adjust.Activate/deactivate the function for left and right exte-
rior mirror setting simultaneously.Factory settingRestore the Convenience factory setting.a)
This function is only available on vehicles with a rain sensor.
b)
This function is only available on vehicles with an electrically adjustable driver seat.
Lights and Visibility
The following functions can be activated, deactivated or adjusted here:
Coming HomeActivate/deactivate and adjust the light duration of the
COMING HOME function.Leaving HomeSwitch on/off and adjust the light duration of the
LEAVING HOME function.Footwell lightActivate/deactivate and adjust the footwell light inten-
sity.Daytime running lightsActivate/deactivate “DAY LIGHT” function.Rear wiperActivate/deactivate the function of the automatic rearwindow wiping.Lane ch. flashActivate/deactivate the lane ch. flash function.Travel modeActivate/deactivate the travel mode feature.Factory settingRestore the factory setting for the lighting. 29Information system
Page 33 of 274
Time
The time, time format (12 or 24 hour indicator) and the changeover between sum-
mer/winter time can be set here.
Winter tyres
Here, you can set the speed at which an audible signal should sound. This func-
tion is, for example, used for winter tyres where the maximum permissible speed
is lower than the maximum speed of the vehicle » page 220.
The following message appears in the display when exceeding the speed limit: Winter tyres: maximum ... km/h.
Units of measurement
The units for the temperature, consumption and distance driven can be set here.
Assistants
The tones of the audible signals for the parking aid can be adjusted here.
Alt. speed dis.
Here, the display of the second speed in mph 1)
can be activated.
Service
Here you can have the remaining kilometres and days until the next service inter-
val displayed, and reset the Service Interval Display.
Factory setting
Here, the factory settings of the display can be restored.
Service Interval Display
Introduction
This chapter contains information on the following subjects:
Prompt in the segment display
30
Prompt in the MAXI DOT display
31
Before the next service interval is reached, a message concerning the kilometres
and days remaining until the next service is due is shown for about 10 seconds
after the ignition is switched on.
The kilometre indicator or the days indicator reduces in steps of 100 km or, where
applicable, days until the service due date is reached.
Note
■ Information is retained in the Service Interval Display even after the vehicle bat-
tery is disconnected.■
If the instrument cluster is exchanged after a repair, the correct values must be
entered in the counter for the Service Interval Display. This work is carried out by a specialist garage.
■
For more information on the service intervals » page 191, Service intervals .
Prompt in the segment display
Fig. 11
Segment display: Example of a
message
First read and observe the introductory information given on page 30.
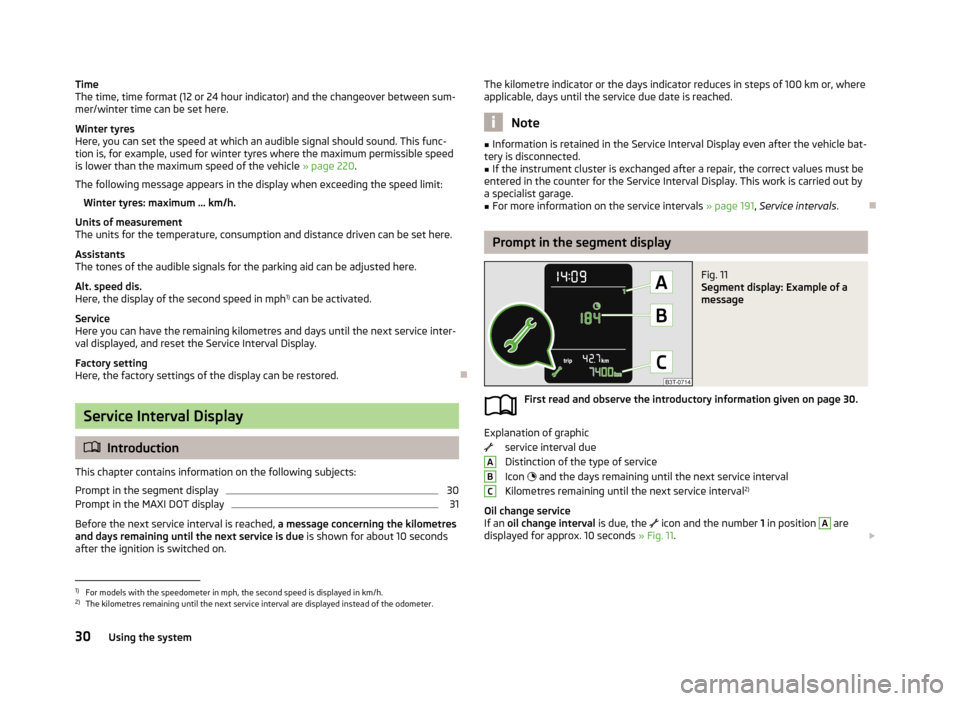
Explanation of graphic
service interval due
Distinction of the type of service
Icon
and the days remaining until the next service interval
Kilometres remaining until the next service interval 2)
Oil change service
If an oil change interval is due, the
icon and the number 1 in position
A
are
displayed for approx. 10 seconds » Fig. 11.
ABC1)
For models with the speedometer in mph, the second speed is displayed in km/h.
2)
The kilometres remaining until the next service interval are displayed instead of the odometer.
30Using the system
Page 34 of 274
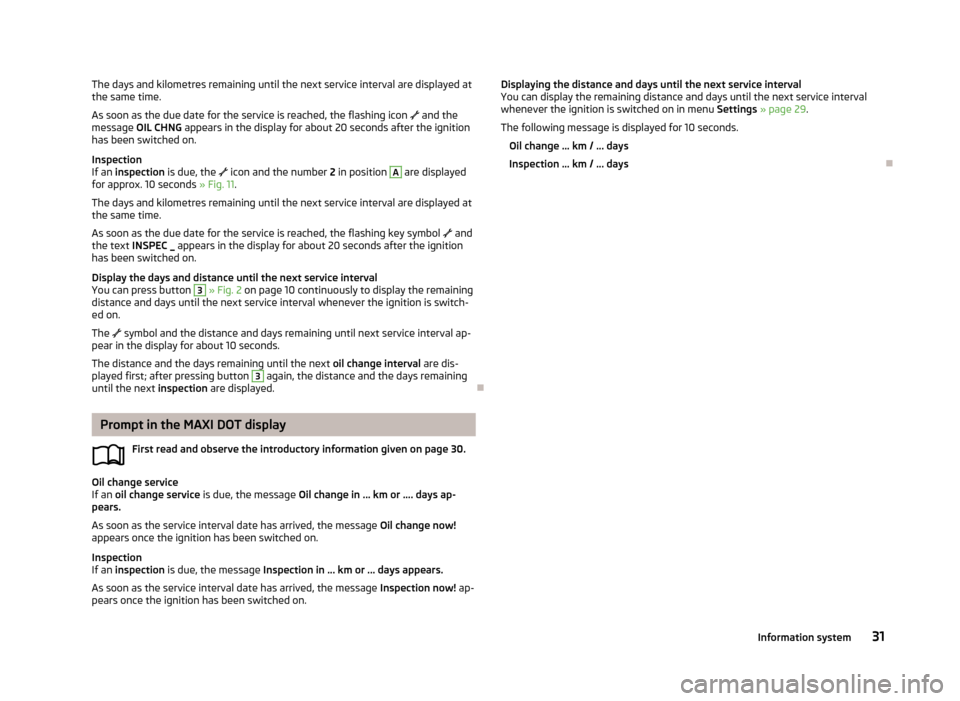
The days and kilometres remaining until the next service interval are displayed atthe same time.
As soon as the due date for the service is reached, the flashing icon and the
message OIL CHNG appears in the display for about 20 seconds after the ignition
has been switched on.
Inspection
If an inspection is due, the icon and the number 2 in position A
are displayed
for approx. 10 seconds » Fig. 11.
The days and kilometres remaining until the next service interval are displayed at the same time.
As soon as the due date for the service is reached, the flashing key symbol
and
the text INSPEC _ appears in the display for about 20 seconds after the ignition
has been switched on.
Display the days and distance until the next service interval
You can press button
3
» Fig. 2 on page 10 continuously to display the remaining
distance and days until the next service interval whenever the ignition is switch-
ed on.
The
symbol and the distance and days remaining until next service interval ap-
pear in the display for about 10 seconds.
The distance and the days remaining until the next oil change interval are dis-
played first; after pressing button
3
again, the distance and the days remaining
until the next inspection are displayed.
Prompt in the MAXI DOT display
First read and observe the introductory information given on page 30.
Oil change service
If an oil change service is due, the message Oil change in ... km or .... days ap-
pears.
As soon as the service interval date has arrived, the message Oil change now!
appears once the ignition has been switched on.
Inspection
If an inspection is due, the message Inspection in ... km or ... days appears.
As soon as the service interval date has arrived, the message Inspection now! ap-
pears once the ignition has been switched on.
Displaying the distance and days until the next service interval
You can display the remaining distance and days until the next service interval whenever the ignition is switched on in menu Settings » page 29 .
The following message is displayed for 10 seconds. Oil change ... km / ... days
Inspection ... km / ... days
31Information system
Page 65 of 274

Note■Each time the ignition switches off for the third time, the position of the wind-
screen wipers changes. This counteracts an early fatigue of the wiper rubbers.■
The rear window wiper only operates if the boot lid is closed.
■
Keep the wiper blades clean. They may become soiled, e.g., with wax residues
after washing in automatic car wash systems » page 197.
■
The windscreen washer nozzles for the windscreen are heated when the en-
gine is running and the outside temperature is less than approx. +10 °C.
Windscreen wipers and washers
Fig. 44
Operating lever: Windscreen
wipers and washer settings
First read and observe the introductory information and safety warn-
ings on page 61.
Lever positions » Fig. 44
Wipers off
Periodic windscreen wiping/automatic wiping in rain
slow windscreen wiping
rapid windscreen wiping
Flick windscreen wiping (spring-tensioned position)
Automatic wipe/wash for windscreen (spring-tensioned position) Wiping the rear window pane (the windscreen wiper wipes at regular inter- vals after a few seconds)
Automatic wipe/wash for the rear window (spring-tensioned position)
Switches for setting the required break between the individual wiper strokes
(
1
periodic windscreen wiping) or the wiper speed in rain (
1
automatic
windscreen wiping in rain)
01234567AAutomatic wipe/wash for windscreen
The wash system operates immediately, the windscreen wipers wipe somewhat
later. The wash system and the windscreen wiper operate simultaneously at a
speed of more than 120 km/h.
Letting go of the lever will cause the windscreen wash system to stop and the wiper to continue for another 3-4 wiper strokes (depending on the period of
spraying of the windscreen).
At a speed of more than 2 km/h, the wiper wipes once again 5 seconds after the
last wiper stroke in order to wipe the last drops from the windscreen. This func-
tion can be activated/deactivated by a specialist garage.
Automatic wipe/wash for the rear window (Superb Combi)The wash system operates immediately, the windscreen wiper wipes somewhat later.
Letting go of the lever will cause the windscreen wash system to stop and the
wiper to continue for another 2-3 wiper strokes (depending on the period of
spraying of the windscreen). The lever remains in position 6
» Fig. 44 .
Automatic rear window wiper (Superb Combi)
If the lever is in position
2
» Fig. 44 or
3
the rear window is wiped every
30 or 10 seconds if the vehicle's speed exceeds 5 km/h.
If automatic windscreen wiping in rain is activated (the lever is in the position
1
)
the function is only active if the windscreen wipers operate in continuous mode
(no break between each wiping process).
Automatic rear window wiping can be activated/deactivated via the MAXI DOT
display in the menu item Rear wiper » page 29 .
Winter setting of the windscreen wiper If the windscreen wipers are in rest position, they cannot be folded out from the
windscreen. For this reason we recommend adjusting the windscreen wipers in
winter so that they can be folded out from the windscreen easily.
› Switch on the windscreen wipers.
› Switch off the ignition.
The windscreen wipers remain in the position in which they were when switching
off the ignition.
The service position can also be used as a winter position » page 243.
62Using the system
Page 92 of 274
Automatic Retractable cargo cover (Superb Combi)First read and observe the introductory information and safety warn-
ings
on page 84.
The automatic rolling up of the foldable boot cover enables an easier entry into
the boot.
›
Open the boot lid.
The foldable boot cover rolls up automatically in the position
1
to » Fig. 87 on
page 88.
›
Push the cover in the area of the handle in the direction of the arrow
3
.
The cover retracts completely.
When the boot lid is opened quickly, the automatic rolling up of the foldable boot
cover is blocked for a delay time of approx. 2 seconds.
The function to automatically roll up the foldable boot cover can be activated/de- activated via the MAXI DOT display in the menu:
■ Settings
■ Auto Rollo
Side pockets in luggage compartment
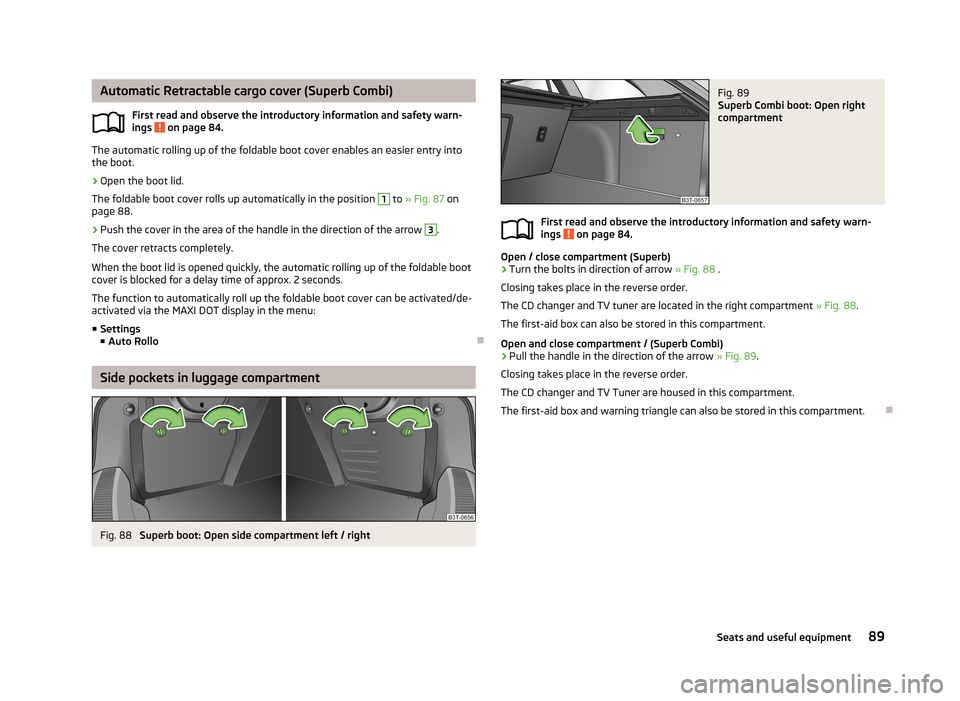
Fig. 88
Superb boot: Open side compartment left / right
Fig. 89
Superb Combi boot: Open right
compartment
First read and observe the introductory information and safety warn-
ings on page 84.
Open / close compartment (Superb)
›
Turn the bolts in direction of arrow » Fig. 88 .
Closing takes place in the reverse order.
The CD changer and TV tuner are located in the right compartment » Fig. 88.
The first-aid box can also be stored in this compartment.
Open and close compartment / (Superb Combi)
›
Pull the handle in the direction of the arrow » Fig. 89.
Closing takes place in the reverse order.
The CD changer and TV Tuner are housed in this compartment.
The first-aid box and warning triangle can also be stored in this compartment.
89Seats and useful equipment
Page 111 of 274

Switching on/offFig. 109
Button for switching on/off the system directly on the operating
part of the air conditioning/Climatronic
First read and observe the introductory information and safety warn-ings
on page 107.
The auxiliary heating (aux. heating) can be switched on/off as follows.
Manually switching on using the button on the operating part of the manual air conditioning/Clima-
tronic. The warning light in the button lights up » Fig. 109;
by using the radio remote control » page 109.
Manually switching off
using the button on the operating part of the manual air conditioning/Clima-
tronic. The warning light in the button goes out » Fig. 109;
by using the radio remote control » page 109.
After switching off the auxiliary heating, the coolant pump runs for a short period.
Automatic switching on/off
The following menu items can be selected from the Aux. heating menu item in
the information display » page 28 (depending on the vehicle equipment):
■ Day of the week - set the current day of the week;
■ Running time - Set the required running time in 5 minute increments. The run-
ning time can be 10 to 60 minutes.
■ Mode - Set the desired heating/ventilation mode;
■
Starting time 1 , Starting time 2 , Starting time 3 - for each pre-set time, the day
and the time (hour and minute) can be set for switching on the auxiliary heating
and ventilation. An empty position can be found between Sunday and Monday
when selecting the day. If this empty position is selected, the activation is per-
formed without taking into account the day.
■ Activate - Activate pre-set mode;
■ Deactivate - Deactivate pre-set mode;
■ Factory setting - Restore factory setting;
■ Back - Return to main menu
Only one programmed pre-set time can be active.
The last programmed pre-set time remains active.
After the auxiliary heating (aux. heating) automatically activates at the set time, it is necessary to pre-set a time again.
If the menu item Back is selected or no changes are made on the display for lon-
ger than 10 seconds, the set values are stored, but the pre-set time is not activa-
ted.
The system switches itself off at the end of the running time set under the menu item Running time .
Note
An indicator light on the button » Fig. 109 is illuminated when the system is
running.
108Using the system
Page 118 of 274

Dial number
Any telephone number can be entered in the Dial number menu item. The re-
quired digits must be selected one after the other using the adjustment wheel,
and then confirmed by pressing the adjustment wheel. You can select digits 0-9,
symbols , , # and the Cancel, Call and Delete functions.
Call list
The following menu items can be selected in the Call list menu item.
■ Missed calls - List of missed calls
■ Dialled Nos. - List of dialled numbers
■ Received calls - list of received calls
Voice mailbox
In the Voice mailbox menu item, you can set the number of the voice mailbox 1)
and then dial the number.
Bluetooth
The following menu items can be selected from the Bluetooth menu item.
■ User - Overview of the stored telephones
■ New user - Search for new mobile phones that are in the reception range
■ Visibility - Switches on the visibility of the hands-free system for other devices
■ Media player - Playback via Bluetooth ®
■ Active device - Connected device
■ Paired Devices - List of paired devices
■ Search - Device search
■ Phone name - option to change the name of the phone (default SKODA_BT)
Settings
The following menu items can be selected from the Settings menu item.
■ Telephone book - Phonebook
■ Update 1)
- Update the phone book
■ List - Arrange the entries in the phone book
■ Surname - Arrange according to surname
■ First name - Arrange according to first name
■ Ring tone - Ring tone setting
Back
Return to the telephone's basic menu.
Universal telephone preinstallation GSM IIl
Introduction
This chapter contains information on the following subjects:
Connecting the phone to the hands-free system
116
Telephone operation in the MAXI DOT display
117
Internet connection via Bluetooth ®
118
The following functions are included in the universal telephone preinstallation
GSM III:
› Phone Phonebook
» page 113.
› Convenience operation via the multifunction steering wheel
» page 111.
› Telephone operation in the MAXI DOT display
» page 117.
› Voice control of the telephone
» page 122.
› Music playback from the telephone or other multimedia units
» page 126.
› Internet connection
» page 118.
› Display of SMS messages
» page 117.
All communication between a telephone and the hands-free system of your vehi- cle can only be established with the help of the following profiles of Bluetooth ®
technology.
rSAP - Remote SIM access profile
After connecting the telephone with the hands-free system via the rSAP profile,
the telephone deregisters from the GSM network, and communication with the
network is only enabled by the hands-free system via the vehicle's external aerial. In the telephone only the interface for Bluetooth ®
remains active. In this case,
you can only use the mobile phone to disconnect from the hands-free system, de- activate the Bluetooth ®
connection or dial the emergency number 112 (only valid
in some countries).
HFP - Hands Free Profile
After connecting the telephone with the hands-free system via the HFP profile,
the telephone continues to use its GMS module and the internal antenna to com-
municate with the GSM network.
1)
On vehicles fitted with the Amundsen+ navigation system, this function can be accessed via the navi-
gation system menu; refer to the » operating instructions for the Amundsen+ navigation system .
115Communication and multimedia
Page 121 of 274

■Delete - Delete the device
■ Authorisation - Authorise the device
■ Search - Search for available media players
■ Visibility - Switch on the visibility of the hands-free system for media players
in the vicinity
■ Modem - overview of the active and paired devices for the connection to the in-
ternet
■ Active device - Connected device
■ Paired devices - List of paired devices
■ Phone name - option to change the name of the phone (default SKODA_BT)
WLAN
Wi-Fi menu item » page 120, Use WLAN network in MAXI DOT display .
Settings
The following menu items can be selected from the Settings menu item.
■ Telephone book - Phonebook
■ Update - Read in the phone book
■ Select memory - Select memory with phone contacts
■ SIM & phone - Download the contacts of the SIM card and the phone
■ SIM card - Download the contacts from the SIM card
■ Mobile phone - Initial setting to also import contacts from the SIM card; it is
necessary to switch to the SIM & phone menu item
■ List - Arrange the entries in the phone book
■ Surname - Arrange according to surname
■ First name - Arrange according to first name
■ Own number - Optionally display your own telephone number on the display of
the device of the person you are calling (this function is network-dependent)
■ Network depnd. - Network-dependent own number display
■ Yes - Allow display of your own number
■ No - Prohibit display of your own number
■ Signal settings - Signal settings
■ Ring tone - Ring tone setting
■ Volume - Signal volume settings
■ Turn vol. up - Increase volume
■ Turn vol. down - Decrease volume
■ Phone settings - Phone settings
■ Select operator - Select operator
■ Automatic - Automatic operator selection
■ Manual - Manual operator selection■
Network mode - Network mode
■ UMTS - UMTS
■ GSM - GSM
■ Automatic - automatic
■ SIM mode - Applies to telephones with the rSAP profile that simultaneously
support the operation of two SIM cards - there is an option to choose which
SIM card to connect to the hands-free system ■ SIM mode 1 - SIM 1 is connected to the hands-free system
■ SIM mode 2 - SIM 2 is connected to the hands-free system
■ Phone mode - Toggle between rSAP and HFP mode
■ Premium - rSAP mode
■ Handsfree - HFP mode
■ Off time - Set the off time in increments of 5 min
■ Access point - Set the Internet access point
■ APN - Change the access point name
■ User name - User Name
■ Password - Password
■ Switch off ph. - Switch off the hands-free system (the mobile phone remains
paired)
Back
Return to the main menu in the MAXI DOT display.
Internet connection via Bluetooth ®
First read and observe the introductory information given on page 115.
A notebook can, for example, be connected to the Internet via the hands-free system.
The control unit of the hands-free system supports the GPRS, EDGE and UMTS/3G
technologies.
An Internet can only be established via a telephone which is connected via the rSAP profile.
The procedure for connecting to the Internet can vary depending on the type and version of the operating system as well as the type of the device to be connected.
Successfully connecting to the internet requires appropriate knowledge of theoperating system for connecting the device .
Process of connection
›
Connect the mobile phone with the hands-free system.
118Using the system