belt SKODA SUPERB 2014 2.G / (B6/3T) User Guide
[x] Cancel search | Manufacturer: SKODA, Model Year: 2014, Model line: SUPERB, Model: SKODA SUPERB 2014 2.G / (B6/3T)Pages: 246, PDF Size: 17.16 MB
Page 19 of 246
WARNING■Adjust the driver's seat in a forward/back direction so that there is a gap
of at least 10 cm between the legs B and the dash panel in the vicinity of
the knee airbag » Fig. 10. If it is not possible to meet this requirement due
to your body size, visit a specialist garage.■
The surface of the airbag module in the lower part of the dash panel be-
low the steering column not have stickers attached, be covered or modified
in any other way. This part should only be cleaned with a cloth that is dry or
has been moistened with water. No objects must be attached to the cover
of the airbag module or located within the immediate vicinity.
■
Do not attach any bulky and heavy objects (bunch of keys etc.) to the igni-
tion key. These can be ejected by the knee airbag when it is deployed and
can cause injuries.
Note
In vehicles with a driver's knee airbag, a symbol with the word AIRBAG is loca-
ted on the side panel on the driver's side.
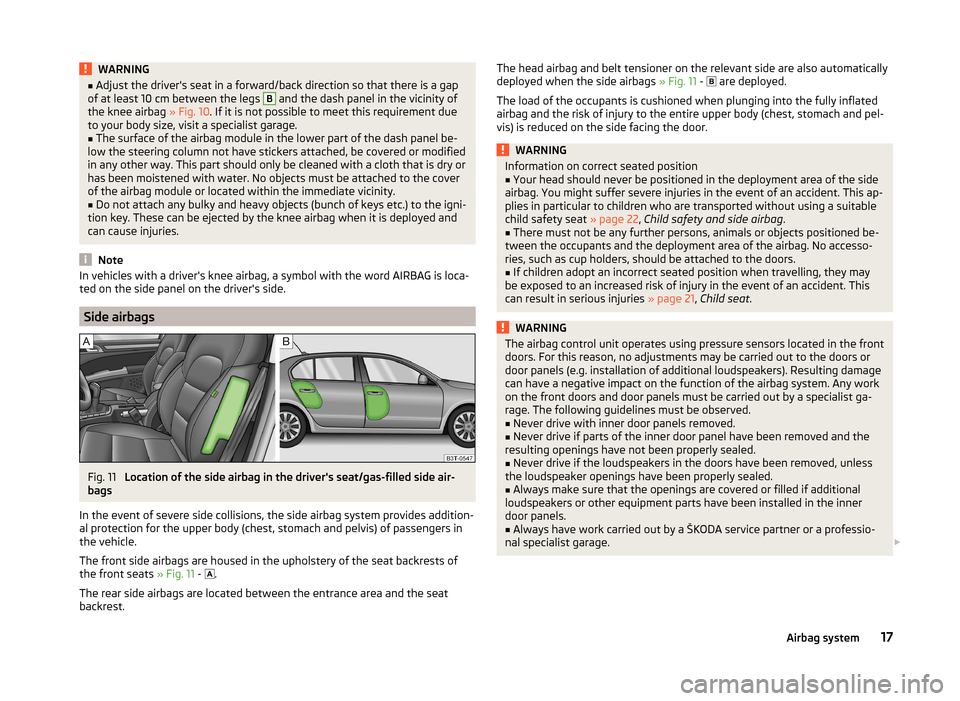
Side airbags
Fig. 11
Location of the side airbag in the driver's seat/gas-filled side air-
bags
In the event of severe side collisions, the side airbag system provides addition-
al protection for the upper body (chest, stomach and pelvis) of passengers in
the vehicle.
The front side airbags are housed in the upholstery of the seat backrests of
the front seats » Fig. 11 -
.
The rear side airbags are located between the entrance area and the seat backrest.
The head airbag and belt tensioner on the relevant side are also automatically
deployed when the side airbags » Fig. 11 - are deployed.
The load of the occupants is cushioned when plunging into the fully inflated
airbag and the risk of injury to the entire upper body (chest, stomach and pel-
vis) is reduced on the side facing the door.WARNINGInformation on correct seated position■Your head should never be positioned in the deployment area of the side
airbag. You might suffer severe injuries in the event of an accident. This ap-
plies in particular to children who are transported without using a suitable
child safety seat » page 22, Child safety and side airbag .■
There must not be any further persons, animals or objects positioned be-
tween the occupants and the deployment area of the airbag. No accesso-
ries, such as cup holders, should be attached to the doors.
■
If children adopt an incorrect seated position when travelling, they may
be exposed to an increased risk of injury in the event of an accident. This
can result in serious injuries » page 21, Child seat .
WARNINGThe airbag control unit operates using pressure sensors located in the front
doors. For this reason, no adjustments may be carried out to the doors or
door panels (e.g. installation of additional loudspeakers). Resulting damage
can have a negative impact on the function of the airbag system. Any work
on the front doors and door panels must be carried out by a specialist ga-
rage. The following guidelines must be observed.■
Never drive with inner door panels removed.
■
Never drive if parts of the inner door panel have been removed and the
resulting openings have not been properly sealed.
■
Never drive if the loudspeakers in the doors have been removed, unless
the loudspeaker openings have been properly sealed.
■
Always make sure that the openings are covered or filled if additional
loudspeakers or other equipment parts have been installed in the inner
door panels.
■
Always have work carried out by a ŠKODA service partner or a professio-
nal specialist garage.
17Airbag system
Page 20 of 246
WARNING■Only hang light items of clothing on the hooks fitted in the vehicle. Never
leave any heavy or sharp-edged objects in the pockets of the items of
clothing.■
Ensure that there are no excessive forces, such as violent knocks, kicks
etc., impact on the backrests of the seats otherwise the system may be
damaged. The side airbags would not be deployed in such a case!
■
Any seat or protective covers which you fit to the driver or front passen-
ger seats must only be of the type expressly authorized by ŠKODA. In view
of the fact that the airbag inflates out of the backrest of the seat, use of
non-approved seat or protective covers would considerably impair the pro-
tective function of the side airbag.
■
Any damage to the original seat covers in the area of the side airbag mod-
ule must be repaired immediately by a specialist garage.
■
The airbag modules in the front seats must not display any damage,
cracks or deep scratches. It is not permissible to use force in order to open
the modules.
Note
■ In vehicles with side airbags at the front, a label with the word AIRBAG is lo-
cated on the front seat backrests.■
In vehicles with rear side airbags, the word AIRBAG is located between the
entrance area and the rear seat rest.
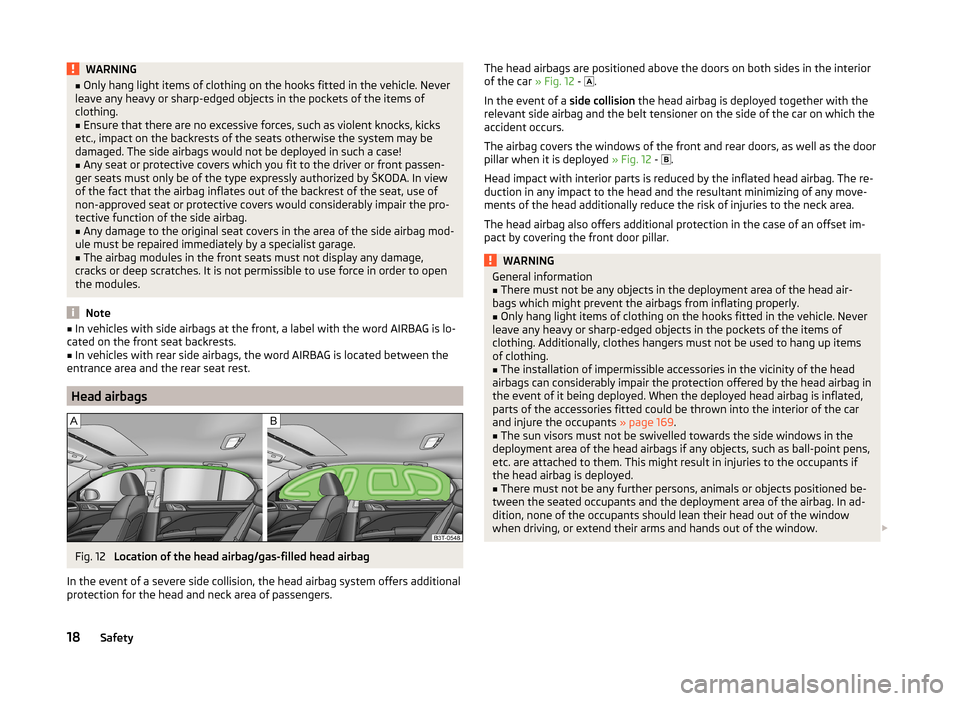
Head airbags
Fig. 12
Location of the head airbag/gas-filled head airbag
In the event of a severe side collision, the head airbag system offers additional
protection for the head and neck area of passengers.
The head airbags are positioned above the doors on both sides in the interior
of the car » Fig. 12 - .
In the event of a side collision the head airbag is deployed together with the
relevant side airbag and the belt tensioner on the side of the car on which the
accident occurs.
The airbag covers the windows of the front and rear doors, as well as the door
pillar when it is deployed » Fig. 12 -
.
Head impact with interior parts is reduced by the inflated head airbag. The re-
duction in any impact to the head and the resultant minimizing of any move-
ments of the head additionally reduce the risk of injuries to the neck area.
The head airbag also offers additional protection in the case of an offset im-
pact by covering the front door pillar.WARNINGGeneral information■There must not be any objects in the deployment area of the head air-
bags which might prevent the airbags from inflating properly.■
Only hang light items of clothing on the hooks fitted in the vehicle. Never
leave any heavy or sharp-edged objects in the pockets of the items of
clothing. Additionally, clothes hangers must not be used to hang up items
of clothing.
■
The installation of impermissible accessories in the vicinity of the head
airbags can considerably impair the protection offered by the head airbag in
the event of it being deployed. When the deployed head airbag is inflated,
parts of the accessories fitted could be thrown into the interior of the car
and injure the occupants » page 169.
■
The sun visors must not be swivelled towards the side windows in the
deployment area of the head airbags if any objects, such as ball-point pens,
etc. are attached to them. This might result in injuries to the occupants if
the head airbag is deployed.
■
There must not be any further persons, animals or objects positioned be-
tween the seated occupants and the deployment area of the airbag. In ad-
dition, none of the occupants should lean their head out of the window
when driving, or extend their arms and hands out of the window.
18Safety
Page 23 of 246
Transporting children safely
Child seat
Introduction
This chapter contains information on the following subjects:
Use of a child seat on the front passenger seat
21
Child safety and side airbag
22
Classification of child seats
23
Use of child seats fastened with a seat belt
23
Children are generally safer on the rear seats than on the front passenger
seat.
In contrast to adults, the muscles and bone structure of children are not yet
fully developed. Thus children are exposed to increased risk of injury.
Children should be transported in accordance with the relevant statutory pro-
visions.
Child seats complying with the ECE-R 44 standard must be used. ECE-R stands
for: Economic Commission for Europe - Regulation.
Child seats that comply with the ECE-R 44 standard are identified with a test
mark that cannot be removed: a large E within a circle with the test number
below.
WARNING■ The national legal requirements must be observed when using child
seats.■
One should never carry children, and also not babies! - on one's lap.
■
Never leave children unattended in the vehicle. Certain outside climatic
conditions can cause life-threatening temperatures in the vehicle.
■
The child must be secured in the vehicle during the entire journey! Other-
wise, the child would be thrown through the vehicle in the event of an acci-
dent, causing fatal injuries to both the child and other occupants.
■
Children are exposed to an increased risk of injury in the event of an acci-
dent if they lean forward or adopt an incorrect seated position when the
vehicle is moving. This particularly applies to children who are transported
on the front passenger seat as they can suffer severe, or even fatal injuries
if the airbag system is deployed!
WARNING (Continued)■ Pay particular attention to the information provided by the manufacturer
of the child safety seat regarding the correct routing of the belt. Seat belts
which are not correctly adjusted can themselves cause injuries even in mi-
nor accidents.■
Safety belts must be checked to ensure that they are running properly.
One should also ensure that the belt is not damaged by sharp-edged fit-
tings.
■
The front passenger airbag must be deactivated if using a rear-facing
child seat on the front passenger seat. Further information » page 21, Use
of a child seat on the front passenger seat .
CAUTION
When installing a child seat in which the child faces forward, adjust the head
restraints so that they are as high as possible.
Note
We recommend that you use child seats from ŠKODA Original Accessories.
These child seats were developed and also tested for use in ŠKODA vehicles.
They meet the ECE-R 44 standard.
Use of a child seat on the front passenger seat
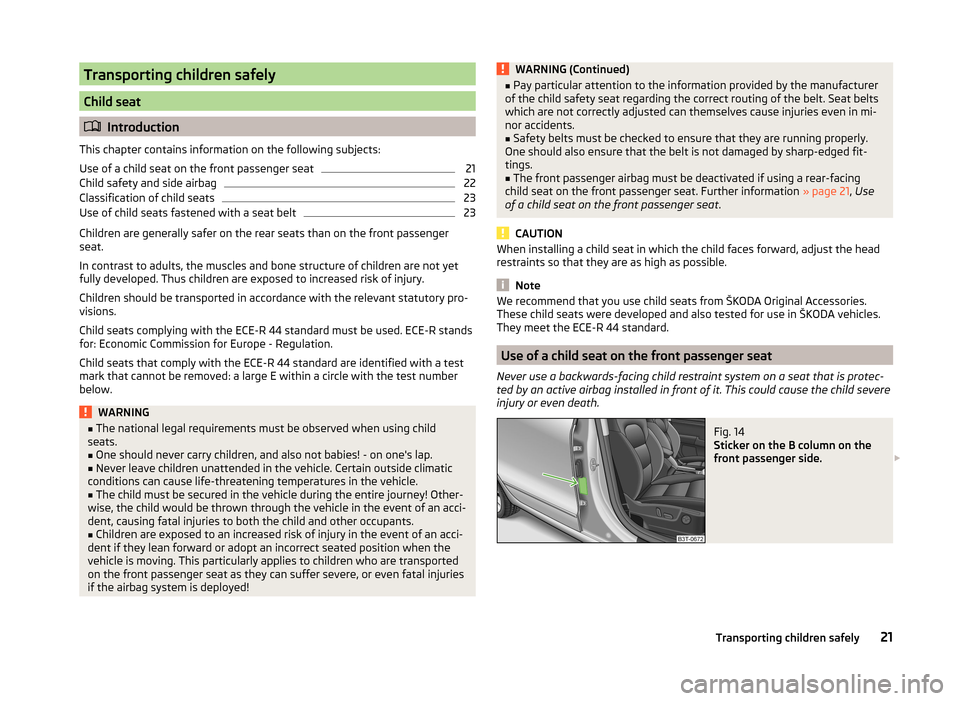
Never use a backwards-facing child restraint system on a seat that is protec-
ted by an active airbag installed in front of it. This could cause the child severe
injury or even death.
Fig. 14
Sticker on the B column on the
front passenger side.
21Transporting children safely
Page 24 of 246
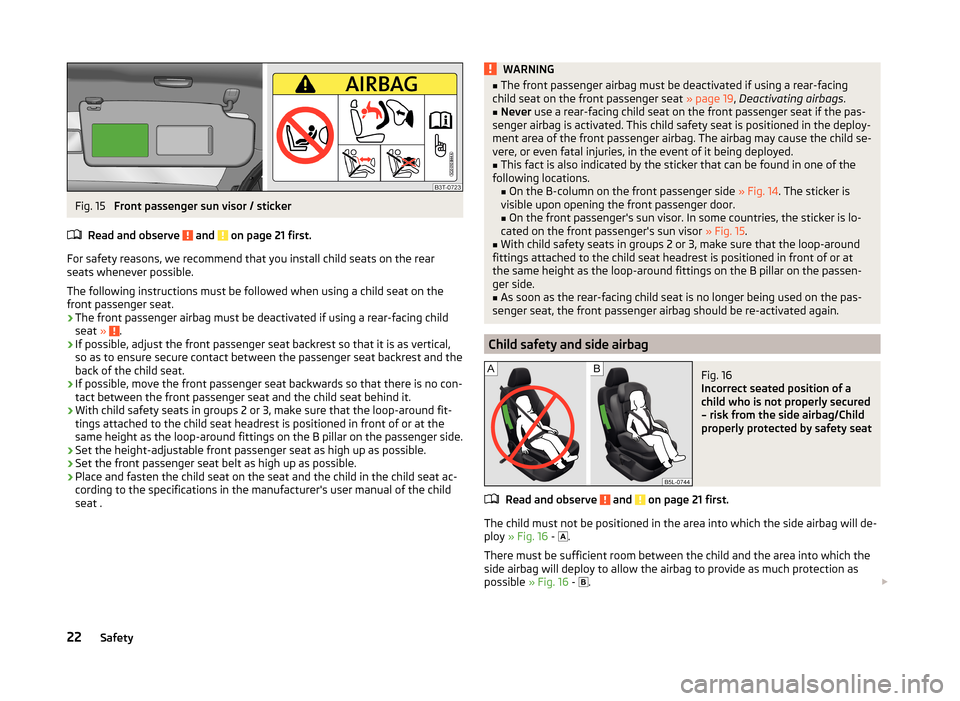
Fig. 15
Front passenger sun visor / sticker
Read and observe
and on page 21 first.
For safety reasons, we recommend that you install child seats on the rear
seats whenever possible.
The following instructions must be followed when using a child seat on the
front passenger seat.
› The front passenger airbag must be deactivated if using a rear-facing child
seat »
.
› If possible, adjust the front passenger seat backrest so that it is as vertical,
so as to ensure secure contact between the passenger seat backrest and the
back of the child seat.
› If possible, move the front passenger seat backwards so that there is no con-
tact between the front passenger seat and the child seat behind it.
› With child safety seats in groups 2 or 3, make sure that the loop-around fit-
tings attached to the child seat headrest is positioned in front of or at the
same height as the loop-around fittings on the B pillar on the passenger side.
› Set the height-adjustable front passenger seat as high up as possible.
› Set the front passenger seat belt as high up as possible.
› Place and fasten the child seat on the seat and the child in the child seat ac-
cording to the specifications in the manufacturer's user manual of the child
seat .
WARNING■ The front passenger airbag must be deactivated if using a rear-facing
child seat on the front passenger seat » page 19, Deactivating airbags .■
Never use a rear-facing child seat on the front passenger seat if the pas-
senger airbag is activated. This child safety seat is positioned in the deploy-
ment area of the front passenger airbag. The airbag may cause the child se-
vere, or even fatal injuries, in the event of it being deployed.
■
This fact is also indicated by the sticker that can be found in one of the
following locations. ■On the B-column on the front passenger side » Fig. 14. The sticker is
visible upon opening the front passenger door.
■ On the front passenger's sun visor. In some countries, the sticker is lo-
cated on the front passenger's sun visor » Fig. 15.
■
With child safety seats in groups 2 or 3, make sure that the loop-around
fittings attached to the child seat headrest is positioned in front of or at
the same height as the loop-around fittings on the B pillar on the passen-
ger side.
■
As soon as the rear-facing child seat is no longer being used on the pas-
senger seat, the front passenger airbag should be re-activated again.
Child safety and side airbag
Fig. 16
Incorrect seated position of a
child who is not properly secured
– risk from the side airbag/Child
properly protected by safety seat
Read and observe and on page 21 first.
The child must not be positioned in the area into which the side airbag will de-
ploy » Fig. 16 -
.
There must be sufficient room between the child and the area into which the
side airbag will deploy to allow the airbag to provide as much protection as
possible » Fig. 16 -
.
22Safety
Page 25 of 246
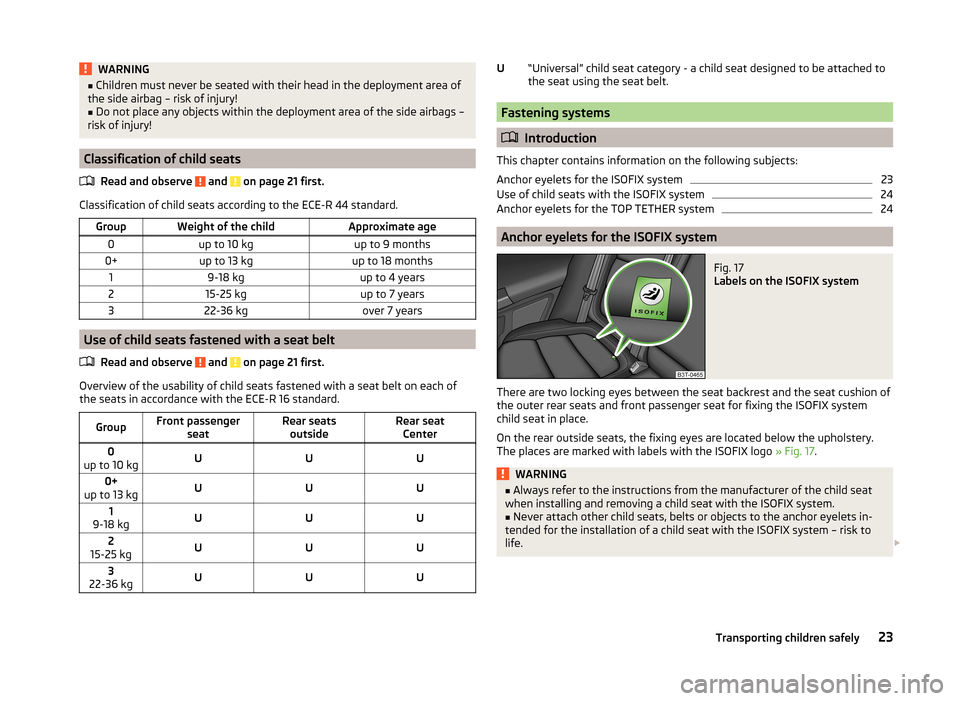
WARNING■Children must never be seated with their head in the deployment area of
the side airbag – risk of injury!■
Do not place any objects within the deployment area of the side airbags –
risk of injury!
Classification of child seats
Read and observe
and on page 21 first.
Classification of child seats according to the ECE-R 44 standard.
GroupWeight of the childApproximate age0up to 10 kgup to 9 months0+up to 13 kgup to 18 months19-18 kgup to 4 years215-25 kgup to 7 years322-36 kgover 7 years
Use of child seats fastened with a seat belt Read and observe
and on page 21 first.
Overview of the usability of child seats fastened with a seat belt on each of
the seats in accordance with the ECE-R 16 standard.
GroupFront passenger seatRear seatsoutsideRear seatCenter0
up to 10 kgUUU0+
up to 13 kgUUU1
9-18 kgUUU2
15-25 kgUUU3
22-36 kgUUU“Universal” child seat category - a child seat designed to be attached to the seat using the seat belt.
Fastening systems
Introduction
This chapter contains information on the following subjects:
Anchor eyelets for the ISOFIX system
23
Use of child seats with the ISOFIX system
24
Anchor eyelets for the TOP TETHER system
24
Anchor eyelets for the ISOFIX system
Fig. 17
Labels on the ISOFIX system
There are two locking eyes between the seat backrest and the seat cushion of
the outer rear seats and front passenger seat for fixing the ISOFIX system
child seat in place.
On the rear outside seats, the fixing eyes are located below the upholstery.
The places are marked with labels with the ISOFIX logo » Fig. 17.
WARNING■
Always refer to the instructions from the manufacturer of the child seat
when installing and removing a child seat with the ISOFIX system.■
Never attach other child seats, belts or objects to the anchor eyelets in-
tended for the installation of a child seat with the ISOFIX system – risk to
life.
U23Transporting children safely
Page 26 of 246

Note■A child seat fitted with the ISOFIX system can only be mounted in a vehicle
fitted with an ISOFIX system if the child seat has been approved for this type
of vehicle. Further information is available from a ŠKODA Partner.■
Child seats with the ISOFIX system can be purchased from ŠKODA Original
Accessories.
Use of child seats with the ISOFIX system
Overview of the usability of child seats with the ISOFIX system on each of the
seats in accordance with the ECE-R 16 standard.GroupSize class
of the child seat a)Front passenger seat
b)Outer rear seatsRear seat middle0
up to 10 kgEXIL-SUX0+
up to 13 kgE
XIL-SUX
DC
1
9-18 kg
D
XIL-SU IUFX
CBB1Aa)
The size category is shown on the label attached to the child seat.
b)
If the front passenger seat is fitted with the ISOFIX system attachment points, it is suited for the installation of an ISOFIX child seat with the “Semi-Universal” approval.
The seat is suited for installation of an ISOFIX child seat with “Semi-
Universal” approval. The “Semi-Universal” category means that the child
seat with the ISOFIX system is approved for your vehicle. Observe the
list of vehicles that comes with the child seat.
The seat is suitable for the installation of an ISOFIX child seat with
“Universal” approval and attachment with the TOP TETHER belt.
The seat is not fitted with fixing eyes for the ISOFIX system.IL-SUIUFXAnchor eyelets for the TOP TETHER systemFig. 18
Anchor eyelets on the TOP
TETHER system
24Safety
Page 27 of 246
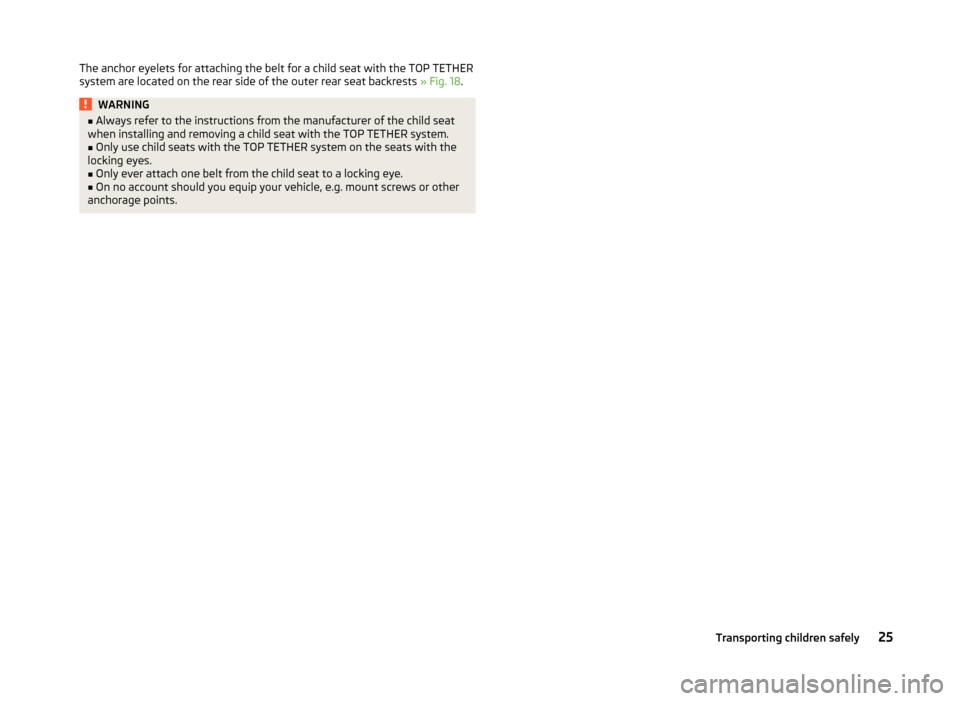
The anchor eyelets for attaching the belt for a child seat with the TOP TETHER
system are located on the rear side of the outer rear seat backrests » Fig. 18.WARNING■
Always refer to the instructions from the manufacturer of the child seat
when installing and removing a child seat with the TOP TETHER system.■
Only use child seats with the TOP TETHER system on the seats with the
locking eyes.
■
Only ever attach one belt from the child seat to a locking eye.
■
On no account should you equip your vehicle, e.g. mount screws or other
anchorage points.
25Transporting children safely
Page 34 of 246
The following message is shown in the MAXI DOT display.Gearbox overheated. Stop! Log book!
do not continue to drive! Stop the vehicle, switch off the engine, and wait
until the
icon goes out – risk of gearbox damage! You can continue your
journey as soon as the symbol disappears.WARNINGIf you have to stop for technical reasons, then park the vehicle at a safe
distance from the traffic, switch off the engine and activate the hazard
warning lights system » page 70. The warning triangle must be set up at
the prescribed distance - observe the national legal provisions when doing
so.
Note
■ If the MAXI DOT display shows warning messages, these messages must be
confirmed in order to access the main menu » page 40 .■
As long as the operational faults are not rectified, the symbols are always in-
dicated again. After they are displayed for the first time, the symbols continue
to be indicated without any extra messages for the driver.
Warning lights
Introduction
This chapter contains information on the following subjects:
Handbrake
33
Brake system
33
Seat belt warning light
33
Generator
33
Door open
34
Engine oil pressure
34
Coolant
34
Bonnet
34
Boot lid
34
Power steering / steering lock (system KESSY)
34
Engine oil level
35
Traction Control System (ASR)
35
Electronic Stability Control (ESC)
35 Antilock brake system (ABS)36 Rear fog light36
Lamp failure
36
Adaptive headlights (AFS)
36
Exhaust inspection system
36
Glow plug system (diesel engine)
36
Engine performance check (petrol engine)
37
Diesel particulate filter (diesel engine)
37
Fuel reserve
37
Airbag system
38
Tyre inflation pressure
38
Windscreen washer fluid level
38
Pads
38
Turn signal system
38
Low beam
39
Fog lights
39
Cruise control system
39
Selector lever lock / starter (system KESSY)
39
Main beam
39
The warning lights indicate certain functions or faults.
Some warning lights can be accompanied by acoustic signals and messages in
the display of the instrument cluster.
After switching on the ignition, some warning lights illuminate briefly as a
function test.
If the tested systems are OK, the corresponding warning lights go out a few
seconds after switching on the ignition or after starting the engine.
32Operation
Page 35 of 246
WARNING■Ignoring illuminated warning lights and related messages or instructions
in the display of the instrument cluster may lead to serious personal injury
or damage to the vehicle.■
If you have to stop for technical reasons, then park the vehicle at a safe
distance from the traffic, switch off the engine and activate the hazard
warning lights system » page 70. The warning triangle must be set up at
the prescribed distance - observe the national legal provisions when doing
so.
■
The engine compartment of your car is a hazardous area. The following
warning instructions must be followed at all times when working in the en-
gine compartment » page 182, Engine compartment .
Handbrake
Read and observe
on page 33 first.
The warning light
illuminates if the handbrake is applied.
An acoustic signal will sound if you drive the vehicle above 6 km/h for at least
3 seconds while the handbrake is applied.
The following message is shown in the MAXI DOT display. Release parking brake!
Brake system
Read and observe
on page 33 first.
The indicator light
illuminates if the brake fluid level in the braking system is
too low or there is a fault in the ABS.
The following message is shown in the MAXI DOT display. Brake fluid: Log book!
›
Stop the vehicle, switch off the engine, and check the level of the brake flu-
id » page 189 » .
WARNING■
If the warning light is displayed simultaneously with warning light
» page 36 , Antilock brake system (ABS) , do not continue your
journey! Seek help from a specialist garage.■
A fault to the ABS system or the braking system can increase the vehi-
cle's braking distance – risk of accident!
■
The following guidelines should be observed when opening the bonnet
and checking the brake fluid level » page 182, Engine compartment .
Seat belt warning light
Read and observe
on page 33 first.
The warning light
illuminates as a reminder for the driver and front passen-
ger to fasten seat belts.
The indicator light
goes off after the respective seat belt is fastened.
If the driver or front passenger has not fastened their seat belt and the vehicle
speed is more than 20 km/h, the warning light
flashes and you will hear an
acoustic signal.
The warning signal is switched of and the indicator light is
permanently lit if
the driver and front passenger have not fastened their seat belts within the
next 90 seconds.
Generator
Read and observe
on page 33 first.
If the warning light
illuminates when the engine is running, the vehicle bat-
tery is not being charged.
Seek assistance from a specialist garage immediately. The electrical system re-
quires checking.
CAUTION
If the warning light (cooling system fault) lights up in addition to the
warning light while driving, do not continue to drive! Stop the engine -
there is a risk of engine damage! Seek help from a specialist garage.33Instruments and Indicator Lights
Page 40 of 246
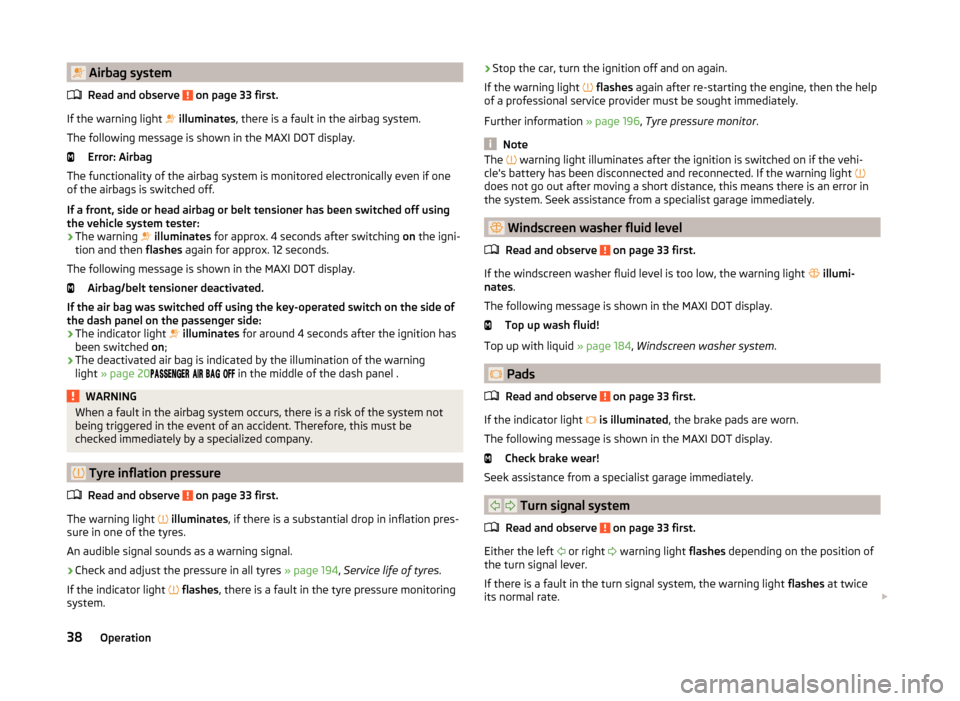
Airbag systemRead and observe
on page 33 first.
If the warning light
illuminates , there is a fault in the airbag system.
The following message is shown in the MAXI DOT display. Error: Airbag
The functionality of the airbag system is monitored electronically even if one
of the airbags is switched off.
If a front, side or head airbag or belt tensioner has been switched off using
the vehicle system tester:
› The warning
illuminates for approx. 4 seconds after switching on the igni-
tion and then flashes again for approx. 12 seconds.
The following message is shown in the MAXI DOT display. Airbag/belt tensioner deactivated.
If the air bag was switched off using the key-operated switch on the side of
the dash panel on the passenger side:
› The indicator light
illuminates for around 4 seconds after the ignition has
been switched on;
› The deactivated air bag is indicated by the illumination of the warning
light » page 20
in the middle of the dash panel .
WARNINGWhen a fault in the airbag system occurs, there is a risk of the system not
being triggered in the event of an accident. Therefore, this must be
checked immediately by a specialized company.
Tyre inflation pressure
Read and observe
on page 33 first.
The warning light
illuminates , if there is a substantial drop in inflation pres-
sure in one of the tyres.
An audible signal sounds as a warning signal.
›
Check and adjust the pressure in all tyres » page 194, Service life of tyres .
If the indicator light
flashes , there is a fault in the tyre pressure monitoring
system.
› Stop the car, turn the ignition off and on again.
If the warning light
flashes again after re-starting the engine, then the help
of a professional service provider must be sought immediately.
Further information » page 196, Tyre pressure monitor .
Note
The warning light illuminates after the ignition is switched on if the vehi-
cle's battery has been disconnected and reconnected. If the warning light
does not go out after moving a short distance, this means there is an error in
the system. Seek assistance from a specialist garage immediately.
Windscreen washer fluid level
Read and observe
on page 33 first.
If the windscreen washer fluid level is too low, the warning light
illumi-
nates .
The following message is shown in the MAXI DOT display. Top up wash fluid!
Top up with liquid » page 184, Windscreen washer system .
Pads
Read and observe
on page 33 first.
If the indicator light
is illuminated , the brake pads are worn.
The following message is shown in the MAXI DOT display. Check brake wear!
Seek assistance from a specialist garage immediately.
Turn signal system
Read and observe
on page 33 first.
Either the left or right
warning light
flashes depending on the position of
the turn signal lever.
If there is a fault in the turn signal system, the warning light flashes at twice
its normal rate.
38Operation