ECO mode SKODA SUPERB 2015 3.G / (B8/3V) Owner's Guide
[x] Cancel search | Manufacturer: SKODA, Model Year: 2015, Model line: SUPERB, Model: SKODA SUPERB 2015 3.G / (B8/3V)Pages: 276, PDF Size: 42.14 MB
Page 173 of 276
f the distance-warning function was deactivated before the ignition was
switched off, it remains deactivated after the ignition is switched on again.WARNINGIn the following situations, Front Assist should be switched off for safety
reasons.■
When the vehicle is being towed away.
■
When the vehicle is on a rolling test bench.
■
If an unfounded warning or a system action was taken.
■
When on a truck, or a car ferry service or similar.
Information messages
Read and observe
and on page 169 first.
The warning symbols are shown in the instrument cluster display.
Front Assist: no sensor view.FRONT ASSIST NO SENSOR VIEW
The sensor cover or the sensor is covered or dirty.
Stop the car, switch off the engine and clean the sensor cover or remove the
obstacle » Fig. 174 on page 143 .
If this message appears in winter, the cause can be snow covering the sensor.
The system is functional again after the snow melts away from the sensor.
Front Assist not available.FRONT ASSIST NOT AVAILABLE
The system is not available for an unknown reason.
Stop the vehicle, switch off the engine and then start it again.
If after engine start the message persists, then the help of a professional or- ganisation is required.
Selection of the driving mode(Driving Mode Selection)
Introduction
This chapter contains information on the following subjects:
Adaptive Chassis Control (DCC)
171
Mode
Comfort171Normal172Sport
mode172Eco
mode
172Individual
mode
172
Mode selection and Infotainment display
173
Mode settings
Individual173
By selecting the driving mode, the driving behaviour can be adapted to the de-
sired mode of operation.
The following modes are available
Comfort
,
Normal
,
Sport
,
Eco
and
Individual
.
The mode
Comfort
is only available on vehicles with adaptive chassis control
(DCC).
WARNINGPlease take note of the general points relating to the use of assistance
systems » page 142, in section Introduction .
Note
The set driving mode remains stored even after switching the ignition on and
off.
Adaptive Chassis Control (DCC)
Read and observe
on page 171 first.
The adaptive chassis control (following known as DCC) provides the ability toadjust the shock characteristics for the sporty, normal or comfortable driving
when the corresponding control mode is selected.
The DCC evaluates steering response and road conditions while driving contin-
uously and adjusts the suspension behaviour within the selected driving mode
accordingly.
Mode
Comfort
Read and observe on page 171 first.
This mode is suitable for driving on roads with poorer surface or for long mo- torway journeys.
171Assist systems
Page 174 of 276

Normal
Read and observe on page 171 first.
This mode is suitable for a conventional driving.
Sport
mode
Read and observe
on page 171 first.
This mode is suitable for a sporty driving.
Selecting this mode primarily affects the function of the following systems.
DCC
The DCC adjusts the chassis for the sporty driving style.
Steering
The power steering is reduced slightly, i.e., the driver needs to exert more
force for steering .
Engine / drive
The vehicle acceleration is more dynamic than in
Normal
mode.
Adaptive Cruise Control (ACC)
The acceleration is quicker than in
Normal
mode with distance control
» page 163 .
Xenon headlight
The headlamps adapt to the driving style more dynamically than in mode
Nor-mal
» page 69 .
ProActive passenger protection
The first level of protection is deactivated » page 173.
Eco
mode
Read and observe
on page 171 first.
This mode is suitable for a relaxed style of driving and helps to save fuel.
Selecting this mode primarily affects the function of the following systems.
Engine / drive
Vehicle acceleration is more relaxed than in
Normal
mode.
The recommended gear is controlled such to achieve the lowest possible fuel
consumption » page 42.
When the START-STOP system was deactivated manually » page 130, it is au-
tomatically activated.
The automatic gearbox is set automatically to mode E » page 135 .
Adaptive Cruise Control (ACC)
Acceleration occurs more relaxed than in Normal
» page 163 mode with distance
control.
Xenon headlight
The system is in economic mode » page 69. The headlamps are in basic setting
and do not adapt to the direction of travel.
Air conditioning (Climatronic)
The air conditioning is controlled so as to save energy. For this reason, for ex-
ample, it may take longer to reach the desired interior temperature in mode
Normal
.
Note
■ The mode Eco is not available when towing a trailer or when another acces-
sory is connected to the trailer socket. If the vehicle is in drive mode Eco
and a
trailer is hitched up or another accessory is connected, the vehicle is automati-
cally set to the driving mode
Normal
.
■
The maximum vehicle acceleration (kick down function) is possible also in
driving mode
Eco
.
Individual
mode
Read and observe
on page 171 first.
In the mode
Individual
each system can be set independently » page 173, Mode
settings
Individual
.
172Driving
Page 175 of 276
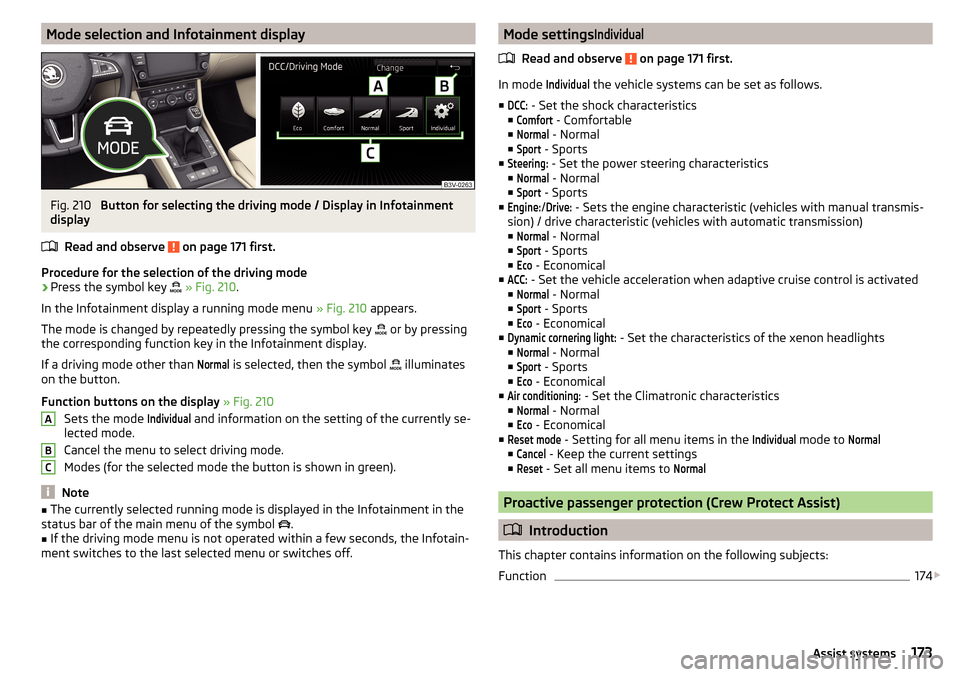
Mode selection and Infotainment displayFig. 210
Button for selecting the driving mode / Display in Infotainment
display
Read and observe
on page 171 first.
Procedure for the selection of the driving mode
›
Press the symbol key
» Fig. 210 .
In the Infotainment display a running mode menu » Fig. 210 appears.
The mode is changed by repeatedly pressing the symbol key or by pressing
the corresponding function key in the Infotainment display.
If a driving mode other than
Normal
is selected, then the symbol illuminates
on the button.
Function buttons on the display » Fig. 210
Sets the mode
Individual
and information on the setting of the currently se-
lected mode.
Cancel the menu to select driving mode.
Modes (for the selected mode the button is shown in green).
Note
■ The currently selected running mode is displayed in the Infotainment in the
status bar of the main menu of the symbol .■
If the driving mode menu is not operated within a few seconds, the Infotain-
ment switches to the last selected menu or switches off.
ABCMode settingsIndividual
Read and observe on page 171 first.
In mode
Individual
the vehicle systems can be set as follows.
■
DCC:
- Set the shock characteristics
■
Comfort
- Comfortable
■
Normal
- Normal
■
Sport
- Sports
■
Steering:
- Set the power steering characteristics
■
Normal
- Normal
■
Sport
- Sports
■
Engine:
/
Drive:
- Sets the engine characteristic (vehicles with manual transmis-
sion) / drive characteristic (vehicles with automatic transmission)
■
Normal
- Normal
■
Sport
- Sports
■
Eco
- Economical
■
ACC:
- Set the vehicle acceleration when adaptive cruise control is activated
■
Normal
- Normal
■
Sport
- Sports
■
Eco
- Economical
■
Dynamic cornering light:
- Set the characteristics of the xenon headlights
■
Normal
- Normal
■
Sport
- Sports
■
Eco
- Economical
■
Air conditioning:
- Set the Climatronic characteristics
■
Normal
- Normal
■
Eco
- Economical
■
Reset mode
- Setting for all menu items in the
Individual
mode to
Normal
■
Cancel
- Keep the current settings
■
Reset
- Set all menu items to
Normal
Proactive passenger protection (Crew Protect Assist)
Introduction
This chapter contains information on the following subjects:
Function
174
173Assist systems
Page 176 of 276
ProActive passenger protection (following known as system) increases pas-
senger protection in the front seats in situations that could lead to vehicle im-
pact or overturning.WARNINGPlease take note of the general points relating to the use of assistance
systems » page 142, in section Introduction .
Note
The system component service life is monitored electronically. Further infor-
mation » page 35 , Safety systems .
Function
Read and observe
on page 174 first.
In critical driving situations (e.g. during emergency braking or a sudden change
in direction), the following steps can be taken separately or combined in order
to reduce the risk of serious injury.
▶ The front passenger's and driver's seatbelts, if worn, are automatically ten-
sioned closely over the body.
▶ The windows in the side doors (if open) are automatically closed up to a gap
of about 5 cm from the edge.
▶ The sliding/tilting roof is closed.
Once the critical driving situation has passed, the tension on the seatbelts will
be released again.
The system operates at two levels of protection.
The first level of protection
The system already intervenes in situations that may occur during dynamic
driving. As a result, this primarily helps to keep the driver and the passenger in
the correct seated position.
The first protection level can be deactivated in one of the following ways.
▶ The system deactivation in the Infotainment » Owner´s Manual Infotain-
ment , chapter CAR - vehicle settings .
▶ Deactivation of TCS » page 143, Braking and stabilisation systems .
▶ Selecting the driving mode
Sport
» page 171 .
Provided that the driving mode
Sport
is not selected, the system is activated
over the two levels of protection after switching the ignition off and on again.
The second level of protection
The system intervenes only if the situation is evaluated as critical, such as in
panic braking at high speeds.
This level of protection cannot be deactivated.
Vehicles with the Front Assist system
On vehicles with Front Assist the system has been expanded to include infor-
mation from the radar sensor » page 143. Using this information a system in-
tervention may also occur when there is the danger of a collision with an ob-
stacle detected in front of the vehicle.
A system intervention can only take place on the basis of the information col-
lected by the radar sensor, if the radar sensor is fully functional.
Note
If the front passenger front airbag is deactivated » page 19 the belt tensioning
function for the front passenger seat is switched off.
Lane Departure Warning (Lane Assist)
Introduction
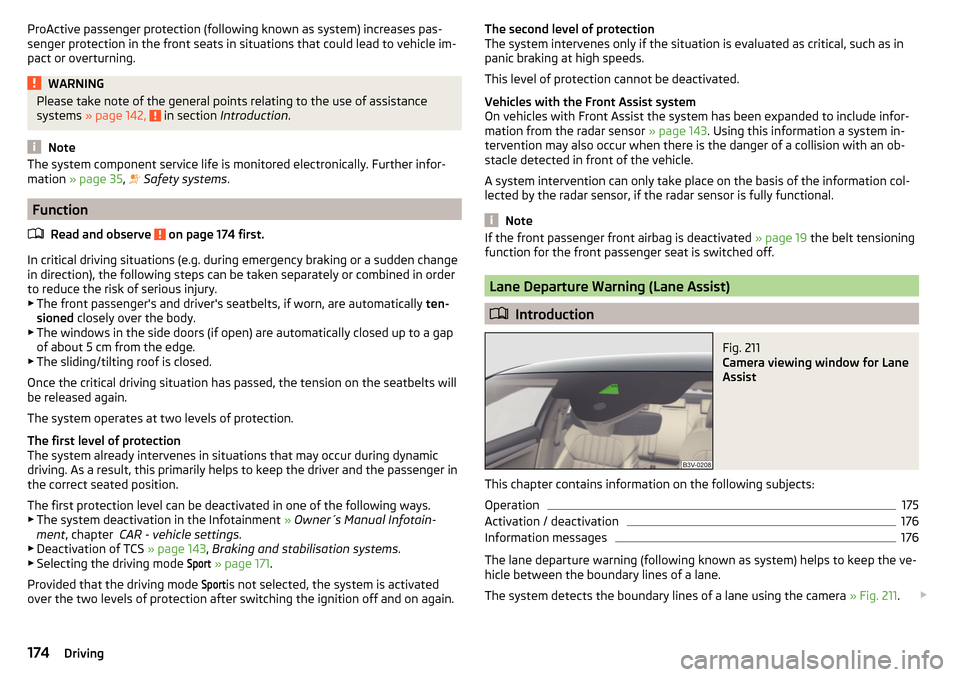
Fig. 211
Camera viewing window for Lane
Assist
This chapter contains information on the following subjects:
Operation
175
Activation / deactivation
176
Information messages
176
The lane departure warning (following known as system) helps to keep the ve-
hicle between the boundary lines of a lane.
The system detects the boundary lines of a lane using the camera » Fig. 211.
174Driving
Page 183 of 276

FunctionFig. 217
Camera viewing range for traffic
sign recognition
Fig. 218
Instrument cluster display: Display examples
Read and observe
on page 180 first.
Description of indications and displayed traffic signs
Display » Fig. 218Display of detected traffic signs in the menu item Driving data → Road signAdditional display (monochromatic display)Additional display (colour display)
The system can display the following (vertical) traffic signs where identified.
▶ Speed limit.
▶ Overtaking prohibited.
Additional signs, such as 'when wet' or signs which only apply for a limited
time can also be displayed.
The system works on the basis of the data captured by the camera and is only
able to show traffic signs which are in the camera's “viewing range” » Fig. 217.
Data from the camera is supplemented by information from the Infotainment
Navigation. This is the reason why traffic signs with maximum speeds can also
be shown on sections of roads which do not have any traffic signs.
Warning when exceeding the speed limit
The warning when exceeding the permissible speed can be activated and set
in the Infotainment (based on the recognized road sign) » Owner´s Manual In-
fotainment , chapter CAR - vehicle settings .
Mode when towing a trailer
For vehicles with a factory-fitted towing device, it is possible in the Infotain-
ment to enable or disable the relevant traffic signs for trailer operation and the
top speed for the towing a trailer » Owner´s Manual Infotainment , chap-
ter CAR - vehicle settings .
The system may not be available or may only be available to a limited extent
in the following situations.
▶ Poor visibility conditions, e.g. fog, heavy rain, thick snowfall.
▶ The camera is blinded by the sun.
▶ The camera is blinded by the oncoming traffic.
▶ The camera “viewing range” is obstructed by an obstacle.
▶ Travelling at high speed.
▶ The traffic signs are fully or partially obscured (e.g. by trees, snow, dirt or
other vehicles).
▶ The traffic signs are not standard (round with a red border).
▶ The traffic signs are damaged or bent.
▶ The traffic signs are attached to flashing neon signs.
▶ The traffic signs were changed (the navigation data are out of date).
Additional display
Read and observe
on page 180 first.
If the menu item
Road sign
is currently not shown » Fig. 218 on page 181 -
, the
road sign with the speed limit will appear in the upper display area of the in-
strument cluster » Fig. 218 on page 181 -
,
.
If several traffic signs are detected simultaneously, the next traffic sign will al- so in some cases be displayed in the colour display - . All detected traffic
signs can be displayed in the menu item
Road sign
- .
The additional display can be enabled or disabled in the Infotainment » Owner
´s Manual Infotainment , chapter CAR - vehicle settings .
181Assist systems
Page 193 of 276

The ŠKODA Service Partners are up-to-date on the legally required tests and
will prepare the vehicle for the tests as part of a service operation if required,
or will be responsible for carrying out these tests. The specialist garages can
carry out the specified tests directly if required by the customer if they are au-
thorised to do so. This saves you time and money.
Even if you want to take your vehicle to an officially approved test centre for
prior checking in preparation of a legally required test, we recommend that you
consult the service consultant of your ŠKODA Service Partner beforehand.
Based on their appraisal, the service consultant will tell you which areas you
should focus on in order to ensure that your vehicle will pass the technical test
without any problems. This allows you to avoid additional expenses resulting
from a possible subsequent test.
ŠKODA Service Partners
Read and observe
on page 190 first.
ŠKODA Service Partners feature modern, specially developed tools and equip-
ment. Here, trained specialists have access to a comprehensive range of
ŠKODA Original Parts and ŠKODA Original Accessories for carrying out modifi-
cations, repairs and technical alterations.
All ŠKODA service partners operate according to the most recent guidelines
and instructions from ŠKODA AUTO a.s. All service and repair work is therefore
carried out on time and at the appropriate quality. Adhering to these instruc-
tions and guidelines helps ensure road safety and helps keep your vehicle in a
good technical condition.
ŠKODA Service Partners are therefore properly prepared to service your vehicle
and to provide quality work. We therefore advise you to have all modifications,
repairs and technical alterations to your vehicle carried out by a ŠKODA Service
Partner.
ŠKODA Original parts
Read and observe
on page 190 first.
We recommend the use of ŠKODA Genuine Parts for your vehicle, as these
parts are approved by ŠKODA AUTO a.s.. They correspond precisely to the
ŠKODA AUTO a.s. regulations with regard to design, dimensional accuracy and
material, and are identical to the components used in series production.
ŠKODA AUTO a.s. is able to vouch for the safety, suitability and long service life of these products. We therefore recommend that you only use ŠKODA Genuine
Parts.
ŠKODA AUTO a.s. supplies the market with a complete range of ŠKODA Genu-
ine Parts - not only while the model is still in production but for at least 15
years after the end of series production for wear parts and at least 10 years
after the end of series production for all other vehicle parts.
ŠKODA Service Partners are liable for any defects of ŠKODA Genuine Parts for a period of 2 years after sale in accordance with the materials defect liability,
unless agreed otherwise in the purchase agreement. You should keep the ap-
proved warranty certificate and the invoices for these components for this pe-
riod of time, so that the commencement of the term can be verified.
Body repairs
ŠKODA vehicles are designed such that if any damage occurs to the body, it is
only necessary to replace those parts that are actually damaged.
However, before you decide to have damaged body parts replaced, you should
first of all contact your specialist garage to determine whether or not the parts
can also be repaired. Repairs to body parts are usually cheaper.
ŠKODA Original accessories
Read and observe
on page 190 first.
If you wish to fit accessories to your vehicle, you should remember the follow-ing.
We recommend that you use ŠKODA Genuine Accessories in your vehicle.
ŠKODA AUTO a.s. has selected these accessories to ensure that they are relia-
ble, safe and suitable for your particular vehicle. Although we constantly moni-
tor the market, we are not able to assess or vouch for other products even
though in some instances such parts may have operational approval or may
have been approved by a nationally recognised testing laboratory.
All accessory products are subjected to a challenging process in the areas of technical development (technical testing) and quality inspection (customer
testing), and the product only becomes a ŠKODA Genuine Accessory if all tests
are passed.
Our ŠKODA Genuine Accessories service also includes expert advice and pro-
fessional fitting if required by the customer.
191Care and maintenance
Page 220 of 276
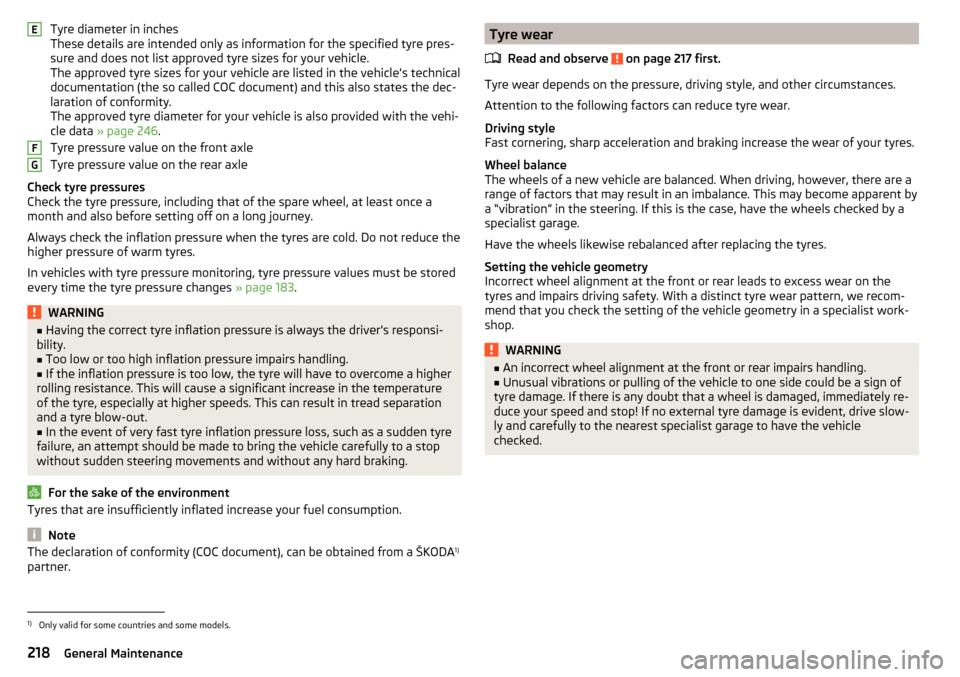
Tyre diameter in inches
These details are intended only as information for the specified tyre pres-
sure and does not list approved tyre sizes for your vehicle.
The approved tyre sizes for your vehicle are listed in the vehicle's technical
documentation (the so called COC document) and this also states the dec-
laration of conformity.
The approved tyre diameter for your vehicle is also provided with the vehi-
cle data » page 246 .
Tyre pressure value on the front axle
Tyre pressure value on the rear axle
Check tyre pressures
Check the tyre pressure, including that of the spare wheel, at least once a
month and also before setting off on a long journey.
Always check the inflation pressure when the tyres are cold. Do not reduce the
higher pressure of warm tyres.
In vehicles with tyre pressure monitoring, tyre pressure values must be stored
every time the tyre pressure changes » page 183.WARNING■
Having the correct tyre inflation pressure is always the driver's responsi-
bility.■
Too low or too high inflation pressure impairs handling.
■
If the inflation pressure is too low, the tyre will have to overcome a higher
rolling resistance. This will cause a significant increase in the temperature
of the tyre, especially at higher speeds. This can result in tread separation
and a tyre blow-out.
■
In the event of very fast tyre inflation pressure loss, such as a sudden tyre
failure, an attempt should be made to bring the vehicle carefully to a stop
without sudden steering movements and without any hard braking.
For the sake of the environment
Tyres that are insufficiently inflated increase your fuel consumption.
Note
The declaration of conformity (COC document), can be obtained from a ŠKODA 1)
partner.EFGTyre wear
Read and observe
on page 217 first.
Tyre wear depends on the pressure, driving style, and other circumstances.
Attention to the following factors can reduce tyre wear.
Driving style
Fast cornering, sharp acceleration and braking increase the wear of your tyres.
Wheel balance
The wheels of a new vehicle are balanced. When driving, however, there are a
range of factors that may result in an imbalance. This may become apparent by
a “vibration” in the steering. If this is the case, have the wheels checked by a
specialist garage.
Have the wheels likewise rebalanced after replacing the tyres.
Setting the vehicle geometry
Incorrect wheel alignment at the front or rear leads to excess wear on the
tyres and impairs driving safety. With a distinct tyre wear pattern, we recom-
mend that you check the setting of the vehicle geometry in a specialist work-
shop.
WARNING■ An incorrect wheel alignment at the front or rear impairs handling.■Unusual vibrations or pulling of the vehicle to one side could be a sign of
tyre damage. If there is any doubt that a wheel is damaged, immediately re-
duce your speed and stop! If no external tyre damage is evident, drive slow-
ly and carefully to the nearest specialist garage to have the vehicle
checked.1)
Only valid for some countries and some models.
218General Maintenance
Page 261 of 276
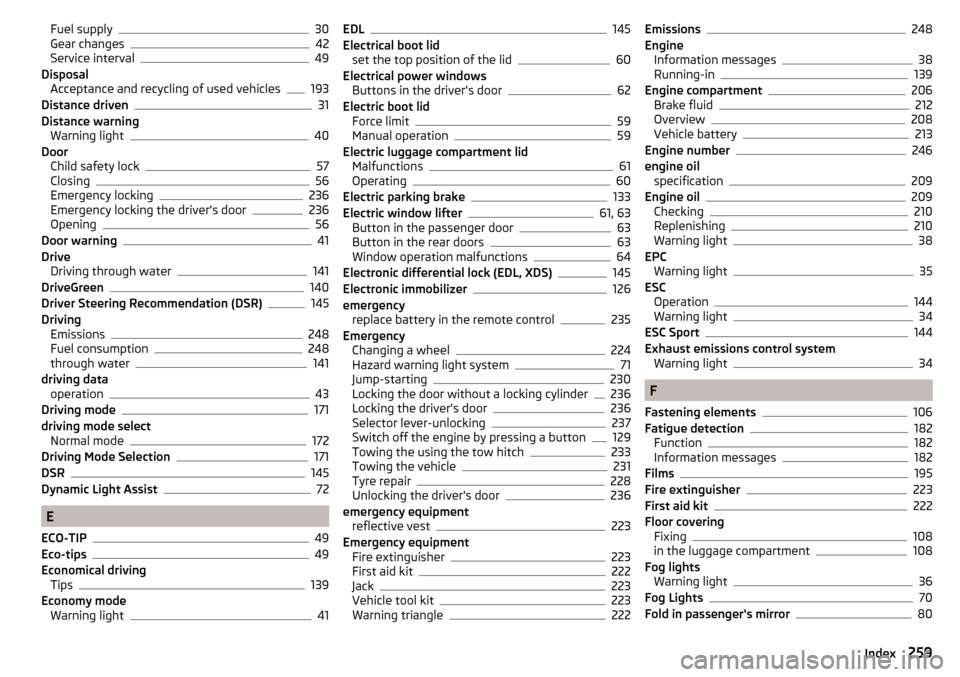
Fuel supply30
Gear changes42
Service interval49
Disposal Acceptance and recycling of used vehicles
193
Distance driven31
Distance warning Warning light
40
Door Child safety lock
57
Closing56
Emergency locking236
Emergency locking the driver's door236
Opening56
Door warning41
Drive Driving through water
141
DriveGreen140
Driver Steering Recommendation (DSR)145
Driving Emissions
248
Fuel consumption248
through water141
driving data operation
43
Driving mode171
driving mode select Normal mode
172
Driving Mode Selection171
DSR145
Dynamic Light Assist72
E
ECO-TIP
49
Eco-tips49
Economical driving Tips
139
Economy mode Warning light
41
EDL145
Electrical boot lid set the top position of the lid
60
Electrical power windows Buttons in the driver's door
62
Electric boot lid Force limit
59
Manual operation59
Electric luggage compartment lid Malfunctions
61
Operating60
Electric parking brake133
Electric window lifter61, 63
Button in the passenger door63
Button in the rear doors63
Window operation malfunctions64
Electronic differential lock (EDL, XDS)145
Electronic immobilizer126
emergency replace battery in the remote control
235
Emergency Changing a wheel
224
Hazard warning light system71
Jump-starting230
Locking the door without a locking cylinder236
Locking the driver's door236
Selector lever-unlocking237
Switch off the engine by pressing a button129
Towing the using the tow hitch233
Towing the vehicle231
Tyre repair228
Unlocking the driver's door236
emergency equipment reflective vest
223
Emergency equipment Fire extinguisher
223
First aid kit222
Jack223
Vehicle tool kit223
Warning triangle222
Emissions248
Engine Information messages
38
Running-in139
Engine compartment206
Brake fluid212
Overview208
Vehicle battery213
Engine number246
engine oil specification
209
Engine oil209
Checking210
Replenishing210
Warning light38
EPC Warning light
35
ESC Operation
144
Warning light34
ESC Sport144
Exhaust emissions control system Warning light
34
F
Fastening elements
106
Fatigue detection182
Function182
Information messages182
Films195
Fire extinguisher223
First aid kit222
Floor covering Fixing
108
in the luggage compartment108
Fog lights Warning light
36
Fog Lights70
Fold in passenger's mirror80
259Index
Page 266 of 276

Reversing cameraLens care197
Revolutions counter29
Roller blind Luggage compartment cover
109
Roof Load
118
Roof rack117
mounting points118
Roof load118
Rubber seals196
Running-in Brake linings
139
Engine139
Tyres139
S
SAFE See Safe securing system
55
SAFELOCK See Safe securing system
55
Safe securing system55
Safety8
Child safety20
Child safety seats20
Correct seated position8
Headrests87
i-Size25
ISOFIX23
TOP TETHER25
Save electrical energy139
Save fuel139
Screens see Sun screen in the rear doors
77
Seals Vehicle care
196
Seat belt height adjustment
12
Warning light33, 37
Seat belts11
Belt tensioners14
fastening and unfastening13
Seatbelts Inertia reels
13
Seat belts reversible
14
The physical principle of a head-on collision12
Seat electrical adjustment82
Seats Convenience features of passenger seat
82
Electrical adjustment82
Folding front passenger seat84
Front armrest85
Front seat adjustment81
Headrests87
Heated front seats89
Manual adjustment82
Memory Function of the electrically adjustable seat
83
Rear armrest86
Rear heated seats90
Rear seat backrests85
Storing in memory of remote control key83
Seats and head restraint81
see Automatic gearbox Manual gear shifting on the multifunctionsteering wheel
137
see Instrument cluster see Instrument cluster
28
Select drive mode Individual mode settings
173
Mode selection and Infotainment display173
Select driving mode Eco mode
172
Individual mode172
Mode comfort171
Sport mode172
Selector lever Refer to Selector lever
136
Selector lever lockWarning light37
Service191
Service interval display49
Warning light41
Setting Positions of the variable loading floor
115
Seat belt height12
Settings Interior mirror
79
Setting the Clock
31
Side airbag17
Side compartments in the luggage compart- ment
112
sliding/tilting roof Sunblind
66
Sliding/tilting roof Closing
64
Sliding / tilting roof Malfunction
65
Malfunction of the sun blind66
Sliding/tilting roof Opening and tilting
64
Operation64
SmartGate Connect by searching for a Wi-Fi network
50
introductory information50
Password/PIN code change51
Setting51
Wi-Fi Direct51
SmartLink see Infotainment
4
Snow chains221
Sockets 12 volt socket in luggage compartment
101
12 volt socket inside100
230 V101
264Index