engine SKODA SUPERB 2015 3.G / (B8/3V) Owner's Manual
[x] Cancel search | Manufacturer: SKODA, Model Year: 2015, Model line: SUPERB, Model: SKODA SUPERB 2015 3.G / (B8/3V)Pages: 276, PDF Size: 42.14 MB
Page 4 of 276
Table of Contents
On-board literature4
Notes
5
Structure and more information about the
Owner's Manual
6
Abbreviations
Safety
Passive Safety
8
General information
8
Correct and safe seated position
8
Seat belts
11
Using seat belts
11
Belt retractors and belt tensioners, reversible
seat belts
13
Airbag system
14
Description of the airbag system
14
Airbag overview
15
Deactivating airbags
19
Transporting children safely
20
Child seat
20
Fastening systems
23
Using the system
Cockpit
27
Overview
26
Instruments and warning lights
28
Instrument cluster
28
Warning lights
31
Information system
41
Driver information system
41
Driving data (Multifunction display)
42MAXI DOT display45Service interval display49
SmartGate
50
Unlocking and opening
52
Unlocking and locking
52
Anti-theft alarm system
57
Luggage compartment lid
58
Electric boot lid
59
Window operation
61
Panorama sliding/tilting roof
64
Lights and visibility
67
Lights
67
Headlamp Assistant (Light Assist / Dynamic
Light Assist)
72
Interior lights
74
Visibility
75
Windscreen wipers and washers
77
Rear mirror
79
Seats and head restraints
81
Front seats
81
Rear seats
85
Head restraints
87
Seat heating and ventilation
88
Transporting and practical equipment
90
Useful equipment
90
Electrical sockets and cigarette lighter
99
Ashtrays
103
Tablet holder
104
Luggage compartment and transport of
cargo
105
Variable loading floor in the luggage
compartment (Estate)
115Net partition116Roof rack117
Heating and ventilation
118
Heating, manual air conditioning system,
Climatronic
118
Auxiliary heating (auxiliary heating and
ventilation)
123
Driving
Starting-off and Driving
126
Starting and stopping the engine using the
key
126
Starting and stopping the engine at the push
of the button
128
START-STOPsystem
130
Brakes and parking
132
Manual gear changing and pedals
135
Automatic transmission
135
Running-in and economical driving
138
Avoiding damage to your vehicle
141
Assist systems
142
General information
142
Braking and stabilisation systems
143
Parking aid (ParkPilot)
147
Rear Traffic Alert
149
Rear View Camera
151
Park Assist
155
Cruise Control System
160
Speed Limiter
162
Adaptive Cruise Control (ACC)
163
Front Assist
168
Selection of the driving mode(Driving Mode
Selection)
171
Proactive passenger protection (Crew Protect
Assist)
173
Lane Departure Warning (Lane Assist)
174
Assistant for “blind spot monitoring”
1772Table of Contents
Page 5 of 276
Traffic jam assistant179Assistant for emergencies179
Traffic sign recognition
180
Fatigue detection
182
Tyre pressure monitoring
183
Hitch and trailer
184
Hitch
184
Trailer
185
General Maintenance
Care and maintenance
190
Service work, adjustments and technical
alterations
190
Washing vehicle
193
Cleaning vehicle exterior
194
Interior care
198
Inspecting and replenishing
201
Fuel
201
AdBlue ®
and its refilling
204
Engine compartment
206
Engine oil
209
Coolant
210
Brake fluid
212
Vehicle battery
213
Wheels
217
Tyres and wheel rims
217
Winter operation
220
Do-it-yourself
Emergency equipment and self-help
222
Emergency equipment
222
Changing a wheel
224
Puncture repair kit
228
Jump-starting
230
Towing the vehicle
231
Remote control and removable light
233Emergency unlocking/locking235Replacing windscreen wiper blades237
Fuses and light bulbs
238
Fuses
238
Bulbs
242
Technical data
Technical data
246
Basic vehicle data
246
Vehicle-specific information depending on
engine type
252
Index
3Table of Contents
Page 9 of 276
AbbreviationsAbbreviationDefinitionrpmEngine revolutions per minuteABSAnti-lock brake systemACCAdaptive cruise controlACTactive cylinder managementAFMulti-purpose vehiclesAGMVehicle battery typeAPNAn access point name for the WLAN connectionTCSTraction controlCO2Carbon dioxideCOCDeclaration of conformityDCCadaptive chassis controlDPFDiesel particle filterDSGAutomatic double clutch gearboxDSRActive driver-steering recommendationEDLElectronic differential lockECEEconomic Commission for EuropeEPCEPC fault lightESCElectronic Stability ControlETRim depthEUEuropean UnionGSMGlobal system for mobile communicationsHBAHydraulic brake assistHHCUphill start assistKESSYKeyless unlocking, starting and lockingkWKilowatt, measuring unit for outputLEDLighting element typeM1A passenger car constructed primarily for the transport of
peopleMCBMulti-collision brakeMGManual gearboxAbbreviationDefinitionN1Panel van intended exclusively or mainly for the transporta-
tion of goodsNiMHNickel metal hydrideNmNewton meter, measuring unit for the engine torquePINpersonal identification numberSCRDiesel engine for which the AdBlue ®
solution is requiredSSPConnect two devices using Bluetooth ®
profileTDI CRDiesel engine with turbo-charging and common rail injection
systemTSATrailer stabilisationTSIPetrol engine with turbo charging and direct injectionVDAAssociation of the Automotive Industry (in Germany)VINVehicle identification numberWWatt, unit of powerWLANWireless data networkXDSFunctional extension of the electronic differential lock7Abbreviations
Page 10 of 276
Safety
Passive Safety
General information
Introduction
This chapter contains information on the following subjects:
Before setting off
8
Driving safety
8
In this section of the instructions you will find important information, tips and
notes on the subject of passive safety.
We have combined everything here which you should be familiar with, for ex-
ample, regarding seat belts, airbags, safety of children and anything similar.
You can find further information on safety concerning you and those travelling
with you in the following chapters of this Owner's Manual.
The complete on-board literature should therefore always be in the vehicle.
This applies in particular, if you rent out or sell the vehicle.
Before setting off
For your own safety and the safety of the people travelling with you, please
pay attention to the following points before setting off.
▶ Ensure that the lighting and the turn signal system are functioning properly.
▶ Ensure that the function of the wipers and the condition of the wiper blades
are free of any defects.
▶ Ensure that all of the windows offer good visibility to the outside.
▶ Adjust the rear-view mirror so that vision to the rear is guaranteed.
▶ Ensure that the mirrors are not covered.
▶ Check the tyre inflation pressure.
▶ Check the engine oil, brake fluid and coolant level.
▶ Secure all items of luggage.
▶ Do not exceed the permissible axle loads and permissible gross weight of the
vehicle.
▶ Close all doors as well as the bonnet and boot lid.
▶ Ensure that no objects can obstruct the pedals.
▶
Protect children in suitable child seats with correctly fastened seat belts
» page 20 , Transporting children safely .
▶ Adopt the correct seated position » page 8, Correct and safe seated posi-
tion . Tell your passengers to assume the correct seated position.
Driving safety
The driver is fully responsible for himself and passengers, especially children. If
your driving safety is effected, you place yourself and the oncoming traffic at
risk.
The following guidelines must therefore be observed. ▶ Do not become distracted from concentrating on the traffic situation, (e.g. by
your passengers or mobile phone calls).
▶ Never drive when your driving ability is impaired, (e.g. due to medication, al-
cohol or drugs).
▶ Keep to the traffic regulations and the permissible speed limit.
▶ Always adjust the driving speed to the road, traffic and weather conditions.
▶ Take regular breaks on long journeys (at least every two hours).
The following list contains instructions for the Passenger which, if not ob-
served, may cause serious injuries or death. ▶ Do not lean against the dash panel.
▶ Do not put your feet on the dash panel.
The following list contains instructions for all Passengers which, if not ob-
served, may cause serious injuries or death. ▶ Do not sit only on the front part of the seat.
▶ Do not sit facing to the side.
▶ Do not lean out of the window.
▶ Do not put your limbs out of the window.
▶ Do not put your feet on the seat cushion.
Correct and safe seated position
Introduction
This chapter contains information on the following subjects:
Correct seat position of the driver
9
Adjusting the steering wheel position
9
Correct seated position for the front passenger
10
Correct seated position for the passengers in the rear seats
10
8Safety
Page 17 of 276
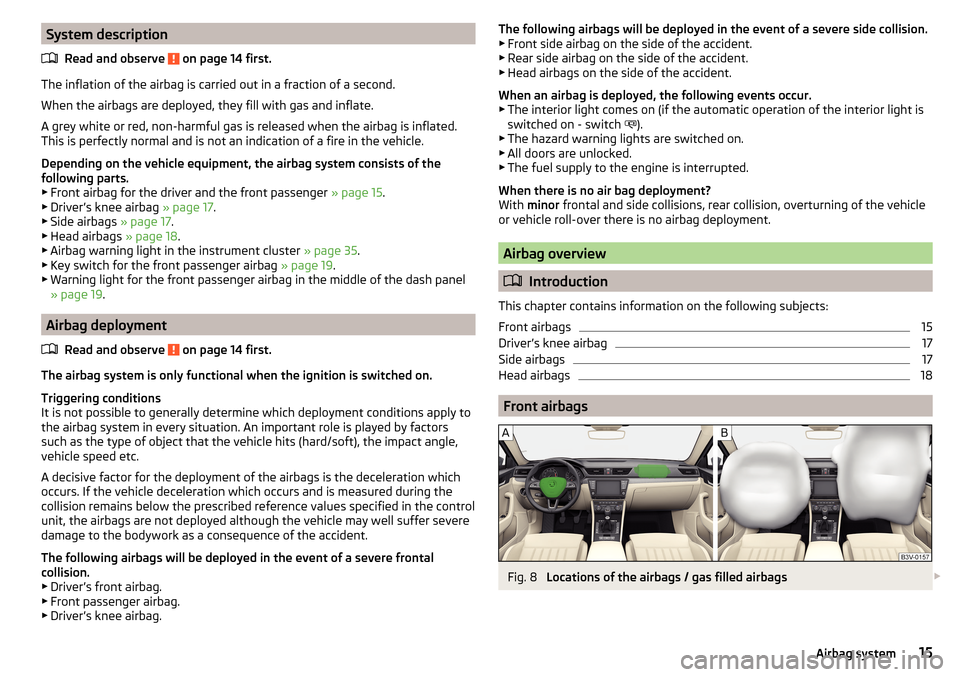
System descriptionRead and observe
on page 14 first.
The inflation of the airbag is carried out in a fraction of a second.
When the airbags are deployed, they fill with gas and inflate.
A grey white or red, non-harmful gas is released when the airbag is inflated.
This is perfectly normal and is not an indication of a fire in the vehicle.
Depending on the vehicle equipment, the airbag system consists of the
following parts. ▶ Front airbag for the driver and the front passenger » page 15.
▶ Driver’s knee airbag » page 17.
▶ Side airbags » page 17.
▶ Head airbags » page 18.
▶ Airbag warning light in the instrument cluster » page 35.
▶ Key switch for the front passenger airbag » page 19.
▶ Warning light for the front passenger airbag in the middle of the dash panel
» page 19 .
Airbag deployment
Read and observe
on page 14 first.
The airbag system is only functional when the ignition is switched on.
Triggering conditions
It is not possible to generally determine which deployment conditions apply to
the airbag system in every situation. An important role is played by factors
such as the type of object that the vehicle hits (hard/soft), the impact angle, vehicle speed etc.
A decisive factor for the deployment of the airbags is the deceleration which
occurs. If the vehicle deceleration which occurs and is measured during the
collision remains below the prescribed reference values specified in the control
unit, the airbags are not deployed although the vehicle may well suffer severe
damage to the bodywork as a consequence of the accident.
The following airbags will be deployed in the event of a severe frontal
collision.
▶ Driver’s front airbag.
▶ Front passenger airbag.
▶ Driver’s knee airbag.
The following airbags will be deployed in the event of a severe side collision.
▶ Front side airbag on the side of the accident.
▶ Rear side airbag on the side of the accident.
▶ Head airbags on the side of the accident.
When an airbag is deployed, the following events occur. ▶ The interior light comes on (if the automatic operation of the interior light is
switched on - switch
).
▶ The hazard warning lights are switched on.
▶ All doors are unlocked.
▶ The fuel supply to the engine is interrupted.
When there is no air bag deployment?
With minor frontal and side collisions, rear collision, overturning of the vehicle
or vehicle roll-over there is no airbag deployment.
Airbag overview
Introduction
This chapter contains information on the following subjects:
Front airbags
15
Driver’s knee airbag
17
Side airbags
17
Head airbags
18
Front airbags
Fig. 8
Locations of the airbags / gas filled airbags
15Airbag system
Page 30 of 276

Storage compartment with bottle storage91
Waste container
93
Note
The arrangement of the controls right-hand drive models may differ from the
layout shown in » Fig. 21. The symbols on the controls and switches are the
same as for left-hand drive models.3839Instruments and warning lights
Instrument cluster
Introduction
This chapter contains information on the following subjects:
Overview
29
Revolutions counter
29
Display
29
Coolant temperature gauge
30
Fuel gauge
30
Counter for distance driven
31
Setting the clock
31
Display in rear centre console
31
The instrument cluster gives the driver basic information such as the current
speed, engine speed, the state of some vehicle systems and the like.
If there is a fault in the instrument cluster, the following message will appear
in the display.
Error: instrument cluster. Workshop!COMBI-INSTRUM_ WORKSHOP
Seek help from a specialist garage.
WARNINGConcentrate fully at all times on your driving! As the driver, you are fully re-
sponsible for road safety.
Note
■ If the message SAFE CP appears in the instrument cluster display, the compo-
nent protection for the instrument cluster is active. Further information
» page 192 , Component protection .■
With the ignition switched on the instruments are also illuminated. The
brightness of the instrument illumination is set automatically depending on
the ambient lighting throughout.
28Using the system
Page 31 of 276
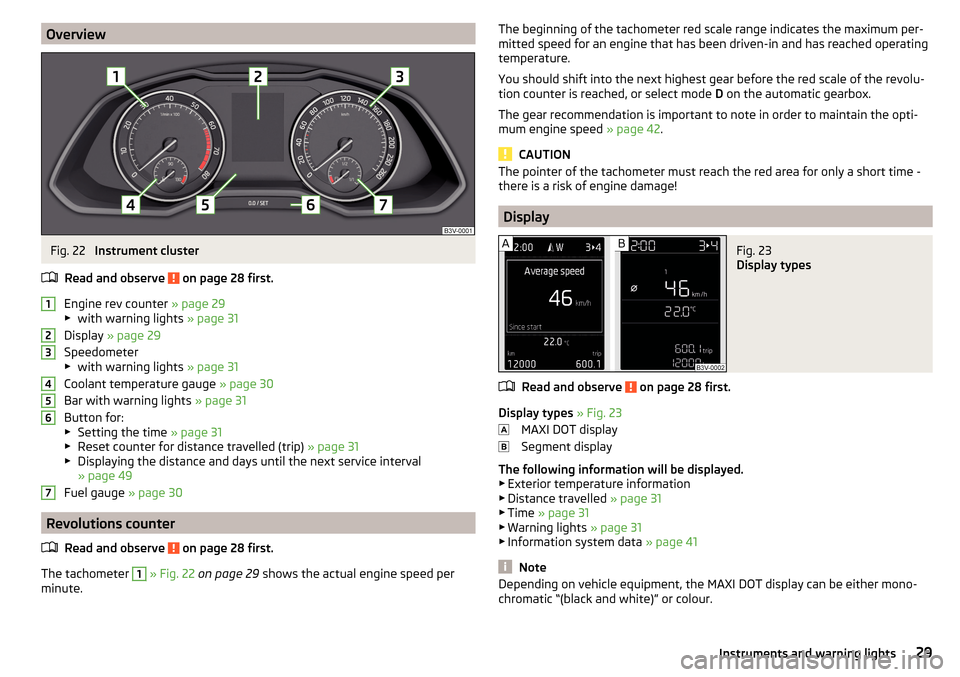
OverviewFig. 22
Instrument cluster
Read and observe
on page 28 first.
Engine rev counter » page 29
▶ with warning lights » page 31
Display » page 29
Speedometer
▶ with warning lights » page 31
Coolant temperature gauge » page 30
Bar with warning lights » page 31
Button for: ▶ Setting the time » page 31
▶ Reset counter for distance travelled (trip) » page 31
▶ Displaying the distance and days until the next service interval
» page 49
Fuel gauge » page 30
Revolutions counter
Read and observe
on page 28 first.
The tachometer
1
» Fig. 22 on page 29 shows the actual engine speed per
minute.
1234567The beginning of the tachometer red scale range indicates the maximum per-
mitted speed for an engine that has been driven-in and has reached operating
temperature.
You should shift into the next highest gear before the red scale of the revolu-
tion counter is reached, or select mode D on the automatic gearbox.
The gear recommendation is important to note in order to maintain the opti-
mum engine speed » page 42.
CAUTION
The pointer of the tachometer must reach the red area for only a short time -
there is a risk of engine damage!
Display
Fig. 23
Display types
Read and observe on page 28 first.
Display types » Fig. 23
MAXI DOT display
Segment display
The following information will be displayed.
▶ Exterior temperature information
▶ Distance travelled » page 31
▶ Time » page 31
▶ Warning lights » page 31
▶ Information system data » page 41
Note
Depending on vehicle equipment, the MAXI DOT display can be either mono-
chromatic “(black and white)” or colour.29Instruments and warning lights
Page 32 of 276
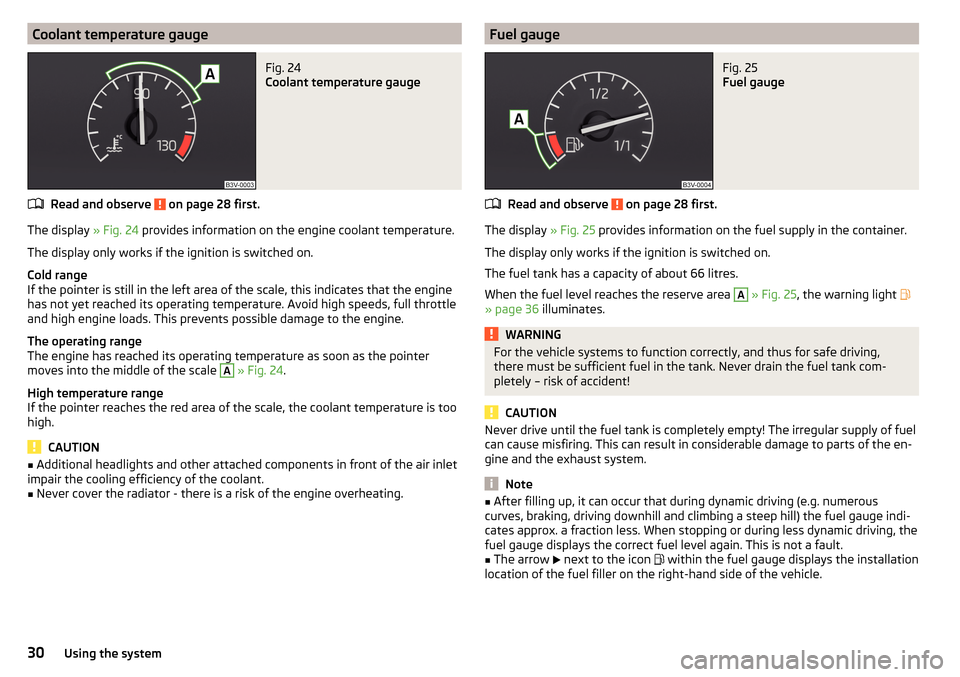
Coolant temperature gaugeFig. 24
Coolant temperature gauge
Read and observe on page 28 first.
The display » Fig. 24 provides information on the engine coolant temperature.
The display only works if the ignition is switched on.
Cold range
If the pointer is still in the left area of the scale, this indicates that the engine has not yet reached its operating temperature. Avoid high speeds, full throttle
and high engine loads. This prevents possible damage to the engine.
The operating range
The engine has reached its operating temperature as soon as the pointer
moves into the middle of the scale
A
» Fig. 24 .
High temperature range
If the pointer reaches the red area of the scale, the coolant temperature is too
high.
CAUTION
■ Additional headlights and other attached components in front of the air inlet
impair the cooling efficiency of the coolant.■
Never cover the radiator - there is a risk of the engine overheating.
Fuel gaugeFig. 25
Fuel gauge
Read and observe on page 28 first.
The display » Fig. 25 provides information on the fuel supply in the container.
The display only works if the ignition is switched on.
The fuel tank has a capacity of about 66 litres.
When the fuel level reaches the reserve area
A
» Fig. 25 , the warning light
» page 36 illuminates.
WARNINGFor the vehicle systems to function correctly, and thus for safe driving,
there must be sufficient fuel in the tank. Never drain the fuel tank com-
pletely – risk of accident!
CAUTION
Never drive until the fuel tank is completely empty! The irregular supply of fuel
can cause misfiring. This can result in considerable damage to parts of the en-
gine and the exhaust system.
Note
■ After filling up, it can occur that during dynamic driving (e.g. numerous
curves, braking, driving downhill and climbing a steep hill) the fuel gauge indi-
cates approx. a fraction less. When stopping or during less dynamic driving, the
fuel gauge displays the correct fuel level again. This is not a fault.■
The arrow
next to the icon
within the fuel gauge displays the installation
location of the fuel filler on the right-hand side of the vehicle.
30Using the system
Page 33 of 276
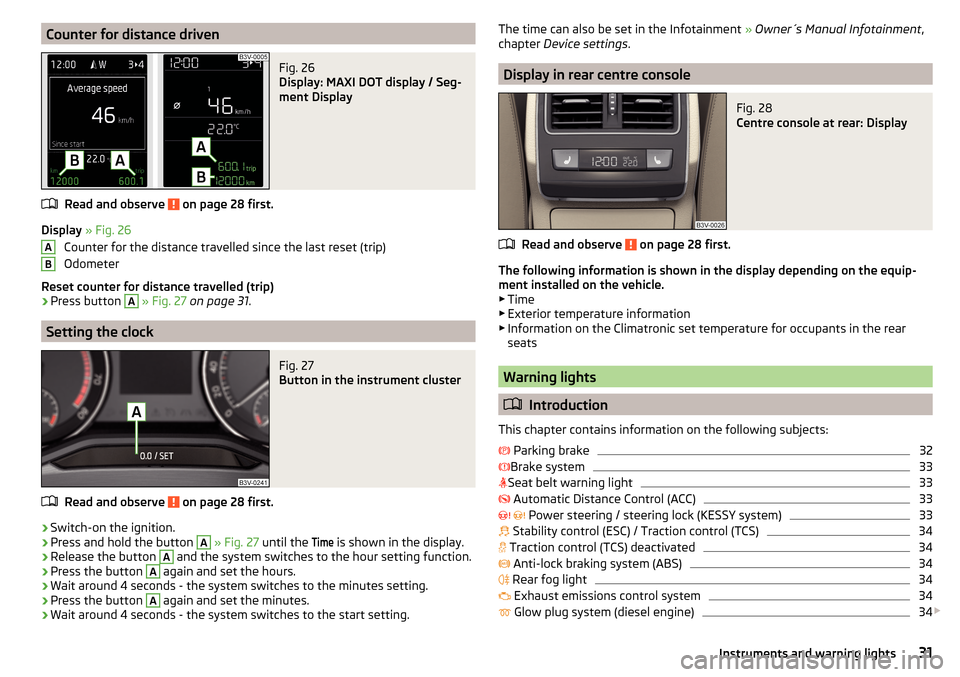
Counter for distance drivenFig. 26
Display: MAXI DOT display / Seg-
ment Display
Read and observe on page 28 first.
Display » Fig. 26
Counter for the distance travelled since the last reset (trip)
Odometer
Reset counter for distance travelled (trip)
›
Press button
A
» Fig. 27 on page 31 .
Setting the clock
Fig. 27
Button in the instrument cluster
Read and observe on page 28 first.
›
Switch-on the ignition.
›
Press and hold the button
A
» Fig. 27 until the
Time
is shown in the display.
›
Release the button
A
and the system switches to the hour setting function.
›
Press the button
A
again and set the hours.
›
Wait around 4 seconds - the system switches to the minutes setting.
›
Press the button
A
again and set the minutes.
›
Wait around 4 seconds - the system switches to the start setting.
ABThe time can also be set in the Infotainment » Owner´s Manual Infotainment ,
chapter Device settings .
Display in rear centre console
Fig. 28
Centre console at rear: Display
Read and observe on page 28 first.
The following information is shown in the display depending on the equip-
ment installed on the vehicle. ▶ Time
▶ Exterior temperature information
▶ Information on the Climatronic set temperature for occupants in the rear
seats
Warning lights
Introduction
This chapter contains information on the following subjects:
Parking brake
32
Brake system
33
Seat belt warning light
33
Automatic Distance Control (ACC)
33
Power steering / steering lock (KESSY system)
33
Stability control (ESC) / Traction control (TCS)
34
Traction control (TCS) deactivated
34
Anti-lock braking system (ABS)
34
Rear fog light
34
Exhaust emissions control system
34
Glow plug system (diesel engine)
34
31Instruments and warning lights
Page 34 of 276
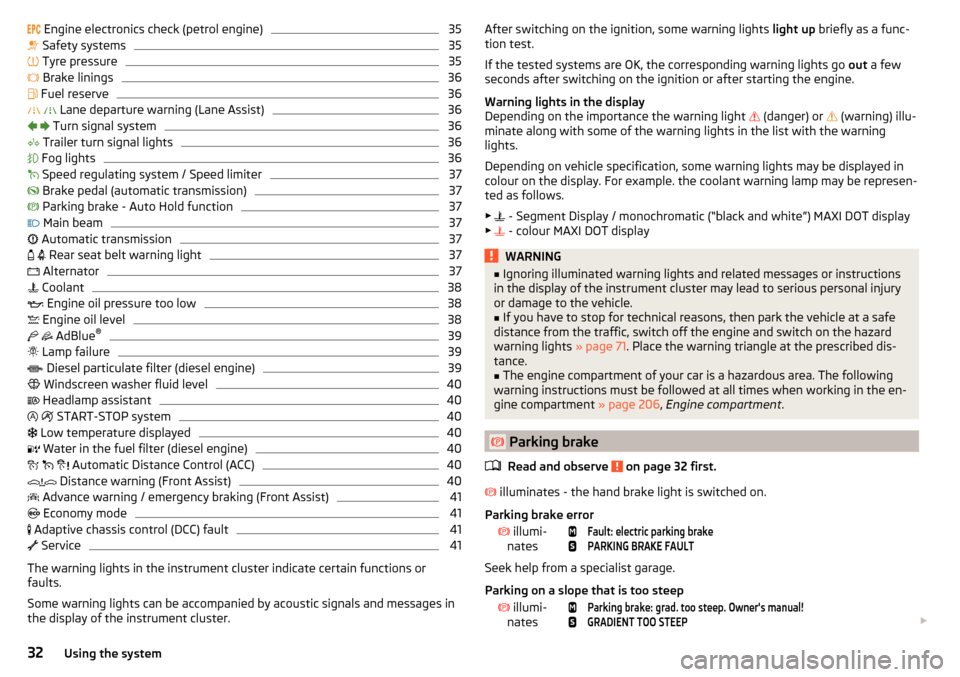
Engine electronics check (petrol engine)35 Safety systems35
Tyre pressure
35
Brake linings
36
Fuel reserve
36
Lane departure warning (Lane Assist)
36
Turn signal system
36
Trailer turn signal lights
36
Fog lights
36
Speed regulating system / Speed limiter
37
Brake pedal (automatic transmission)
37
Parking brake - Auto Hold function
37
Main beam
37
Automatic transmission
37
Rear seat belt warning light
37
Alternator
37
Coolant
38
Engine oil pressure too low
38
Engine oil level
38
AdBlue ®
39
Lamp failure
39
Diesel particulate filter (diesel engine)
39
Windscreen washer fluid level
40
Headlamp assistant
40
START-STOP system
40
Low temperature displayed
40
Water in the fuel filter (diesel engine)
40
Automatic Distance Control (ACC)
40
Distance warning (Front Assist)
40
Advance warning / emergency braking (Front Assist)
41
Economy mode
41
Adaptive chassis control (DCC) fault
41
Service
41
The warning lights in the instrument cluster indicate certain functions or
faults.
Some warning lights can be accompanied by acoustic signals and messages in
the display of the instrument cluster.
After switching on the ignition, some warning lights light up briefly as a func-
tion test.
If the tested systems are OK, the corresponding warning lights go out a few
seconds after switching on the ignition or after starting the engine.
Warning lights in the display
Depending on the importance the warning light
(danger) or
(warning) illu-
minate along with some of the warning lights in the list with the warning
lights.
Depending on vehicle specification, some warning lights may be displayed in
colour on the display. For example. the coolant warning lamp may be represen-
ted as follows.
▶ - Segment Display / monochromatic (“black and white”) MAXI DOT display
▶ - colour MAXI DOT displayWARNING■
Ignoring illuminated warning lights and related messages or instructions
in the display of the instrument cluster may lead to serious personal injury
or damage to the vehicle.■
If you have to stop for technical reasons, then park the vehicle at a safe
distance from the traffic, switch off the engine and switch on the hazard
warning lights » page 71. Place the warning triangle at the prescribed dis-
tance.
■
The engine compartment of your car is a hazardous area. The following
warning instructions must be followed at all times when working in the en-
gine compartment » page 206, Engine compartment .
Parking brake
Read and observe
on page 32 first.
illuminates - the hand brake light is switched on.
Parking brake error
illumi-
nates
Fault: electric parking brakePARKING BRAKE FAULT
Seek help from a specialist garage.
Parking on a slope that is too steep
illumi-
nates
Parking brake: grad. too steep. Owner's manual!GRADIENT TOO STEEP
32Using the system