headlights SKODA SUPERB 2015 3.G / (B8/3V) Owner's Manual
[x] Cancel search | Manufacturer: SKODA, Model Year: 2015, Model line: SUPERB, Model: SKODA SUPERB 2015 3.G / (B8/3V)Pages: 276, PDF Size: 42.14 MB
Page 32 of 276
Coolant temperature gaugeFig. 24
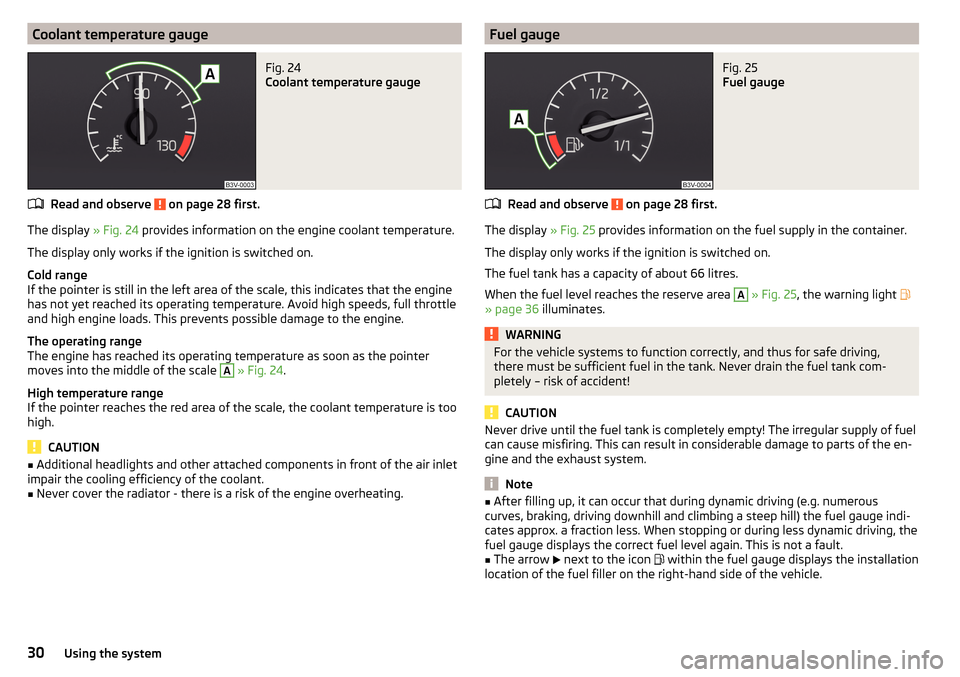
Coolant temperature gauge
Read and observe on page 28 first.
The display » Fig. 24 provides information on the engine coolant temperature.
The display only works if the ignition is switched on.
Cold range
If the pointer is still in the left area of the scale, this indicates that the engine has not yet reached its operating temperature. Avoid high speeds, full throttle
and high engine loads. This prevents possible damage to the engine.
The operating range
The engine has reached its operating temperature as soon as the pointer
moves into the middle of the scale
A
» Fig. 24 .
High temperature range
If the pointer reaches the red area of the scale, the coolant temperature is too
high.
CAUTION
■ Additional headlights and other attached components in front of the air inlet
impair the cooling efficiency of the coolant.■
Never cover the radiator - there is a risk of the engine overheating.
Fuel gaugeFig. 25
Fuel gauge
Read and observe on page 28 first.
The display » Fig. 25 provides information on the fuel supply in the container.
The display only works if the ignition is switched on.
The fuel tank has a capacity of about 66 litres.
When the fuel level reaches the reserve area
A
» Fig. 25 , the warning light
» page 36 illuminates.
WARNINGFor the vehicle systems to function correctly, and thus for safe driving,
there must be sufficient fuel in the tank. Never drain the fuel tank com-
pletely – risk of accident!
CAUTION
Never drive until the fuel tank is completely empty! The irregular supply of fuel
can cause misfiring. This can result in considerable damage to parts of the en-
gine and the exhaust system.
Note
■ After filling up, it can occur that during dynamic driving (e.g. numerous
curves, braking, driving downhill and climbing a steep hill) the fuel gauge indi-
cates approx. a fraction less. When stopping or during less dynamic driving, the
fuel gauge displays the correct fuel level again. This is not a fault.■
The arrow
next to the icon
within the fuel gauge displays the installation
location of the fuel filler on the right-hand side of the vehicle.
30Using the system
Page 69 of 276
Lights and visibility
Lights
Introduction
This chapter contains information on the following subjects:
Operating the lights
67
Daylight running lights (DAY LIGHT)
68
Turn signal and main beam
68
Automatic driving lamp control
69
Xenon headlight
69
Front and rear fog lights
70
Fog lights with the CORNER function
71
COMING HOME / LEAVING HOME
71
Hazard warning light system
71
Parking lights
72
Driving abroad
72
Unless otherwise stated, the lights only work when the ignition is switched on.
The arrangement of the controls right-hand drive models may differ from the
layout shown in » Fig. 54 on page 67 . The symbols which mark the positions
of the controls are identical.
Keep the headlights lenses clean » page 197, Headlight glasses .
WARNINGThe automatic driving lamp control only operates as a support and
does not release the driver from his responsibility to check the lights and, if
necessary, to switch on the light depending on the prevailing light condi-
tions.Note■ The headlights may mist up temporarily. When the driving lights are switched
on, the light outlet surfaces are free from mist after a short period, although
the headlight lenses may still be misted up in the peripheral areas. This mist
has no influence on the life of the lighting system.■
If the visibility is poor and the lights are not on (except daytime running light)
the brightness of the instrument lighting reduces to alert the driver to switch
on the lights in due time.
■
The brightness of the instrument lighting with the lights on (except daytime
running lights) can be set in the Infotainment » Owner´s Manual Infotainment ,
chapter CAR - Vehicle Settings .
Operating the lights
Fig. 54
Light switch and control dial for
the headlight beam range regu-
lation
Read and observe on page 67 first.
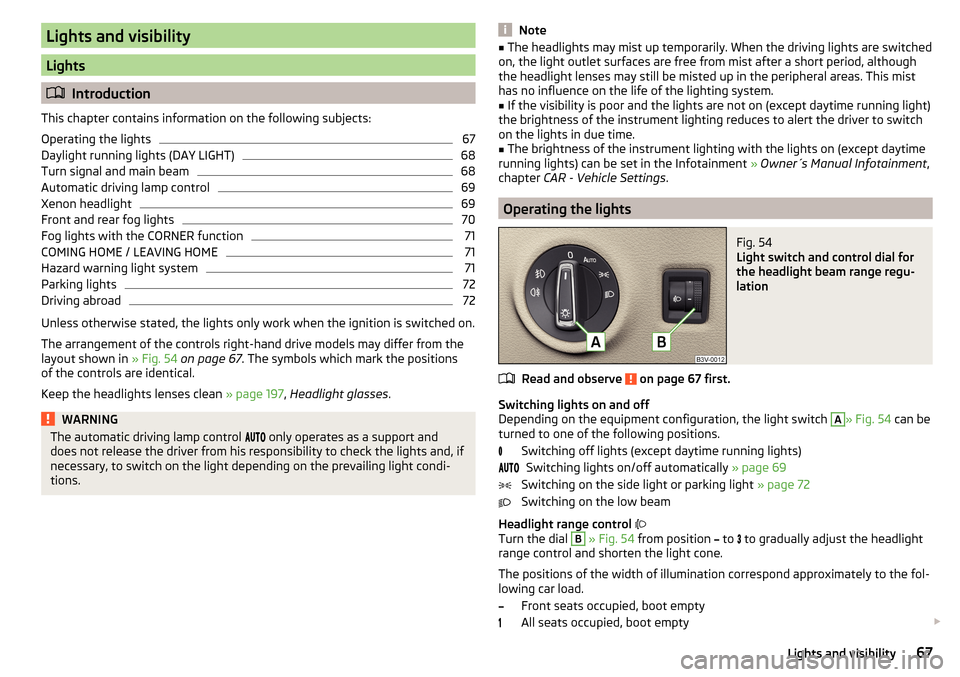
Switching lights on and off
Depending on the equipment configuration, the light switch
A
» Fig. 54 can be
turned to one of the following positions.
Switching off lights (except daytime running lights)Switching lights on/off automatically » page 69
Switching on the side light or parking light » page 72
Switching on the low beam
Headlight range control
Turn the dial
B
» Fig. 54 from position
to
to gradually adjust the headlight
range control and shorten the light cone.
The positions of the width of illumination correspond approximately to the fol-
lowing car load.
Front seats occupied, boot empty
All seats occupied, boot empty
67Lights and visibility
Page 70 of 276
All seats occupied, boot loaded
Driver seat occupied, boot loaded
Xenon headlight
The Xenon bulbs adapt automatically to the load and driving state of the vehi-
cle when the ignition is switched on and when driving. Vehicles that are equip-
ped with Xenon headlights do not have a manual headlight range adjustment
control.WARNINGAlways adjust the headlight range control to meet the following conditions.■The vehicle does not dazzle other road users, especially oncoming vehi-
cles.■
The beam range is sufficient for safe driving.
Note
■ The light switch is in position or and the ignition is turned off, the low
beam is switched off automatically 1)
and the status light is lit. The side light is
switched off when the ignition key is removed, for vehicles with the KESSY
system after switching off the ignition and opening the driver's door.■
If there is a fault in the light switch, the low beam comes on automatically.
Daylight running lights (DAY LIGHT)
Read and observe
on page 67 first.
The daytime running lights light up the area in front of and to the rear of the
vehicle (only applicable for some countries).
The lights are switched on automatically if the following conditions are met. The light switch is in the position
or
.
The ignition is switched on.
WARNINGAlways switch on the low beam when visibility is poor.Turn signal and main beamFig. 55
Operating lever: Turn signal and
main beam operation
Read and observe on page 67 first.
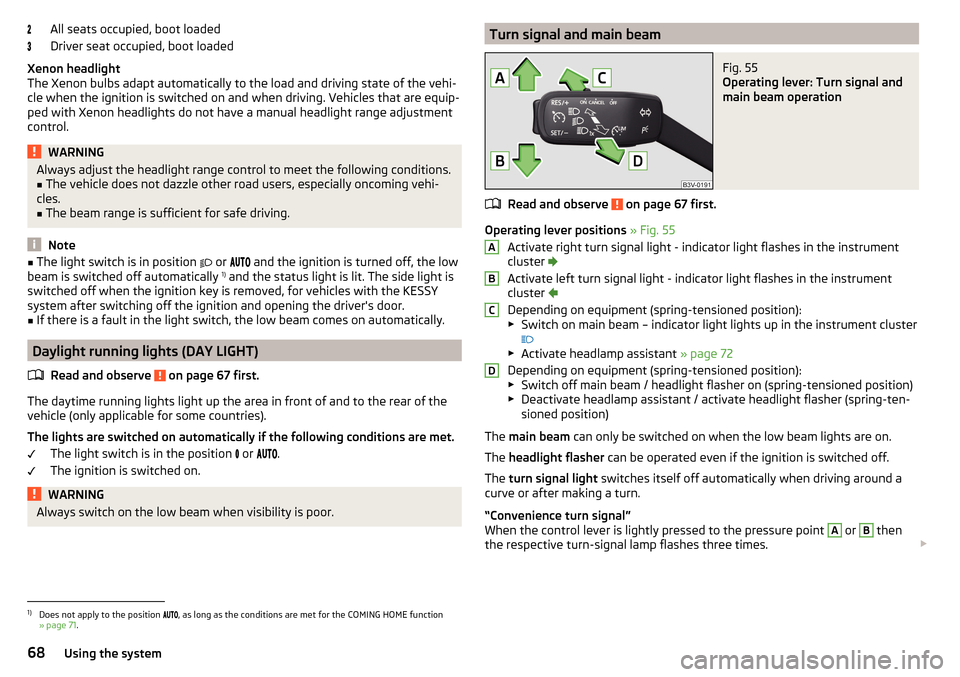
Operating lever positions » Fig. 55
Activate right turn signal light - indicator light flashes in the instrument cluster
Activate left turn signal light - indicator light flashes in the instrument
cluster
Depending on equipment (spring-tensioned position):
▶ Switch on main beam – indicator light lights up in the instrument cluster
▶ Activate headlamp assistant » page 72
Depending on equipment (spring-tensioned position):
▶ Switch off main beam / headlight flasher on (spring-tensioned position)
▶ Deactivate headlamp assistant / activate headlight flasher (spring-ten-
sioned position)
The main beam can only be switched on when the low beam lights are on.
The headlight flasher can be operated even if the ignition is switched off.
The turn signal light switches itself off automatically when driving around a
curve or after making a turn.
“Convenience turn signal”
When the control lever is lightly pressed to the pressure point
A
or
B
then
the respective turn-signal lamp flashes three times.
ABCD1)
Does not apply to the position
, as long as the conditions are met for the COMING HOME function
» page 71 .
68Using the system
Page 72 of 276
Fog mode
The cone of light in front of the vehicle is adjusted so that the driver is not
dazzled by the reflection of the cone of light by fog in front of the vehicle.
The mode is active at speeds of 15 – 70 km/h and if the rear fog light is switch- ed on for a period of time longer than about 10 seconds. The deactivation of
the mode is carried out a few minutes after switching off the rear fog lights.
Dynamic cornering lights
The cone of light in front of the vehicle is adjusted to the steering angle so
that the road in the curve is illuminated. This function is active at speeds
greater than 10 km.h and in all System modes.
travel mode
If the travel mode is activated, there is no automatic cone of light adaptation
in front of the vehicle.
The travel mode can be activated/deactivated in the Infotainment » Owner´s
Manual Infotainment , chapter CAR - vehicle settings .
Economy mode
When the Eco driving mode » page 171 is activated the system is in Economy
mode and there is no direction dependent light cone adaptation in front of the
vehicle.WARNINGIf there is a system malfunction the headlights are automatically lowered
to the emergency position, which prevents a possible dazzling of oncoming
traffic. This reduces the cone of light in front of the vehicle. Drive carefully
and visit a specialist garage as soon as possible.Front and rear fog lightsFig. 57
Light switch – switch on front
and rear fog lights
Read and observe on page 67 first.
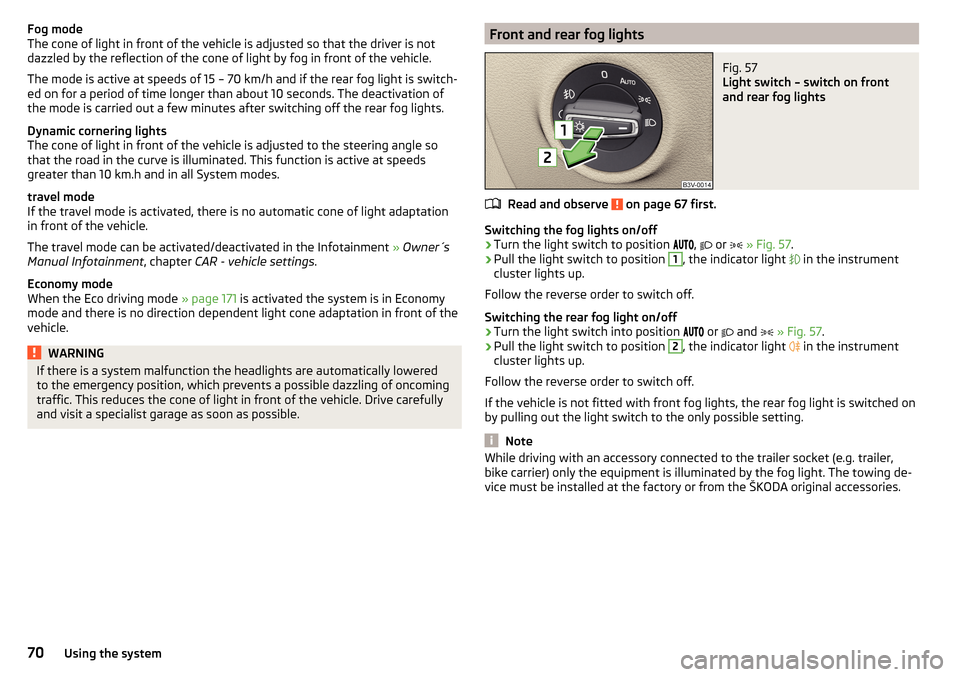
Switching the fog lights on/off
›
Turn the light switch to position ,
or
» Fig. 57 .
›
Pull the light switch to position
1
, the indicator light
in the instrument
cluster lights up.
Follow the reverse order to switch off.
Switching the rear fog light on/off
›
Turn the light switch into position or
and
» Fig. 57 .
›
Pull the light switch to position
2
, the indicator light
in the instrument
cluster lights up.
Follow the reverse order to switch off.
If the vehicle is not fitted with front fog lights, the rear fog light is switched on
by pulling out the light switch to the only possible setting.
Note
While driving with an accessory connected to the trailer socket (e.g. trailer,
bike carrier) only the equipment is illuminated by the fog light. The towing de-
vice must be installed at the factory or from the ŠKODA original accessories.70Using the system
Page 74 of 276

When the hazard warning system is on and the indicator light is switched on
(e.g. when turning), the hazard warning lights are switched off temporarily and
only the turn signal flashes on the relevant side of the vehicle.
Parking lights
Read and observe
on page 67 first.
The side light is provided for lighting of the parked vehicle.
Switching on the side light
on one side
›
Switch off the ignition.
›
Press the control lever to position
A
or
B
as far as the stop » Fig. 55 on
page 68 .
The parking lights on the right or left side of the vehicle are turned on.
Switching on the side light on both sides
›
With the ignition switched on turn the light switch to position .
›
Switch off the ignition.
›
Lock the vehicle.
After pulling out the ignition key and opening the driver's door, an audible
warning sounds.
After a few seconds or after closing the driver's door, the audible alarm is
turned off, but the parking lights will remain switched on.
CAUTION
■ Turning on the parking light means the battery is heavily loaded.■The parking light cannot be turned off automatic due to the low battery
charge level.■
If the two-sided parking lights are switched on when the ignition is off, then
there is no automatic switching off of the parking light.
Driving abroad
Read and observe
on page 67 first.
When driving in countries with opposing traffic system (traffic on the
left/right), your headlights may dazzle oncoming traffic. In order to avoid this,
the headlights must be adjusted at a specialist garage.
You can adjust the Xenon headlights yourself by setting the travel mode in In- fotainment » Owner´s Manual Infotainment , chapter CARVehicle settings .
Headlamp Assistant (Light Assist / Dynamic Light Assist)
Introduction
Fig. 59
Camera view window for the
headlamp assistant
This chapter contains information on the following subjects:
Function
73
Switching on and off
73
Information messages
73
The headlamp assistant (following as system) can prevent the dazzling of oth-
er road users.
The system automatically switches the high beam on / off, if necessary, ad-
justs the beam of the headlights in accordance with the existing traffic (other
vehicles) and environmental conditions (e.g. driving through a lighted village).
The switching on / off of the high beam, if necessary adaptation of the head-
lamp is controlled by a camera » Fig. 59.
Depending on the equipment, the following system versions can exist. ▶
Light Assist
▶
Dynamic Light AssistLight Assist
The system automatically switches the high beam on / off.
Dynamic Light Assist
The system automatically adjusts the light cone shape of the headlights in or-
der to prevent the dazzling oncoming and preceding vehicles, while ensuring
the highest possible illumination of the road edges.
72Using the system
Page 75 of 276
In the following cases, the automatic adjustment of the cone of light of the
headlights is disabled, the system automatically switches only the high beam
on/off.
▶ The driving mode Eco is selected » page 171, Selection of the driving
mode(Driving Mode Selection) .
▶ The driving mode Travel mode is selected » page 70, travel mode .
In the following case the Dynamic Light Assist
is disabled.
▶ The system is in rain or fog mode » page 69, Xenon headlight .
WARNINGThe system only serves as a support and does not relieve the driver of his
or her responsibility to check the headlights and low beam and, if necessa-
ry, to switch on the lights depending on the light conditions. The manual
operation may be required for example, in the following situations.■
When visibility is poor, e.g. fog, heavy rain, or thick snowfall.
■
Passing poorly lit road users, e.g. cyclists or pedestrians.
■
When driving around “sharp” bends.
■
Driving through poorly-lit locations.
■
The camera viewing range is obstructed by an obstacle.
CAUTION
Do not attach any stickers or similar objects to the windscreen to avoid impair-
ing the functions of the systems.
Function
Read and observe
and on page 73 first.
Operating conditions
The system works under the following conditions.
The light switch is in the position
.
The system is activated.
The system is activated » page 73, Switching on and off .
The vehicle speed is over 60 km / h or for some countries more than 40
km / h.
The headlight switches off automatically when the speed falls below 30 km/h.
The system can be activated/deactivated in the Infotainment » Owner´s Man-
ual Infotainment , chapter CAR - vehicle settings .
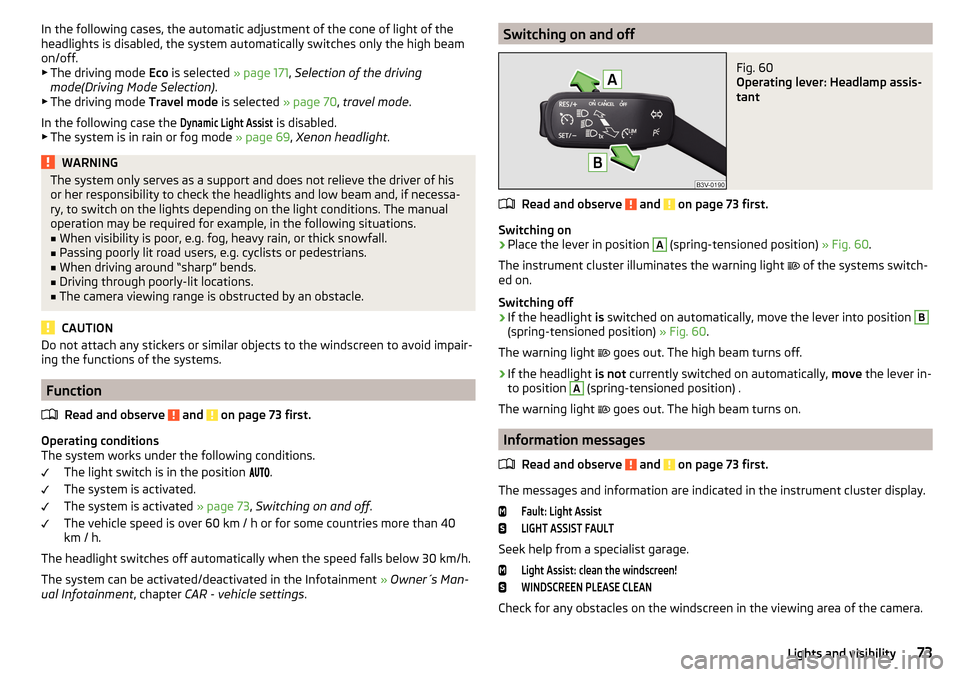
Switching on and offFig. 60
Operating lever: Headlamp assis-
tant
Read and observe and on page 73 first.
Switching on
›
Place the lever in position
A
(spring-tensioned position) » Fig. 60.
The instrument cluster illuminates the warning light of the systems switch-
ed on.
Switching off
›
If the headlight is switched on automatically, move the lever into position
B
(spring-tensioned position) » Fig. 60.
The warning light goes out. The high beam turns off.
›
If the headlight
is not currently switched on automatically, move the lever in-
to position
A
(spring-tensioned position) .
The warning light goes out. The high beam turns on.
Information messages
Read and observe
and on page 73 first.
The messages and information are indicated in the instrument cluster display.
Fault: Light AssistLIGHT ASSIST FAULT
Seek help from a specialist garage.
Light Assist: clean the windscreen!WINDSCREEN PLEASE CLEAN
Check for any obstacles on the windscreen in the viewing area of the camera.
73Lights and visibility
Page 80 of 276

Windscreen wipers and washersFig. 69
Operation of wipers and washers: front / rear
Read and observe
and on page 77 first.
Operating lever positions Wipers off
Depending on specification:
▶ Intermittent windscreen wiping
▶ Automatic windscreen wiping in rain
Slow windscreen wiping
Rapid windscreen wiping
Front screen touch wiping / wiper arms service position (spring-loaded
position)
Spraying and wiping the windscreen (spring-loaded position)
Rear screen wiping
Spraying and wiping the rear window (spring-loaded position)
Depending on specification:
▶ To set the wiper interval for the windscreen
▶ Sensitivity setting of the automatic wiping with rain
By setting the switch in the direction of the arrow wipers sweep more of-
ten.
Spraying and wiping the windscreen
After releasing the operating lever, the wipers will make from 2 to 3 wiper
strokes.
At a speed of more than 2 km/h, the wiper wipes once again 5 seconds after
the last wiper stroke in order to wipe the last drops from the windscreen. This
function can be activated/deactivated by a specialist garage.
01234567ASpraying and wiping the rear window
After releasing the operating lever, the wipers will make from 2 to 3 wiper
strokes.
The operating lever remains in position 6
.
Activating / deactivating of the automatic windscreen wiping with rain
Automatic windscreen wiping in rain can be activated or deactivated in the In-
fotainment » Owner´s Manual Infotainment , chapter CAR - Vehicle settings .
Automatic rear window wiping
If the lever is in position
2
or
3
» Fig. 69 , the rear window is wiped every
30 or 10 seconds if the vehicle's speed exceeds 5 km/h.
If automatic windscreen wiping in rain is activated (the operating lever is in the
position
1
) the function is only active if the windscreen wipers operate in
continuous mode (no break between each wiping process).
The automatic rear wiper can be activated/deactivated in the Infotainment
» Owner´s Manual Infotainment , chapter CAR - vehicle settings .
WARNINGAutomatic wiping during rain is only a support. The driver is not released
from the responsibility to set the function of the windscreen wipers man-
ually depending on the visibility conditions.
Note
■ If the operating lever is in the position 2 or 3 and the speed of the vehicle
drops below 4 km / h, the wiping speed is reduced. The original wiping speed is
restored step by step when the speed of the vehicle exceeds 8 km/h.■
The rear window is wiped once automatically if the windscreen wipers are on
when reverse gear is selected.
Headlight cleaning system
Read and observe
and on page 77 first.
To clean the headlights, the headlamp is also sprayed after every ten squirts.
The headlight washer system works under the following conditions. The ignition is switched on.
The low beam is switched on.
The outside temperature is about -12° C to +39° C.
78Using the system
Page 175 of 276
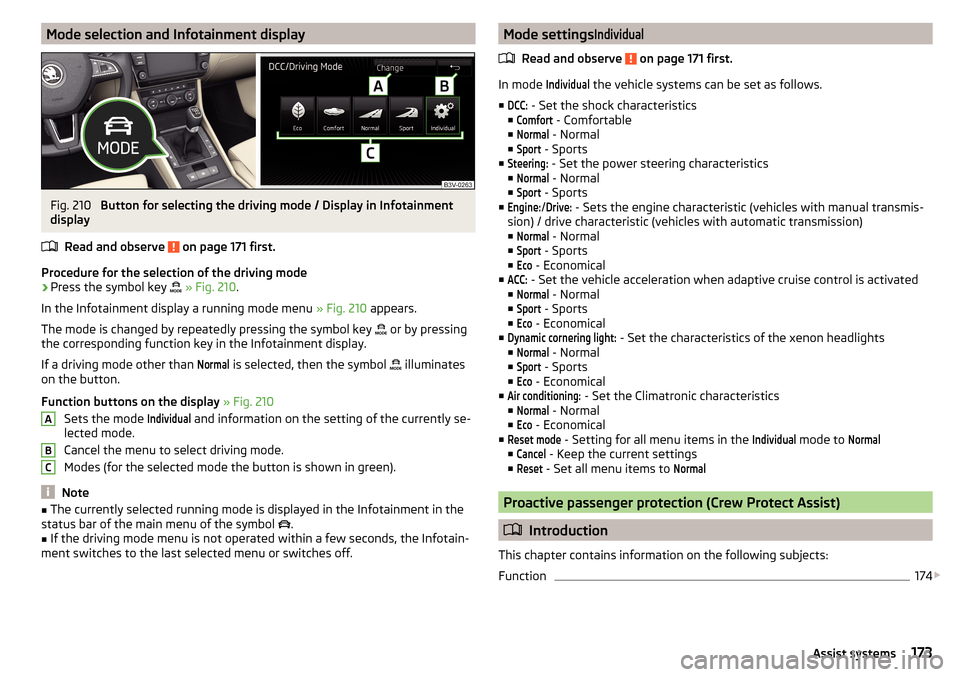
Mode selection and Infotainment displayFig. 210
Button for selecting the driving mode / Display in Infotainment
display
Read and observe
on page 171 first.
Procedure for the selection of the driving mode
›
Press the symbol key
» Fig. 210 .
In the Infotainment display a running mode menu » Fig. 210 appears.
The mode is changed by repeatedly pressing the symbol key or by pressing
the corresponding function key in the Infotainment display.
If a driving mode other than
Normal
is selected, then the symbol illuminates
on the button.
Function buttons on the display » Fig. 210
Sets the mode
Individual
and information on the setting of the currently se-
lected mode.
Cancel the menu to select driving mode.
Modes (for the selected mode the button is shown in green).
Note
■ The currently selected running mode is displayed in the Infotainment in the
status bar of the main menu of the symbol .■
If the driving mode menu is not operated within a few seconds, the Infotain-
ment switches to the last selected menu or switches off.
ABCMode settingsIndividual
Read and observe on page 171 first.
In mode
Individual
the vehicle systems can be set as follows.
■
DCC:
- Set the shock characteristics
■
Comfort
- Comfortable
■
Normal
- Normal
■
Sport
- Sports
■
Steering:
- Set the power steering characteristics
■
Normal
- Normal
■
Sport
- Sports
■
Engine:
/
Drive:
- Sets the engine characteristic (vehicles with manual transmis-
sion) / drive characteristic (vehicles with automatic transmission)
■
Normal
- Normal
■
Sport
- Sports
■
Eco
- Economical
■
ACC:
- Set the vehicle acceleration when adaptive cruise control is activated
■
Normal
- Normal
■
Sport
- Sports
■
Eco
- Economical
■
Dynamic cornering light:
- Set the characteristics of the xenon headlights
■
Normal
- Normal
■
Sport
- Sports
■
Eco
- Economical
■
Air conditioning:
- Set the Climatronic characteristics
■
Normal
- Normal
■
Eco
- Economical
■
Reset mode
- Setting for all menu items in the
Individual
mode to
Normal
■
Cancel
- Keep the current settings
■
Reset
- Set all menu items to
Normal
Proactive passenger protection (Crew Protect Assist)
Introduction
This chapter contains information on the following subjects:
Function
174
173Assist systems
Page 188 of 276

Coupling / uncoupling trainerFig. 222
Housing of the 13 pin socket,
safety eyelet
Connect and disconnect
›
Swing out the tow bar » page 184.
›
Place the trailer onto the ball.
›
Plug the trailer cable into the 13-pin socket
A
» Fig. 222 .
If the trailer that is to be towed has a 7-pin connector, you can use a suitable
adapter from ŠKODA Original Accessories to establish a connection to the elec-
tricity.
›
Hook the breakaway cable of the trailer onto the safety eyelet
B
.
The breakaway cable of the trailer must sag in all trailer positions relative to
the vehicle (sharp curves, reverse driving and the like).
Uncoupling takes place in reverse order.
Exterior mirrors
You should have additional exterior mirrors fitted if you are not able to see the
traffic behind the trailer with the standard rear-view mirrors.
Headlights
The front of the vehicle may lift up when a trailer is being towed and the head-
lights may dazzle other road users.
Adjust the headlights using the headlight beam control » page 67, Operating
the lights 1)
.
Power to the trailer power grid
For the electrical connection between the vehicle and trailer, the power for the
trailer power grid is supplied by the vehicle.
The power supply works with ignition on or off.
With the ignition off, the battery of the towing vehicle is discharged by activa-
ted consumers.
At low charge state of the vehicle battery power to the trailer is interrupted.WARNING■ Improperly connected trailer electrical installations may cause accidents
or serious injury due to electric shock.■
Work on the electrical system must only be carried out by specialist ga-
rages.
■
Never directly connect the trailer's electrical system with the electrical
connections for the tail lights or other current sources.
■
After coupling the trailer and connecting up the power socket, check the
rear lights on the trailer to ensure they are working.
■
Never use the safety eyelet for towing!
CAUTION
Improperly connected trailer electrical installations may cause malfunction of
the entire vehicle electronics.
Note
■ The total power consumption of all the connected consumers on the trailer
must not exceed 350 watts.■
Coat the ball head of the towing device with a suitable grease whenever
necessary.
Loading a trailer
Distribution of the cargo
Distribute the cargo in the trailer in such a way that heavy items are located as
close to the trailer axle as possible. Secure the items from slipping.
The distribution of the weight is very poor if your vehicle is unladen and the
trailer is laden. Maintain a particularly low speed if you cannot avoid driving
with this combination.
Tyre pressure
Correct the tyre inflation pressure on your vehicle for a “full load” » page 217.
1)
Applies to vehicles with xenon headlights.
186Driving
Page 199 of 276
CAUTIONInformation for cleaning windows■Do not clean the inside of the windows with sharp-edged objects or corro-
sive and acidic cleaning agents – there is a risk of damaging the heating ele-
ments or window aerial.■
When drying the windows after washing the vehicle, do not use window
leathers that have been used to polish the bodywork. Residues of preserva-
tives in the window leather can make the window dirty and reduce visibility.
Headlight glasses
Read and observe
and on page 195 first.
Clean plastic front headlight lenses using clean, warm water and soap.
CAUTION
■The headlights are never to be wiped dry - there is a risk of damaging the
protective lacquer and the headlight glass subsequently developing cracks.■
Do not use sharp objects to clean the glasses - there is a risk of damaging
the protective lacquer and the headlight glasses subsequently developing
cracks.
■
Do not use any aggressive cleaning or chemical solvent products to clean the
headlights – risk of damaging the headlight lenses.
Camera lens
Read and observe
and on page 195 first.
Moisten the lens of the rear view camera first with clean water and then dry
with a dry cloth.
Remove the snow from the lens with a brush and the ice from the lens with
de-icing agents specifically developed for these purposes.
CAUTION
■ Remove snow or ice on the lens with warm or hot water - there is a risk of
damaging the lens.■
Never use cleaners containing abrasive effect to clean the lens.
■
Never use pressurized water or steam jet to clean the lens.
Door closing cylinder
Read and observe
and on page 195 first.
Specific products must be used for de-icing door lock cylinders.
CAUTION
Make sure that as little water as possible gets into the locking cylinder when
washing the vehicle - there is a risk of freezing the lock cylinder!
Cavity protection
Read and observe
and on page 195 first.
All the cavities of your vehicle which are at risk from corrosion are protected
for life by a layer of protective wax applied in the factory.
This wax protection does not need to be inspected or re-applied.
If any small amount of wax flow out of the cavities at high temperatures, these
must be removed with a plastic scraper and the stains cleaned using a petrole-
um cleaner.
WARNINGSafety regulations should be observed when using petroleum cleaner to re-
move wax – risk of fire!
Jack
Read and observe
and on page 195 first.
The jack is maintenance-free.
If necessary, the moving parts of the jack should be lubricated with a suitable
lubricant.
Wheels
Read and observe
and on page 195 first.
Wheel rims
Also thoroughly wash the wheel rims when washing the vehicle on a regular
basis.
197Care and maintenance