oil pressure SKODA SUPERB 2015 3.G / (B8/3V) Owner's Manual
[x] Cancel search | Manufacturer: SKODA, Model Year: 2015, Model line: SUPERB, Model: SKODA SUPERB 2015 3.G / (B8/3V)Pages: 276, PDF Size: 42.14 MB
Page 5 of 276
Traffic jam assistant179Assistant for emergencies179
Traffic sign recognition
180
Fatigue detection
182
Tyre pressure monitoring
183
Hitch and trailer
184
Hitch
184
Trailer
185
General Maintenance
Care and maintenance
190
Service work, adjustments and technical
alterations
190
Washing vehicle
193
Cleaning vehicle exterior
194
Interior care
198
Inspecting and replenishing
201
Fuel
201
AdBlue ®
and its refilling
204
Engine compartment
206
Engine oil
209
Coolant
210
Brake fluid
212
Vehicle battery
213
Wheels
217
Tyres and wheel rims
217
Winter operation
220
Do-it-yourself
Emergency equipment and self-help
222
Emergency equipment
222
Changing a wheel
224
Puncture repair kit
228
Jump-starting
230
Towing the vehicle
231
Remote control and removable light
233Emergency unlocking/locking235Replacing windscreen wiper blades237
Fuses and light bulbs
238
Fuses
238
Bulbs
242
Technical data
Technical data
246
Basic vehicle data
246
Vehicle-specific information depending on
engine type
252
Index
3Table of Contents
Page 10 of 276
Safety
Passive Safety
General information
Introduction
This chapter contains information on the following subjects:
Before setting off
8
Driving safety
8
In this section of the instructions you will find important information, tips and
notes on the subject of passive safety.
We have combined everything here which you should be familiar with, for ex-
ample, regarding seat belts, airbags, safety of children and anything similar.
You can find further information on safety concerning you and those travelling
with you in the following chapters of this Owner's Manual.
The complete on-board literature should therefore always be in the vehicle.
This applies in particular, if you rent out or sell the vehicle.
Before setting off
For your own safety and the safety of the people travelling with you, please
pay attention to the following points before setting off.
▶ Ensure that the lighting and the turn signal system are functioning properly.
▶ Ensure that the function of the wipers and the condition of the wiper blades
are free of any defects.
▶ Ensure that all of the windows offer good visibility to the outside.
▶ Adjust the rear-view mirror so that vision to the rear is guaranteed.
▶ Ensure that the mirrors are not covered.
▶ Check the tyre inflation pressure.
▶ Check the engine oil, brake fluid and coolant level.
▶ Secure all items of luggage.
▶ Do not exceed the permissible axle loads and permissible gross weight of the
vehicle.
▶ Close all doors as well as the bonnet and boot lid.
▶ Ensure that no objects can obstruct the pedals.
▶
Protect children in suitable child seats with correctly fastened seat belts
» page 20 , Transporting children safely .
▶ Adopt the correct seated position » page 8, Correct and safe seated posi-
tion . Tell your passengers to assume the correct seated position.
Driving safety
The driver is fully responsible for himself and passengers, especially children. If
your driving safety is effected, you place yourself and the oncoming traffic at
risk.
The following guidelines must therefore be observed. ▶ Do not become distracted from concentrating on the traffic situation, (e.g. by
your passengers or mobile phone calls).
▶ Never drive when your driving ability is impaired, (e.g. due to medication, al-
cohol or drugs).
▶ Keep to the traffic regulations and the permissible speed limit.
▶ Always adjust the driving speed to the road, traffic and weather conditions.
▶ Take regular breaks on long journeys (at least every two hours).
The following list contains instructions for the Passenger which, if not ob-
served, may cause serious injuries or death. ▶ Do not lean against the dash panel.
▶ Do not put your feet on the dash panel.
The following list contains instructions for all Passengers which, if not ob-
served, may cause serious injuries or death. ▶ Do not sit only on the front part of the seat.
▶ Do not sit facing to the side.
▶ Do not lean out of the window.
▶ Do not put your limbs out of the window.
▶ Do not put your feet on the seat cushion.
Correct and safe seated position
Introduction
This chapter contains information on the following subjects:
Correct seat position of the driver
9
Adjusting the steering wheel position
9
Correct seated position for the front passenger
10
Correct seated position for the passengers in the rear seats
10
8Safety
Page 34 of 276
Engine electronics check (petrol engine)35 Safety systems35
Tyre pressure
35
Brake linings
36
Fuel reserve
36
Lane departure warning (Lane Assist)
36
Turn signal system
36
Trailer turn signal lights
36
Fog lights
36
Speed regulating system / Speed limiter
37
Brake pedal (automatic transmission)
37
Parking brake - Auto Hold function
37
Main beam
37
Automatic transmission
37
Rear seat belt warning light
37
Alternator
37
Coolant
38
Engine oil pressure too low
38
Engine oil level
38
AdBlue ®
39
Lamp failure
39
Diesel particulate filter (diesel engine)
39
Windscreen washer fluid level
40
Headlamp assistant
40
START-STOP system
40
Low temperature displayed
40
Water in the fuel filter (diesel engine)
40
Automatic Distance Control (ACC)
40
Distance warning (Front Assist)
40
Advance warning / emergency braking (Front Assist)
41
Economy mode
41
Adaptive chassis control (DCC) fault
41
Service
41
The warning lights in the instrument cluster indicate certain functions or
faults.
Some warning lights can be accompanied by acoustic signals and messages in
the display of the instrument cluster.
After switching on the ignition, some warning lights light up briefly as a func-
tion test.
If the tested systems are OK, the corresponding warning lights go out a few
seconds after switching on the ignition or after starting the engine.
Warning lights in the display
Depending on the importance the warning light
(danger) or
(warning) illu-
minate along with some of the warning lights in the list with the warning
lights.
Depending on vehicle specification, some warning lights may be displayed in
colour on the display. For example. the coolant warning lamp may be represen-
ted as follows.
▶ - Segment Display / monochromatic (“black and white”) MAXI DOT display
▶ - colour MAXI DOT displayWARNING■
Ignoring illuminated warning lights and related messages or instructions
in the display of the instrument cluster may lead to serious personal injury
or damage to the vehicle.■
If you have to stop for technical reasons, then park the vehicle at a safe
distance from the traffic, switch off the engine and switch on the hazard
warning lights » page 71. Place the warning triangle at the prescribed dis-
tance.
■
The engine compartment of your car is a hazardous area. The following
warning instructions must be followed at all times when working in the en-
gine compartment » page 206, Engine compartment .
Parking brake
Read and observe
on page 32 first.
illuminates - the hand brake light is switched on.
Parking brake error
illumi-
nates
Fault: electric parking brakePARKING BRAKE FAULT
Seek help from a specialist garage.
Parking on a slope that is too steep
illumi-
nates
Parking brake: grad. too steep. Owner's manual!GRADIENT TOO STEEP
32Using the system
Page 40 of 276
CoolantRead and observe
on page 32 first.
Coolant level too low
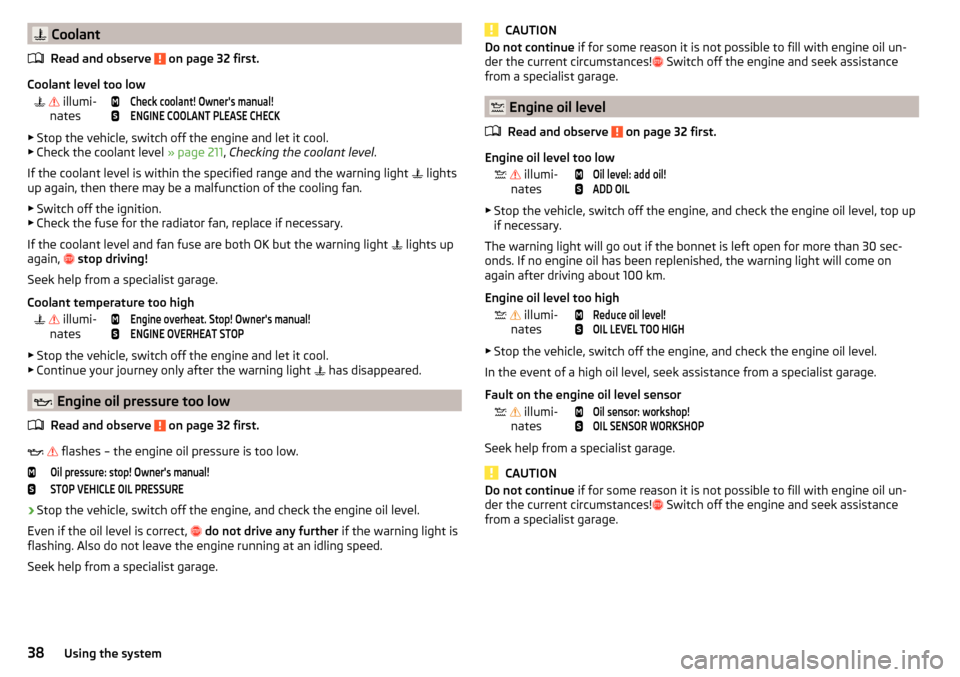
illumi-
nates
Check coolant! Owner's manual!ENGINE COOLANT PLEASE CHECK
▶ Stop the vehicle, switch off the engine and let it cool.
▶ Check the coolant level » page 211, Checking the coolant level .
If the coolant level is within the specified range and the warning light
lights
up again, then there may be a malfunction of the cooling fan.
▶ Switch off the ignition.
▶ Check the fuse for the radiator fan, replace if necessary.
If the coolant level and fan fuse are both OK but the warning light lights up
again,
stop driving!
Seek help from a specialist garage.
Coolant temperature too high
illumi-
nates
Engine overheat. Stop! Owner's manual!ENGINE OVERHEAT STOP
▶ Stop the vehicle, switch off the engine and let it cool.
▶ Continue your journey only after the warning light has disappeared.
Engine oil pressure too low
Read and observe
on page 32 first.
flashes – the engine oil pressure is too low.
Oil pressure: stop! Owner's manual!STOP VEHICLE OIL PRESSURE›
Stop the vehicle, switch off the engine, and check the engine oil level.
Even if the oil level is correct,
do not drive any further if the warning light is
flashing. Also do not leave the engine running at an idling speed.
Seek help from a specialist garage.
CAUTIONDo not continue if for some reason it is not possible to fill with engine oil un-
der the current circumstances! Switch off the engine and seek assistance
from a specialist garage.
Engine oil level
Read and observe
on page 32 first.
Engine oil level too low
illumi-
nates
Oil level: add oil!ADD OIL
▶ Stop the vehicle, switch off the engine, and check the engine oil level, top up
if necessary.
The warning light will go out if the bonnet is left open for more than 30 sec-
onds. If no engine oil has been replenished, the warning light will come on
again after driving about 100 km.
Engine oil level too high
illumi-
nates
Reduce oil level!OIL LEVEL TOO HIGH
▶ Stop the vehicle, switch off the engine, and check the engine oil level.
In the event of a high oil level, seek assistance from a specialist garage.
Fault on the engine oil level sensor
illumi-
nates
Oil sensor: workshop!OIL SENSOR WORKSHOP
Seek help from a specialist garage.
CAUTION
Do not continue if for some reason it is not possible to fill with engine oil un-
der the current circumstances! Switch off the engine and seek assistance
from a specialist garage.38Using the system
Page 196 of 276
Clean wheels, door sills and similar parts last. Use a second sponge for such
areas.
Give the vehicle a good rinse after washing it and dry it off using a chamois
leather.WARNINGProtect your hands and arms from sharp-edged metal parts when cleaning
the under floor or the inside of the wheel housings or the wheel trims – risk
of cuts!
CAUTION
■ Only apply slight pressure when cleaning the vehicle's paintwork.■Do not wash your vehicle in bright sunlight – risk of paint damage.
Automatic car wash systems
Read and observe
and on page 193 first.
The usual precautionary measures must be taken before washing the vehicle
in an automatic car wash system (e.g. closing the windows and the sliding/tilt-
ing roof etc.).
If your vehicle is fitted with any particular attached parts, such as a spoiler,
roof rack system, two-way radio aerial etc., it is best to consult the operator of
the car wash system beforehand.
After an automatic wash with wax treatment, the lips of the wipers should be
cleaned with cleaning agents specially designed for the purpose, and then de-
greased.
CAUTION
Before driving through a car wash fold in the exterior mirrors - there is a risk of
damage.
Washing with a high-pressure cleaner
Read and observe
and on page 193 first.
When washing the vehicle with a high-pressure cleaner, the instructions for
use of the equipment must be observed. This applies in particular to the pres-
sure used and to the spraying distance .
Maintain a sufficiently large distance to the parking aid sensors and soft mate-
rials such as rubber hoses or insulation material.
CAUTION
■ The films should not be washed with any high-pressure cleaners - risk of
damage » page 195 .■
Do not aim the water jet directly at the lock cylinders or the door or opening
joints when washing the vehicle in the winter – there is a risk of freezing.
■
The sensors of the parking aid can be sprayed only for a short time and there
must be a minimum distance of 10 cm - there is a risk of damage.
■
When washing the vehicle, do not point the water jet directly at the tow bar
or the trailer socket - there is a risk of seal damage or washing out the grease.
Cleaning vehicle exterior
Introduction
This chapter contains information on the following subjects:
Vehicle paint work
195
Films
195
Plastic parts
196
Rubber seals
196
Chrome and anodized parts
196
Windows and external mirrors
196
Headlight glasses
197
Camera lens
197
Door closing cylinder
197
Cavity protection
197
Jack
197
Wheels
197
Under-body protection
198
Wiper blades
198
We recommend using vehicle care products from ŠKODA Original Accessories.
These are available from ŠKODA Partners. The usage instructions on the pack-
age must be observed.
194General Maintenance
Page 221 of 276
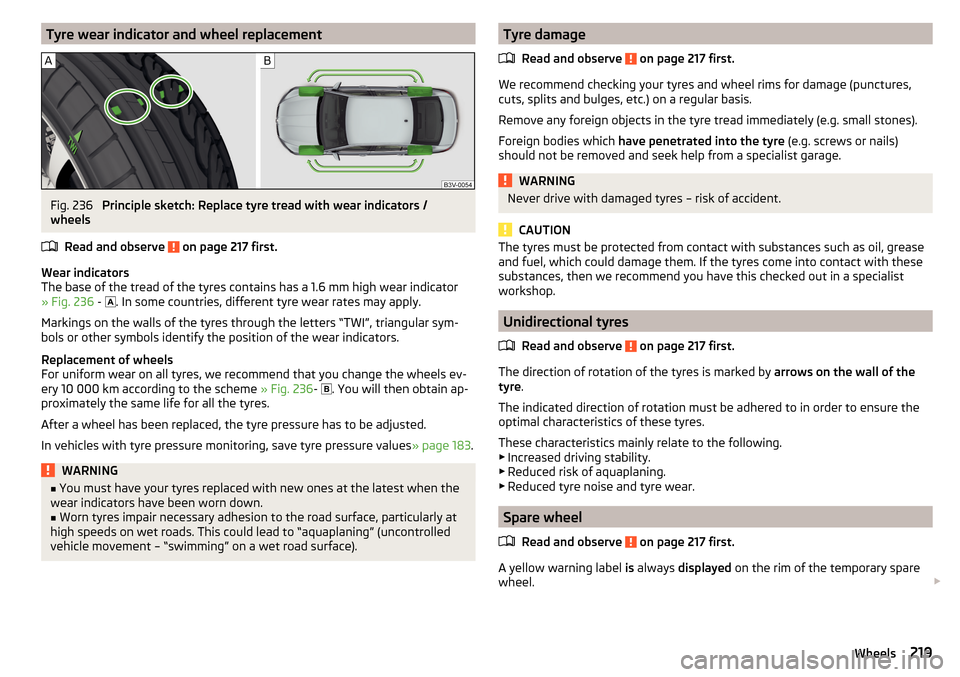
Tyre wear indicator and wheel replacementFig. 236
Principle sketch: Replace tyre tread with wear indicators /
wheels
Read and observe
on page 217 first.
Wear indicators
The base of the tread of the tyres contains has a 1.6 mm high wear indicator
» Fig. 236 -
. In some countries, different tyre wear rates may apply.
Markings on the walls of the tyres through the letters “TWI”, triangular sym-
bols or other symbols identify the position of the wear indicators.
Replacement of wheels
For uniform wear on all tyres, we recommend that you change the wheels ev-
ery 10 000 km according to the scheme » Fig. 236-
. You will then obtain ap-
proximately the same life for all the tyres.
After a wheel has been replaced, the tyre pressure has to be adjusted.
In vehicles with tyre pressure monitoring, save tyre pressure values » page 183.
WARNING■
You must have your tyres replaced with new ones at the latest when the
wear indicators have been worn down.■
Worn tyres impair necessary adhesion to the road surface, particularly at
high speeds on wet roads. This could lead to “aquaplaning” (uncontrolled vehicle movement – “swimming” on a wet road surface).
Tyre damage
Read and observe
on page 217 first.
We recommend checking your tyres and wheel rims for damage (punctures,
cuts, splits and bulges, etc.) on a regular basis.
Remove any foreign objects in the tyre tread immediately (e.g. small stones).
Foreign bodies which have penetrated into the tyre (e.g. screws or nails)
should not be removed and seek help from a specialist garage.
WARNINGNever drive with damaged tyres – risk of accident.
CAUTION
The tyres must be protected from contact with substances such as oil, grease
and fuel, which could damage them. If the tyres come into contact with these
substances, then we recommend you have this checked out in a specialist
workshop.
Unidirectional tyres
Read and observe
on page 217 first.
The direction of rotation of the tyres is marked by arrows on the wall of the
tyre .
The indicated direction of rotation must be adhered to in order to ensure the
optimal characteristics of these tyres.
These characteristics mainly relate to the following. ▶ Increased driving stability.
▶ Reduced risk of aquaplaning.
▶ Reduced tyre noise and tyre wear.
Spare wheel
Read and observe
on page 217 first.
A yellow warning label is always displayed on the rim of the temporary spare
wheel.
219Wheels
Page 229 of 276
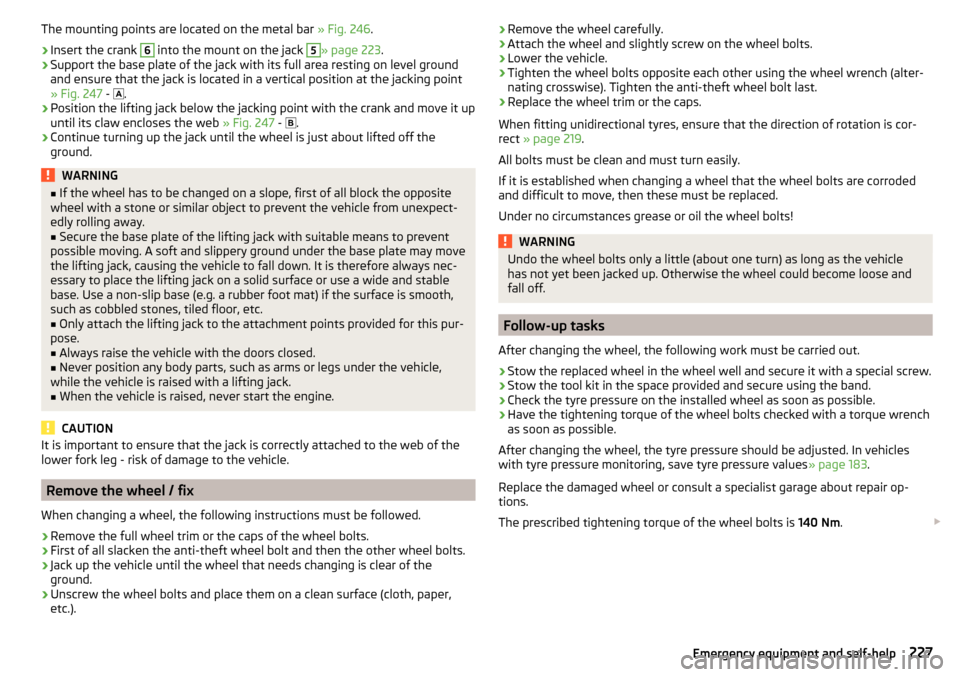
The mounting points are located on the metal bar » Fig. 246.›
Insert the crank
6
into the mount on the jack
5
» page 223 .
›
Support the base plate of the jack with its full area resting on level ground
and ensure that the jack is located in a vertical position at the jacking point
» Fig. 247 -
.
›
Position the lifting jack below the jacking point with the crank and move it up
until its claw encloses the web » Fig. 247 -
.
›
Continue turning up the jack until the wheel is just about lifted off the
ground.
WARNING■ If the wheel has to be changed on a slope, first of all block the opposite
wheel with a stone or similar object to prevent the vehicle from unexpect-
edly rolling away.■
Secure the base plate of the lifting jack with suitable means to prevent
possible moving. A soft and slippery ground under the base plate may move
the lifting jack, causing the vehicle to fall down. It is therefore always nec-
essary to place the lifting jack on a solid surface or use a wide and stable
base. Use a non-slip base (e.g. a rubber foot mat) if the surface is smooth,
such as cobbled stones, tiled floor, etc.
■
Only attach the lifting jack to the attachment points provided for this pur-
pose.
■
Always raise the vehicle with the doors closed.
■
Never position any body parts, such as arms or legs under the vehicle,
while the vehicle is raised with a lifting jack.
■
When the vehicle is raised, never start the engine.
CAUTION
It is important to ensure that the jack is correctly attached to the web of the
lower fork leg - risk of damage to the vehicle.
Remove the wheel / fix
When changing a wheel, the following instructions must be followed.
›
Remove the full wheel trim or the caps of the wheel bolts.
›
First of all slacken the anti-theft wheel bolt and then the other wheel bolts.
›
Jack up the vehicle until the wheel that needs changing is clear of the
ground.
›
Unscrew the wheel bolts and place them on a clean surface (cloth, paper,
etc.).
› Remove the wheel carefully.›Attach the wheel and slightly screw on the wheel bolts.›
Lower the vehicle.
›
Tighten the wheel bolts opposite each other using the wheel wrench (alter-
nating crosswise). Tighten the anti-theft wheel bolt last.
›
Replace the wheel trim or the caps.
When fitting unidirectional tyres, ensure that the direction of rotation is cor-
rect » page 219 .
All bolts must be clean and must turn easily.
If it is established when changing a wheel that the wheel bolts are corroded and difficult to move, then these must be replaced.
Under no circumstances grease or oil the wheel bolts!
WARNINGUndo the wheel bolts only a little (about one turn) as long as the vehicle
has not yet been jacked up. Otherwise the wheel could become loose and
fall off.
Follow-up tasks
After changing the wheel, the following work must be carried out.
›
Stow the replaced wheel in the wheel well and secure it with a special screw.
›
Stow the tool kit in the space provided and secure using the band.
›
Check the tyre pressure on the installed wheel as soon as possible.
›
Have the tightening torque of the wheel bolts checked with a torque wrench
as soon as possible.
After changing the wheel, the tyre pressure should be adjusted. In vehicles
with tyre pressure monitoring, save tyre pressure values » page 183.
Replace the damaged wheel or consult a specialist garage about repair op-
tions.
The prescribed tightening torque of the wheel bolts is 140 Nm.
227Emergency equipment and self-help
Page 243 of 276
No.Consumer42Boot lid, headlight washers, windscreen washer system43Visor for gas discharge bulbs, interior lighting44Towing hitch - contact in the socket45Operating the seat adjustment46230-Volt power socket47Rear window wiper48Blind spot detection49Coil on starter relay, clutch pedal switch50Opening the boot lid51Heating of the rear seats52Cooling of the front seats53Relay for rear window heater
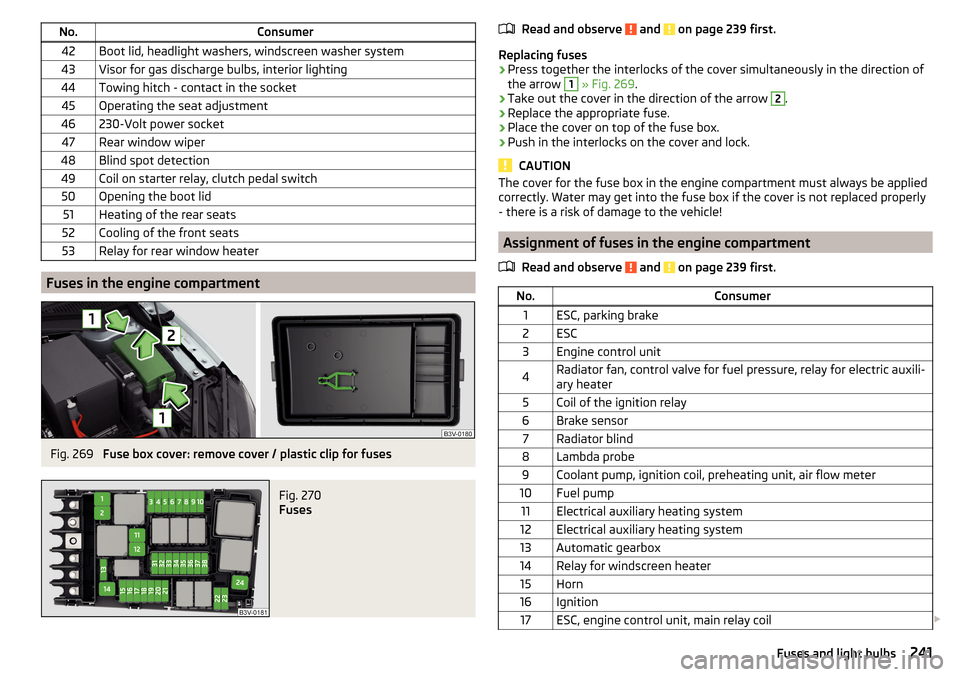
Fuses in the engine compartment
Fig. 269
Fuse box cover: remove cover / plastic clip for fuses
Fig. 270
Fuses
Read and observe and on page 239 first.
Replacing fuses
›
Press together the interlocks of the cover simultaneously in the direction of
the arrow
1
» Fig. 269 .
›
Take out the cover in the direction of the arrow
2
.
›
Replace the appropriate fuse.
›
Place the cover on top of the fuse box.
›
Push in the interlocks on the cover and lock.
CAUTION
The cover for the fuse box in the engine compartment must always be applied
correctly. Water may get into the fuse box if the cover is not replaced properly
- there is a risk of damage to the vehicle!
Assignment of fuses in the engine compartment
Read and observe
and on page 239 first.
No.Consumer1ESC, parking brake2ESC3Engine control unit4Radiator fan, control valve for fuel pressure, relay for electric auxili-
ary heater5Coil of the ignition relay6Brake sensor7Radiator blind8Lambda probe9Coolant pump, ignition coil, preheating unit, air flow meter10Fuel pump11Electrical auxiliary heating system12Electrical auxiliary heating system13Automatic gearbox14Relay for windscreen heater15Horn16Ignition17ESC, engine control unit, main relay coil 241Fuses and light bulbs
Page 264 of 276
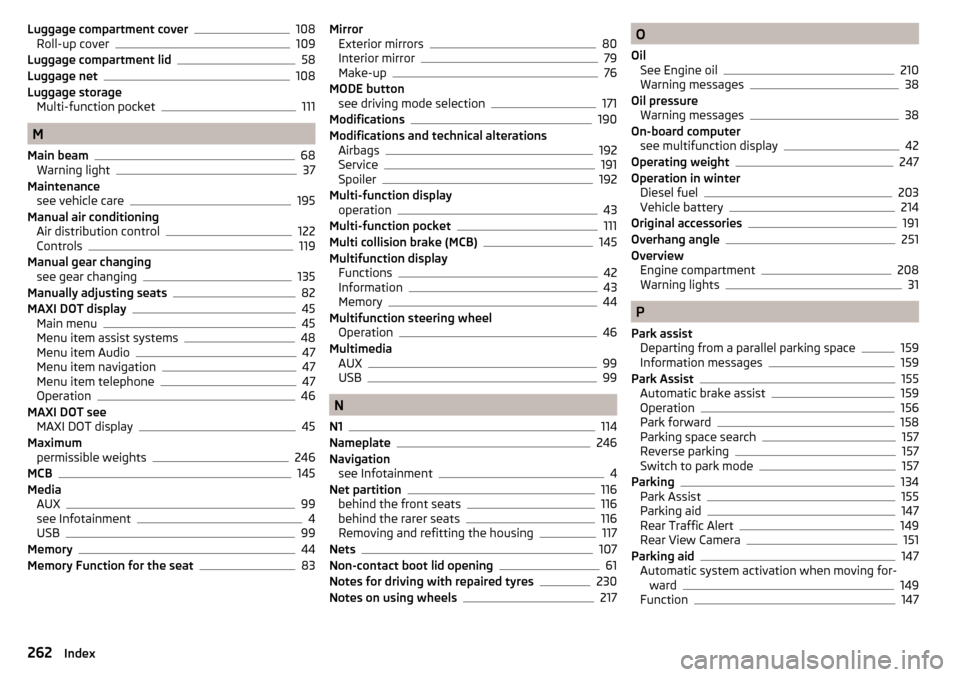
Luggage compartment cover108
Roll-up cover109
Luggage compartment lid58
Luggage net108
Luggage storage Multi-function pocket
111
M
Main beam
68
Warning light37
Maintenance see vehicle care
195
Manual air conditioning Air distribution control
122
Controls119
Manual gear changing see gear changing
135
Manually adjusting seats82
MAXI DOT display45
Main menu45
Menu item assist systems48
Menu item Audio47
Menu item navigation47
Menu item telephone47
Operation46
MAXI DOT see MAXI DOT display
45
Maximum permissible weights
246
MCB145
Media AUX
99
see Infotainment4
USB99
Memory44
Memory Function for the seat83
Mirror Exterior mirrors80
Interior mirror79
Make-up76
MODE button see driving mode selection
171
Modifications190
Modifications and technical alterations Airbags
192
Service191
Spoiler192
Multi-function display operation
43
Multi-function pocket111
Multi collision brake (MCB)145
Multifunction display Functions
42
Information43
Memory44
Multifunction steering wheel Operation
46
Multimedia AUX
99
USB99
N
N1
114
Nameplate246
Navigation see Infotainment
4
Net partition116
behind the front seats116
behind the rarer seats116
Removing and refitting the housing117
Nets107
Non-contact boot lid opening61
Notes for driving with repaired tyres230
Notes on using wheels217
O
Oil See Engine oil
210
Warning messages38
Oil pressure Warning messages
38
On-board computer see multifunction display
42
Operating weight247
Operation in winter Diesel fuel
203
Vehicle battery214
Original accessories191
Overhang angle251
Overview Engine compartment
208
Warning lights31
P
Park assist Departing from a parallel parking space
159
Information messages159
Park Assist155
Automatic brake assist159
Operation156
Park forward158
Parking space search157
Reverse parking157
Switch to park mode157
Parking134
Park Assist155
Parking aid147
Rear Traffic Alert149
Rear View Camera151
Parking aid147
Automatic system activation when moving for- ward
149
Function147
262Index
Page 267 of 276
Spare wheel219
Removal224
Stowage224
Speed limiter Operation
162
Operation description163
Warning light37
Speed Limiter162
Speed regulating system Warning light
37
Speed symbol see Wheels
220
Spoiler192
Stabilisation system143
Stability Control (ESC)144
Staring engine Jump-starting
230
START-STOP130
Jump-starting230
Manually deactivating/activating the system132
operation131
Warning light40
START-STOP system130
Starter button Problems starting the engine
130
Starting the engine129
Steering column lock locking128
Steering column lock unlocking128
Switching off the engine129
Switch off the ignition129
Switch on the ignition129
Starting and stopping the engine at the push of the button
128
Starting and stopping the engine using the key 126
Starting engine Jump-starting
230
Starting the engine Starter button
129
START STOP Information messages
132
Start the engineKey127
Steering column lock locking Starter button
128
Steering column lock unlocking Starter button
128
Steering lock locking Key
127
Steering lock unlocking Key
127
Steering lock (KESSY system) Warning light
33
Steering wheel correct posture
9
setting9
Stop see Parking
134
Stopping the engine Key
127
Storage90
Storage compartment Glasses compartment
95
in the front centre console92
in the rear centre console98
on the driver's side91
on the front passenger side95
under the front arm rest94
Storage compartments90
Storage compartment under passenger seat96
Storing seats
83
Storing skis86
Stowage compartments in the doors
91
Sunblind Operation
66
Sun screen76
Sun screen in the rear doors77
sun visors76
Switch Lamp batteries235
Switching lights on and off67
Switching off the engine Starter button
129
Switch off TCS Warning light
34
Switch off the ignition Key
127
Starter button129
Switch on the ignition Key
127
Starter button129
Synchronous adjustment of the rear-view mir- ror
80
T
Tablet holder behind the head restraint
104
Handling104
in the rear armrest105
Taking care of your vehicle Automatic car wash system
194
High-pressure cleaner194
Washing by hand193
Wash system194
TCS Operation
144
Warning light34
Technical data246
Telephone see Infotainment
4
Through-loading bag98
Time31
Tiptronic137
Tools223
TOP TETHER25
Towing231
Towing a trailer188
265Index