display SKODA SUPERB 2016 3.G / (B8/3V) Owner's Manual
[x] Cancel search | Manufacturer: SKODA, Model Year: 2016, Model line: SUPERB, Model: SKODA SUPERB 2016 3.G / (B8/3V)Pages: 336, PDF Size: 53.89 MB
Page 261 of 336
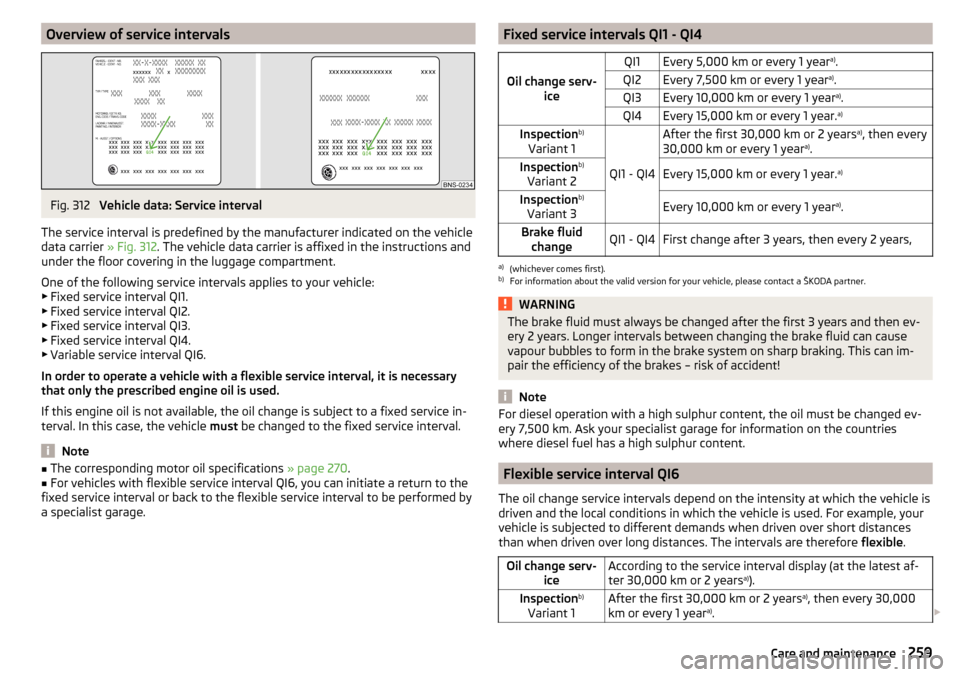
Overview of service intervalsFig. 312
Vehicle data: Service interval
The service interval is predefined by the manufacturer indicated on the vehicle
data carrier » Fig. 312. The vehicle data carrier is affixed in the instructions and
under the floor covering in the luggage compartment.
One of the following service intervals applies to your vehicle:
▶ Fixed service interval QI1.
▶ Fixed service interval QI2.
▶ Fixed service interval QI3.
▶ Fixed service interval QI4.
▶ Variable service interval QI6.
In order to operate a vehicle with a flexible service interval, it is necessary
that only the prescribed engine oil is used.
If this engine oil is not available, the oil change is subject to a fixed service in-
terval. In this case, the vehicle must be changed to the fixed service interval.
Note
■
The corresponding motor oil specifications » page 270.■For vehicles with flexible service interval QI6, you can initiate a return to the
fixed service interval or back to the flexible service interval to be performed by
a specialist garage.Fixed service intervals QI1 - QI4
Oil change serv- ice
QI1Every 5,000 km or every 1 year a)
.QI2Every 7,500 km or every 1 year a)
.QI3Every 10,000 km or every 1 year a)
.QI4Every 15,000 km or every 1 year. a)Inspectionb)
Variant 1
QI1 - QI4
After the first 30,000 km or 2 years a)
, then every
30,000 km or every 1 year a)
.Inspection b)
Variant 2Every 15,000 km or every 1 year. a)Inspectionb)
Variant 3Every 10,000 km or every 1 year a)
.Brake fluid
changeQI1 - QI4First change after 3 years, then every 2 years,a)
(whichever comes first).
b)
For information about the valid version for your vehicle, please contact a ŠKODA partner.
WARNINGThe brake fluid must always be changed after the first 3 years and then ev-
ery 2 years. Longer intervals between changing the brake fluid can cause
vapour bubbles to form in the brake system on sharp braking. This can im-
pair the efficiency of the brakes – risk of accident!
Note
For diesel operation with a high sulphur content, the oil must be changed ev-
ery 7,500 km. Ask your specialist garage for information on the countries
where diesel fuel has a high sulphur content.
Flexible service interval QI6
The oil change service intervals depend on the intensity at which the vehicle is
driven and the local conditions in which the vehicle is used. For example, your
vehicle is subjected to different demands when driven over short distances
than when driven over long distances. The intervals are therefore flexible.
Oil change serv-
iceAccording to the service interval display (at the latest af-
ter 30,000 km or 2 years a)
).Inspection b)
Variant 1After the first 30,000 km or 2 years a)
, then every 30,000
km or every 1 year a)
. 259Care and maintenance
Page 270 of 336
We recommend when refilling using refill bottles that you use refill bottles
from ŠKODA Original Accessories.
When adding AdBlue ®
take note of the minimum and maximum AdBlue ®
tank
capacity shown in the display of the instrument cluster » page 40.
Refill AdBlue ®
under the following conditions.
The vehicle is on a horizontal surface.
The ignition is switched off.
Refilling›
Press the fuel filler flap in direction of arrow
1
and fold in the direction of
arrow
2
» Fig. 317 .
›
Unscrew the tank cap in the direction of arrow
3
.
›
Remove the tank cap and place in the recess on top of the fuel filler flap in
the direction of arrow
4
.
›
Refill AdBlue ®
in the neck
A
by means of a refill or a fuel nozzle refill (follow
the instructions on the container or the instructions of the petrol station op-
erator).
The AdBlue ®
- tank is full when no AdBlue ®
flows from the refill bottle or as
soon as the correctly operated pump cuts out for the first time. Do not contin-
ue refilling AdBlue ®
.
›
After refilling AdBlue ®
put the cap on the fuel filler neck and turn in the oppo-
site direction of the arrow
3
until it engages.
›
Close the fuel filler flap until it clicks into place.
Before continuing your journey , switch on just the ignition for 30 s so that the
refilling can be recognized by the system. Only then start the engine.
Engine compartment
Introduction
This chapter contains information on the following subjects:
Open the bonnet and close
269
Engine compartment overview
269
Windscreen washer fluid
270WARNINGNever cover the engine with additional insulation material (e.g. with a cov-
er) – risk of fire!WARNINGWhen working in the engine compartment, the following instructions must
be observed - risk of injury or fire. The engine compartment of your car is a
hazardous area!WARNINGInstructions before beginning work in the engine compartment■Stop the engine and remove the ignition key, on vehicles with the KESSY
system, open the driver's door.■
Switch on the parking brake.
■
For vehicles with manual transmission the lever into the neutral position.
On vehicles with automatic transmission , place the selector lever in the P
position.
■
Allow the engine to cool.
■
Never open the bonnet if you can see steam or coolant flowing out of the
engine compartment – risk of scalding! Wait until the steam or coolant has
stopped escaping.
WARNINGInformation for working in the engine room■Keep everyone away from the engine compartment.■
Do not touch any hot engine parts – risk of burns!
■
Never touch the radiator fan. The radiator fan suddenly switch on approx.
10 minutes after switching off the ignition!
■
Do not smoke or use open flames in the vicinity of the engine.
■
Do not leave any items (e.g. cloths or tools) in the engine compartment.
This presents a fire hazard and the risk of engine damage.
■
Read and observe the information and warning instructions on the fluid
containers.
WARNINGInformation for working in the engine compartment with the engine run-
ning■
If it is necessary to work on the engine compartment with the engine run-
ning, then observe the rotating engine parts and electrical plants - it can
be fatal!
■
Never touch the electric wiring on the ignition system.
■
Avoid short circuits in the electrical system, particularly on the vehicle's
battery.
268General Maintenance
Page 271 of 336
CAUTIONRefill only operating fluids of the correct specification - danger of damaging
the vehicle!
Note
■ Fluids with the proper specifications can be purchased from the ŠKODA Origi-
nal Accessories or from the ŠKODA Genuine Parts ranges.■
We recommend you have the battery replaced by a specialist garage.
Open the bonnet and close
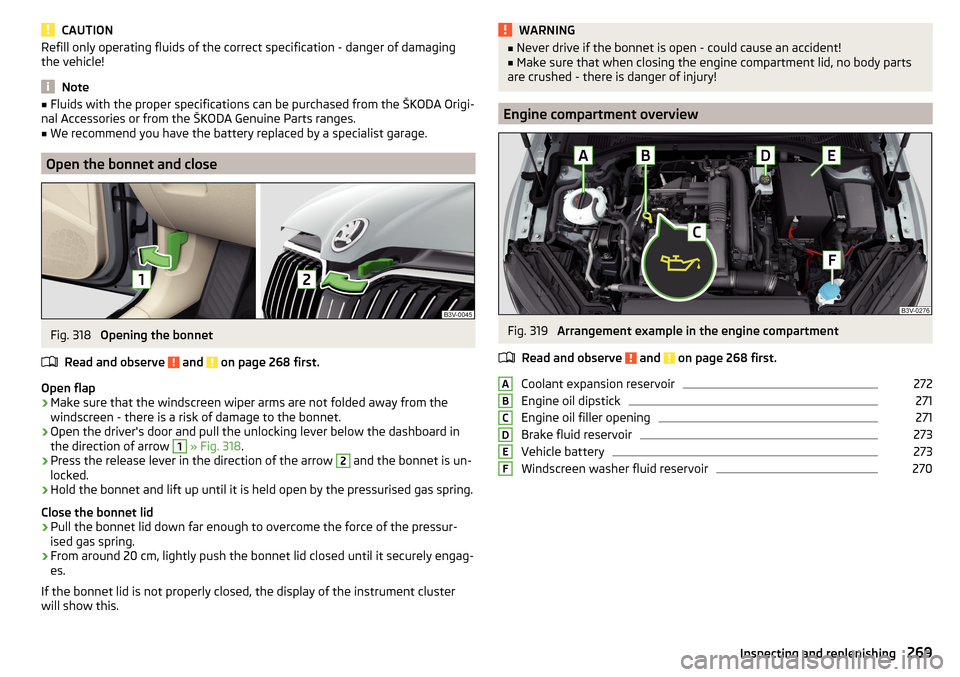
Fig. 318
Opening the bonnet
Read and observe
and on page 268 first.
Open flap
›
Make sure that the windscreen wiper arms are not folded away from the
windscreen - there is a risk of damage to the bonnet.
›
Open the driver's door and pull the unlocking lever below the dashboard in
the direction of arrow
1
» Fig. 318 .
›
Press the release lever in the direction of the arrow
2
and the bonnet is un-
locked.
›
Hold the bonnet and lift up until it is held open by the pressurised gas spring.
Close the bonnet lid
›
Pull the bonnet lid down far enough to overcome the force of the pressur-
ised gas spring.
›
From around 20 cm, lightly push the bonnet lid closed until it securely engag-
es.
If the bonnet lid is not properly closed, the display of the instrument cluster
will show this.
WARNING■ Never drive if the bonnet is open - could cause an accident!■Make sure that when closing the engine compartment lid, no body parts
are crushed - there is danger of injury!
Engine compartment overview
Fig. 319
Arrangement example in the engine compartment
Read and observe
and on page 268 first.
Coolant expansion reservoir
272
Engine oil dipstick
271
Engine oil filler opening
271
Brake fluid reservoir
273
Vehicle battery
273
Windscreen washer fluid reservoir
270ABCDEF269Inspecting and replenishing
Page 275 of 336
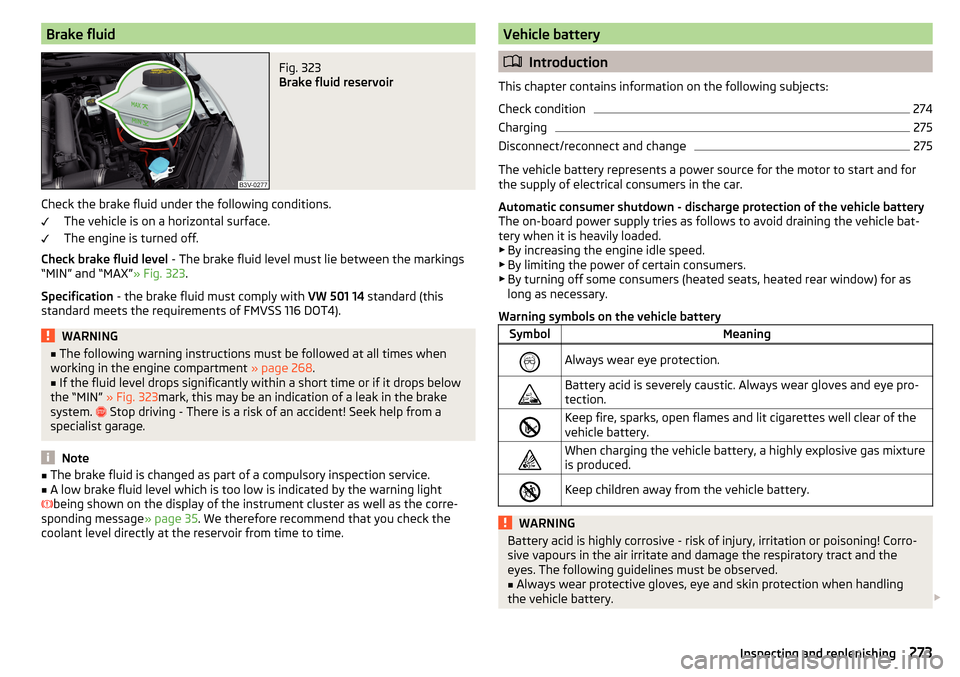
Brake fluidFig. 323
Brake fluid reservoir
Check the brake fluid under the following conditions.The vehicle is on a horizontal surface.
The engine is turned off.
Check brake fluid level - The brake fluid level must lie between the markings
“MIN” and “MAX” » Fig. 323.
Specification - the brake fluid must comply with VW 501 14 standard (this
standard meets the requirements of FMVSS 116 DOT4).
WARNING■ The following warning instructions must be followed at all times when
working in the engine compartment » page 268.■
If the fluid level drops significantly within a short time or if it drops below
the “MIN” » Fig. 323mark, this may be an indication of a leak in the brake
system.
Stop driving - There is a risk of an accident! Seek help from a
specialist garage.
Note
■ The brake fluid is changed as part of a compulsory inspection service.■A low brake fluid level which is too low is indicated by the warning light
being shown on the display of the instrument cluster as well as the corre-
sponding message » page 35. We therefore recommend that you check the
coolant level directly at the reservoir from time to time.Vehicle battery
Introduction
This chapter contains information on the following subjects:
Check condition
274
Charging
275
Disconnect/reconnect and change
275
The vehicle battery represents a power source for the motor to start and for the supply of electrical consumers in the car.
Automatic consumer shutdown - discharge protection of the vehicle battery
The on-board power supply tries as follows to avoid draining the vehicle bat-
tery when it is heavily loaded.
▶ By increasing the engine idle speed.
▶ By limiting the power of certain consumers.
▶ By turning off some consumers (heated seats, heated rear window) for as
long as necessary.
Warning symbols on the vehicle battery
SymbolMeaningAlways wear eye protection.Battery acid is severely caustic. Always wear gloves and eye pro-
tection.Keep fire, sparks, open flames and lit cigarettes well clear of the
vehicle battery.When charging the vehicle battery, a highly explosive gas mixture
is produced.Keep children away from the vehicle battery.WARNINGBattery acid is highly corrosive - risk of injury, irritation or poisoning! Corro-
sive vapours in the air irritate and damage the respiratory tract and the
eyes. The following guidelines must be observed.■
Always wear protective gloves, eye and skin protection when handling
the vehicle battery.
273Inspecting and replenishing
Page 276 of 336
WARNING (Continued)■If your eyes or skin come into contact with the electrolyte fluid, immedi-
ately wash the affected area for a few minutes with plenty of water. Seek
medical assistance if required.■
Keep the vehicle battery away from people who are not completely inde-
pendent, especially children.
■
Do not tilt the battery otherwise battery electrolyte may flow out of the
battery vent openings.
WARNINGWhen working on the car battery, there is the risk of explosion, fire, injury
or irritation! The following guidelines must be observed.■
Avoid smoking, the use of open flames or light and any activities that
could cause sparks.
■
A discharged vehicle battery can freeze slightly. Never charge up a fro-
zen or thawed vehicle battery. Replace a frozen vehicle battery.
■
Never use a damaged vehicle battery – risk of explosion!
■
Do not connect the battery terminals with each other by bridging the two
poles of a short circuit.
CAUTION
Ensure that battery acid does not come into contact with the bodywork – risk
of damage to the paintwork.
Note
■ We recommend having all work on the vehicle battery carried out by a spe-
cialist garage.■
You should replace batteries older than 5 years.
Check conditionFig. 324
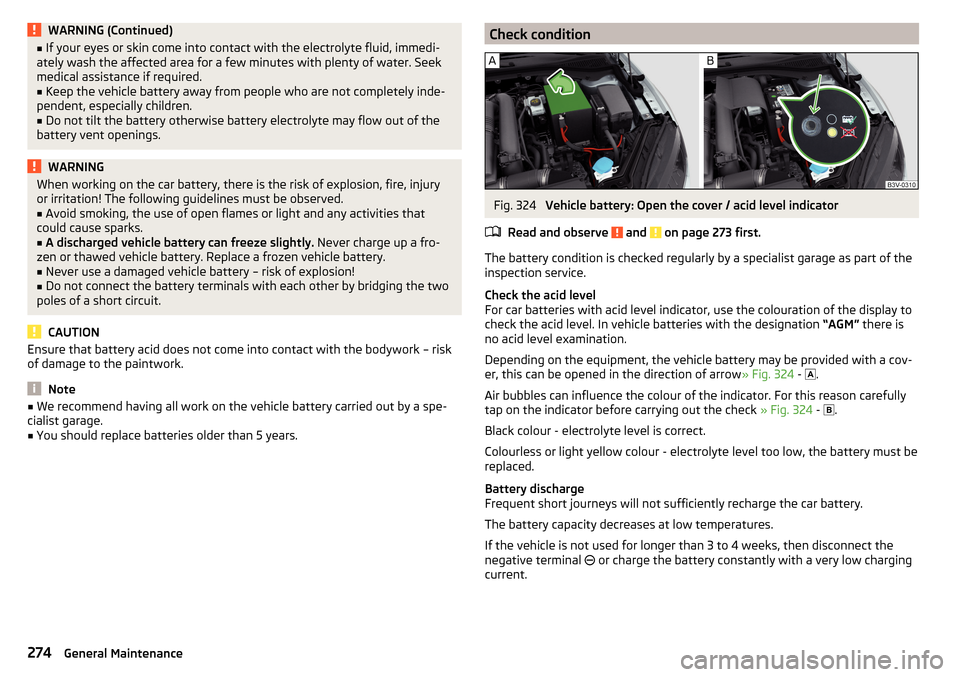
Vehicle battery: Open the cover / acid level indicator
Read and observe
and on page 273 first.
The battery condition is checked regularly by a specialist garage as part of the
inspection service.
Check the acid level
For car batteries with acid level indicator, use the colouration of the display to
check the acid level. In vehicle batteries with the designation “AGM” there is
no acid level examination.
Depending on the equipment, the vehicle battery may be provided with a cov-
er, this can be opened in the direction of arrow » Fig. 324 -
.
Air bubbles can influence the colour of the indicator. For this reason carefully
tap on the indicator before carrying out the check » Fig. 324 -
.
Black colour - electrolyte level is correct.
Colourless or light yellow colour - electrolyte level too low, the battery must be
replaced.
Battery discharge
Frequent short journeys will not sufficiently recharge the car battery.
The battery capacity decreases at low temperatures.
If the vehicle is not used for longer than 3 to 4 weeks, then disconnect the
negative terminal or charge the battery constantly with a very low charging
current.
274General Maintenance
Page 280 of 336
WARNING■Change when they are worn down to the wear indicators at the latest -
risk of accident.■
Improper wheel alignment affects the driving behaviour - there is an acci-
dent.
■
Unusual vibrations or “pulling” of the vehicle to one side could be a sign
of tyre damage. Reduce speed and stop! If no tyre damage is evident, seek
the assistance of a specialist garage.
Spare wheel
Use the emergency spare wheel only to reach the nearest specialist garage, as
it is not intended for permanent use .
A warning label is displayed on the rim of the temporary spare wheel.
Please note the following if you intend to use the temporary spare wheel. ▶ Do not cover the signs.
▶ Be particularly observant when driving.
▶ Inflate the temporary spare wheel to the maximum inflation pressure for the
vehicle » page 277 (the prescribed tyre pressure of the spare wheel R 18 is
4.2 bar).
In vehicles with tyre pressure monitoring, save the tyre pressure values in the
system » page 249 .
WARNING■
Never drive with more than one spare wheel mounted!■When driving with the temporary spare wheel at full throttle acceleration,
avoid sharp braking and fast cornering.■
Do not use snow chains on the temporary spare wheel.
■
Observe instructions on the warning sign of the emergency wheel.
Tyre marking
Explanation of tyre markings - e.g. 215/60 R 16 95 V
215Tyre width in mm60Height/width ratio in %RCode letter for the type of tyre – Radial16Diameter of wheel in inches95load indexVSpeed symbol
Load index - indicates the maximum permissible load for each individual tyre
load index919293949596979899Load
(In kg)615630650670690710730750775
Speed symbol - indicates the maximum permissible speed for a vehicle fitted
with tyres in the category concerned
speed
symbolMTUHVWYMaximum speed
(in km/h)130190200210240270300WARNINGNever exceed the maximum permissible load bearing capacity and speed
for the tyres fitted – There is a risk of accident.
Operating in winter conditions
All-year (or “winter”) tyres
All-season or “winter”tyres (indicated by an M+S or a mountain peak/snow-
flake symbol ) to improve the performance of the vehicle in winter condi-
tions.
For the best possible handling, use all-season or “winter” tyres on all four
wheels with a minimum tread depth of 4 mm.
If using “winter” tyres, fit the summer tyres on again in good time as they pro-
vide better handling properties, a shorter braking distance, less tyre noise, and
reduced tyre wear on roads which are free of snow and ice as well as at tem-
peratures above 7 °C.
278General Maintenance
Page 306 of 336
The approved tyres and rim sizes for your vehicle are listed in the vehicle's
technical documentation (the so called COC document) and this also states the
declaration of conformity.
Type plate
The rating plate » Fig. 370 is located at the bottom of the B-column on the
right-hand driver's side.
The type plate contains the following data. Vehicle manufacturers
Vehicle identification number (VIN)
Maximum permissible gross weight
Maximum permissible towed weight (towing vehicle and trailer)
Maximum permissible front axle load
Maximum permissible rear axle load
Vehicle identification number (VIN)
The vehicle identification number - VIN (vehicle body number) is stamped into
the engine compartment on the right hand suspension strut dome. This num-
ber is also located on a sign on the lower left hand edge below the windscreen
(together with a VIN bar code), and on the type plate.
The VIN number can also be displayed in Infotainment in the
→
→
serv-ice
menu.
Engine number
The engine number (three-digit identifier and serial number) is stamped on the
engine block.
Supplementary Information (applies to Russia)
The full type approval number of the means of transport is indicated in the
registration documents, field 17.
Maximum permissible towed weight
The listed maximum allowable trailer weight is only valid for altitudes up to
1000 m above sea level.
The engine output falls as altitude increases, as does the vehicle's climbing
power. Therefore, for every additional 1000 m in height (or part), the maximum
permissible towed weight must be reduced by 10%.
The towed weight is made up of the actual weights of the loaded towing vehi-
cle and the loaded trailer.
123456WARNINGDo not exceed the specified maximum permissible weights – risk of acci-
dent and damage!
Operating weight
This value is only a guide value and corresponds to the lowest possible operat-
ing weight without further weight-reducing equipment (e.g. air conditioning,
spare wheel etc.). The operating weight also includes the weight of the driver
(75 kg), the weight of the operating fluids, the tool kit, and a fuel tank filled to
90 % capacity.
Operating weight - Superb
EngineTransmissionOperating weight (kg)1.4 l/92 kW TSIMG1375
1.4 l/110 kW TSI ACT
MG1395MG 4x41505DSG14251.4 l/110 kW TSIMG1388DSG14181.8 l./132 kW TSIMG1465DSG14852.0 l./162 kW TSIDSG (EU6)1505DSG (EU4)15002.0 l/206 kW TSIDSG 4x41615
1.6 l/88 kW TDI CR
MG1465MG (Green Line)1485DSG1480
2.0 l/110 kW TDI CR
MG1485MG 4x41605DSG15002.0 l/130 kW TDI CRDSG1515
2.0 l/140 kW TDI CR
MG1505DSG1555DSG 4x41615 304Technical data
Page 316 of 336
Selector lever emergency unlocking293
Selector lever lock207
Start and run208
Tiptronic208
Warning light39
Automatic transmission206
AUX90, 150
Settings135
Auxiliary heating (auxiliary heating and ventila- tion)
118
Avoiding damage to your vehicle211
B
Battery Changing batteries for the removable light
292
Changing in key290, 291
Replace the battery in the remote control in the auxiliary heating
291
Belts15
Belt tensioners17
Bluetooth A2DP / AVRCP
133
Name133
on / off133
Paired external devices133
rSAP167
Set140
set to133, 136
Set to133
Switch on/off140
Update131, 134
Updates140
Visibility133, 140
Bluetooth Player151
Bluetooth profile164
Bluetooth® update164
Bonnet Close
269
Open269
Boot Class N1 vehicles109
Boot lid59
Automatic locking59
Contactless open/close61
Open/close59, 60
See boot lid59
Boot lid contactless open/close61
Brake Assist (HBA)214
Brake booster203
Brake fluid273
Check273
specification273
Brake linings Warning light
38
Brake pads new
203
Brake pedal (automatic gearbox) Warning light
38
Brakes Brake booster
203
Brake fluid273
Braking and stabilisation systems212
Information on braking203
Parking brake203
Running in209
Warning light35
Brake system212
Breakdown call168
Broadcasting143
See main menu142
Bulbs Replacing
299
Buttons on the driver door Electric windows
62
C
Call list Call list
170
CameraSee reversing camera221
CAR198
Car battery automatic consumer shutdown
273
Check condition274
Cover274
Disconnecting and reconnecting275
Replacing275
Winter operation274
CAR button198
Car care260
Exterior263
Interior263
Car computer see multifunction display
46
Care and maintenance256
Cargo element106
CAR menu198
Car park184
Carrier112
Car wash260
Exterior263
Panes263
CD149
Central locking53
Problems57
Central locking button55
Changing Batteries for the removable light
292
Battery290, 291
Wheels282
Windscreen wiper blades295
Changing a wheel282
Changing gear Selector lever
207
Tiptronic208
Charging a vehicle battery275
314Index
Page 317 of 336
CheckBrake fluid273
Engine oil271
Oil level271
Checking Battery status
274
Coolant272
Checks Statutory checks
256
Children and safety22
Child safety lock57
Child seat22
Classification25
I-Size27
Installation location25, 27
ISOFIX26
on the front passenger seat23, 24
Place of installation26
TOP TETHER27
Cigarette lighter99
Cleaning the vehicle Interior
263
Outside261
Washing260
Clear calls136
Climatronic113
air distribution control117
Automatic operation116
Operate in Infotainment116
Operating elements114
Clothes hook93
Cockpit31
Lighting72
Comfort indicating68
COMING HOME70
Compartments87
Compatible sources Pictures
154
Video DVD156
Component protection257
Computer see multifunction display46
Conditions for pairing164
Conference call171
Configuration wizard127
Convenience operation Window
63
Coolant271
Checking272
Refilling272
Temperature display32
Warning light39
CORNER See Fog lights with CORNER function
70
Correct routing of seat belt
16
Correct seated position12
Correct seating position14
Crew Protect Assist242
Cruise control230
Cruise Control System229
Cup holders90
Custom destination186
D
DAB
142, 143
Additional information142
Radio Text and image presentation142
Set134, 141
DAB slideshow142
Data connection175
Data roaming133
Data transfer of external devices128
Date132, 139
DAY LIGHT See Daytime running lights
67
Daytime running lights67
DCC240
Warning light42
De-icing the windscreen and rear window74
Deactivation Airbag
21
Default settings133 , 198
Delayed locking of the boot lid See boot lid
59
Delete destination190
Demo mode138, 191
Destination Custom destination
186
Entered on the map184
Favourite185, 190
final destinations184
Flagged destination185
Home address185
Image with GPS187
Memory190
Saved destination185
Search for182
Telephone contact185
vCard185
Destination details190
Destination management Destination details
190
Favourite190
Storage190
Destination memory185
Detail of the traffic report197
Device Connect to the telephone
163
Device hotspot174
Diesel266
Diesel fuel266
Diesel particle filter (DPF)41
Digital Clock44
Digital radio reception Set
141
Digital Service Plan260
Dipped beam67
315Index
Page 318 of 336
Dipstick271
Display125
Cardinal points43
Coolant temperature32
Fuel level33
Gear changes44
In the instrument cluster43
MAXI DOT48
Rear centre console33
Service intervals49
Display in Infotainment Driving data
46
Disposal Acceptance and recycling of used vehicles
258
Distance warning238
Warning light42
Diverting calls136
Door Child safety lock
57
Emergency locking293
Emergency locking of the driver's door292
Open / Close57
Door warning43
Drive Driving through water
211
DriveGreen210
Driving Emissions
305
Fuel consumption305
Maximum speed309
through water211
Driving data Show
46
Driving mode240
Adaptive Chassis Control (DCC)240
Comfort241
Eco240
Individual241
Mode selection and Infotainment display241
Normal241
Settings for individual mode242
Sports241
Driving Mode Selection240
DSR214
DVD149
DVD-Video Set to
135
Dynamic Light Assist71
Dynamic Road Sign Display Additional display
248
Information messages248
Malfunctions248
Operation247
Settings in Infotainment247
Dynamic route switch on / off
197
E
Economical driving
209
Economy mode42
ECO TIP43
Eco tips43
Edit route192
EDS214
Electrical boot lid set the top position of the lid
61
Electric boot lid Force limiter
59
Manual operation59
Open/close60
Electric parking brake203
Electric power windows62, 63
Malfunctions64
Electric tail gate Malfunctions
61
Electric windows Buttons on the driver door
62
Electronic Differential Lock (EDL, XDS)214
Electronic immobilizer199
Elevation180
emergency Jump-starting
288
Starting the engine / stopping the push of a button
201
Emergency Changing a wheel
282
Hazard warning light system70
Jump-starting287
Selector lever release293
Starting the engine / stopping the engine at the push of a button
200
Towing the using the tow hitch290
Towing the vehicle288
Tyre repair285
Unlocking/locking the door292
Unlocking / locking the door293
Emergency call168
Emergency equipment Fire extinguisher
281
First aid kit280
Jack281
Reflective vest280
Vehicle tool kit281
Warning triangle280
Emission control system36
Emissions305
Engine Information messages
39
Running in209
Engine compartment268
Brake fluid273
Coolant271
Engine oil270
Overview269
Vehicle battery273
Windscreen washer fluid270
Engine drag torque control (MSR)213
Engine number303
316Index