Ambient SKODA SUPERB 2016 3.G / (B8/3V) Owner's Manual
[x] Cancel search | Manufacturer: SKODA, Model Year: 2016, Model line: SUPERB, Model: SKODA SUPERB 2016 3.G / (B8/3V)Pages: 336, PDF Size: 53.89 MB
Page 34 of 336
Instruments and warning lights
Instrument cluster
Introduction
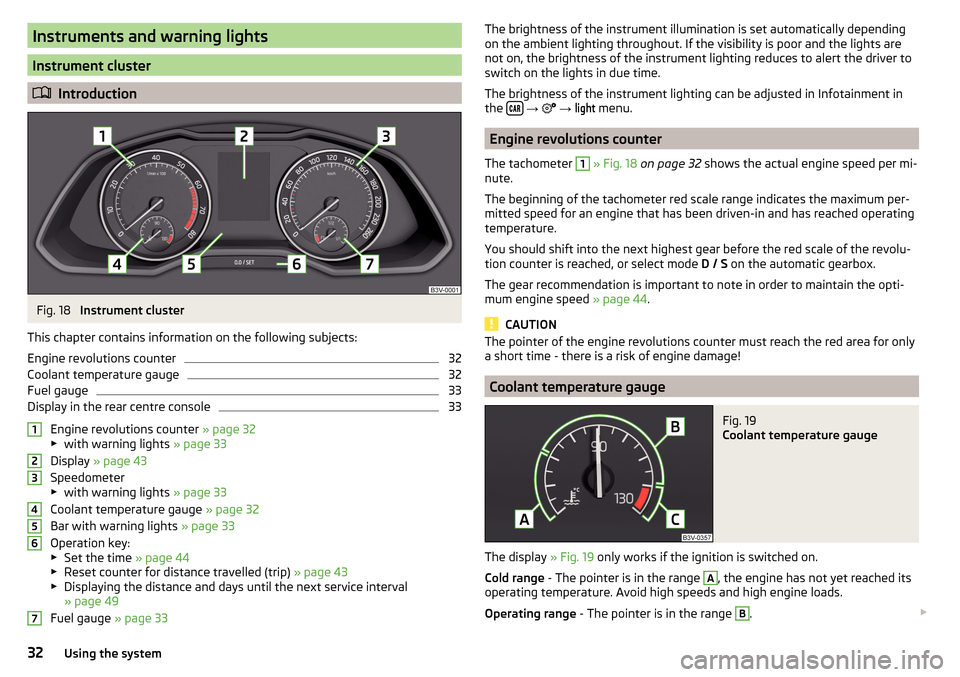
Fig. 18
Instrument cluster
This chapter contains information on the following subjects:
Engine revolutions counter
32
Coolant temperature gauge
32
Fuel gauge
33
Display in the rear centre console
33
Engine revolutions counter » page 32
▶ with warning lights » page 33
Display » page 43
Speedometer
▶ with warning lights » page 33
Coolant temperature gauge » page 32
Bar with warning lights » page 33
Operation key:
▶ Set the time » page 44
▶ Reset counter for distance travelled (trip) » page 43
▶ Displaying the distance and days until the next service interval
» page 49
Fuel gauge » page 33
1234567The brightness of the instrument illumination is set automatically depending
on the ambient lighting throughout. If the visibility is poor and the lights are
not on, the brightness of the instrument lighting reduces to alert the driver to
switch on the lights in due time.
The brightness of the instrument lighting can be adjusted in Infotainment in
the
→
→
light
menu.
Engine revolutions counter
The tachometer
1
» Fig. 18 on page 32 shows the actual engine speed per mi-
nute.
The beginning of the tachometer red scale range indicates the maximum per-
mitted speed for an engine that has been driven-in and has reached operating
temperature.
You should shift into the next highest gear before the red scale of the revolu-
tion counter is reached, or select mode D / S on the automatic gearbox.
The gear recommendation is important to note in order to maintain the opti-
mum engine speed » page 44.
CAUTION
The pointer of the engine revolutions counter must reach the red area for only
a short time - there is a risk of engine damage!
Coolant temperature gauge
Fig. 19
Coolant temperature gauge
The display » Fig. 19 only works if the ignition is switched on.
Cold range - The pointer is in the range
A
, the engine has not yet reached its
operating temperature. Avoid high speeds and high engine loads.
Operating range - The pointer is in the range
B
.
32Using the system
Page 52 of 336
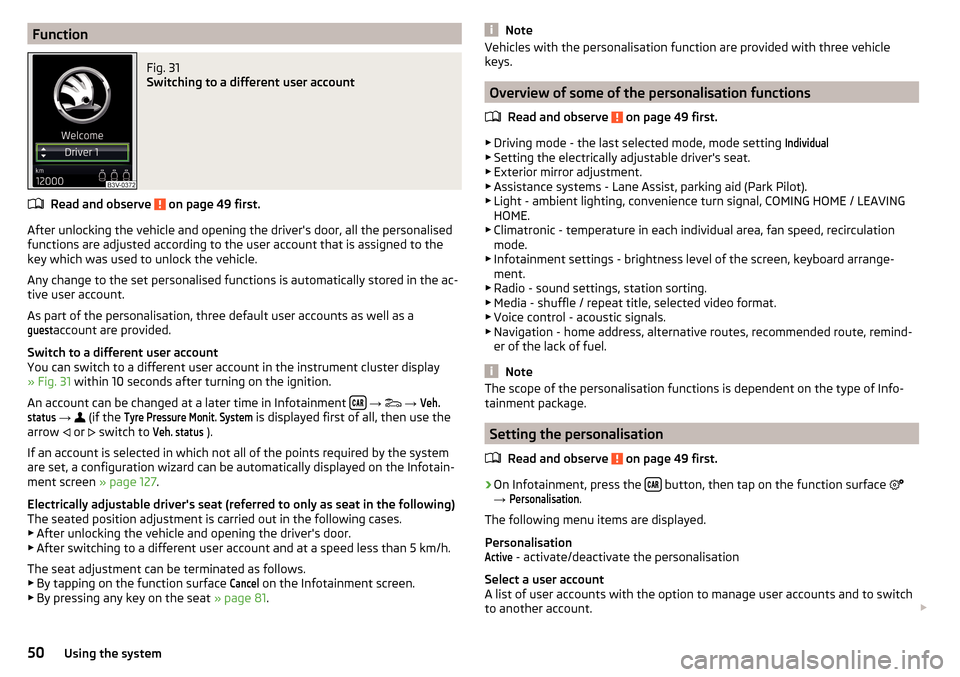
FunctionFig. 31
Switching to a different user account
Read and observe on page 49 first.
After unlocking the vehicle and opening the driver's door, all the personalised
functions are adjusted according to the user account that is assigned to the
key which was used to unlock the vehicle.
Any change to the set personalised functions is automatically stored in the ac- tive user account.
As part of the personalisation, three default user accounts as well as a
guest
account are provided.
Switch to a different user account
You can switch to a different user account in the instrument cluster display
» Fig. 31 within 10 seconds after turning on the ignition.
An account can be changed at a later time in Infotainment
→
→
Veh.status
→
(if the
Tyre Pressure Monit. System
is displayed first of all, then use the
arrow or
switch to
Veh. status
).
If an account is selected in which not all of the points required by the system
are set, a configuration wizard can be automatically displayed on the Infotain-
ment screen » page 127.
Electrically adjustable driver's seat (referred to only as seat in the following)
The seated position adjustment is carried out in the following cases. ▶ After unlocking the vehicle and opening the driver's door.
▶ After switching to a different user account and at a speed less than 5 km/h.
The seat adjustment can be terminated as follows.
▶ By tapping on the function surface
Cancel
on the Infotainment screen.
▶ By pressing any key on the seat » page 81.
NoteVehicles with the personalisation function are provided with three vehicle
keys.
Overview of some of the personalisation functions
Read and observe
on page 49 first.
▶Driving mode - the last selected mode, mode setting
Individual
▶Setting the electrically adjustable driver's seat.
▶ Exterior mirror adjustment.
▶ Assistance systems - Lane Assist, parking aid (Park Pilot).
▶ Light - ambient lighting, convenience turn signal, COMING HOME / LEAVING
HOME.
▶ Climatronic - temperature in each individual area, fan speed, recirculation
mode.
▶ Infotainment settings - brightness level of the screen, keyboard arrange-
ment.
▶ Radio - sound settings, station sorting.
▶ Media - shuffle / repeat title, selected video format.
▶ Voice control - acoustic signals.
▶ Navigation - home address, alternative routes, recommended route, remind-
er of the lack of fuel.
Note
The scope of the personalisation functions is dependent on the type of Info-
tainment package.
Setting the personalisation
Read and observe
on page 49 first.
›
On Infotainment, press the button, then tap on the function surface
→
Personalisation
.
The following menu items are displayed.
Personalisation
Active
- activate/deactivate the personalisation
Select a user account
A list of user accounts with the option to manage user accounts and to switch
to another account.
50Using the system
Page 74 of 336
WARNINGThe system is used only for support, thus the driver is not released from his
obligation to manually adjust the main or low beam according to the given
ambient conditions (e.g. in unfavourable lighting and weather conditions,
as when passing poorly lit road users, if necessary, when the visual range
of the sensor is limited by an obstacle).
CAUTION
Do not attach any stickers or similar objects in front of the sensor on the wind-
screen to avoid impairing the function of the system.
Note
The adjustment of the headlight assistant in Infotainment is stored (depend-
ing on the Infotainment type) in the active user account personalisation
» page 49 .
Operating conditions
Read and observe
and on page 72 first.
The system works under the following conditions. The system is activated in the Infotainment menu
→
→
light
.
The light switch is in the position .
The system is activated » page 72, Switching on and off .
The vehicle speed is over 60 km/h or for some countries more than 40
km/h.
The windscreen is clean in the sensor area.
Switching on and off
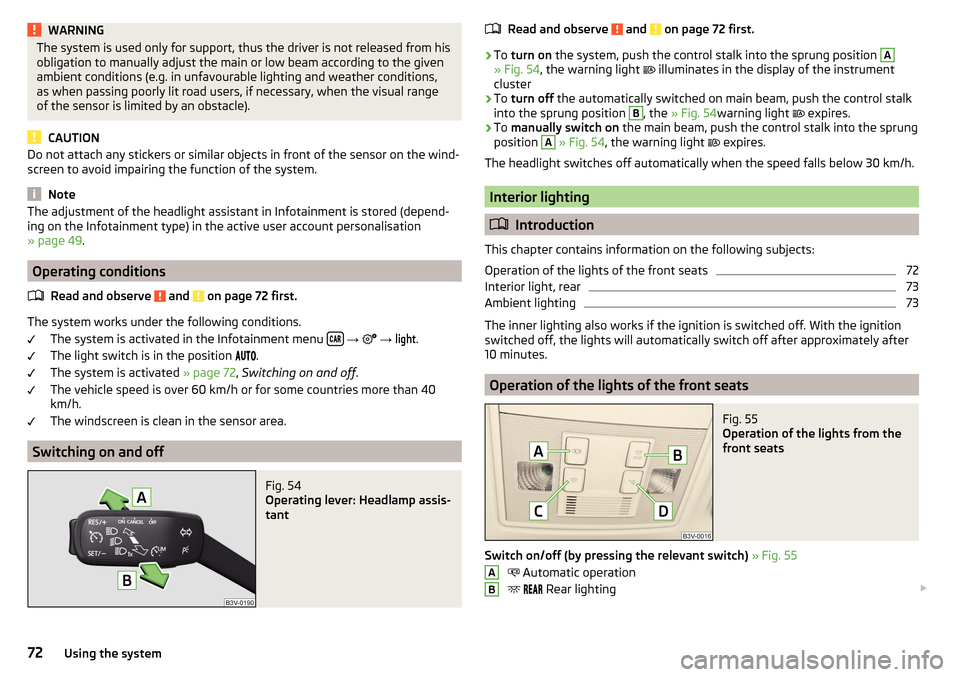
Fig. 54
Operating lever: Headlamp assis-
tant
Read and observe and on page 72 first.›
To turn on the system, push the control stalk into the sprung position
A
» Fig. 54 , the warning light
illuminates in the display of the instrument
cluster
›
To turn off the automatically switched on main beam, push the control stalk
into the sprung position
B
, the » Fig. 54 warning light
expires.
›
To manually switch on the main beam, push the control stalk into the sprung
position
A
» Fig. 54 , the warning light
expires.
The headlight switches off automatically when the speed falls below 30 km/h.
Interior lighting
Introduction
This chapter contains information on the following subjects:
Operation of the lights of the front seats
72
Interior light, rear
73
Ambient lighting
73
The inner lighting also works if the ignition is switched off. With the ignition
switched off, the lights will automatically switch off after approximately after
10 minutes.
Operation of the lights of the front seats
Fig. 55
Operation of the lights from the
front seats
Switch on/off (by pressing the relevant switch) » Fig. 55
Automatic operation
Rear lighting
AB72Using the system
Page 75 of 336

Front and rear lighting
Passenger light
Automatic operation - switch
The system is turned on when any of the following is present.
▶ The vehicle is unlocked.
▶ One of the doors is opened.
▶ The ignition key is removed.
The system is turned off when any of the following is present.
▶ The vehicle is locked.
▶ The ignition is switched on.
▶ About 30 seconds after all the doors have been closed.
Interior light, rear
Fig. 56
Interior light, rear: Variant 1
Fig. 57
Interior light, rear: Variant 2 / Variant 3
CDOption 1 - switch on/off (by pressing relevant switch) » Fig. 56
Reading lamp left
Reading lamp right
Variant 2 - operation (by moving the light lens C
) » Fig. 57
Switching on
Switching off
Automatic operation 1)
Option 3 - switch on/off (by pressing relevant switch) » Fig. 57
Reading lamp left
Reading lamp right
The rear lighting (variants 1 and 3) is controlled together with the automatic
operation of the lighting from the front seats. ▶ When the front interior lighting is switched on, the rear interior lighting also
turns on automatically.
▶ When the front interior lighting is switched off, the rear interior lighting can
be turned on/off as required.
Ambient lighting
Fig. 58
Infotainment Columbus, Amund-
sen, Bolero: Setting ambient
lighting
The ambient lighting illuminates the panel in colour, side door panels and the
footwell white.
The switching on of the lighting takes place automatically after opening the
door, switching off occurs automatically after the locking of the vehicle or 30
seconds after the closing of the door with the ignition switched off.
ABD1)
In this position, for the rear lighting, the same conditions apply as for the automatic operation of the
lighting from the front seats » page 72.
73Lights and visibility
Page 76 of 336

The ambient lighting can be adjusted in the Infotainment menu
→ →Ambient lighting
.
Infotainment Columbus, Amundsen, Bolero: Description of function surfaces
» Fig. 58
Enable / disable the background lighting
Activating of the brightness setting for all areas at the same time
Activating of the brightness setting for the dashboard area
Activating the brightness controls for the door area
Activating of the brightness setting for the footwell area only in white
Choice of colour options / brightness adjustment
Function surfaces for selecting lighting colour / brightness adjustment
To display B
.
C
.
D
and
E
tap on the function surface .
Note
The adjustment of the ambient lighting is stored (depending on the Infotain-
ment type) in the active user account personalisation » page 49.
Visibility
Introduction
This chapter contains information on the following subjects:
Windscreen and rear window heater
74
Sun visors
75
Sunshade
75
Sunshade in the rear doors
75WARNINGNo objects should be attached to the sun visors, which could limit the view
or endanger the vehicle occupants during sudden braking or should the ve-
hicle collide.ABCDEFGWindscreen and rear window heaterFig. 59
Buttons for the front and rear window heater: Climatronic / man-
ual air conditioning
Read and observe
on page 74 first.
The heating for quick defrosting and ventilation of the front /and rear window.
The heating only works when the engine is running.
Buttons for the heating (depending on vehicle equipment) » Fig. 59
Switch on/off the rear window heating
Switching the windscreen heater on/off
When the heating is switched on, a light illuminates inside or below the but-
ton.
The heating automatically switches off after ten minutes.
If the engine is switched off when the heating is on and turned back on again
within 10 minutes, the heating is continued.
Note
■ If the on-board voltage decreases, the heating switches off automatically
» page 273 , Automatic consumer shutdown - discharge protection of the vehi-
cle battery .■
If the lighting inside or below the button flashes, the heater will not work be-
cause of the low charge of the battery.
■
If the Climatronic recognises that the windshield could fog up, the windshield
heating is automatically switched on. This function can be activated / deactiva-
ted on the Climatronic control panel menu
→
.
74Using the system
Page 131 of 336
▶You are recommended to speak louder at higher speeds, so that the sound of
your voice is not drowned out by the increased ambient noise.
▶ During voice control, limit additional noise in the vehicle, e.g. passengers
talking at the same time.WARNINGThe emergency number must be dialled manually. Your voice commands
may not be recognized in such situations. The telephone connection may
not be established or the connection may take too much time to complete.
CAUTION
■ The messages are generated by Infotainment. The flawless clarity (e.g. road
or city name) cannot always be guaranteed.■
For some Infotainment languages, there is no voice control available. Info-
tainment indicates this fact through a text message that is displayed after set-
ting the device language screen.
Note
During voice control, no nav. announcements and traffic announcements are
played.
Voice control on / off
Fig. 171
Voice control: Main menu
Activating
›
Press the button on Infotainment
or the button
on the multifunction
steering wheel.
The main menu is displayed » Fig. 171.
Switching off
›
Press the button twice on Infotainment
or press the button twice
on
the multifunction steering wheel.
› Or
Issue the voice command “ End voice control”.
Operation principle
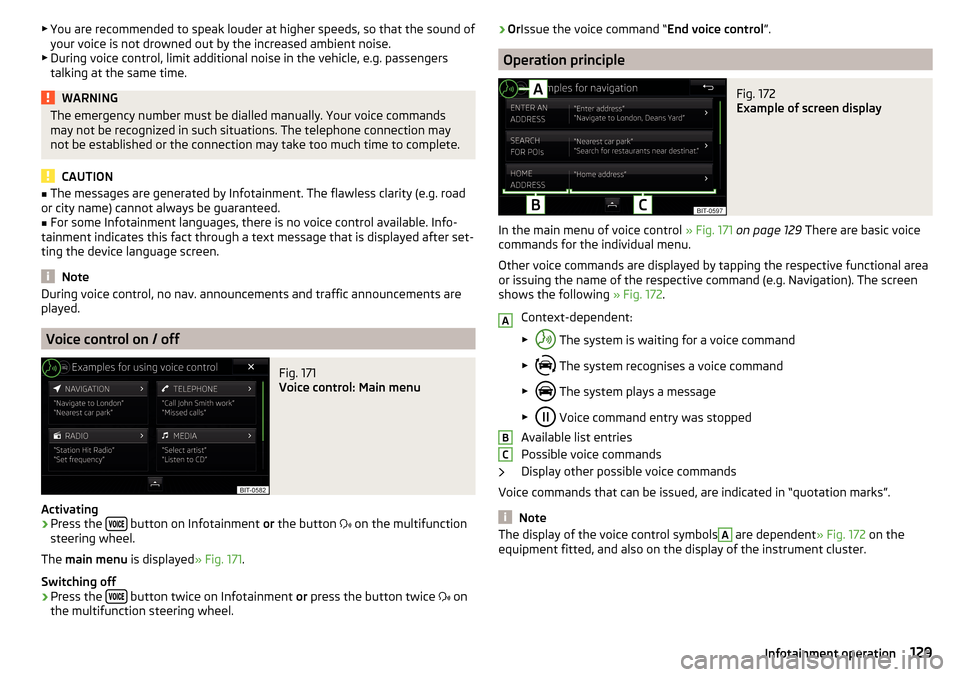
Fig. 172
Example of screen display
In the main menu of voice control » Fig. 171 on page 129 There are basic voice
commands for the individual menu.
Other voice commands are displayed by tapping the respective functional area
or issuing the name of the respective command (e.g. Navigation). The screen
shows the following » Fig. 172.
Context-dependent:
▶ The system is waiting for a voice command
▶ The system recognises a voice command
▶ The system plays a message
▶ Voice command entry was stopped
Available list entries
Possible voice commands
Display other possible voice commands
Voice commands that can be issued, are indicated in “quotation marks”.
Note
The display of the voice control symbolsA are dependent » Fig. 172 on the
equipment fitted, and also on the display of the instrument cluster.ABC129Infotainment operation
Page 151 of 336
Select the audio source
Tap - selection of the parent folder / Hold - selection of the audio source
Audio sources
Introduction to the subject
›
To playback connect or insert the desired audio source. Starts playback auto-
matically, then select the audio source » page 146.
If AUX is selected as the audio source, the playback must be started on the
connected device.
CAUTION
■ Do not save any important data or that which has not been backed up on the
connected audio sources. ŠKODA assumes no responsibility for lost or dam-
aged files or connected audio sources.■
When changing or connecting an audio source, this may cause sudden
changes in volume. Reduce the volume before changing or connecting an au-
dio source.
■
When connecting an external audio source, the external source information
messages can be displayed. These messages must be observed and confirmed
if necessary (e.g. enabling data transfer etc).
Note
The national copyright laws that apply in your country must be observed.
CD / DVD
Only applies to Infotainment Columbus.
Fig. 186
CD / DVD slot
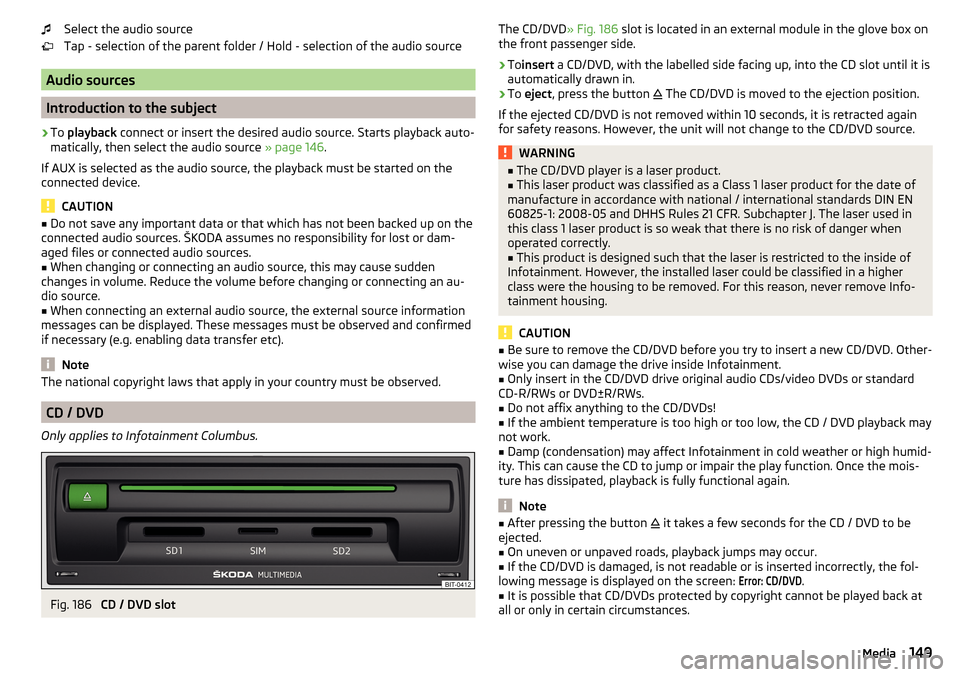
The CD/DVD
» Fig. 186 slot is located in an external module in the glove box on
the front passenger side.›
To insert a CD/DVD, with the labelled side facing up, into the CD slot until it is
automatically drawn in.
›
To eject , press the button
The CD/DVD is moved to the ejection position.
If the ejected CD/DVD is not removed within 10 seconds, it is retracted again
for safety reasons. However, the unit will not change to the CD/DVD source.
WARNING■ The CD/DVD player is a laser product.■This laser product was classified as a Class 1 laser product for the date of
manufacture in accordance with national / international standards DIN EN
60825-1: 2008-05 and DHHS Rules 21 CFR. Subchapter J. The laser used in
this class 1 laser product is so weak that there is no risk of danger when
operated correctly.■
This product is designed such that the laser is restricted to the inside of
Infotainment. However, the installed laser could be classified in a higher
class were the housing to be removed. For this reason, never remove Info-
tainment housing.
CAUTION
■ Be sure to remove the CD/DVD before you try to insert a new CD/DVD. Other-
wise you can damage the drive inside Infotainment.■
Only insert in the CD/DVD drive original audio CDs/video DVDs or standard
CD-R/RWs or DVD±R/RWs.
■
Do not affix anything to the CD/DVDs!
■
If the ambient temperature is too high or too low, the CD / DVD playback may
not work.
■
Damp (condensation) may affect Infotainment in cold weather or high humid-
ity. This can cause the CD to jump or impair the play function. Once the mois-
ture has dissipated, playback is fully functional again.
Note
■ After pressing the button it takes a few seconds for the CD / DVD to be
ejected.■
On uneven or unpaved roads, playback jumps may occur.
■
If the CD/DVD is damaged, is not readable or is inserted incorrectly, the fol-
lowing message is displayed on the screen:
Error: CD/DVD
.
■
It is possible that CD/DVDs protected by copyright cannot be played back at
all or only in certain circumstances.
149Media
Page 240 of 336
WARNING■Please take note of the general points relating to the use of assistance
systems » page 212, in section Introduction .■
The system does not respond to crossing or oncoming objects.
CAUTION
In case of failure of more than one brake light on the vehicle or on the electri-
cally connected trailer, the system becomes unavailable.
Settings in Infotainment
Read and observe
and on page 238 first.
›
Press the button, then tap on the function surface
→
Driver assistance
.
■ Front Assist (ambient traffic monitor. sys.) - Set the assistant for distance
monitoring to the vehicles ahead ■
Active
- Activate/deactivate the assistant
■
Advance warning
(Version 1) - Activate/deactivate advance warning
■
Advance warning
(Version 2) - Activating/deactivating and setting the distance
level at which a warning occurs
■
Display distance warning
- Activate/deactivate distance warnings
Operation
Read and observe
and on page 238 first.
The system support is provided in the following manner.▶ Alerts you about a dangerous proximity to the vehicle ahead.
▶ Warns you of an impending collision.
▶ Assists with a brake action triggered by the driver.
▶ If the driver fails to respond to a detected danger, an automatic braking ac-
tion is performed.
The system can work only if the following basic conditions are met. The system is activated.
TCS is activated » page 214.
The vehicle is travelling forwards at a speed of more than approx. 5 km/h.
Note
The system can be impaired or may not be available, for example when driving
in “sharp ”curves or with an ESC engagement » page 213.Distance warningFig. 299
Display of the instrument cluster: Proximity warning
Read and observe and on page 238 first.
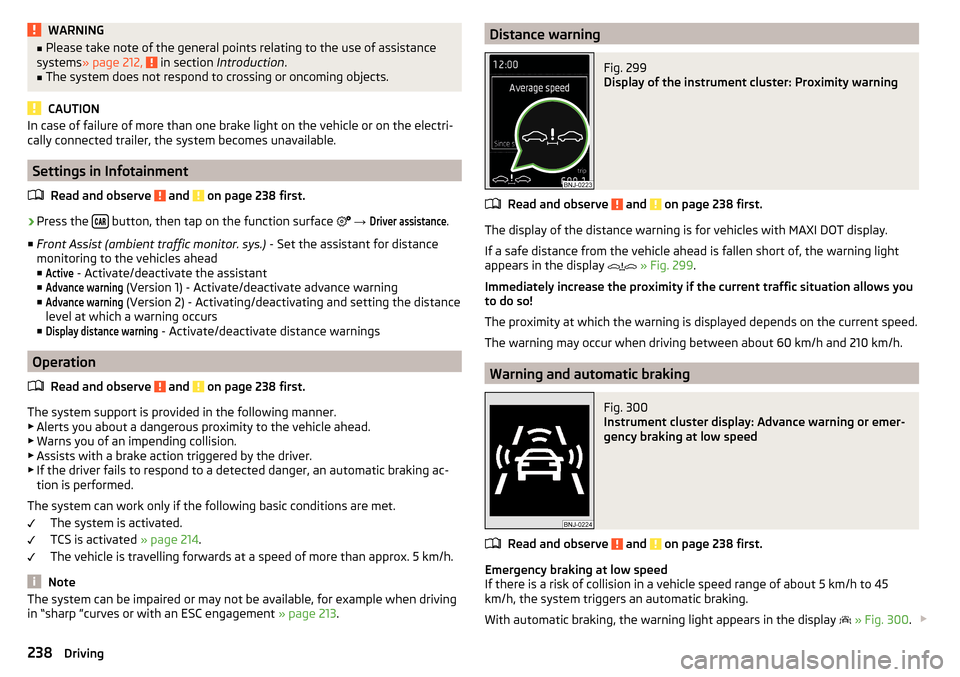
The display of the distance warning is for vehicles with MAXI DOT display.
If a safe distance from the vehicle ahead is fallen short of, the warning light
appears in the display
» Fig. 299 .
Immediately increase the proximity if the current traffic situation allows you
to do so!
The proximity at which the warning is displayed depends on the current speed.
The warning may occur when driving between about 60 km/h and 210 km/h.
Warning and automatic braking
Fig. 300
Instrument cluster display: Advance warning or emer-
gency braking at low speed
Read and observe and on page 238 first.
Emergency braking at low speed
If there is a risk of collision in a vehicle speed range of about 5 km/h to 45
km/h, the system triggers an automatic braking.
With automatic braking, the warning light appears in the display
» Fig. 300 .
238Driving
Page 299 of 336
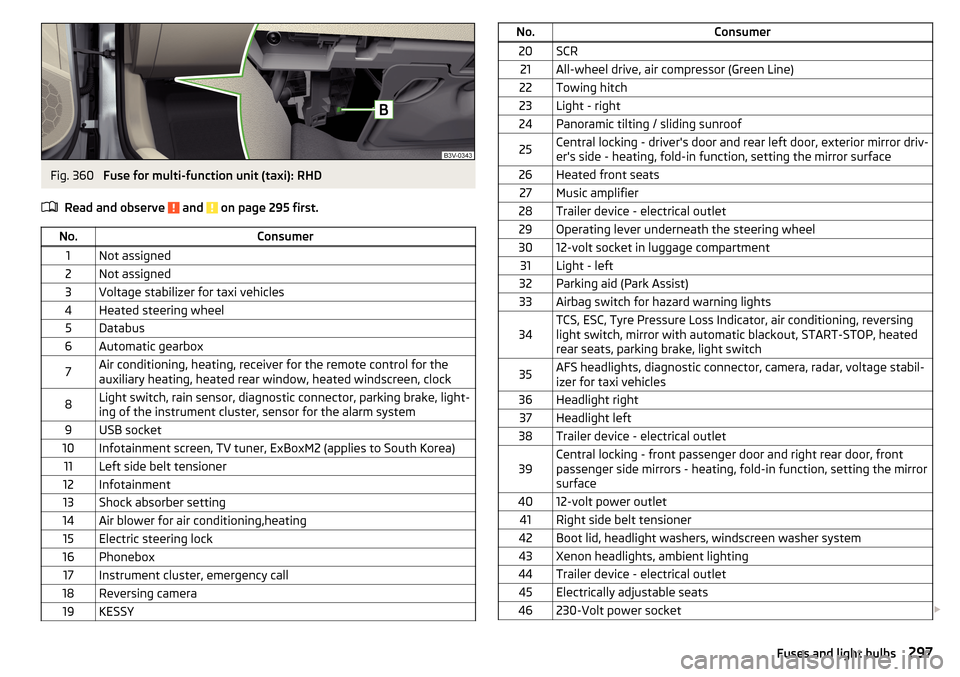
Fig. 360
Fuse for multi-function unit (taxi): RHD
Read and observe
and on page 295 first.
No.Consumer1Not assigned2Not assigned3Voltage stabilizer for taxi vehicles4Heated steering wheel5Databus6Automatic gearbox7Air conditioning, heating, receiver for the remote control for the
auxiliary heating, heated rear window, heated windscreen, clock8Light switch, rain sensor, diagnostic connector, parking brake, light-
ing of the instrument cluster, sensor for the alarm system9USB socket10Infotainment screen, TV tuner, ExBoxM2 (applies to South Korea)11Left side belt tensioner12Infotainment13Shock absorber setting14Air blower for air conditioning,heating15Electric steering lock16Phonebox17Instrument cluster, emergency call18Reversing camera19KESSYNo.Consumer20SCR21All-wheel drive, air compressor (Green Line)22Towing hitch23Light - right24Panoramic tilting / sliding sunroof25Central locking - driver's door and rear left door, exterior mirror driv-
er's side - heating, fold-in function, setting the mirror surface26Heated front seats27Music amplifier28Trailer device - electrical outlet29Operating lever underneath the steering wheel3012-volt socket in luggage compartment31Light - left32Parking aid (Park Assist)33Airbag switch for hazard warning lights34TCS, ESC, Tyre Pressure Loss Indicator, air conditioning, reversing
light switch, mirror with automatic blackout, START-STOP, heated
rear seats, parking brake, light switch35AFS headlights, diagnostic connector, camera, radar, voltage stabil-
izer for taxi vehicles36Headlight right37Headlight left38Trailer device - electrical outlet39Central locking - front passenger door and right rear door, front
passenger side mirrors - heating, fold-in function, setting the mirror
surface4012-volt power outlet41Right side belt tensioner42Boot lid, headlight washers, windscreen washer system43Xenon headlights, ambient lighting44Trailer device - electrical outlet45Electrically adjustable seats46230-Volt power socket 297Fuses and light bulbs
Page 315 of 336
Index
A
A2DP/AVRCP
164
Abort route guidance192
ABS Operation
213
Warning light36
ACC233
Settings in Infotainment233
Acceptance and recycling of used vehicles258
Accessories256
Active steering assist (DSR)214
Adaptive Chassis Control Warning light
42
Adaptive Chassis Control (DCC)240
Adaptive cruise control Operation
234
Set/change the desired speed236
Start control235
Warning light35, 42
Adaptive cruise Control Settings in Infotainment
233
Adaptive Cruise Control233
automatic stopping and starting234
Malfunctions237
Operation overview235
Overtaking237
Radar sensor212
Set the clearance level236
Special driving situations236
Stop/resume control235
Trailer towing237
Adaptive headlight see xenon headlight
69
AdBlue267
Check level267
refill267
Warning light40
Additional keypad languages132, 140
Additional windows Audio
182
Compass182
Manoeuvre182
Map182
Menus182
Most frequent routes182
Satellite data182
Turn on/off182
Waypoint tour182
Adjusting Steering wheel
13
Adjusting seats manually80
Adjusting the seats12
Advice on tyre/wheel usage276
AHL See xenon headlight
69
Aim Enter destination using the address
183
Air-conditioning system Air outlet vents
117
Airbag18
Adjustments and impairments on the airbag system
257
Deactivation21
Deployment19
Warning light37
Airbag system18
Air conditioning113
Air distribution control117
Climatronic114
Manual air conditioning114
Air distribution control117
Air outlet vents117
Alarm58
Trailer255
All season tyres278
Alphanumeric with keyboard126
Alternative routes137
Ambient lighting73
Android Auto177
Connection establishment177
Disconnection177
Main menu177
Anti-lock braking system (ABS)213
Anti-theft alarm system58
Trailer255
Anti-theft wheel bolts284
APN133
Apple CarPlay178
Connection establishment178
Disconnection178
Main menu178
Armrest Front
82
rear94
Rear83
Ashtray98
Assistant for emergencies246
Assist systems212
AT THE142, 143
Audio source149
Auto Check Control44
Auto Hold204
Warning light39
Auto Hold function204
Warning light39
Automatic consumer shutdown273
Automatic drive Kickdown
208
Selector lever207
Automatic driving light control68
Automatic gearbox Launch control
209
Malfunction39
Manual shifting on the multifunction steering wheel
208
Release gear selector lever207
313Index