coolant temperature SKODA SUPERB 2016 3.G / (B8/3V) Owner's Manual
[x] Cancel search | Manufacturer: SKODA, Model Year: 2016, Model line: SUPERB, Model: SKODA SUPERB 2016 3.G / (B8/3V)Pages: 336, PDF Size: 53.89 MB
Page 34 of 336
Instruments and warning lights
Instrument cluster
Introduction
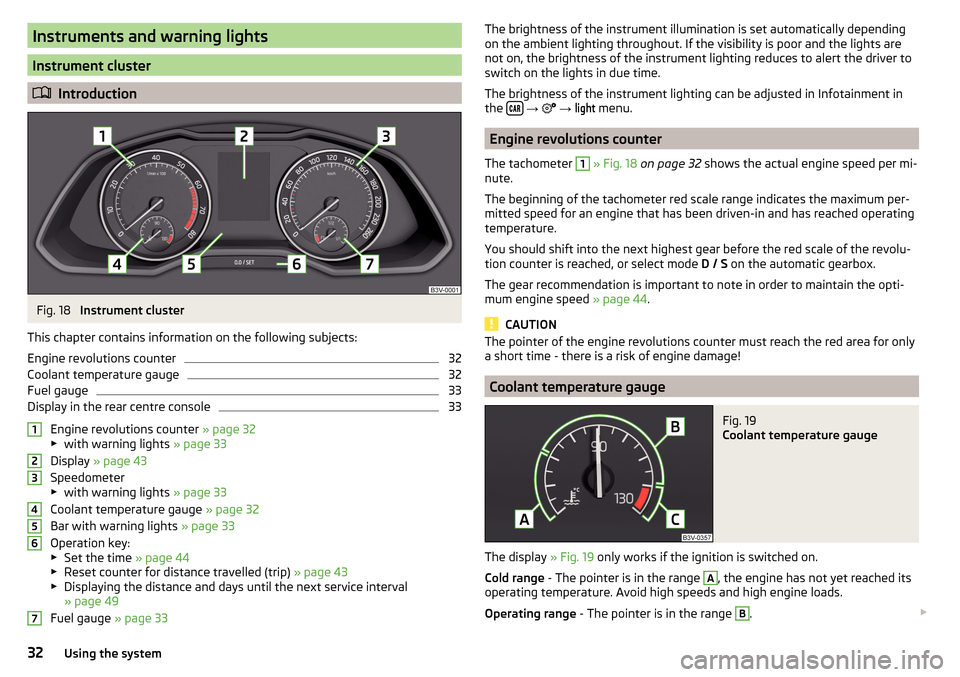
Fig. 18
Instrument cluster
This chapter contains information on the following subjects:
Engine revolutions counter
32
Coolant temperature gauge
32
Fuel gauge
33
Display in the rear centre console
33
Engine revolutions counter » page 32
▶ with warning lights » page 33
Display » page 43
Speedometer
▶ with warning lights » page 33
Coolant temperature gauge » page 32
Bar with warning lights » page 33
Operation key:
▶ Set the time » page 44
▶ Reset counter for distance travelled (trip) » page 43
▶ Displaying the distance and days until the next service interval
» page 49
Fuel gauge » page 33
1234567The brightness of the instrument illumination is set automatically depending
on the ambient lighting throughout. If the visibility is poor and the lights are
not on, the brightness of the instrument lighting reduces to alert the driver to
switch on the lights in due time.
The brightness of the instrument lighting can be adjusted in Infotainment in
the
→
→
light
menu.
Engine revolutions counter
The tachometer
1
» Fig. 18 on page 32 shows the actual engine speed per mi-
nute.
The beginning of the tachometer red scale range indicates the maximum per-
mitted speed for an engine that has been driven-in and has reached operating
temperature.
You should shift into the next highest gear before the red scale of the revolu-
tion counter is reached, or select mode D / S on the automatic gearbox.
The gear recommendation is important to note in order to maintain the opti-
mum engine speed » page 44.
CAUTION
The pointer of the engine revolutions counter must reach the red area for only
a short time - there is a risk of engine damage!
Coolant temperature gauge
Fig. 19
Coolant temperature gauge
The display » Fig. 19 only works if the ignition is switched on.
Cold range - The pointer is in the range
A
, the engine has not yet reached its
operating temperature. Avoid high speeds and high engine loads.
Operating range - The pointer is in the range
B
.
32Using the system
Page 35 of 336
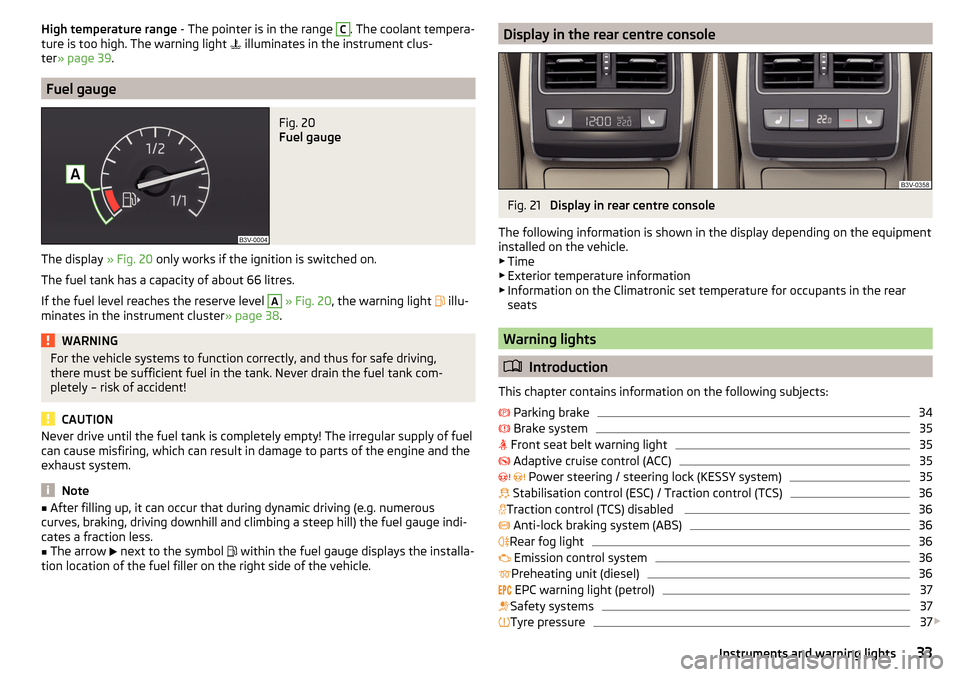
High temperature range - The pointer is in the range C. The coolant tempera-
ture is too high. The warning light illuminates in the instrument clus-
ter » page 39 .
Fuel gauge
Fig. 20
Fuel gauge
The display » Fig. 20 only works if the ignition is switched on.
The fuel tank has a capacity of about 66 litres.
If the fuel level reaches the reserve level
A
» Fig. 20 , the warning light
illu-
minates in the instrument cluster » page 38.
WARNINGFor the vehicle systems to function correctly, and thus for safe driving,
there must be sufficient fuel in the tank. Never drain the fuel tank com-
pletely – risk of accident!
CAUTION
Never drive until the fuel tank is completely empty! The irregular supply of fuel
can cause misfiring, which can result in damage to parts of the engine and the
exhaust system.
Note
■ After filling up, it can occur that during dynamic driving (e.g. numerous
curves, braking, driving downhill and climbing a steep hill) the fuel gauge indi-
cates a fraction less.■
The arrow
next to the symbol
within the fuel gauge displays the installa-
tion location of the fuel filler on the right side of the vehicle.
Display in the rear centre consoleFig. 21
Display in rear centre console
The following information is shown in the display depending on the equipment
installed on the vehicle.
▶ Time
▶ Exterior temperature information
▶ Information on the Climatronic set temperature for occupants in the rear
seats
Warning lights
Introduction
This chapter contains information on the following subjects:
Parking brake
34
Brake system
35
Front seat belt warning light
35
Adaptive cruise control (ACC)
35
Power steering / steering lock (KESSY system)
35
Stabilisation control (ESC) / Traction control (TCS)
36
Traction control (TCS) disabled
36
Anti-lock braking system (ABS)
36
Rear fog light
36
Emission control system
36
Preheating unit (diesel)
36
EPC warning light (petrol)
37
Safety systems
37
Tyre pressure
37
33Instruments and warning lights
Page 36 of 336
Brake linings38 Fuel reserve38
Lane Departure Warning (Lane Assist)
38
Turn signal system
38
Trailer turn signal lights
38
Fog lights
38
Speed regulating system / speed limiter
38
Brake pedal (automatic gearbox)
38
Auto Hold function
39
Main beam
39
Automatic gearbox
39
Rear seat belt warning light
39
Generator
39
Coolant
39
Engine oil pressure
40
Engine oil level
40
AdBlue ®
40
Lamp failure
41
Diesel particle filter (diesel)
41
Windscreen washer fluid level
41
Headlight assistant
41
START-STOPsystem
41
Display - a low temperature
42
Water in the fuel filter (diesel)
42
Adaptive cruise control (ACC)
42
Distance warning (Front Assist)
42
front Assist
42
Economy mode
42
Adaptive Chassis Control (DCC)
42
Service
42
The warning lights in the instrument cluster indicate certain functions or
faults.
Some warning lights can be accompanied by acoustic signals and messages in
the display of the instrument cluster.
After switching on the ignition, some warning lights light up briefly as a func-
tion test. If the tested systems are OK, the corresponding warning lights go
out a few seconds after switching on the ignition or after starting the engine.
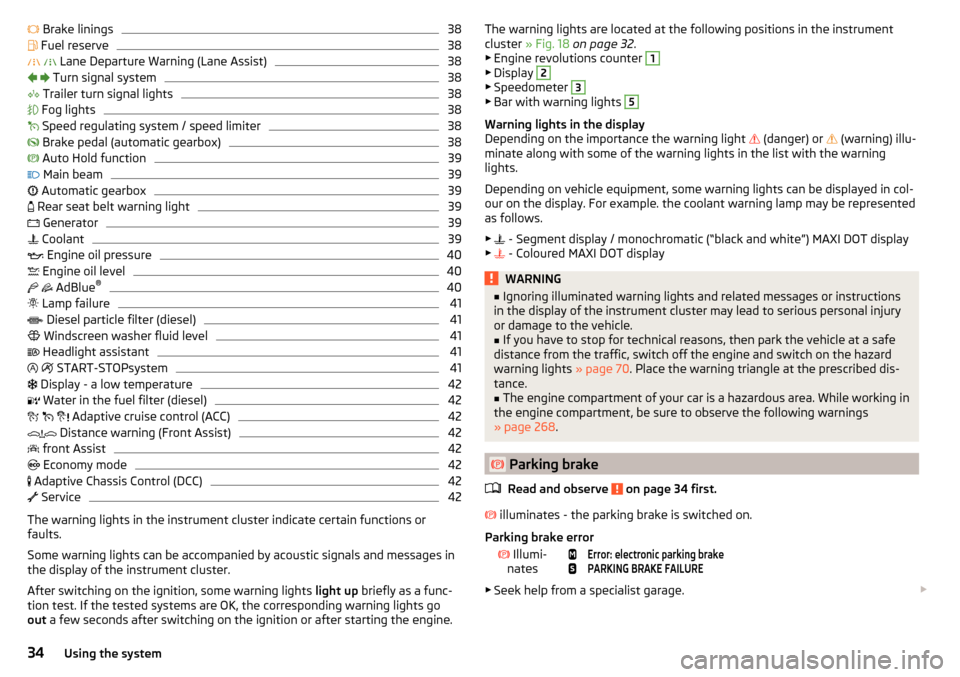
The warning lights are located at the following positions in the instrument
cluster » Fig. 18 on page 32 .
▶ Engine revolutions counter 1
▶Display
2
▶Speedometer
3
▶Bar with warning lights
5
Warning lights in the display
Depending on the importance the warning light
(danger) or
(warning) illu-
minate along with some of the warning lights in the list with the warning
lights.
Depending on vehicle equipment, some warning lights can be displayed in col-
our on the display. For example. the coolant warning lamp may be represented
as follows.
▶ - Segment display / monochromatic (“black and white”) MAXI DOT display
▶ - Coloured MAXI DOT display
WARNING■
Ignoring illuminated warning lights and related messages or instructions
in the display of the instrument cluster may lead to serious personal injury
or damage to the vehicle.■
If you have to stop for technical reasons, then park the vehicle at a safe
distance from the traffic, switch off the engine and switch on the hazard
warning lights » page 70. Place the warning triangle at the prescribed dis-
tance.
■
The engine compartment of your car is a hazardous area. While working in
the engine compartment, be sure to observe the following warnings
» page 268 .
Parking brake
Read and observe
on page 34 first.
illuminates - the parking brake is switched on.
Parking brake error
Illumi-
nates
Error: electronic parking brakePARKING BRAKE FAILURE
▶ Seek help from a specialist garage.
34Using the system
Page 42 of 336
Coolant temperature too high Illumi-
nates
Engine overheat. Stop! Log book!ENGINE OVERHEAT STOP
▶ Stop the vehicle, switch off the engine and let it cool.
▶ Continue your journey only after the warning light
has disappeared.
Engine oil pressure
Read and observe
on page 34 first.
flashes – the engine oil pressure is too low.
▶ Stop the vehicle, switch off the engine, and check the engine oil level.
▶ Even if the oil level is correct,
do not drive any further if the warning light
is flashing! Also do not leave the engine running at an idling speed.
▶ Seek help from a specialist garage.
CAUTION
If, under the given conditions, it is not possible to top up with engine oil,
stop driving - there is a risk of engine damage! Switch off the engine and seek
assistance from a specialist garage.
Engine oil level
Read and observe
on page 34 first.
Engine oil level too low
Illumi-
nates
Oil level: add oil!ADD OIL
▶ Stop the vehicle, switch off the engine, and check the engine oil level, top up
if necessary.
The warning light will go out if the bonnet is left open for more than 30 sec-
onds. If the engine oil is not replenished, the warning light will come on again
after driving about 100 km.
Engine oil level too high
Illumi-
nates
Reduce oil level!OIL LEVEL TOO HIGH
▶ Stop the vehicle, switch off the engine, and check the engine oil level.
▶ In the event of an oil level which is too high, you can drive on, exercising ap-
propriate caution. Seek assistance from a specialist garage immediately.
Fault on the engine oil level sensor Illumi-
nates
Oil sensor: Workshop!OIL SENSOR WORKSHOP
▶ You can drive on, exercising appropriate caution. Seek assistance from a spe-
cialist garage immediately.
CAUTION
If, under the given conditions, it is not possible to top up with engine oil,
stop driving - there is a risk of engine damage! Switch off the engine and seek
assistance from a specialist garage.
AdBlue ®
Read and observe
on page 34 first.
AdBlue ®
level too low
Information on the amount of AdBlue ®
to be added is also shown. The values
"min" and "max" stand for the minimum and maximum AdBlue ®
replenishment
amounts.
Illuminates
Refill AdBlue (DEF)! Range: ...REFILL ADBLUE (DEF)... RANGE_ ...
The range in the display indicates the distance that can be driven with the re-
maining AdBlue ®
left in the tank.
▶ Add AdBlue ®
» page 267 .
Illumi-
nates
Refill AdBlue (DEF)! No start in …REFILL ADBLUE (DEF)_NO START IN …
The value in the display indicates the distance that can still be travelled, after
which no engine restart is possible unless AdBlue ®
is added.
▶ Add AdBlue ®
» page 267 .
Illumi-
nates
Refill AdBlue (DEF)! Engine start not possible.REFILL ADBLUE (DEF)... NO RESTART
It is no longer possible to start the engine.
▶ Add AdBlue ®
» page 267 .
AdBlue ®
fault
Illumi-
nates
Error: AdBlue (DEF). No engine start in …ADBLUE (DEF) ERROR NO START IN …
40Using the system
Page 115 of 336
NoteWe recommend that you use a roof rack from ŠKODA Original Accessories.Heating and ventilation
Heating, manual air conditioning system, Climatronic
Introduction
This chapter contains information on the following subjects:
Heating and manual air conditioning
114
Climatronic (automatic air conditioning)
114
Operate Climatronic in Infotainment
116
Climatronic - automatic operation
116
Air distribution control
117
Air outlet vents
117
The heating heats and ventilates the vehicle interior. The air conditioning sys-
tem also cools and dehumidifies the vehicle interior.
The heating effect is dependent upon the coolant temperature, thus full heat
output only occurs when the engine has reached its operating temperature.
The cooling system works under the following conditions. The cooling system is switched on.
The engine is running.
The outside temperature is below 2 ° C.
The blower is switched on.
Fogging is prevented when the cooling system is switched on.
It is possible to boost the effectiveness of the cooling system by briefly acti-
vating the air recirculation system » page 117.
Health protection
To reduce health risks (e.g. common colds), the following instructions for the
use of the cooling system are to be observed. ▶ The difference between the indoor temperature and the outdoor air temper-
ature should not be greater than about 5 ° C.
▶ The cooling system should be turned off about 10 minutes before the end of
the journey.
▶ Once a year, the air conditioning should be disinfected by a specialist garage.
113Heating and ventilation
Page 116 of 336
WARNING■The blower should always be on to prevent the windows from misting.
Otherwise there could be an accident.■
Under certain circumstances, air at a temperature of about 5 °C can flow
out of the vents when the cooling system is switched on.
Note
■ The air inlet in front of the windscreen must be free of e.g. ice, snow or
leaves to ensure that the heating and cooling system operates properly.■
After switching on the cooling Condensation from the evaporator of the air
conditioning may drip down and form a puddle below the vehicle. This is not a
leak!
■
If the coolant temperature is too high, the cooling system is switched off to
ensure that the engine cools down.
Heating and manual air conditioning
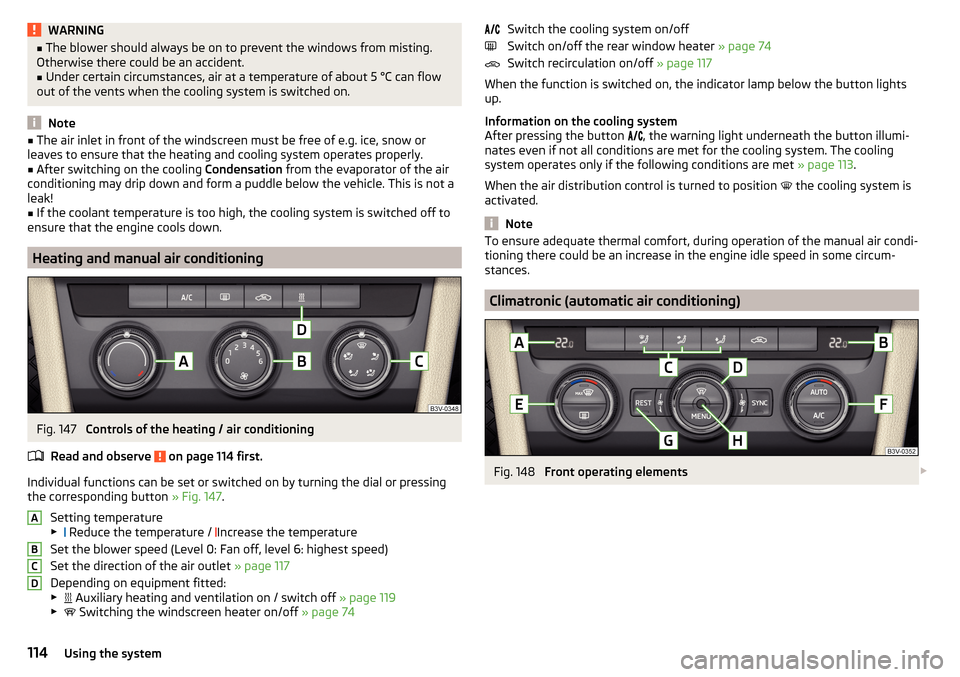
Fig. 147
Controls of the heating / air conditioning
Read and observe
on page 114 first.
Individual functions can be set or switched on by turning the dial or pressing the corresponding button » Fig. 147.
Setting temperature
▶ Reduce the temperature /
Increase the temperature
Set the blower speed (Level 0: Fan off, level 6: highest speed)
Set the direction of the air outlet » page 117
Depending on equipment fitted:
▶ Auxiliary heating and ventilation on / switch off
» page 119
▶ Switching the windscreen heater on/off
» page 74
ABCDSwitch the cooling system on/off
Switch on/off the rear window heater » page 74
Switch recirculation on/off » page 117
When the function is switched on, the indicator lamp below the button lights up.
Information on the cooling system
After pressing the button
, the warning light underneath the button illumi-
nates even if not all conditions are met for the cooling system. The cooling
system operates only if the following conditions are met » page 113.
When the air distribution control is turned to position
the cooling system is
activated.
Note
To ensure adequate thermal comfort, during operation of the manual air condi-
tioning there could be an increase in the engine idle speed in some circum-
stances.
Climatronic (automatic air conditioning)
Fig. 148
Front operating elements
114Using the system
Page 120 of 336
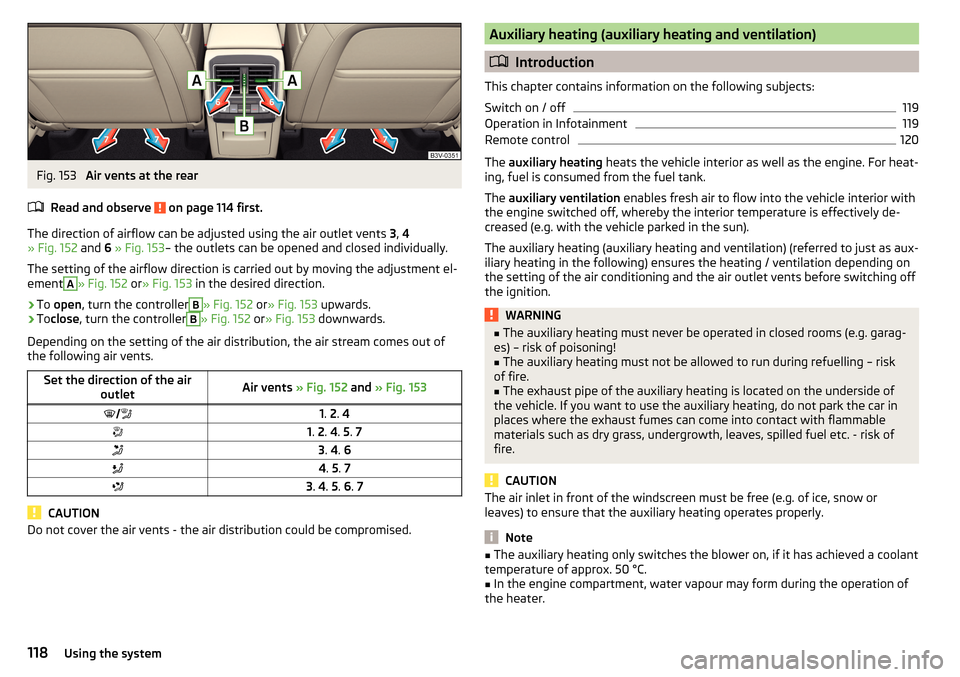
Fig. 153
Air vents at the rear
Read and observe
on page 114 first.
The direction of airflow can be adjusted using the air outlet vents 3, 4
» Fig. 152 and 6 » Fig. 153 – the outlets can be opened and closed individually.
The setting of the airflow direction is carried out by moving the adjustment el-
ement
A
» Fig. 152 or» Fig. 153 in the desired direction.
›
To open , turn the controller
B
» Fig. 152 or» Fig. 153 upwards.
›
Toclose , turn the controller
B
» Fig. 152 or» Fig. 153 downwards.
Depending on the setting of the air distribution, the air stream comes out of
the following air vents.
Set the direction of the air outletAir vents » Fig. 152 and » Fig. 1531. 2 . 41. 2 . 4 . 5 . 73 . 4 . 64 . 5 . 73 . 4 . 5 . 6 . 7
CAUTION
Do not cover the air vents - the air distribution could be compromised.Auxiliary heating (auxiliary heating and ventilation)
Introduction
This chapter contains information on the following subjects:
Switch on / off
119
Operation in Infotainment
119
Remote control
120
The auxiliary heating heats the vehicle interior as well as the engine. For heat-
ing, fuel is consumed from the fuel tank.
The auxiliary ventilation enables fresh air to flow into the vehicle interior with
the engine switched off, whereby the interior temperature is effectively de-
creased (e.g. with the vehicle parked in the sun).
The auxiliary heating (auxiliary heating and ventilation) (referred to just as aux- iliary heating in the following) ensures the heating / ventilation depending on
the setting of the air conditioning and the air outlet vents before switching off
the ignition.
WARNING■ The auxiliary heating must never be operated in closed rooms (e.g. garag-
es) – risk of poisoning!■
The auxiliary heating must not be allowed to run during refuelling – risk
of fire.
■
The exhaust pipe of the auxiliary heating is located on the underside of
the vehicle. If you want to use the auxiliary heating, do not park the car in
places where the exhaust fumes can come into contact with flammable
materials such as dry grass, undergrowth, leaves, spilled fuel etc. - risk of
fire.
CAUTION
The air inlet in front of the windscreen must be free (e.g. of ice, snow or
leaves) to ensure that the auxiliary heating operates properly.
Note
■ The auxiliary heating only switches the blower on, if it has achieved a coolant
temperature of approx. 50 °C.■
In the engine compartment, water vapour may form during the operation of
the heater.
118Using the system
Page 273 of 336

Diesel enginesSpecification1.6 ltr. / 88 kW TDI CRVW 507 002.0 l/110, 130, 140 kW TDI CR
Vehicles with fixed service intervals
Petrol enginesSpecification1.4 l/92, 110 kW TSI
VW 502 00
1.8 ltr./132 kW TSI2.0 l/162, 206 kW TSIDiesel enginesSpecification1.6 ltr. / 88 kW TDI CRVW 507 002.0 l/110, 130, 140 kW TDI CR
Engine oil VW 505 01 can optionally be used in diesel engines without a DPF.
CAUTION
■
If no prescribed engine oil is available, then max. 0.5 l oil of the following
specifications can be refilled. ■Petrol engines: ACEA A3/ACEA B4 or API SN, (API SM);
■ Diesel engines: ACEA C3 or API CJ-4.
Check and refill
Fig. 321
Dipstick variants
Read and observe and on page 270 first.
Check the oil under the following conditions and refill.
The vehicle is standing on a horizontal surface.
The engine operating temperature is reached.
The engine is turned off.
Checking the level
›
Wait a few minutes until the engine oil flows back into the oil trough.
›
Remove the dipstick and wipe with a clean cloth.
›
Push the dipstick to the stop and pull out again.
›
Read the oil level and push in the dipstick.
The oil level must be in range
A
» Fig. 321 . If the oil level is below the range
A
, refill the oil.
Refilling
›
Unscrew the cap of the engine oil filler opening
C
» Fig. 319 on page 269 .
›
Add oil of the correct specification in portions of 0.5 litres » page 270.
›
Check the oil level .
›
Screw the lid of the engine oil filler closed carefully.
CAUTION
■
The oil level must never be below the range A » Fig. 321 – risk of damage to
the motor as well as the exhaust system.■
If a top up with oil is not possible or the oil level is above range
A
,
stop
driving! Switch off the engine and seek assistance from a specialist garage.
Note
Too low engine oil level is shown in the instrument cluster by the warning
light illuminating and also indicated by the message » page 40. Nevertheless,
we recommend to check the oil level on a regular basis with the dipstick.
Coolant
Introduction
This chapter contains information on the following subjects:
Checking and refilling
272
The coolant cools the engine and consists of water and coolant additive (with
additives that protect the cooling system against corrosion and prevents fur-
ring).
271Inspecting and replenishing
Page 317 of 336
CheckBrake fluid273
Engine oil271
Oil level271
Checking Battery status
274
Coolant272
Checks Statutory checks
256
Children and safety22
Child safety lock57
Child seat22
Classification25
I-Size27
Installation location25, 27
ISOFIX26
on the front passenger seat23, 24
Place of installation26
TOP TETHER27
Cigarette lighter99
Cleaning the vehicle Interior
263
Outside261
Washing260
Clear calls136
Climatronic113
air distribution control117
Automatic operation116
Operate in Infotainment116
Operating elements114
Clothes hook93
Cockpit31
Lighting72
Comfort indicating68
COMING HOME70
Compartments87
Compatible sources Pictures
154
Video DVD156
Component protection257
Computer see multifunction display46
Conditions for pairing164
Conference call171
Configuration wizard127
Convenience operation Window
63
Coolant271
Checking272
Refilling272
Temperature display32
Warning light39
CORNER See Fog lights with CORNER function
70
Correct routing of seat belt
16
Correct seated position12
Correct seating position14
Crew Protect Assist242
Cruise control230
Cruise Control System229
Cup holders90
Custom destination186
D
DAB
142, 143
Additional information142
Radio Text and image presentation142
Set134, 141
DAB slideshow142
Data connection175
Data roaming133
Data transfer of external devices128
Date132, 139
DAY LIGHT See Daytime running lights
67
Daytime running lights67
DCC240
Warning light42
De-icing the windscreen and rear window74
Deactivation Airbag
21
Default settings133 , 198
Delayed locking of the boot lid See boot lid
59
Delete destination190
Demo mode138, 191
Destination Custom destination
186
Entered on the map184
Favourite185, 190
final destinations184
Flagged destination185
Home address185
Image with GPS187
Memory190
Saved destination185
Search for182
Telephone contact185
vCard185
Destination details190
Destination management Destination details
190
Favourite190
Storage190
Destination memory185
Detail of the traffic report197
Device Connect to the telephone
163
Device hotspot174
Diesel266
Diesel fuel266
Diesel particle filter (DPF)41
Digital Clock44
Digital radio reception Set
141
Digital Service Plan260
Dipped beam67
315Index
Page 318 of 336
Dipstick271
Display125
Cardinal points43
Coolant temperature32
Fuel level33
Gear changes44
In the instrument cluster43
MAXI DOT48
Rear centre console33
Service intervals49
Display in Infotainment Driving data
46
Disposal Acceptance and recycling of used vehicles
258
Distance warning238
Warning light42
Diverting calls136
Door Child safety lock
57
Emergency locking293
Emergency locking of the driver's door292
Open / Close57
Door warning43
Drive Driving through water
211
DriveGreen210
Driving Emissions
305
Fuel consumption305
Maximum speed309
through water211
Driving data Show
46
Driving mode240
Adaptive Chassis Control (DCC)240
Comfort241
Eco240
Individual241
Mode selection and Infotainment display241
Normal241
Settings for individual mode242
Sports241
Driving Mode Selection240
DSR214
DVD149
DVD-Video Set to
135
Dynamic Light Assist71
Dynamic Road Sign Display Additional display
248
Information messages248
Malfunctions248
Operation247
Settings in Infotainment247
Dynamic route switch on / off
197
E
Economical driving
209
Economy mode42
ECO TIP43
Eco tips43
Edit route192
EDS214
Electrical boot lid set the top position of the lid
61
Electric boot lid Force limiter
59
Manual operation59
Open/close60
Electric parking brake203
Electric power windows62, 63
Malfunctions64
Electric tail gate Malfunctions
61
Electric windows Buttons on the driver door
62
Electronic Differential Lock (EDL, XDS)214
Electronic immobilizer199
Elevation180
emergency Jump-starting
288
Starting the engine / stopping the push of a button
201
Emergency Changing a wheel
282
Hazard warning light system70
Jump-starting287
Selector lever release293
Starting the engine / stopping the engine at the push of a button
200
Towing the using the tow hitch290
Towing the vehicle288
Tyre repair285
Unlocking/locking the door292
Unlocking / locking the door293
Emergency call168
Emergency equipment Fire extinguisher
281
First aid kit280
Jack281
Reflective vest280
Vehicle tool kit281
Warning triangle280
Emission control system36
Emissions305
Engine Information messages
39
Running in209
Engine compartment268
Brake fluid273
Coolant271
Engine oil270
Overview269
Vehicle battery273
Windscreen washer fluid270
Engine drag torque control (MSR)213
Engine number303
316Index