oil pressure SKODA SUPERB 2016 3.G / (B8/3V) Owner's Manual
[x] Cancel search | Manufacturer: SKODA, Model Year: 2016, Model line: SUPERB, Model: SKODA SUPERB 2016 3.G / (B8/3V)Pages: 336, PDF Size: 53.89 MB
Page 5 of 336
Radio142Operation142
Media
146
Operation
146
Audio sources
149
Images
153
Image viewer
153
Video DVD
155
Video player
155
TV tuner
156
TV function
156
Media Command
158
Operation
158
Telephone
160
Introductory information
160
Pair and connect
163
Use the SIM card in the external module
166
rSAP
167
Telephone functions
168
Text messages (SMS)
172
Hotspot (WLAN) and data connection
174
Hotspot (WLAN)
174
Data connection
175
SmartLink
176
Introductory information
176
Android Auto
177
Apple CarPlay
178
MirrorLink®
178
Navigation
180
Introductory information
180
Search for destination and enter
182
Import my destinations
186
Map
187
Route guidance
190Route192Waypoint mode194
Traffic reports
196
vehicle systems
198
CAR - Vehicle settings
198
Driving
Starting-off and Driving
199
Starting and stopping the engine
199
START-STOPsystem
201
Brakes and Parking
203
Manual gear changing and pedals
205
Automatic transmission
206
Running in the engine and economical
driving
209
Avoiding damage to your vehicle
211
Assist systems
212
General information
212
Braking and stabilisation systems
212
Parking aid (ParkPilot)
215
Rear traffic alert and wizard for “Blind
spot”Monitoring
218
Reversing camera
221
Park Assist
225
Cruise Control System
229
Speed limiter
231
Adaptive Cruise Control (ACC)
233
Front Assist
237
Select the driving mode (Driving Mode
Selection)
240
Proactive occupant protection (Crew Protect
Assist)
242
Lane Departure Warning (Lane Assist)
243
Traffic jam assistant
245
Assistant for emergencies
246
Traffic sign recognition
246Fatigue detection248Tyre pressure monitoring249
Towing device and trailer
250
Hitch
250
Using hitch
252
General Maintenance
Care and maintenance
256
Service work, adjustments and technical
alterations
256
Service intervals
258
Cleaning and care
260
Inspecting and replenishing
264
Fuel
264
AdBlue ®
and its refilling
267
Engine compartment
268
Engine oil
270
Coolant
271
Brake fluid
273
Vehicle battery
273
Wheels
276
Wheels and tyres
276
Operating in winter conditions
278
Do-it-yourself
Emergency equipment and self-help
280
Emergency equipment
280
Changing a wheel
282
Puncture repair kit
285
Jump-starting
287
Towing the vehicle
288
Remote control and removable light -
replacing the battery/batteries
2903Table of Contents
Page 14 of 336
Safety
Passive Safety
General information
Introduction
This chapter contains information on the following subjects:
Before setting off
12
Driving safety
12
This section of the manual includes important information on the subject of
passive safety. We have combined everything here which you should be famili-
ar with, for example, regarding seat belts, airbags, safety of children and any-
thing similar.
Other important safety information can also be found in the following chapters
of this Owner´s Manual. The Owner´s Manual should therefore always be in
the vehicle.
Before setting off
For your own safety and the safety of the people travelling with you, please
pay attention to the following points before setting off.
▶ Check the function of the lighting and turn signal systems.
▶ Check the function of the wipers and check the wiper blades for wear. Check
the windscreen washer fluid level.
▶ Ensure that all of the windows offer good visibility to the outside.
▶ Adjust the rear-view mirror so that vision to the rear is guaranteed. Ensure
that the mirrors are not covered.
▶ Check the tyre inflation pressure.
▶ Check the engine oil, brake fluid and coolant level.
▶ Secure all items of luggage.
▶ Do not exceed the permissible axle loads and permissible gross weight of the
vehicle.
▶ Close all doors as well as the bonnet and boot lid.
▶ Ensure that no objects can obstruct the pedals.
▶
Protect children by using a suitable child seat » page 22, Transporting chil-
dren safely .
▶ Adopt the correct seated position. Instruct your passengers to assume the
correct seated position » page 12, Correct and safe seated position .
Driving safety
In the interests of traffic safety, the following information must be observed. ▶ Do not become distracted from concentrating on the traffic situation, (e.g. by
your passengers or mobile telephone calls).
▶ Never drive when your driving ability is impaired, (e.g. due to medication, al-
cohol or drugs).
▶ Keep to the traffic regulations and the permissible speed limit.
▶ Always adjust the driving speed to the road, traffic and weather conditions.
▶ Take regular breaks on long journeys (at least every two hours).
Correct and safe seated position
Introduction
This chapter contains information on the following subjects:
Driver’s correct seating position
13
Adjusting the steering wheel position
13
Correct seating position of the passenger
14
Correct seating position for the passengers in the rear seats
14
Always assume the correct seated position before setting off and do not
change this position while driving. Also advise your passengers to adopt the
correct seated position and not to change this position while the car is moving.
The following list contains instructions for the Passenger which, if not ob-
served, may cause serious injuries or death. ▶ Do not lean against the dash panel.
▶ Do not put your feet on the dash panel.
The following list contains instructions for all Passengers which, if not ob-
served, may cause serious injuries or death.
▶ Do not sit only on the front part of the seat.
▶ Do not sit facing to the side.
▶ Do not lean out of the window.
▶ Do not put your limbs out of the window.
▶ Do not put your feet on the seat cushion.
12Safety
Page 36 of 336
Brake linings38 Fuel reserve38
Lane Departure Warning (Lane Assist)
38
Turn signal system
38
Trailer turn signal lights
38
Fog lights
38
Speed regulating system / speed limiter
38
Brake pedal (automatic gearbox)
38
Auto Hold function
39
Main beam
39
Automatic gearbox
39
Rear seat belt warning light
39
Generator
39
Coolant
39
Engine oil pressure
40
Engine oil level
40
AdBlue ®
40
Lamp failure
41
Diesel particle filter (diesel)
41
Windscreen washer fluid level
41
Headlight assistant
41
START-STOPsystem
41
Display - a low temperature
42
Water in the fuel filter (diesel)
42
Adaptive cruise control (ACC)
42
Distance warning (Front Assist)
42
front Assist
42
Economy mode
42
Adaptive Chassis Control (DCC)
42
Service
42
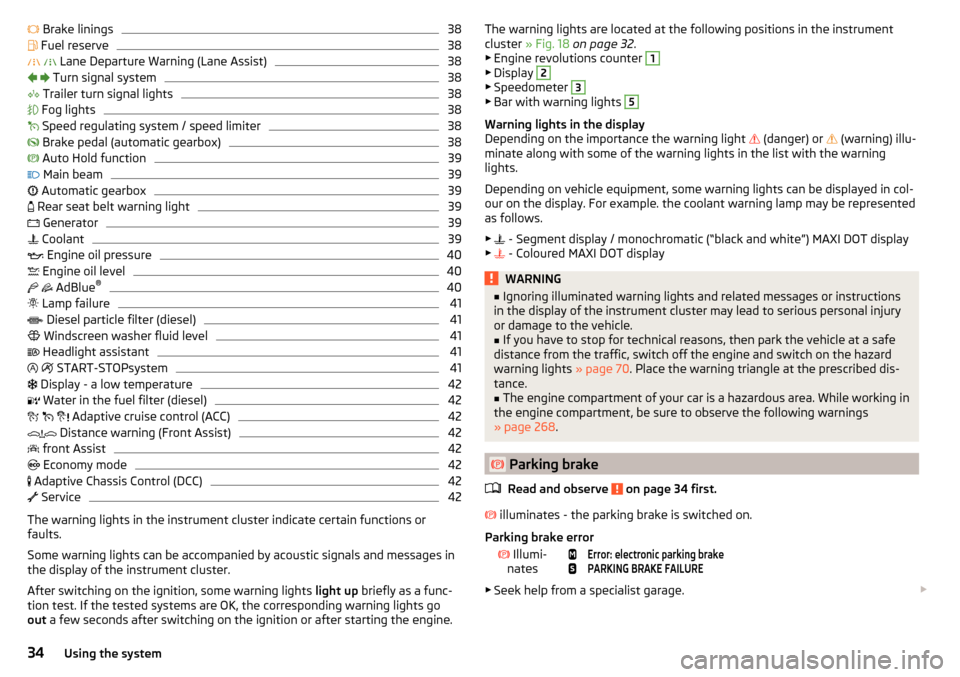
The warning lights in the instrument cluster indicate certain functions or
faults.
Some warning lights can be accompanied by acoustic signals and messages in
the display of the instrument cluster.
After switching on the ignition, some warning lights light up briefly as a func-
tion test. If the tested systems are OK, the corresponding warning lights go
out a few seconds after switching on the ignition or after starting the engine.
The warning lights are located at the following positions in the instrument
cluster » Fig. 18 on page 32 .
▶ Engine revolutions counter 1
▶Display
2
▶Speedometer
3
▶Bar with warning lights
5
Warning lights in the display
Depending on the importance the warning light
(danger) or
(warning) illu-
minate along with some of the warning lights in the list with the warning
lights.
Depending on vehicle equipment, some warning lights can be displayed in col-
our on the display. For example. the coolant warning lamp may be represented
as follows.
▶ - Segment display / monochromatic (“black and white”) MAXI DOT display
▶ - Coloured MAXI DOT display
WARNING■
Ignoring illuminated warning lights and related messages or instructions
in the display of the instrument cluster may lead to serious personal injury
or damage to the vehicle.■
If you have to stop for technical reasons, then park the vehicle at a safe
distance from the traffic, switch off the engine and switch on the hazard
warning lights » page 70. Place the warning triangle at the prescribed dis-
tance.
■
The engine compartment of your car is a hazardous area. While working in
the engine compartment, be sure to observe the following warnings
» page 268 .
Parking brake
Read and observe
on page 34 first.
illuminates - the parking brake is switched on.
Parking brake error
Illumi-
nates
Error: electronic parking brakePARKING BRAKE FAILURE
▶ Seek help from a specialist garage.
34Using the system
Page 42 of 336
Coolant temperature too high Illumi-
nates
Engine overheat. Stop! Log book!ENGINE OVERHEAT STOP
▶ Stop the vehicle, switch off the engine and let it cool.
▶ Continue your journey only after the warning light
has disappeared.
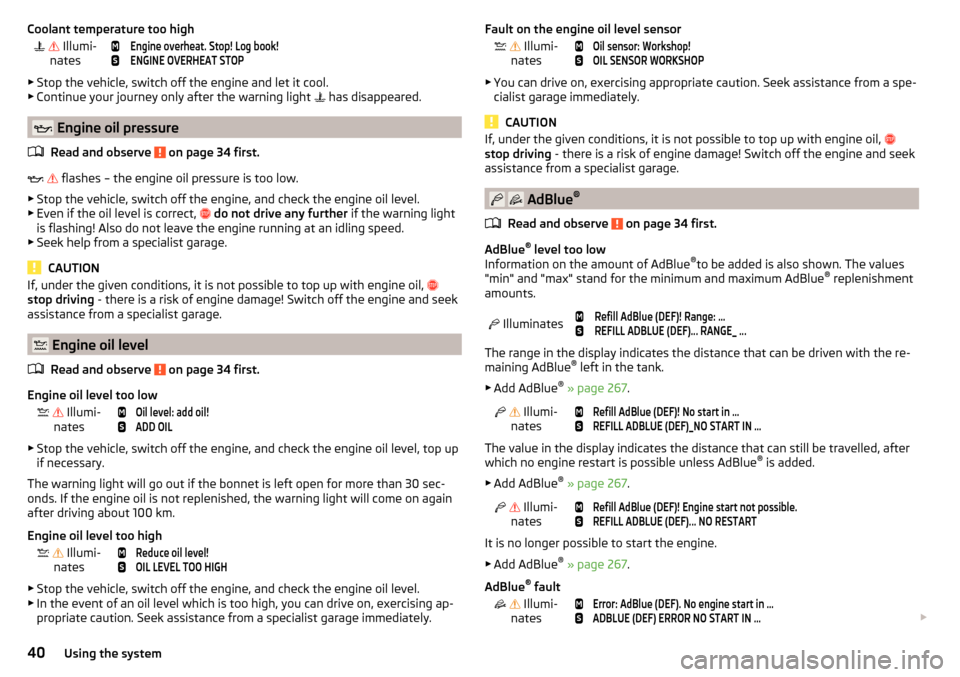
Engine oil pressure
Read and observe
on page 34 first.
flashes – the engine oil pressure is too low.
▶ Stop the vehicle, switch off the engine, and check the engine oil level.
▶ Even if the oil level is correct,
do not drive any further if the warning light
is flashing! Also do not leave the engine running at an idling speed.
▶ Seek help from a specialist garage.
CAUTION
If, under the given conditions, it is not possible to top up with engine oil,
stop driving - there is a risk of engine damage! Switch off the engine and seek
assistance from a specialist garage.
Engine oil level
Read and observe
on page 34 first.
Engine oil level too low
Illumi-
nates
Oil level: add oil!ADD OIL
▶ Stop the vehicle, switch off the engine, and check the engine oil level, top up
if necessary.
The warning light will go out if the bonnet is left open for more than 30 sec-
onds. If the engine oil is not replenished, the warning light will come on again
after driving about 100 km.
Engine oil level too high
Illumi-
nates
Reduce oil level!OIL LEVEL TOO HIGH
▶ Stop the vehicle, switch off the engine, and check the engine oil level.
▶ In the event of an oil level which is too high, you can drive on, exercising ap-
propriate caution. Seek assistance from a specialist garage immediately.
Fault on the engine oil level sensor Illumi-
nates
Oil sensor: Workshop!OIL SENSOR WORKSHOP
▶ You can drive on, exercising appropriate caution. Seek assistance from a spe-
cialist garage immediately.
CAUTION
If, under the given conditions, it is not possible to top up with engine oil,
stop driving - there is a risk of engine damage! Switch off the engine and seek
assistance from a specialist garage.
AdBlue ®
Read and observe
on page 34 first.
AdBlue ®
level too low
Information on the amount of AdBlue ®
to be added is also shown. The values
"min" and "max" stand for the minimum and maximum AdBlue ®
replenishment
amounts.
Illuminates
Refill AdBlue (DEF)! Range: ...REFILL ADBLUE (DEF)... RANGE_ ...
The range in the display indicates the distance that can be driven with the re-
maining AdBlue ®
left in the tank.
▶ Add AdBlue ®
» page 267 .
Illumi-
nates
Refill AdBlue (DEF)! No start in …REFILL ADBLUE (DEF)_NO START IN …
The value in the display indicates the distance that can still be travelled, after
which no engine restart is possible unless AdBlue ®
is added.
▶ Add AdBlue ®
» page 267 .
Illumi-
nates
Refill AdBlue (DEF)! Engine start not possible.REFILL ADBLUE (DEF)... NO RESTART
It is no longer possible to start the engine.
▶ Add AdBlue ®
» page 267 .
AdBlue ®
fault
Illumi-
nates
Error: AdBlue (DEF). No engine start in …ADBLUE (DEF) ERROR NO START IN …
40Using the system
Page 205 of 336
Brakes and Parking
Introduction
This chapter contains information on the following subjects:
Electric parking brake
203
Auto Hold function
204
Parking
205
The wear of the brake pads is dependent on the operating conditions and driv-
ing style. Under difficult conditions (e.g. urban, sporty driving style) the condi-
tion of the brakes should also be checked by a specialist garage between the
service intervals.
The performance of the brakes can be delayed if the brakes are damp, iced up
in winter or if covered in a layer of salt . The brakes are cleaned and dried by
applying the brakes several times »
.
Corrosion on the brake discs and dirt on the brake pads occur if the vehicle has
been parked for a long period and if you do not make much use of the braking
system. The brakes are cleaned by applying the brakes several times »
.
Before travelling a long distance with a steep gradient , reduce speed and
shift into the next lowest gear. As a result, the braking effect of the engine will
be used, reducing the load on the brakes. If you do have to brake, this should
be carried out at intervals.
Emergency braking display - when an emergency braking is performed, the
automatic flashing of the brake lights are used to alert the traffic behind.
New brake pads must first be “worn in” because these do not initially have the
best possible braking effect. Drive especially carefully for the first 200 km or
so.
A too low brake fluid level can cause faults in the braking system , the warn-
ing light illuminates in the instrument cluster
» page 35,
Brake system
. If
the warning light does not illuminate and an extended stopping distance is re-
quired, then driving should be adapted according to the unknown cause of
fault and restricted braking effect - seek the assistance of a specialist garage
immediately.
The brake booster increases the pressure generated with the brake pedal. The
brake booster only operates when the engine is running.
WARNING■ Greater physical effort is required for braking when the engine is switch-
ed off – risk of accident!■
During the braking procedure on a vehicle with manual transmission,
when the vehicle is in gear and at low revs, press the clutch pedal. Other-
wise, the functionality of the brake system may be impaired – risk of acci-
dent!
■
Do not press the brake pedal if braking is now required. This causes the
brakes to overheat and can also result in a longer braking distance and ex-
cessive wear - risk of accident!
■
Braking for the purpose of drying and cleaning the brake discs should be
carried out only if the traffic conditions permit. Do not place any other road
users in jeopardy.
■
Recommendations for new brake pads have to be observed.
■
When stopping and parking, the parking brake should always be on, oth-
erwise the vehicle could move off - there is the risk of an accident!
■
If a front spoiler, full wheel trim, etc. is mounted retrospectively, it must
be ensured that the air supply to the front wheel brakes is not reduced.
Otherwise, the functionality of the brake system may be impaired – risk of
accident!
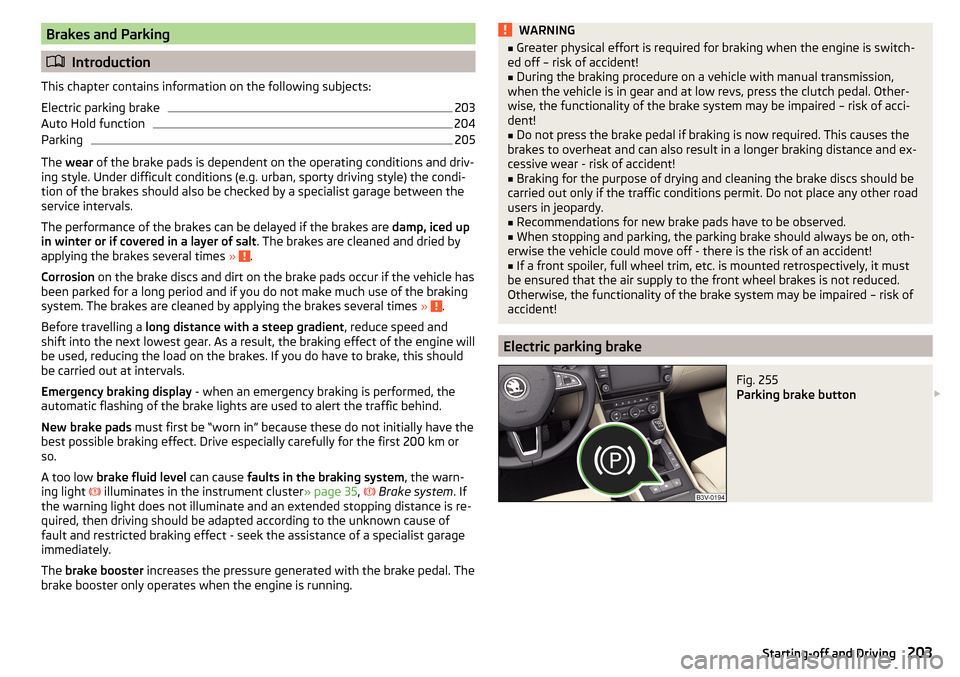
Electric parking brake
Fig. 255
Parking brake button
203Starting-off and Driving
Page 260 of 336
WARNING■No changes may be made to parts of the airbag system, the front bumper
and the body.■
Any work on the airbag system including the installation and removal of
system components due to other repair work (e.g. removal of the steering
wheel) must only be carried out by a specialist garage.
■
Do not manipulate individual parts of the airbag system, as this might re-
sult in the airbag being deployed.
■
If the airbag is triggered, the airbag system must be exchanged.
WARNINGThe airbag system operates using pressure sensors located in the front
doors. For this reason, no adjustments may be carried out to the doors or
door panels (e.g. installation of additional loudspeakers). The resulting
damage can negatively affect the function of the airbag system - there is a
risk of accidents and fatal injuries! The following guidelines must be ob-
served.■
Any work on the front doors and their door panels must be carried out by
a specialist garage.
■
Never drive with removed inner door panels or openings in the panels.
Acceptance and recycling of used vehicles
Read and observe
on page 256 first.
All new ŠKODA vehicles are 95% recyclable.
Service intervals
Introduction
This chapter contains information on the following subjects:
Overview of service intervals
259
Fixed service intervals QI1 - QI4
259
Flexible service interval QI6
259
Digital Service Plan
260
The service interval display in the display of the instrument cluster will remind
you to carry out every service stipulated by the manufacturer at the right time
in order to prevent you from forgetting them » page 49.
The completion of services can be verified through the printed verification
from the digital service schedule and the respective receipts.
The specified service intervals are tailored to normal operating conditions.
In the case of difficult operating conditions, it is necessary to have some serv-
ice work performed before the date of the next service or between the speci-
fied service intervals. This applies mainly to the cleaning or the replacement of
the air filter insert in regions with heavy dust pollution as well as checking and
replacing the toothed belt, but also to vehicles with diesel particle filters,
which can put greater strain on the engine oil.
The following is understood under difficult conditions:
▶ Fuel containing sulphur.
▶ Frequent short trips.
▶ Longer periods of engine idling (e.g. taxis).
▶ Operation in areas with heavy dust pollution.
▶ Frequent trailer operation.
▶ Predominantly stop-and-go traffic as is often the case in city driving, for ex-
ample.
▶ Operation predominantly during winter.
You will be told at the specialist garage whether the operating conditions of your vehicle may make it necessary for service work to be carried out between
the normal service intervals.
Different service charges may apply from the particular scope of work required,
depending on the vehicle type and equipment and the status of your vehicle.
Note
■ The customer is responsible for covering the cost of all services including
changing or replenishing the oil, even during the warranty period, unless sta-
ted otherwise in the ŠKODA AUTO. warranty terms or other agreements.■
You will be informed about the current service scopes for the particular serv-
ice work by the specialist garage.
258General Maintenance
Page 263 of 336

The longer insect residues, bird droppings, road salt and other aggressive de-
posits remain on the paintwork of your vehicle, the more detrimental their de-
structive effect can be. High temperatures, such as those caused by intensive
sun's rays, accentuate this caustic effect.
It is essential to also thoroughly clean the underside of the vehicle at the end
of the winter.
Washing by hand
Wash the vehicle from top to bottom, if necessary, wash using a soft sponge or
washing mitt and plenty of water with appropriate detergents. Wash out the
sponge or washing glove thoroughly at short intervals.
Use a different sponge for the wheels, door sills and lower vehicle areas.
Give the vehicle a good rinse after washing it and dry it off using a chamois
leather.
Automatic car washes
The usual precautionary measures must be taken before washing the vehicle
in an automatic car wash system (e.g. closing the windows and the sliding/tilt-
ing roof etc.).
If your vehicle is fitted with any particular attached parts, such as a spoiler,
roof rack system, two-way radio aerial etc., it is best to consult the operator of
the car wash system beforehand.
After an automatic wash with wax treatment, the blades of the wipers should
be cleaned with cleaning agents specially designed for the purpose, and then
degreased.
Pressure washer
When washing the vehicle with a high-pressure cleaner, the instructions for
use of the equipment must be observed. This particularly applies to informa-
tion with respect to the pressure and spray distance from the vehicle surface.WARNING■
When washing your vehicle in the winter: Water and ice in the braking
system can affect the braking efficiency – risk of accident!■
Take care when cleaning the underbody or the inside of the wheel wells -
there is a risk of injury on sharp metal parts!
CAUTION■ Do not wash the vehicle in direct sunlight, do not exert pressure on the body
while washing. The temperature of the washing water should be max. 60 ° C -
otherwise there is a risk of damaging the vehicle paint.■
Before driving through a car wash, fold in the exterior mirrors - there is a risk
of damage.
CAUTION
Washing the vehicle using pressure washers■The foils should not be washed using pressure washers - there is a risk of
damage .■
Do not aim the water jet directly at the lock cylinders or the door or opening
joints when washing the vehicle in the winter – there is a risk of freezing.
■
During cleaning always keep a sufficiently large spraying distance to the
parking sensors, the rear camera lens, to external decorative and protective
plastic parts (e.g. Roof racks, spoilers, protective strips) and other vehicle parts
made of non-metallic materials such as rubber hoses or insulation materials.
■
The sensors of the parking aid can be sprayed only for a short time and there
must be a minimum distance of 10 cm - there is a risk of damage.
■
When washing the vehicle, do not point the water jet directly at the tow bar
or the trailer socket - there is a risk of seal damage or washing out the grease.
Caring for the outside of the vehicle
Read and observe
and on page 260 first.
Vehicle compo- nentFacts of thematterRemedy
Paint
Spilled fuelClear water, cloth, (clean as soon as
possible)No water drop-
lets form on the
paintUse hard wax (min. twice a year), apply
wax to clean and dry bodyMatt paintUse polish, then preserve (if the polish
does not contain any preservative in-
gredients)Chromed
and anodised
partsSoilingClear water, cloth or cleaning agent
provided for this purpose, then polish
with a soft dry clothFoilsSoilingSoft sponge and mild soap solution a)
261Care and maintenance
Page 264 of 336

Vehicle compo-nentFacts of thematterRemedyWindows
and door mirrorsSoilingWash with clean water and dry using
the intended clothHeadlights/lightsSoilingSoft sponge and mild soap solution a)
Reversing cameraSoilingWash with clean water and dry with a
soft clothSnow / iceHand brush / de-icerDoor lock cylinderSnow / iceDe-icerWiper / wiper
bladesSoilingGlass cleaner, sponge or clothWheelsSoilingClear water, then coat with appropriate
conservation solutiona)
Mild soap solution = 2 tablespoons of natural soap to 1 litre of lukewarm water.
The jack is maintenance-free. If necessary, the moving parts of the jack should
be lubricated with a suitable lubricant.
The towing device is maintenance-free. Coat the ball head of the towing de-
vice with a suitable grease whenever necessary.
Protection of hollow spaces
All the hollow spaces on your vehicle which are at risk from corrosion are pro-
tected for life by a layer of protective wax applied in the factory.
If any small amount of wax flow out of the cavities at high temperatures, these
must be removed with a plastic scraper and the stains cleaned using a petrole-
um cleaner.
Underbody protection
The underside of your vehicle is already permanently protected by the factory
against chemical and mechanical influences.
We recommend having the protective coating underneath the vehicle and the
chassis checked — preferably before the beginning of winter and at the end of winter.
Product life of the films
Environmental influences (e.g. sunlight, humidity, air pollution, rockfall) affect
the life of the films. Films will age and become brittle – this is entirely normal:
this is not a fault.
Sunlight may also affect the strength of the film colour.
When transporting a load on the roof rack (e.g. roof box or similar), there is an
increased risk of film damage (e.g. of chipping from the secured load).
CAUTION
■ Vehicle paint
■ Damaged areas should be repaired as soon as possible.
■ Do not treat painted parts with or hard waxes.
■ Do not polish the paintwork in a dusty environment - risk of paint scratch-
es. ■ Do not apply any paint care products to door seals or window guides.■
Plastic parts
■ Do not use paint care products.
■
Chromed and anodised parts
■ Do not polish the chrome parts in a dusty environment - risk of surface
scratches.
■
Foils
The following instructions must be observed, otherwise there is a risk of foil
damage.
■ Do not clean with dirty cloths or sponges.
■ To remove ice and snow, do not use a scraper or other means.
■ Do not polish the foils
■ Do not use a pressure washer to clean the foils
■
Rubber seals
■ Do not treat the door seals and window guides with any products - the pro-
tective lacquer layer could be affected.
■
Windows and external mirror glass
■ Do not clean the inside of the windows with sharp objects - there is a risk
of damage to the filaments or glass antenna. ■ Do not use a cloth, which was used to polish the body - this could soil the
window and reduce visibility.
■
Headlights/lights ■ Do not dry off the headlights/lights, do not use sharp objects - there is a
risk of damage to the protective coating and subsequent cracking of the
headlight glass.
■
Reversing camera
The following instructions must be observed, otherwise there is a risk of
camera damage.
■ Do not remove snow / ice with warm / hot water.
■ To wash, never use a pressure washer or steam jet.
■ For cleaning, do not use abrasive cleaners.
262General Maintenance
Page 278 of 336
Wheels
Wheels and tyres
Introduction
This chapter contains information on the following subjects:
Advice on tyre/wheel usage
276
Tyre pressure
277
Tire wear and wheel change
277
Spare wheel
278
Tyre marking
278
Advice on tyre/wheel usage
New tyres , during the first 500 km, new tyres do not offer optimum grip and
appropriate care should therefore be taken when driving.
Always fit tyres with a greater profile depth on the front wheels.
Wheels and bolts are matched to each other in terms of design. We recom-
mend that you use wheel rims and wheel bolts from ŠKODA Original Accesso-
ries.
Always store wheels or tyres in a cool, dry and, where possible, dark place. The
tyres themselves should be stored standing.
Tyre life
Tyres age and lose their original characteristics, even if they are not being
used. Therefore, we recommend not using tyres that are more than 6 years
old.
The manufacturing date is indicated on the tyre sidewall (possibly on the in-
side ). E.g. DOT ... 10 16... means, for example, that the tyre was manufactured
in the 10. week of 2016.
Tyre damage
We recommend checking your tyres and wheel rims for damage (punctures,
cuts, splits and bulges, etc.) on a regular basis.
Remove any foreign objects in the tyre tread immediately (e.g. small stones).
Foreign bodies which have penetrated into the tyre (e.g. screws or nails)
should not be removed. Seek help from a specialist garage.
Installation of new tyres
Only fit radial tyres of the same type, size (rolling circumference) and the same
tread pattern on one axle on all 4 wheels.
When mounting new tyres the tyres have to be replaced axle by axle.
Uni-directional tires
The direction of rotation of the tyres is marked by arrows on the wall of the
tyre .
The specified running direction must be strictly adhered to, otherwise the fol-
lowing tyre characteristics may be degraded. ▶ Driving stability.
▶ Traction.
▶ Tyre noise and tyre wear.
Tyres with increased puncture resistance
Some vehicles may be fitted with tyres at the factory that have increased
puncture resistance (so-called “SEAL” tyres). For some countries, vehicles are
equipped with “SEAL” tyres delivered without a spare wheel and appropriate
tools.
If “SEAL”tyres are replaced with standard tyres, the vehicle must be retrofitted
with a puncture repair kit or spare wheel and appropriate hand tools.WARNING■ Never use tyres if you do not know anything about the condition and age.■Never drive with damaged tyres – risk of accident.
CAUTION
■ The tyres must be protected from contact with substances such as oil,
grease and fuel, which could damage them. If the tyres come into contact with
these substances, then we recommend you have this checked out in a special-
ist workshop.■
Do not use rims with ground or polished surface in winter conditions - there
is a risk of wheel damage (e.g. from the road grit).
Note
■ We recommend that any work on the wheels or tyres is carried out by a spe-
cialist garage.■
We recommend that you use wheel rims, tyres, full wheel trims and snow
chains from ŠKODA Original Accessories.
276General Maintenance
Page 284 of 336
CAUTIONScrew the jack back to its starting position prior to putting it back in its box -
Otherwise, there is a risk of damage to the box.
Note
The declaration of conformity is included with the jack or the log folder.
Changing a wheel
Preliminary work
For safety's sake, the following instructions must be observed before
changing a wheel on the road.
›
As far as possible, park the vehicle far away from the traffic flow - find a
place with a flat and firm surface.
›
Switch off the engine.
›
For vehicles with manual transmission , select 1st gear.
›
For vehicles with automatic transmission , place the selector lever in the P
position.
›
Switch on the parking brake.
›
Position the hazard warning system and the warning triangle at the prescri-
bed distance.
›
All the occupants should get out of the vehicle. The passengers should not
stand on the road (instead they should remain behind a crash barrier, for in-
stance) while the wheel is being changed.
›
Uncouple any trailers.
Changing a wheel
›
Remove the spare wheel » page 283.
›
Remove the full wheel trim » page 283 or caps » page 283 .
›
Loosen the wheel bolts » page 284 » .
›
Jack up the vehicle » page 284 until the wheel that needs changing is clear of
the ground.
›
Unscrew the wheel bolts and place them on a clean surface (cloth, paper,
etc.).
›
Remove the wheel carefully.
›
Attach the spare wheel and slightly screw on the wheel bolts.
›
Lower the vehicle.
›
Tighten the wheel bolts opposite each other using the wheel wrench (“alter- nating crosswise”) » page 284.
›Replace the wheel trim
» page 283and the caps » page 283.
When fitting a wheel with a unidirectional tyre, ensure that the direction of ro-
tation is correct » page 276.
All bolts must be clean and must turn easily. If the screws are corroded and dif-
ficult to move, then these must be replaced.WARNING■ Undo the wheel bolts just a little (about one turn) while the vehicle is not
jacked up. Otherwise, the wheel could come off and fall down – there is a
risk of injury.■
Under no circumstances grease or oil the wheel bolts - risk of accident!
Subsequent steps
After changing the wheel, the following work must be carried out.
›
Stow the replaced wheel in the well under the floor covering of the luggage
compartment and secure with a locking screw.
›
Stow the tool kit in the space provided and secure using the band.
›
Check and, if necessary, adjust the tyre pressure on the assembled wheel,
and, for vehicle with tyre pressure monitoring, save the tyre pressure values
in the system » page 249.
›
Have the tightening torque of the wheel bolts checked with a torque wrench
as soon as possible. The prescribed tightening torque is 140 Nm.
Replace the damaged wheel or consult a specialist garage about repair op-
tions.
WARNINGA tightening torque which is too high can damage the bolts and threads
and this can result in permanent deformation of the contact surfaces on
the rim. Too low tightening torque, the wheels may fall off while driving -
risk of an accident. Drive cautiously and only at a moderate speed until the
tightening torque has been checked.282Do-it-yourself