start stop button SKODA YETI 2012 1.G / 5L Owner's Manual
[x] Cancel search | Manufacturer: SKODA, Model Year: 2012, Model line: YETI, Model: SKODA YETI 2012 1.G / 5LPages: 225, PDF Size: 5.47 MB
Page 16 of 225
Current fuel consumption
The current fuel consumption level is shown in the display in litres/100 km
1)
. You
can use this information to adapt your driving style to the desired fuel consump-
tion.
The display appears in litres/hour if the vehicle is stationary or driving at a low
speed 2)
.
Average fuel consumption
The average fuel consumption since the memory was last erased is shown in the
display in litres/100
km1 )
» page 12.
To determine the average fuel consumption over a certain period of time, set the
memory at the start of the new measurement to zero using button B
»
Fig. 6
on
page 13 or with the adjustment wheel D
. Dashes appears in the display for the
first 100 m you drive after erasing the memory.
The display is updated regularly while you are driving.
Range
The estimated range in kilometres is shown on the display. It indicates the dis-
tance you can still drive with your vehicle based on the level of fuel in the tank
and the same style of driving.
The display is shown in steps of 10
km. Once the fuel gauge pointer reaches the
reserve marking, the range is displayed in 5 km.
The fuel consumption over the last 50 km is used to calculate the range. The
range will increase if you drive in a more economical manner.
If the memory is set to zero (after disconnecting the battery), the fuel consump-
tion of 10 ltr./100 km is calculated for the range; afterwards the value is adapted
accordingly to the style of driving.
Distance travelled
The distance driven since the memory was last erased appears in the dis-
play » page 12. If you wish to measure the distance travelled from a particular
point in time, you need to set the memory to zero at this point in time by pressing
the button B
» Fig. 6 on page 13 or the adjustment wheel D
.
The maximum distance indicated in both memories is 1
999 km or 9 999 km on
vehicles with an information display. The indicator is set back to zero if this period
is exceeded. Average speed
The average speed since the memory was last erased is shown in the display in
km/hour
» page 12 . If you wish to determine the average speed over a certain pe-
riod of time, you need to set the memory to zero at the start of the measurement
using the button B
» Fig. 6 on page 13 or the adjustment wheel D
.
A zero appears in the display for the first approx. 300 m you drive after erasing
the memory.
The display is updated regularly while you are driving.
Current speed
The current speed which is identical to the display of the speedometer 2
»
Fig. 2
on page 8 is indicated on the display.
Oil temperature
If the oil temperature is lower than 50 °C or if a fault in the system for checking
the oil temperature is present, only - -.- is displayed instead of the oil tempera-
ture. Ð Warning against excessive speeds
First read and observe the introductory information and safety warn-
ings on page 12.
Adjust the speed limit while the vehicle is stationary
›
With the button A
» Fig. 6
on page
13 or the adjustment wheel D
, select the
menu item Warning against excessive speeds .
› Press the button B
» Fig. 6 on page 13 or the adjustment wheel D
to activate
the ability to set the speed limit (value flashes).
› Set the desired speed limit, e.g. 50 km/h, with the button A
or the adjustment
wheel D
.
› Use the button B
or the adjustment wheel D
to confirm the set speed limit, or
wait approx. 5 seconds and the setting is saved automatically (the value stops
flashing).
This allows you to set the speed in 5 km/h intervals. £
ä
1)
On some models in certain countries, the display appears in kilometres/litre.
2) On some models in certain countries, the display appears in --,- kilometres/litres if the vehicle is sta-
tionary.
14 Using the system
Page 20 of 225
Warning symbols
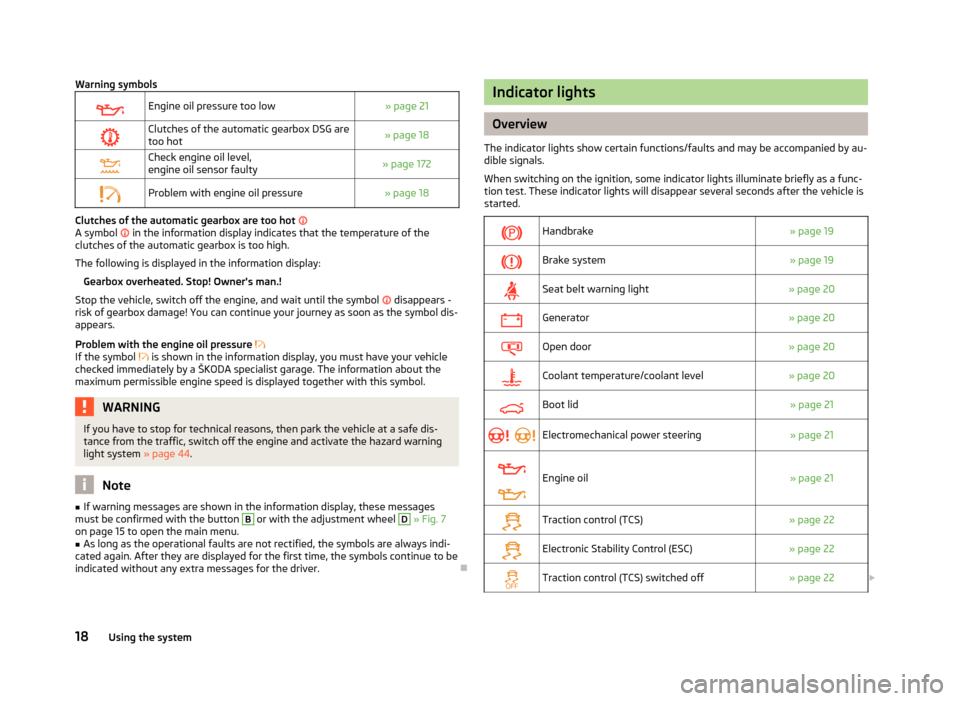
Engine oil pressure too low
» page 21
Clutches of the automatic gearbox DSG are
too hot » page 18
Check engine oil level,
engine oil sensor faulty
» page 172
Problem with engine oil pressure
» page 18Clutches of the automatic gearbox are too hot
A symbol in the information display indicates that the temperature of the
clutches of the automatic gearbox is too high.
The following is displayed in the information display: Gearbox overheated. Stop! Owner's man.!
Stop the vehicle, switch off the engine, and wait until the symbol disappears -
risk of gearbox damage! You can continue your journey as soon as the symbol dis-
appears.
Problem with the engine oil pressure
If the symbol is shown in the information display, you must have your vehicle
checked immediately by a
ŠKODA specialist garage. The information about the
maximum permissible engine speed is displayed together with this symbol. WARNING
If you have to stop for technical reasons, then park the vehicle at a safe dis-
tance from the traffic, switch off the engine and activate the hazard warning
light system » page 44. Note
■ If warning messages are shown in the information display, these messages
must be confirmed with the button B
or with the adjustment wheel D
» Fig. 7
on page 15 to open the main menu. ■ As long as the operational faults are not rectified, the symbols are always indi-
cated again. After they are displayed for the first time, the symbols continue to be
indicated without any extra messages for the driver. Ð Indicator lights
Overview
The indicator lights show certain functions/faults and may be accompanied by au-
dible signals.
When switching on the ignition, some indicator lights illuminate briefly as a func-
tion test. These indicator lights will disappear several seconds after the vehicle is
started.
Handbrake
» page 19
Brake system
» page 19
Seat belt warning light
» page 20
Generator
» page 20
Open door
» page 20
Coolant temperature/coolant level
» page 20
Boot lid
» page 21
Electromechanical power steering
» page 21
Engine oil
» page 21
Traction control (TCS)
» page 22
Electronic Stability Control (ESC)
» page 22
Traction control (TCS) switched off
» page 22£18
Using the system
Page 24 of 225
If the engine oil level sensor is faulty, the indicator light flashes
several times
and an audible signal sounds when the ignition is turned on.
Seek help from a
ŠKODA specialist garage.WARNING
If you have to stop for technical reasons, then park the vehicle at a safe dis-
tance from the traffic, switch off the engine and activate the hazard warning
light system » page 44. ÐTraction control system (TCS)
The indicator light flashes to show that the ASR is currently operating.
If the indicator light comes on immediately after starting the engine, the ASR
can be switched off for technical reasons. Switch the ignition off and on again. If
the indicator light does not light up after you switch the engine back on, the ASR
is fully functional again.
If the indicator light lights up, there is a fault in the ASR.
The following is displayed in the information display: Error: traction control (ASR)
Seek help from a ŠKODA
specialist garage.
Further information » page 97, Traction control system (TCS).Note
If the vehicle's battery has been disconnected and reconnected, the indicator
light comes on after switching on the ignition. The indicator light must go out
after driving a short distance. ÐElectronic Stability Control (ESC)
The indicator light flashes to show that the ESC is currently operating.
If the indicator light comes on immediately after you start the engine, the ESC
might be switched off due to technical reasons. Switch the ignition off and on
again. If the indicator light does not light up after you switch the engine back on,
the ESR is fully functional again. If the indicator light
lights up, there is a fault in the ESC.
The following is displayed in the information display: Error: Electronic Stability Control (ESC)
Seek help from a
ŠKODA specialist garage.
Further information » page 96, Stabilisation Control (ESC) . Note
If the vehicle's battery has been disconnected and reconnected, the indicator
light comes on after switching on the ignition. The indicator light must go out
after driving a short distance. Ð Switching off traction control system (TCS)
The TCS is switched off by pressing the button » page 97, Traction control
system (TCS) and the warning light illuminates.
The following is displayed in the information display: Traction control (ASR) deactivated. Ð Antilock brake system (ABS)
If the indicator light lights up, there is a fault in the ABS.
The following is displayed in the information display: Error: ABS
The vehicle will only be braked by the normal brake system without the ABS.
Seek help from a
ŠKODA specialist garage. £
22 Using the system
Page 28 of 225
Unlocking and locking
Vehicle key
Introductory information
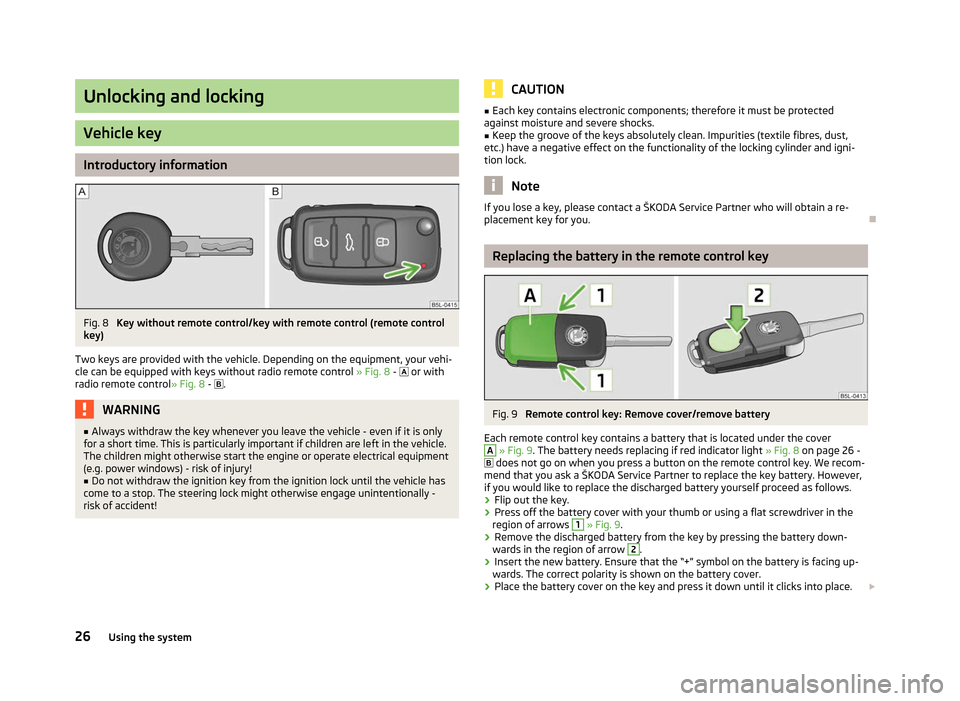
Fig. 8
Key without remote control/key with remote control (remote control
key)
Two keys are provided with the vehicle. Depending on the equipment, your vehi-
cle can be equipped with keys without radio remote control » Fig. 8 - or with
radio remote control»
Fig. 8 - . WARNING
■ Always withdraw the key whenever you leave the vehicle - even if it is only
for a short time. This is particularly important if children are left in the vehicle.
The children might otherwise start the engine or operate electrical equipment
(e.g. power windows) - risk of injury!
■ Do not withdraw the ignition key from the ignition lock until the vehicle has
come to a stop. The steering lock might otherwise engage unintentionally -
risk of accident! CAUTION
■ Each key contains electronic components; therefore it must be protected
against moisture and severe shocks.
■ Keep the groove of the keys absolutely clean. Impurities (textile fibres, dust,
etc.) have a negative effect on the functionality of the locking cylinder and igni-
tion lock. Note
If you lose a key, please contact a ŠKODA Service Partner who will obtain a re-
placement key for you. Ð Replacing the battery in the remote control key
Fig. 9
Remote control key: Remove cover/remove battery
Each remote control key contains a battery that is located under the cover A
» Fig. 9. The battery needs replacing if red indicator light
» Fig. 8 on page 26
-
does not go on when you press a button on the remote control key. We recom-
mend that you ask a ŠKODA Service Partner to replace the key battery. However,
if you would like to replace the discharged battery yourself proceed as follows.
› Flip out the key.
› Press off the battery cover with your thumb or using a flat screwdriver in the
region of arrows 1
» Fig. 9.
› Remove the discharged battery from the key by pressing the battery down-
wards in the region of arrow 2
.
› Insert the new battery. Ensure that the “+” symbol on the battery is facing up-
wards. The correct polarity is shown on the battery cover.
› Place the battery cover on the key and press it down until it clicks into place.
£
26 Using the system
Page 35 of 225

Boot lid
ä
Introduction
This chapter contains information on the following subjects:
Open/close 33
Automatic locking 33
Emergency unlocking 34
WARNING
■ Ensure that the lock is properly engaged after closing the boot lid. Other-
wise, the boot lid might open suddenly when driving even if the boot lid lock
was closed - risk of accident!
■ Never drive with the boot lid fully opened or slightly ajar otherwise exhaust
gases may get into the interior of the vehicle - risk of poisoning!
■ Do not press on the rear window when closing the boot lid, it could crack -
risk of injury! Note
■ After closing the boot lid, it is automatically locked within 1 second and the
anti-theft alarm system is activated. This applies only if the vehicle was locked
before closing the boot lid. ■ The function of the handle above the licence plate is deactivated when starting
off or at a speed of 5
km/hour or more for vehicles with central locking. The func-
tion of the handle is activated again when the vehicle has stopped and a door is
opened. Ð Open/close
Fig. 16
Handle of boot lid
First read and observe the introductory information and safety warn-
ings on page 33.
After unlocking the vehicle, you can open the lid by pushing the handle located
above the licence plate.
Opening
›
Press the handle and simultaneously lift up the boot lid
»
Fig. 16.
Closing
› Pull down the boot lid and close it with a slight swing. Ð Automatic locking
First read and observe the introductory information and safety warn-
ings on page 33.
If the vehicle was locked with the button
on the remote control key before the
boot lid was closed, the lid is automatically locked as soon as it is closed.
The delayed automatic locking function of the boot lid can be activated on your
vehicle. The following applies following activation of this function: If the boot lid
was locked with the button on the remote control key 2
» page 30, then it is
possible to open the lid within a limited period of it being closed.
If you wish, a
ŠKODA Service Partner can activate or deactivate the delayed auto-
matic locking of the boot lid. The Service Partner will also provide any further in-
formation that is required. £
ä
ä
33
Unlocking and locking
Page 85 of 225

Set-up
Setting of the control dial
Button 1
Air outlet vents 4
A B C
The fastest heating
To the right up to the
stop 3
Briefly switch on
Opening
Comfortable heating Desired temperature 2 or 3
Do not switch on
Opening
Fresh air mode - ventilation To the left up to the
stop Desired position
Do not switch on
OpeningNote
■ Controls A
, B
, C
and the button 1
» Fig. 89
on page 82.
■ Air outlet vents 4 » Fig. 87 on page 81.
■ We recommend that you leave the air outlet vents 3 » Fig. 87 on page 81 in the
opened position. ÐRecirculated air mode
Recirculated air mode prevents polluted air outside the vehicle from getting into
the vehicle, for example when driving through a tunnel or when standing in a
traffic jam.
Switching on
› Press the button
» Fig. 89
on page 82 and the indicator light in the button
illuminates.
Switching off
› Press the button
» Fig. 89
on page 82again - the indicator light in the but-
ton goes out.
Recirculated air mode is switched off automatically if the air distribution control C
is turned to position
» Fig. 89 on page 82. Recirculated air mode can be
switched on again from this setting by repeatedly pressing the button .
WARNING
Do not leave recirculated air mode on over a longer period of time, as “stale”
air can cause fatigue of the driver and passengers, reduce attention levels and
also cause the windows to mist up. The risk of having an accident increases.
Switch off recirculated air mode as soon as the windows start to mist up. Ð Air conditioning system (manual air conditioning
system) Introductory information
The cooling system only operates if the button AC 1
» Fig. 90 on page 84
is
pressed, and the following conditions are met:
› engine running;
› outside temperature above approx. +2 °C;
› blower switch switched on (positions 1 to 4).
Under certain circumstances, air at a temperature of about 5 °C can flow out of
the vents when the cooling system is switched on. Lengthy and uneven distribu-
tion of the air flow out of the vents and large differences in temperature, for ex-
ample when getting out of the vehicle, can result in chills in sensitive persons. Note
We recommend that you have the air conditioning system cleaned by a ŠKODA
specialist garage once every year. Ð
83
Heating and air conditioning system
Page 87 of 225

Setting the air conditioning system
Recommended basic settings of the control elements of the air conditioning sys-
tem for the respective operating modes:
Set-up Setting of the control dial
Button
Air outlet vents 4 A B C 1 4
Defrost/defog windscreen and
side windows
a) Desired tempera-
ture 3 or 4
Automatically
switched on Do not switch on Open and align with the side
window
The fastest heating To the right up to
the stop 3
Switched off Briefly switch on
Opening
Comfortable heating Desired tempera-
ture 2 or 3
Switched off Do not switch on
Opening
The fastest cooling To the left up to
the stop briefly 4, then
2 or 3 Activated Briefly switch on
Opening
Optimal cooling Desired tempera-
ture 1, 2 or 3
Activated Do not switch on Open and align to the roof
Fresh air mode - ventilation To the left up to
the stop Desired position
Switched off Do not switch on
Openinga)
We recommend that you do not use this setting in countries with high humidity levels. This can result in heavy cooling of the window glass and the following fogging from outside. Note
■ Controls A
, B
, C
and the button 1
and 4
» Fig. 90 on page 84
.
■ Air outlet vents 4 » Fig. 87 on page 81 .
■ We recommend that you leave the air outlet vents 3 » Fig. 87 on page 81 in the
opened position. ÐRecirculated air mode
Recirculated air mode prevents polluted air outside the vehicle from getting into
the vehicle, for example when driving through a tunnel or when standing in a
traffic jam.
Switching on
› Press the button
4
» Fig. 90
on page
84 and the indicator light in the but-
ton illuminates. Switching off
›
Press the button
again - the indicator light in the button goes out.
Recirculated air mode is switched off automatically if the air distribution control C
» Fig. 90
on page
84 is turned to position
. Recirculated air mode can be
switched on again from this setting by repeatedly pressing the button .
WARNING
Do not leave recirculated air mode on over a longer period of time, as “stale”
air can cause fatigue of the driver and passengers, reduce attention levels and
also cause the windows to mist up. The risk of having an accident increases.
Switch off recirculated air mode as soon as the windows start to mist up. Ð
85
Heating and air conditioning system
Page 105 of 225

Parking with the help of the park assist system and
completing the parking procedure
Fig. 103
Information display: Parking space detected including the informa-
tion to continue driving and to engage reverse gear
Fig. 104
Information display: Information to engage the forward gear
or
the reverse gear
First read and observe the introductory information and safety warn-
ings on page 101.
The time limit for the parking procedure with the help of the park assist system is
180 seconds.
› If the park assist system has recognised a suitable parking space, it is shown in
the information display » Fig. 103 - .
› Continue driving forwards until the display
» Fig. 103 -
appears.
› Stop the vehicle for at least 1 second.
› Engage reverse gear or move the selector lever into the position
R.
ä ›
As soon as the following message is shown in the information display:
Steering
intervent. active. Check area around veh.! , let go of the steering wheel and the
steering is taken over by the system.
› Observe the direct vicinity of the vehicle and reverse carefully.
› In the event that the parking procedure cannot be carried out in one go, the
parking process is completed in further stages. When the arrow in the informa-
tion display is flashing towards the front » Fig. 104 - , engage the 1st
gear or
move the selector lever to position D.
› Wait until the steering wheel automatically turns into the required position and
then carefully drive forwards.
› When the arrow in the information display is flashing towards the
rear » Fig. 104 , engage the reverse gear or move the selector lever to the po-
sition R.
› Wait until the steering wheel automatically turns into the required position and
then carefully reverse. You can repeat these steps several times.
› Terminate the parking procedure based on the distance information provided
by the park assist system.
As soon as the parking procedure is completed, an audible signal sounds and the
following message appears in the information display: Steering interv. finished. Please take over steering!
Switch off park assist
The park assist switches off during one of the following occurrences:
› Speed of 30 km/h exceeded;
› Speed of 7 km/h exceeded during the parking procedure;
› Time limit of 180
seconds for the parking procedure exceeded;
› Button for the park assist system pressed;
› Parking aid activated;
› TCS system switched off;
› Automatic steering procedure interrupted by the driver (stopping the steering
wheel);
› Reverse gear disengaged or selector lever removed from the position
R when
reversing into the parking space. Ð
103
Starting-off and Driving
Page 108 of 225
Switching off the cruise control system temporarily
First read and observe the introductory information and safety warn-
ings on page 104.
The cruise control system is
temporarily switched off by pressing the switchA
» Fig. 105 on page 105 » page 105
into the spring-tensioned position CANCEL
or by depressing the brake or clutch pedal.
The set speed remains stored in the memory.
Briefly press the rocker button B
into the position RES
to resume the stored
speed after the clutch or brake pedal is released. ÐSwitching off the cruise control system completely
First read and observe the introductory information and safety warn-
ings on page 104.
›
Turn the switch A
» Fig. 105 on page 105 into the OFF position.
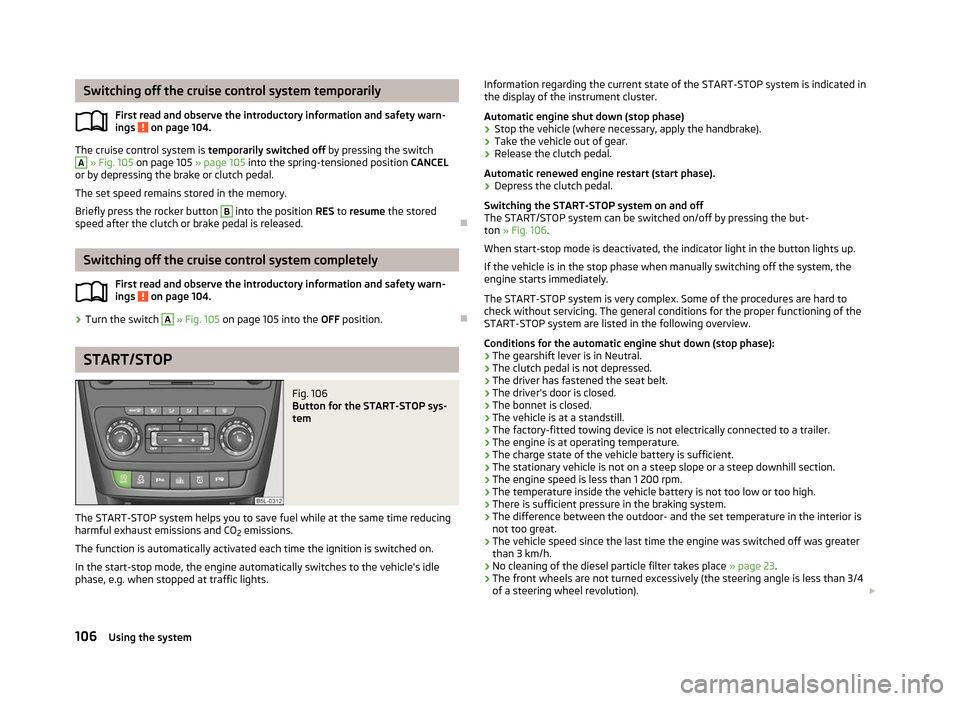
ÐSTART/STOP
Fig. 106
Button for the START-STOP sys-
tem
The START-STOP system helps you to save fuel while at the same time reducing
harmful exhaust emissions and CO 2 emissions.
The function is automatically activated each time the ignition is switched on.
In the start-stop mode, the engine automatically switches to the vehicle's idle
phase, e.g. when stopped at traffic lights.
ä
ä Information regarding the current state of the START-STOP system is indicated in
the display of the instrument cluster.
Automatic engine shut down (stop phase)
› Stop the vehicle (where necessary, apply the handbrake).
› Take the vehicle out of gear.
› Release the clutch pedal.
Automatic renewed engine restart (start phase).
› Depress the clutch pedal.
Switching the
START-STOP system on and off
The START/STOP system can be switched on/off by pressing the but-
ton » Fig. 106.
When start-stop mode is deactivated, the indicator light in the button lights up.
If the vehicle is in the stop phase when manually switching off the system, the
engine starts immediately.
The START-STOP system is very complex. Some of the procedures are hard to
check without servicing. The general conditions for the proper functioning of the
START-STOP system are listed in the following overview.
Conditions for the automatic engine shut down (stop phase):
› The gearshift lever is in Neutral.
› The clutch pedal is not depressed.
› The driver has fastened the seat belt.
› The driver's door is closed.
› The bonnet is closed.
› The vehicle is at a standstill.
› The factory-fitted towing device is not electrically connected to a trailer.
› The engine is at operating temperature.
› The charge state of the vehicle battery is sufficient.
› The stationary vehicle is not on a steep slope or a steep downhill section.
› The engine speed is less than 1 200 rpm.
› The temperature inside the vehicle battery is not too low or too high.
› There is sufficient pressure in the braking system.
› The difference between the outdoor- and the set temperature in the interior is
not too great.
› The vehicle speed since the last time the engine was switched off was greater
than 3 km/h.
› No cleaning of the diesel particle filter takes place
» page 23.
› The front wheels are not turned excessively (the steering angle is less than 3/4
of a steering wheel revolution).
£
106 Using the system
Page 109 of 225
Conditions for an automatic restart (start phase):
›
The clutch pedal is depressed.
› The max./min. temperature is set.
› The defrost function for the windscreen is switched on.
› A high blower stage has been selected.
› The START STOP
button is pressed.
Conditions for an automatic restart without driver intervention: › The vehicle moves at a speed of more than 3 km/h.
› The difference between the outdoor- and the set temperature in the interior is
too great.
› The charge state of the vehicle battery is not sufficient.
› There is insufficient pressure in the braking system.
If the driver's seat belt is removed for more than 30 seconds or the driver's door is
opened during stop mode, the engine must be started manually with the key. The
following messages in the instrument cluster display must be observed.
Messages in the instrument cluster display (valid for vehicles without
Information display)
ERROR START STOP Error in the START-STOP system
START STOP NOT POSSIBLE Automatic engine shut down is not
possible.
START STOP ACTIVE Automatic engine shut down (stop
phase)
SWITCH OFF IGNITION Switch off the ignition.
START MANUALLY Start the engine manually.WARNING
■ The brake servo unit and power steering only operate if the engine is run-
ning.
■ Never let the vehicle roll with the engine switched off. CAUTION
Deactivate the START-STOP system before driving through water on the
street » page 151. Note
■ Changes to the outdoor temperature can have an effect on the internal temper-
ature of the vehicle battery even after several hours. If the vehicle remains out-
doors for a long time in minus temperatures or in direct sunlight, it can take sev-
eral hours until the internal temperature of the vehicle battery reaches a suitable
temperature for proper operation of the
START STOP system.
■ If the Climatronic is running in automatic mode, under certain conditions, the
engine may not switch off automatically. Ð Fatigue detection system (break recommendation)
The fatigue detection system advises the driver on the basis of information about
the steering behaviour, to take a break from driving. The system recommends a
break at speeds of 65 km/h to 200
km/h.
After the ignition has been switched on, the system evaluates the steering be-
haviour for 15 minutes. This baseline analysis is constantly compared with the
current steering behaviour. If the system detects deviations from normal steering
behaviour due to possible fatigue of the driver, it recommends to take a break
from driving.
The symbol will appear in the information display for a few seconds and the fol-
lowing message will be displayed:
Break recommended.
An audible signal is also emitted.
The system deletes the stored baseline analysis if one of the following condi-
tions is met:
› the vehicle is stopped and the ignition is turned off,
› the seat belt taken off and the driver's door is opened,
› the vehicle is stopped for more than 15 minutes.
If none of the conditions for deleting the stored baseline analysis is met, the sys-
tem will recommend a driving break again.
Switching on/off
The system can be switched on/off in the main menu of the information dis-
play » page 15 in the menu item Assistants. £
107
Starting-off and Driving