boot SKODA YETI 2014 1.G / 5L User Guide
[x] Cancel search | Manufacturer: SKODA, Model Year: 2014, Model line: YETI, Model: SKODA YETI 2014 1.G / 5LPages: 248, PDF Size: 29.49 MB
Page 58 of 248

Unlocking / locking » Fig. 36
Locking
Unlocking
If the icon in the button
is lit, the vehicle is locked.
If the icon in the button
is not lit, the vehicle is not locked.
The central locking system also operates if the ignition is switched off.
The following applies after locking.
› Opening the doors and the boot lid from the outside is not possible.
› The doors can be unlocked and opened from the inside by a single pull on the
opening lever of the respective door.
› In the event of an accident in which the airbags are deployed, the locked
doors are automatically unlocked in order to enable rescuers to gain access
to the vehicle.WARNING■ Doors locked from the inside make it difficult for rescuers to get into the
vehicle in an emergency – risk to life!■
If the Safelock system is switched on » page 54, the door opening levers
and the central locking buttons do not operate.
CAUTION
If at least one door has been opened, the vehicle cannot be locked.
Child safety lock
Fig. 37
Back door: left / right
Read and observe and on page 51 first.
The child safety lock prevents the rear door from being opened from the in- side. The door can only be opened from the outside.
Switching the child safety system on and off » Fig. 37
Switching on
Switching off
You can switch the child safety lock on and off using the vehicle key.
Malfunctions
Read and observe
and on page 51 first.
Failure of the central locking
If the central locking system fails, only the driver's door can be locked / un-
locked with the key. The other doors and the tailgate can be emergency-
locked or unlocked.
› Unlocking / locking
» page 52 for vehicles without remote control.
› Unlocking / locking for vehicles with remote control
» page 211.
› Emergency locking of the door
» page 211.
› Emergency unlocking of the boot lid
» page 212.
Displaying an error
If the warning light in the driver's door initially flashes quickly for around 2 sec-
onds, and then lights up for 30 seconds without interruption before flashing
again slowly, you will need to seek the assistance of a specialist garage.
Discharged battery in the remote control key
If the red indicator light
B
» Fig. 33 on page 52 does not flash when you press
a button on the remote control key, the battery is empty.
If the voltage of the battery in the remote control key is too low, the following
message appears in the display of the instrument cluster.
Renew key battery!
KEY BATTERY
Replace the battery » page 210.
55Unlocking and opening
Page 59 of 248
Anti-theft alarm system
Introduction
This chapter contains information on the following subjects:
Activating/deactivating
56
Interior monitor and towing protection
56
The anti-theft alarm system increases the level of protection against people
trying to break into the vehicle.
The alarm system triggers audible and visual signals if an attempt is made to
break into the vehicle (hereafter referred to only as alarm).
Triggering the alarm
The alarm is triggered when the following unauthorized actions are carried out
on the locked vehicle.
› Opening the bonnet.
› Opening the boot lid.
› Opening the doors.
› Manipulation of the ignition lock.
› Towing the vehicle
» page 56.
› Movement in the vehicle
» page 56.
› Sudden and significant voltage drop of the electrical system.
› Uncoupling the trailer
» page 163, Coupling / uncoupling trainer .
If the driver's door of a vehicle with a remote control is unlocked and opened by the lock cylinder, then the alarm is triggered.
Switching off the alarm
The alarm is turned off by pressing the button on the radio remote control
key or switching on the ignition.
CAUTION
Before leaving the vehicle, it must be checked that all of the windows, doors
and the sliding/tilting roof are locked in order to ensure the full functionality of
the anti-theft alarm system.
Note
The working life of the alarm siren is 5 years.Activating/deactivating
Read and observe
on page 56 first.
Activating
The anti-theft alarm system is activated automatically approximately 30 sec-
onds after the vehicle is locked.
If you unlock the vehicle and do not open a door or the boot lid within the next
30 seconds, the vehicle will lock again automatically and the safelock system
or anti-theft alarm system will be switched on. This function is intended to
prevent the car being unlocked unintentionally.
Deactivating
The anti-theft alarm system is deactivated automatically after the vehicle is
unlocked. If the vehicle is not opened within 30 seconds, the anti-theft alarm
system is automatically activated again.
The alarm system is also deactivated if you unlock the driver door using the
key within 45 seconds of locking the vehicle.
Note
You can switch the audible signalling of the activation of the warning system
on and off in the Maxi DOT display in the menu item ATA confirm » page 47 .
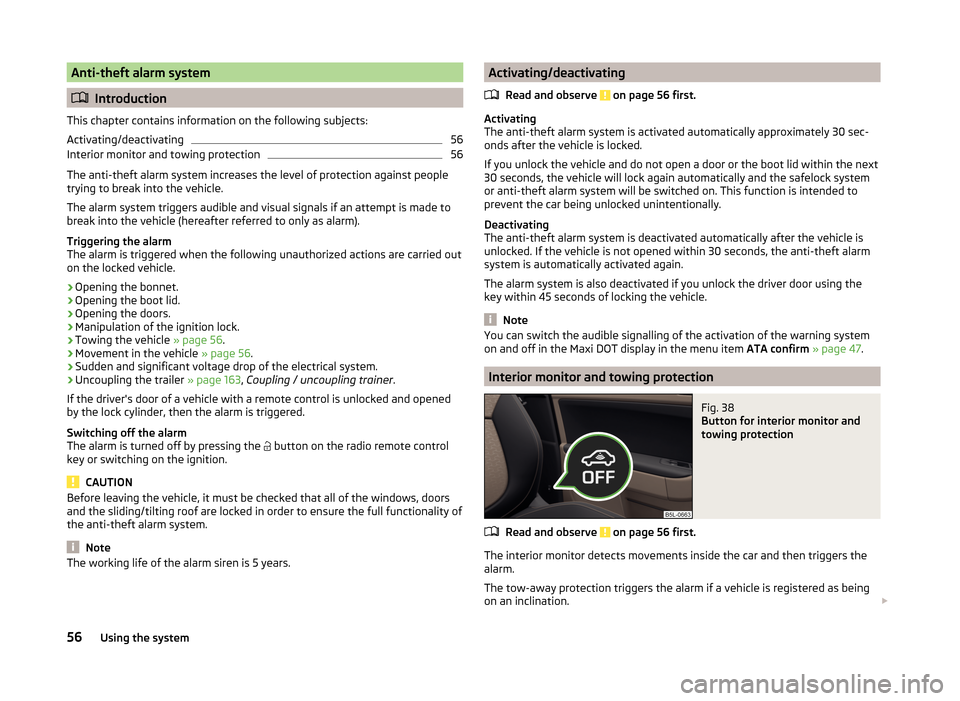
Interior monitor and towing protection
Fig. 38
Button for interior monitor and
towing protection
Read and observe on page 56 first.
The interior monitor detects movements inside the car and then triggers the alarm.
The tow-away protection triggers the alarm if a vehicle is registered as being
on an inclination.
56Using the system
Page 60 of 248

Activating
The interior monitor and the towing protection are activated automatically af-
ter the vehicle is locked.
Deactivate›
Switch off the ignition.
›
Open the driver door.
›
Press the symbol button
» Fig. 38 on the B column of the driver's side.
The illumination of the symbol
in the button changes from red to orange.
›
Lock the vehicle within 30 seconds.
Deactivate the interior monitor and the towing protection if there is a possibili-
ty of the alarm being triggered by movements (e.g. by children or animals)
within the vehicle interior or if the vehicle has to be transported (e.g. by train
or ship) or towed.
CAUTION
■ The opened glasses storage compartment reduces the effectiveness of the
interior monitor. To ensure the full functionality of the interior monitor, the
glasses storage compartment must always be closed before locking the vehi-
cle.■
The anti-theft alarm system is activated when the vehicle is locked even if
the safe securing system is deactivated. The interior monitor is however not
activated.
Luggage compartment lid
Introduction
This chapter contains information on the following subjects:
Opening/closing
57
Delayed locking of the boot lid
58WARNING■ Ensure that the lock is properly engaged after closing the boot lid. Other-
wise, the lid might open suddenly while the vehicle is moving, even if the
lid was locked – risk of accident!■
Never drive with the boot lid open or ajar, as otherwise exhaust gases
may get into the interior of the vehicle – risk of poisoning!
WARNING (Continued)■ Do not press on the rear window when closing the luggage compartment
lid, it could crack – risk of injury!■
Make sure that when closing the boot lid, no body parts are crushed -
there is danger of injury!
Note
The function of the button in the grip above the licence plate is deactivated
when starting off or at a speed of 5 km/hour or more for vehicles with central
locking. The function is restored after the vehicle stops and the door is
opened.
Opening/closing
Fig. 39
Opening / closing tailgate
Read and observe
on page 57 first.
After unlocking the vehicle, the boot lid can be opened with the button in the
handle above the number plate.
Opening / closing tailgate » Fig. 39
Unlocking the door
Open flap
Closing the flap (by pulling the handle)
12357Unlocking and opening
Page 61 of 248
Delayed locking of the boot lidRead and observe
on page 57 first.
If the boot lid is unlocked with the symbol button
on the remote control
key, then the door is automatically locked after closing.
The period after which the boot lid is locked automatically can be extended by a specialist garage.
After activation of delayed locking, the boot lid can be opened again after clos-
ing within a limited period.
Delayed locking can be deactivated by a specialist garage at any time.
CAUTION
There is a risk of unwanted entry into the vehicle before the boot lid is locked
automatically. We therefore recommend locking the vehicle with the symbol
button
on the remote control key.
Power windows
Introduction
This chapter contains information on the following subjects:
Open / close windows
59
Opening the windows in the front passenger door and in the rear doors
59
Force limit
60
Window convenience operation
60
Operational faults
60WARNINGThe system is fitted with a force limiter » page 60. If there is an obstacle,
the closing process is stopped and the window goes down by several centi-
metres. However, the windows should be closed carefully – risk of injury.CAUTION■ Keep the windows clean to ensure the correct functionality of the electric
windows.■
In the event that the windows are frozen, first of all eliminate the
ice » page 172 , Windows and mirrors and only then operate the electrical
power windows. Otherwise, the window sealing and the electrical power win-
dow mechanism could be damaged.
■
In the winter, ice accumulating on the surface of the window may cause
there to be more resistance when closing the window. The window will stop
and move back several centimetres.
■
It is necessary to deactivate the force limiter to close the win-
dow » page 60 .
■
Make sure that the windows are closed whenever you leave the locked vehi-
cle.
■
Always close the sliding/tilting roof before disconnecting the battery.
For the sake of the environment
At high speeds you should keep the windows closed to prevent unnecessarily high fuel consumption.
Note
■ After switching the ignition off, it is still possible to open or close the win-
dows for approx. 10 minutes. After the driver's or front passenger's door has
been opened, the windows can only be operated by using button A
» Fig. 40
on page 59 .
■
When driving always use the existing heating, air conditioning and ventila-
tion system for ventilating the interior of the vehicle. If the windows are
opened, dust as well as other dirt can get into the vehicle and in addition the wind noise is more at certain speeds.
■
The window lift mechanism is equipped with protection against overheating.
Repeated opening and closing of the window can cause this mechanism to
overheat. If this happens, it will not be possible to operate the window for a
short time. You will be able to operate the window again as soon as the over-
heating protection has cooled down.
58Using the system
Page 67 of 248
WARNING (Continued)■The automatic driving lamp control only operates as a support and
does not release the driver from his responsibility to check the lights and, if
necessary, to switch on the light depending on the prevailing light condi-
tions. The light sensor cannot, for example, detect rain or snow. Under
these conditions we recommend switching on the low beam or fog lights!■
Never drive with only the side lights on! The side lights are not bright
enough to light up the road sufficiently in front of you or to be seen by oth-
er oncoming traffic. Therefore always switch on the low beam when it is
dark or if visibility is poor.
Note
The headlights may mist up temporarily. When the driving lights are switched
on, the light outlet surfaces are free from mist after a short period, although
the headlight lenses may still be misted up in the peripheral areas. This mist
has no influence on the life of the lighting system.
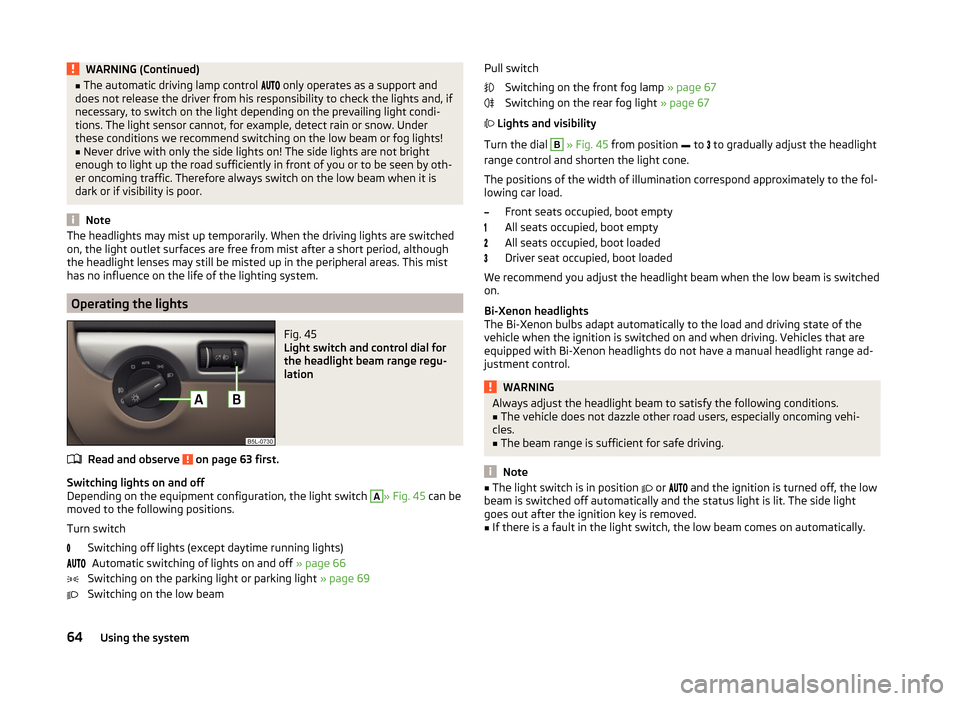
Operating the lights
Fig. 45
Light switch and control dial for
the headlight beam range regu-
lation
Read and observe on page 63 first.
Switching lights on and off
Depending on the equipment configuration, the light switch
A
» Fig. 45 can be
moved to the following positions.
Turn switch Switching off lights (except daytime running lights)Automatic switching of lights on and off » page 66
Switching on the parking light or parking light » page 69
Switching on the low beam
Pull switch
Switching on the front fog lamp » page 67
Switching on the rear fog light » page 67
Lights and visibility
Turn the dial B
» Fig. 45 from position
to
to gradually adjust the headlight
range control and shorten the light cone.
The positions of the width of illumination correspond approximately to the fol-
lowing car load.
Front seats occupied, boot empty
All seats occupied, boot empty
All seats occupied, boot loaded
Driver seat occupied, boot loaded
We recommend you adjust the headlight beam when the low beam is switched
on.
Bi-Xenon headlights
The Bi-Xenon bulbs adapt automatically to the load and driving state of the
vehicle when the ignition is switched on and when driving. Vehicles that are
equipped with Bi-Xenon headlights do not have a manual headlight range ad-
justment control.
WARNINGAlways adjust the headlight beam to satisfy the following conditions.■The vehicle does not dazzle other road users, especially oncoming vehi-
cles.■
The beam range is sufficient for safe driving.
Note
■ The light switch is in position or and the ignition is turned off, the low
beam is switched off automatically and the status light is lit. The side light
goes out after the ignition key is removed.■
If there is a fault in the light switch, the low beam comes on automatically.
64Using the system
Page 71 of 248
The rear fog light is switched off in the reverse order.
The warning light
lights up in the instrument cluster when the rear fog light
is switched on » page 34.
Only the rear fog light on the trailer lights up if the vehicle has a factory-fitted
towing device or a towing device from ŠKODA original accessories and it is
driven with a trailer.
COMING HOME / LEAVING HOME
Read and observe
on page 63 first.
COMING HOME (hereinafter referred to only as a function) switches the light
automatically for a short time after leaving the vehicle.
LEAVING HOME (hereinafter referred to only as a function) switches the light
automatically for a short time when approaching the vehicle.
The daytime running lights are switched on automatically if the following
conditions are met.
The light switch is in position
» Fig. 47 on page 66 .
The visibility in the vehicle environment is reduced.
The ignition is switched off.
The parking aid is activated.
The function is switched on (the driver's door is opened / the car is un-
locked with the remote control).
The function switches on the following light, depending on the equipment
fitted.
› Parking lights
› Low beam
› Entry lighting in the exterior mirrors
› Licence plate light
Poorer visibility is evaluated by a motor mounted in the holder of the interior
mirror sensor.
COMING HOME
The light turns on automatically when you open the driver's door on (within 60
seconds of turning off the ignition).
The light turns off 10 seconds after closing all the doors and the boot lid or af-
ter the pre-set time has expired.
If a door or the boot lid remains open, the light goes out after 60 seconds.
LEAVING HOME
The light turns on automatically after the vehicle is unlocked with the remote
control.
The light turns off after 10 seconds or after a pre-set time or after the vehicle
is locked.
If no door is opened, the vehicle is locked automatically after 30 seconds.
Enabling / disabling and setting function
The functions and settings of the illumination time can be activated/deactiva-
ted via the MAXI DOT display in the menu items Coming Home or Leaving
Home » page 47 .
CAUTION
■
Do not attach any stickers or similar objects in front of the light sensor on
the windscreen to avoid impairing the function or its reliability.■
If this function is activated constantly, the battery will be heavily discharged
particularly in short-haul traffic.
Hazard warning light system
Fig. 49
Button for hazard warning light
system
Read and observe on page 63 first.
Switching on/off
›
Press the button
» Fig. 49 .
All the turn signal lights on the vehicle flash at the same time when the hazard
warning light system is switched on. The warning light for the turn signals and
the warning light in the button also flash at the same time. The hazard warn-
ing light system can also be operated if the ignition is switched off.
68Using the system
Page 76 of 248
CAUTION■If the ignition is switched off while the windscreen wipers are switched on,
the windscreen wipers will continue wiping in the same mode after the igni-
tion is turned back on. The windscreen wipers could freeze up in cold tempera-
tures between the time the ignition was turned off and when it was turned
back on again.■
In cold temperatures and during the winter, check before the journey or be-
fore switching on the ignition that the wiper blades are not frozen to the
windscreen. If the windscreen wipers are switched on when the blades are fro-
zen to the windscreen, this may damage both the blades and windscreen wip-
er motor!
■
Carefully peel frozen wiper blades off the pane.
■
Remove snow and ice from the windscreen wipers before driving.
■
If the windscreen wipers are handled carelessly, there is a risk of damage to
the windscreen.
■
Do not switch on the ignition if the front wiper arms are retracted. The wiper
arms could damage the paint of the bonnet.
■
If there is an obstacle on the windscreen, the wiper will try to push away the
obstacle. The wiper stops automatically after 5 attempts to eliminate the ob-
stacle, in order to avoid a damage to the wiper. Remove the the obstacle and
switch the wiper on again.
Note
■ Each time the ignition switches off for the third time, the position of the
windscreen wipers changes. This counteracts an early fatigue of the wiper rub-
bers.■
The rear window wiper only operates if the boot lid is closed.
■
To avoid streaking, the wiper blades must be kept clean » page 174.
■
The windscreen washer nozzles for the windscreen are heated when the en-
gine is running and the outside temperature is less than approx. +10 °C.
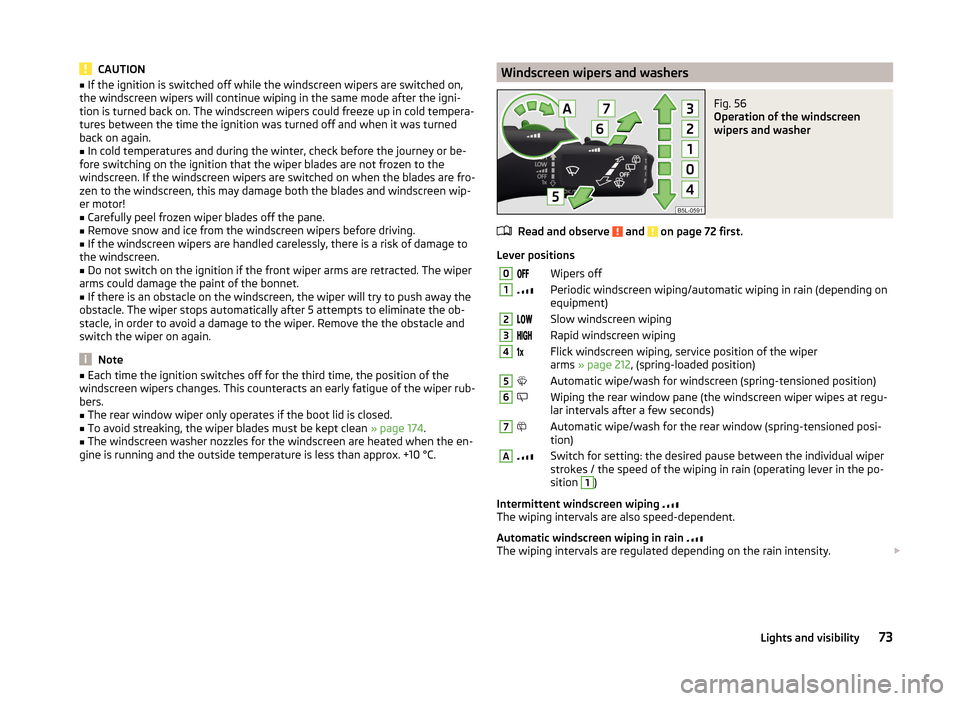
Windscreen wipers and washersFig. 56
Operation of the windscreen
wipers and washer
Read and observe and on page 72 first.
Lever positions
0Wipers off1Periodic windscreen wiping/automatic wiping in rain (depending on
equipment)2Slow windscreen wiping3Rapid windscreen wiping4 Flick windscreen wiping, service position of the wiper
arms » page 212 , (spring-loaded position)5Automatic wipe/wash for windscreen (spring-tensioned position)6Wiping the rear window pane (the windscreen wiper wipes at regu-
lar intervals after a few seconds)7Automatic wipe/wash for the rear window (spring-tensioned posi-
tion)ASwitch for setting: the desired pause between the individual wiper
strokes / the speed of the wiping in rain (operating lever in the po-
sition 1
)
Intermittent windscreen wiping
The wiping intervals are also speed-dependent.
Automatic windscreen wiping in rain
The wiping intervals are regulated depending on the rain intensity.
73Lights and visibility
Page 88 of 248
NoteThe outer seats are not mutually interchangeable. In the rear area the left seat
is marked with the letter L and the right seat with the letter R.
Setting outer seat in the transverse direction
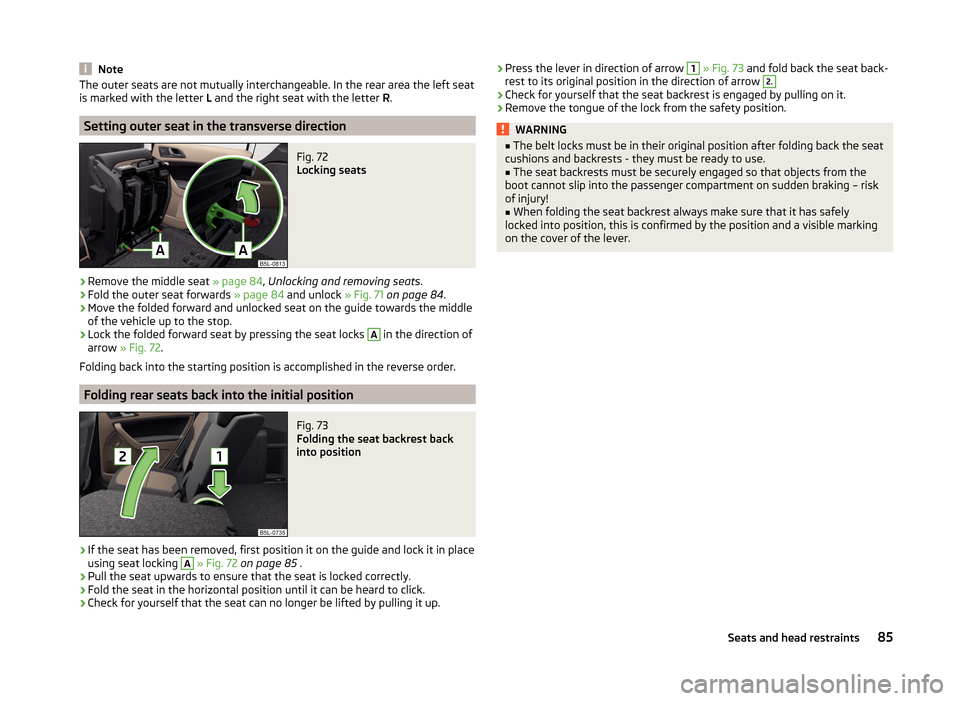
Fig. 72
Locking seats
›
Remove the middle seat » page 84, Unlocking and removing seats .
›
Fold the outer seat forwards » page 84 and unlock » Fig. 71 on page 84 .
›
Move the folded forward and unlocked seat on the guide towards the middle
of the vehicle up to the stop.
›
Lock the folded forward seat by pressing the seat locks
A
in the direction of
arrow » Fig. 72 .
Folding back into the starting position is accomplished in the reverse order.
Folding rear seats back into the initial position
Fig. 73
Folding the seat backrest back
into position
›
If the seat has been removed, first position it on the guide and lock it in place
using seat locking
A
» Fig. 72 on page 85 .
›
Pull the seat upwards to ensure that the seat is locked correctly.
›
Fold the seat in the horizontal position until it can be heard to click.
›
Check for yourself that the seat can no longer be lifted by pulling it up.
›Press the lever in direction of arrow 1
» Fig. 73 and fold back the seat back-
rest to its original position in the direction of arrow 2.›
Check for yourself that the seat backrest is engaged by pulling on it.
›
Remove the tongue of the lock from the safety position.
WARNING■ The belt locks must be in their original position after folding back the seat
cushions and backrests - they must be ready to use.■
The seat backrests must be securely engaged so that objects from the
boot cannot slip into the passenger compartment on sudden braking – risk
of injury!
■
When folding the seat backrest always make sure that it has safely
locked into position, this is confirmed by the position and a visible marking
on the cover of the lever.
85Seats and head restraints
Page 93 of 248
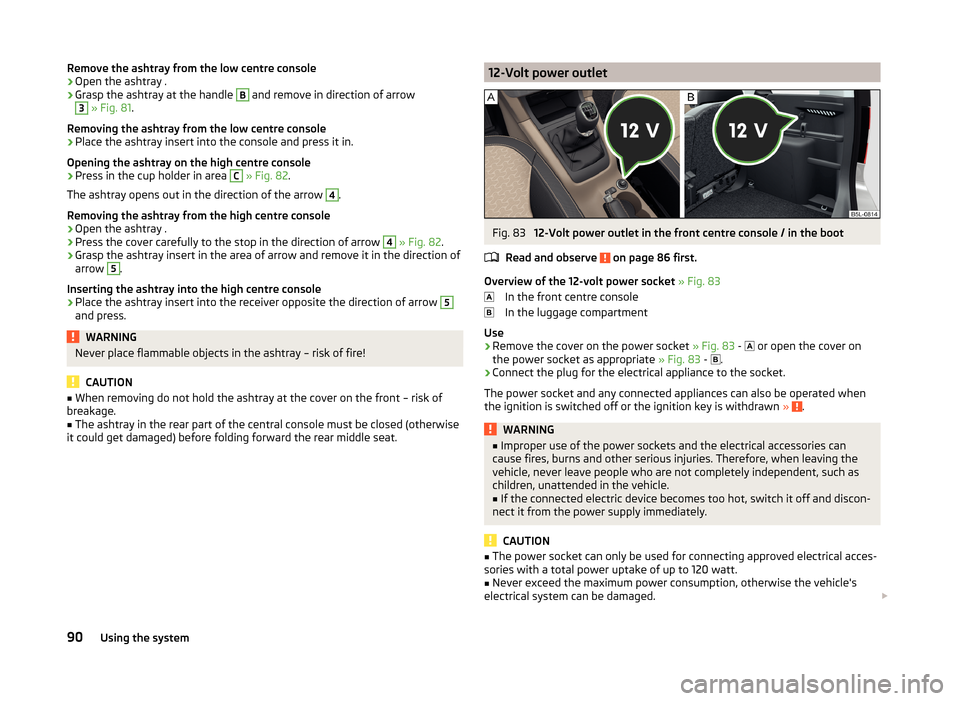
Remove the ashtray from the low centre console›Open the ashtray .›
Grasp the ashtray at the handle
B
and remove in direction of arrow
3
» Fig. 81 .
Removing the ashtray from the low centre console
›
Place the ashtray insert into the console and press it in.
Opening the ashtray on the high centre console
›
Press in the cup holder in area
C
» Fig. 82 .
The ashtray opens out in the direction of the arrow
4
.
Removing the ashtray from the high centre console
›
Open the ashtray .
›
Press the cover carefully to the stop in the direction of arrow
4
» Fig. 82 .
›
Grasp the ashtray insert in the area of arrow and remove it in the direction of
arrow
5
.
Inserting the ashtray into the high centre console
›
Place the ashtray insert into the receiver opposite the direction of arrow
5
and press.
WARNINGNever place flammable objects in the ashtray – risk of fire!
CAUTION
■ When removing do not hold the ashtray at the cover on the front – risk of
breakage.■
The ashtray in the rear part of the central console must be closed (otherwise
it could get damaged) before folding forward the rear middle seat.
12-Volt power outletFig. 83
12-Volt power outlet in the front centre console / in the boot
Read and observe
on page 86 first.
Overview of the 12-volt power socket » Fig. 83
In the front centre console
In the luggage compartment
Use
›
Remove the cover on the power socket » Fig. 83 -
or open the cover on
the power socket as appropriate » Fig. 83 -
.
›
Connect the plug for the electrical appliance to the socket.
The power socket and any connected appliances can also be operated when
the ignition is switched off or the ignition key is withdrawn »
.
WARNING■
Improper use of the power sockets and the electrical accessories can
cause fires, burns and other serious injuries. Therefore, when leaving the
vehicle, never leave people who are not completely independent, such as
children, unattended in the vehicle.■
If the connected electric device becomes too hot, switch it off and discon-
nect it from the power supply immediately.
CAUTION
■ The power socket can only be used for connecting approved electrical acces-
sories with a total power uptake of up to 120 watt.■
Never exceed the maximum power consumption, otherwise the vehicle's
electrical system can be damaged.
90Using the system
Page 99 of 248
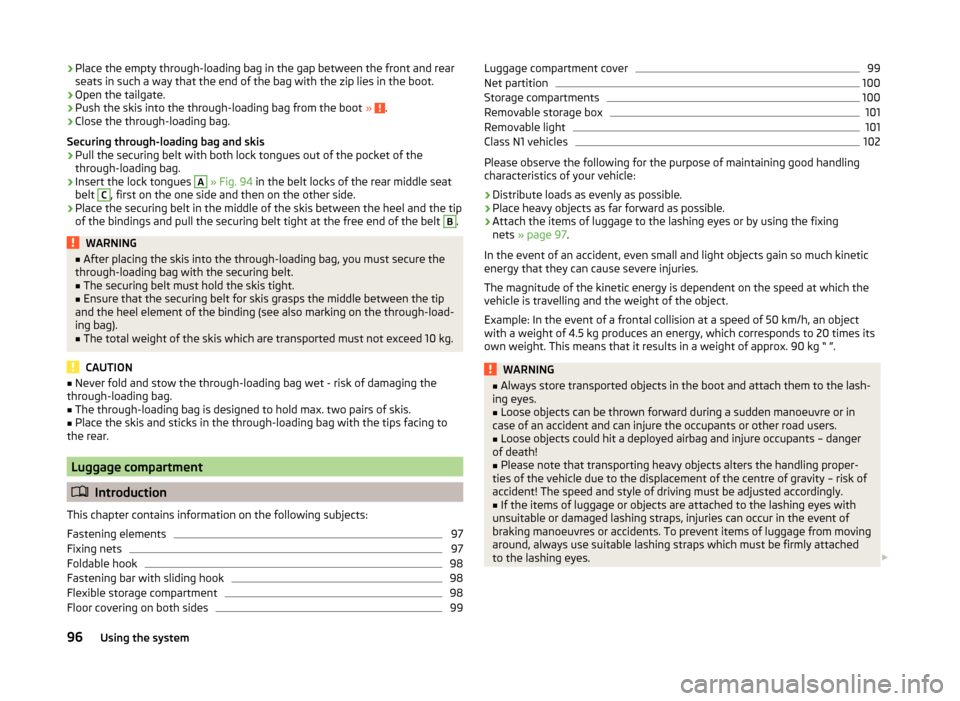
›Place the empty through-loading bag in the gap between the front and rear
seats in such a way that the end of the bag with the zip lies in the boot.›
Open the tailgate.
›
Push the skis into the through-loading bag from the boot » .
›
Close the through-loading bag.
Securing through-loading bag and skis
›
Pull the securing belt with both lock tongues out of the pocket of the
through-loading bag.
›
Insert the lock tongues
A
» Fig. 94 in the belt locks of the rear middle seat
belt
C
, first on the one side and then on the other side.
›
Place the securing belt in the middle of the skis between the heel and the tip
of the bindings and pull the securing belt tight at the free end of the belt
B
.
WARNING■ After placing the skis into the through-loading bag, you must secure the
through-loading bag with the securing belt.■
The securing belt must hold the skis tight.
■
Ensure that the securing belt for skis grasps the middle between the tip
and the heel element of the binding (see also marking on the through-load-
ing bag).
■
The total weight of the skis which are transported must not exceed 10 kg.
CAUTION
■ Never fold and stow the through-loading bag wet - risk of damaging the
through-loading bag.■
The through-loading bag is designed to hold max. two pairs of skis.
■
Place the skis and sticks in the through-loading bag with the tips facing to
the rear.
Luggage compartment
Introduction
This chapter contains information on the following subjects:
Fastening elements
97
Fixing nets
97
Foldable hook
98
Fastening bar with sliding hook
98
Flexible storage compartment
98
Floor covering on both sides
99Luggage compartment cover99Net partition100
Storage compartments
100
Removable storage box
101
Removable light
101
Class N1 vehicles
102
Please observe the following for the purpose of maintaining good handling
characteristics of your vehicle:
›
Distribute loads as evenly as possible.
›
Place heavy objects as far forward as possible.
›
Attach the items of luggage to the lashing eyes or by using the fixing
nets » page 97 .
In the event of an accident, even small and light objects gain so much kinetic
energy that they can cause severe injuries.
The magnitude of the kinetic energy is dependent on the speed at which the
vehicle is travelling and the weight of the object.
Example: In the event of a frontal collision at a speed of 50 km/h, an object
with a weight of 4.5 kg produces an energy, which corresponds to 20 times its
own weight. This means that it results in a weight of approx. 90 kg “ ”.
WARNING■ Always store transported objects in the boot and attach them to the lash-
ing eyes.■
Loose objects can be thrown forward during a sudden manoeuvre or in
case of an accident and can injure the occupants or other road users.
■
Loose objects could hit a deployed airbag and injure occupants – danger
of death!
■
Please note that transporting heavy objects alters the handling proper-
ties of the vehicle due to the displacement of the centre of gravity – risk of
accident! The speed and style of driving must be adjusted accordingly.
■
If the items of luggage or objects are attached to the lashing eyes with
unsuitable or damaged lashing straps, injuries can occur in the event of
braking manoeuvres or accidents. To prevent items of luggage from moving
around, always use suitable lashing straps which must be firmly attached
to the lashing eyes.
96Using the system