start stop button SKODA YETI 2014 1.G / 5L User Guide
[x] Cancel search | Manufacturer: SKODA, Model Year: 2014, Model line: YETI, Model: SKODA YETI 2014 1.G / 5LPages: 248, PDF Size: 29.49 MB
Page 142 of 248
N - Neutral
The power transmission to the drive wheels is interrupted in this mode.D
- Mode for forwards travel (normal programme)
In mode D, the forward gears are automatically changed according to the en-
gine load, accelerator pedal actuation and driving speed.
S
- Mode for forwards travel (sports programme)
In mode S , the forward gears are shifted automatically up and down at high-
er engine speeds than in mode D.
Before changing to mode S from mode D, press the lock button in the direction
of arrow
1
» Fig. 130 .
Fault in the automatic gearbox
A fault in the automatic gearbox can, for example, be noticeable by the follow-
ing.
› Only certain gears are selected.
› The reverse gear
R cannot be used.
› Shifting gears in Tiptronic mode is not possible.
CAUTION
If an error occurs on the automatic transmission the help of a specialist firm
should be sought immediately - there is a risk of damaging the vehicle.
Selector lever lock
Read and observe
and on page 138 first.
The selector lever is locked in mode P and N to prevent that the forward driv-
ing is selected accidentally, thereby setting the vehicle in motion.
The selector lever is locked only when the vehicle is stationary and at speeds
up to 5 km/h.
The selector lever lock is indicated by the illumination of the warning light .
The selector lever is not locked when quickly moving across the position N
(e.g. from R to D). This, for example, helps to rock out a vehicle that is stuck,
e.g. in a bank of snow. The selector lever lock will engage if the lever is in posi-
tion N for more than approx. 2 seconds without the brake pedal being de-
pressed.
Releasing selector lever from mode P or N (selector lever lock)
›
Press the brake pedal and the lock button at the same time in the direction
of
1
» Fig. 130 on page 138 .
Just depress the brake pedal, if you would like to change from the mode N to
D .
Defective selector lever lock If the selector lever lock is defective or its power supply is interrupted (e.g. dis-
charged vehicle battery, faulty fuse), the selector lever can no longer be moved
out of position P in the normal manner and the vehicle can no longer be driven.
The selector lever must be unlocked specially » page 212.
Note
If you want to move the selector lever from mode P to mode D or vice versa,
move the selector lever quickly. This prevents that you accidentally select
mode R or N.
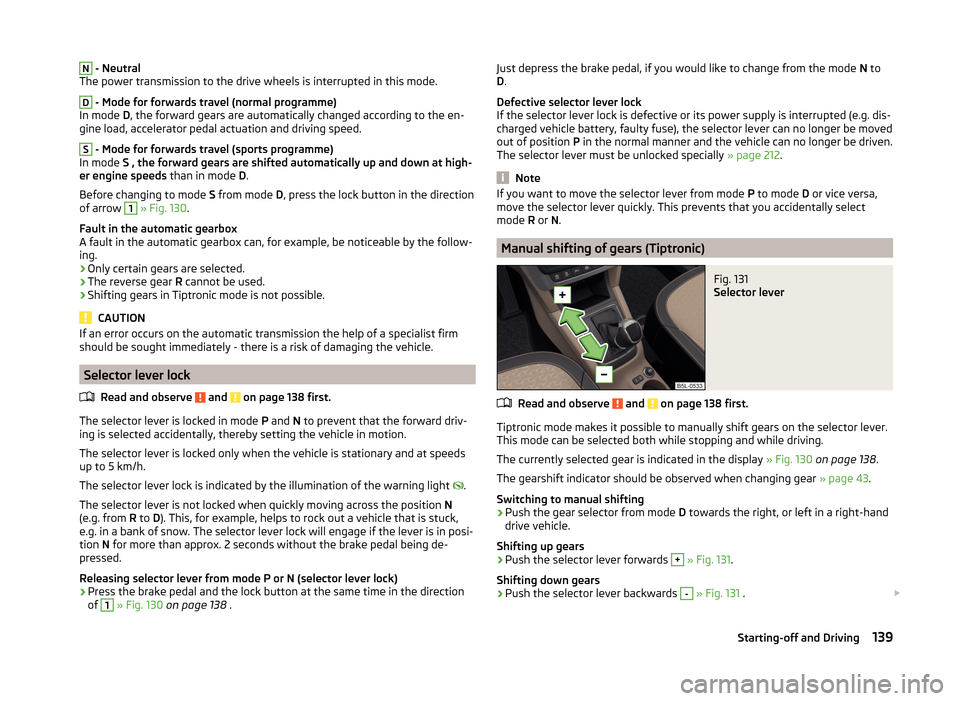
Manual shifting of gears (Tiptronic)
Fig. 131
Selector lever
Read and observe and on page 138 first.
Tiptronic mode makes it possible to manually shift gears on the selector lever.
This mode can be selected both while stopping and while driving.
The currently selected gear is indicated in the display » Fig. 130 on page 138 .
The gearshift indicator should be observed when changing gear » page 43.
Switching to manual shifting
›
Push the gear selector from mode D towards the right, or left in a right-hand
drive vehicle.
Shifting up gears
›
Push the selector lever forwards
+
» Fig. 131 .
Shifting down gears
›
Push the selector lever backwards
-
» Fig. 131 .
139Starting-off and Driving
Page 143 of 248
Note■It may be beneficial, for example, when travelling downhill, to use manual
shifting of gears. Shifting to a lower gear reduces the load on the brakes and
hence the wear of the brakes » page 135, Information on braking .■
When accelerating, the gearbox automatically shifts up into the higher gear
just before the maximum permissible engine speed is reached.
■
If a lower gear is selected, the gearbox does not shift down until there is no
risk of the engine overrevving.
Starting-off and driving
Read and observe
and on page 138 first.
Starting off
›
Start the engine.
›
Firmly depress and hold the brake pedal.
›
Press the lock button in the direction of
1
» Fig. 130 on page 138 and hold.
›
Move the selector lever into the desired position » page 138 and then release
the lock button.
›
Release the brake pedal and accelerate.
Stopping (while the car is moving)
›
Depress the brake pedal and bring the vehicle to a stop.
›
Keep holding the brake pedal until driving is resumed.
The selector lever position N does not have to be selected when stopping for a
short time, such as at a cross roads.
Kickdown
The kickdown function allows you to achieve the maximum acceleration of
your vehicle while driving.
When the accelerator pedal is fully depressed, the kickdown function is activa-
ted in any forward driving mode.
The gearbox shifts down one or more gears depending on the vehicle speed
and engine speed, and the vehicle accelerates.
The gearbox does not shift up into the highest gear until the engine has
reached its maximum revolutions for this gear range.
WARNINGRapid acceleration, particularly on slippery roads, can lead to loss of control
of the vehicle – risk of accident!Running in and economical driving
Introduction
This chapter contains information on the following subjects:
Driving in
140
Tips for economical driving
140
The fuel consumption, degree of pollution and vehicle wear depend on driving
style, road condition, weather conditions and the like.
Driving in
Driving in the engine
The engine has to be run in during the first 1 500 kilometres. During this peri-
od, the driving style decides on the quality of the driving-in process.
During the first 1 000 km we recommend not driving faster than 3/4 of the
maximum permissible engine speed, not to drive at full throttle and to dis-
pense with the trailer.
In the area of 1,000 to 1,500 kilometres the engine load can be increased up
to the maximum permitted engine speed.
New tyres
New tyres must firstly be “run in”, as they do not offer optimal grip at first.
Therefore, drive especially carefully for the first 500 km or so.
New brake pads
New brake pads have to first “grind in” because these do not initially have the
best possible braking effect.
Therefore, drive especially carefully for the first 200 km or so.
Tips for economical driving
To achieve the lowest possible fuel consumption, the following instructions
must be observed.
Looking ahead when driving
Avoid unnecessary acceleration and braking.
Switch in an energy saving and timely manner Observe the recommended gear » page 43.
140Driving
Page 155 of 248
If suitable parking space is found, its parameters are stored until another suit-
able parking space has been found or until a distance of 10 m had been driven
after finding the parking space.
If the driver changes the parking mode while searching for a parking space, the
symbol button must be pressed again.
Note
If the symbol
(km / h) is shown in the display , the vehicle speed should be
reduced below 40 km / hr (parallel parking) or below 20 km / hr (Transverse
parking) .
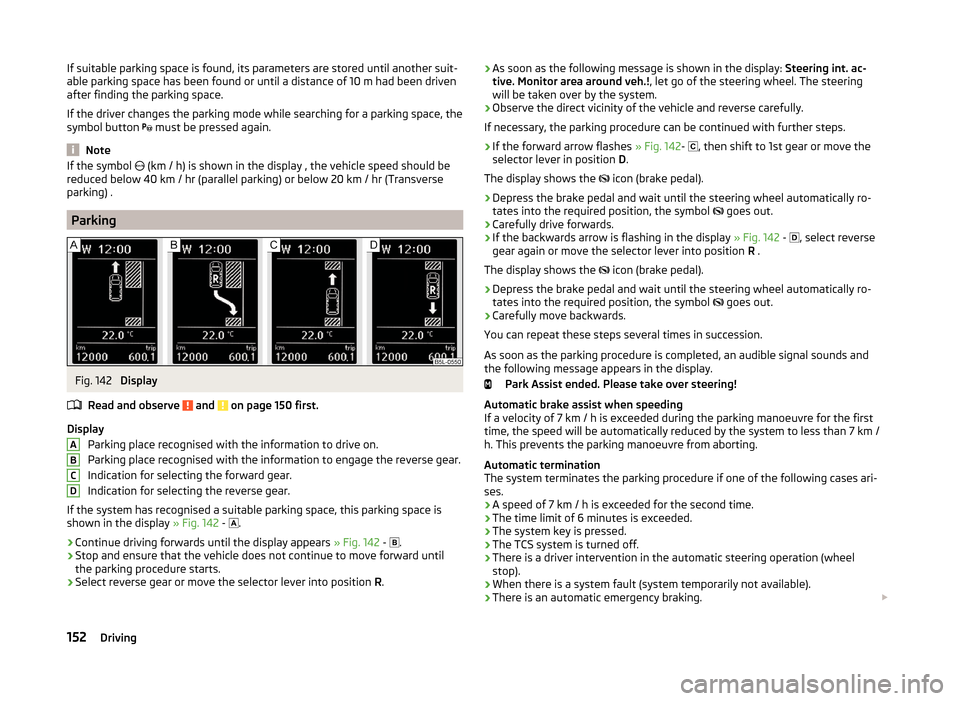
Parking
Fig. 142
Display
Read and observe
and on page 150 first.
Display Parking place recognised with the information to drive on.
Parking place recognised with the information to engage the reverse gear.
Indication for selecting the forward gear.
Indication for selecting the reverse gear.
If the system has recognised a suitable parking space, this parking space is
shown in the display » Fig. 142 -
.
›
Continue driving forwards until the display appears
» Fig. 142 -
.
›
Stop and ensure that the vehicle does not continue to move forward until
the parking procedure starts.
›
Select reverse gear or move the selector lever into position R.
ABCD› As soon as the following message is shown in the display:
Steering int. ac-
tive. Monitor area around veh.! , let go of the steering wheel. The steering
will be taken over by the system.›
Observe the direct vicinity of the vehicle and reverse carefully.
If necessary, the parking procedure can be continued with further steps.
›
If the forward arrow flashes » Fig. 142-
, then shift to 1st gear or move the
selector lever in position D.
The display shows the
icon (brake pedal).
›
Depress the brake pedal and wait until the steering wheel automatically ro-
tates into the required position, the symbol
goes out.
›
Carefully drive forwards.
›
If the backwards arrow is flashing in the display » Fig. 142 -
, select reverse
gear again or move the selector lever into position R .
The display shows the icon (brake pedal).
›
Depress the brake pedal and wait until the steering wheel automatically ro-
tates into the required position, the symbol goes out.
›
Carefully move backwards.
You can repeat these steps several times in succession.
As soon as the parking procedure is completed, an audible signal sounds and
the following message appears in the display.
Park Assist ended. Please take over steering!
Automatic brake assist when speeding
If a velocity of 7 km / h is exceeded during the parking manoeuvre for the first
time, the speed will be automatically reduced by the system to less than 7 km /
h. This prevents the parking manoeuvre from aborting.
Automatic termination
The system terminates the parking procedure if one of the following cases ari-
ses.
› A speed of 7 km / h is exceeded for the second time.
› The time limit of 6 minutes is exceeded.
› The system key is pressed.
› The TCS system is turned off.
› There is a driver intervention in the automatic steering operation (wheel
stop).
› When there is a system fault (system temporarily not available).
› There is an automatic emergency braking.
152Driving
Page 158 of 248

After starting the system, the current speed is stored and the instrument clus-
ter lights up the warning light .
After the interruption in control, the stored speed can be resumed by pressing
the B
button.
Automatic control interruption
Automatic control interruption occurs if any of the following conditions are
met.
› By pressing the brake or clutch pedal.
› When one of the brake assist systems (e.g. ESC) intervenes.
› Through an airbag deployment.
WARNING■
Always deactivate the cruise control system after use to prevent the sys-
tem being switched on unintentionally.■
Control may only be resumed if the stored speed is not too high for the
current traffic conditions.
Note
During control, speed can be increased by pressing the accelerator pedal. Re-
leasing the accelerator pedal will cause the speed to drop again to the set
speed.
START-STOP
Introduction
This chapter contains information on the following subjects:
Operating conditions of the system
155
Operation in vehicles with manual gearbox
156
Operation in vehicles with automatic gearbox
156
System related automatic start-up
156
Manually deactivating/activating the system
157
Information messages
157
The START-STOP system (hereinafter referred to as the system) saves fuel and
reduces polluting emissions and CO 2 emissions by turning the engine off, e.g.
when stopping at traffic lights, and starting the engine again when moving off.
WARNING■ Never let the vehicle roll with the engine switched off.■The brake servo unit and power steering only operate if the engine is run-
ning.
Operating conditions of the system
Fig. 144
Maxi DOT display: Engine is auto-
matically switched off / automat-
ic engine cut off is not possible
Read and observe on page 155 first.
For system-dependent automatic engine shutdown
to work, the following conditions must be met.
The driver's door is closed.
The driver has fastened the seat belt.
The bonnet is closed.
The driving speed was higher than 4 km.h after the last stop.
No trailer is coupled.
Some additional conditions for the system to function correctly cannot be in-
fluenced or recognised by the driver. Therefore, the system can react differ-
ently in situations which are identical from the driver's perspective.
If after stopping the car, the message START-STOP NOT POSSIBLE appears in
the segment display or the
» Fig. 144 check mark appears in the MAXI DOT
display, then the conditions for automatic engine shutdown are not met.
Running the engine is essential for the following reasons, for example.
› The engine temperature for the proper function of the system has not yet
been reached.
› The charge state of the vehicle battery is too low.
› The current consumption is too high.
› High air-conditioning or heating capacity (high fan speed, big difference be-
tween the desired and actual interior temperature).
155Assist systems
Page 160 of 248

Manually deactivating/activating the systemFig. 145
Button for the START-STOP sys-
tem
Read and observe on page 155 first.
Deactivating/activating
›
Press the symbol button
» Fig. 145 .
When start-stop mode is deactivated, the indicator light in the button lights
up.
Note
If the system is deactivated when the engine is turned off automatically, then
the automatic start process takes place.
Information messages
Read and observe
on page 155 first.
The messages and information are indicated in the instrument cluster display. Start engine manually!
START MANUALLY
One of the conditions for automatic engine start is not satisfied or the driver's
seat belt is not fastened. The engine must be started manually.
On vehicles with the system KESSY the ignition is turned off by the first press
of the start button, only after pressing for the second time is the start process
initiated.
Error: Start-Stop system
ERROR START-STOP
A system error is present. Seek help from a specialist garage.
Fatigue detection (break recommendation)
Introduction
This chapter contains information on the following subjects:
Function
157
Information messages
158
The fatigue detection system (hereinafter referred to only as system) recom-
mends the driver taking a break from driving when, because of the driver's
steering behaviour, driver fatigue can be detected.
WARNING■ For the driving ability is always the driver's responsibility. Never drive if
you feel tired.■
The system may not detect all cases where a break is needed.
■
Therefore, take regular, sufficient breaks during long trips.
■
There will be no system warning during the so-called micro-sleep.
Note
■ In some situations, the system may evaluate the driving incorrectly and thus
mistakenly recommend a break (e.g. sporty driving, adverse weather condi-
tions or poor road conditions).■
The system is designed primarily for use on motorways.
Function
Read and observe
on page 157 first.
From the start of the journey, the system evaluates steering behaviour. If,
while driving, there have been changes in the steering behaviours that are
evaluated by the system as indicating possible fatigue, a break recommenda-
tion is issued.
The system evaluates steering behaviour and recommends a break at speeds
of 65-200 km / h.
The system detects a break from driving when one of the following condi-
tions is met.
› The vehicle is stopped and the ignition switched off.
› The vehicle is stopped, the seat belt removed and the driver's door opened.
› The vehicle is stopped for more than 15 minutes.
157Assist systems
Page 218 of 248
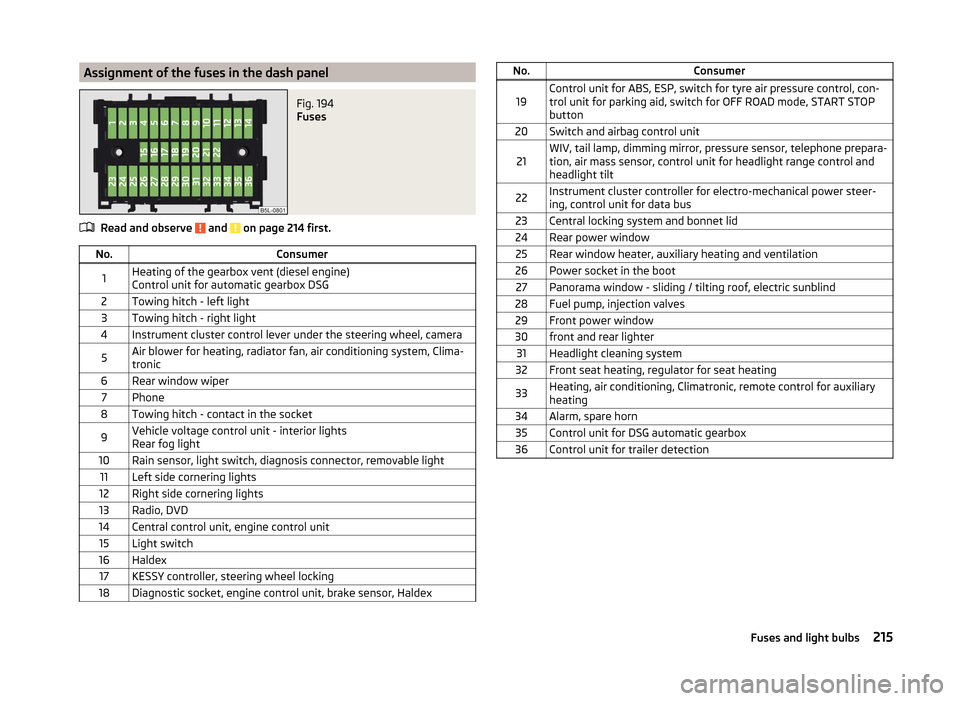
Assignment of the fuses in the dash panelFig. 194
Fuses
Read and observe and on page 214 first.
No.Consumer1Heating of the gearbox vent (diesel engine)
Control unit for automatic gearbox DSG2Towing hitch - left light3Towing hitch - right light4Instrument cluster control lever under the steering wheel, camera5Air blower for heating, radiator fan, air conditioning system, Clima-
tronic6Rear window wiper7Phone8Towing hitch - contact in the socket9Vehicle voltage control unit - interior lights
Rear fog light10Rain sensor, light switch, diagnosis connector, removable light11Left side cornering lights12Right side cornering lights13Radio, DVD14Central control unit, engine control unit15Light switch16Haldex17KESSY controller, steering wheel locking18Diagnostic socket, engine control unit, brake sensor, HaldexNo.Consumer19Control unit for ABS, ESP, switch for tyre air pressure control, con-
trol unit for parking aid, switch for OFF ROAD mode, START STOP button20Switch and airbag control unit21WIV, tail lamp, dimming mirror, pressure sensor, telephone prepara-
tion, air mass sensor, control unit for headlight range control and
headlight tilt22Instrument cluster controller for electro-mechanical power steer-
ing, control unit for data bus23Central locking system and bonnet lid24Rear power window25Rear window heater, auxiliary heating and ventilation26Power socket in the boot27Panorama window - sliding / tilting roof, electric sunblind28Fuel pump, injection valves29Front power window30front and rear lighter31Headlight cleaning system32Front seat heating, regulator for seat heating33Heating, air conditioning, Climatronic, remote control for auxiliary
heating34Alarm, spare horn35Control unit for DSG automatic gearbox36Control unit for trailer detection215Fuses and light bulbs
Page 242 of 248
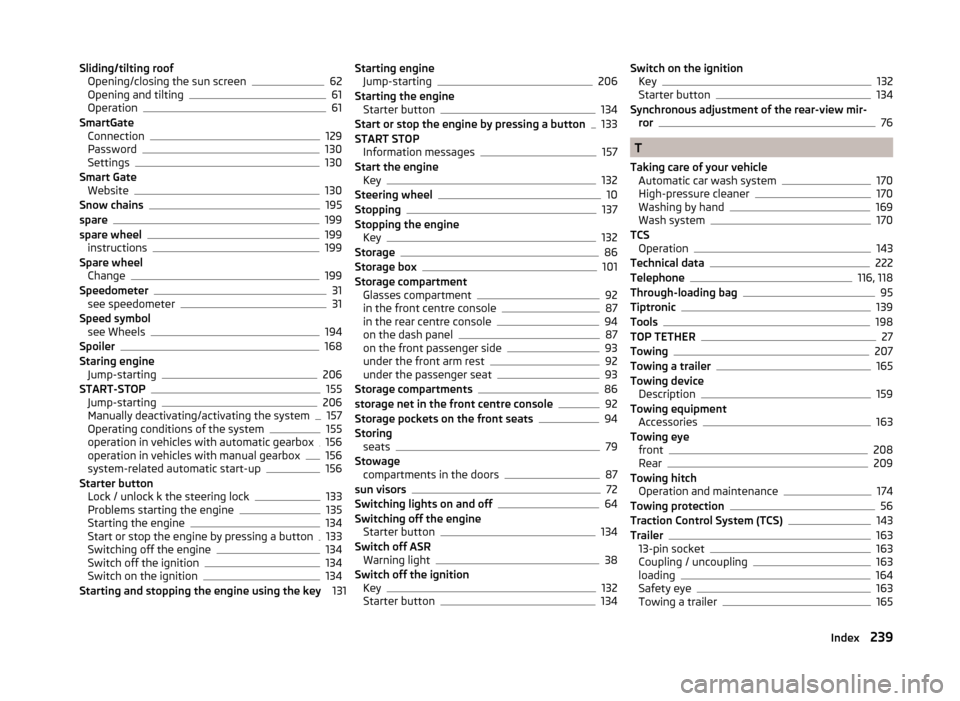
Sliding/tilting roofOpening/closing the sun screen62
Opening and tilting61
Operation61
SmartGate Connection
129
Password130
Settings130
Smart Gate Website
130
Snow chains195
spare199
spare wheel199
instructions199
Spare wheel Change
199
Speedometer31
see speedometer31
Speed symbol see Wheels
194
Spoiler168
Staring engine Jump-starting
206
START-STOP155
Jump-starting206
Manually deactivating/activating the system157
Operating conditions of the system155
operation in vehicles with automatic gearbox156
operation in vehicles with manual gearbox156
system-related automatic start-up156
Starter button Lock / unlock k the steering lock
133
Problems starting the engine135
Starting the engine134
Start or stop the engine by pressing a button133
Switching off the engine134
Switch off the ignition134
Switch on the ignition134
Starting and stopping the engine using the key 131
Starting engine
Jump-starting206
Starting the engine Starter button
134
Start or stop the engine by pressing a button133
START STOP Information messages
157
Start the engine Key
132
Steering wheel10
Stopping137
Stopping the engine Key
132
Storage86
Storage box101
Storage compartment Glasses compartment
92
in the front centre console87
in the rear centre console94
on the dash panel87
on the front passenger side93
under the front arm rest92
under the passenger seat93
Storage compartments86
storage net in the front centre console92
Storage pockets on the front seats94
Storing seats
79
Stowage compartments in the doors
87
sun visors72
Switching lights on and off64
Switching off the engine Starter button
134
Switch off ASR Warning light
38
Switch off the ignition Key
132
Starter button134
Switch on the ignition Key132
Starter button134
Synchronous adjustment of the rear-view mir- ror
76
T
Taking care of your vehicle Automatic car wash system
170
High-pressure cleaner170
Washing by hand169
Wash system170
TCS Operation
143
Technical data222
Telephone116, 118
Through-loading bag95
Tiptronic139
Tools198
TOP TETHER27
Towing207
Towing a trailer165
Towing device Description
159
Towing equipment Accessories
163
Towing eye front
208
Rear209
Towing hitch Operation and maintenance
174
Towing protection56
Traction Control System (TCS)143
Trailer163
13-pin socket163
Coupling / uncoupling163
loading164
Safety eye163
Towing a trailer165
239Index