warning light SKODA YETI 2014 1.G / 5L Owner's Guide
[x] Cancel search | Manufacturer: SKODA, Model Year: 2014, Model line: YETI, Model: SKODA YETI 2014 1.G / 5LPages: 248, PDF Size: 29.49 MB
Page 69 of 248

The indicator light flashes at twice its normal rate if a bulb for the turn signal
light fails.
“Convenience turn signal”
If you only wish to flash three times, briefly push the lever to the upper or low-
er pressure point and release again.
The “Lane ch. flash” can be activated or deactivated via the Maxi DOT display in
the Lane ch. flash » page 47, Settings menu item.WARNINGOnly turn on the main beam or the headlight flasher if other road users will
not be dazzled.
Automatic driving lamp control
Fig. 47
Light switch: AUTO position
Read and observe on page 63 first.
If the light switch is in position
» Fig. 47 , the parking lights, low beam and
number plate lights are switched on or off automatically.
The light on / off switching is controlled by a sensor mounted under the wind- screen in the holder of the inside mirror or in the control panel.
If the light switch is in position
, the lettering
illuminates next to the
light switch. If the light is switched on automatically, the symbol
next to the
light switch also lights up.
Automatic driving light control during rain
The daytime running lights are switched on automatically if the following con-
ditions are met:
The light switch is in position
» Fig. 47 .
Automatic wiping with rain - position 1
or wiping - position
2
or
3
is
turned on » page 73, Windscreen wipers and washers .
The windscreen wipers are on for more than 15 s.
The light turns off about 4 minutes after turning off the wipers.
CAUTION
Do not attach any stickers or similar objects in front of the light sensor on the
windscreen to avoid impairing the function or its reliability.
Adaptive headlights (AFS)
Read and observe
on page 63 first.
The AFS system makes sure the street remains lit up depending on the traffic
and weather situation.
The AFS system automatically adjusts the cone of light in front of the vehicle
to the driving speed or the use of the wiper.
The AFS system works as long as the light switch is in position
» page 66 .
The AHL system operates in the following modes.
Out of town mode
The cone of light in front of the vehicle is similar to the low beam.
City mode
The light cone in front of the vehicle is adjusted so that it illuminates this and
the adjacent sidewalks, intersections, pedestrian crossings, etc. The mode is
active at speeds of 15-50 km / h.
Motorway mode
The cone of light in front of the vehicle is adjusted so that the driver can re-
spond in time to an obstruction or other hazard in time. The mode is active at
speeds above 120 km/h.
Rain mode
The cone of light in front of the vehicle is adjusted so that the driver can re-
duce the glare from oncoming vehicles in rain.
66Using the system
Page 70 of 248

The mode is active when the wipers operate continuously for longer than 2 mi-
nutes at a speed of 20 - 70 km / h. The mode is deactivated when the wind-
screen wipers are switched off for longer than 8 minutes.
Dynamic cornering lights
The cone of light in front of the vehicle is adjusted to the steering angle so
that the road in the curve is illuminated. This function is active at speeds
greater than 10 km.h and in all AFS modes.
Tourist lights (Travel mode)
This mode makes it possible to drive in countries with opposing traffic system
(driving on the left/right) without dazzling the oncoming vehicles.
When this mode is active, the above-mentioned modes and the side swivel of
the headlights is deactivated.
This mode can be enabled or disabled via the MAXI DOT display in the Travel
mode » page 47 , Settings menu option.WARNINGIf the AFS system is defective, the headlights are automatically lowered to
the emergency position, which prevents a possible dazzling of oncoming
traffic. This reduces the cone of light in front of the vehicle. Drive carefully
and visit a specialist garage as soon as possible.
Note
When the “tourist light” mode is active, the warning light flashes for 10 sec-
onds each time the ignition is switched on.
Fog lights
Fig. 48
Light switch: Turn on front and
rear fog light
Read and observe on page 63 first.
Switching on/off
›
Turn the light switch to position
or
» Fig. 48 .
›
Pull the light switch to position
1
.
The rear fog light is switched off in the reverse order.
The indicator light
lights up in the instrument cluster when the fog lights
are switched on » page 34.
Fog lights with the CORNER function
Read and observe
on page 63 first.
The CORNER function improves illumination of the vehicle surroundings when
turning, parking and the like, by switching on the fog lights on the respective
side of the vehicle.
The CORNER function is switched on automatically if the following conditions
are met.
The turn signal is switched on or the front wheels are turned sharply to
the right or left 1)
.
The engine is running.
The vehicle is stopped or moves at a speed of no more than 40 km/h.
The low beam is switched on or the light switch is in the position and
the low beam is switched on.
The daytime running lights are not switched on.
The fog lights are not switched on.
Note
The two fog lights are switched on when you shift into the reverse gear.
Rear fog light
Read and observe
on page 63 first.
Switching on/off
›
Turn the light switch to position or
» Fig. 48 on page 67 .
›
Pull the light switch to position
2
.
1)
If both switch-on conditions are conflicting, for example, if the front wheels are turned to the left and
the right turn signal light is switched on, the turn signal light has the higher priority.
67Lights and visibility
Page 71 of 248
The rear fog light is switched off in the reverse order.
The warning light
lights up in the instrument cluster when the rear fog light
is switched on » page 34.
Only the rear fog light on the trailer lights up if the vehicle has a factory-fitted
towing device or a towing device from ŠKODA original accessories and it is
driven with a trailer.
COMING HOME / LEAVING HOME
Read and observe
on page 63 first.
COMING HOME (hereinafter referred to only as a function) switches the light
automatically for a short time after leaving the vehicle.
LEAVING HOME (hereinafter referred to only as a function) switches the light
automatically for a short time when approaching the vehicle.
The daytime running lights are switched on automatically if the following
conditions are met.
The light switch is in position
» Fig. 47 on page 66 .
The visibility in the vehicle environment is reduced.
The ignition is switched off.
The parking aid is activated.
The function is switched on (the driver's door is opened / the car is un-
locked with the remote control).
The function switches on the following light, depending on the equipment
fitted.
› Parking lights
› Low beam
› Entry lighting in the exterior mirrors
› Licence plate light
Poorer visibility is evaluated by a motor mounted in the holder of the interior
mirror sensor.
COMING HOME
The light turns on automatically when you open the driver's door on (within 60
seconds of turning off the ignition).
The light turns off 10 seconds after closing all the doors and the boot lid or af-
ter the pre-set time has expired.
If a door or the boot lid remains open, the light goes out after 60 seconds.
LEAVING HOME
The light turns on automatically after the vehicle is unlocked with the remote
control.
The light turns off after 10 seconds or after a pre-set time or after the vehicle
is locked.
If no door is opened, the vehicle is locked automatically after 30 seconds.
Enabling / disabling and setting function
The functions and settings of the illumination time can be activated/deactiva-
ted via the MAXI DOT display in the menu items Coming Home or Leaving
Home » page 47 .
CAUTION
■
Do not attach any stickers or similar objects in front of the light sensor on
the windscreen to avoid impairing the function or its reliability.■
If this function is activated constantly, the battery will be heavily discharged
particularly in short-haul traffic.
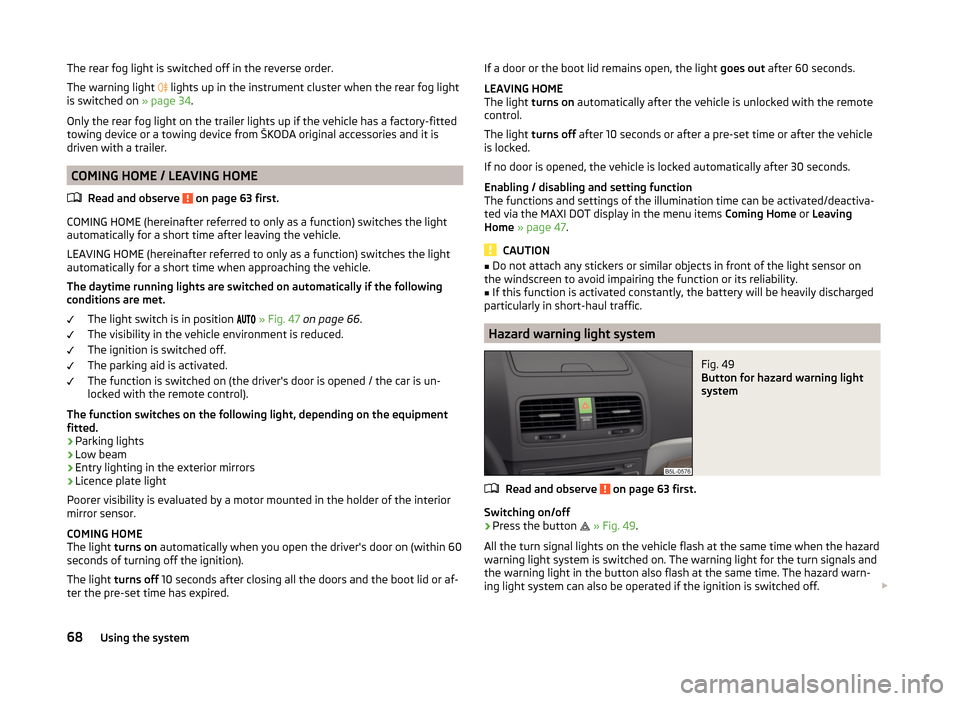
Hazard warning light system
Fig. 49
Button for hazard warning light
system
Read and observe on page 63 first.
Switching on/off
›
Press the button
» Fig. 49 .
All the turn signal lights on the vehicle flash at the same time when the hazard
warning light system is switched on. The warning light for the turn signals and
the warning light in the button also flash at the same time. The hazard warn-
ing light system can also be operated if the ignition is switched off.
68Using the system
Page 72 of 248

If one of the airbags is deployed, the hazard warning light system will switch
on automatically.
If the turn signal light is switched on when the hazard warning light and the
ignition are both switched on, then only the turn signal light on the corre-
sponding vehicle side will flash.WARNINGSwitch on the hazard warning light system if, for example, the following oc-
curs.■
You encounter a traffic congestion.
■
The vehicle has broken down.
Parking lights
Read and observe
on page 63 first.
The parking light is provided for a temporary lighting of the parked vehicle.
Parking light switching on
›
Switch off the ignition.
›
Place the control lever into position
A
or
B
as far as it can go
» Fig. 46 on
page 65 - the parking light on the right/left-hand side of the vehicle is
switched on.
If the right or left turn signal light has been switched on and the ignition is
switched off, the parking light is not automatically switched on.
Switching on the side light on both sides
›
Switch off the ignition.
›
Turn the light switch
A
to position
» Fig. 45 on page 64 and lock the ve-
hicle.
After pulling out the ignition key and opening the driver's door, an audible
warning sounds. After a few seconds or after closing the driver's door, the au-
dible alarm is turned off, but the parking lights will remain switched on.
CAUTION
Turning on the parking light means the battery is heavily loaded, especially
over short distances.Instrument lightingFig. 50
Controls for the instrument
lighting
Read and observe on page 63 first.
The brightness of the instrument lights can be set only if the parking, low
beam or high beam is switched on.
Turning the knob » Fig. 50
Adjust brightness of the instrument lighting.
Note
On vehicles with MAXI DOT display » page 47 the brightness of the instrument
lighting is set automatically. A manual brightness adjustment can therefore
only have a limited effect.
Driving abroad
Read and observe
on page 63 first.
The low beam is set asymmetrically. It illuminates the side of the road on
which the vehicle is being driven to a greater extent.
When driving in countries with opposing traffic system (traffic on the left/
right), asymmetric headlight adjustment can dazzle oncoming traffic. In order
to avoid this, the headlights must be adjusted at a specialist garage.
You can adjust the headlights with Xenon lights in the menu of the MAXI DOT
display under the menu point Travel mode » page 47 , Settings .
Note
You can find out more information on adjusting the headlights at a specialist
garage.69Lights and visibility
Page 73 of 248
Interior lights
Introduction
This chapter contains information on the following subjects:
Front interior light
70
Rear interior light
70
Front door warning light
71
Note
With the ignition off, the light turns off automatically after about 10 minutes.
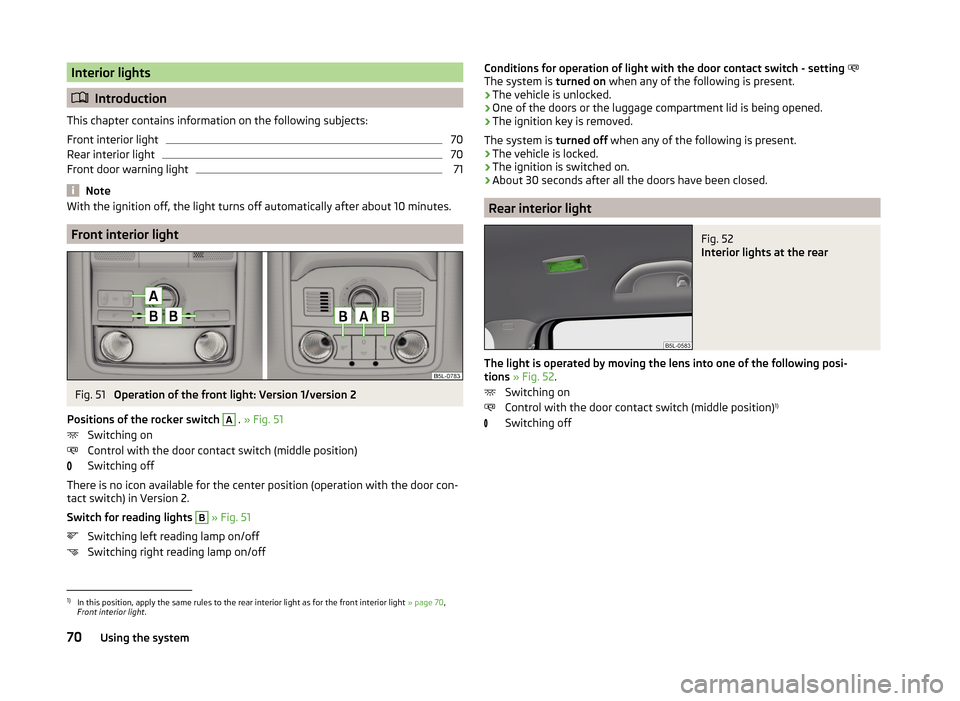
Front interior light
Fig. 51
Operation of the front light: Version 1/version 2
Positions of the rocker switch
A
. » Fig. 51
Switching on
Control with the door contact switch (middle position)
Switching off
There is no icon available for the center position (operation with the door con-
tact switch) in Version 2.
Switch for reading lights
B
» Fig. 51
Switching left reading lamp on/off
Switching right reading lamp on/off
Conditions for operation of light with the door contact switch - setting
The system is turned on when any of the following is present.
› The vehicle is unlocked.
› One of the doors or the luggage compartment lid is being opened.
› The ignition key is removed.
The system is turned off when any of the following is present.
› The vehicle is locked.
› The ignition is switched on.
› About 30 seconds after all the doors have been closed.
Rear interior light
Fig. 52
Interior lights at the rear
The light is operated by moving the lens into one of the following posi-
tions » Fig. 52 .
Switching on
Control with the door contact switch (middle position) 1)
Switching off
1)
In this position, apply the same rules to the rear interior light as for the front interior light » page 70,
Front interior light .
70Using the system
Page 74 of 248
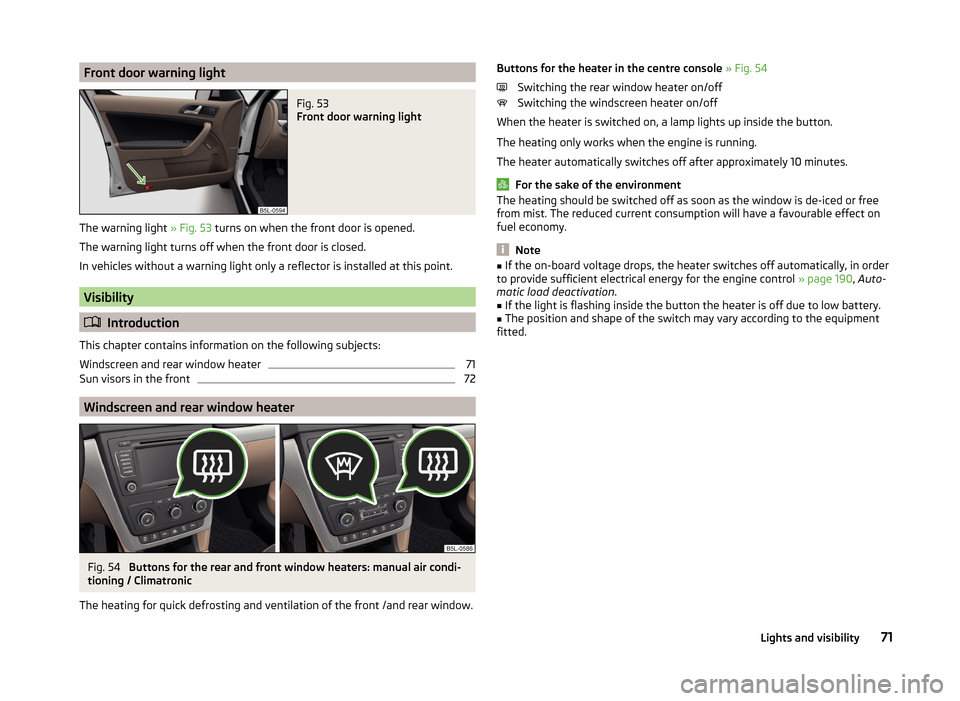
Front door warning lightFig. 53
Front door warning light
The warning light » Fig. 53 turns on when the front door is opened.
The warning light turns off when the front door is closed.
In vehicles without a warning light only a reflector is installed at this point.
Visibility
Introduction
This chapter contains information on the following subjects:
Windscreen and rear window heater
71
Sun visors in the front
72
Windscreen and rear window heater
Fig. 54
Buttons for the rear and front window heaters: manual air condi-
tioning / Climatronic
The heating for quick defrosting and ventilation of the front /and rear window.
Buttons for the heater in the centre console » Fig. 54
Switching the rear window heater on/off
Switching the windscreen heater on/off
When the heater is switched on, a lamp lights up inside the button.
The heating only works when the engine is running.
The heater automatically switches off after approximately 10 minutes.
For the sake of the environment
The heating should be switched off as soon as the window is de-iced or free
from mist. The reduced current consumption will have a favourable effect on
fuel economy.
Note
■ If the on-board voltage drops, the heater switches off automatically, in order
to provide sufficient electrical energy for the engine control » page 190, Auto-
matic load deactivation .■
If the light is flashing inside the button the heater is off due to low battery.
■
The position and shape of the switch may vary according to the equipment
fitted.
71Lights and visibility
Page 75 of 248
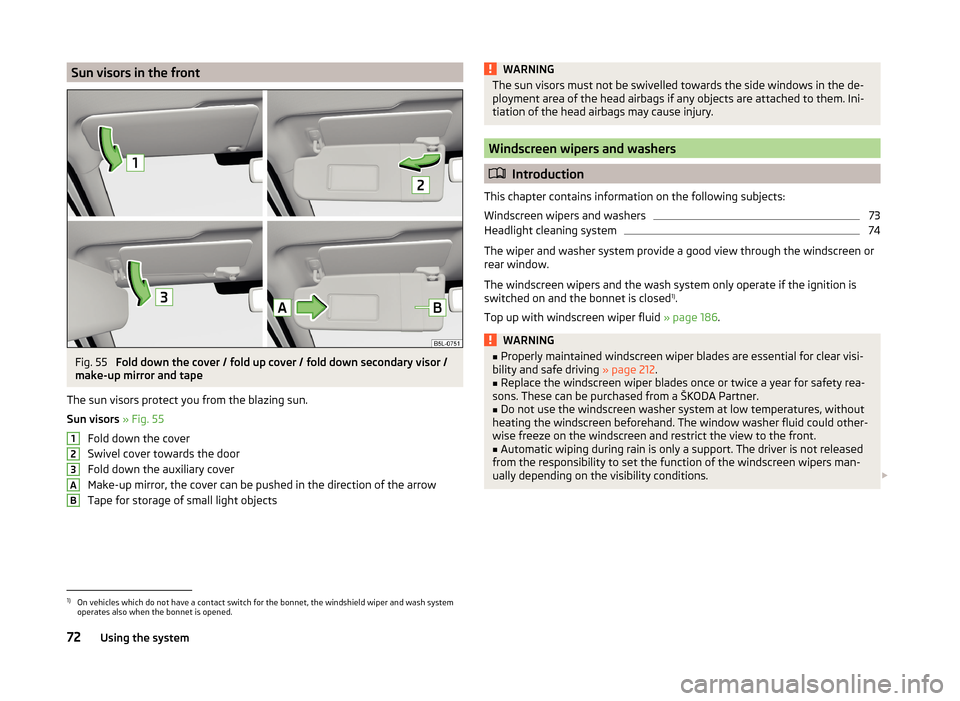
Sun visors in the frontFig. 55
Fold down the cover / fold up cover / fold down secondary visor /
make-up mirror and tape
The sun visors protect you from the blazing sun.
Sun visors » Fig. 55
Fold down the cover
Swivel cover towards the door
Fold down the auxiliary cover
Make-up mirror, the cover can be pushed in the direction of the arrow
Tape for storage of small light objects
123ABWARNINGThe sun visors must not be swivelled towards the side windows in the de-
ployment area of the head airbags if any objects are attached to them. Ini-
tiation of the head airbags may cause injury.
Windscreen wipers and washers
Introduction
This chapter contains information on the following subjects:
Windscreen wipers and washers
73
Headlight cleaning system
74
The wiper and washer system provide a good view through the windscreen or
rear window.
The windscreen wipers and the wash system only operate if the ignition is
switched on and the bonnet is closed 1)
.
Top up with windscreen wiper fluid » page 186.
WARNING■
Properly maintained windscreen wiper blades are essential for clear visi-
bility and safe driving » page 212.■
Replace the windscreen wiper blades once or twice a year for safety rea-
sons. These can be purchased from a ŠKODA Partner.
■
Do not use the windscreen washer system at low temperatures, without
heating the windscreen beforehand. The window washer fluid could other-
wise freeze on the windscreen and restrict the view to the front.
■
Automatic wiping during rain is only a support. The driver is not released
from the responsibility to set the function of the windscreen wipers man-
ually depending on the visibility conditions.
1)
On vehicles which do not have a contact switch for the bonnet, the windshield wiper and wash system
operates also when the bonnet is opened.
72Using the system
Page 78 of 248

WARNING■Make sure that the mirror is not covered by ice, snow, mist or other ob-
jects.■
Convex (curved outward) or aspheric exterior mirrors increase the field of
vision. They do, however, make objects appear smaller in the mirror. These
mirrors are therefore only of limited use for estimating distances to the fol-
lowing vehicles.
■
Whenever possible use the interior mirror for estimating the distances to
the following vehicles.
WARNINGThe mirrors with automatic dimming contain an electrolyte liquid which can
escape if mirror glass is broken.■
The leaking electrolytic fluid can irritate the skin, eyes and breath appara-
tus. Immediately seek out fresh air and leave the vehicle. If this is not pos-
sible, at least open the window.
■
If you swallow electrolytic fluid, seek medical assistance immediately.
■
If your eyes or skin come into contact with the electrolytic fluid, immedi-
ately wash the affected area for a few minutes long with a lot of water.
Then consult a doctor immediately.
Interior mirror
Fig. 57
Interior mirror: manual dimming / auto-dimming / light sensor
Read and observe
on page 75 first.
Mirrors with manual dimming » Fig. 57
Basic position of the mirror
Mirror blackout
12Mirror with automatic dimming » Fig. 57
Warning light - lights when dimming is activated
Switch for the activation of the automatic mirror dimming
Light sensor
Light sensor on the back of the mirror
Mirror with automatic dimming
If the automatic dimming is enabled, the mirror dims automatically depending
on the light falling on the sensors.
When the interior lights are switched on or the reverse gear is engaged, the
mirror always moves back into the basic position (not dimmed).
Do not attach external navigation devices to the windscreen or in the vicinity
of the interior mirror »
.
WARNINGThe illuminated display of an external navigation unit can lead to opera-
tional faults to the automatic dimming interior mirror – risk of accident.
CAUTION
Automatic mirror dimming only operates correctly if the light striking the sen-
sor is not affected by other objects.
Note
If the automatic interior mirror dimming is switched off, the exterior mirror
dimming is also switched off.ABCD75Lights and visibility
Page 80 of 248
Note■The mirror heater only operates when the engine is running and up to an
outside temperature of +35 ℃.■
If the electrical mirror setting fails at any time, the mirrors can be adjusted by
hand by pressing on the edge of the mirror surface.
Seats and head restraints
Front seat
Introduction
This chapter contains information on the following subjects:
Manually adjusting seats
78
Adjusting the front seats electronically
78
Memory Function of the electrically adjustable seat
79
Memory function of the remote control key
79
The driver's seat should be adjusted in such a way that the pedals can be fully
pressed to the floor with slightly bent legs.
The seat backrest on the driver's seat should be adjusted in such a way that the upper point of the steering wheel can be easily reached with slightly bent
arms.
Correct adjustment of the seats is particularly important for the following: › Reaching the controls safely and quickly.
› A relaxed and fatigue-free body position.
› Achieving the maximum protection offered by the seat belts and the airbag
system.
WARNING■ Only adjust the driver's seat when the vehicle is stationary – risk of acci-
dent!■
Caution when adjusting the seat! You may suffer injuries or bruises as a
result of adjusting the seat without paying proper attention.
■
The electric front seat adjustment is also functional when the ignition is
turned off (even with the ignition key removed). Therefore, when leaving
the vehicle, never leave people who are not completely independent, such
as children, unattended in the vehicle - there is a danger of injury!
■
Never carry more people than there are number of seats in the vehicle.
■
Do not carry any objects on the front passenger seat except objects de-
signed for this purpose (e.g. child seats) – risk of accident!
77Seats and head restraints
Page 83 of 248

When automatic storage is activated, the current positions of the driver's seat
and the external mirrors are saved in the memory of the remote control key
each time the vehicle is locked. When the vehicle is next unlocked using the
same key, the driver's seat and the external mirrors assume the positions stor-
ed in the memory of this key 1)
.
Saving front passenger mirror settings when reversing
Above the MAXI DOT display in the menu item Mirror down The lowering func-
tion for the mirror on the passenger side when reversing must be ena-
bled » page 47 .›
Unlock the vehicle with the remote control key.
›
Switch on the ignition.
›
Adjust the rotary knob for the mirrors to the position
or in right-hand drive
to the position
» page 76 .
›
Engage reverse gear.
›
Adjust the front passenger's mirror to the desired position » page 76.
›
Disengage reverse gear.
The adjusted position of the exterior mirror is stored in the remote control key
memory.
Disable the function of automatic storage
›
Unlock the vehicle with the remote control key.
›
Press and hold the SET button
A
» Fig. 61 on page 79 . At the same time,
press the button on the remote control key within 10 seconds.
The successful deactivation of the automatic storage function for each key is confirmed by an acoustic signal.
Stopping the ongoing adjustment
›
Press any button on the driver's seat.
Or
›
Press the button on the remote control key.
Front seat functions
Introduction
This chapter contains information on the following subjects:
Front seat heating
80
Front armrest
81
Folding front passenger seat
81
Front seat heating
Fig. 62
Buttons for heating the front
seats
The seat backrests and seats can be heated electrically.
The seat heating can only be switched on when the engine is running.
Buttons for the seat heater » Fig. 62
Left seat heating
Right seat heating
Switching on
›
Press the corresponding symbol button or
» Fig. 62 .
Pressing once switches the seat heating on at its maximum level.
With repeated pressing of the switch, the intensity of the heating is reduced
until it is switched off.
The level of the seat heating is indicated by the number of illuminated warning
lights in the switch.
1)
The vehicle must be locked and unlocked with the same key to save the seat and exterior mirror position
to the key.
80Using the system