radiator SKODA YETI 2014 1.G / 5L Owner's Manual
[x] Cancel search | Manufacturer: SKODA, Model Year: 2014, Model line: YETI, Model: SKODA YETI 2014 1.G / 5LPages: 248, PDF Size: 29.49 MB
Page 34 of 248

Revolutions counterRead and observe
on page 30 first.
The tachometer
1
» Fig. 23 on page 30 shows the actual engine speed per
minute.
The beginning of the tachometer red scale range indicates the maximum per-
mitted speed for an engine that has been driven-in and has reached operating
temperature.
You should shift into the next highest gear before the red scale of the revolu-
tion counter is reached, or select mode D on the automatic gearbox.
The gear recommendation is important to note in order to maintain the opti-
mum engine speed » page 43.
CAUTION
The pointer of the tachometer must reach the red area for only a short time -
there is a risk of engine damage!
Speedometer
Read and observe
on page 30 first.
The speedometer
2
» Fig. 23 on page 30 displays the current speed.
Warning against excessive speeds
An audible warning signal will sound when the vehicle speed exceeds 120 km/
h 1)
. The audible warning signal is switched off when the vehicle speed falls be-
low 120 km/h.
Coolant temperature gaugeFig. 24
Coolant temperature gauge
Read and observe on page 30 first.
The display » Fig. 24 provides information on the engine coolant temperature.
The display only works if the ignition is switched on.
Cold range
If the pointer is still in the left area of the scale, this indicates that the engine has not yet reached its operating temperature. Avoid high speeds, full throttle
and high engine loads. This prevents possible damage to the engine.
The operating range
The engine has reached its operating temperature as soon as the pointer
moves into the middle of the scale
A
» Fig. 24 . At very high ambient tempera-
tures or heavy engine loads, the pointer may move even further to the right.
High temperature range
If the pointer reaches the red area of the scale, the coolant temperature is too
high. Further information » page 36.
CAUTION
■
Additional headlights and other attached components in front of the air inlet
impair the cooling efficiency of the coolant.■
Never cover the radiator - there is a risk of the engine overheating.
1)
This function only applies to certain countries.
31Instruments and Indicator Lights
Page 39 of 248
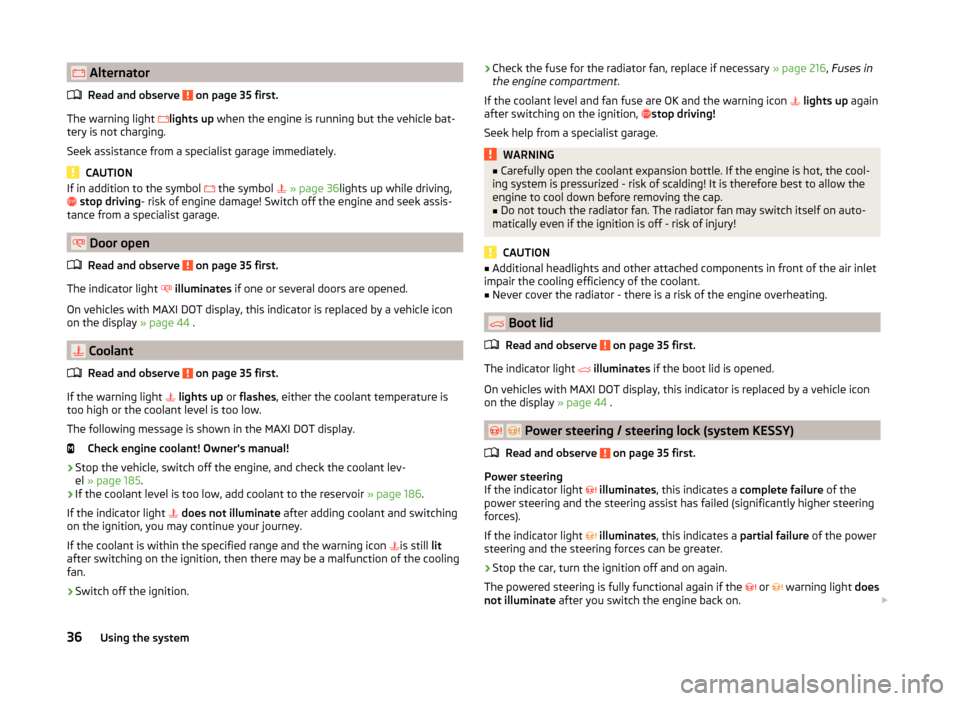
AlternatorRead and observe
on page 35 first.
The warning light
lights up when the engine is running but the vehicle bat-
tery is not charging.
Seek assistance from a specialist garage immediately.
CAUTION
If in addition to the symbol the symbol » page 36 lights up while driving,
stop driving - risk of engine damage! Switch off the engine and seek assis-
tance from a specialist garage.
Door open
Read and observe
on page 35 first.
The indicator light
illuminates if one or several doors are opened.
On vehicles with MAXI DOT display, this indicator is replaced by a vehicle icon
on the display » page 44 .
Coolant
Read and observe
on page 35 first.
If the warning light
lights up or flashes , either the coolant temperature is
too high or the coolant level is too low.
The following message is shown in the MAXI DOT display. Check engine coolant! Owner's manual!
›
Stop the vehicle, switch off the engine, and check the coolant lev-
el » page 185 .
›
If the coolant level is too low, add coolant to the reservoir » page 186.
If the indicator light
does not illuminate after adding coolant and switching
on the ignition, you may continue your journey.
If the coolant is within the specified range and the warning icon is still
lit
after switching on the ignition, then there may be a malfunction of the cooling
fan.
›
Switch off the ignition.
› Check the fuse for the radiator fan, replace if necessary
» page 216, Fuses in
the engine compartment .
If the coolant level and fan fuse are OK and the warning icon
lights up again
after switching on the ignition,
stop driving!
Seek help from a specialist garage.WARNING■ Carefully open the coolant expansion bottle. If the engine is hot, the cool-
ing system is pressurized - risk of scalding! It is therefore best to allow the
engine to cool down before removing the cap.■
Do not touch the radiator fan. The radiator fan may switch itself on auto-
matically even if the ignition is off - risk of injury!
CAUTION
■ Additional headlights and other attached components in front of the air inlet
impair the cooling efficiency of the coolant.■
Never cover the radiator - there is a risk of the engine overheating.
Boot lid
Read and observe
on page 35 first.
The indicator light
illuminates if the boot lid is opened.
On vehicles with MAXI DOT display, this indicator is replaced by a vehicle icon
on the display » page 44 .
Power steering / steering lock (system KESSY)
Read and observe
on page 35 first.
Power steering
If the indicator light
illuminates , this indicates a complete failure of the
power steering and the steering assist has failed (significantly higher steering
forces).
If the indicator light
illuminates , this indicates a partial failure of the power
steering and the steering forces can be greater.
›
Stop the car, turn the ignition off and on again.
The powered steering is fully functional again if the
or
warning light does
not illuminate after you switch the engine back on.
36Using the system
Page 135 of 248
The vehicle is unlocked.
If the ignition switch cannot be turned on, then turn the steering wheel back
and forth slightly and thereby unlock the steering lock.
Turn ignition on / off and start the engine
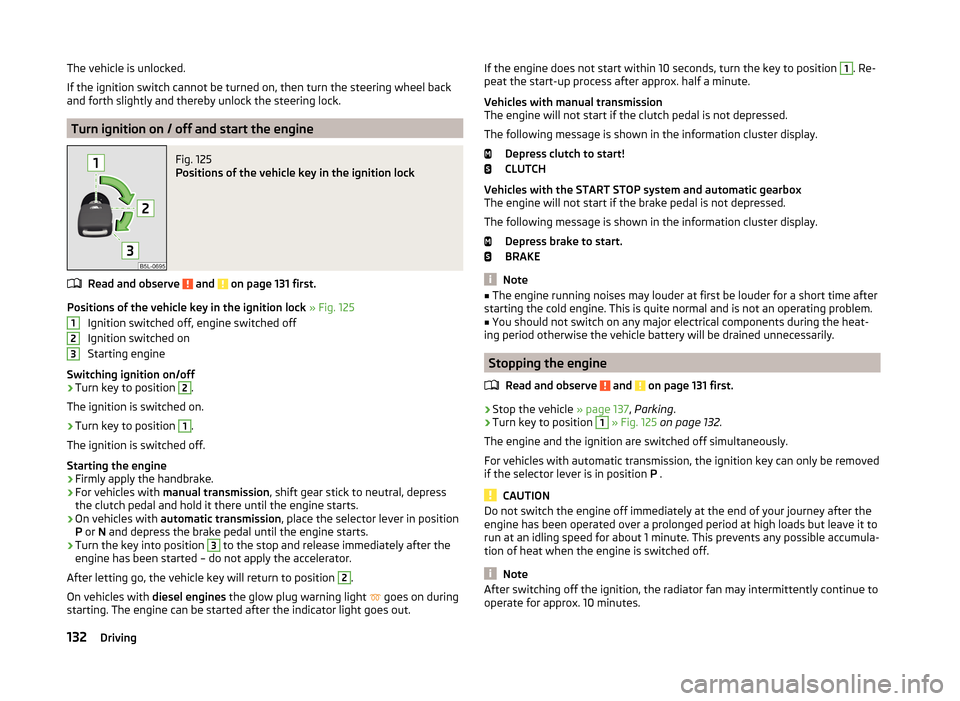
Fig. 125
Positions of the vehicle key in the ignition lock
Read and observe and on page 131 first.
Positions of the vehicle key in the ignition lock » Fig. 125
Ignition switched off, engine switched off
Ignition switched on
Starting engine
Switching ignition on/off
›
Turn key to position
2
.
The ignition is switched on.
›
Turn key to position
1
.
The ignition is switched off.
Starting the engine
›
Firmly apply the handbrake.
›
For vehicles with manual transmission , shift gear stick to neutral, depress
the clutch pedal and hold it there until the engine starts.
›
On vehicles with automatic transmission , place the selector lever in position
P or N and depress the brake pedal until the engine starts.
›
Turn the key into position
3
to the stop and release immediately after the
engine has been started – do not apply the accelerator.
After letting go, the vehicle key will return to position
2
.
On vehicles with diesel engines the glow plug warning light
goes on during
starting. The engine can be started after the indicator light goes out.
123If the engine does not start within 10 seconds, turn the key to position 1. Re-
peat the start-up process after approx. half a minute.
Vehicles with manual transmission
The engine will not start if the clutch pedal is not depressed.
The following message is shown in the information cluster display. Depress clutch to start!
CLUTCH
Vehicles with the START STOP system and automatic gearbox
The engine will not start if the brake pedal is not depressed.
The following message is shown in the information cluster display. Depress brake to start.
BRAKE
Note
■ The engine running noises may louder at first be louder for a short time after
starting the cold engine. This is quite normal and is not an operating problem.■
You should not switch on any major electrical components during the heat-
ing period otherwise the vehicle battery will be drained unnecessarily.
Stopping the engine
Read and observe
and on page 131 first.
›
Stop the vehicle » page 137, Parking .
›
Turn key to position
1
» Fig. 125 on page 132 .
The engine and the ignition are switched off simultaneously.
For vehicles with automatic transmission, the ignition key can only be removed
if the selector lever is in position P .
CAUTION
Do not switch the engine off immediately at the end of your journey after the
engine has been operated over a prolonged period at high loads but leave it to
run at an idling speed for about 1 minute. This prevents any possible accumula-
tion of heat when the engine is switched off.
Note
After switching off the ignition, the radiator fan may intermittently continue to
operate for approx. 10 minutes.132Driving
Page 137 of 248
WARNINGNever let the vehicle roll with locked steering lock - there is a risk of acci-
dent!
Switch ignition on / off
Read and observe
and on page 133 first.
›
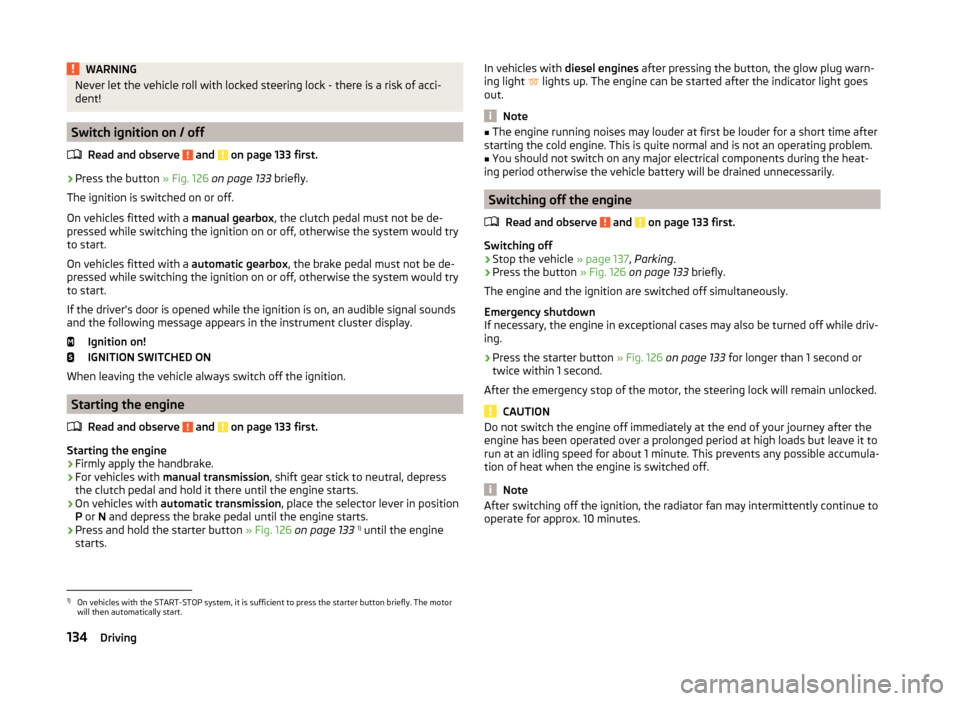
Press the button » Fig. 126 on page 133 briefly.
The ignition is switched on or off.
On vehicles fitted with a manual gearbox, the clutch pedal must not be de-
pressed while switching the ignition on or off, otherwise the system would try
to start.
On vehicles fitted with a automatic gearbox, the brake pedal must not be de-
pressed while switching the ignition on or off, otherwise the system would try
to start.
If the driver's door is opened while the ignition is on, an audible signal sounds
and the following message appears in the instrument cluster display.
Ignition on!
IGNITION SWITCHED ON
When leaving the vehicle always switch off the ignition.
Starting the engine
Read and observe
and on page 133 first.
Starting the engine
›
Firmly apply the handbrake.
›
For vehicles with manual transmission , shift gear stick to neutral, depress
the clutch pedal and hold it there until the engine starts.
›
On vehicles with automatic transmission , place the selector lever in position
P or N and depress the brake pedal until the engine starts.
›
Press and hold the starter button » Fig. 126 on page 133 1)
until the engine
starts.
In vehicles with diesel engines after pressing the button, the glow plug warn-
ing light lights up. The engine can be started after the indicator light goes
out.
Note
■ The engine running noises may louder at first be louder for a short time after
starting the cold engine. This is quite normal and is not an operating problem.■
You should not switch on any major electrical components during the heat-
ing period otherwise the vehicle battery will be drained unnecessarily.
Switching off the engine
Read and observe
and on page 133 first.
Switching off
›
Stop the vehicle » page 137, Parking .
›
Press the button » Fig. 126 on page 133 briefly.
The engine and the ignition are switched off simultaneously.
Emergency shutdown
If necessary, the engine in exceptional cases may also be turned off while driv-
ing.
›
Press the starter button » Fig. 126 on page 133 for longer than 1 second or
twice within 1 second.
After the emergency stop of the motor, the steering lock will remain unlocked.
CAUTION
Do not switch the engine off immediately at the end of your journey after the
engine has been operated over a prolonged period at high loads but leave it to
run at an idling speed for about 1 minute. This prevents any possible accumula-
tion of heat when the engine is switched off.
Note
After switching off the ignition, the radiator fan may intermittently continue to
operate for approx. 10 minutes.1)
On vehicles with the START-STOP system, it is sufficient to press the starter button briefly. The motor
will then automatically start.
134Driving
Page 183 of 248
Diesel fuel additives
The diesel fuel in accordance with the prescribed standards meets all the con-
ditions for a smooth running engine. We therefore recommend that no fuel ad-
ditives are used. This can result in considerable damage to parts of the engine
or the exhaust system.
CAUTION
■ Just filling the tank once with diesel fuel that does not comply with the
standard, can cause severe damage to parts of the engine, the fuel and ex-
haust system!■
If a different fuel other than diesel fuel, which complies to the above men-
tioned standards (e.g. petrol) is put into the tank, do not start the engine or
switch on the ignition! Extensive damage to engine parts can occur!
■
Water which has collected in the fuel filter can cause engine faults.
CAUTION
■ The vehicle cannot be operated with biofuel RME, therefore this fuel must
not be refuelled and driven. The use of biofuel RME can cause considerable
damage to parts of the engine or fuel system.■
Do not mix any fuel additives, so-called “flow improvers” (petrol and similar
agents) into the diesel. This can result in considerable damage to parts of the
engine or the exhaust system!
Engine compartment
Introduction
This chapter contains information on the following subjects:
Opening and closing the bonnet
181
Engine compartment overview
182
Radiator fan
182
Windscreen washer system
182WARNINGInjuries or scolding or risks of accident or fire may occur when working in
the engine compartment. For this reason, it is essential to comply with the
warning instructions outlined below and with the general applicable safety
rules. The engine compartment of your car is a hazardous area!WARNINGInstructions before beginning work in the engine compartment■Turn off the engine and withdraw the ignition key.■
Firmly apply the handbrake.
■
For vehicles with manual transmission the lever into the neutral position.
■
On vehicles with automatic transmission, shift the selector lever into the
P position.
■
Allow the engine to cool.
■
Never open the bonnet if you can see steam or coolant escaping from the
engine compartment – risk of scalding! Wait until no more steam or coolant
is escaping.
WARNINGInformation for working in the engine room■Keep all people, especially children, away from the engine compartment.■
Never touch the radiator fan while the engine is still warm. The fan might
suddenly start running!
■
Do not touch any hot engine parts – risk of burns!
WARNINGInformation for working in the engine compartment with the engine run-
ning■
Pay particular attention to moving engine parts, e.g. V-ribbed belt, gener-
ator, radiator fan - danger to life!
■
Never touch the electric wiring on the ignition system.
■
Avoid short circuits in the electrical system - particularly on the vehicle's
battery.
■
Always make sure that no jewellery, loose clothing or long hair can get
caught in rotating engine parts – risk to life! Always remove any jewellery,
tie back long hair and wear tight fitting clothing before completing any
work.
WARNINGInformation for working on the fuel system or the electrical system■Always disconnect the vehicle battery from the electrical system.■
Do not smoke.
■
Never work near open flames.
■
Always have a functioning fire extinguisher nearby.
180General Maintenance
Page 185 of 248
Engine compartment overviewFig. 159
Principle sketch: Engine compartment
Read and observe
and on page 180 first.
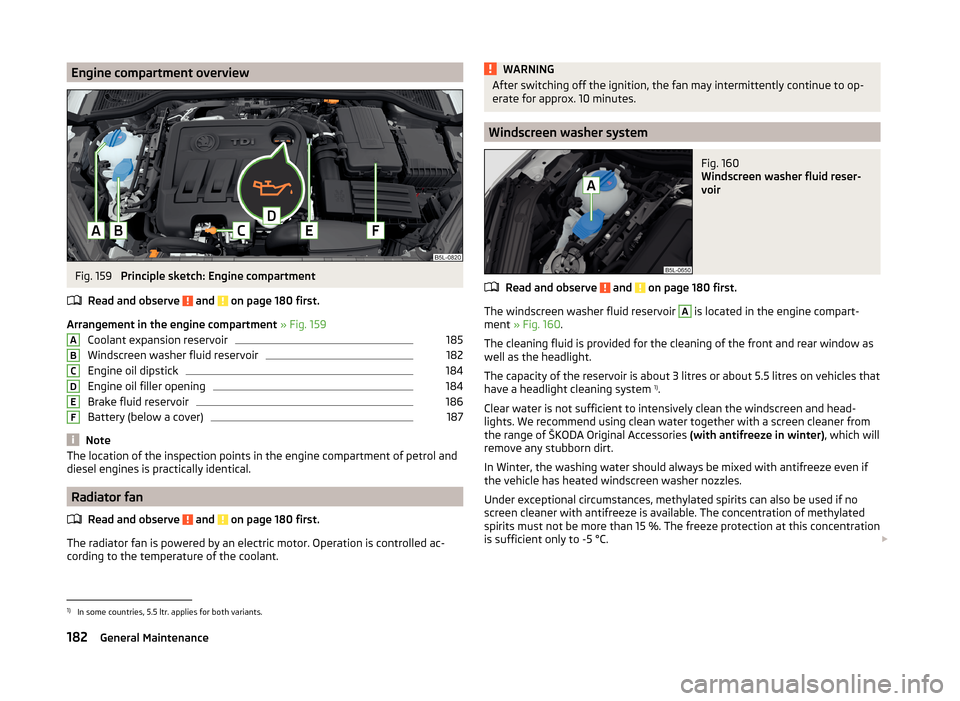
Arrangement in the engine compartment » Fig. 159
Coolant expansion reservoir
185
Windscreen washer fluid reservoir
182
Engine oil dipstick
184
Engine oil filler opening
184
Brake fluid reservoir
186
Battery (below a cover)
187
Note
The location of the inspection points in the engine compartment of petrol and
diesel engines is practically identical.
Radiator fan
Read and observe
and on page 180 first.
The radiator fan is powered by an electric motor. Operation is controlled ac-
cording to the temperature of the coolant.
ABCDEFWARNINGAfter switching off the ignition, the fan may intermittently continue to op-
erate for approx. 10 minutes.
Windscreen washer system
Fig. 160
Windscreen washer fluid reser-
voir
Read and observe and on page 180 first.
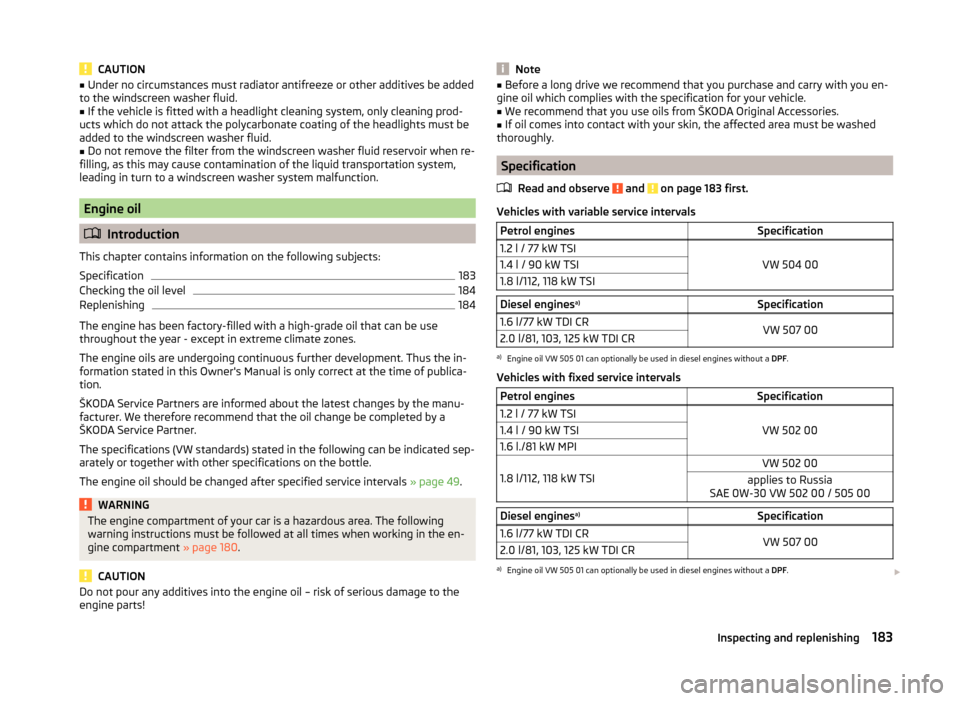
The windscreen washer fluid reservoir
A
is located in the engine compart-
ment » Fig. 160 .
The cleaning fluid is provided for the cleaning of the front and rear window as
well as the headlight.
The capacity of the reservoir is about 3 litres or about 5.5 litres on vehicles that
have a headlight cleaning system 1)
.
Clear water is not sufficient to intensively clean the windscreen and head-
lights. We recommend using clean water together with a screen cleaner from
the range of ŠKODA Original Accessories (with antifreeze in winter), which will
remove any stubborn dirt.
In Winter, the washing water should always be mixed with antifreeze even if
the vehicle has heated windscreen washer nozzles.
Under exceptional circumstances, methylated spirits can also be used if no
screen cleaner with antifreeze is available. The concentration of methylated
spirits must not be more than 15 %. The freeze protection at this concentration
is sufficient only to -5 °C.
1)
In some countries, 5.5 ltr. applies for both variants.
182General Maintenance
Page 186 of 248
CAUTION■Under no circumstances must radiator antifreeze or other additives be added
to the windscreen washer fluid.■
If the vehicle is fitted with a headlight cleaning system, only cleaning prod-
ucts which do not attack the polycarbonate coating of the headlights must be
added to the windscreen washer fluid.
■
Do not remove the filter from the windscreen washer fluid reservoir when re-
filling, as this may cause contamination of the liquid transportation system,
leading in turn to a windscreen washer system malfunction.
Engine oil
Introduction
This chapter contains information on the following subjects:
Specification
183
Checking the oil level
184
Replenishing
184
The engine has been factory-filled with a high-grade oil that can be use
throughout the year - except in extreme climate zones.
The engine oils are undergoing continuous further development. Thus the in- formation stated in this Owner's Manual is only correct at the time of publica-
tion.
ŠKODA Service Partners are informed about the latest changes by the manu-
facturer. We therefore recommend that the oil change be completed by a
ŠKODA Service Partner.
The specifications (VW standards) stated in the following can be indicated sep-
arately or together with other specifications on the bottle.
The engine oil should be changed after specified service intervals » page 49.
WARNINGThe engine compartment of your car is a hazardous area. The following
warning instructions must be followed at all times when working in the en-
gine compartment » page 180.
CAUTION
Do not pour any additives into the engine oil – risk of serious damage to the
engine parts!Note■ Before a long drive we recommend that you purchase and carry with you en-
gine oil which complies with the specification for your vehicle.■
We recommend that you use oils from ŠKODA Original Accessories.
■
If oil comes into contact with your skin, the affected area must be washed
thoroughly.
Specification
Read and observe
and on page 183 first.
Vehicles with variable service intervals
Petrol enginesSpecification1.2 l / 77 kW TSI
VW 504 00
1.4 l / 90 kW TSI1.8 l/112, 118 kW TSIDiesel engines a)Specification1.6 l/77 kW TDI CRVW 507 002.0 l/81, 103, 125 kW TDI CRa)
Engine oil VW 505 01 can optionally be used in diesel engines without a
DPF.
Vehicles with fixed service intervals
Petrol enginesSpecification1.2 l / 77 kW TSI
VW 502 00
1.4 l / 90 kW TSI1.6 l./81 kW MPI
1.8 l/112, 118 kW TSI
VW 502 00applies to Russia
SAE 0W-30 VW 502 00 / 505 00Diesel engines a)Specification1.6 l/77 kW TDI CRVW 507 002.0 l/81, 103, 125 kW TDI CRa)
Engine oil VW 505 01 can optionally be used in diesel engines without a
DPF.
183Inspecting and replenishing
Page 188 of 248
The coolant additive content in the coolant must be at least 40%.
The coolant additive may be increased to a maximum of 60%.
The correct mixing ratio of water and coolant additive is to be checked if nec- essary by a specialist garage or is to be restored if necessary.
The description of the coolant is shown in the coolant expansion reser-
voir » Fig. 162 on page 185 .WARNINGThe engine compartment of your car is a hazardous area. The following
warning instructions must be followed at all times when working in the en-
gine compartment » page 180.■
The coolant is harmful to health.
■
Avoid contact with the coolant.
■
Coolant vapours are harmful to health.
■
Never open the end cover of the coolant expansion reservoir while the
engine is still warm. The cooling system is pressurized!
■
When opening the end cover of the coolant expansion reservoir, cover it
with a cloth to protect your face, hands and arms from hot steam or hot
coolant.
■
If any coolant splashes into your eyes, immediately rinse out your eyes
with clear water and contact a doctor as soon as possible.
■
Always keep the coolant in the original container, safe from people who
are not completely independent, especially children - there is a danger of
poisoning!
■
If coolant is swallowed, consult a doctor immediately.
■
Never spill operating fluids over the hot engine - risk of fire.
CAUTION
■ Do not continue if for some reason it is not possible to fill with coolant un-
der the current circumstances! Switch off the engine and seek assistance from
a specialist garage.■
If the expansion tank is empty, do not top up with coolant. The system could
fill with air - risk of engine damage,
stop driving! Switch off the engine and
seek assistance from a specialist garage.
■
The concentration of coolant additive in the coolant must never be under
40%.
■
Over 60% of coolant additive in the coolant reduces the antifreeze protec-
tion and cooling effect.
■
A coolant additive that does not comply with the correct specification can
significantly reduce the corrosion protection of the cooling system.
■ Any faults resulting from corrosion may cause a loss of coolant and can con-
sequently result in major engine damage!■
Do not fill the coolant above the mark
A
» Fig. 162 on page 185 .
■
If an error occurs, leading to the engine overheating, the help of a professio-
nal garage is to be sought - there is a risk of serious engine damage occurring.
■
Additional headlights and other attached components in front of the air inlet
impair the cooling efficiency of the coolant.
■
Never cover the radiator - there is a risk of the engine overheating.
Note
The coolant capacity is approximately 1 l greater on vehicles that are fitted
with an auxiliary heater (auxiliary heating and ventilation).
Checking the coolant level
Fig. 162
Coolant expansion reservoir
Read and observe and on page 185 first.
The coolant expansion bottle is located in the engine compartment.
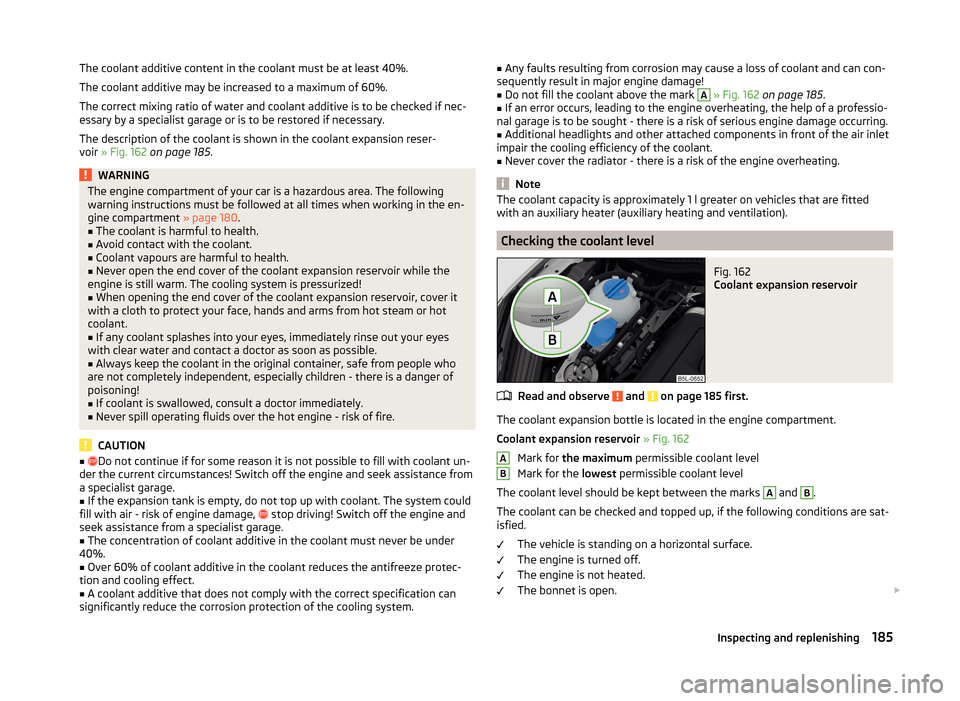
Coolant expansion reservoir » Fig. 162
Mark for the maximum permissible coolant level
Mark for the lowest permissible coolant level
The coolant level should be kept between the marks
A
and
B
.
The coolant can be checked and topped up, if the following conditions are sat-
isfied.
The vehicle is standing on a horizontal surface.
The engine is turned off.
The engine is not heated.
The bonnet is open.
AB185Inspecting and replenishing
Page 218 of 248
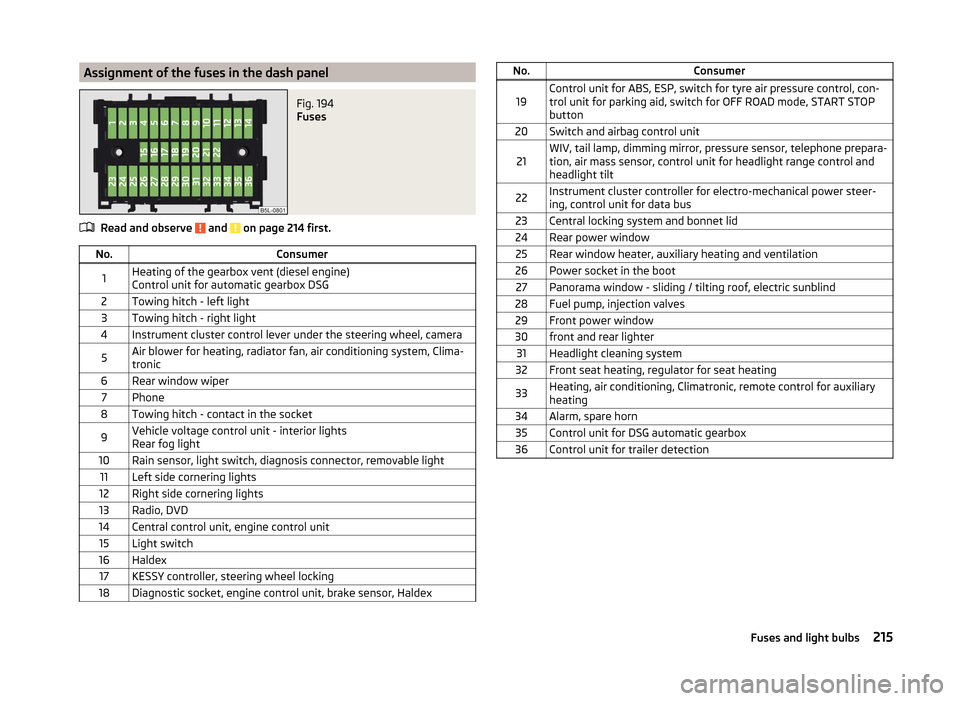
Assignment of the fuses in the dash panelFig. 194
Fuses
Read and observe and on page 214 first.
No.Consumer1Heating of the gearbox vent (diesel engine)
Control unit for automatic gearbox DSG2Towing hitch - left light3Towing hitch - right light4Instrument cluster control lever under the steering wheel, camera5Air blower for heating, radiator fan, air conditioning system, Clima-
tronic6Rear window wiper7Phone8Towing hitch - contact in the socket9Vehicle voltage control unit - interior lights
Rear fog light10Rain sensor, light switch, diagnosis connector, removable light11Left side cornering lights12Right side cornering lights13Radio, DVD14Central control unit, engine control unit15Light switch16Haldex17KESSY controller, steering wheel locking18Diagnostic socket, engine control unit, brake sensor, HaldexNo.Consumer19Control unit for ABS, ESP, switch for tyre air pressure control, con-
trol unit for parking aid, switch for OFF ROAD mode, START STOP button20Switch and airbag control unit21WIV, tail lamp, dimming mirror, pressure sensor, telephone prepara-
tion, air mass sensor, control unit for headlight range control and
headlight tilt22Instrument cluster controller for electro-mechanical power steer-
ing, control unit for data bus23Central locking system and bonnet lid24Rear power window25Rear window heater, auxiliary heating and ventilation26Power socket in the boot27Panorama window - sliding / tilting roof, electric sunblind28Fuel pump, injection valves29Front power window30front and rear lighter31Headlight cleaning system32Front seat heating, regulator for seat heating33Heating, air conditioning, Climatronic, remote control for auxiliary
heating34Alarm, spare horn35Control unit for DSG automatic gearbox36Control unit for trailer detection215Fuses and light bulbs
Page 220 of 248
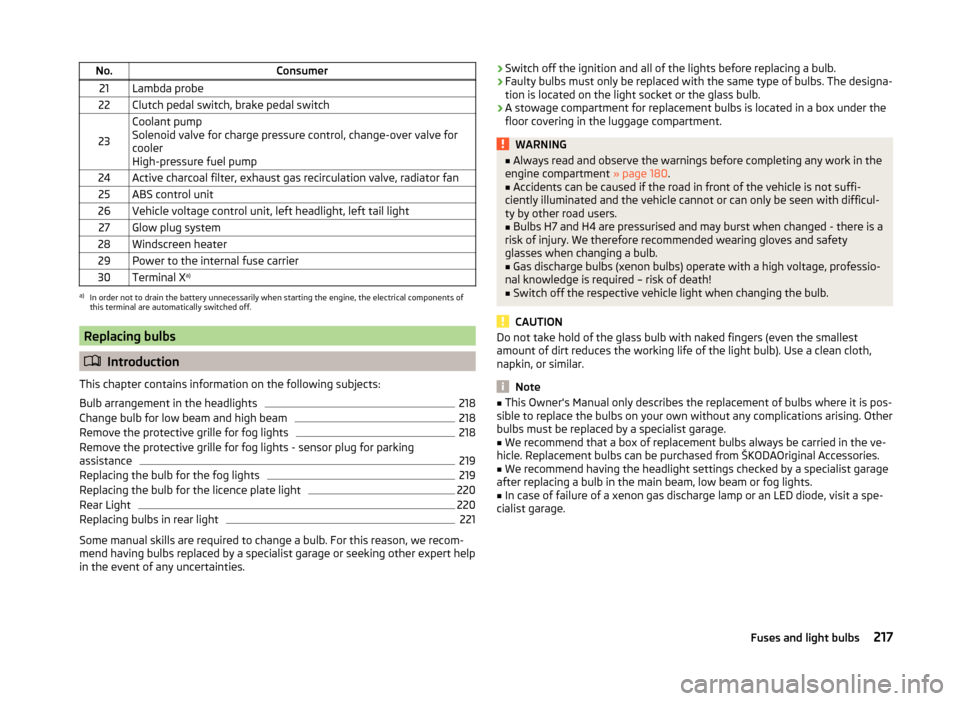
No.Consumer21Lambda probe22Clutch pedal switch, brake pedal switch
23
Coolant pump
Solenoid valve for charge pressure control, change-over valve for
cooler
High-pressure fuel pump24Active charcoal filter, exhaust gas recirculation valve, radiator fan25ABS control unit26Vehicle voltage control unit, left headlight, left tail light27Glow plug system28Windscreen heater29Power to the internal fuse carrier30Terminal X a)a)
In order not to drain the battery unnecessarily when starting the engine, the electrical components of
this terminal are automatically switched off.
Replacing bulbs
Introduction
This chapter contains information on the following subjects:
Bulb arrangement in the headlights
218
Change bulb for low beam and high beam
218
Remove the protective grille for fog lights
218
Remove the protective grille for fog lights - sensor plug for parking
assistance
219
Replacing the bulb for the fog lights
219
Replacing the bulb for the licence plate light
220
Rear Light
220
Replacing bulbs in rear light
221
Some manual skills are required to change a bulb. For this reason, we recom-
mend having bulbs replaced by a specialist garage or seeking other expert help
in the event of any uncertainties.
› Switch off the ignition and all of the lights before replacing a bulb.
› Faulty bulbs must only be replaced with the same type of bulbs. The designa-
tion is located on the light socket or the glass bulb.
› A stowage compartment for replacement bulbs is located in a box under the
floor covering in the luggage compartment.WARNING■ Always read and observe the warnings before completing any work in the
engine compartment » page 180.■
Accidents can be caused if the road in front of the vehicle is not suffi-
ciently illuminated and the vehicle cannot or can only be seen with difficul-
ty by other road users.
■
Bulbs H7 and H4 are pressurised and may burst when changed - there is a
risk of injury. We therefore recommended wearing gloves and safety
glasses when changing a bulb.
■
Gas discharge bulbs (xenon bulbs) operate with a high voltage, professio-
nal knowledge is required – risk of death!
■
Switch off the respective vehicle light when changing the bulb.
CAUTION
Do not take hold of the glass bulb with naked fingers (even the smallest
amount of dirt reduces the working life of the light bulb). Use a clean cloth,
napkin, or similar.
Note
■ This Owner's Manual only describes the replacement of bulbs where it is pos-
sible to replace the bulbs on your own without any complications arising. Other
bulbs must be replaced by a specialist garage.■
We recommend that a box of replacement bulbs always be carried in the ve-
hicle. Replacement bulbs can be purchased from ŠKODAOriginal Accessories.
■
We recommend having the headlight settings checked by a specialist garage
after replacing a bulb in the main beam, low beam or fog lights.
■
In case of failure of a xenon gas discharge lamp or an LED diode, visit a spe-
cialist garage.
217Fuses and light bulbs